
Office 365 – Setting Up Microsoft’s App Authenticator
Department: Information Technology
Document Type: User
Date Created: 04.09.2025
Last Modified: 04.09.2025
Version: 2 0
Overview
The purpose of this document is to highlight the process for setting up Microsoft’s app authenticator to protect your LIM Office 365 account. This document contains instructions for both Apple iPhone and Google Android mobile phone users.
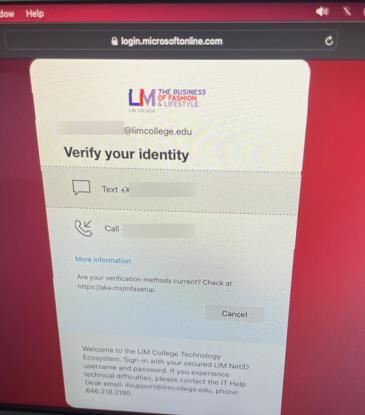
Log into https://portal.office.com – if you have MFA (Multiple Factor Authentication) enabled on your account with your cell phone number you will get the following prompt:
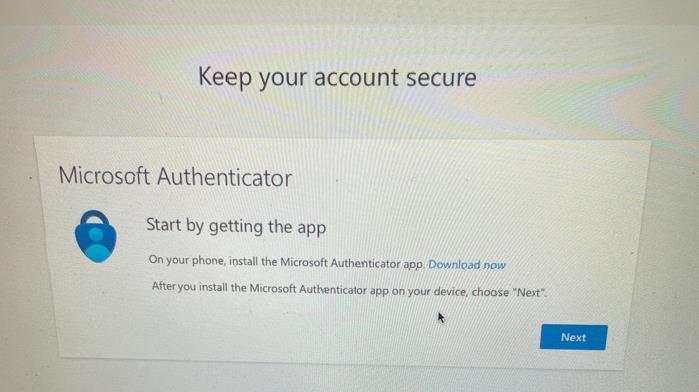
Once you verify your identity via text or a call you will get the following prompt to start the process of setting up Microsoft Authenticator App – click on “Next” to continue the setup.

You will be introduced to the Microsoft Authenticator “Start by getting the app”. You will need to download the Microsoft Authenticator app on your iPhone or Android mobile device to continue the setup. Instructions can be found below. Once the app is installed on your mobile device – click on “Next”
Click on Next again
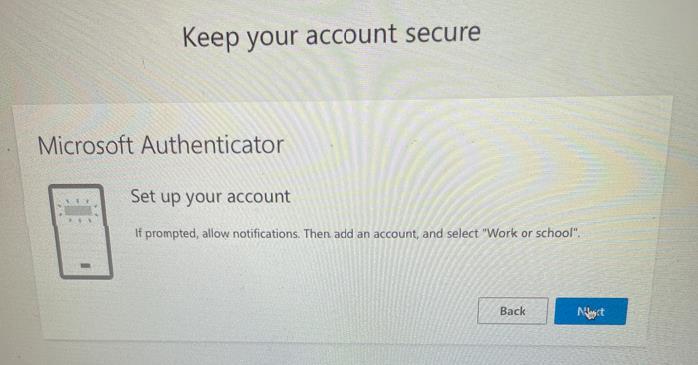
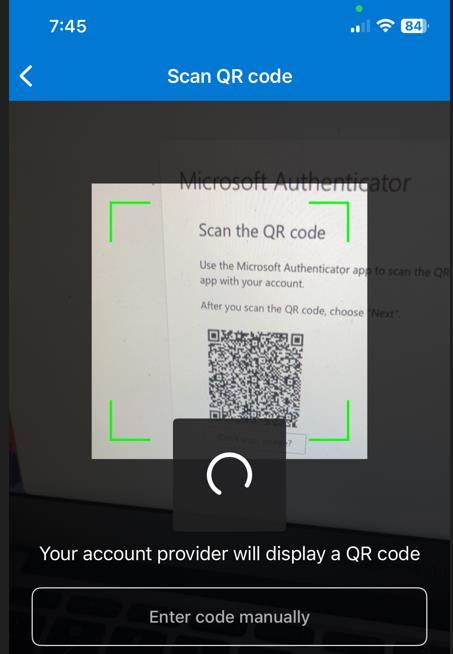
You will get the following QR code to scan within the Microsoft Authenticator app.

Locate the Microsoft Authenticator app and launch it.
Locate the scan button, which located in the lower right corner of the app and launch it.

Point the phone’s camera to the QR code to scan.
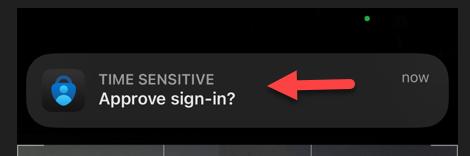
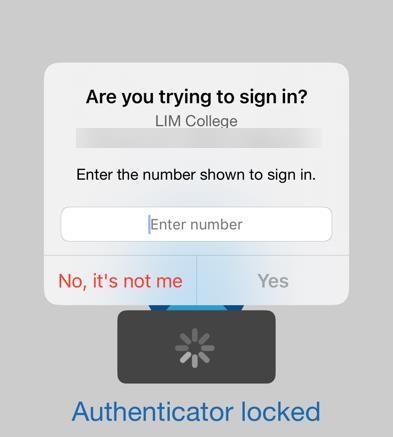
Pay close attention because once the QR code is scanned using the Microsoft Authenticator app you will get a notification to Approve sign-in? Click on the notification to view it.
You will get prompted to enter the number shown on your computer monitor. Enter that number and click on the Yes to continue.
On your computer screen, you will get the following message stating that Microsoft Authenticator notification was approved and to click on Next.

Congratulations, you have successfully configured Microsoft Authenticator. Click on Done.

Click on Yes to continue to log into your Microsoft account.

iPhone Users (Instructions below)
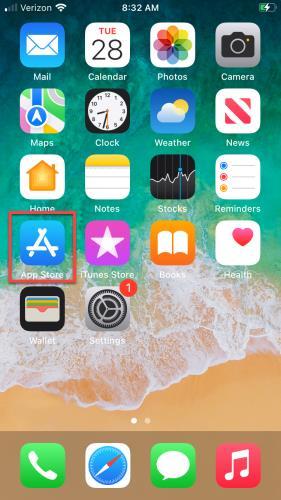
Step 1: Click on the App Store
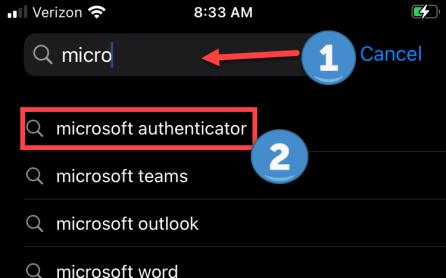
Step 2: Click on the “Search” icon located in the lower right corner of the screen.

Step 3: Start typing into the search bar “Microsoft authenticator”. When it shows up select it.
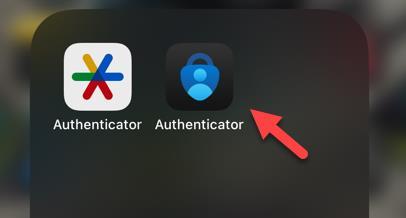
Step 4: There many versions of Microsoft Authenticator. Please review the icon on the below screen shot and select the app.
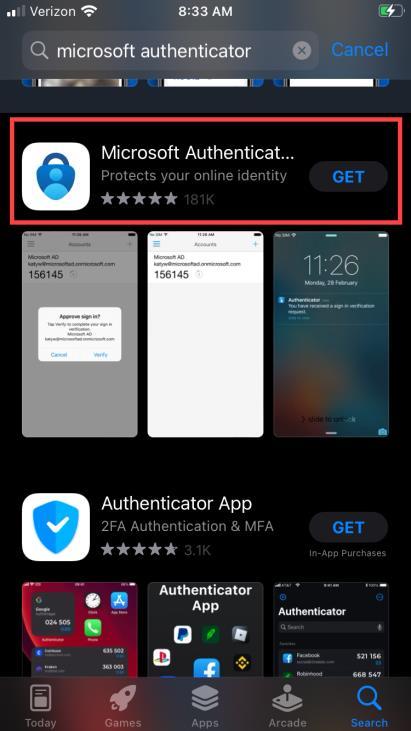
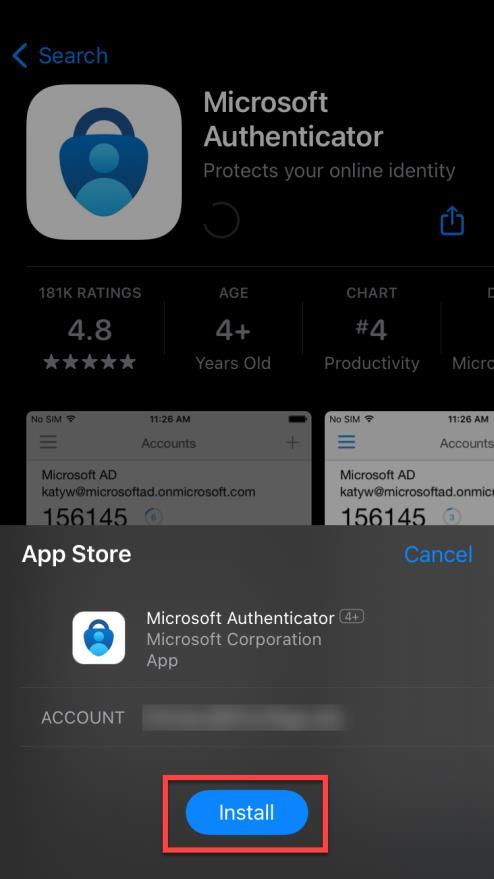
Step 5: Confirm that the application is coming from Microsoft Corporation and select “GET”

Step 6: Click on “Install”
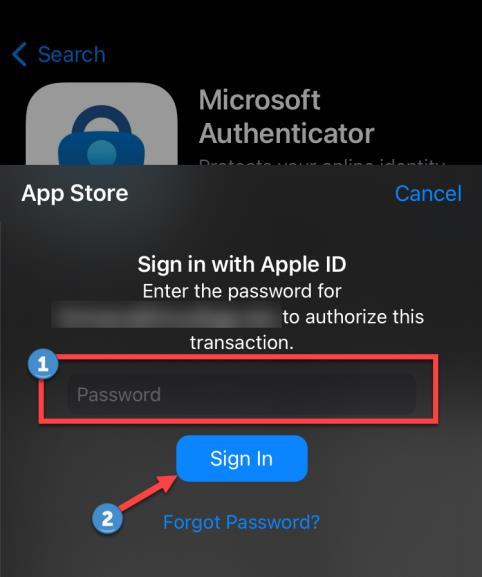
Step 7: Type in your Apple ID password and select “Sign In” to continue the installation.
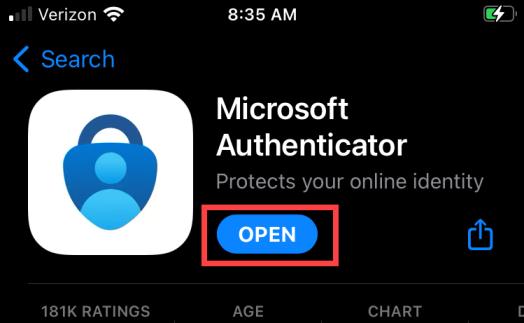
Step 8: Once the installation is completed, select “OPEN”
Step 9: When the app opens for the first time, you will need to agree with Microsoft’s privacy statement. Click on “I agree” to continue the setup.

Step 10: On the next window you will select “Add work or school account”

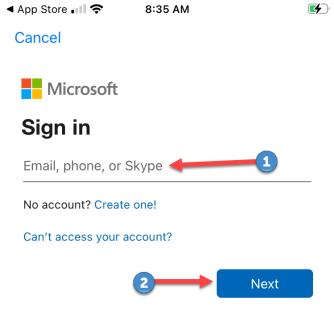
Step 11: Enter your LIM email address (ex: john.smith@limcollege.edu) and select “Next” to continue.
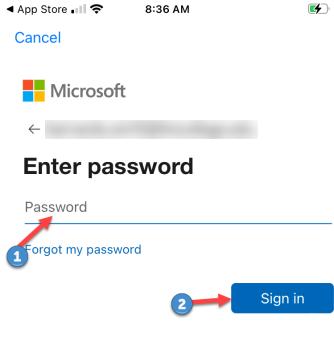
Step 12: Enter your password for your LIM email and select “Sign in” to continue.
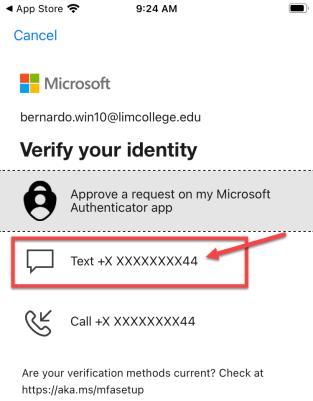
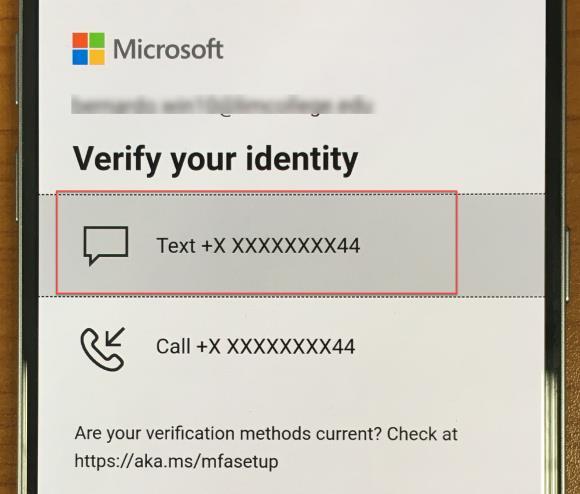
Step 13: You will be asked to identify yourself before continuing. We will select “Text +X XXXXXXX44” for this example. (Note: the code will be sent to your phone number)
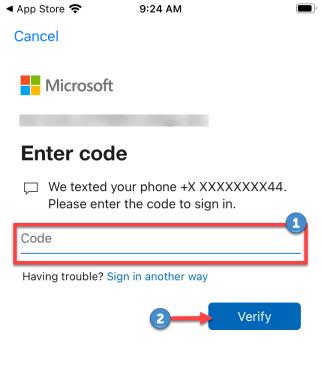
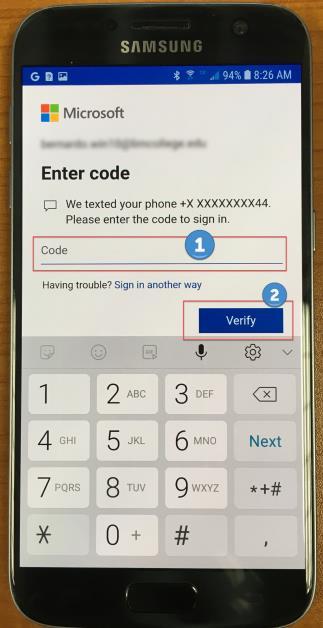
Step 14: Enter the code that was provided to you and select “Verify” to continue.
Step 15: We recommend that you select “Allow” this feature will notify you when you are logging into your account and will prompt you to allow the login process.

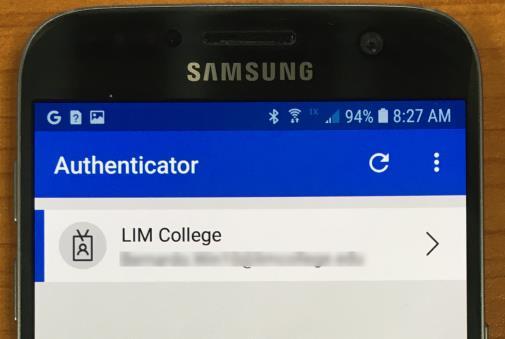
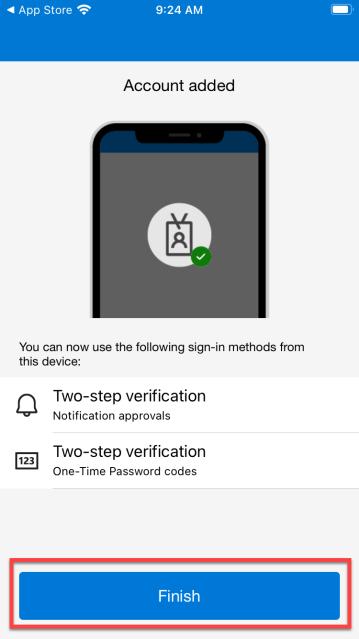
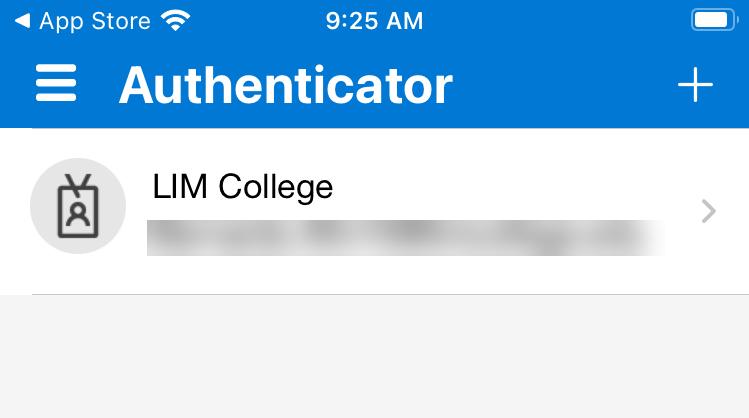
Step 16: You will get the following confirmation that your LIM email account was added. Select “Finish”
Step 17: Congratulations! You did it.
Android Users (Instructions below)
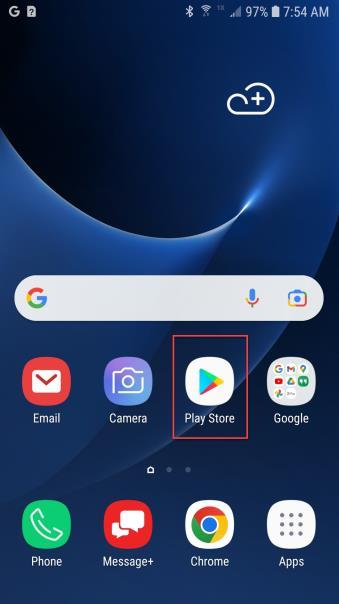
Step 1: Locate and select the “Play Store” app
Step 2: Locate the search bar
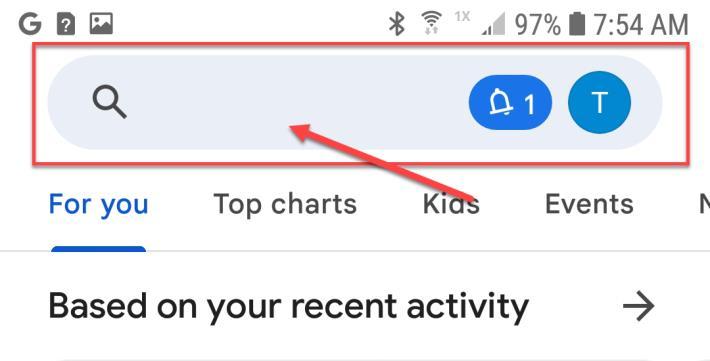
Step 3: Start typing “Microsoft Authenticator” into the search bar and select the Microsoft Authenticator app from the list.

Step 4: Make sure that the app is from Microsoft Corporation. Once you confirmed that, select “Install”

Step 5: You might receive the following dialog: this is due to Google Play changing their privacy statement. You can select “Continue”

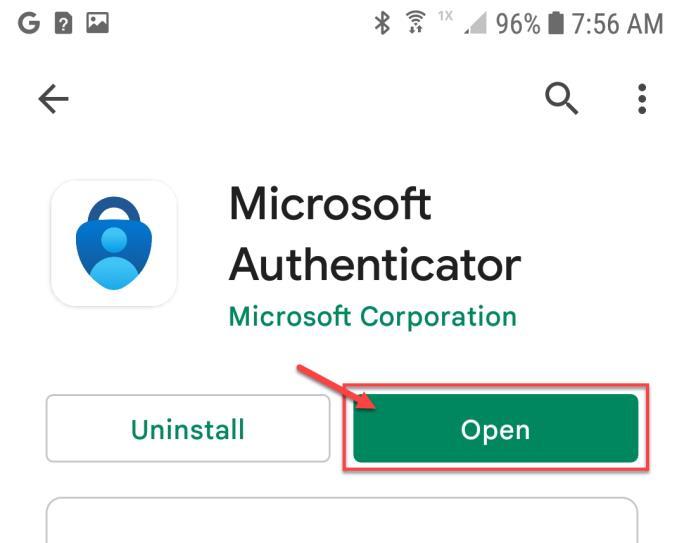
Step 6: Once the installation of the App is completed. You can select “Open” to continue.
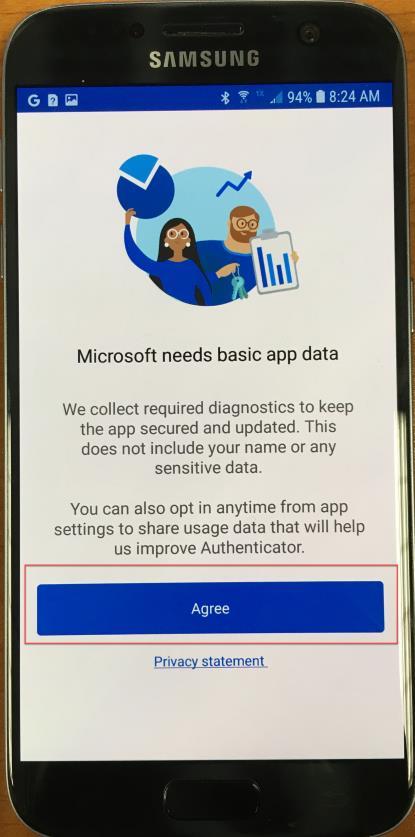
Step 7: When you open Microsoft’s Authenticator you will need to agree with Microsoft’s privacy statement. Please select “Agree” to continue.
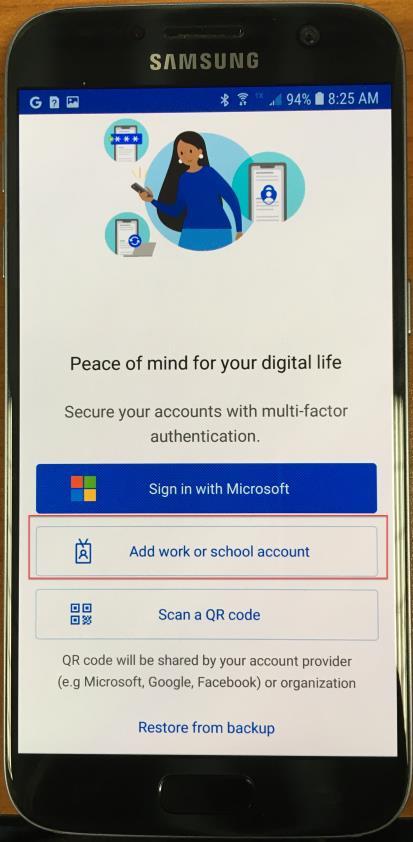
Step 8: Select “Add work or school account”
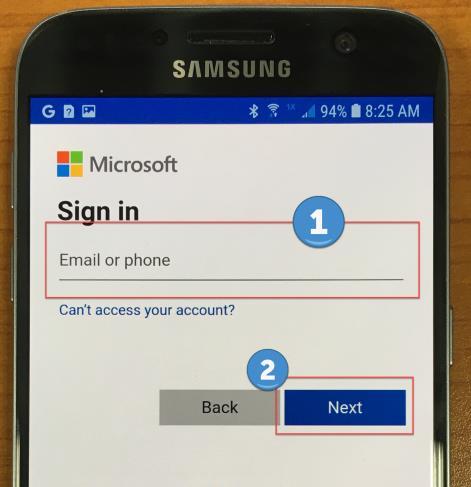
Step 9: Enter your LIM email address (example: john.smith@limcollege.edu) and select “Next” to continue.
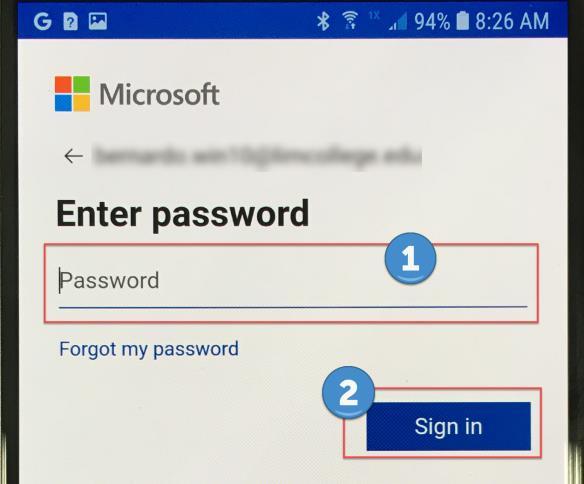
Step 10: Enter your password for your LIM email address. Once you enter the password select “Sign in” to continue.
Step 11: You will need to verify your identity to continue. For this illustration will go with “Text +X XXXXXX44” (Note: this will send a special 6-digit code to your cell phone number attached to your LIM email address)
Step 12: Enter the 6-digit code and select “Verify” to continue.
Step 13: Select “Finish

Step 14: Congratulations!! You did it.