»
HOW IT WORKS
Lightroom 101
Developing Your Wizardry at Photo Development Sometimes all it takes is a little tweak to realise how good your underwater or topside photos can be. Text and Photos: Lawrence Alex Wu
Once you’ve had a chance to sort through and rate your photos, colour and flag them, you’ll have to figure out if your images have great potential. In this installment, we will take you through the Develop module and reveal your photos as they acquire that “wow” factor. The Develop module is where you will see your photos change before your eyes. Some of its features are considered software wizardry and some are from traditional film darkroom techniques. Whatever it is, the magic of beautiful photos is now within your grasp at the flick of the mouse. So adjust to your heart’s content and fear not, as all the changes made in Lightroom never change your original files’ image data – all thanks to Adobe Lightroom’s groundbreaking non-destructive editing feature. Not only can you reset the changes to any of your photos anytime you want, but any Lightroom change to your photos will only take up a few extra bytes (a fraction of a megabyte) on your computer for each photo. My workflow used to involve the original, a couple of duplicates and a photoshop file: with Lightroom, my average 50mb usage has been reduced to around 10mb per photo!
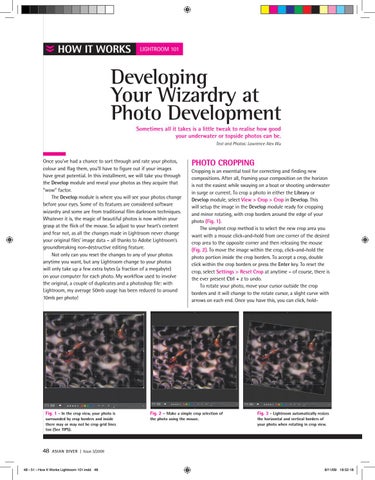
Fig. 1 - In the crop view, your photo is surrounded by crop borders and inside there may or may not be crop grid lines too (See TIPS).
48
PHOTO CROPPING Cropping is an essential tool for correcting and finding new compositions. After all, framing your composition on the horizon is not the easiest while swaying on a boat or shooting underwater in surge or current. To crop a photo in either the Library or Develop module, select View > Crop > Crop in Develop. This will setup the image in the Develop module ready for cropping and minor rotating, with crop borders around the edge of your photo (Fig. 1). The simplest crop method is to select the new crop area you want with a mouse click-and-hold from one corner of the desired crop area to the opposite corner and then releasing the mouse (Fig. 2). To move the image within the crop, click-and-hold the photo portion inside the crop borders. To accept a crop, double click within the crop borders or press the Enter key. To reset the crop, select Settings > Reset Crop at anytime – of course, there is the ever present Ctrl + z to undo. To rotate your photo, move your cursor outside the crop borders and it will change to the rotate cursor, a slight curve with arrows on each end. Once you have this, you can click, hold-
Fig. 2 – Make a simple crop selection of the photo using the mouse.
Fig. 3 - Lightroom automatically resizes the horizontal and vertical borders of your photo when rotating in crop view.
ASIAN DIVER | Issue 3/2009
48 - 51 - How It Works Lightroom 101.indd 48
8/11/09 18:52:18