
BASIC DESIGN III PORTFOLIO
SR NO.
INDEX
EXERCISE
2. MAKING OF MODULE 3. MODULE REPEATATION 4. SCALING OF MODULE 5. POPING THE MODULE 6. ORGANIC FORM OF MODULE 7. DISTORTION OF MODULE 8. PLANE TO SURFACES 9. CREATING DEPTH ON SURFACES 10. FERROCEMENT WORK
1. NEGATIVE AND POSITIVE SPACES
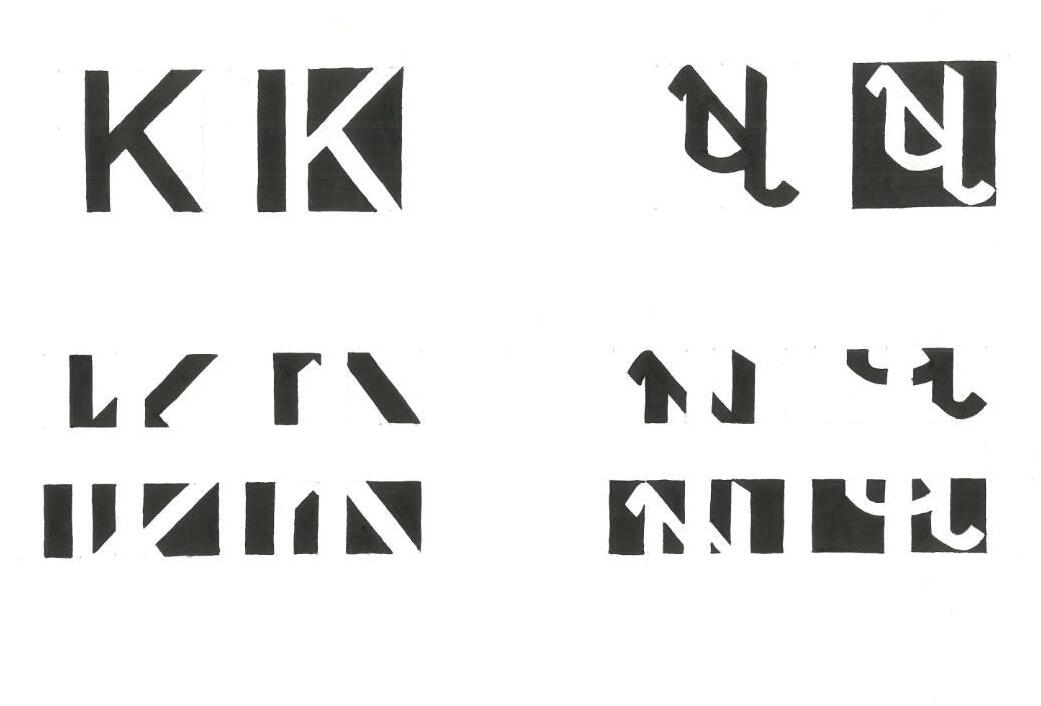
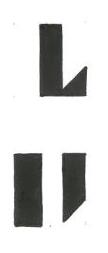
BRIEF:
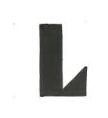
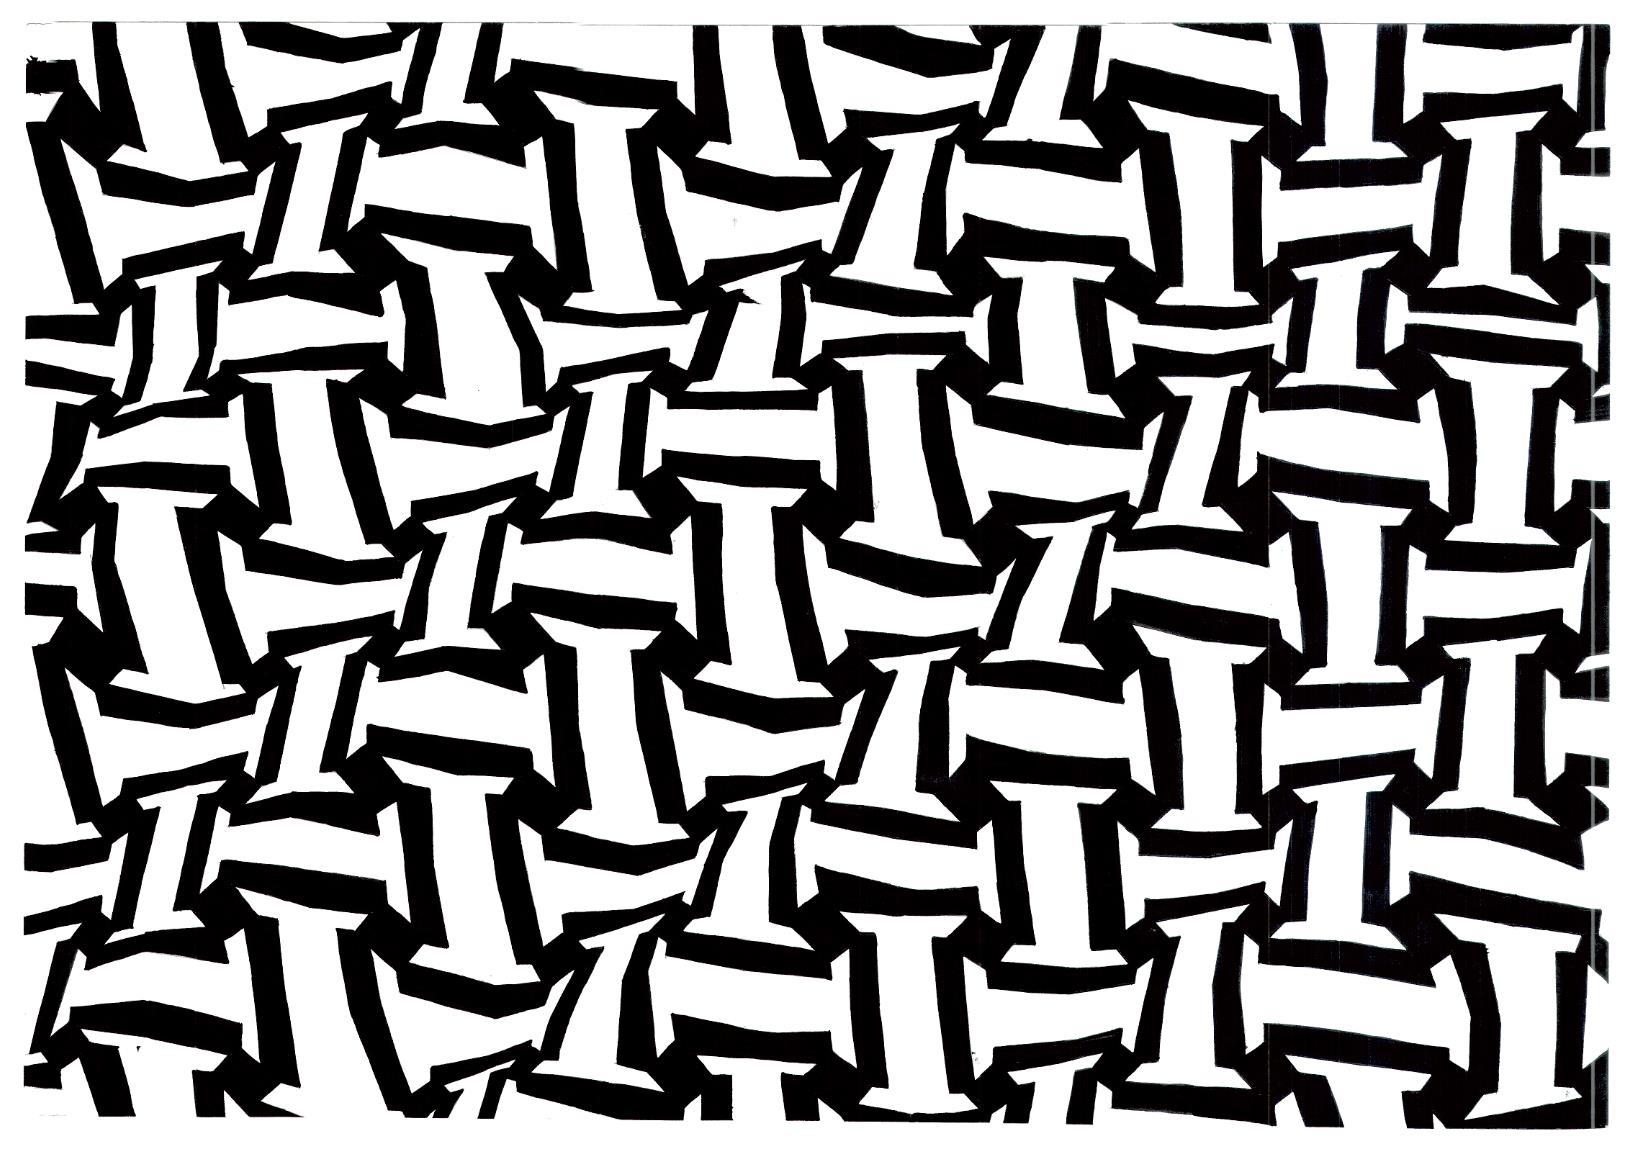
We were instructed to select some alphabets in any language, two alphabets was selected in 2”X2” square and then divide it into 4 equal parts and then separate them and paint it in positive and negative.
UNDERSTANDING:
It help me to see simple things in different ways. When I divided the alphabet and started to make different types of patterns (playing with it like puzzle) unexpected designs explore.
TITLE: NEGATIVE AND POSITIVE SPACES
SIGN :
NAME : KETAN GOHIL ROLL NO. : 14

EXERCISE NO .1 3
EXERCISE NO. 01
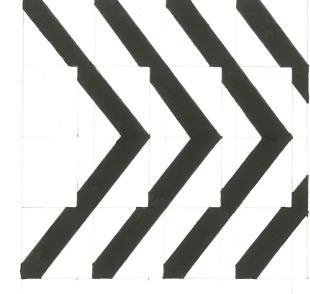
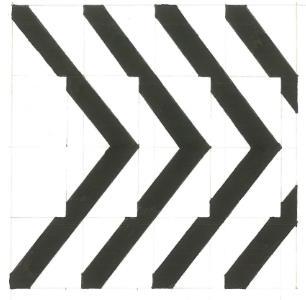
BRIEF:
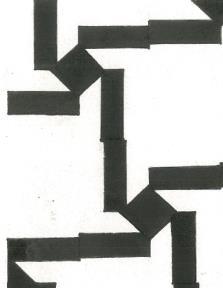
We were supposed to select one unit and then use different types like flipping or rotating and create one module and then repeat it in such a way it should follow a continuity.
UNDERSTANDING:
When I started to arrange in different methods there were more than 20 different types but some of them had continuity flow and some kind of a rhythm, this exercise actually help me to explore more by just arranging units.
: KETAN GOHIL
NO. : 14
EXERCISE NO .1
4
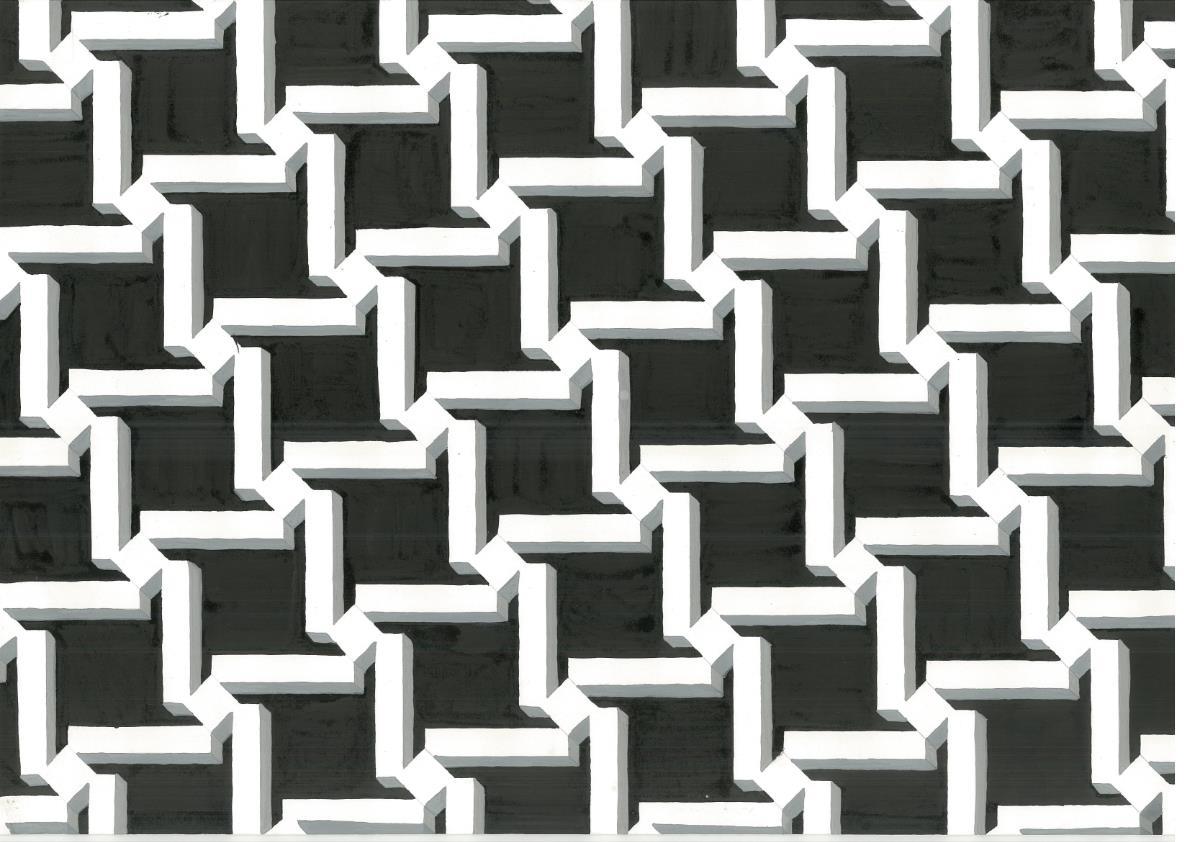
EXERCISE NO. 02 SIGN : TITLE:MAKING OF MODULE
NAME
ROLL
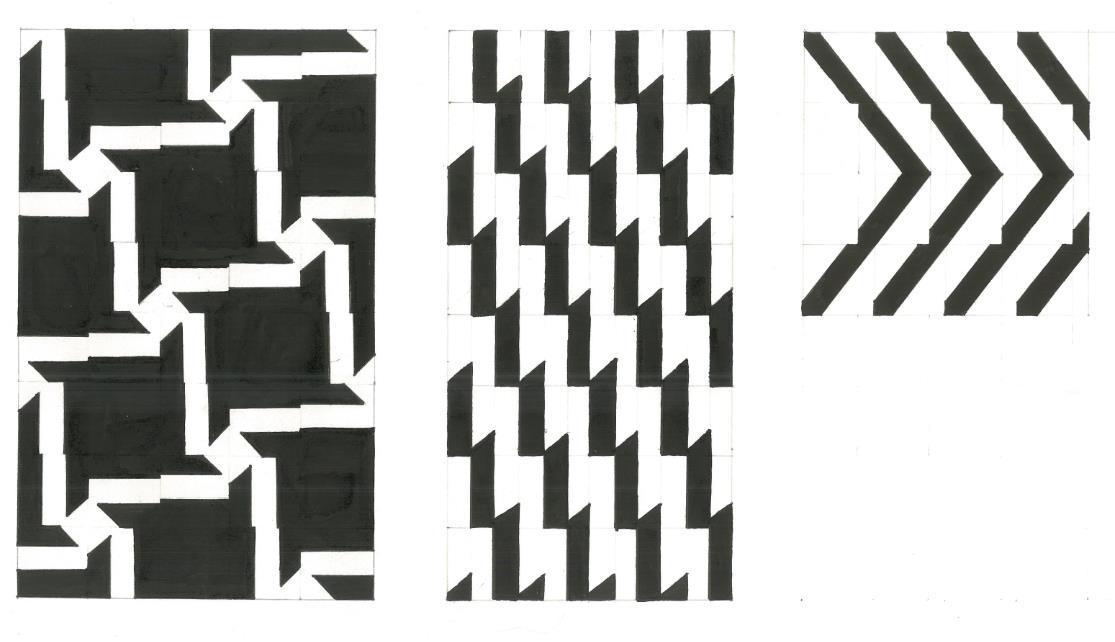
BRIEF:
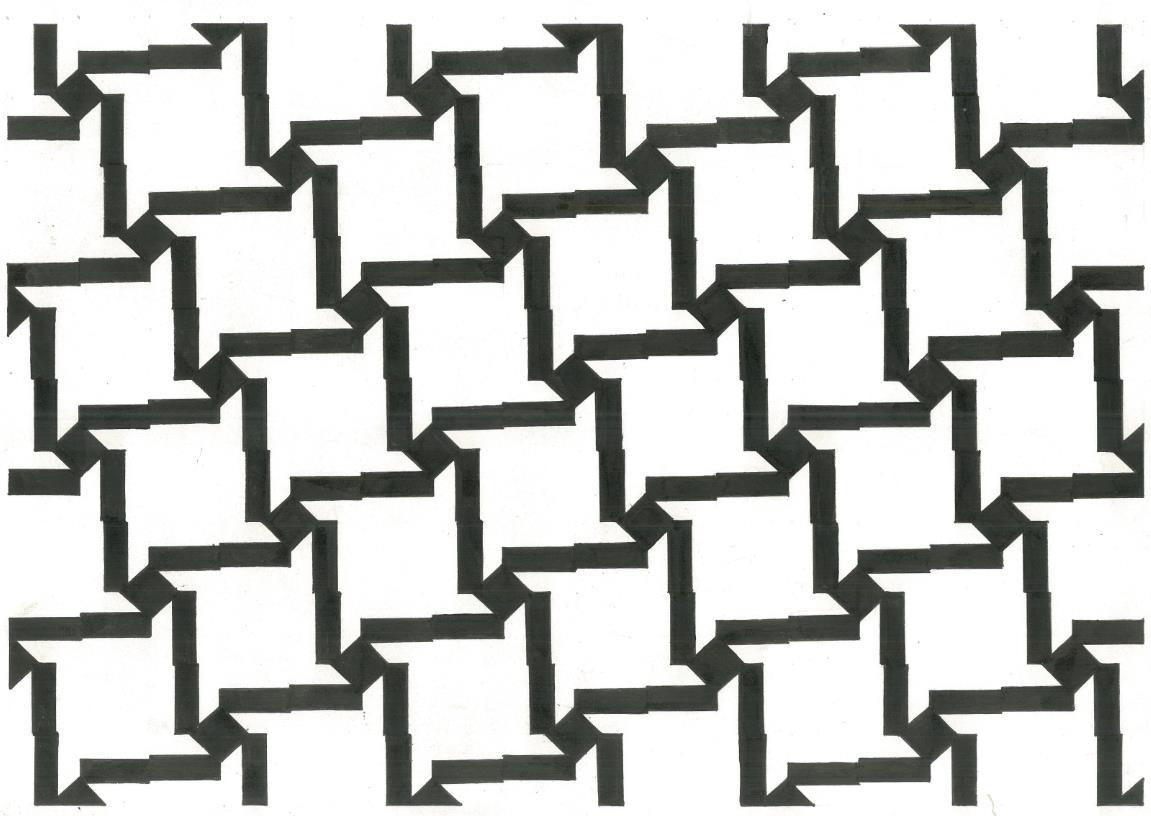
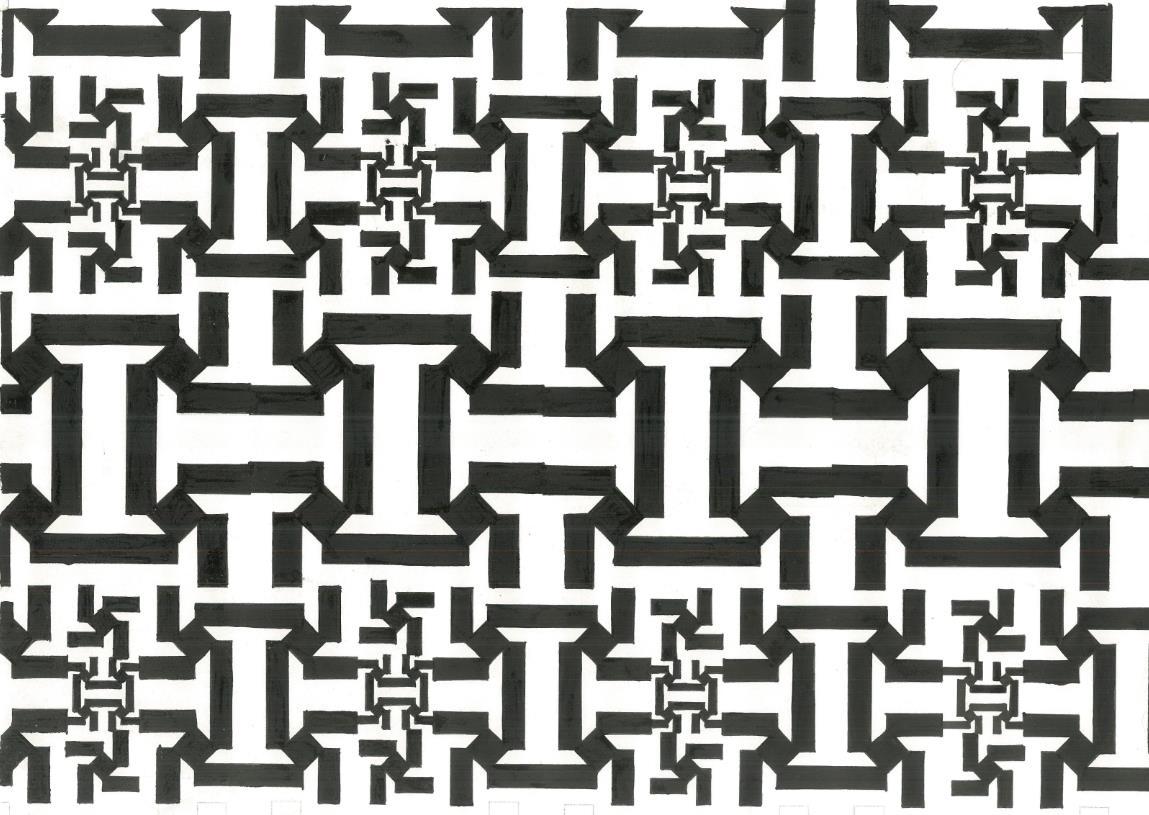
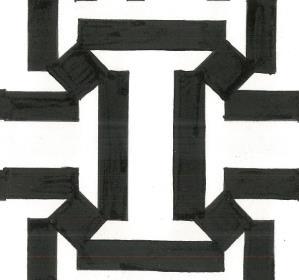
While studying different principles the first principle was to just repeat a single module with continuity and flow.
UNDERSTANDING:
This simple principle with just repeating a single module in a continuous pattern actually looks very easy to see and its continuous and flowing pattern makes it very soothing to eyes, its continuity is like infinity we can't find where it started and where it end. Whenever we create a thing with continuous flowing and rhythmic it actually makes itself thing with a beauty in it
: KETAN GOHIL
EXERCISE NO
.1
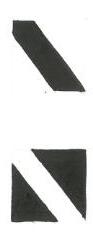
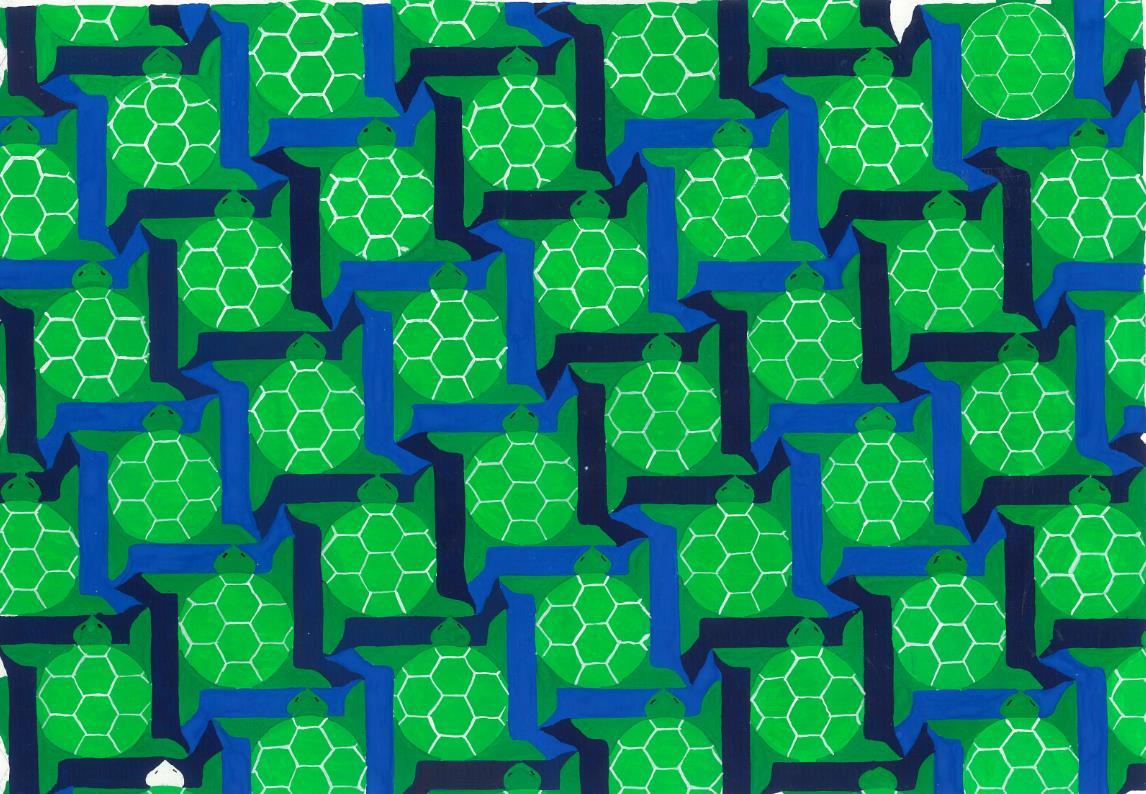
5 EXERCISE NO. 03
ROLL
SIGN
TITLE: MODULE REPEATATION
..
NAME
NO. : 14
:
BRIEF:
The second principal which we explore was scaling in which a single module was to be scaled and repeat and as the same flow and continuity should not break.
UNDERSTANDING:
When I did scaling the visual appearance of same thing looks different like a human observing the thing from a distance and that same things appears to be different when observed it from near it looks like an illusion. This exercise also help me how to manually make scale differences and work on it.
EXERCISE NO .1
6 EXERCISE NO. 04
TITLE:
NAME : KETAN GOHIL ROLL NO. : 14 SIGN :
SCALING OF MODULE
BRIEF:
The principle of 3D or overlapping In this exercise we were told to convert the simple thing into 3D or overlap.
UNDERSTANDING:
In this exercises I learn how to represent 2D drawings in 3D in same 2D paper. What depth different makes difference in appearance.
EXERCISE NO.
EXERCISE NO .1
TITLE: POPING THE MODULE
NAME : KETAN GOHIL ROLL NO. : 14 SIGN : SIGN :
7
05
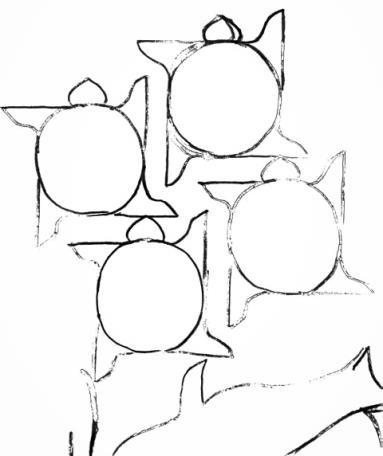
BRIEF:
In this exercise we were supposed to create some organic pattern like animal figures by overlapping tracing sheet on a simple pattern.
UNDERSTANDING:
While performing this exercise overlaying the tracing sheets we explode lot of animal figures. This exercise actually taught me to see critically from many of them one is organic sense. This taught me the sense of exploration how the layer by layer changes comes and a new thing derive.
NAME : KETAN GOHIL
: 14
EXERCISE NO
.1
8 EXERCISE NO. 06
ROLL
SIGN
TITLE: ORGANIC FORM OF MODULE
NO.
:
EXERCISE NO.
TITLE: ORGANIC FORM OF MODULE
: KETAN GOHIL ROLL NO. : 14 SIGN :
EXERCISE NO .1 9
06
NAME
BRIEF:
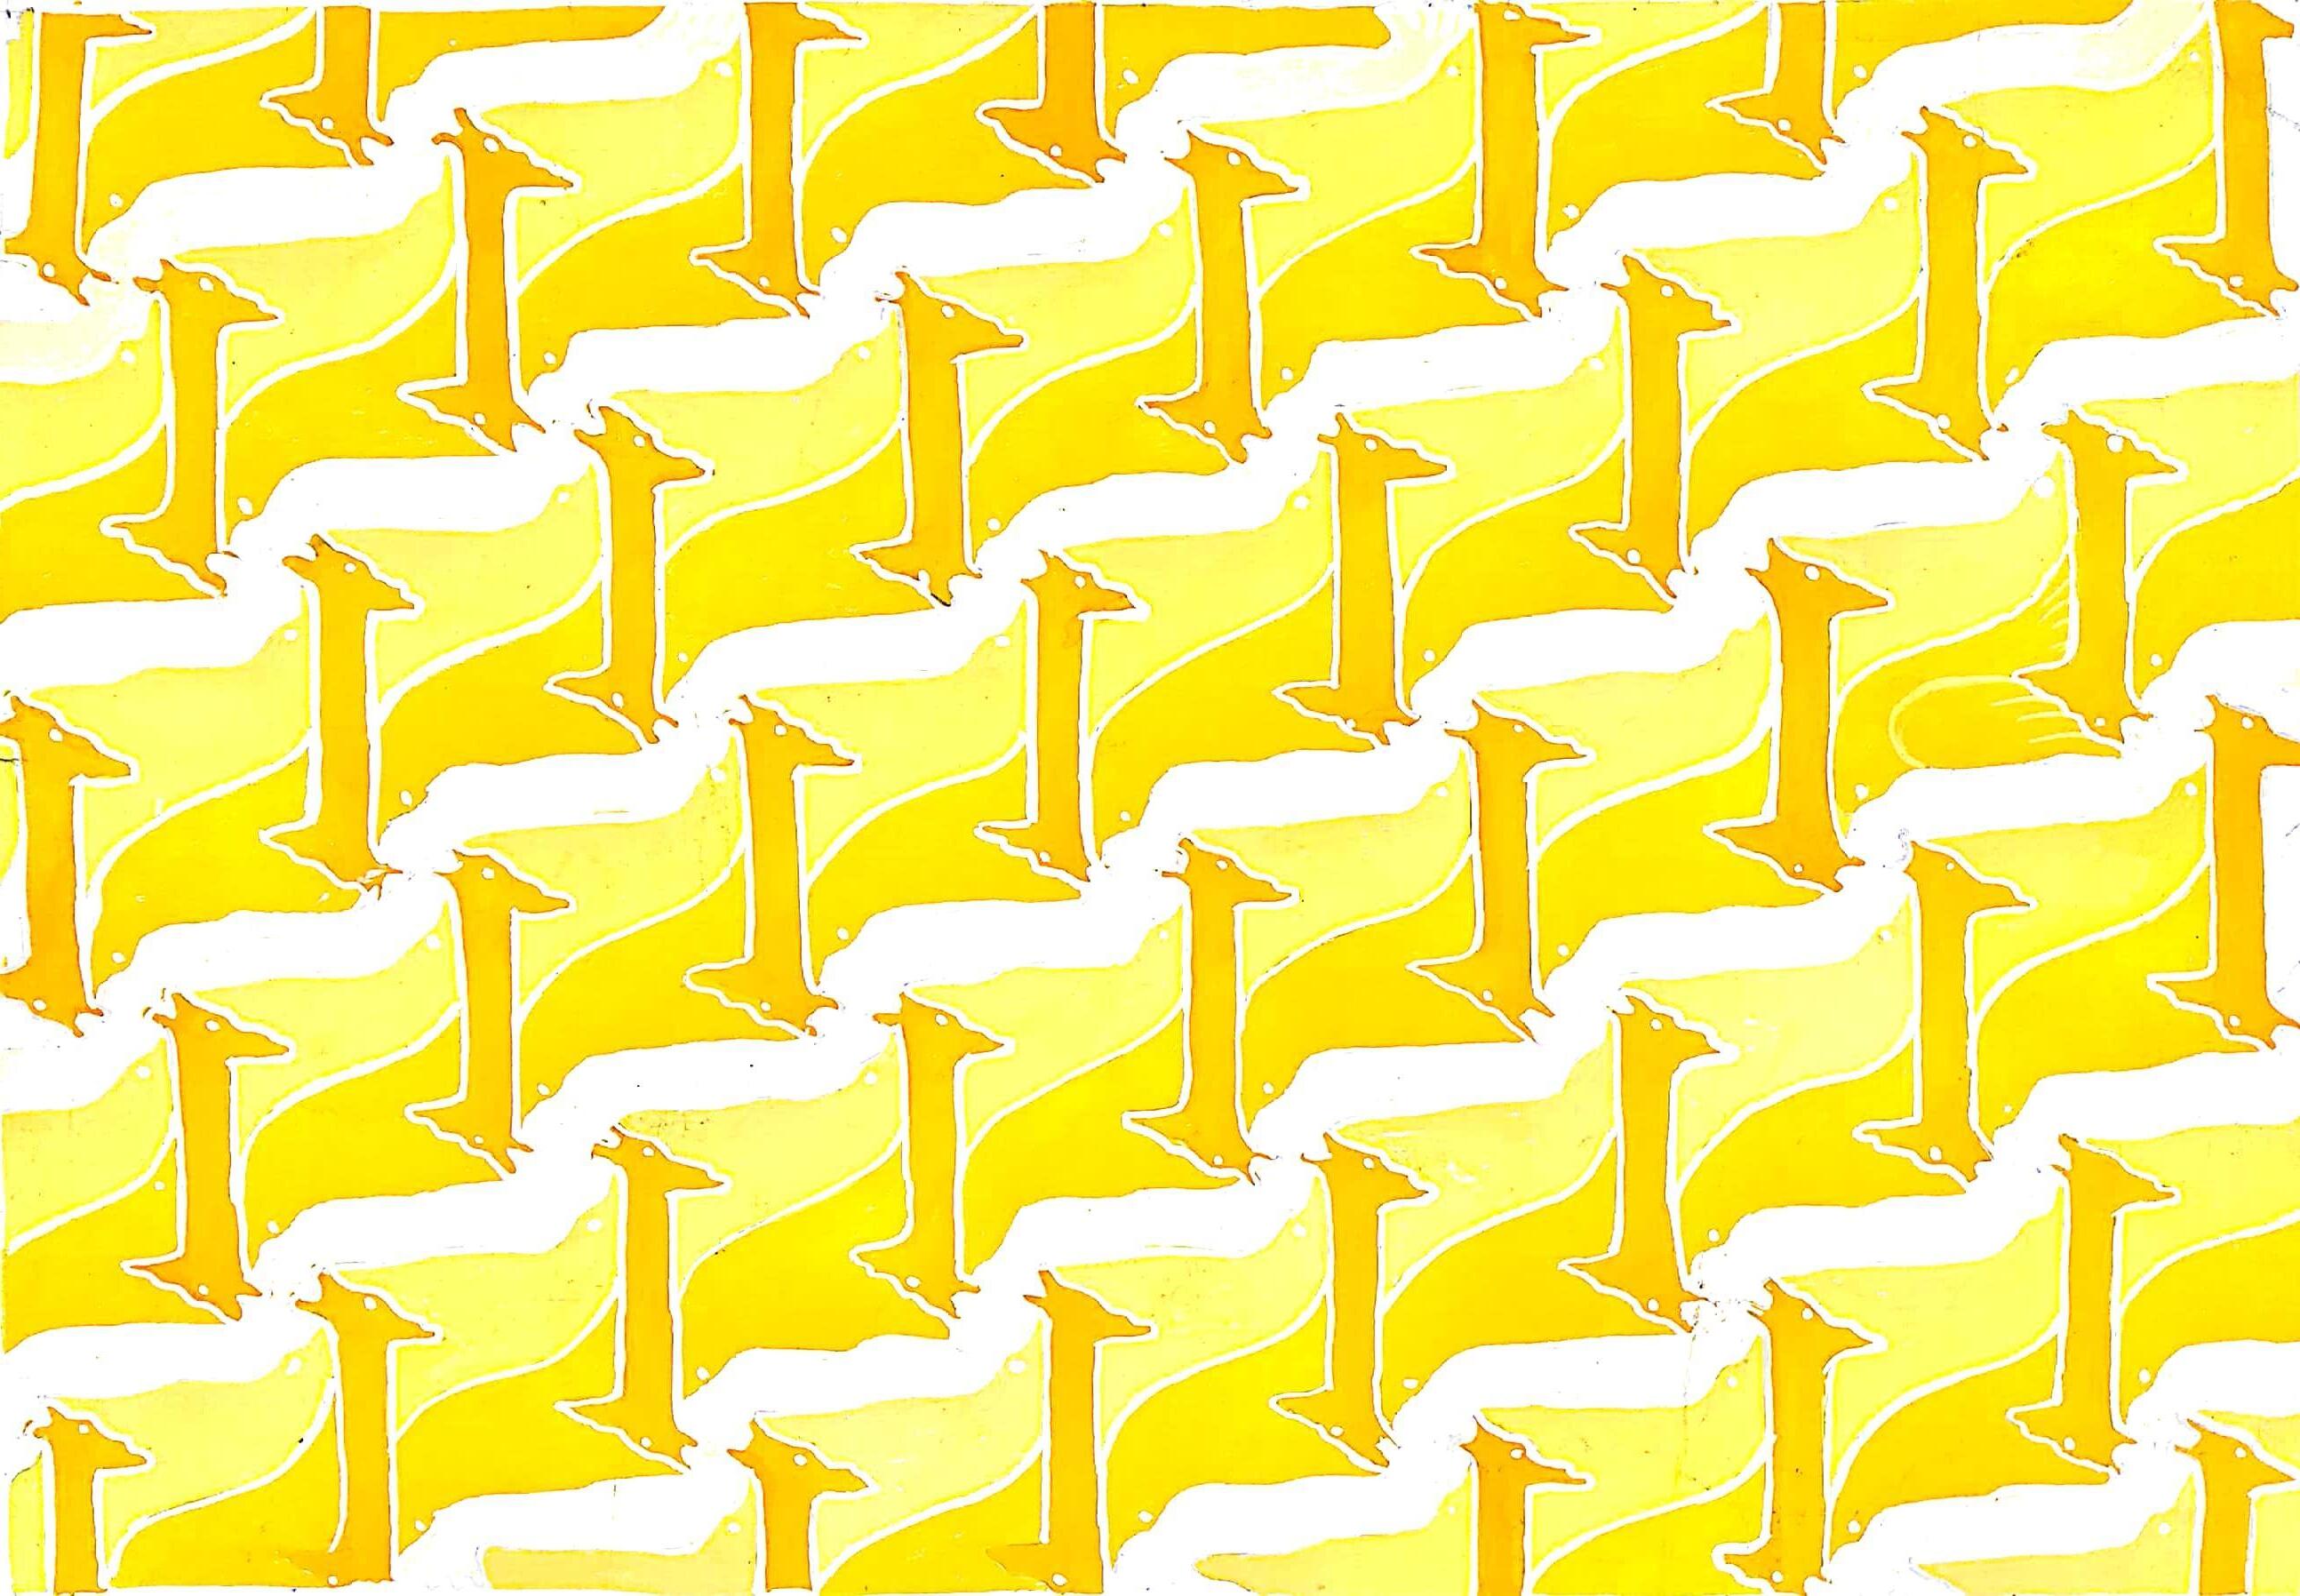
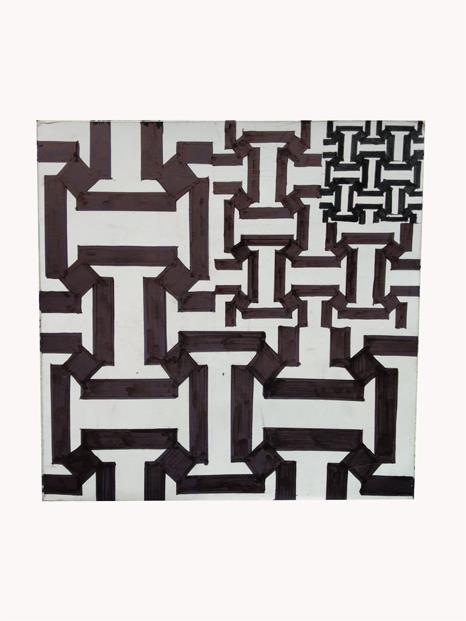
In this exercise we were told to do distortion of any one of the before exercises , distortion which may include any of the things like scaling mirroring squeezing expanding.
UNDERSTANDING:
While distorting the simple pattern by applying any of the principal in random way with remembering the continuity and flow it created an illusion of waviness, inside to outside and death.
EXERCISE NO .1
TITLE: DISTORTION OF MODULE
SIGN :
NAME : KETAN GOHIL ROLL NO. : 14
10
07
EXERCISE NO.
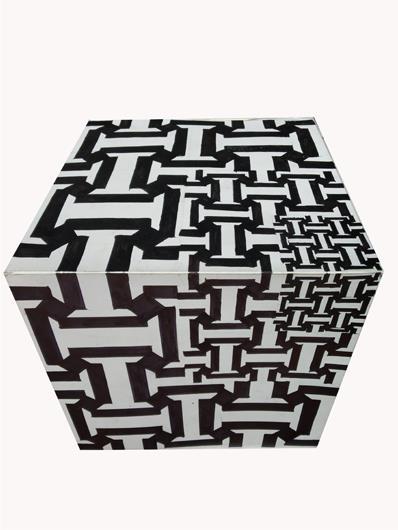
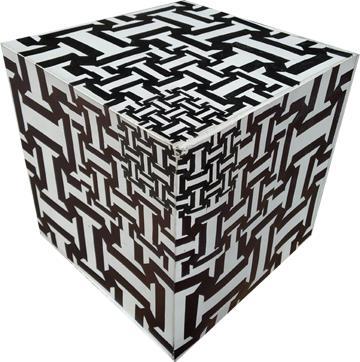
BRIEF:
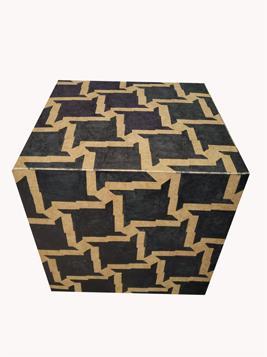
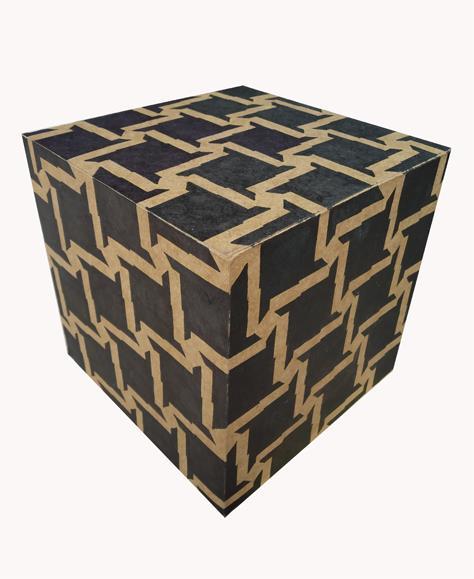
In this exercise we were instructed to apply any of this pattern on the 3D box This exercise was to convert 2D into 3D form.
UNDERSTANDING:
In this exercise I have learnt that how a pattern makes a visual difference, how a pattern actually can connect to different surfaces.
EXERCISE NO .1
11 EXERCISE NO. 08
SIGN
TITLE: PLANE TO SURFACES
NAME : KETAN GOHIL ROLL NO. : 14
:

: KETAN GOHIL ROLL NO. : 14 SIGN : TITLE: PLANE TO SURFACES
EXERCISE NO .1 12
08
EXERCISE NO.
NAME

EDGES
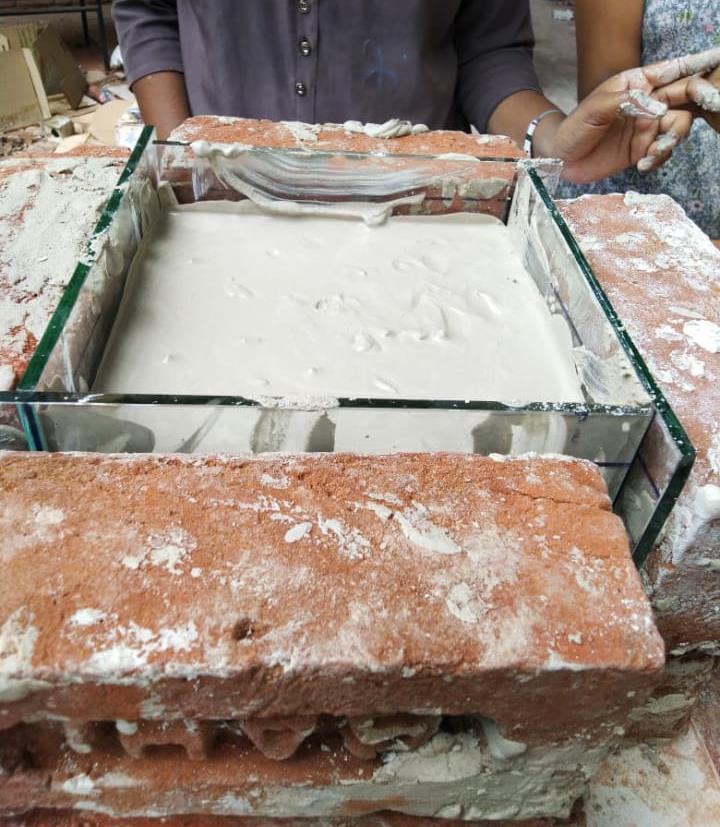
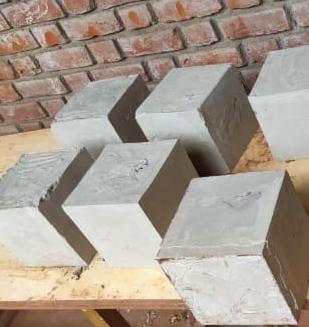
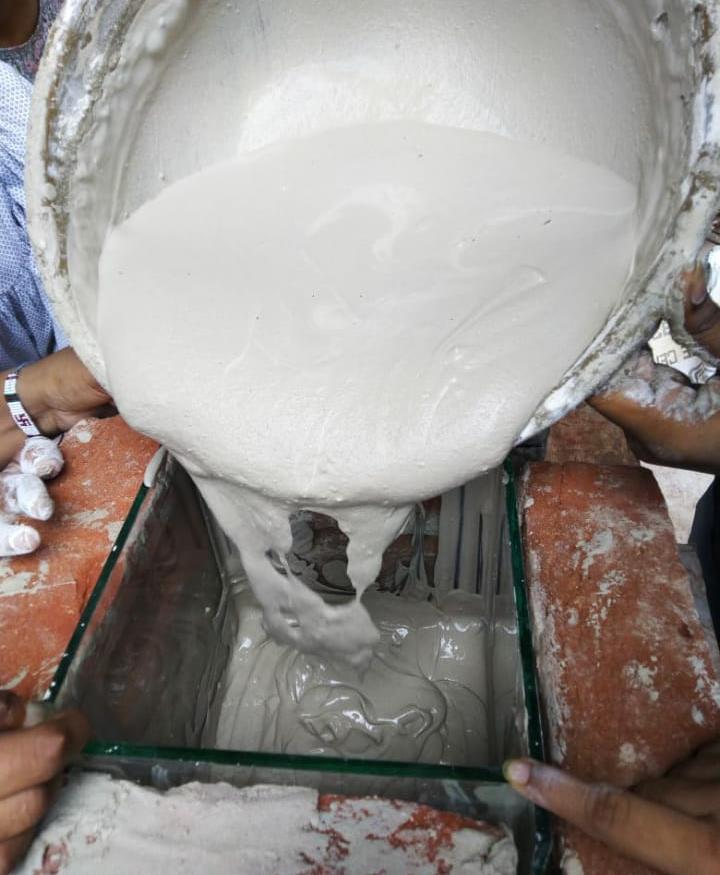
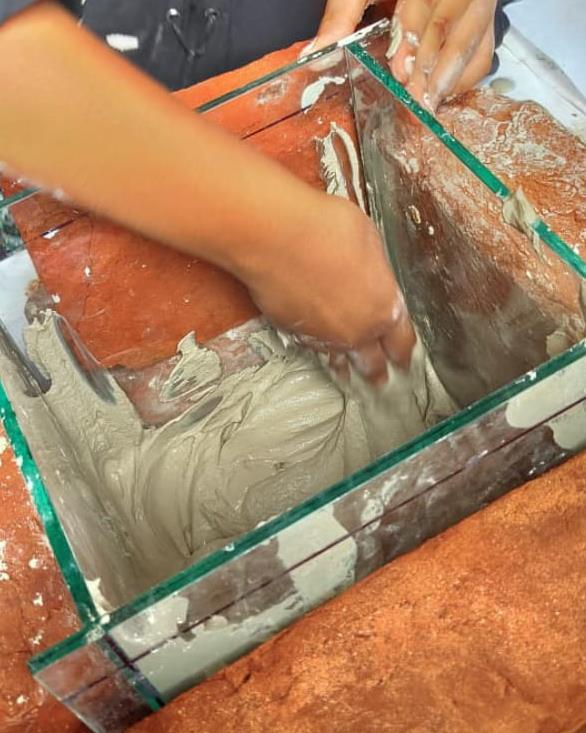
PROCESS OF MAKING POP BLOCK :
First we adjusted the glasses in its proper dimensions which was 8 × 8 inch and kept bricks to support the glass And first we applied the pop on the edges and then we pour all the pop inside and kept 10 minutes and after that we remove the glasses. After removing the block from glass we felt the block was warm if the block does not feel warm there is something wrong in the process, The pop blocks were kept in open for 2 to 3 days and after that it was ready to carve.
EXERCISE NO .1
13 EXERCISE NO. 09
ROLL
SIGN
TITLE: CREATING DEPTH ON SURFACES
READY
NAME : KETAN GOHIL
NO. : 14
:
MODULE OF POP BLOCLK APPLYING POP ON
POURING THE POP SETTING TIME KEPT IN OPEN
TO CARVE
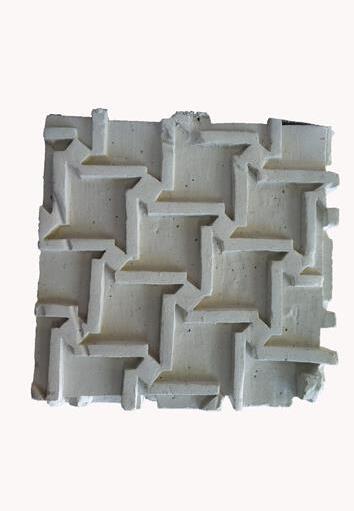
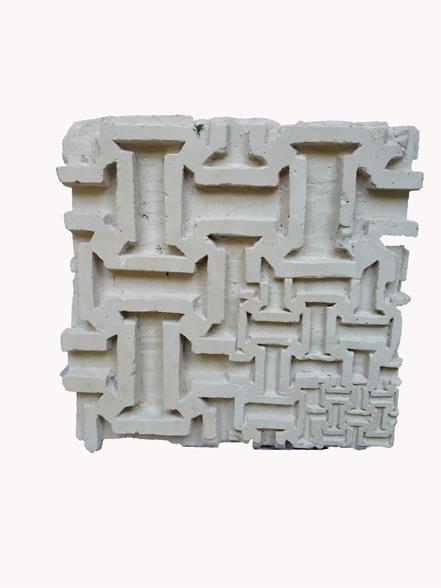
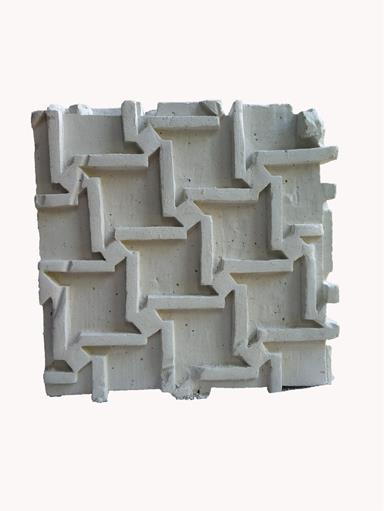
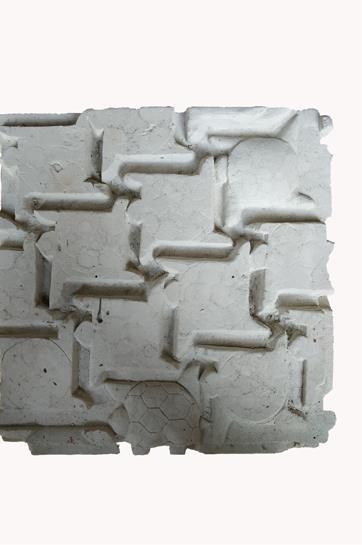
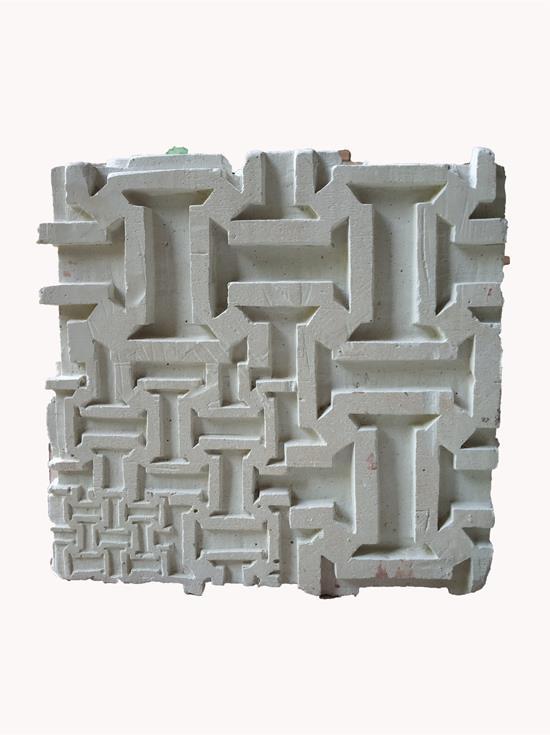
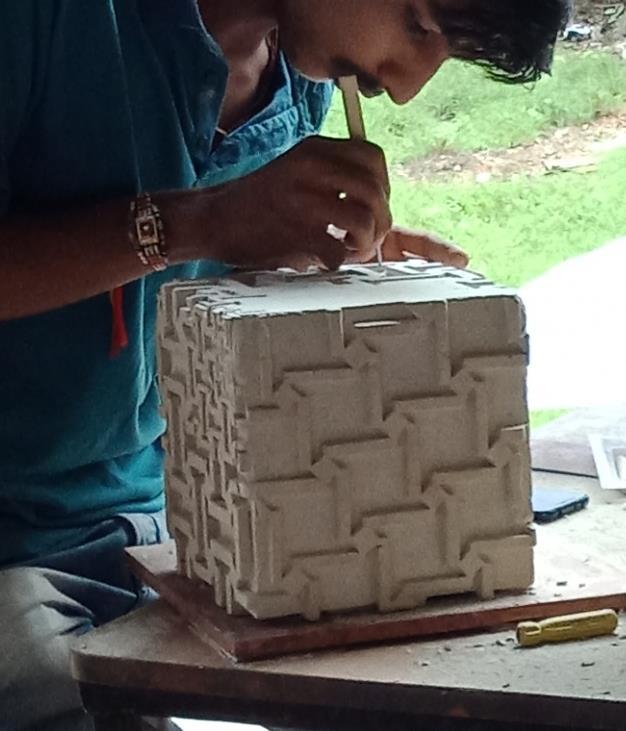
BRIEF:
After the exercise of box the further exercise was to convert that patterns into pop block to study the material Any of the patterns we can repeat on surfaces, two surfaces should connect each other.
UNDERSTANDING:
From the process of making this block the purring, setting time and the time used to keep it in open and then carving starts this whole process help me to be patient and while carving the hand movements and the sense of smoothness .
EXERCISE NO
.1
14 EXERCISE NO. 09 NAME
GOHIL ROLL NO.
14 SIGN : TITLE: CREATING DEPTH ON SURFACES
: KETAN
:
BRIEF:
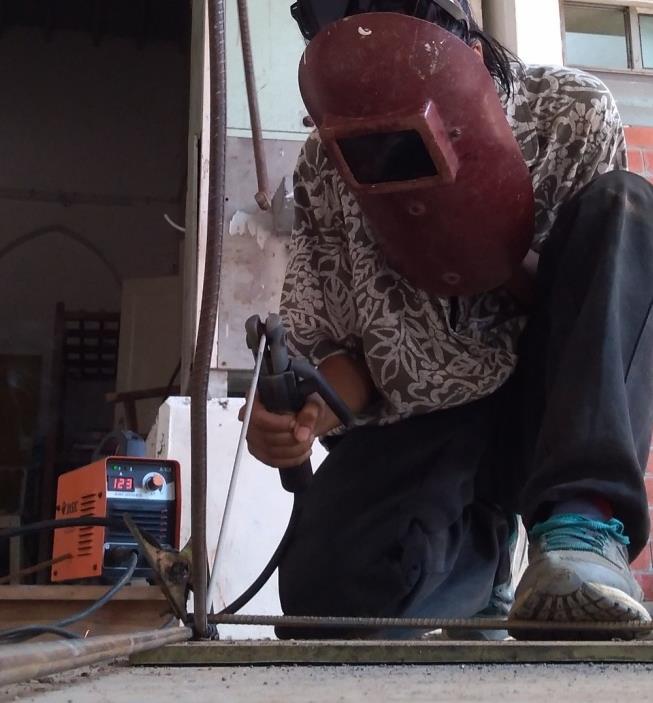
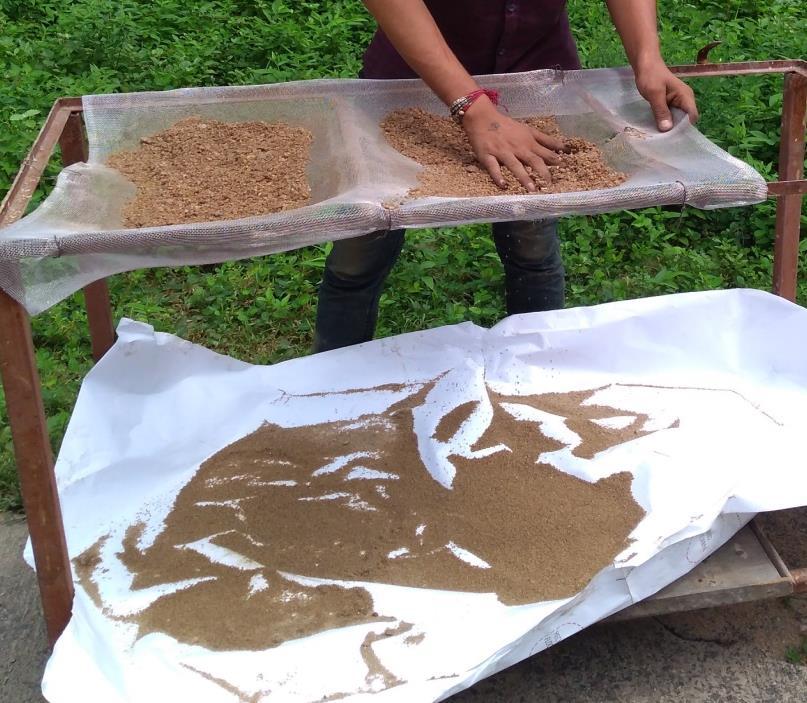
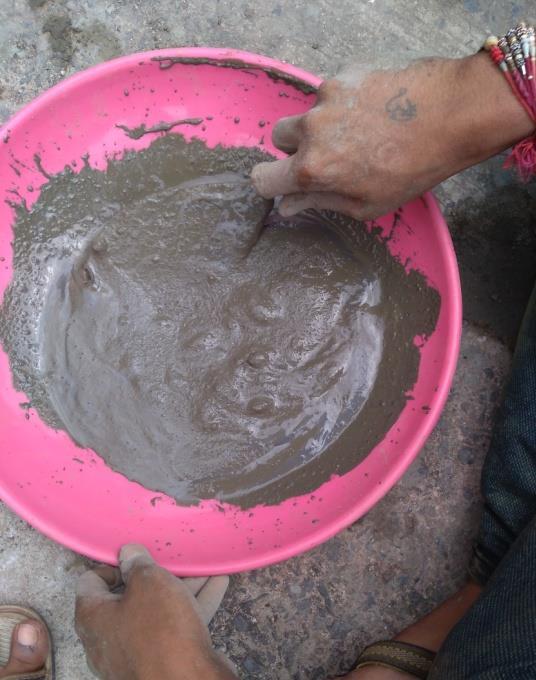
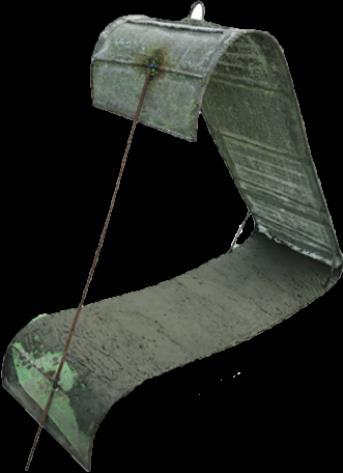
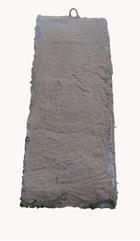
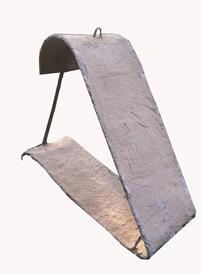
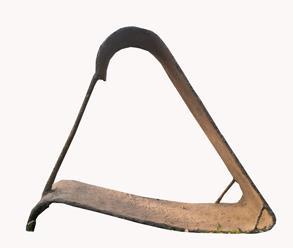
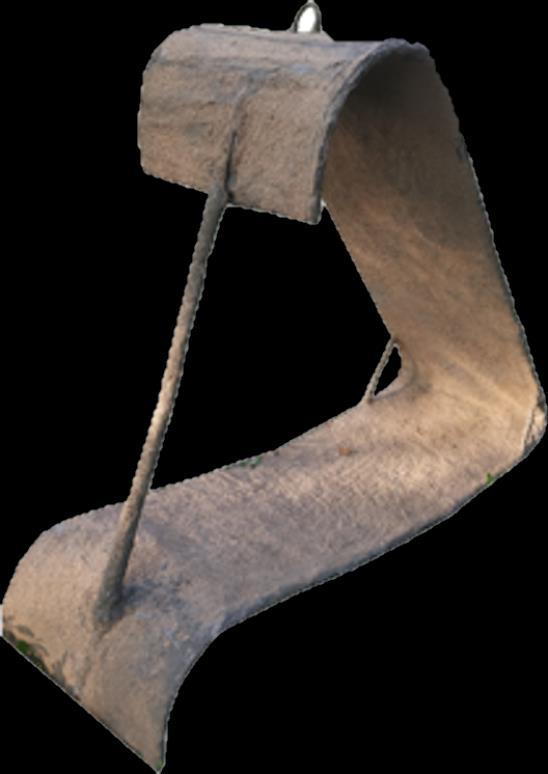
In this exercise we were first instructed to make smallest exploratory models which was to made in ferrocement . After finalizing the model, making it with metal bar the armature. Then layerby-layer cementing by making a proper mixture of sand cement and water. Then the final layer of texture.
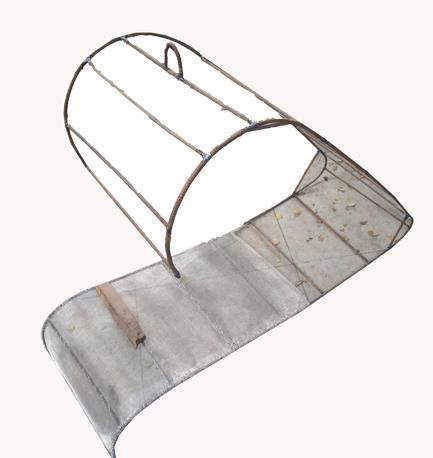
SIGN : TITLE: FERROCEMENT WORK
NAME : KETAN GOHIL ROLL NO. : 14
EXERCISE NO .1 15
10
EXERCISE NO.
Welding
Refining the sand
ARMATURE FIREST LAYER OF
Mixing the cement sand with water
CEMENT
UNDERSTANDING:
While making this ferrocement models I actually learn, how the balance of material is important, how the layer by layer cementing works. I learn how to weld , how to tie wire mash and cement mixture in proper proportion .While I made armature I learned how metal melt and binds each other. The wire mesh which we have put ,it was actually for the support of cement which will bind and make the structure strong. Cement first layer rest on the wire mesh the second layer for the filling of the cracks which may be develop and too hard the structure and the third layer of giving the texture which gives overall feel of the form
SIGN :
NAME : KETAN GOHIL ROLL NO. : 14
EXERCISE NO .1
16 EXERCISE NO. 10
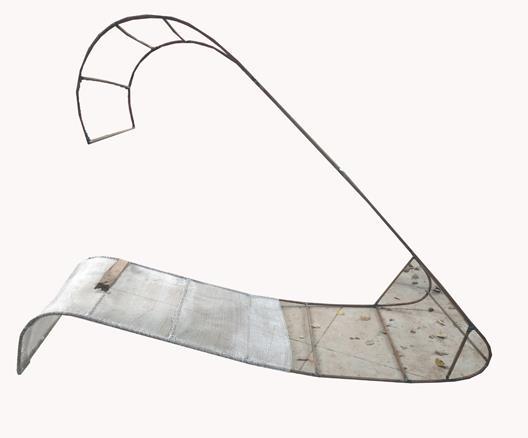
TITLE: SWINGING CURVES