BUS HOW TO
01Get cutting
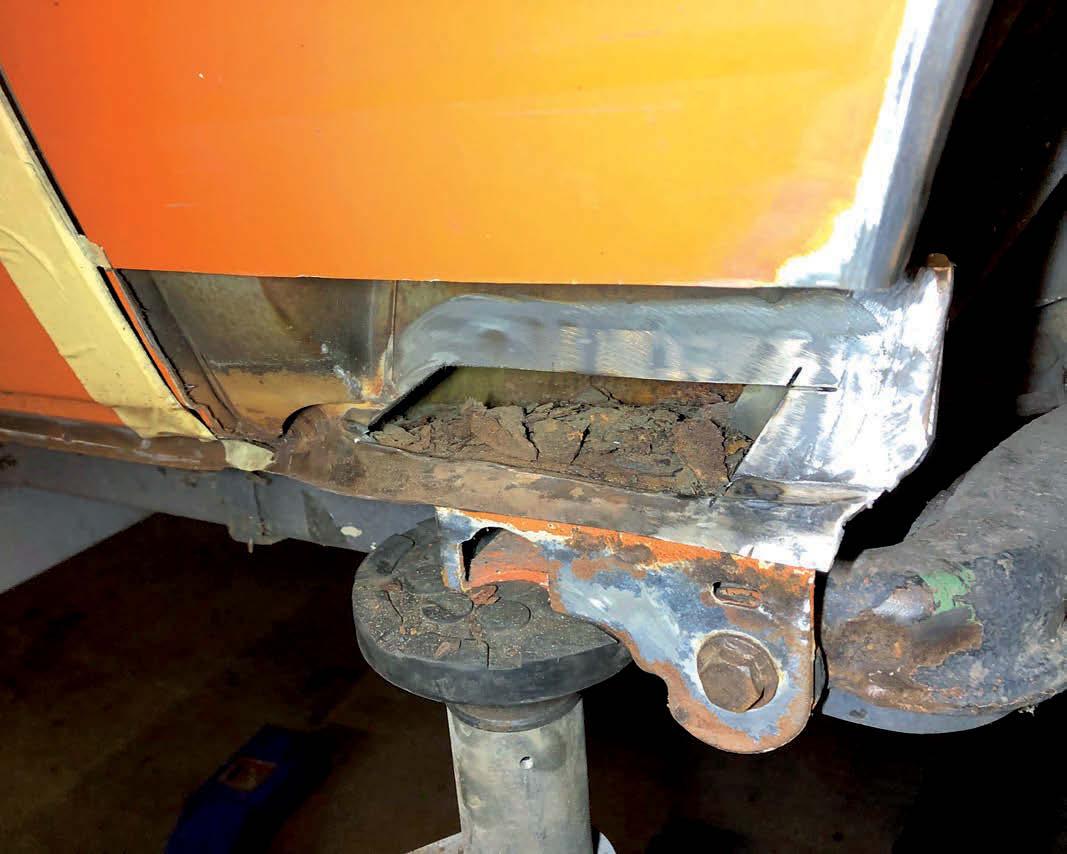
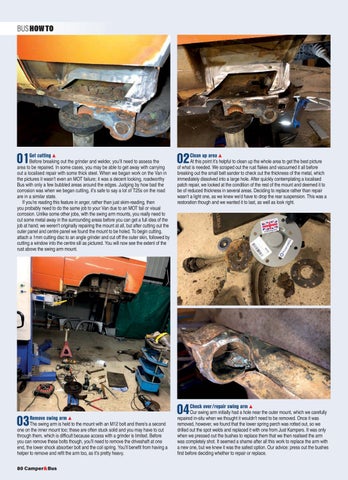
Before breaking out the grinder and welder, you’ll need to assess the area to be repaired. In some cases, you may be able to get away with carrying out a localised repair with some thick steel. When we began work on the Van in the pictures it wasn’t even an MOT failure; it was a decent looking, roadworthy Bus with only a few bubbled areas around the edges. Judging by how bad the corrosion was when we began cutting, it’s safe to say a lot of T25s on the road are in a similar state. If you’re reading this feature in anger, rather than just skim-reading, then you probably need to do the same job to your Van due to an MOT fail or visual corrosion. Unlike some other jobs, with the swing arm mounts, you really need to cut some metal away in the surrounding areas before you can get a full idea of the job at hand; we weren’t originally repairing the mount at all, but after cutting out the outer panel and centre panel we found the mount to be holed. To begin cutting, attach a 1mm cutting disc to an angle grinder and cut off the outer skin, followed by cutting a window into the centre sill as pictured. You will now see the extent of the rust above the swing arm mount.
03
Remove swing arm
The swing arm is held to the mount with an M12 bolt and there’s a second one on the inner mount too; these are often stuck solid and you may have to cut through them, which is difficult because access with a grinder is limited. Before you can remove these bolts though, you’ll need to remove the driveshaft at one end, the lower shock absorber bolt and the coil spring. You’ll benefit from having a helper to remove and refit the arm too, as it’s pretty heavy.
02 Clean up area
At this point it’s helpful to clean up the whole area to get the best picture of what is needed. We scraped out the rust flakes and vacuumed it all before breaking out the small belt sander to check out the thickness of the metal, which immediately dissolved into a large hole. After quickly contemplating a localised patch repair, we looked at the condition of the rest of the mount and deemed it to be of reduced thickness in several areas. Deciding to replace rather than repair wasn’t a light one, as we knew we’d have to drop the rear suspension. This was a restoration though and we wanted it to last, as well as look right.
04Check over/repair swing arm
Our swing arm initially had a hole near the outer mount, which we carefully repaired in-situ when we thought it wouldn’t need to be removed. Once it was removed, however, we found that the lower spring perch was rotted out, so we drilled out the spot welds and replaced it with one from Just Kampers. It was only when we pressed out the bushes to replace them that we then realised the arm was completely shot. It seemed a shame after all this work to replace the arm with a new one, but we knew it was the safest option. Our advice: press out the bushes first before deciding whether to repair or replace.
80 Camper&Bus
079-082 C&BMAY SwingarmsIC.indd 80
03/03/2022 19:50