


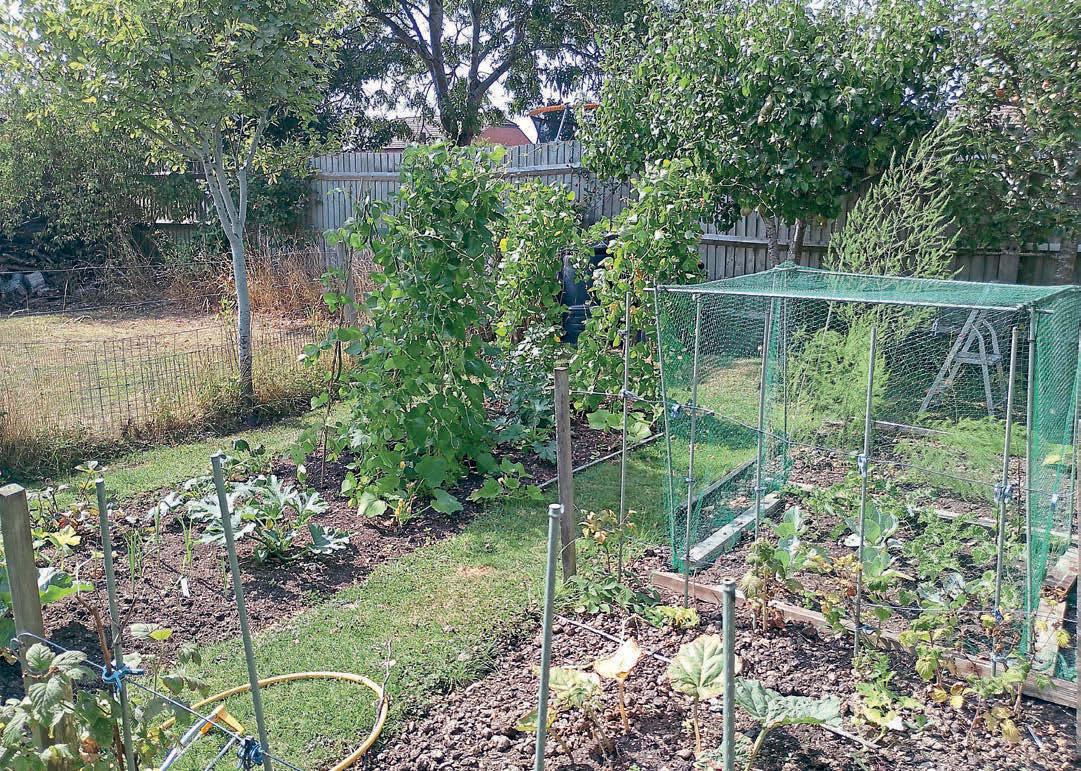
After months of grey skies, soggy beds and waiting for the soil to dry, there’s suddenly a shift in the air. The ground is beginning to crumble again rather than clag to your boots, the first proper blue skies appear between the showers, and the birds are singing their hearts out.


Along with those comes that unmistakable scent of the new growing season: the earthy smell of warming soil, fresh green shoots and the faint sweetness of blossom beginning to open. After the long winter months, it’s a smell that promises good things ahead.


April always feels like the moment when gardening shifts gear and the real growing begins. Seed trays start to fill up quickly, whether on windowsills, in propagators or tucked into corners of the greenhouse. Outdoors, beds that looked bare just a few weeks ago are suddenly ready for sowing. It’s also a time when the garden rewards a little patience. The temptation is always to sow everything at once, but April reminds us that steady progress usually wins the race. Before long, those first sowings will be strong enough to plant out.


Rachel Graham, editor


This month’s issue reflects that sense of momentum. We start with one of the most dependable crops you can grow – leeks – with Benedict Vanheems explaining how to raise strong plants that will keep the kitchen supplied right through the colder months. Rob Smith looks at coloured broad beans, which bring unexpected beauty to the veg plot with crimson and chocolate blooms, while Martin Fish shares his practical advice for growing cucumbers under cover.
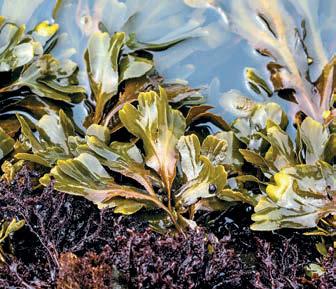
Soil health is another theme running through this issue. Dr Anton Rosenfeld explains how legumes and their bacterial partners capture nitrogen from the air and return it to the soil naturally. We also explore the long tradition of using seaweed as a soil improver.
April is busy, certainly, but it’s the most hopeful kind of busy. The soil is workable again, the days are longer and the garden is beginning to surge into life. All pretty exciting!


78 FRESH FLAVOURS OF SPRING
Anna Cairns Pettigrew celebrates the season’s produce with four simple recipes using early harvests from the veg patch
80 THE LAST WORD
Sarah Purser reflects on the rhythm and promise of April in the garden


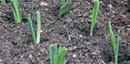
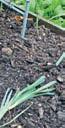
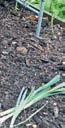
16 LUSCIOUS LEEKS ✪
Benedict Vanheems explains how to grow this dependable crop for harvests from autumn right through winter
26 BROAD BEANS GROWING IN FULL COLOUR ✪
Rob Smith explores coloured broad beans, from crimson to chocolate blooms that bring ornamental beauty to the veg plot
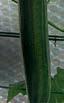
32 EARLY CUCUMBERS FROM THE GREENHOUSE ✪
Martin Fish shares practical advice for raising strong cucumber plants under cover for a reliable summer harvest
40 FIX YOUR OWN FERTILISER ✪
Dr Anton Rosenfeld explains how legumes and soil bacteria capture nitrogen from the air and return it to the soil naturally
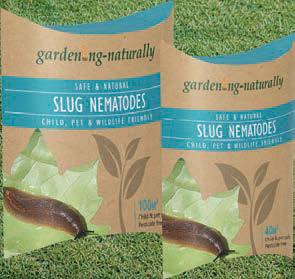
43 SLUG CONTROL IN SPRING ✪
An early biological treatment can reduce slug numbers before seedlings are shredded
44 PERMACULTURE PRINCIPLES ✪
Stephanie Hafferty explores what gardening setbacks can teach us about observing and adapting in the kitchen garden

51 SEAWEED – BUILDING BETTER SOIL ✪
Charlotte Sterland examines the history, science and practical use of seaweed as a soil improver in productive gardens
56 STONE FRUIT UNDER GLASS ✪
David Patch weighs up the benefits and drawbacks of growing peaches, nectarines and cherries under greenhouse protection
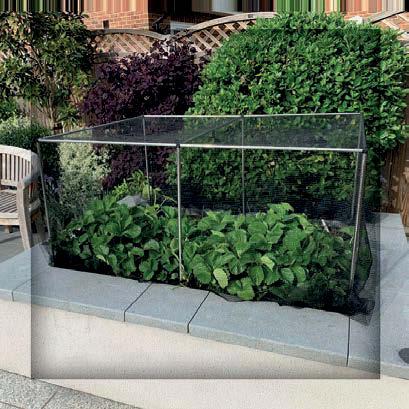
60 HUMANE PEST DETERRENTS
Practical ways to discourage cats, pigeons and rabbits while protecting both plants and garden wildlife
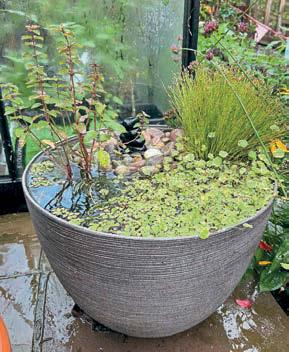
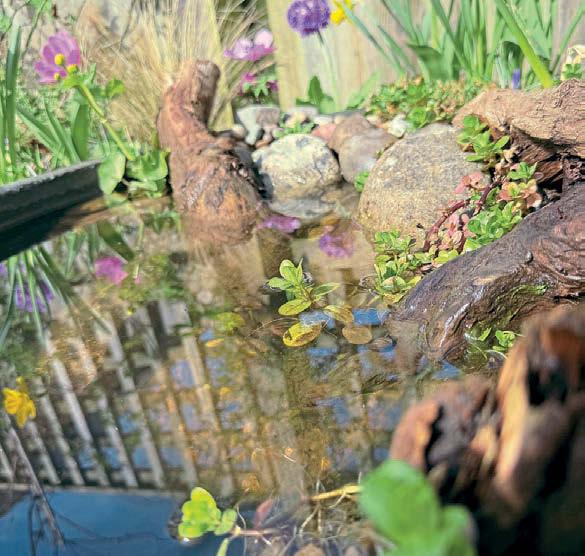
62 BUILD YOUR OWN WILDLIFE POND IN A POT ✪
Becky Searle shows how to create a simple container pond that encourages birds, insects and amphibians to visit
72 READY, STEADY, SOW!
Garden Organic’s Heritage Seed Library shares practical advice for successful seed sowing this spring
74 FLEECE CLOCHE TEST
A side-by-side trial compares covered and uncovered beds to see how fleece affects soil temperature and growth


66 GIVEAWAYS WORTH £984 ✪
Jumbo plug plants, Backdoorshoes, coir products and wood protection
68 GARDEN STORE
A chance for KG subscribers to take advantage of some exclusive offers
76 READER OFFERS ✪
Super savings on slug treatments and strawberry mats


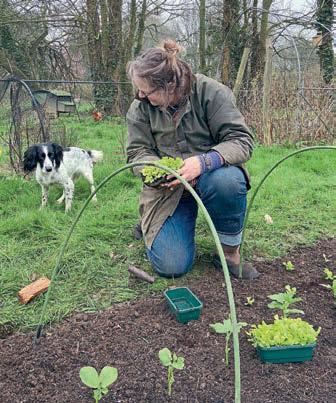
Stephanie Hafferty shares her top jobs for the month, from sowing melons and planting hardy crops to stretching your lettuce harvest


Check trays and pots regularly for woodlice, which can damage seedlings. Sweep them into a bucket and relocate to a wilder part of the garden
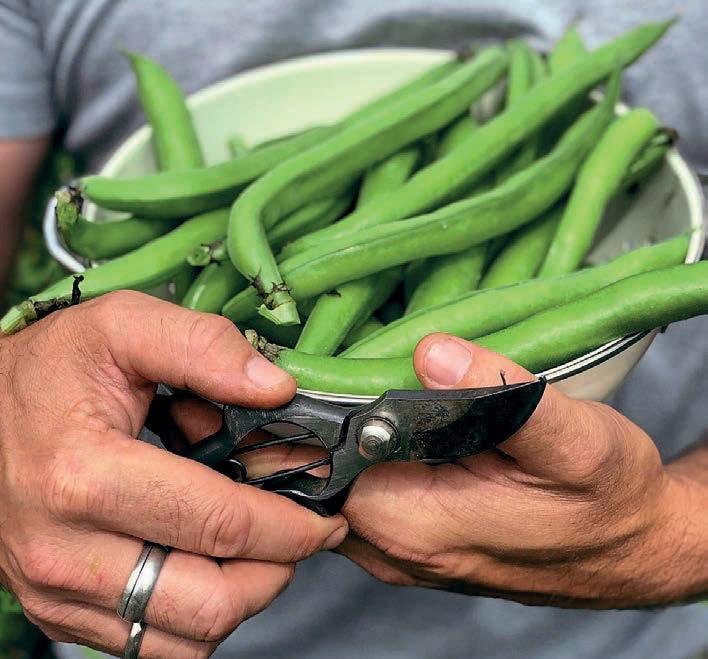
Cut spears level with the soil, or just below the surface, using a sharp knife. Enjoy this short but delicious seasonal treat
Hoe beds on dry days to prevent weeds taking hold. Lift soft weeds, such as willowherb, with a trowel and compost them
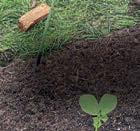
Plant 2cm deep in weed-free soil, spacing 10-15cm apart in rows 30cm apart. Sow quick radishes between rows as a catch crop
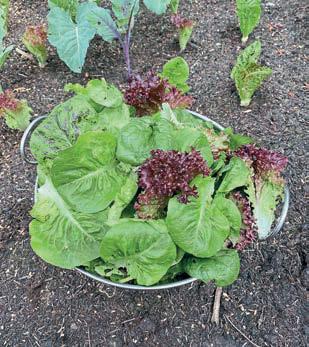
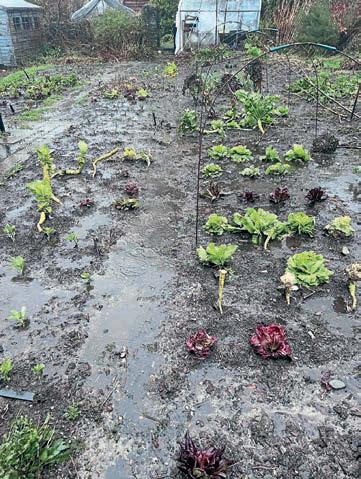
April is a joyfully busy month in the kitchen garden. I’m still harvesting overwintered crops grown under cover in the polytunnels and outside in the beds, including salads, brassicas and leeks. It’s time to get the last of the parsnips and leeks out, before they start going to seed and becoming woody in the middle. I always leave a few leeks to go to ower, to enjoy their stunning globe-shaped blooms, and to attract bene cial predatory insects to the plot.
Trays of transplants are ready to go out into the spaces cleared by harvesting. ere’s still a good chance of frost in most places throughout April, so only plant out crops that can withstand cold temperatures. I start everything except radish, carrots, and parsnips o in modules. is means they can be sown several weeks earlier than outside, so will crop earlier too. is method also helps to protect seeds and seedlings from slugs and rodents. It uses more compost and takes a little more time than direct sowing, but grows a more productive veg patch.

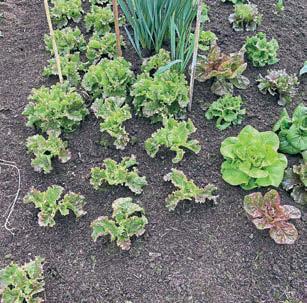
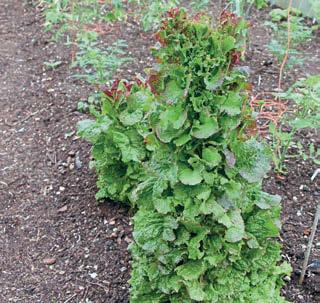
STEP 1: I grow some lettuce to be harvested as whole-head lettuce, delicious when cut into quarters and roasted or barbecued (do try it!), and the rest for picking as leaves. Bags of mixed salad leaves are very expensive to buy, and often imported, yet it is easy to grow your own tasty mixed salad, year-round.

STEP 2: To extend the crop, use the pick-and-come-again method. After removing and composting any really damaged outer leaves, carefully remove 2-4 leaves per plant, using your fingers and a downward motion to snap them off the stalk. Leave the centre part to continue growing.
STEP 3: Over time, the lettuce plants will start to resemble little palm trees. When they start to bolt and go bitter, twist them out of the ground and compost. Add extra colour and depth of flavour to your salad with herbs, edible flowers and spicy leaves, such as mustard or rocket.
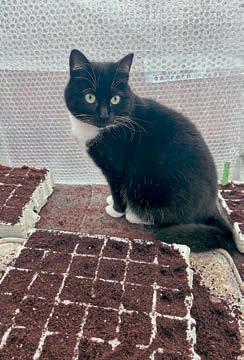
■ Trays full of young seedlings on warm heat mats are very enticing to cats seeking a cosy place for an afternoon snooze. Unfortunately, they can squash and kill baby seedlings, or even knock trays onto the floor. Close the door to propagating areas when you’re not in them, or cover the trays with propagation lids to make them less attractive.

■ St Mark’s Fly, a black insect just over a centimetre long, emerges towards the end of April, around St Mark’s Day (April 25). The swarms of newly-emerged flies can look alarming, but they are completely harmless. The insects are important pollinators and also provide valuable nutrition for birds and other wildlife.
■ Keep an eye on the weather forecasts, and watch out for cold weather and frosts. Protect susceptible crops with horticultural fleece, bubble wrap or several sheets of newspaper. Newspaper is especially good for protecting potato foliage, but do remember to remove it during the day.
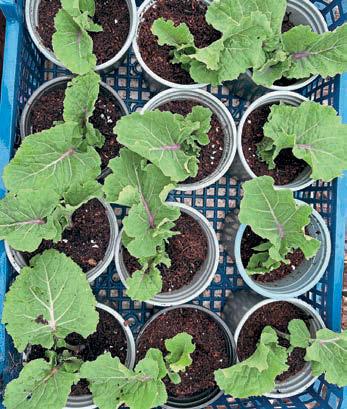
Perennial kale is a valuable addition to the veg plot, providing tasty leaves for almost year-round harvests. They are lowmaintenance and have a lifespan of around five years. Like all brassicas they are a food source for caterpillars, but even if they are stripped right back, they’ll bounce back and continue cropping.
Varieties such as Taunton Deane are propagated by cuttings rather than seed. To make more plants, fill small plant pots with multipurpose compost and water. Take side-shoot cuttings of around 1012cm or so, remove the lower leaves, and push each cutting into a pot. Pop under cover to protect from the weather.
The cuttings will look a little droopy as they start to produce roots but, once established, they will grow into sturdy little plants. Plant out at least 60cm apart. Perennial kales grow very big!
SOW NOW
Basil, beetroot, broad beans, broccoli, Brussels sprouts, cabbage, carrots, cauliflower, celeriac, celery, coriander, courgettes, cucumber, dill, Florence fennel, kohl rabi, leeks, lettuce, mangelwurzels, onions, parsley, parsnip, peas, radish, salad leaves, shiso, spinach, salad onions, summer squash, winter squash, tomato, turnip

Globe artichoke, beetroot, broad beans, calabrese, cauliflower, onion sets, oca, peas, potatoes
Asparagus, spring cabbage, chard, kale, leeks, parsnips, rhubarb, sprouting broccoli, salad leaves, spring onions
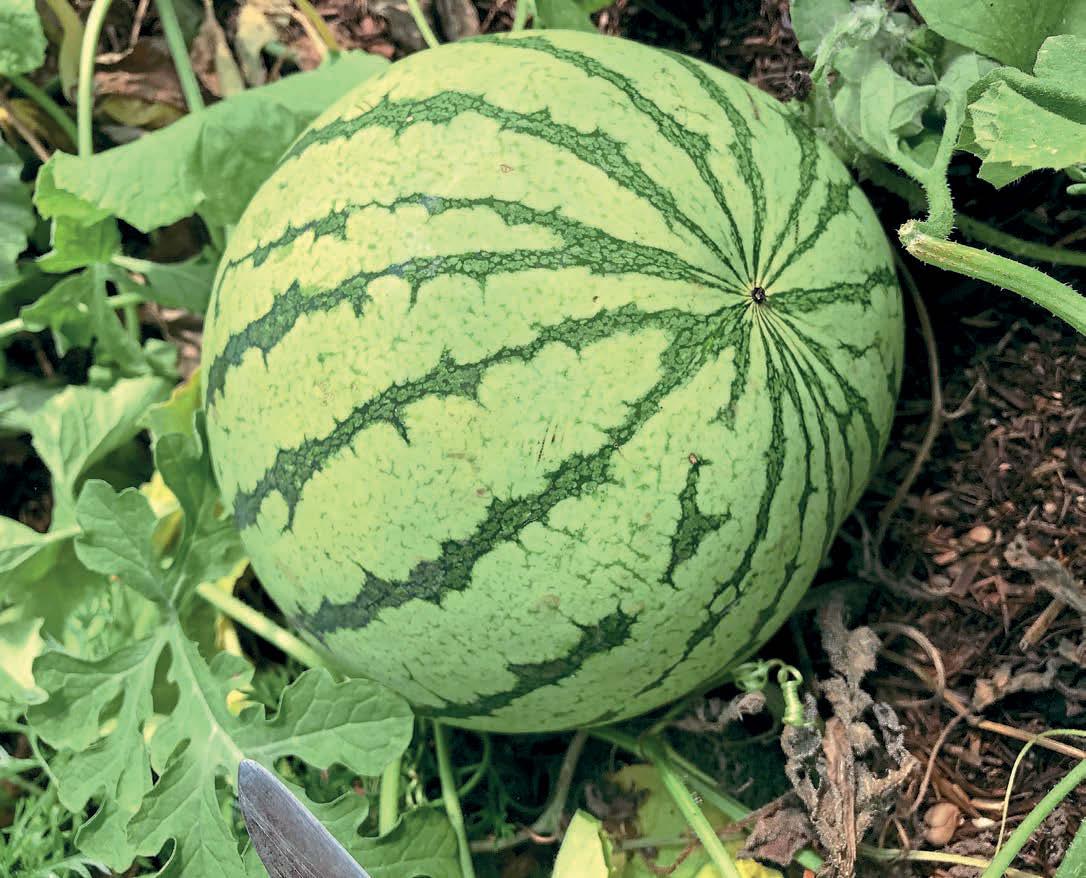
Start sowing melons now, and look forward to a fragrant, sweet taste of summer. ere are many kinds of melons, including watermelons, which are suited for growing in our climate. Favourite varieties that do well here include Petit Gris de Rennes, Early Moonbeam watermelon and the F1 Little Darling. Shark’s Fin melon (actually a type of gourd) produces huge fruit that can be used in both sweet and savoury dishes.
Melons are tender plants. ey need warmth to grow, and protection from frost. In most of the UK they crop more abundantly if grown under cover in a greenhouse, cloche or polytunnel. For outdoor growing, look for varieties bred for UK conditions.
Fill a module tray (cells approx 4x4cm), small pots, or loo roll tubes with multipurpose peat-free compost. Sow one seed in each, and place in a heated propagator or other warm, frost-free place. Pot on when the seedlings are about 8cm tall into 7.5cm pots. Keep in a warm, light place until they can be planted out, when the danger of frost has passed.
Plant out 1m apart in beds, or into large pots or grow bags. Either allow them to trail across the ground or provide supports for them to clamber up.
It is difficult saying goodbye to plants that have been cropping under cover all winter and into spring, but it is time to clear them away to prepare these valuable protected spaces for the summer crops.
Cut everything at ground level carefully with a sharp knife, leaving the roots in the ground. This is very beneficial for soil ecosystems. Leave a few brassicas to go to flower, to attract beneficial insects such as hoverflies.
Chop up anything with a woody stem, such as brassicas, with a sharp spade. Pile into the compost heap, being sure to add ‘browns’ (such as cardboard, shredded wood or straw) to balance out the ‘greens’.
Now is a good time to mulch the beds with 1-2cm of compost, in readiness for planting out tomatoes and other summer crops.
STEP 1: Lettuce seed is one of the easiest seeds to save. First, choose two healthy lettuces which should be the same variety. If you use two it helps to ensure a backup in case one fails to thrive. Place a stake or other reminder next to them, so you’ll remember not to pick them.
■ Bright sunshine and warm spring days can raise temperatures in greenhouses and other under cover spaces, causing young seedlings to frazzle. Protect them for a few hours by hanging an old bed sheet to create a shady environment.
■ Ventilation is important for a healthy growing environment, reducing the risk of mould, mildews and damping off. Open vents and doors for an hour each day, weather permitting, to allow air to flow. Remember to close the doors midafternoon as temperatures fall towards evening.
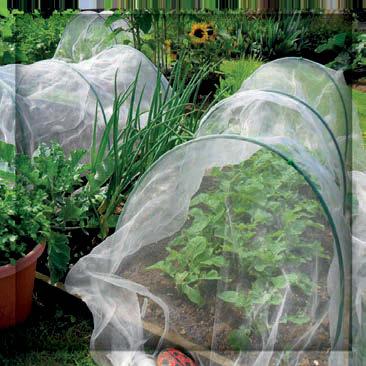
■ Carrot root fly is a tiny insect that feeds on carrots and related vegetables, including celery, celeriac, and parsnips. They start to become active in May, so it is a good idea to protect April sowings of carrots with fine vegetable mesh now, to prevent infestation. Spread the mesh over cloche hoops or lay it over the carrot leaves. Secure to the ground, making sure there are no gaps for the root fly to get in through.
■ Plant second early and main crop potatoes. For an easy way to plant with minimal soil disturbance, make a hole a trowel depth in the soil, pop in the tuber, and cover. Plant the spuds 30cm apart, in rows 60cm apart. Mulch with a layer of compost. If the weather is very dry, a mulch of grass clippings or comfrey leaves will also help keep the soil underneath moist.
STEP 2: Leave the lettuces to grow. As they get taller, they may need to be tied to a stake to prevent them from toppling over. Remove the lower leaves, which are very enticing to slugs, but leave the rest on the plant. It will take several months for the lettuces to start producing flowering shoots and tiny flowers.
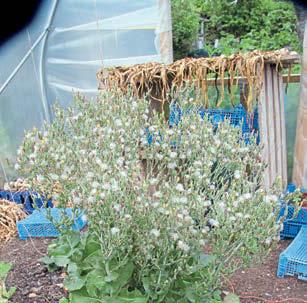
STEP 3: Next, the flower heads produce lots of small, fluffy seeds. Once most of the plant has gone to seed, cut the stem at the bottom. Check for any slugs or other insects, then hang the plant upside down in a dry, airy place. When the plant is completely dry, shake the seeds out and store in a cool, dry place.


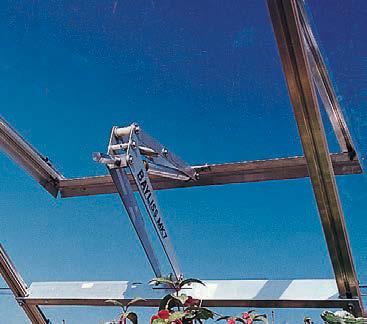
The Bayliss Autovent opens and closes a hinged vent automatically using energy from the warmth of the sun or the surrounding air. The hotter it gets, the wider the Autovent opens the vent. And because it uses no electricity, it is a very environmentally friendly product.
baylissautovents.co.uk/shop


The perfect companion for tomatoes and a key ingredient in summer dishes, basil is easy to grow from seed when conditions are right. Basil needs warmth to germinate, and warmth and light to thrive. A heated propagator or warm sunny windowsill is ideal. Growing basil from seed opens up a whole world of exciting flavours. We are familiar with the green leaf Italian basil, the kind most readily available in supermarkets. Different cuisines have their own basil varieties with exciting flavours, including spicy aniseflavoured Thai basil, cinnamon basil, and zingy lemon basil.
Sow two seeds per module into a small cell module tray filled with compost, and


place on warmth to germinate. Thin out to one strong seedling (pop those in a sandwich!) When the seedlings are 6-8cm tall, pot on into small pots to grow on until the weather is warm enough to plant them out.
A pelletised fertiliser made from British sheep wool is being launched for home gardeners this spring.
Wooltiliser, developed by Oxfordshire-based firm Traditional Garden Growers, uses low-grade sheep fleece processed into pellets that can be applied directly to soil. The wool breaks down gradually, releasing nutrients while helping improve soil structure and moisture retention.
The product is designed to support soil biology and provide slow, steady nutrition throughout the growing season from a single annual application. Wool has long been used by growers as a soil amendment, traditionally added to compost heaps or worked into planting trenches.
Wooltiliser recently won a Wool Innovation Award for its contribution to soil health and has been tested in research carried out with the University of Reading. Find out more at: traditionalgardengrowers.co.uk


A soil additive based on beneficial fungi has been launched for home gardens following trials in farming and forestry.
Solivita is made from a blend of fungi, bacteria and natural nutrients, and is designed to support soil biology and improve plant resilience. The product is applied directly to soil in small quantities and is intended to remain active for extended periods.
company Land Energy with soil specialists


Developed by Scottish renewables company Land Energy with soil specialists Re-Genus, the product is aimed at gardeners interested in improving soil health through biological approaches. A 2kg pack is expected to cover around 80m² and can be applied in spring or autumn.
is expected to cover around 80m² and can be
More information from:
More information from: solivita.co.uk
A colourful wildflower seed mix is helping support a charity that champions artists with learning and physical disabilities.
The Butterfly & Bird Seed mix features collaborative artwork created by artists working with Arthouse Unlimited, a charity that showcases the talents of
adults living with complex disabilities. The blend of seeds includes annual, biennial and perennial flowers chosen to attract pollinators and provide colour in the garden over several seasons.
More information: arthouseunlimited.org
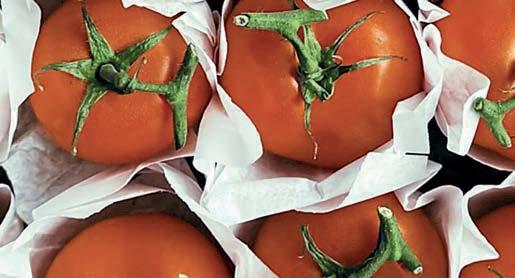


Traditional Italian storage tomatoes could help gardeners enjoy home-grown fruit long after the main tomato season ends.
Heirloom seed company She Grows Veg is highlighting a range of storage tomato varieties bred specifically to keep for months after harvest. Unlike typical salad tomatoes, these thickerskinned types are harvested in autumn and can be stored on hanging trusses or kept individually in paper, where they gradually ripen through winter.
In parts of southern Italy bunches of storage tomatoes are traditionally hung in cool, airy rooms, slowly concentrating their flavour. Some gardeners report enjoying their own home grown tomatoes as late as Christmas.
Varieties such as Piennolo del Vesuvio, Hanging Prince and Long Keeper are among those attracting renewed interest from growers looking to extend the harvest and experiment with heritage tomatoes.
More information: shegrowsveg.com


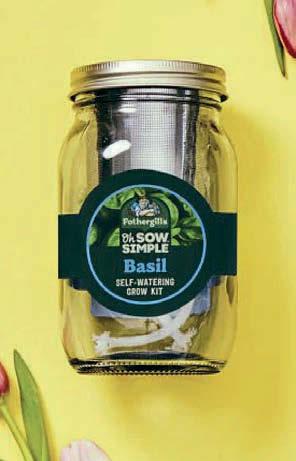
A new self-watering herb kit aims to make growing herbs at home easier for beginners.
The system uses a wicking rope that draws water from a reservoir into the compost, helping maintain consistent moisture levels for healthy plant growth. Designed for small spaces and windowsills, the kit includes a glass jar reservoir, planting basket and coir compost pellets. Choose from basil, coriander or parsley seeds.
Self-watering systems can be particularly useful for herbs such as coriander, which prefer evenly moist compost to produce tender leaves. More information from: mr-fothergills.co.uk

After planting out young sweetcorn three years ago, overnight all were felled by what we presume were mice or voles. We came up with the idea of using clear spiral tree guards placed around each plant, pushed about an inch into the soil and supported by a single cane.
The guards act as a deterrent, protect from frost and cold, and create a micro-climate, allowing us to plant and crop earlier. Remove the guards once growth reaches the top, always being mindful of hotter temperatures in late spring.
Rachael Lee
Frost-prone Low Weald of Surrey


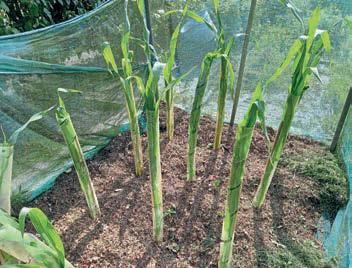
Editor’s reply: That’s a smart solution, Rachael. Young sweetcorn is irresistible to mice and voles, and losing a whole planting overnight is heartbreaking. Spiral guards provide just enough protection while still allowing light and airflow. As you say, they should be removed promptly as temperatures rise. In high-risk areas, starting plants in modules and planting out when they are sturdier can also help, but your simple micro-climate approach is an effective and practical fix.
SEND US YOUR LETTERS AND TIPS: KG.ED@KELSEY.CO.UK
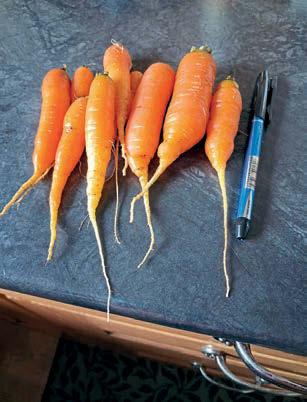
We were in the garden doing the final tree pruning and noticed I had left some mesh out in my crop cage. On taking a closer look, we discovered carrots still growing. They had survived 12 inches of snow and heavy rain. Needless to say, I was delighted to be pulling fresh carrots for supper in February.
Lindy Robertson Banffshire
Editor’s reply: What a wonderful surprise, Lindy. Carrots are tougher than many of us think, particularly when protected by mesh and good soil structure. Well-drained ground helps them come through prolonged cold, and lifting roots as needed through winter is one of the quiet pleasures of growing your own. Fresh carrots in February do feel like a small victory over the weather.


HAVE A QUESTION ABOUT YOUR KG SUBSCRIPTION? JUST CALL 01507 529529
EDITOR Rachel Graham kg.ed@kelsey.co.uk
PRODUCTION EDITOR Sue North
PUBLISHER Daisy Bury
DESIGNER Charlotte Fairman
ADVERTISING: Karen Davies – karen.davies@kelsey.co.uk Tel: 01959 543536
CHIEF EXECUTIVE OFFICER Steve Kendall DIVISIONAL MD Fiona Mercer
SUBSCRIPTIONS MARKETING MANAGER Emily Hancock
RETAIL DIRECTOR Steve Brown
PRINT PRODUCTION CONTROLLER Hayley Brown
SUBSCRIPTIONS AND BACK ISSUES
Customer Service: Tel 01507 529529
Telephone lines are open: Monday-Friday 8.30am-5pm 24hr answerphone help@classicmagazines.co.uk www.classicmagazines.co.uk
SUBSCRIPTION: Full subscription rates (but see page 38 for offer): 12 months 12 issues, inc post and packing) – UK £95.88. Export rates are also available – see page 38 for more details. UK subscriptions are zero-rated for the purposes of Value Added Tax.
DISTRIBUTION
Frontline Distribution Solutions, 2 East Poultry Avenue, London, EC1A 9PT PRINTING
William Gibbons & Sons, Wolverhampton
PUBLISHED
Monthly by Kelsey Media Ltd, The Granary, Downs Court, Yalding Hill, Yalding, Maidstone, Kent ME18 6AL Tel 01507 523456, Fax 01507 529301 THE TALKING KG Kitchen Garden is available on audio CD or USB at very reasonable rates to anyone unable to read normal type. Details from the Talking Newspaper Association of the UK on 01435 866102. ISSN 1369-1821
© Copyright Kelsey Media Ltd. Reproduction in any manner, in whole or part, without prior approval in writing is prohibited. The publisher cannot accept responsibility for errors in articles or advertisements, or for unsolicited manuscripts, photographs or illustrations. kitchengarden.co.uk
ADVERT DEADLINE: April 8, 2026
NEXT ISSUE: April 30, 2026
KG AND THE ENVIRONMENT
Once you have read and enjoyed your copy of Kitchen Garden magazine, why not recycle it? Remove the glossy cover and shred the rest before adding to your compost heap or bean trench. Subscriber copies now come in recyclable paper, while the polythene sleeves in which KG is


Send us your tips and pictures and if your letter is published you will get a £10 Dobies voucher. If you are lucky enough to have yours chosen as our Star Letter you will get a £25 voucher. You can choose to spend your
winnings on a fabulous range of seeds, young plants and gardening sundries, all available on the Dobies website, or you can get hold of a free copy of the 2026 catalogue now by phoning 0844 701 7625 or going online to: dobies.co.uk
Email your letters to kg.ed@kelsey. co.uk or post to: Letters, Kitchen Garden, Kelsey Media, Media Centre, Morton Way, Horncastle, Lincs LN9 6JR, and remember to include your postal address. Reach us via our Facebook page. Search: KitchenGardenMag or via our Instagram page: growwithkg KELSEYmedia

There’ssomethingdeeplysatisfying aboutgrowingandcookingyourown fruit.Whetherit’s crabapplesforjelly, rowanberries fora seasonalpreserve, orhedgerowfruits forcordial,planting fruittreesisone of thesimplestways tomakeyourlandmoreproductive, beautifulandwildlife-friendlyatthe sametime.
Fruittreesandshrubsalsoprovide vital food forpollinators.Theirblossom arrivesatkeypointsintheyear, offeringnectarandpollen,andhelping supportthebees,hoverflies,butterflies andmothsthatpollinateourcropsand wildplants.
Fruitisjustpart of the story. Trees helpboostbiodiversitybyproviding shelter, nestingsitesand food fora wide range of wildlife.Theyimprove our air,capturecarbon,andhelpmakeland healthierandmoreresilientbyslowing theflowofwaterduringheavy rainand stabilisingsoils.
They’realsogoodforpeople. Trees improvewellbeing,encouragetime outdoors,andbringseasonalinterest toanyspace —froma gardentoa communityorchard or asmallpatch of land.Blossominspring,fruitin autumn, andberriesandbranchesthrough winter:treesareyear-roundassets.
One of thejoys of plantingfruitingtrees isthat evenoneortwocanproduce asurprisingamountofusablefruit. Anditdoesn’t have tobeperfect, supermarket-styleproducetobe valuable.
Crabapplescanbeturnedintoa sharp,goldenjellythat’s perfectwith roastporkorcheese. Rowanberries makea traditionaljellythatpairs
brilliantlywithgame.Hawthornberries (haws) canbeusedfor ketchupsand jellies,andblackthornfruits (sloes) are aclassicforflavouringgin —orcanbe usedinjamsandsyrups.
Evenifyoudon’t want tomake preserves,fruitingtreesstillearntheir keepby feedingbirdsandwildlife throughthecoldermonths.

Treescansometimes feellike alongterminvestment—butthe Woodland Trust’ssubsidisedtreepacksmake iteasierandmoreaffordabletoget started. Availableonlinefrom October toMarch (themaintreeplanting season),thesepacksare designedto helppeopleplantmoretrees forless.
Thankstosubsidiesfromthe Trust’s partners,you’llpay aslittleas43p pertree,and deliveryisfree too.It’sa greatopportunitytocreate afruitrichlandscapethathelpspeopleand wildlifethrive.
Ifyou’replantingwithpollinatorsand peopleinmind,twopacks standout.
The Plant forPollinators packhas beendesignedtoprovidenectarand nestingsitesthroughouttheseasons. Itincludes amix of native treesand shrubsthat offerearlyflowers,spring blossomandsummerblooms— followedbyberries andfruit thatwildlife canusethroughautumnandwinter.
The Urban Treespack isideal forsmallerspacesandcommunity settings.It’s designedtohelpbringthe benefits of treesintotowns,villages, gardensandsharedgreenspaces— addingshade,seasonalinterestanda valuablesource of blossom forinsects.
Bothpacksare asimple waytocreate athrivinggreenspacewithlasting impactbutthereare many othertree packscontainingfruittrees available.


STARTYOURTREE
Plantmoreforlesswiththe Woodland Trust’ssubsidised treepacks.Withnative mixes sourcedandgrownintheUK and Ireland,theymake iteasyto plantconfidentlyandaffordably —whetheryou’recreatinga communityorchardfeel,enriching ahedgerow,orsimply addinga littlemorefruit, blossomandlifeto yourland.
Othersubsidisedpacksarealso availabletosuitdifferentspaces andpurposes,fromsupporting vulnerablewildlifetocreating newhabitaton farmsand smallholdings.
Visit shop.woodlandtrust. org.uk/treepacks

The Woodland Trustlogois aregisteredtrademark.The Woodland Trustisaregisteredcharity,numbers 294344 andSC038885.A non-profit-makingcompanylimitedby guarantee. Registeredin Englandnumber1982873.Images: Jill Jennings/WTML,Philip Formby/WTML,JohnBridges/ WTML.CP0255602/26
Q. Can sweet potatoes be grown in bags like normal potatoes or do they need to grow in the ground? I have to grow my veg in containers, raised beds and bags and wondered if I could grow them in sacks like a normal potato or if they need ground space? I’ve never grown sweet potatoes before.
Natalie, Derbyshire
A. Sweet potatoes can absolutely be grown in bags and large containers, and in many parts of the UK this is actually preferable. They need warmth, freedraining compost and plenty of space for
their roots to swell. A large grow bag or 30-40L container filled with a rich, peatfree compost mixed with some grit for drainage works well.
Unlike maincrop potatoes, sweet potatoes form tubers along trailing stems, so give them room to sprawl or allow the vines to trail over the side of the container. Place them in the warmest, sunniest position you have. In cooler areas, starting slips indoors and planting out once nights are reliably warm will improve results.
The key is warmth rather than ground depth, so bags are perfectly suitable.
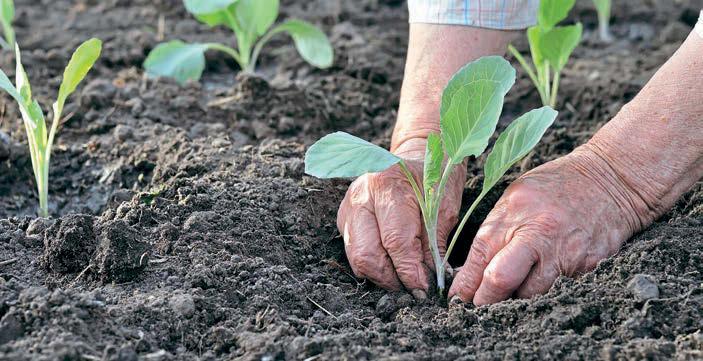
Q. I’ve been growing vegetables in the north of Scotland for about three years with less than impressive results. I’m now trying to analyse where I’m going wrong. Why, when planting something like a cabbage that most would consider a robust vegetable, is it necessary to sow outdoors in a seed bed first then transplant into the final growing position? I don’t have room in my garden for a ‘seedling kindergarten’ – is any harm done by planting the seeds directly into the final growing position?
Nicky Torbet, Scotland
A. It’s not a basic question at all – it’s one many gardeners ask once they start looking more closely at how they use their space.
You can sow cabbages and other brassicas directly into their final position, and in warmer parts of the country many gardeners do just that. However, in the north of Scotland the growing season is shorter, spring soil warms more slowly and early growth can be checked by cold winds and persistent rain. Raising seedlings first gives you a useful head start.


A small seed bed, module tray or even a compact ‘seed snail’ started indoors or in a greenhouse allows you to control conditions at the most vulnerable stage.
Seedlings establish more quickly, are less likely to be lost to slugs or flea beetle, and can be planted out as sturdy young plants once the soil is workable and temperatures are improving. That head start can make a noticeable difference in a cooler climate.
Direct sowing into the final position


isn’t harmful, but it can be slower and less reliable in colder regions. You may find germination is patchier and young plants struggle if conditions turn wet or windy.
If space is tight, consider sowing into modules rather than a separate outdoor seed bed. They take up very little room, avoid the need for a ‘seedling kindergarten’, and transplant with minimal root disturbance. In a shorter growing season, that efficiency can be the difference between a mediocre crop and a really satisfying one.


Fothergill’s


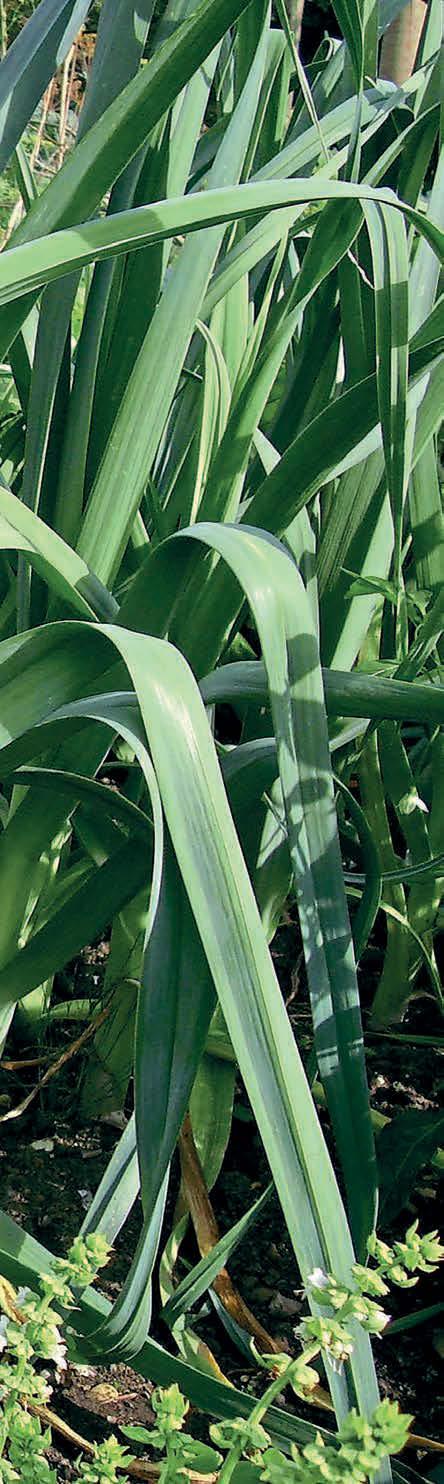
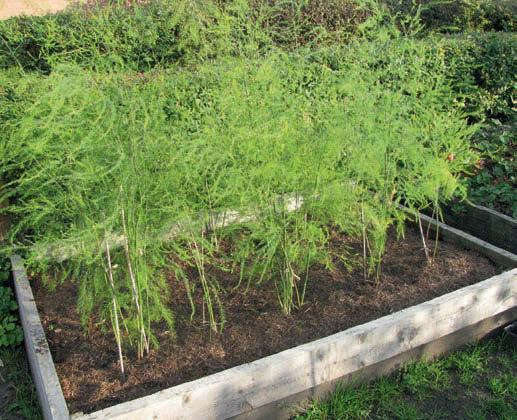
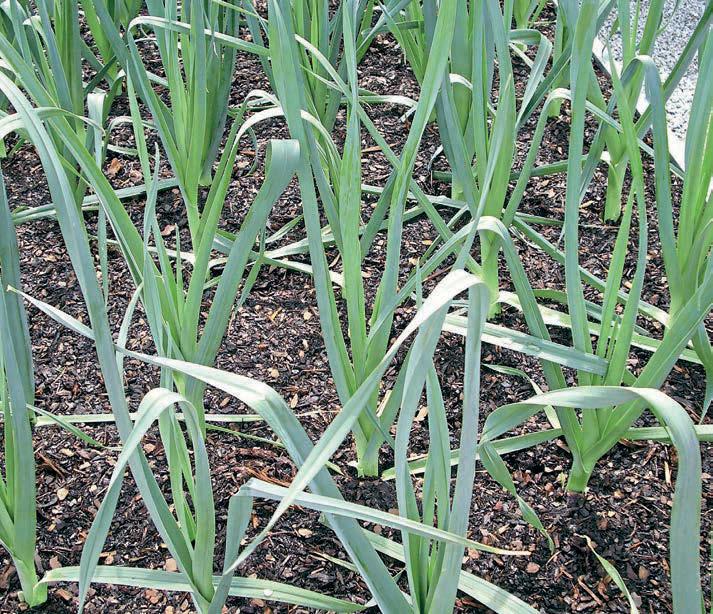
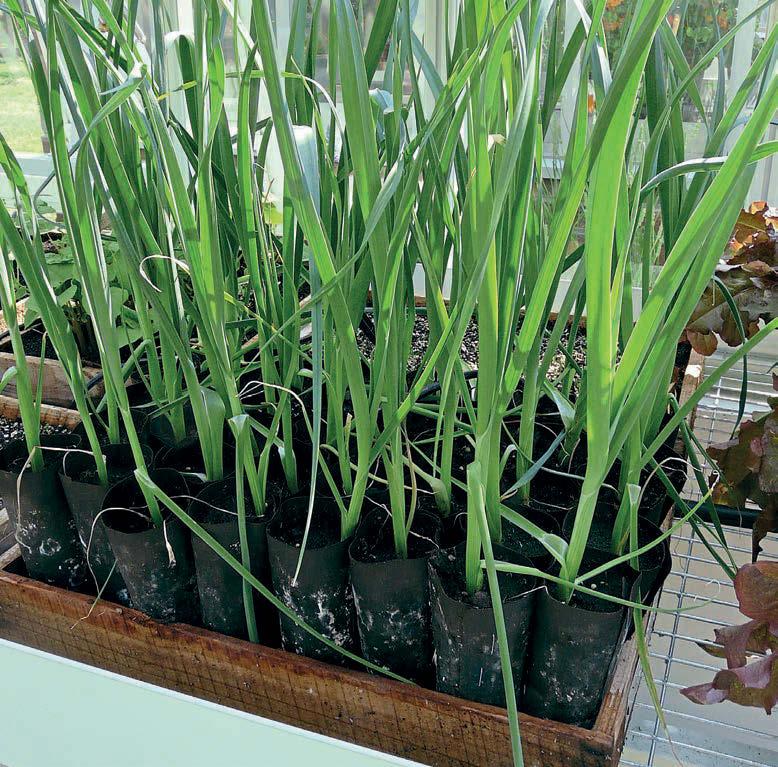
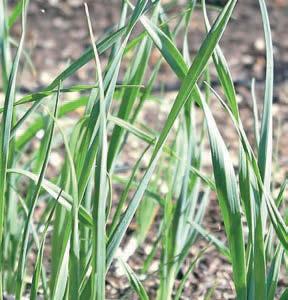
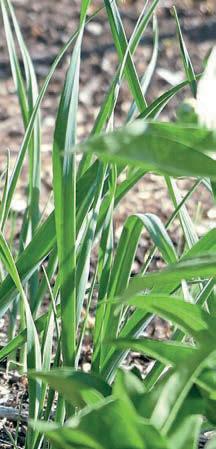
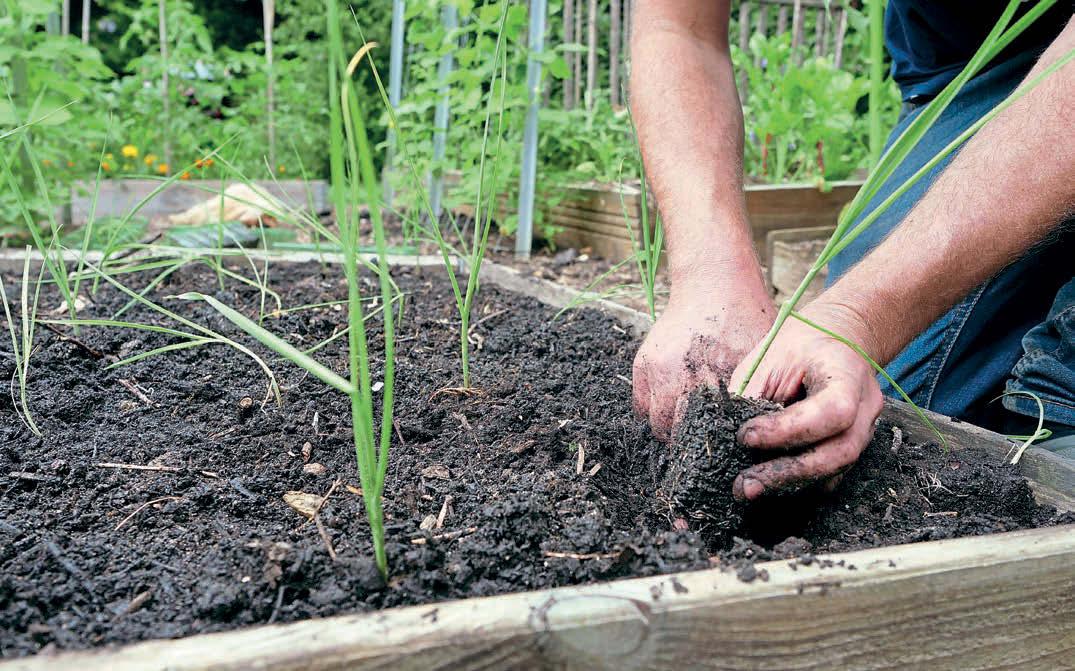
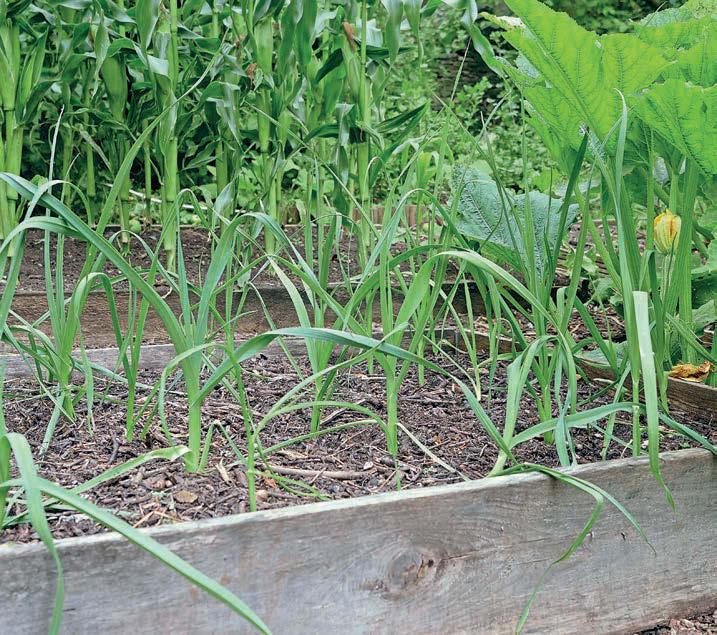
Few vegetables are as reassuring as leeks. When much of the garden is winding down, and as winter beds start to look bare, there they stand – upright, unfazed by frost, snow or driving rain. In short (and long!), leeks are one of the most dependable crops you can grow, providing fresh harvests from autumn through winter and on into spring, just when you need them most.
Reliable, resilient and delicious, leeks most definitely earn their keep in the veg patch, says Benedict Vanheems. Best of all, now is the perfect time to get this exceptionally hardy hero started in
temperatures down to as low as a decidedly fresh -12°C, and often lower in well-drained soil or where plants are mulched. Even the most brutal winters are all in the stride of this hardy hero. In fact, mature leeks will sit happily in the ground for months, ready to lift as needed, making them invaluable for winter self-su ciency.


March and April are ideal months to get leeks started. e soil is warming up, light levels are vastly improved, and there’s a long growing season ahead. Whether you favour traditional methods or modern space-saving techniques – both of which we’ll cover shortly – leeks reward good preparation with months of reliable harvests.
Leeks are close relatives of onions and garlic, but with a character all of their own. Instead of forming bulbs they produce long, cylindrical stems, or shanks, prized for their mild, almost sweet, avour. is is a truly majestic and outrageously delicious winter staple.
But their greatest asset is surely their hardiness. Many varieties tolerate
Leeks are relatively trouble-free, too. Give them fertile soil, adequate spacing and remove any weeds that pop up, and you’ll nd they require little fuss, making them well-suited to both beginners and more experienced growers alike.
Varieties are broadly grouped by their harvest period and level of hardiness so, with a little forward planning, you could be lifting leeks from the end of summer right through to the following spring.
Rust is a common fungal disease of leeks and can be a problem especially in milder, wetter parts of the country or in our increasingly damper autumns. I have noticed the telltale orange-brown spots becoming more frequent in my sheltered garden, and will be seeking out a rust-resistant variety to sow this spring. ➤
Early February to March (under cover) August to OctoberFast growing but less hardy
Mid-season March to AprilOctober to JanuaryReliable, with a good balance of size and hardiness
Late April to May December to MarchSlower growing but very hardy
When sowing into modules, you have the option to grow seedlings individually or multi-sow for a cluster of seedlings. Each approach has its advantages.
■ Single-sown: Sow two seeds into each module then, after germination, thin to leave the strongest seedling. Alternatively, separate pot or seedbedraised seedlings for individual planting. This method gives larger, thicker leeks and makes spacing more accurate.
■ Multi-sown: Sow a pinch of up to six seeds per module, then thin to leave a maximum of four seedlings after germination. Grow on and plant out as a cluster, 25cm (10in) apart each way. This newer method offers higher yields in smaller spaces and saves time as planting is faster.


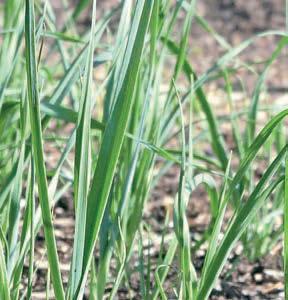

Leeks are hungry plants with a long growing season, so good preparation really pays dividends. Choose a site in full sun if you can, though leeks will tolerate some light shade, and prioritise soil that’s deep, fertile and moisture retentive, with a neutral to slightly alkaline pH.
Set the scene for a stellar year by incorporating plenty of well-rotted manure or garden compost ahead of planting. If using manure avoid any material that is too fresh, as it can encourage lush but ultimately weak growth, susceptible to pests and diseases. Another must is good air circulation, which will help prevent fungal problems like rust. It may be tempting to pack these tall, narrow plants in, but proper spacing ensures enough light and, crucially, air ow between plants to help them thrive.


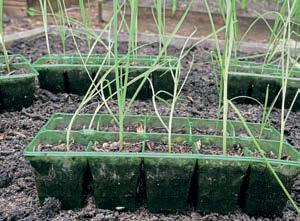
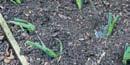
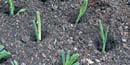
ere are several ways to sow leeks, depending on the space and equipment you have, and personal preference. e rst sowings – of early varieties – can be made under cover from the end of winter. Following closely are mid and late-season varieties for winter and spring harvesting, typically sown from March to May. Start leeks outside in a dedicated seedbed, or sow into modules, pots or trays.
■ Seedbed: Seedbeds are the traditional way to sow leeks and a solid choice if you have plenty of outdoor space and are sowing once the soil has dried out and warmed up a bit in spring. Rake over previously dug soil to leave a ne tilth. Draw a shallow drill into the seedbed about 1cm (½ in) deep, then sow the seeds thinly along the bottom. Cover lightly and water gently, adding a label to mark where you’ve sown. Remove any weeds as they appear and keep the soil lightly moist. Seedlings can be left to grow on in the seedbed until they are roughly pencil thick.
■ Pots or trays: If you don’t want to dedicate valuable ground space to a seedbed, simply sow into pots or seed trays. Fill pots with sieved, peat-free multipurpose compost, then sow a pinch of seeds across the surface before covering over with a little more compost. Water, label and leave to germinate and grow on somewhere relatively sheltered, ideally under the cover of a greenhouse or cold frame.

■ Modules: Using modules to start leeks is increasingly popular and o ers more control. It can make planting out easier, too. Fill modules with sieved multipurpose compost, then sow seeds into each cell to give either individual seedlings – one per cell – or a cluster of ‘multi-sown’ seedlings that will be planted out and grown on as a cluster. Like pot-sown leeks, keep modules in a bright, sheltered spot to grow on until it’s time to plant. ➤
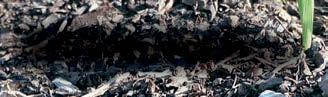
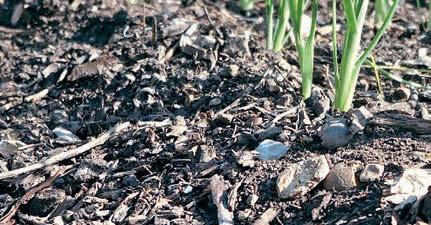
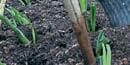
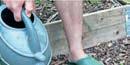
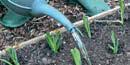
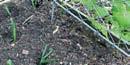
1. Use a dibber, tool handle or thick bamboo cane to make a hole 15-20cm (6-8in) deep.
2. Drop just one leek into each hole. Make sure the leek’s roots reach right to the bottom.
3. Fill each hole with water right to the top. Do not backfill with soil – it will naturally wash in over time.
4. Planting like this creates a longer white stem, but soil can also be earthed up against stems for the same effect.


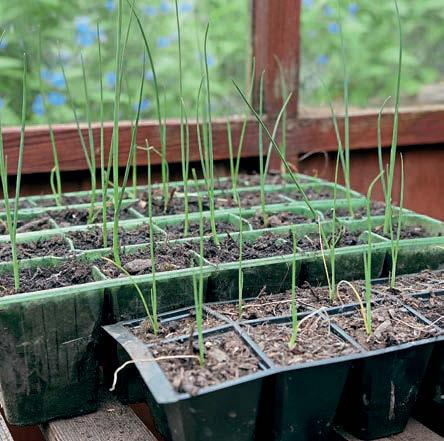
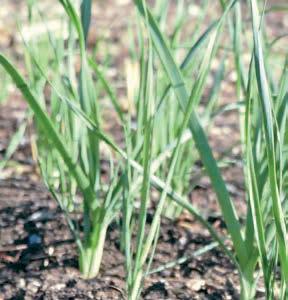
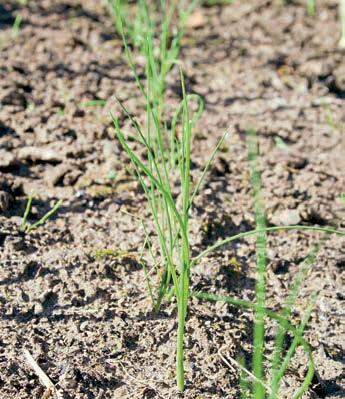
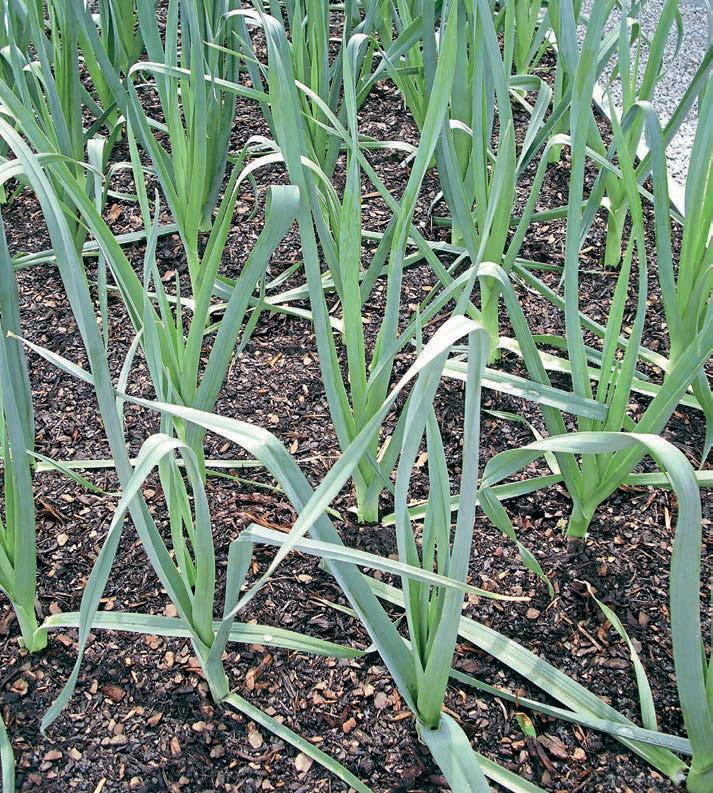
Leeks are ready to plant when they are around 15-20cm (6-8in) tall and anywhere from chopstick to pencil thickness. Seedlings raised under cover should be hardened o gradually over one or two weeks by leaving them outside for increasingly longer periods each day. Prepare the ground ahead of planting by removing any weeds and stones, then raking the soil level. Plant multi-sown leeks in a block pattern, leaving 25cm (10in) between each cluster in both directions. Single-sown leeks can go in closer – around 15cm (6in) apart with 30cm (12in) left between rows.

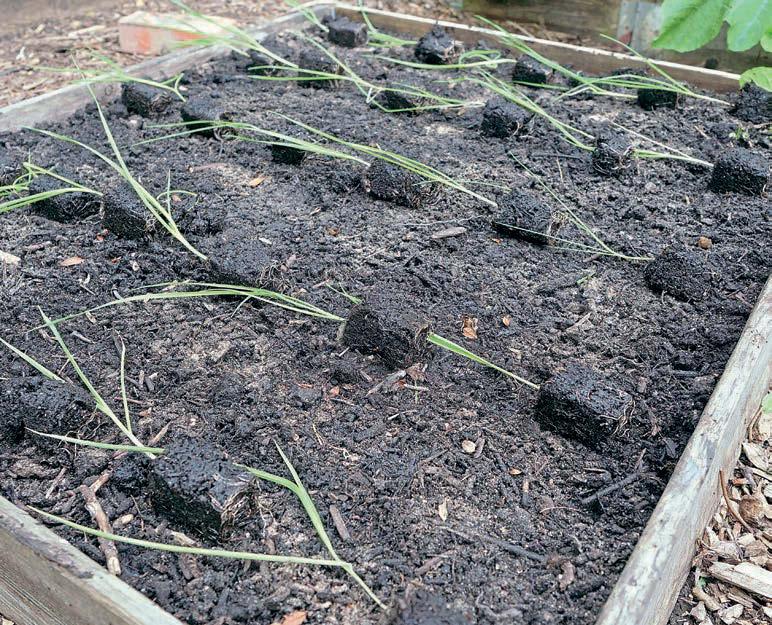

Plant modules at the same depth they grew at or, if transferring leeks from a seedbed or pots, set them deeper by dibbing planting holes, dropping one leek into each hole, then simply lling the hole up with water – see the step-by-step.
Once planted and getting established, leeks are wonderfully undemanding, those robust so-and-sos! Water during dry weather, and especially during heatwaves, to ensure uninterrupted growth. Mulching with compost from midsummer will help to lock
in moisture while reducing the risk of water splashing back up onto the foliage, which can lead to disease. Take the time to remove weeds too, as these strappy-leaved plants are easily overwhelmed by competition, especially while small.
Rust is perhaps the most common issue a ecting this generally fuss-free vegetable. It’s easily identi ed by orange pustules on leaves, which slow down growth and can reduce the nal size of your leeks. Reduce the rust risk by sticking to proper spacings, which in turn will improve air ow between plants. Regular watering will also help.


Leek stems, or shanks, are ready as soon as they reach a usable size. Loosen the soil with a fork, then lift carefully to avoid snapping the stem. Trim o the roots and any damaged leaves, then enjoy.
Leeks grown from modules planted at ground level, rather than sinking into holes, will have less tender white stem but will still taste completely delicious. If you want more of a white stem from leeks grown this way, try earthing up from late summer by drawing soil up around the stems in stages to exclude light.
Hardy varieties can remain in the ground all winter, to lift as needed. If a very hard frost or wintry period is forecast, lift up some leeks in advance so they aren’t frozen hard into the ground. Wash them o , store in the fridge or simply heel them into loose soil or sand under cover, ready to liven up warming dishes as and when.
Leeks can be a nuisance to prepare for cooking – all that gritty mud in the folds of the leaves at the top! Get around this by splitting them in half lengthways before washing. is makes getting them spick and span ahead of cooking so much easier.
Leeks are the ultimate slow-burn crop. Patience is needed, but they are generous in return. ey ll the winter gap, shrug o poor weather, and bring sweetness to soups, pies and simple buttery side dishes. Sow now, and by autumn you’ll be glad you did. Few vegetables give so much for so little fuss – and that’s exactly why leeks deserve their place in every garden or allotment. ■
■ Batter F1: Long, clean white shanks. Good tolerance to rust and resistant to thrip damage too. Has a long harvest period
■ Below Zero F1: Extreme cold tolerance. Stands well throughout winter, is slow to bolt, and has good rust resistance
■ Oarsman F1: Quick growing (for a leek!) and early to mature. Great flavour, good rust tolerance and slow to bolt. RHS Award of Garden Merit winner
■ Porbella: This RHS Award of Garden Merit winner is a great all-rounder with a long harvest window, strong winter hardiness and good rust resistance
■ Santora F1: Very high rust resistance and good hardiness. Exceptionally long harvest window from November to April
Last summer we launched a competition to find our Top Plotters, with the top three winning some great prizes and all being featured in Kitchen Garden magazine this year. Here we meet one of the runners-up...
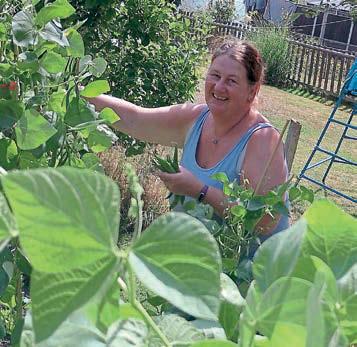

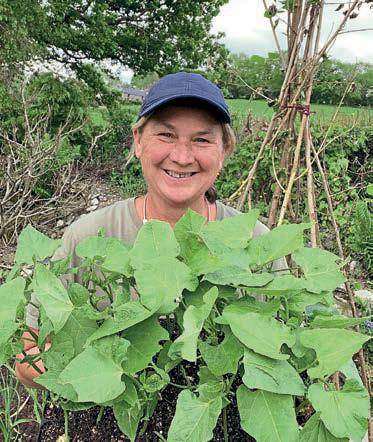
Helen Elliott, from Evesham in Worcestershire, has been growing fruit and veg in her 140ft back garden for more than two decades, combining productive veg beds, ambitious greenhouse growing and plenty of wildlife-friendly planting – all with a practical, family-focused approach
Do you tend your plot on your own, or do you have help?
I do most of the gardening myself, especially deciding what to grow, planting seeds and growing plants on. My husband, Mat, does a lot of the heavy work – digging, shifting compost bags and building things. He enjoys making planters and working on projects
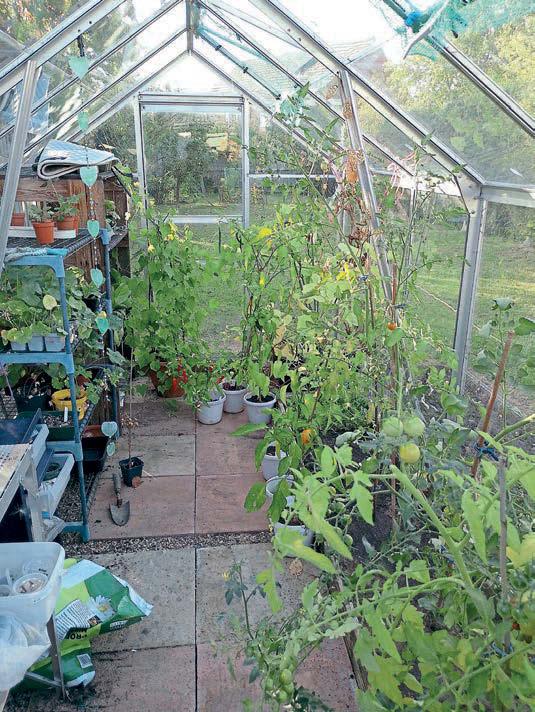
together. One of our biggest recent projects was renovating our ‘greenhouse area’. We removed the old potting shed, which had originally been the children’s playhouse, took down the existing greenhouse, levelled the ground and then built two greenhouses end-to-end. We now have much more space and far better light, which has extended the growing season and allowed me to grow a wider range of crops.
When our youngest daughter, Charlotte, is home from university, she helps with mowing and pruning fruit trees, and she still enjoys growing and eating the carrots. Even our little dog, Hopper, gets involved by picking up windfall fruit and running o with it.

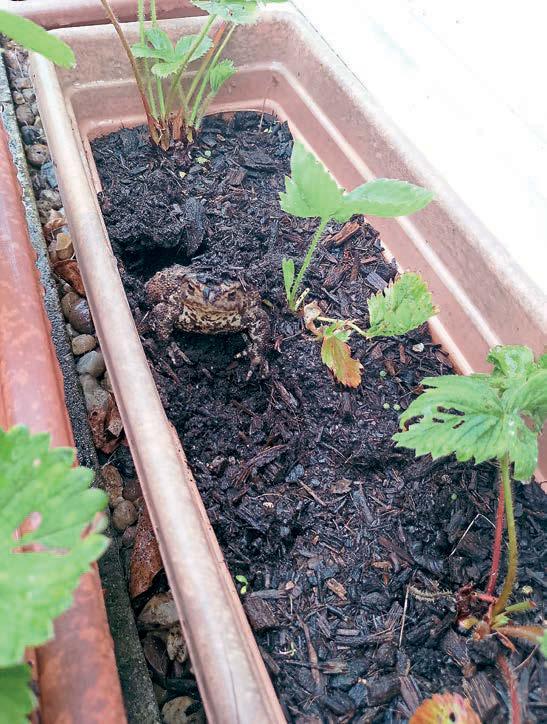
A resident toad has made herself at home in the strawberry planter – a sign that the garden is as welcoming to wildlife as it is productive

Do you have an allotment, a veg patch at home, or both?
We grow everything in our own garden. It’s about 140ft long, mostly lawn, with ower beds, a greenhouse area and two vegetable plots measuring 5ft by 16ft. We also grow a lot in pots and containers around the garden and patio.
How long have you been growing your own vegetables?
Although my dad always grew plenty of veg, I wasn’t especially interested as a child –apart from helping cut back raspberry canes. It wasn’t until my husband and I bought our rst house that I tried growing tomatoes. ey were a huge success, and I was incredibly proud of the crop – even if my dad later pointed out that I should have pinched out the side shoots.
When we moved to our current house 23 years ago, I began experimenting more seriously, starting with tomatoes, courgettes and strawberries. Since then, I’ve become much more adventurous, and now I’ll try almost anything.
Do you grow any crops in containers? If so, what do you grow and how?
I grow blueberries, carrots, herbs, strawberries, salad crops and cape gooseberries in pots and planters. My blueberry has been in the same 12in pot for years and continues to thrive, so I’ve left it undisturbed.

greenhouse area was recently rebuilt, with two
installed end-
increase light and extend the growing season


Carrots are a favourite, especially coloured varieties. I’ve grown mixes such as Rainbow Mix alongside Early Nantes 5 in a 3ft-square raised planter, layered with horse manure and garden soil, and topped with peat-free compost. e planter will need refreshing at some point, but it continues to crop well.
Strawberries have also been very successful in 2ft-long planters. I use a base layer of garden soil with peat-free compost on top, which helps retain moisture. ey’re fed occasionally with tomato feed and kept wellwatered during hot weather.
Herbs and salad crops grow in two oldfashioned wheelbarrows rescued from a skip. e herbs do amazingly – again they have been in the same peat-free compost for years, no feed, just watering them well. Unfortunately, my salad veg (spring onions, radish and beetroot) didn’t do well last year. I think I might replace the soil this year.
Can you talk us through how you grow one particular crop, from sowing to harvest? I love growing chilli peppers. I start by planting the seeds in trays of seed compost around February/March, which then go into my propagator to germinate. Once they’re big enough to handle, I transplant them on into 3-inch pots and let them grow on a bit. Once they are ve inches tall, I move them on into 5-inch pots with a good quality compost. At this point I move them into my conservatory where I can keep them well-
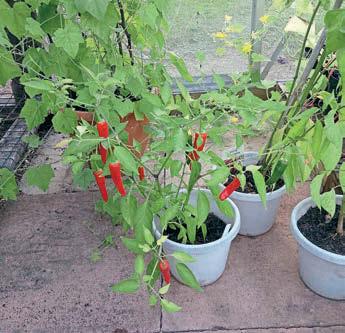
Chilli peppers are started in late winter and grown on in pots before cropping heavily in the greenhouse and conservatory
watered and enjoy the lovely colours. Once ripe, I usually freeze most of them for use throughout the year.
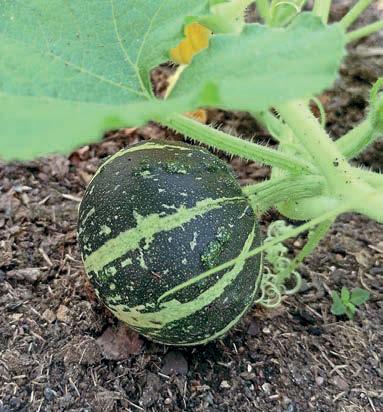
Have you tried any new or unusual vegetable varieties that you’d recommend? Last year, I experimented with melons, gourds and cucamelons. e gourds developed well and were fascinating to watch as they formed. e melons and cucamelons took over the greenhouse. ey were more challenging – the cucamelons eventually began forming fruit, while the melons produced plenty of owers but were less reliable at setting fruit, even with hand pollination. ➤

The following companies kindly sponsored our 2026 Top Plotter Competition

GARDENING NATURALLY gardening-naturally.com

KENT & STOWE kentandstowe.com


NEMASYS nematodesdirect.co.uk

PRO-GROW pro-grow.com

STRULCH strulch.co.uk

VEG PLOTTER vegplotter.com


I enjoy trying something new each year, even if the results are mixed.
Do you reuse or recycle materials on your plot? If so, how?
We try to reuse as much as possible before anything is thrown away. My husband found two old-fashioned wheelbarrows in a skip –they are now a herb and a salad planter – but probably the most recycled structure in the garden was our children’s playhouse. After they outgrew it we added a wire run, and it became a rabbit house. When we no longer had the rabbits it became my potting shed until the oor rotted and, even then, parts were salvaged to make a door behind our garage. e rest is still waiting for its next life.
Kitchen peelings go into the compost bins, along with a little pony manure, to make compost for the beds. We do share the compost bins with a healthy population of slow worms, but they do their part by keeping the slugs under control.


What do you do on your plot to encourage pollinators and wildlife?
I grow plenty of owers to attract pollinators, and we leave some areas of grass longer to encourage clover and wild owers. Bees love the lavender, foxgloves and especially the sea holly.
We’ve made sure hedgehogs can access the garden freely, and the compost bins in a quiet corner are home to slow worms. We also have a new resident toad who has taken up residence in the strawberry planter. I haven’t found where she goes in the day but she’s often buried in at night. And of course, we have an insect hotel too. All this lovely wildlife is welcome, as it’s keeping our slugs and snails under control.
Why are you passionate about your plot? It’s so peaceful. It’s my space (I’m happy to share though) and I love watching it change through the seasons. It keeps me busy in my spare time as there’s always something to do, even if it’s just sitting and enjoying my space. I enjoy caring for my plot and it always gives something back ■
Trying new crops keeps things interesting – melons and gourds have been recent experiments in the greenhouse


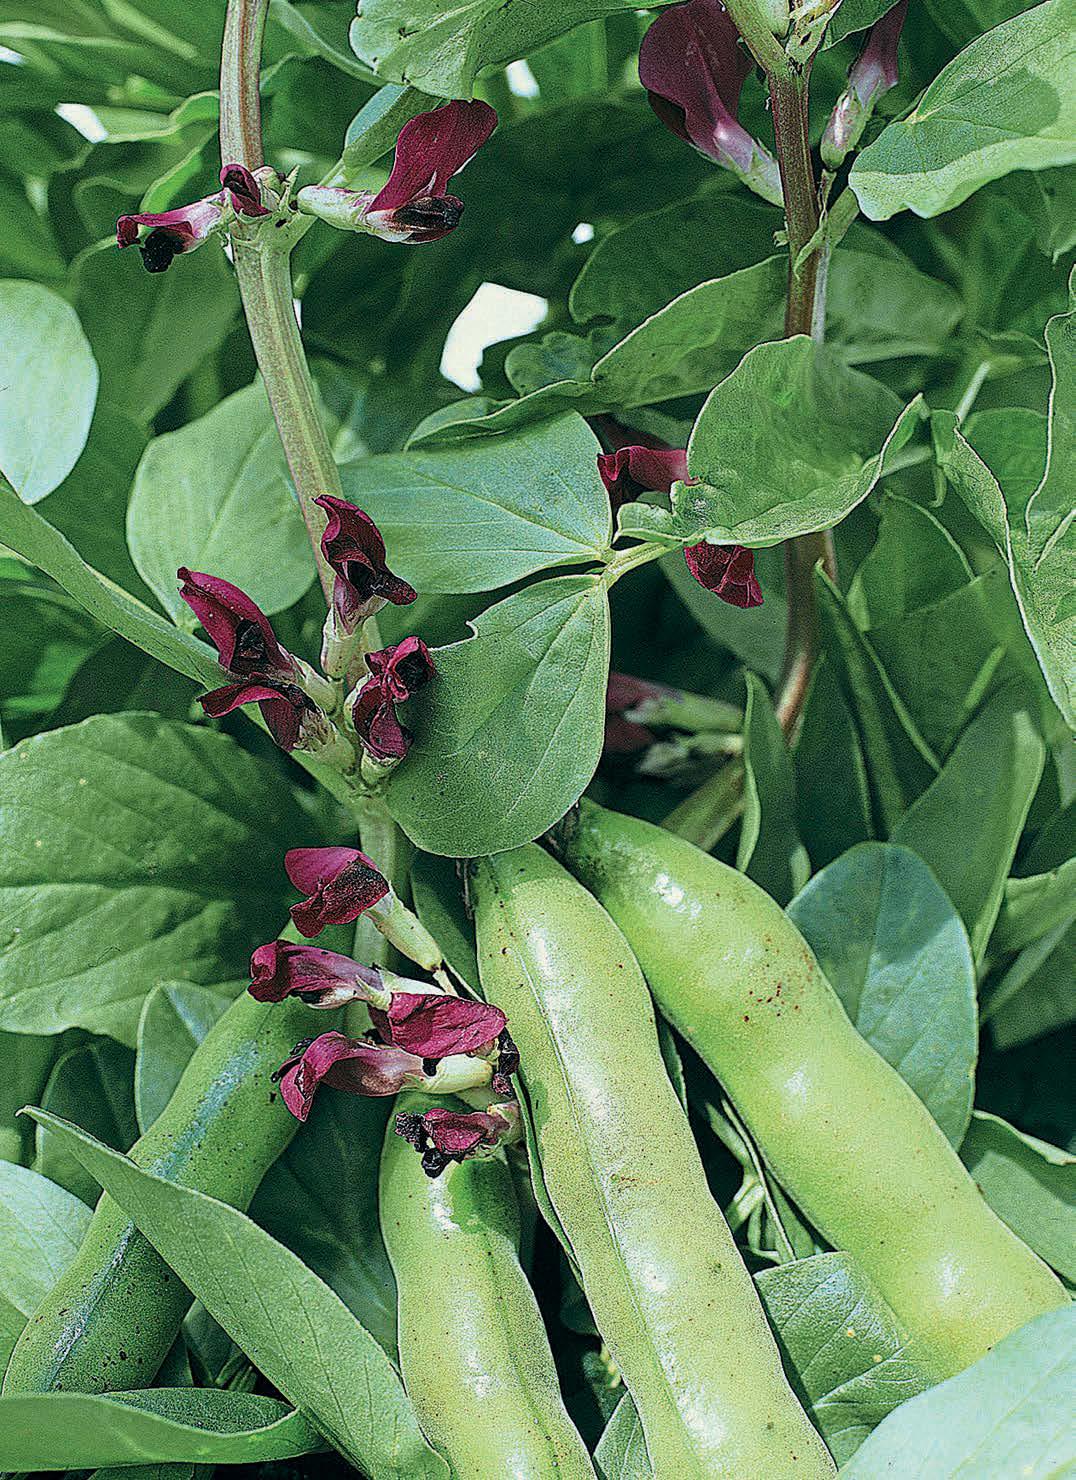
Rob Smith explores the overlooked beauty of coloured broad beans – from crimson to chocolate blooms – and shows how these productive spring stalwarts can earn their place as ornamental highlights as well as reliable kitchen garden crops
Broad beans mark the true start of the productive season. eir sturdy stems, soft grey-green leaves, and upright habit give structure to the plot long before tomatoes and courgettes get going. Most gardeners know the familiar white owers with black blotches, but there’s a richer side to this bean that deserves more space in our gardens. Coloured owered broad beans combine delicious beans with real ornamental value. Crimson, chocolate and deeply tinted owers look stunning in spring, just when beds can still look bare. ey also allow us to add colour to early-season salads, as the owers of broad bean plants are edible and have a
bean-like avour (who would have thought!) If you’ve only ever grown standard blackand-white types, it’s de nitely time to try something di erent.
e crimson- owered broad bean is one of the most striking forms you can grow. Instead of white petals, the blooms open in shades of deep red to claret, often paling slightly as they age. Set against blue-green foliage, they look almost like mini orchids and always attract attention through April and May.
Information recorded by the Heritage Seed Library shows that dedicated seed savers have maintained this variety for its unusual ower colour and dependable cropping for generations. It’s not a novelty bred for show – it’s a working kitchen garden bean that has been kept alive outside mainstream catalogues until recently. Plants are typically tall, reaching 1.2-1.5m in fertile soil. Stems are strong, but bene t from support in exposed sites, and pods are medium to long and well- lled. e beans have the full, earthy avour you expect from a good broad bean, with no loss of quality for the sake of appearance. is is a variety to plant where you will see it daily, adding a bit of colour to the veg plot or allotment. A block near a path or mixed into a decorative potager makes the most of the ower colour, and bees love them.
From further north comes Black Isle, o ered by Seeds of Scotland and named after the peninsula in the Scottish Highlands. Its owers are a rich brown to deep chocolate colour, darker than many gardeners imagine possible in a broad bean.
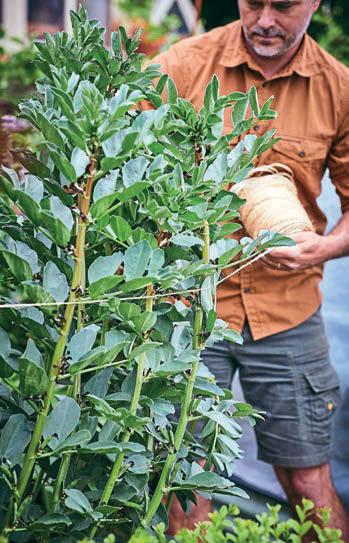
Tall coloured varieties benefit from simple support. A ring of canes and twine prevents wind rock without crowding the plants
In certain light the blooms appear almost smoky purple, especially just as they begin to open. ey contrast beautifully with the pale foliage and really stand out from a distance. Black Isle has shown good resilience in cooler, windier regions, and the plants are upright and sturdy, often reaching 1.2m. ey cope well with uctuating spring temperatures and set pods reliably once pollinated, with beans suitable for shelling green or drying for winter use. Personally, I like to grow them for soups and adding to stews, making them the main feature rather than a side note. ➤

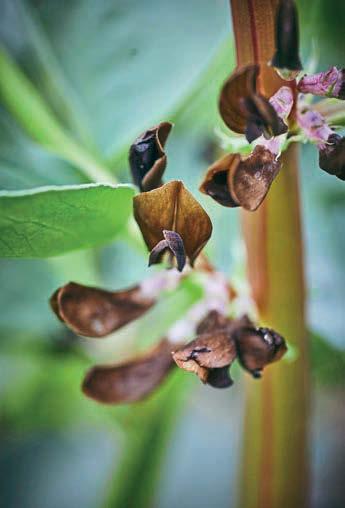
Atawallpa’s Fingerprint broad beans take things to another level! e name hints at South American heritage, and the dried beans often show attractive mottling or markings that set them apart once harvested, almost looking like carved wood. ese elusive beans are really di cult to nd and are more of a hidden secret than something you’ll nd in the garden centre, making them a veg you need to get from ‘someone in the know’ rather than a seed catalogue.
e owers aren’t that special, though they seem a brighter white, giving a richer display in spring. Plants are vigorous and can reach 1.5m if well fed and watered. As with many, there can be slight variation between plants, making them a good candidate for home seed saving. Select from your strongest, healthiest plants each year, then dry the beans and save those with the most prominent markings, and you’ll gradually improve the strain to your own soil and climate.
Broad beans are hardy and forgiving, yet careful preparation helps get the most from your plants. Choose an open, sunny site with well-drained soil. ey tolerate heavier ground better than many crops, but they dislike sitting in cold, waterlogged conditions, so if you’re sowing in autumn, make sure to choose wisely.
In mild areas, sow in October or November for overwintering crops that will ower early the following spring. In colder regions, wait until February or March and sow as soon as the soil can be worked.
Sow seeds 5-7cm deep and 20-25cm apart in rows spaced 45-60cm apart. For a neat block, sow in double rows 20cm apart, leaving a 60cm path between each pair of rows. is layout makes supporting and harvesting easier.
Support matters, especially with taller coloured varieties. A simple boxing ring structure works well. Drive sturdy canes at the four corners of your block. Add intermediate canes every 1.5 metres along the rows. Run strong twine around the outside of the canes, adding another line every 20cm as plants grow taller. is creates a contained framework that prevents wind rock and keeps stems upright without damaging the plants.
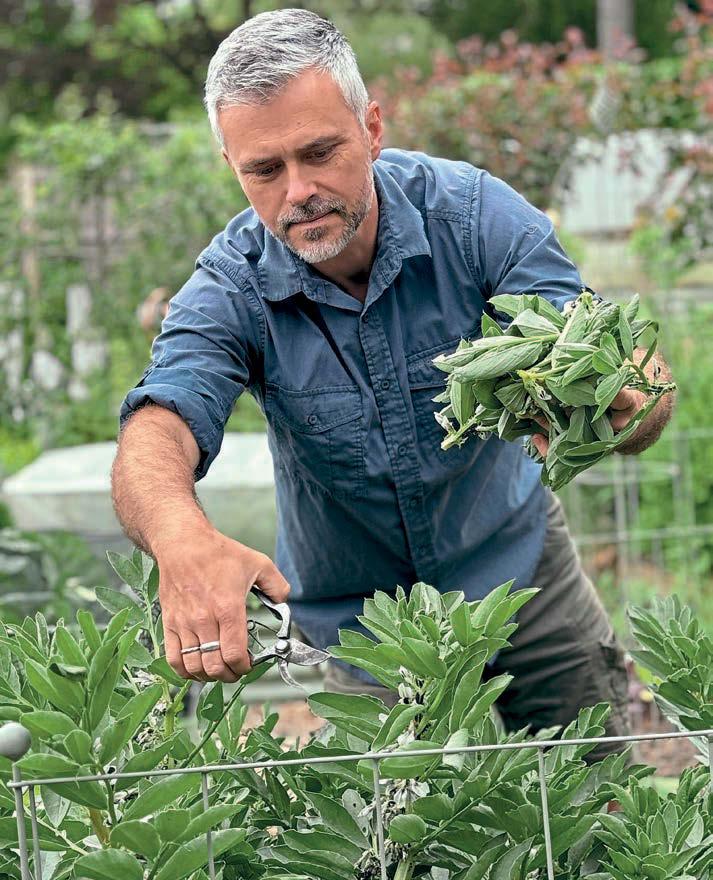
Pinch out the growing tips once the lowest trusses have set pods, removing the top 5-8cm of soft growth. is limits excessive height, encourages the plant to focus on lling pods, and reduces the risk of black y building up on tender tips. ey can gather quickly in late spring, especially in warm, still weather. Dense clusters form around the soft growing points and young ower stems. Act


early and consistently, pinching out tips as soon as lower pods are visible. Even if there are no black ies present, I still ‘snip the tip’ from the plant to help the pods set. It also allows you to add the removed tips to a stirfry for a ‘secret veg’ you can’t buy in the shops – broad bean tops!
For fresh eating, pick pods while they are still glossy and rm. Smaller beans can be cooked whole. Larger beans bene t from double podding. Blanch brie y, then slip o the outer skin to reveal the tender green centre. For drying, leave pods on the plant until they become leathery and begin to turn brown. Shell and dry the beans thoroughly before storing in a cool, dry place. If you want to know whether a bean will be tender enough to eat fresh, look at the scar left by pulling the bean from the pod: if it’s light green, it will be tender; if it’s dark brown, it will be tougher. is allows you to decide whether to leave them on the plant to dry for winter use or enjoy them straight away. ■

In practical terms, these beans yield as well as traditional types. In visual terms, they add a well-needed splash of colour to the spring plot. A row of crimson or chocolate blooms rivals many ornamentals and brings earlyseason interest before summer crops take over. They even look good dotted through a spring flower border, plus you’ll get to eat them as well.
Broad beans are one of the simplest crops to grow. They fix nitrogen in the soil, easily stand through cold weather, and provide one of the first substantial harvests of the year. Choosing coloured flowered forms adds a bit of interest without any extra effort. Simply give them space, build a straightforward support, stay on top of blackfly, and you’ll enjoy both an attractive and delicious crop at the same time.


Pleasevisit ourwebsitefor the highestquality, practical gardenproducts made in our UKfactory. Therange includesthe Vitopodheated propagator &Quadgrow self-wateringplanter.


GreenhouseSensation, 93 VantagePoint, The PensnettEstate, Kingswinford, West Mids, DY67FR www.greenhousesensation.co.uk


IntroducingMarshalls Veg Compost —thenutrientrich, structurebuilding,moisture balancing compostdesigned to supercharge your vegetablepatch fromdayone... It’ssoeasy!
MarshallsGardenVegetable Compost:
•Packedwithnutrientvegcrave
•Providestheperfectstructure forrootcrops
•Givetheperfectbalancefor waterretention
•Ideal forbeds &borders
•Provenresultsthatspeak forthemselves
Thismixhasbeentrialledand testedatourplant nurseryfor 3yearsandhas consistentlyprovedto perform -supportingrobust,andhealthyvegetable plants.Whether you’readding to existingsoilorusingin containers,our compostisdesigned to supportsuccess forhomeandallotmentgrowersalike. Thisidealblend of peat,plant food,and woodfibreensures your vegetables gettheperfectsoilenvironment,enhancingroot development forhealthy,greenfloweringandfruiting. If youwant avegpatchthatdeliversrealresults,start withMarshalls VegCompost.
ORDERTODAYANDWEWILLSENDYOUTWINPACK FORONLY£24.98!SAVE£10.00!PLUSFREEDELIVERY
SinglePack (code10904660) £17.49+FREEDELIVERY TwinPack (code10904665)Was£34.98 LimitedOffer £24.98
SAVE £10.00 +FREEDELIVERY

MarshallsGardenPottingand Planting CompostwithFeed Ourprofessional-gradeblend givesplantsthebeststart-with guaranteedflower-boosting bloomsallseasonlong.
SinglePack£18.99 FREEDELIVERY (code10906209)
TwinPack£27.98
SAVE£15PLUSFREEDELIVERY (code10906210)


“Greatcompost
Ihaveused.”
Trustpilot


Add SinclairHorticulturalGrade Vermiculiteis poroussoithelpsretain waternutrientsinthe soil forrelease to plants.
1x100Lbags£34.99 SAVE£3 +FREEDELIVERY! (code10904000)
Pleasecompleteandsendto:MarshallsGarden, AlconburyHill,Huntingdon,PE284HY


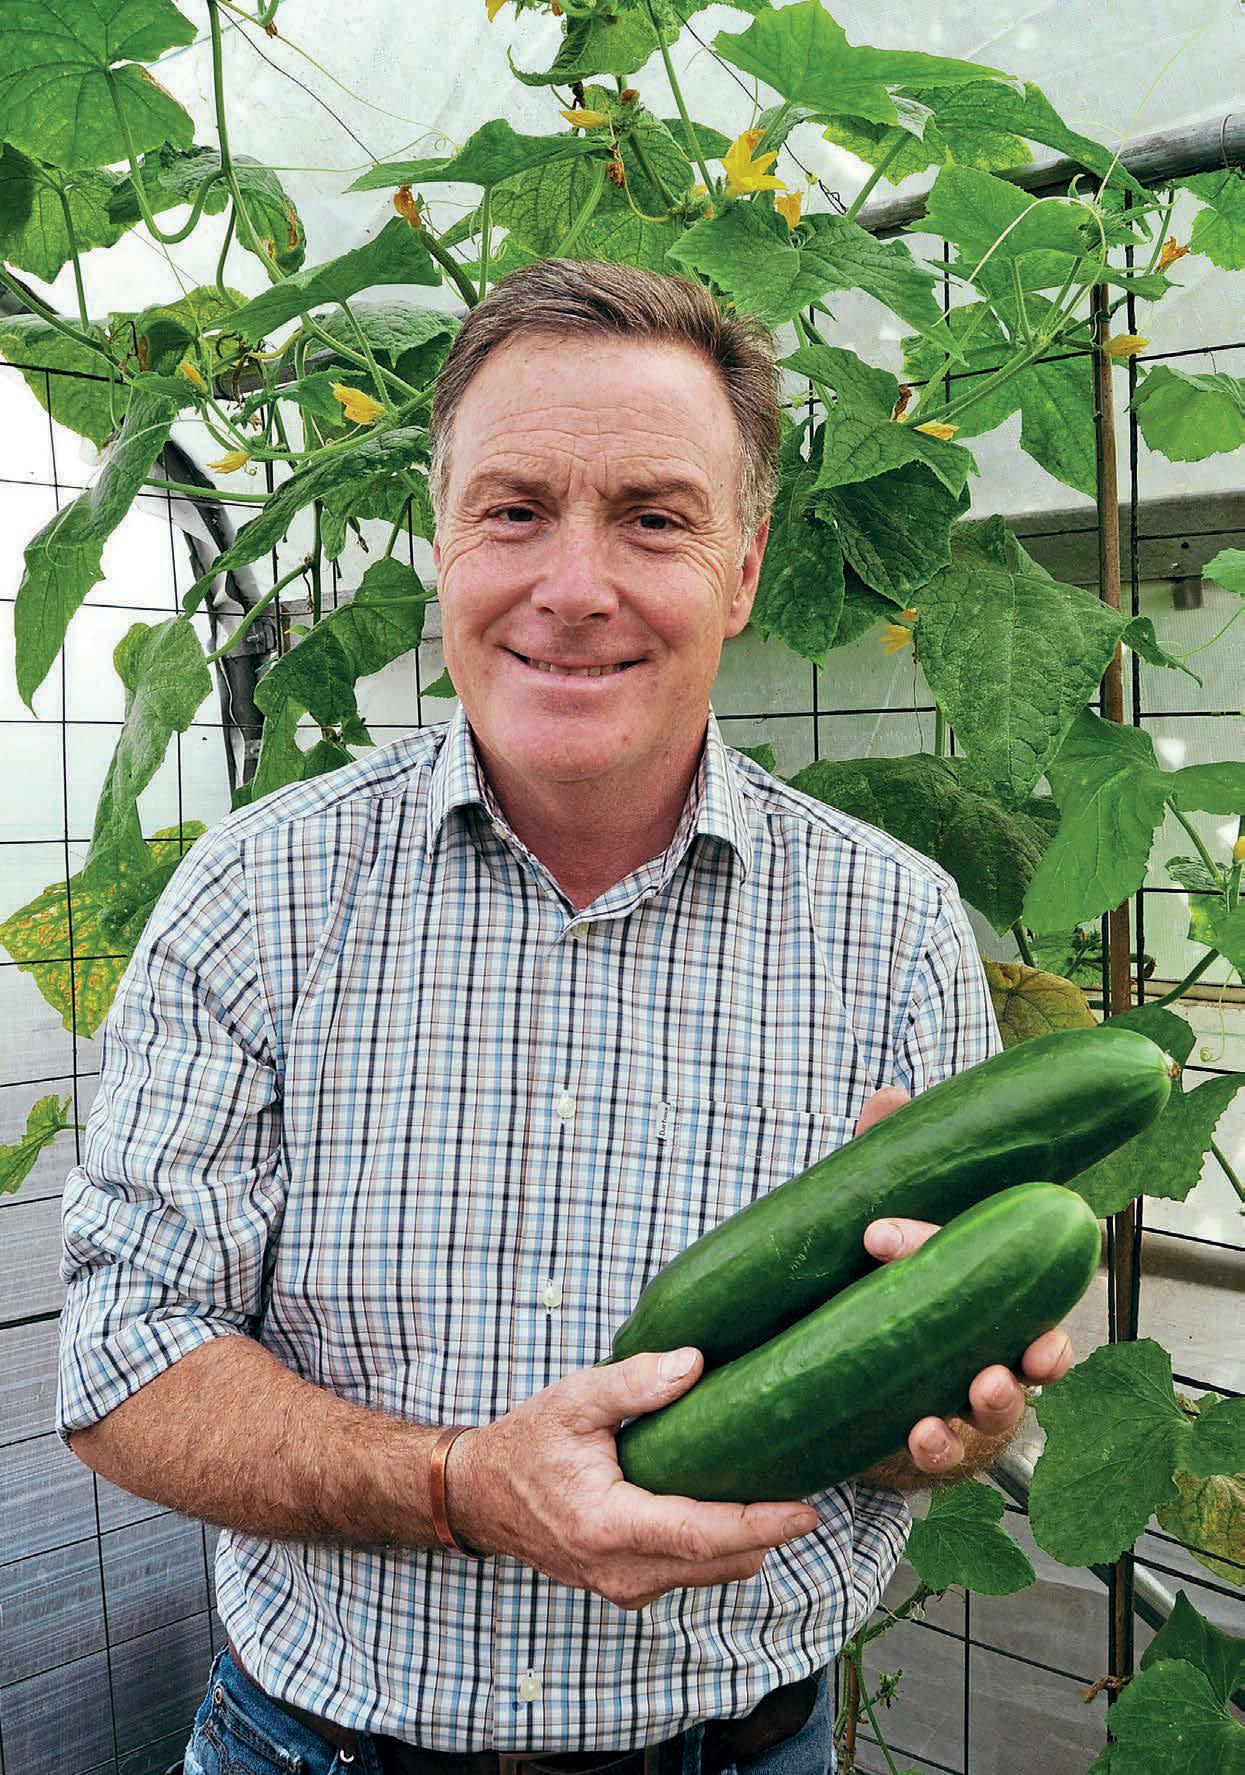
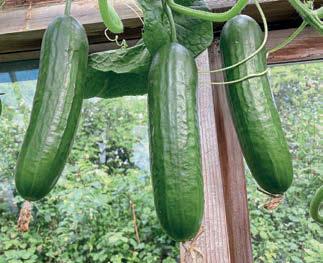
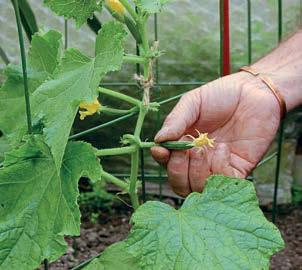
Martin Fish explains how to raise strong cucumber plants under cover – from sowing and planting to feeding, training and avoiding common problems
Without doubt homegrown cucumbers, picked fresh from the greenhouse or polytunnel, are so tasty in summer salads or a simple cucumber sandwich. Although readily available in supermarkets, you can’t beat that just-picked avour and, if given the correct growing conditions, they are easy to grow, and each plant should produce an abundance of fruits through the summer months.
Cucumbers come in various shapes and sizes, but by far the most popular type we grow is the smooth-skinned greenhouse varieties that are best grown under cover for a little extra protection. Many of these are all-female, meaning they are self-fertile and produce only female owers.
As the name suggests, greenhouse cucumbers are best grown under cover in a greenhouse or polytunnel to o er them protection and a little extra warmth. ey certainly don’t like to be cold, especially when the plants are young and establishing. Only plant them into their permanent growing position when the temperatures are warm, especially at night, as they dislike sudden drops in temperature.


Cucumbers are greedy feeders and need a good supply of nutrients. If growing in the soil border in a greenhouse or polytunnel, work in plenty of well-rotted manure or compost, and sprinkle a little fertiliser before planting.
If growing in larger containers use a good quality growing compost with a little extra fertiliser added to ensure they get o to a good start.
For growing in a heated greenhouse, you can start to sow from early to mid-March, but in an unheated greenhouse April to May is the ideal time to sow.
You will, however, need heat to germinate the seeds, but by the time the young plants are large enough to grow on it should be warm enough in the greenhouse. ➤


■ Merlin F1: all-female, easy to grow, producing many small cucumbers 15cm (6in) in length over a long period. Good resistance to powdery mildew and other diseases.
■ Femspot F1: early cropping all-female type producing long ribbed fruits on strong growing plants. Some resistance to powdery mildew.
■ Passandra F1: all-female producing a heavy crop of fruits around 20cm (8in) long. Good resistance to powdery mildew and a popular choice.
■ Carmen F1: all-female and a stronggrowing plant capable of producing 50 plus fruits per plant. Resistant to powdery mildew and other diseases, and is often used to grow exhibition cucumbers.
■ La Diva: all-female mini-cucumber that can be grown in the greenhouse, polytunnel or outside in a warm position. Smooth fruits 15cm (6in) long.
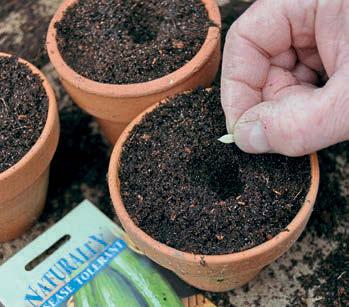
Seed can be sown in small pots, modules or bre pots. Use a quality compost that retains moisture but doesn’t get too wet. I mix multipurpose compost with vermiculite or perlite to create a well-drained mixture.
Sow the seeds singly on their sides around 2cm (¾in) deep, and place in a heated propagator or on a warm windowsill at 21°C. Germination takes 5-10 days.
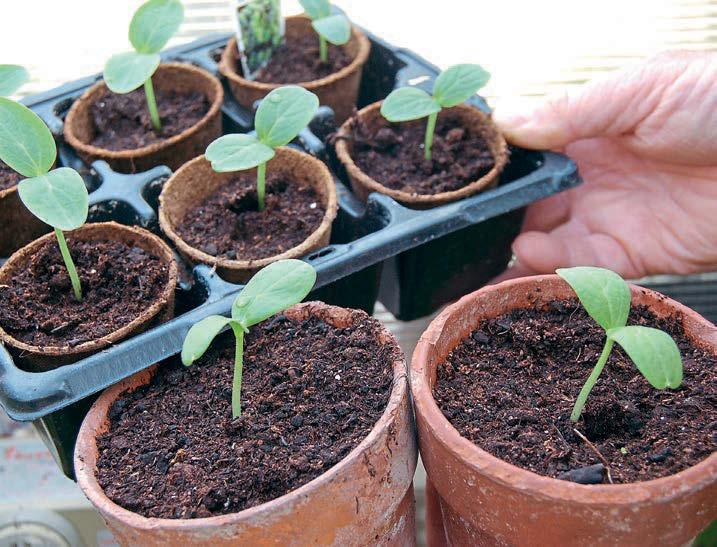
Once germinated, grow on in good light and, after a week, you can gradually reduce the temperature by a few degrees. Keep the compost moist, but not wet.


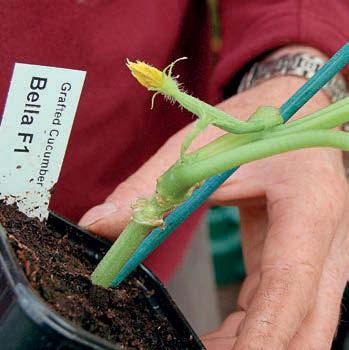
If you are unable to germinate seed, garden centres and nurseries will have young plants for sale in spring, at a stage ready to plant out or grow on in larger pots. ese are popular, reliable, all-female F1 hybrids that should give you excellent results.
Another alternative is to buy grafted plants. is is a named variety grafted onto a cucumber rootstock that has more vigour and often disease resistance. ey cost more but should produce strong plants and lots of fruit.


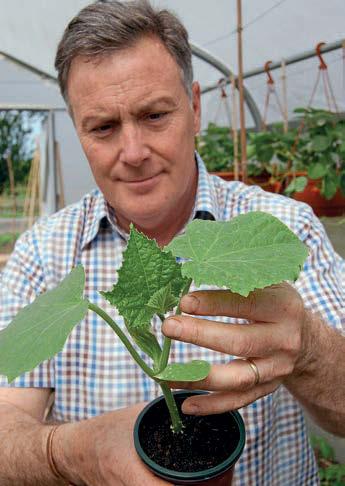
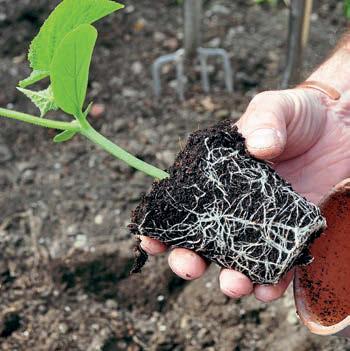
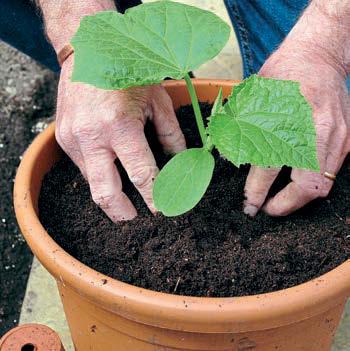
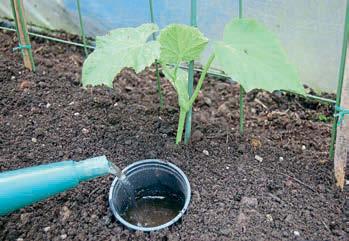
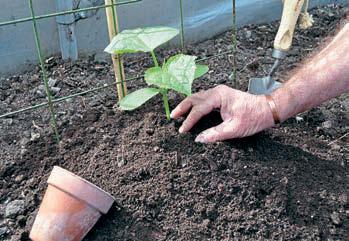
Plant out into prepared soil or pot into larger containers around 30cm (12in) in diameter when the young cucumber plants have made a good root system and have developed two to four true leaves. ey need to be strong, sturdy plants at this stage. Water to settle them in and keep the compost moist.
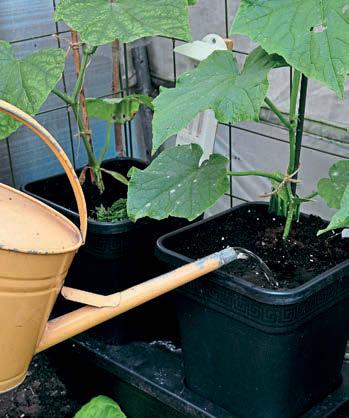
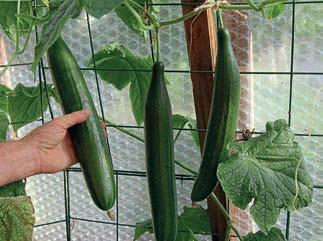
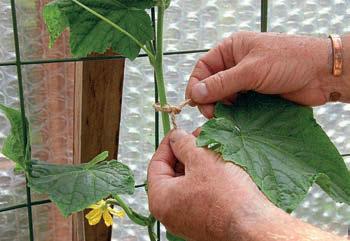
In the polytunnel I train the plants along the hoops so that the fruits hang down. Once planted, keep the plants warm and out of draughts while they establish. Take care with watering and don’t overdo it, as soggy compost can lead to problems.
As the plants start to grow they will need support to climb in the form of canes, strings or netting. Tie the main stem to the support, and as side shoots develop they can also be tied in. Once owers and fruit start to develop, feed weekly with a high-potash (tomato) fertiliser and, in mid-season when the plants are large, I suggest feeding twice a week.
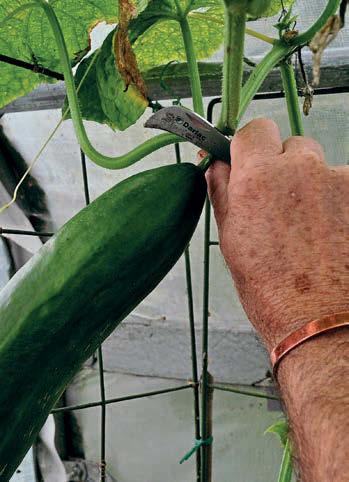
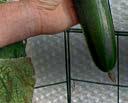
Harvest the fruits while still young and fresh, and before they get too big – unless you want one for the longest cucumber class in your local show! e secret is to pick regularly to encourage more owers and fruit to develop.
Powdery mildew is recognised by white fungal growth on the upper surface of the leaves, usually in late summer. Cut o infected leaves and increase watering and feeding to encourage new growth. Several F1 hybrid varieties have good resistance to it.
Collar rot is caused by a fungal infection attacking the plant at soil level, causing the plant to collapse. It often occurs on young plants in cool, wet conditions. To help prevent collar rot, plant in warm conditions, avoid deep planting and try to keep the base of the stem dry by watering the compost away from the stem. ■
■ When sowing, don’t just think about the germination temperature. Consider what the temperature will be around a month later, when it’s time to grow the young plants.
■ Flowers will start to develop when the plant is still small. To help the plant establish, pinch off any fruits until the plant is at least 60cm (2ft) tall.
■ Occasionally, all-female plants produce a male flower, which has a thin stem rather than an embryo cucumber at its base. If spotted, simply pick them off.
■ If you don’t have a greenhouse, there are varieties of cucumbers that can be grown outside in a sheltered, warm position. Plant out after the danger of frost, and they will start to crop from July onwards.

on a slight mound, so water runs away, will help to prevent collar rot
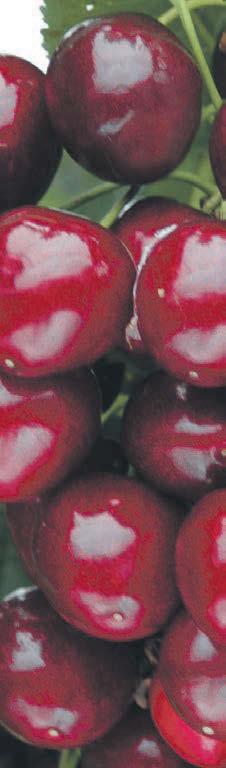
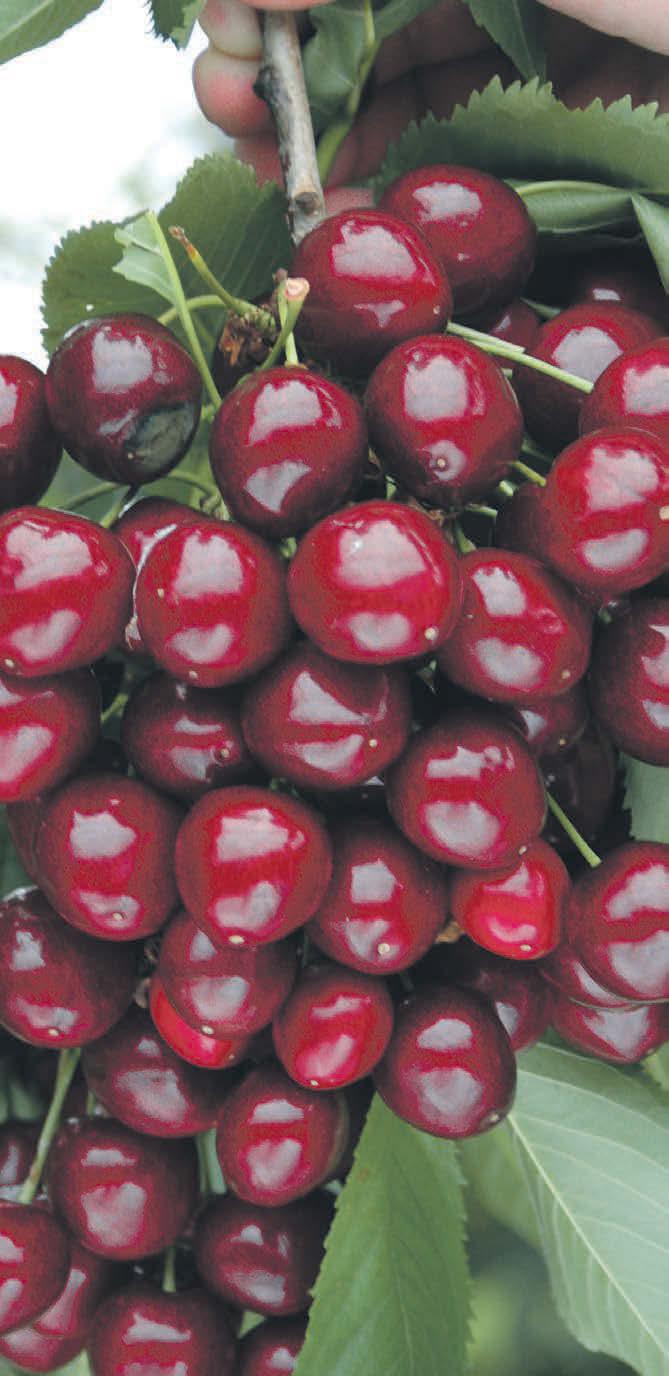
Abrandnewwayof growingcherries, revolutionisingcommercialcrops–andnow w availabletogardenersforthefirsttime!
WhyChoosethe Cherry Bush ‘Porthos’
Thefirstevercherry bush –‘Porthos’ –forms aneat clumpoffruitingbranchesright fromthebaseofthe stem –makingpicking your cropsincrediblyeasy! The cherries have afabuloussweet flavour andyou’llpickuup to5kg(12lbs)per seasononce yourtree hasestablished d – so you’ll save asmall fortuneoverthe lifeof yourtree! ‘Porthos’is100% self-fertile so youwon’t need asecond d tree to pollinateit,and boastsiconic cherry blossomthatwillbbring your gardento life with colour andfragrance inearlyspring g It is very easy to grow andcompletelyhardy –perfect forany smallggarden or even a patiopot!Supplied as a50cmtallplant in a3 Litrepot t Eventual height 2m (6ft).
✔ World’sfirstcherrybush–pickfruit wi ✔ Delicious, super-sweetfruit –upto5kg peryearonceestablished!
✔ Compact –perfect forasmall gardeno ✔ Stockisstrictlylimited… ORDERNOW!
g (12lbs) or patio!


Springisuponusand that meansone thing: more frequent lawn maintenance.
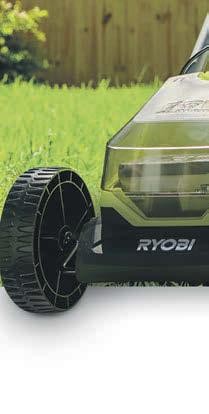
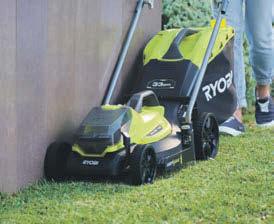
Butfearnot,Ryobi hascreated theperfect packagetomakethistask abreeze.Saygoodbye to tangledwires andmessy petrol motors,and helloto theconvenience of cordless battery-poweredtools.With theRyobi 18VCordless33cm Lawnmowerand FREE 23cm GrassTrimmer, you’ll have the perfectpairtokeepyourlawn looking pristine.
Effortlessmowingwiththe cordlesslawnmower
Imagine thefreedom of mowing your lawnwithout beingtetheredtoapower outlet.Ryobi’s best-selling 18Vlawnmower makesthat dreamareality.Its cordless design meansyou can effortlesslynavigatearound your garden.Nomoretripping over wiresorlimited range of motion.
Weighing in at alightweight 8.7kg, this mowerisabreeze to pushandmaneouvre, reducing fatigueand making mowing ajoy,not achore. Andits innovative EasyEdge™ featuretrims rightupto theedge,leavingno stray blades of grassbehind.Your lawnwill have that polished, professional look that will
‘Rated Excellent’
make your neighboursgreen with envy.
This mowerboastssome impressive features,too!With its5-positioncuttingheight adjustment,you have full control over thelengthofyour grass(from 25-65mm).The ergonomichandle designwith threeheight positionsensures comfortableoperation for usersofall heights.
It’s easy to empty, thanks to themulchingplugand generous 35Lgrass catcher bag. Plus, itsclevercollapsible design makesitsoeasyto storeaway, too.


FREEcordlesstrimmerfor theperfectfinish
As abonus,you’llreceive theRyobi Cordless23cm GrassTrimmer absolutely free.Iteffortlesslytackles finegrass andkeeps your edgeslooking pristine.Switch betweenedgingand trimming modeswithRyobi’s innovative EasyEdge™feature. With itsdurableall-metal boom andergonomictwinhandleset-up,thistrimmer


sible rc ent rage


is designed to make your gardening experience more comfortable and efficient.
TheRyobi 18VCordless 33cm Lawnmowerwith FREE 23cm GrassTrimmer offers theperfect combinationof performance,versatility,and ease of use.
Saygoodbye to thehassleof wiresand petrol and hellotoa perfectlymanicured lawnwith minimaleffort.Thisfantastic offer from thegardenexperts


at Ryobialsoincludes your 5.0Ahbattery and charger starterkit. Actnow!FREEGrass Trimmerworth£61.99! OrderRyobi’s18VCordless 33cmLawnmowertoday forjust£199.99andreceive the23cmCordlessGrass TrimmerabsolutelyFREE! Bothproductsarecovered byRyobi’simpressive3-year guaranteeandincludefast, freeGBmainlanddelivery.


Rather than buy in expensive fertilisers, which can damage the environment, why not learn how to get bacteria to feed your plants for you?
One of the nutrients that plants often run out of rst is nitrogen. It’s needed for many functions in the plant, including the production of chlorophyll, which makes the leaves green. Without it, plants start to turn yellow, and growth is stunted. Ironically, there is an abundant supply of nitrogen in
the air, but it is in the form of a gas that the plants can’t use.
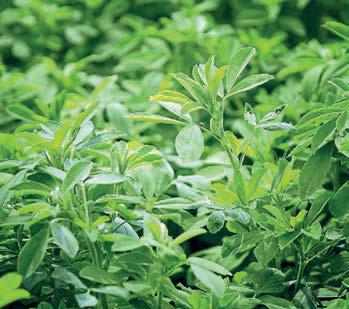
Rhizobium bacteria in the soil can come to the rescue by taking up nitrogen from the air and converting it into a form plants can use. ese bacteria live in small nodules in the roots of plants in the legume family. It’s a two-way symbiotic partnership: the bacteria supply the nitrogen to the plant, and in return, the plant feeds them with sugars.
‘Fixing your own fertiliser’ is nothing new. In fact, there’s mention of using lupins and

eld beans to improve soil fertility in Roman textbooks on agriculture.
Until the 1950s, growing legumes was an important way of replenishing the nitrogen in the soil. e invention of the Haber-Bosch process eliminated the need to do this. It allowed the manufacture of arti cial nitrogen fertiliser by combining nitrogen from the air with hydrogen from natural methane gas. It boosted food production but made our crops dependent on a highly energy-intensive process requiring large amounts of fossil fuels.


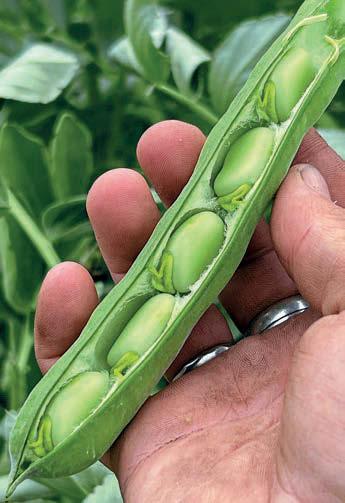
e rst step in xing a fertiliser is to grow a legume green manure. Suitable crops include vetch, clovers or eld beans. ese are plants that will x nitrogen with the help of Rhizobium bacteria. ey can later be chopped up and buried, where they will return all the xed nitrogen to enrich the soil. All the action takes place in the nodules. If you carefully dig up a legume, you will see the small swellings on its roots. Plants that are actively xing nitrogen should have red/pink nodules on their roots, the size of a pinhead.
Nitrogen xation requires a minimum temperature of 8°C, so it occurs in spring, summer or autumn. To release the nitrogen for the next crops, the green manure must be dug or chopped into the soil well before it starts forming seed pods; otherwise, it becomes quite tough and slow to break down.
Most green manures need to be sown between March and September, or they won’t germinate, although eld beans will germinate under colder conditions.
Clover has small seeds and should be scattered and lightly raked in. Larger seeds, such as eld beans, should be sown at a depth of 1-2cm.
Weeds can easily be controlled in clover by waiting until it is 5cm high, then running over it with a mower. is will stimulate the clover to come back more strongly than the weeds, resulting in a much cleaner crop.
Before the plants start forming pods, chop them down using shears or a strimmer.
Bury the plant residues just a few centimetres deep, a few weeks before you want to start the next crop. If you have grown vetch, wait at least four weeks before sowing seeds directly in the soil, as it can inhibit germination.
Vetch is good for quickly covering the ground and will last up to nine months before going to seed. If you need something that lasts longer, try growing red or white clover.
Some legumes are more reliable at xing nitrogen than others. Field beans, broad beans, vetch and many clovers are a good bet as they nearly always nd some Rhizobium in the soil to pair up with. Other types of legumes, such as French beans, runner beans, alfalfa and fenugreek, have slightly more unusual tastes and require a strain of Rhizobium bacteria that is not always found in UK soils. Check whether they are active by digging up a few plants to see if the nodules are pink/red.
As Rhizobium bacteria are only active above 8°C, your green manure needs to have spent at least a few months of its life in slightly warmer soils. If you only grew your green manure during the coldest winter months, it won’t have xed much nitrogen. Green manures need to be dug in or chopped down before they reach the podding stage to add a decent quantity of nutrients to the soil. At the podding stage, most of the nutrients are transferred from the plant’s stems and leaves into the beans. If you harvest those beans, you are removing most of the nutrients, so they can no longer be returned to the soil. You can have a crop of beans to eat or grow a green manure to feed the soil, but you can’t do a good job of both at once! ■
Inside each nodule nitrogen-fixing bacteria convert atmospheric nitrogen into a form that plants can use. But there’s a complication: the enzyme responsible for this process (nitrogenase) is damaged by oxygen –but the bacteria also need oxygen to produce energy.
The solution is elegant. The plant produces a reddish protein called leghaemoglobin, which binds oxygen and keeps its concentration very low but carefully controlled. This allows the bacteria to respire without shutting down nitrogen fixation.
That pink/red colour you see when you cut open an active nodule? That’s leghaemoglobin at work – and it’s a reliable sign the partnership is functioning.
Explanation by Professor Robert Eady, a microbiologist whose career has focused on nitrogen fixation


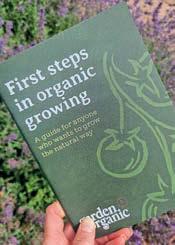
Join Garden Organic as a member before the end of June and you’ll receive a free copy of its First Steps in Organic Growing – full of tips about sustainable growing techniques. For this and a whole host of other member benefits, visit gardenorganic.org.uk/join and click Kitchen Garden Reader Offer in the dropdown menu as you progress


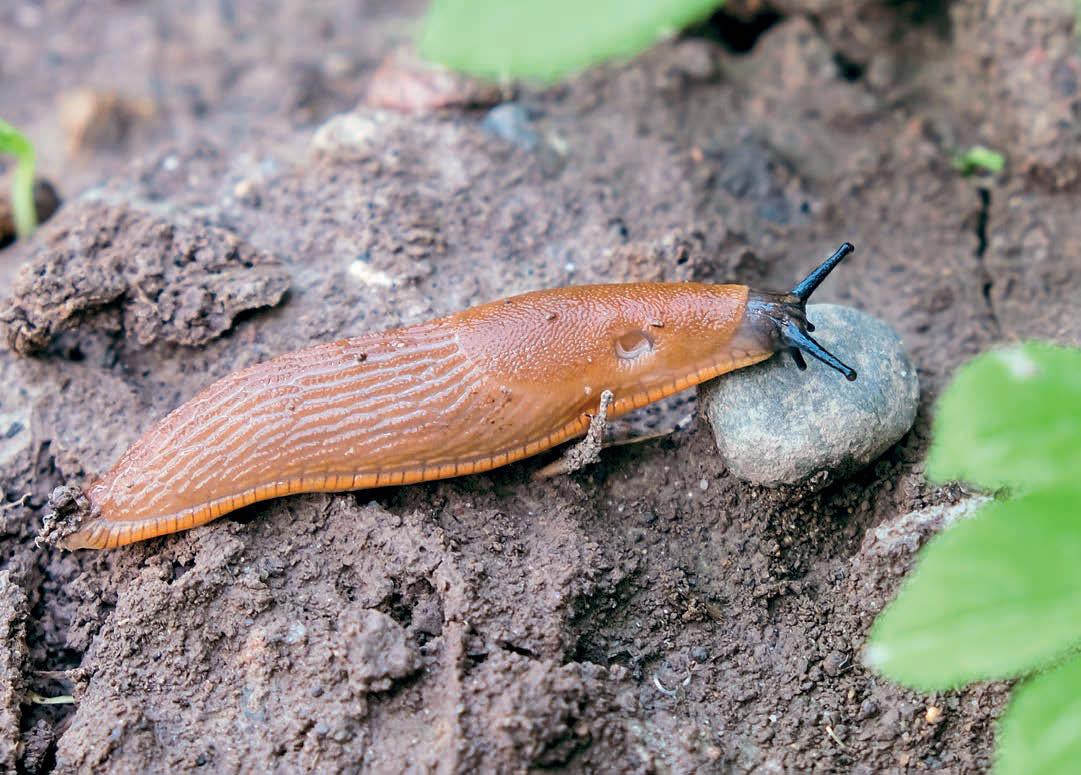
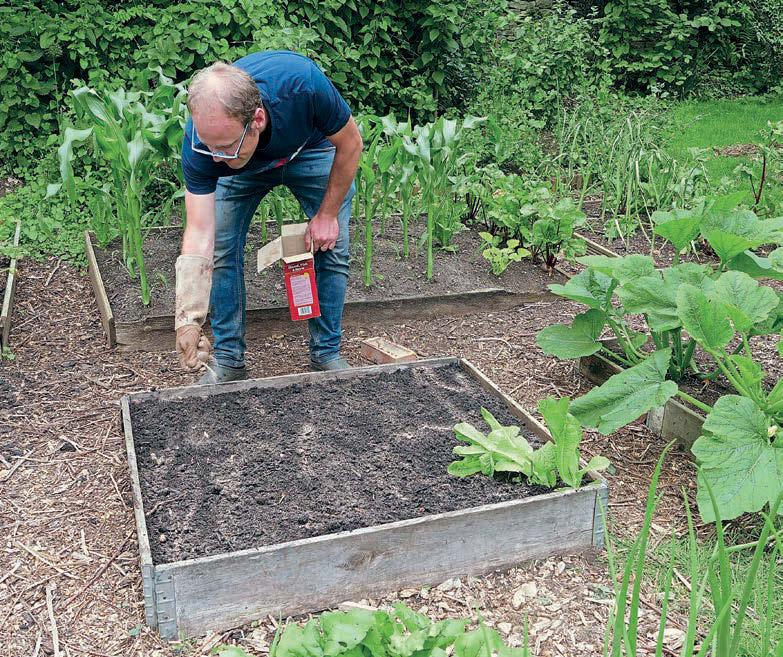
If you’ve had a mild, wet winter, you can almost hear the slugs gearing up, ready to start munching. An early biological treatment can reduce numbers before seedlings are shredded – but timing and expectations matter
After a damp winter, slug damage in spring often feels inevitable. Eggs overwinter in the soil and, as temperatures rise, small juveniles start feeding just as lettuces, beans and young ornamentals are trying to establish. By the time you spot the holes, the worst may already have happened.

An increasingly popular approach is the use of bene cial nematodes – microscopic soil-dwelling worms that target slugs below ground. Applied as a watering treatment, they move through moist soil in search of hosts. Once inside a slug, they release a bacterium that stops it feeding. e slug dies underground, and the nematodes multiply before dispersing.
You won’t see dramatic surface die-o . Instead, you’ll notice a gradual reduction in fresh damage.
Spring is the most e ective window because many slugs are still small and feeding below the surface, where pellets and hand-picking don’t reach. Treating early can reduce the population before it matures and breeds.
Each application o ers roughly four to six weeks of protection. In high-pressure years some gardeners repeat treatments throughout the season. As soil-dwelling organisms, nematodes work best in consistently moist conditions, so watering before and after application helps them move e ectively through the soil.
Success depends on soil temperature and moisture. Apply when the soil is consistently 5°C or above and water beforehand, so the
ground is evenly moist. After treatment, keep the area damp for at least a fortnight to help them establish.
ey’re best applied in the evening or early morning and should be used promptly once mixed. Unused packs can be stored in the fridge until needed.
Nematodes work best against small to medium slugs living in the soil. ey’re particularly helpful for:
■ Direct-sown crops
■ Newly planted seedlings
■ Raised beds and polytunnels
■ Slug-prone crops such as lettuce
ey’re most e ective against soil-dwelling slugs, so combining them with good garden hygiene and other cultural controls gives the best results.
Biological control isn’t instant or absolute. It’s part of a wider strategy. In seasons following high slug numbers, however, reducing that rst ush of juveniles can mean the di erence between re-sowing repeatedly and crops getting away cleanly.
Used thoughtfully, nematodes are another tool in the spring gardener’s kit – working with soil life rather than relying solely on pellets. ■


When Stephanie moved here, she laid out the vegetable beds vertically across the slope. The garden appeared flat at first glance, but later storms revealed the subtle gradient. A lesson learned!


This month Stephanie Hafferty offers permaculture principle 4 – what we can learn from getting it wrong!
The fourth permaculture principle certainly looks rather daunting: “Apply self-regulation and accept feedback.” How can this be applied to gardening?
is principle means learning from mistakes, accepting responsibility for actions (such as sowing seeds too early) and making adjustments. It celebrates the curiosity and resilience of gardeners.
To apply this in the kitchen garden, it is simply good old-fashioned gardening advice – spend some time observing what is happening and see what the garden is telling you. Listen to people who have grown in the area for a long time and have experience of which areas ood, or are very shaded, or what pests are prevalent. Every day is a school day, and we are always learning and discovering new things. Making mistakes is really important, because mistakes are useful tools for learning.
is principle links well with the rst one (discussed in Kitchen Garden magazine’s January issue): Observe and Interact. One thing that unites virtually all gardeners is having an inquiring mind and a resourceful nature, keen to resolve any problems that come along (often with a shed or box lled with ings at Will Be Useful One Day –but that is a topic for next month).
I am sure we have all learned the lesson of planting something in the wrong place, where it has failed to thrive or even died. Or puzzled why some plants are succumbing to diseases or mildews, to discover that it’s due to overcrowding or not enough ventilation.
By observing the health of plants and the soil, we can change and adapt the plot to create one that is more resilient and thriving.

Runner beans sown at the appropriate time grow sturdy and well-rooted, avoiding the leggy, frost-sensitive plants that come from sowing too early
Problems that we may observe include:
■ leggy plants due to too much shade, or not enough hours of daylight
■ waterlogged soil
■ lots of pests
■ not enough insects
■ poor yields
■ crops rotting
■ plants struggling because they are too hot
■ plants struggling because they are too cold
■ compost that is too soggy or too dry
Sometimes the lessons happen quickly. One morning last year, after a few days of heavy rain, I went out into the garden to discover that all three small water butts had fallen to the ground. ey’d only been installed recently. Unlike the larger water butts, which stand on solid bases to raise them high enough for a watering can to t underneath, these are placed on a base made of four segments that slot together. e sheer weight of the water exposed a aw in the design, putting pressure on the connecting ➤

parts, causing them to collapse. e sloping ground likely didn’t help much, but this has never been an issue for the larger water butts. e solution, of course, is to secure the base so that it forms one rm, solid structure. I used very strong glue, and the gardener’s friend: heavy-duty duct tape. But sometimes the mistakes only become apparent over time. Many years ago, I moved to a property with a somewhat dilapidated wooden greenhouse. My rst greenhouse! I was thrilled, and that rst spring set about sowing seeds for the new veg plot, including my rst ever runner beans. On a bright sunny day in early March. Oh dear….
In my naivety and enthusiasm, I’d clearly skipped the bit in Geo Hamilton’s organic gardening book which said sow in mid-
three small water butts shortly after installation. Their segmented bases would later prove unable to cope with the weight of collected rainwater
spring. Runner beans grow fast, and they are not frost-hardy. At rst, all was well, but after a few weeks, I had to pot them on and bring most of them into the house to keep them frost-free, tying their poor spindly stems to sticks to keep them upright. is was a very valuable lesson in patience and sowing at the right time. It was also quite an expensive mistake, because I needed to buy extra compost to pot them on.
Now, almost 30 years later, I know that a cheaper and more sensible solution would be to compost these beans and start again in late April or May, depending on location. Had I done that, however, I wouldn’t have the useful rst-hand knowledge of what a palaver it is trying to keep beans alive in the house for months!
Not all of the feedback from nature is about nding problems. Spend time observing the good things in your garden –where plants are thriving, and which provide early forage for insects and are covered with bees in the spring. Note the joyful surprises as well as the collapsing water butts and unexpected invasion of sheep (yes, that does happen here. e solution was better fencing!)
Gardening knowledge is constantly evolving as we gain more experience and respond to a changing environment, particularly to extremes of weather. Many of us have experienced far more storms than is usual, which has an impact on many aspects of gardening.


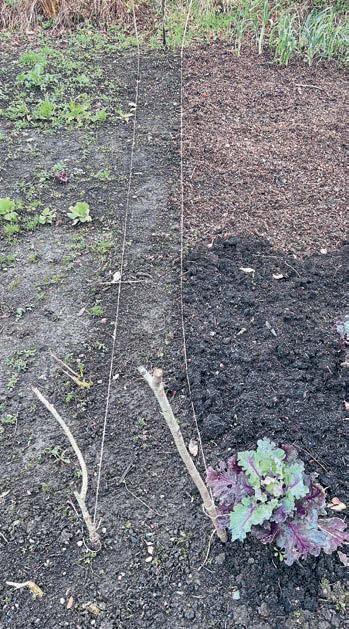

For example, high winds have meant I’ve had to change where I grow things here, especially in the beds close to the house, where the wind whips around. My poor leeks have spent part of the winter reclining thanks to the wind, and some of the brassicas were blown out of the ground completely. Solutions include choosing low-growing plants, staking taller plants very securely, and creating windbreaks.
Heavy rainfall over a long period can cause waterlogging and, if combined with high winds, can also wash away mulch or topsoil. e solutions will depend on the situation, and may include digging French drains or swales to redirect the water and help it drain away, or sowing green manures in the late summer and autumn so their root systems can help keep the soil structure intact.
When I moved here ve years ago, I made the rst veg beds vertically across the back garden. is area looked quite at compared to the rest of the plot and the surrounding landscape on this hillside. e plot thrived, lled with abundant produce year-round. However, in the winter of 24/25, when very stormy weather started to wash away some of the mulches, it became clear that the garden was more sloping than I’d thought. e solution in this situation was to realign the beds so they were horizontal and aligned with the slope. Using string, I mapped out the new beds and began mulching. In other situations, the best thing to do may be to create terraces, or use beds with sides. ■
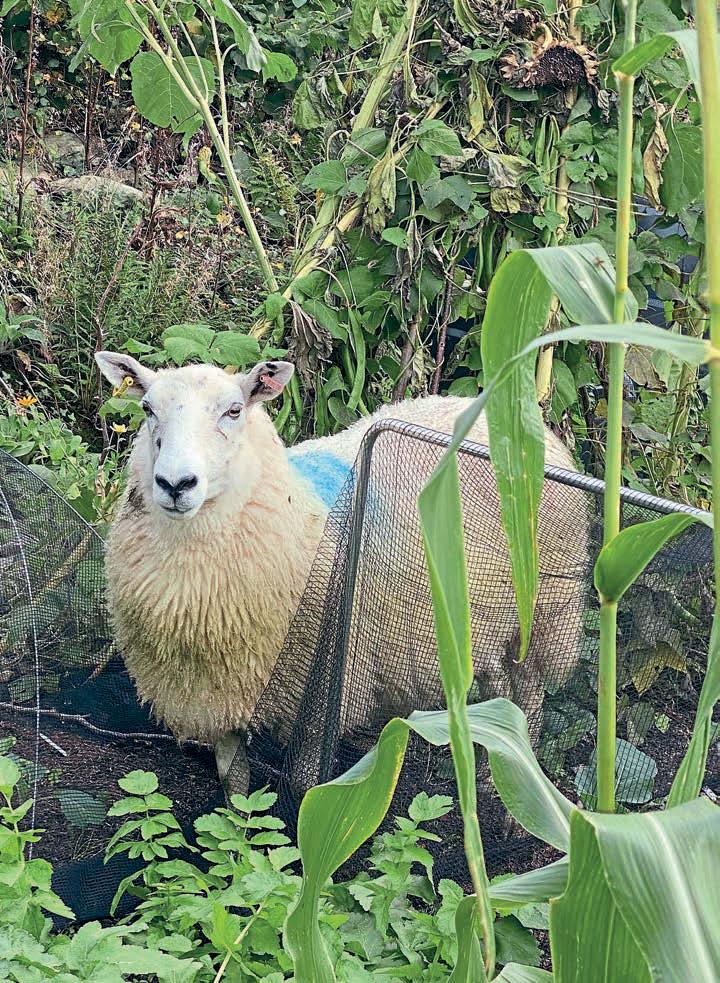
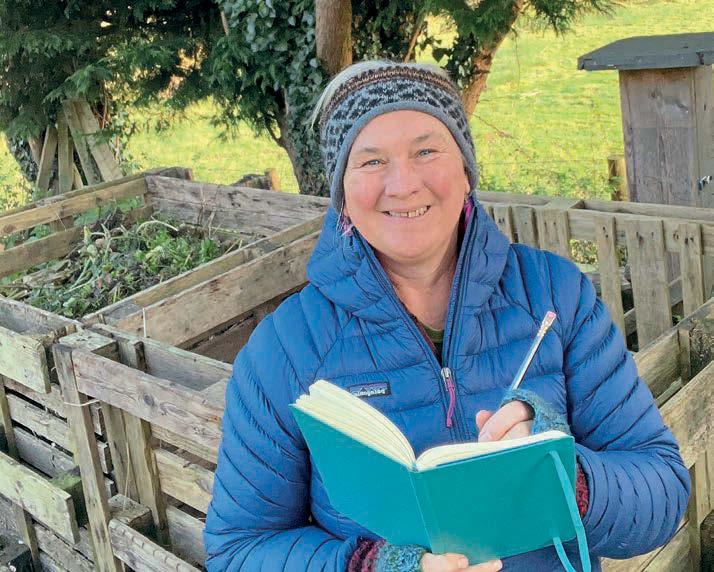


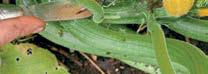

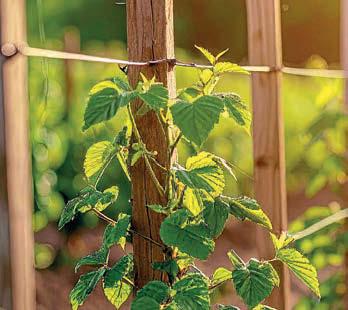


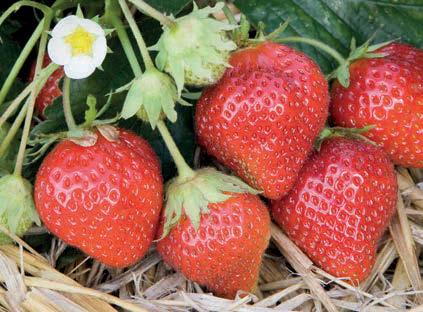

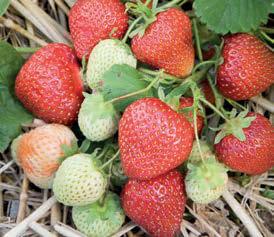


Strawberry plantsareeasy togrow andall they requireisasunny, shelteredspot.Plantscanbe spaced30cm(12in)apartintheopen ground. Alternativelytheycanbe growningrowbags(10 plantsperbag)or containers.

Theperfect waytogrowstrawberries,ensuringheavieryieldsand betterqualityfruit! Manufacturedfromstrong15mmblackpolymer coatedgalvanizedsteeltubingwithmouldedfittings, theframe comes completewith abirdnetand hoops to supportthenet above thefruit.Thetabletop willaccommodate 20plants to producethreesuccessive crops over athree yearperiodbefore theplants &growbagsneed to be replaced.
XAF001 StrawberryTabletop
£148.95 inc.p&p*
SAVE£20 -Tabletopforonly £128.95 inc.p&p* when you purchase aminimumof24 strawberryplants pertabletop. *MainlandUKonly.Pleasephone forp&p charges to Highlands &Islands.


Asparagusis expensivetobuyintheshopsbutiseasy togrow andtastesdeliciousfreshlyharvestedfrom thegarden.Once established12plantswillproduce anaveragecropof10kg(22lb)annuallyfor12 years ormore. We supplylargeone yearoldcrownswhich willestablishquicklysothatyoucanharvest yourfirst crop(werecommendonlysparingly)justone yearafter planting.Plantsshouldbespaced38cm(15in)apartin rows 1m(3ft)apart. Delivery isfrom Aprilonwards. Offercloses30th April2026.
GIJNLIM -ThismaledominantF1hybridproduces heavy cropsofsucculentgreenspearsjustone year afterplanting.Itcanalsobe grownaswhiteasparagus iftheplantsarecoveredwith amoundofsandysoil andharvestedbeforetheypushthroughthe ground. Cropsearly to midseason.RHSAward of Garden Merit. ASP004 12crowns- ONLY £26.50inc.p&p
BACKLIM -ThisallmaleF1 hybridis very popular with commercial growers,producingheavy crops of exceptionallythick,succulentgreenspearswith excellentflavour.Veryreliable,boastinggooddisease resistance. Cropsmid to late season.RHS Awardof Garden Merit.
ASP001 12crowns- ONLY £26.50inc.p&p
Ourhand graded‘frozen’(cold-stored)strawberry plantsareraisedunderthePHPSschemeandare guaranteed to befreefrompestsand diseases. Theadvantageof‘frozen’plantsisthat they produce fruitthefirstsummer followedby bumpercrops forthenext 2-3 years.Provided theyareplantedoutsidebytheendofJuly,they willcropjust60-90days afterplanting. Deliveryis within28days.Offercloses30th April2026.
HONEOYE(early) -A very populargarden variety. Thebrightredfruitsare largeand roundand have averygoodoldfashionedstrawberry flavour. Heavy cropping. RHS AwardofGarden Merit. Usually£22.95
STR004 12plants- NOWONLY£20.65inc.p&p
CAMBRIDGEFAVOURITE (mid) -Amuch lovedheirloom variety-manygardenersrefuse togrow anythingelse! It isoneoftheheaviest cropping varieties availableandcanbereliedon to crop wellunder awide rangeof weather conditions. Themedium-sizedberriesaresoft, sweetandjuicy andhave averygoodflavour.Resistanttomildew. RHSAward of Garden Merit. Usually£22.95
STR010 12plants- NOWONLY£20.65inc.p&p
ELSANTA(mid) -Datingback over40 years, thisheavy croppingstrawberry isanestablished favouriteand wasformanyyearsthemostwidely growncommercial varietyintheUK.Thefruitsare largeandfirm andhave averygoodflavourwhen home grown. Usually£24.95
STR011 12plants- NOWONLY£22.45inc.p&p
MALWINA (late) - Thisfabuloustasting variety isan excellentchoiceforthegardenasitiseasy to grow and very disease resistant.Thelargeberries are exceptionallysweet.Verylateripening,cropping wellinto Augustwhenmostothersummerfruiting varietieshave finishedcropping. Usually£24.95
STR018 12plants- NOWONLY£22.45inc.p&p
MARA DES BOIS (perpetual) -Combines thearomaticflavourofthewildalpinestrawberry withthefruitsizeandyieldofthemoderncultivars. Whenfully ripe,themediumsizedberriesare extremelyfragrant anddevelopanintenseflavour andaromasimilar to the woodlandstrawberry. Resistanttomildew.Ripens Aug-Oct. Usually£25.95
STR016 12plants- NOWONLY£23.35inc.p&p


Charlotte Sterland examines the claims, the history and the reality of using seaweed in productive gardens
Seaweed is increasingly being used as a natural soil improver and biostimulant in gardens. While coastal ecologists focus on the ecological importance of healthy kelp beds in supporting marine biodiversity, growers and gardeners are also exploring how seaweed can be used on land to support soil health and reduce reliance on synthetic inputs.
Seaweed has a long history of use in coastal regions, including by crofters in the Outer Hebrides, and on farms in Devon, Wales and Ireland. In these areas, it was traditionally gathered from the shoreline and applied directly to elds and vegetable plots. Today, many gardeners across the UK are adopting similar practices. With kelp sprays, liquid extracts, pellets, meals and mulches widely
available, it is now possible to use seaweed products without living near the coast. e global market for seaweed-based agricultural and horticultural products is estimated to be worth around $1.5 billion.
Several UK-based companies are now producing seaweed products that are popular with gardeners who incorporate seaweed into their soil management systems. ➤
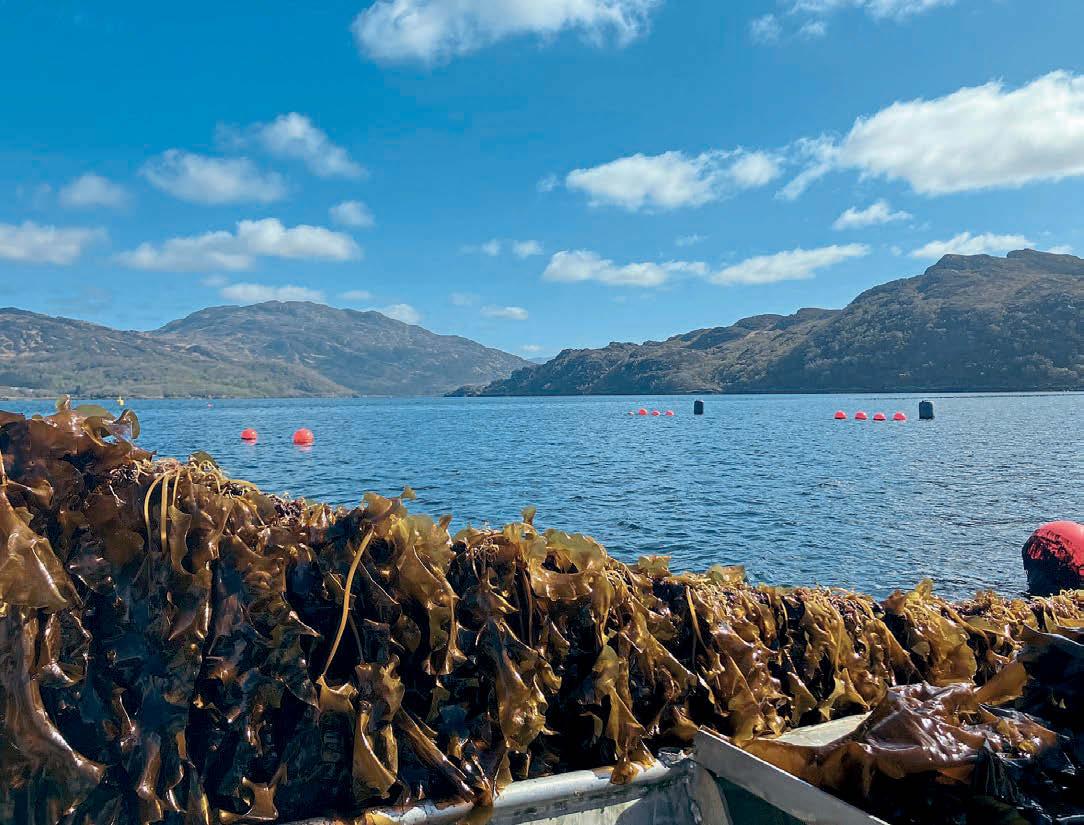
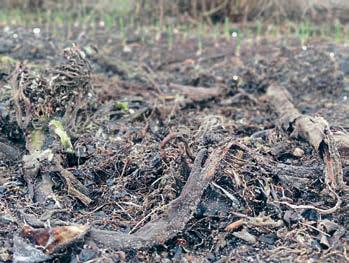
Seaweed is best understood as a soil improver and biostimulant rather than a fertiliser. Unlike conventional fertilisers, it does not generally supply signi cant levels of nitrogen, phosphorus or potassium. Instead, it contributes organic matter, trace elements and naturally occurring compounds that can support plant resilience and soil biological activity.
When applied as a mulch or dug into the soil, seaweed breaks down and contributes to soil structure. Many gardeners nd that it improves moisture retention and soil texture over time. e brous nature of seaweed can help bind lighter soils, while in heavier soils the added organic matter can support aeration and aggregation.
It is also valued for its biostimulant properties. Seaweed contains naturally occurring compounds associated with
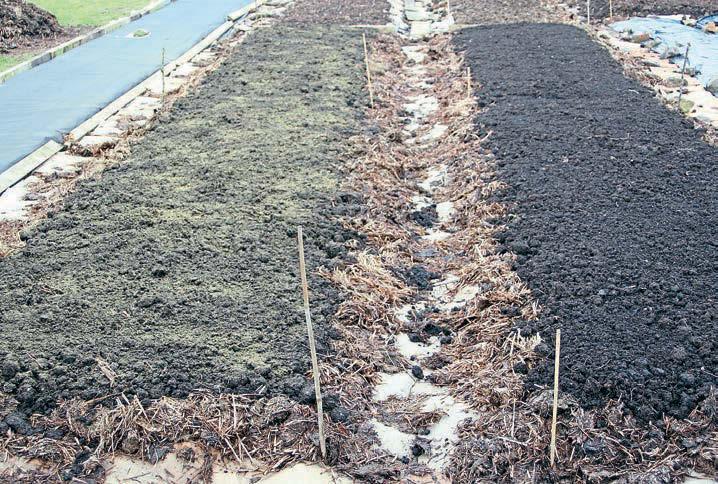
plant stress tolerance and growth responses. Rather than feeding plants directly, these compounds are thought to support root development, improve nutrient uptake from the soil and help plants cope with environmental stresses such as drought or temperature uctuations.
Gardeners who use seaweed often report improvements in crop performance and quality when it is incorporated into a broader soil health approach. It is not a replacement for balanced feeding programmes, but it can be a useful addition to them.
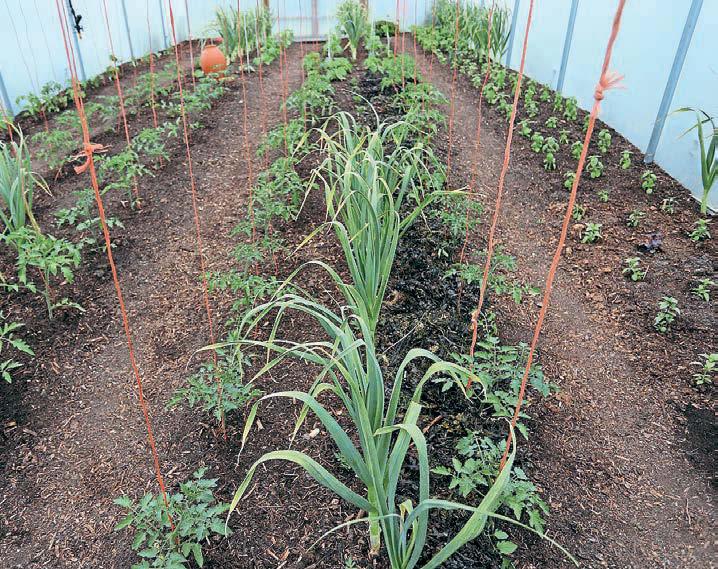
Di erent seaweeds contain di erent naturally occurring biostimulant compounds. Ascophyllum nodosum, found largely around the western isles of Scotland, is one of the most commonly used species in commercial biostimulant products. Other species used commercially include Ulva (sea lettuce), Kappaphycus alvarezii and Sargassum.
ese seaweeds contain a range of organic acids, carbohydrates and polysaccharides. In horticultural use, these compounds are associated with supporting plant stress responses and defence pathways. While research is ongoing, they are widely used in both commercial agriculture and horticulture as part of integrated crop management systems.
Seaweed can be gathered locally, where permitted, or purchased as part of commercial soil products.
In many locations, small-scale collection for personal use is permitted, particularly on Crown Estate land, but local regulations must always be checked. A larger-scale collection may require permission from the managing authority or landowner to ensure sustainable practice. If collecting directly, only take naturally detached drift seaweed, rather than cutting living material from rocks. is helps protect marine ecosystems and prevents habitat damage. Traditionally, gathered seaweed was often left to weather slightly before use, reducing salt content through rain exposure. Gardeners who collect fresh material today sometimes allow it to rinse naturally outdoors before applying it to beds.
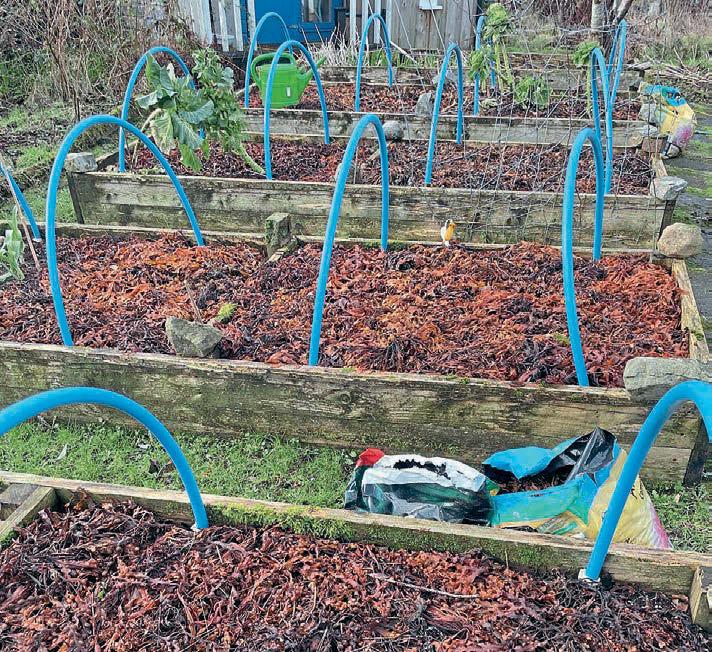
Seaweed can be applied in several ways and is often used in autumn so that winter weather and soil biology can begin the decomposition process in preparation for spring planting. One method is to use it as a surface mulch, spreading it directly onto the soil and allowing it to decompose gradually. As it breaks down, organic matter and trace elements become incorporated into the soil and available to soil organisms. Some gardeners prefer this method, as it mirrors traditional coastal practice.
Others choose to dig seaweed into the soil, particularly if odour is a concern or if they want to encourage faster decomposition. Chopping the material before incorporation can help speed up breakdown. According to RHS guidance, it is generally suitable to apply seaweed directly to the soil rather than waiting for it to fully compost.
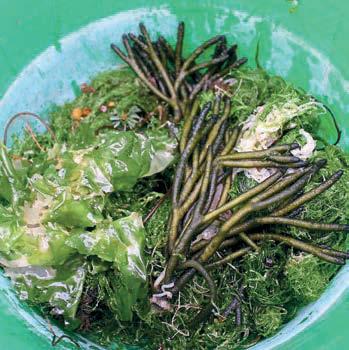
Commercial seaweed products are most often marketed as biostimulants and soil conditioners rather than nutrient fertilisers. Calci ed seaweed products are derived from naturally occurring calcareous algae. ese are harvested, processed and ground into granular products. ey are primarily used as soil conditioners and as sources of calcium and magnesium. In heavier soils, they can help improve structure and aeration.
Oliver Routledge at Atlantic Mariculture says the company’s Liquid Kelp products are used to support grassland recovery and to grow crops in depleted soils. He says the proteins, carbohydrates and vitamins in the products are associated with improved crop productivity and resilience to disease and environmental stress. Winged kelp, used in the liquid formulations, contains naturally occurring cytokinins linked to root development and plant growth responses. Sugar kelp meal is used as a soil amendment and contains alginic acid, which can contribute to soil structure.
Allie Wharf at Norfolk Seaweed, which supplies seaweed-based biostimulants to farms in Norfolk, says these products are commonly used during dry periods and at key growth stages. Fruiting crops such as tomatoes, peppers, chillies, cucumbers, courgettes, pumpkins and aubergines are frequent targets for application. She adds that biostimulants are used to support ower retention, early plant development and stress tolerance, and are also applied to leafy crops and root vegetables.
Steve at Caledonian Horticulture, which produces the compost product Kelpie, describes its soil improver as a blend of green and woody material combined with
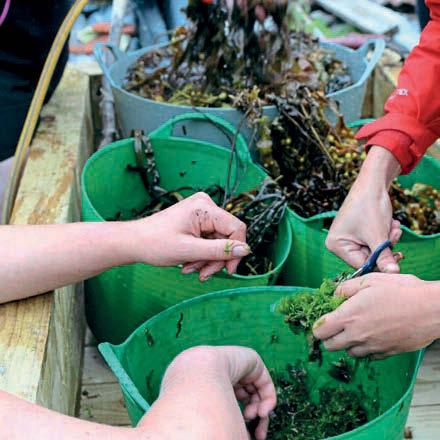
Sorting and trimming seaweed before it reaches the garden – a quick check removes debris and keeps only the best material for compost or mulch
a range of locally collected seaweeds from the North Sea. e seaweed is incorporated into a composting process and contributes to organic matter and soil structure. e inspiration, he says, came from traditional crofting practice, where seaweed was used as a locally available resource to improve thin soils.
On the Isle of Iona, seaweed has been used for centuries as a soil improver and source of organic matter. At the St Columba Hotel, head gardener Floortje Brandsteder and her team continue this approach in their vegetable beds.
“We harvest seaweed as it is broken o from the shoreline naturally in winter storms,” she says. “Since these storms are happening less predictably at the moment, we collect seaweed right through the autumn, from August, so the soil has time to bene t from the added organic matter and trace elements over winter for spring crops to ourish.”
For gardeners, seaweed is not a magic cure or a shortcut to instant results. Its value lies in steady, long-term soil improvement and supporting plant resilience. Used thoughtfully – whether gathered locally and applied as mulch, or incorporated through commercial biostimulant products – it can become part of a broader soil-building strategy.
It will not replace good composting, crop rotation or balanced feeding, but it can complement them. In a time when gardeners are increasingly focused on soil health, reducing synthetic inputs and building resilience into their plots, seaweed o ers a practical link between traditional coastal practice and modern kitchen gardening. For those willing to experiment, it is another useful tool in the kit. ■


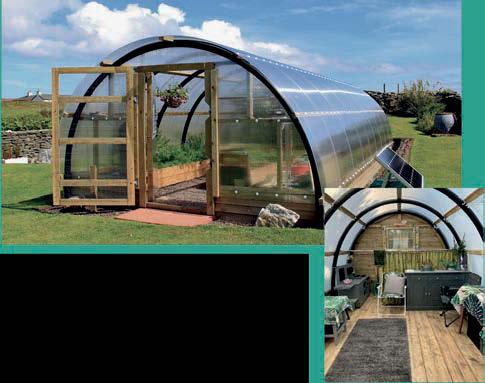

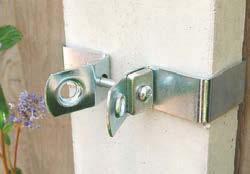


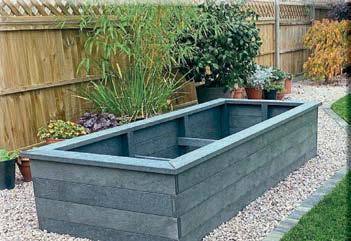


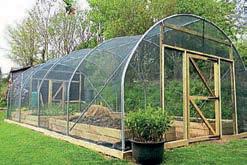

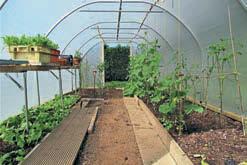


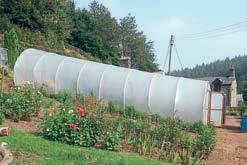

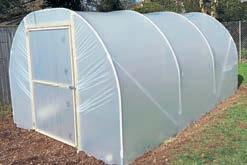
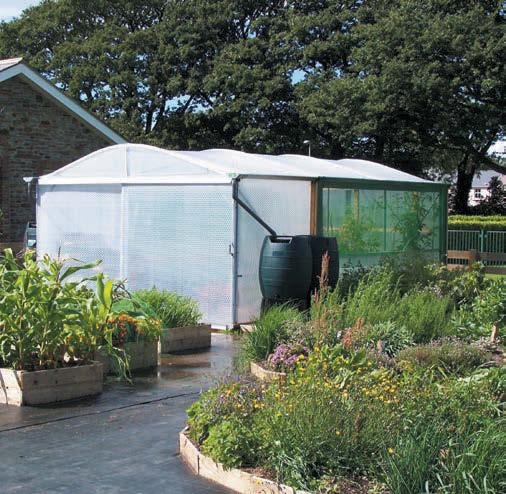


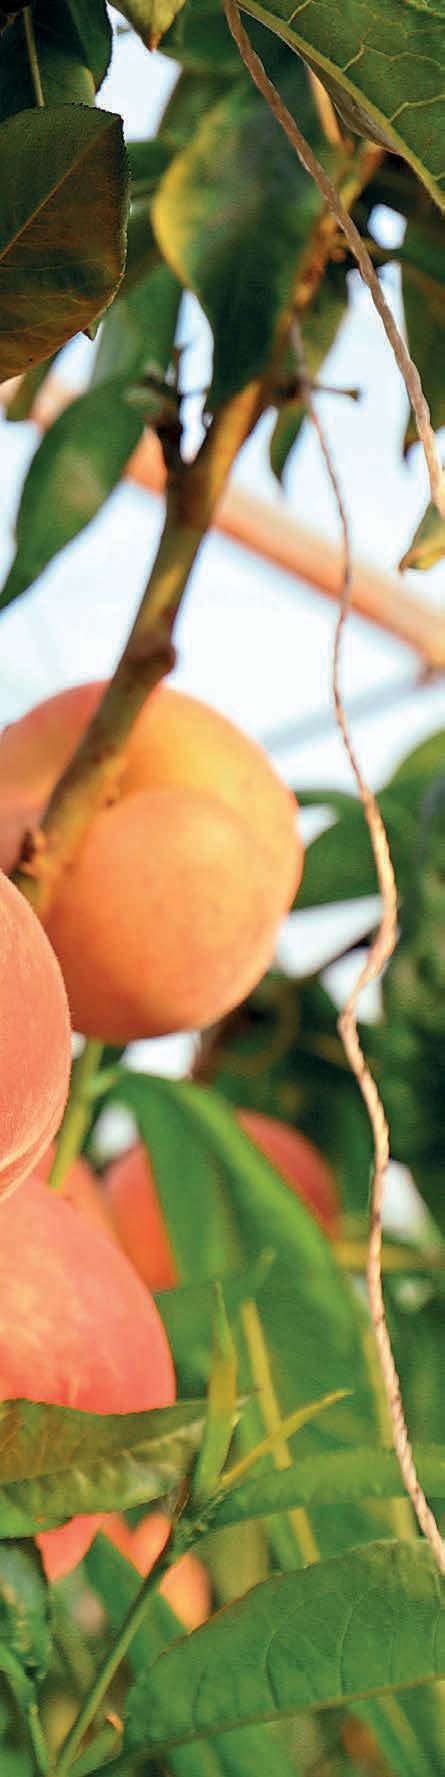
David Patch weighs up the real costs and rewards of growing peaches, nectarines and cherries under glass – from avoiding peach leaf curl to managing red spider mite – and asks whether they deserve permanent greenhouse space
In economics, ‘opportunity cost’ refers to the potential bene t or gain that is given up when choosing one option over others. Introduced and formalised by Austrian economist Friedrich von Wieser in the late 19th century, the concept frames every decision as a tradeo , made necessary when resources are limited. I think it’s a concept familiar to every gardener, even if they don’t give it such a fancy name – there’s only so much space in a garden or allotment, and a very long list of plants it would be lovely to grow.
Perhaps this applies most particularly to growing under glass. Whatever size greenhouse you have, there will be a point in the year (probably around late April) when you wish it were twice the size, as seedlings which are still too tender to plant out are crammed into every available nook and cranny. is month, we’re going to look at the pros and cons of devoting some permanent space under cover to growing stone fruit, and why it may be worth the cost of foregoing a few tomato plants or the odd tray of annual bedding.
Peach leaf curl is a common and dramaticlooking fungal disease that primarily a ects peach, nectarine, apricot and almond trees. If you’ve ever seen a tree whose new spring leaves look thick, puckered with pinky-red blisters and bizarrely contorted, you’ve likely witnessed this disease. It’s one of
the most widespread diseases of these fruit trees in home gardens, and the bane of anyone trying to grow peaches and nectarines outside.


e disease is caused by the fungus Taphrina deformans. In the spring, as temperatures rise and the tree’s buds begin to swell and open, spring rains wash these dormant spores onto the newly emerging, tender leaves. If the weather stays cool (below 60-65°F) and wet for an extended period, the spores germinate and infect the leaves. ➤

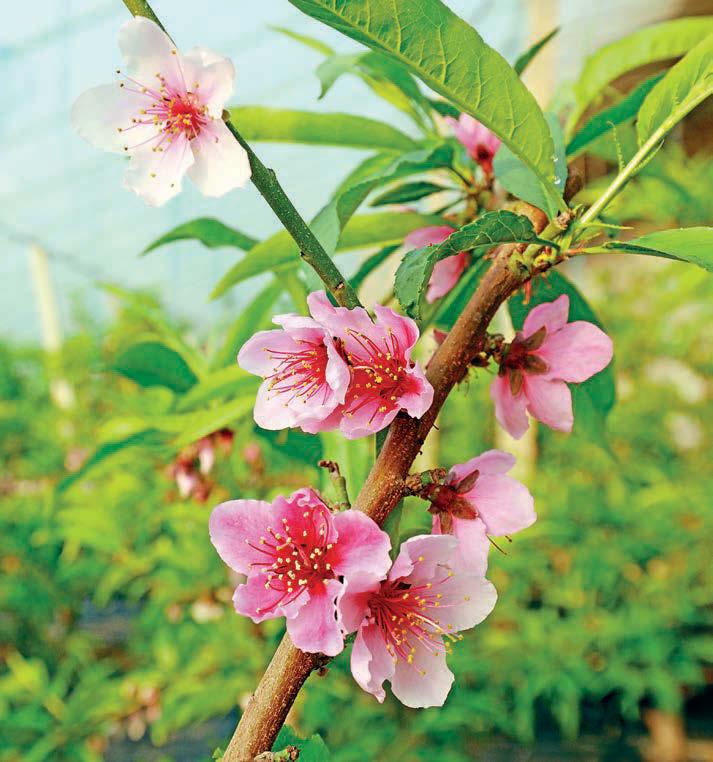


Once inside the leaf tissue, the fungus is safe from any sprays. e infection causes the leaf cells to multiply rapidly and randomly, resulting in the characteristic thickened, curled growth. Later in the season, the fungus produces a new crop of spores on the surface of these diseased leaves, which are then spread by wind and rain back onto the tree’s bark, where they will wait until next spring to repeat the cycle.
Crucially, growing under glass means that the spores can’t be spread by rain, so trees grown in a greenhouse are pretty much guaranteed to be peach leaf curl-free. It’s a de nite plus for devoting some precious real estate to growing these fantastic fruit.
Another major advantage is the extra warmth provided by growing under glass, in particular in spring. Almost all top fruit trees originate from countries with colder winters than we have in the UK but, crucially, where they have warmer springs – the blossom of almost all peach, nectarine and apricot trees is susceptible to frost damage. ey blossom early enough for anywhere in the UK to have a ground frost. A greenhouse (or polytunnel) can provide those extra couple of degrees of warmth, which can make all the di erence between a bumper fruit set and complete failure. Even a cold, unheated greenhouse will act like a heat sink and keep
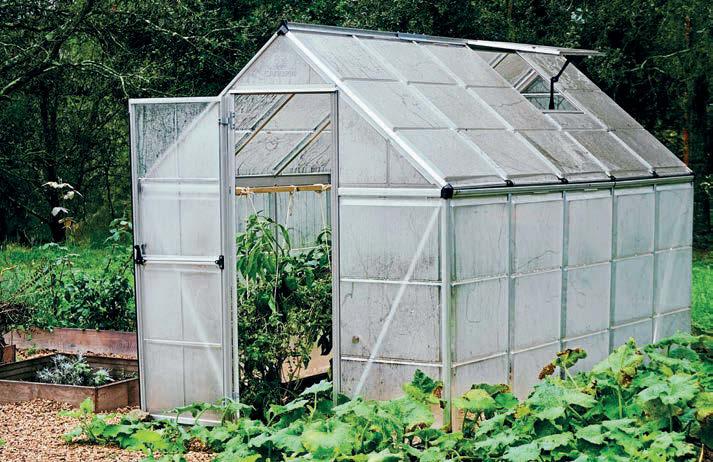

the temperature above freezing on all but the coldest nights – and if a hard frost is forecast, it is much easier to put some eece over an indoor tree than one outside. is also works in late summer by extending the season, which is great for gs in particular –many varieties are notorious for starting to ripen in the UK just as the weather turns in September.
For sweet cherries, birds are probably the single biggest pest – they can strip a tree of almost-ripe fruit in a very short space of time. So while there are some sweet cherry trees available these days that have a little frost resistance, if you are a cherry devotee, then growing under cover gives your precious fruit the protection it needs. For soft peaches and nectarines, a greenhouse will also protect against hail and rain damage, resulting in perfect, Instagram-ready fruit.
It’s worth noting that while growing under glass o ers several advantages to the home fruit grower, it doesn’t come without drawbacks. e most serious is the red spider mite, a common pest of plants grown in warm, hot conditions. Tetranychus urticae, or red spider mite, are less than 1mm in size, so they are very hard to see, plus they tend to hide and feed on the underside of leaves – it is very common only to realise that they are


present after the damage has been done, or when there is a serious infestation.
ey actually start o either light green or yellow and only turn red in the autumn as the temperatures drop. Under magni cation, two darker markings can be seen towards the head, giving them their other name – twospotted spider mite.
If the temperature rises above 25°C, as it can in a greenhouse, they can potentially double their population within only a few days. Red spider mites feed o the sap of plants, and a severe attack can weaken a plant to the point where it can die.
e key to preventing spider mites from taking hold is to ensure there is adequate air ow and increased humidity in the greenhouse. Ventilation is key, so as soon as temperatures start to rise in spring, open all available louvres and windows during the day, then close them again before sunset to retain warmth overnight.
In a greenhouse, it is also essential to keep humidity as high as possible – damp down the oor as often as you can on hot days, which will not only increase humidity levels but also reduce temperatures. You can also keep plant trays, saucers or buckets of water nearby and top them up regularly.
Watering and feeding are the other main drawbacks to growing fruit under cover. You can’t rely on nature to do this for you
Step 1: Prepare the pot
Choose a large plastic tree pot with plenty of drainage holes in the base and sides. Add a layer of compost to the bottom – with good drainage like this, there’s no need to add crocks.
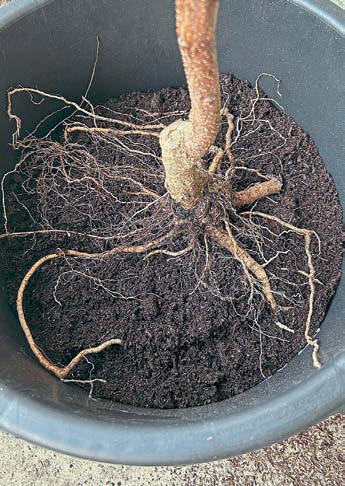
(although if last summer is anything to go by, this applies to outdoor crops too). If you are lucky enough to plant into the ground, this isn’t too onerous – a thorough soaking once per week, along with a high-potash feed once in early spring, should su ce. If growing your fruit trees in pots, try to keep moisture levels as even as possible to avoid fruit splitting. Use as large a pot as possible, as bigger volumes of compost dry out less
Step 2: Position the tree
Place the bare-root tree in the pot and spread the roots out evenly. Set it so the soil level sits just above the uppermost roots, at the same depth it was growing previously.
Step 3: Fill and firm in
Backfill with compost, working it in around the roots. Firm the compost well – using the handle of a spade is an easy way to tamp it down –then check the tree is secure and upright.
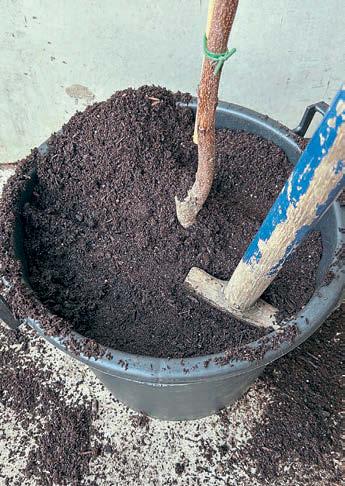
quickly and are easier to manage. Use a dark plastic pot rather than terracotta or, if you do use a terracotta pot, line the inside with a sleeve of black plastic to reduce moisture loss. ere are also plenty of excellent composts which include moisture-retaining granules. And if you go on holiday, enlist the help of a friendly neighbour or fellow allotment holder, perhaps with the promise of a bribe from duty free on your return! ■
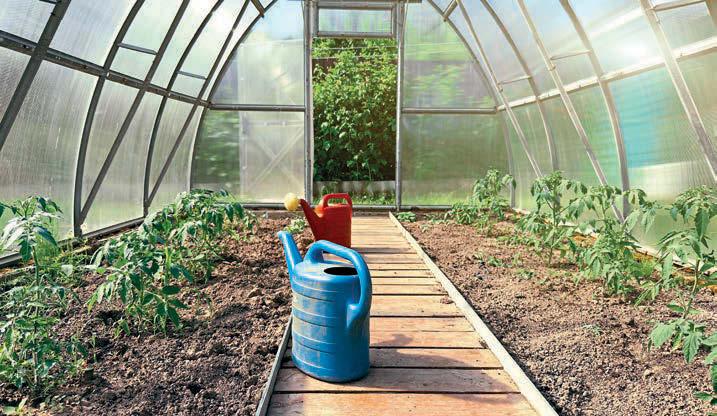
From neighbourhood cats to pigeons and rabbits, unwanted visitors can undo weeks of work. Here’s how to discourage common garden intruders using practical, non-lethal methods that protect both plants and wildlife
Most gardeners reach a point where something unwanted is digging, pecking or attening at exactly the wrong moment. e challenge is to address it without causing harm – and without resorting to methods that are harmful, illegal, or unlikely to solve the underlying issue.
Humane deterrence is about one principle: make your garden less appealing, not lethal. Address the cause rst, then choose the right deterrent for your situation.
But before taking action, look at what’s attracting the animal in the rst place:
■ Freshly raked soil is an invitation to cats
■ Ripening fruit draws birds
■ Seedlings and tender growth attract rabbits and deer
■ Open compost heaps can encourage rodents
Neighbourhood cats are probably the most common complaint from gardeners. ey are not ‘pests’ in the legal sense, so harming or trapping them is not an option.
Practical deterrents include:
■ Laying thorny prunings (rose, berberis or holly) over bare soil until plants ll out
■ Using proprietary plastic spike mats which are designed to be uncomfortable but not harmful
■ Densely planting groundcover to eliminate loose soil
■ Motion-activated water sprayers, which startle rather than injure
■ Ultrasonic deterrent devices that emit high-
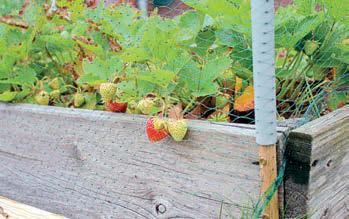

frequency sound when movement is detected Ultrasonic units are widely used in the UK and can help discourage repeat behaviour in de ned areas. Positioning and coverage matter, and they are most e ective when combined with sensible garden management.
Pigeons stripping brassicas or pulling seedlings can be infuriating, but netting remains the most reliable solution.
■ Fine mesh netting secured tightly over hoops prevents access
■ Crop cages o er longer-term protection
■ Re ective tape or old CDs can help in the short term, though birds quickly learn when there is no real threat
Avoid using loose netting that can trap wildlife. A properly xed, taut mesh is essential.
In rural settings, physical exclusion is usually the only dependable answer.
■ Rabbit-proof fencing needs to be buried at least 15cm into the soil
■ Deer fencing must be su ciently high –1.8m is often cited as the minimum
■ Temporary protection, such as tree
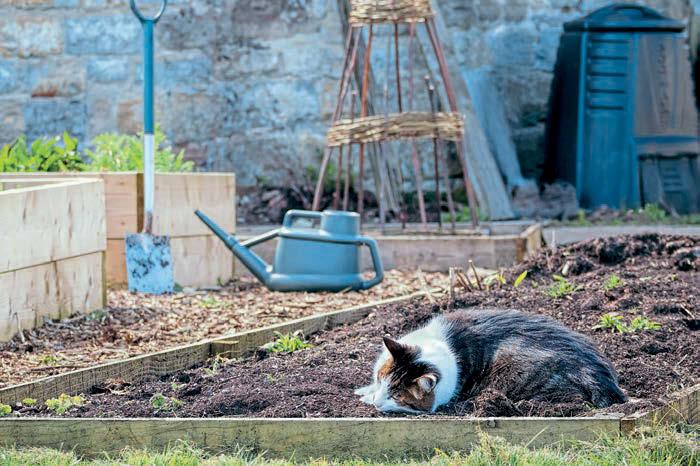


guards, can help young plants establish. Scent repellents exist, but most require regular reapplication and are unreliable in wet weather.
Where food is involved – bird feeders, compost bins, stored chicken feed – tidy practice matters more than deterrents.
■ Clear fallen seed
■ Use rodent-proof compost bins
■ Store feed in metal containers
■ Block obvious access holes in sheds
In cases of signi cant rodent infestation, professional pest control may be necessary as a last resort. Rodenticides are tightly regulated and must be used responsibly, in line with current guidance, to avoid harming non-target wildlife.
Remember, no humane deterrent works instantly or permanently. Animals adapt. e aim is to tip the balance. In most cases, a combination of tactics works best: physical barriers, habitat management and, if appropriate, technology such as motionactivated water or ultrasonic devices. It’s rarely glamorous, but thoughtful prevention usually succeeds where reactive measures fail. ■


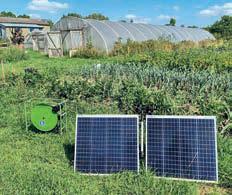


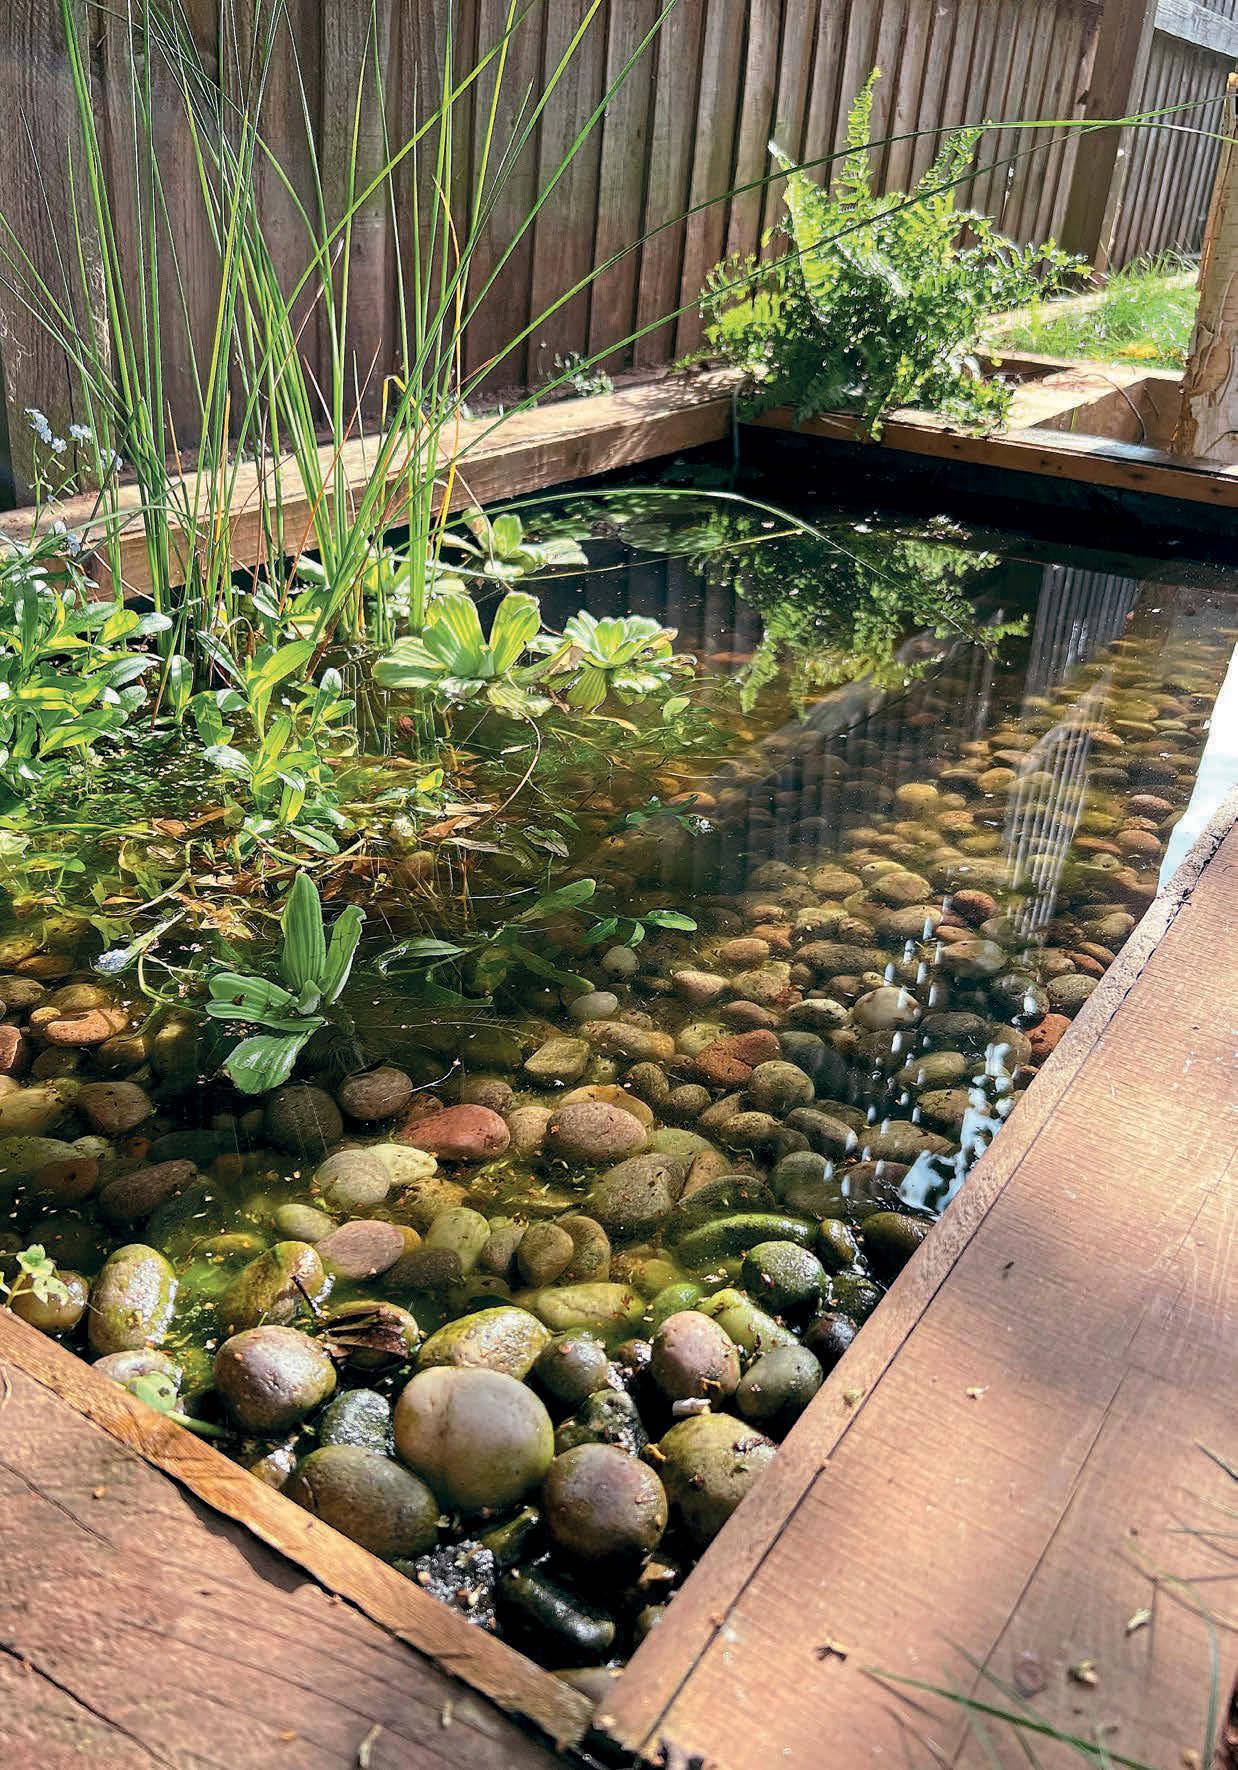

Becky Searle explains how to create a low-maintenance container pond that works beautifully in any size garden
Water is one of the most wonderful additions to any garden. It instantly changes the feel of a space. I, for one, am magnetically drawn towards it – the lure of gazing into the depths, just for a moment, is too strong to resist. For organic gardeners, water is more than just another feature. A pond helps attract biodiversity into our gardens and growing spaces, particularly the type of biodiversity we actually want. Frogs help patrol slug populations, hover ies lay eggs in the water and their larvae eat aphids, and birds come for refreshment. Even a small pond can help a garden become more self-sustaining.
I confess I’m rather partial to making container ponds. I now have three of them and am eyeing up space for another. ey’re so easy to make that anyone could do it, and I rmly believe everyone should.
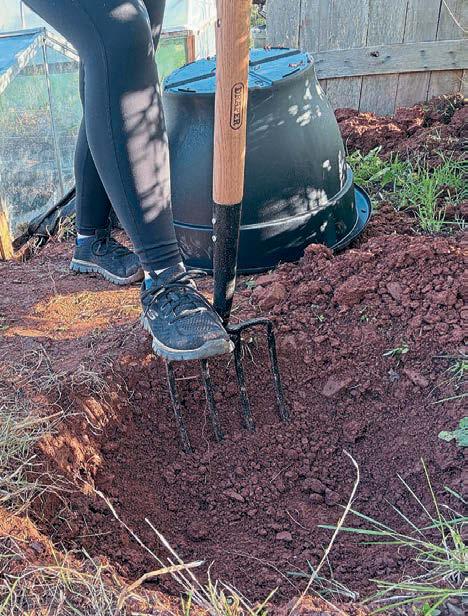
Container ponds are often dismissed as novelty features, but water is such an important resource for our garden wildlife; size really doesn’t matter. While container ponds do cater more to small visitors such as insects and birds, they can also be designed so that larger creatures bene t too.
e rst decision to make is where your pond will go. Water is heavy, so the container needs to sit on level ground that can support the weight once it is full. Take the time to check this properly, because even a slight tilt will be obvious once the waterline is in place. A spot with partial shade is ideal. Full sun can lead to overheating and algae problems, and deep shade can limit plant growth. Avoid placing a pond directly under trees, if possible, as falling leaves can quickly add excess nutrients to the water. If your container pond is going onto soil rather than paving, you’ll need to rm the ground well, so it doesn’t shift over time. ➤


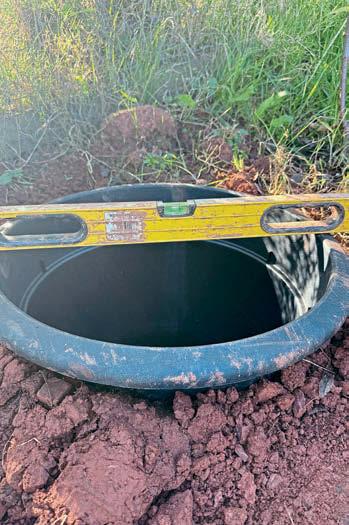
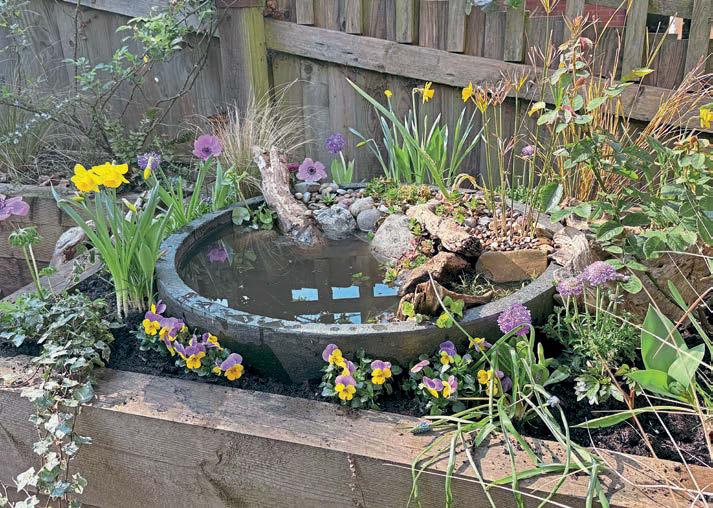
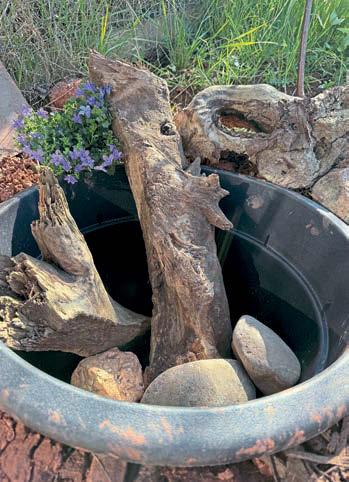

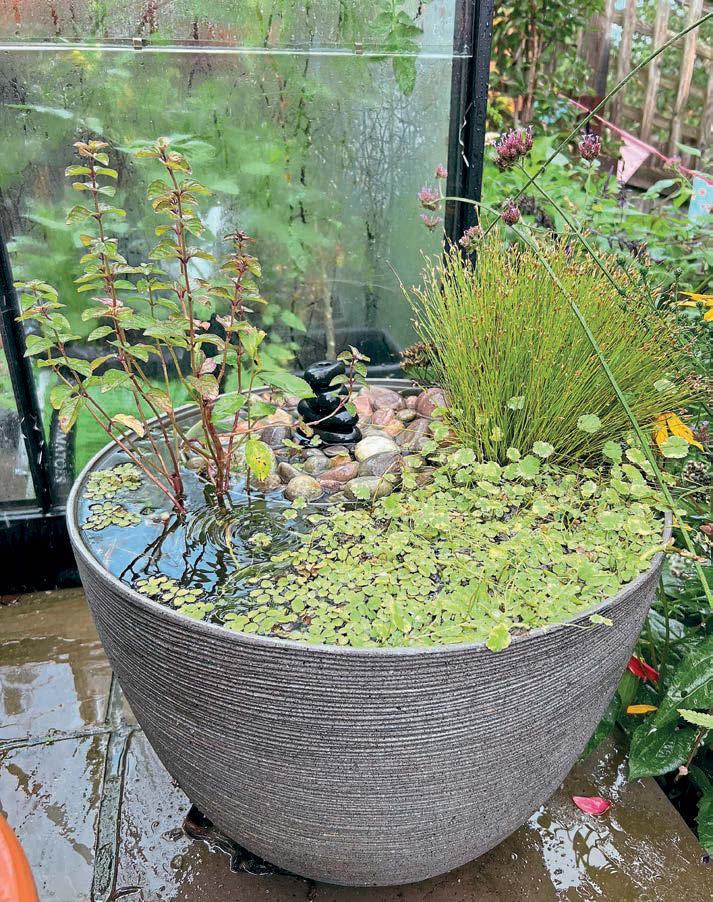
Next, you’ll need to choose a suitable container. It must be watertight, sturdy and non-toxic. ere are plenty of purposebuilt containers for making ponds, or you could try something made of breglass or glazed ceramic, though the latter may not be frost-proof. Try to get something that is around 50cm deep, as depth matters more than width when it comes to a container pond. Deeper ponds support a greater diversity of aquatic life and allow a wider variety of plants. ey also have more stable temperatures. If you can nd a container with built-in shelves, this is ideal for planting, but if not, you can create di erent levels using rocks and wood.
Just like in your garden, plants are a key element in container ponds. ey help maintain water quality and turn it into a thriving mini habitat. Most pond plants come in compost- lled baskets, which is ne, but for a container pond, we need to limit the amount of nutrients leaching into the water. Excess nutrients cause algal blooms and other serious water quality issues. So,
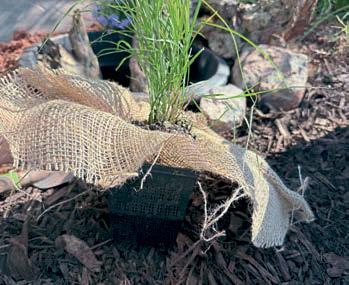
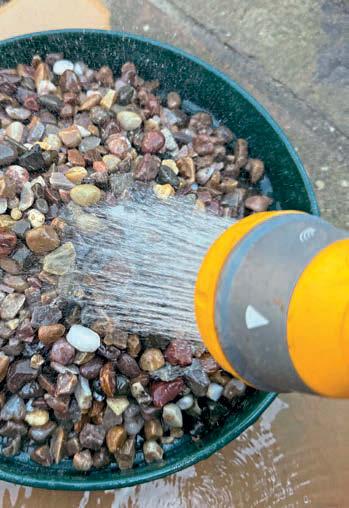
take some hessian squares (usually available from the same place you buy your pond plants) and, before placing your plants in the pond, remove them from the basket. Line the basket with hessian and then replace the plant. Wrap the hessian over the top of the compost too, and weigh it down with some small stones or gravel. is will help to keep the compost contained and limit nutrients entering the water. Take this opportunity to pot up your pond plants, too, if needed.
Di erent plants need di erent water depths, and this is where container ponds often fail. e depth is measured from the base of the plant, not the bottom of the container. Try to follow the planting advice that comes with the plants, and make sure nothing is planted too deep or too shallow, as this will a ect their growth and lifespan. When choosing plants, try to match them to the conditions you have, and pick a mix of aerating, owering, tall-stemmed and creeping plants to give your pond some diversity.
If your container does not have built-in levels you can create them using large, solid stones. Avoid anything porous, such as breeze blocks, and do not use limestone or concrete, as these can alter the pH of the water. Build the layers slowly, wedging stones together so they are stable and cannot collapse. You’ll need to take your time with this. Aim to make sure that water can ow freely around and through these layers. You don’t want to create small stagnant pockets where oxygen cannot circulate, so avoid using smaller stones or gravel at this stage. Wood can also be used to add structure and habitat, as long as it is clean, untreated and not already rotting. Bogwood is perfect as it’s already naturally preserved. Branches
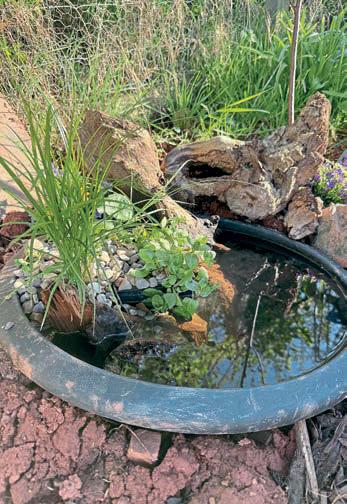
that extend slightly above the water can provide perches for birds and ramps for insects. Avoid driftwood as it contains salt, and always secure the wood rmly under a rock or shelf so it does not oat or shift once you add the water.
Once you have positioned the rocks, wood and plants, make sure everything is rmed up. Wedge in smaller stones to make everything t properly, and use washed pea shingle on top if you want a natural-looking beach area where the plants are sitting.
Tap water is usually the best choice for a new container pond. It is predictable, well oxygenated and easier to balance. Rainwater can be used later once the system has settled, but it typically contains more nutrients. Fill the pond slowly, adjusting the plants and stones as needed. Expect some things to move around – this is normal, just keep tweaking it.
For the rst day or so, the water will probably look cloudy. is is ok – the sediments will settle quickly. Adding some bene cial bacteria (pond probiotics) to
your pond will help to clear the water. e large rocks and wood you added earlier will help provide surfaces for these organisms to breed, and they will continue to keep the water clear.
A container pond doesn’t need a pump or a lter, and it certainly doesn’t need any sh. What it does need, however, is regular checks, especially in the early days. Remove any fallen leaves, prune back plants that get out of hand and top up the water during dry spells.
Over time, you will start to notice more wildlife visiting your garden. It’ll start with birds and insects, then over time you may also see some amphibians, like frogs, toads and newts. If your container pond is sunk into the ground or has sloping access, things like hedgehogs will also be able to visit.
It’s so easy and fun to make a container pond. I urge you to give it a go. I would like to thank Dan and Emily from DU Waterscapes, who built my rst container pond and showed me the ropes, teaching me everything I have just imparted to you! ■
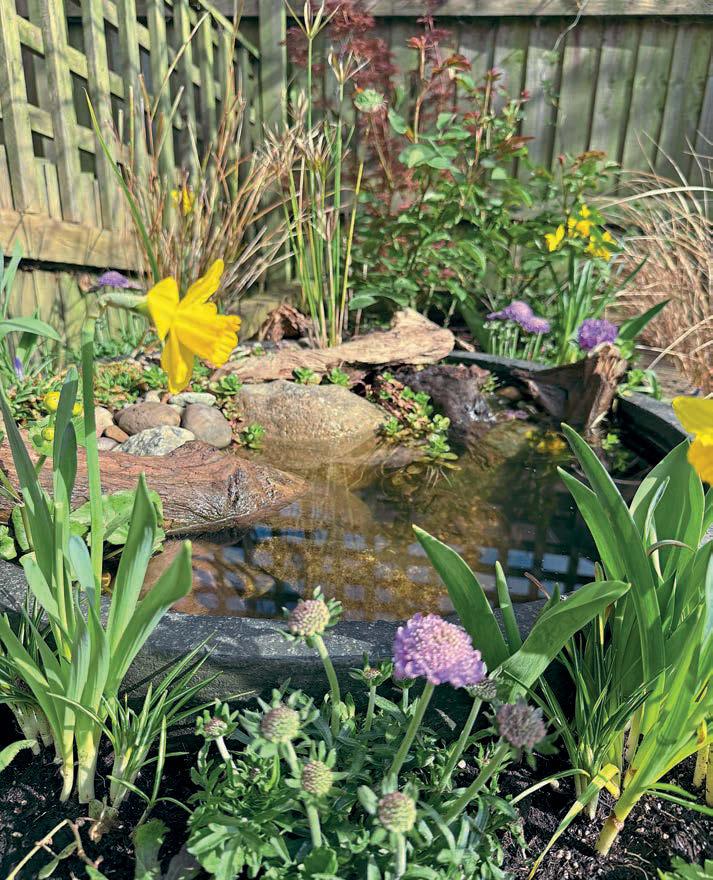
TO ENTER OUR GIVEAWAYS SEE PAGE 67 OR VISIT THE KG WEBSITE
This spring, Marshalls Garden is helping growers of all levels kickstart their kitchen gardens with an inspiring prize bundle packed with delicious potential.
Two lucky winners will each receive six Jumbo plug plants – three of cucumber Mini Muncher, perfect for snacking, and three of chilli Basket of Fire, a compact variety with colourful, fiery fruits. They’ll also get three 9cm cordon tomato Sungold plants, renowned for exceptionally sweet, golden cherry tomatoes and reliable harvests.

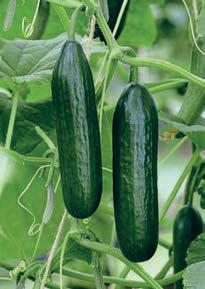
Root crop favourites are included too, with parsnip Gladiator F1 seeds for smooth, canker-resistant roots and beetroot Boltardy for excellent flavour and bolt-resistance. The bundle also includes a 50-litre twin-pack of Marshalls Vegetable Compost, specially formulated to support strong, healthy growth.

And because great gardens start with great tools, the prize is completed with a Kent & Stowe Border Spade and Fork Duo – reliable tools that offer superior craftsmanship.
With quality plants, trusted varieties and expert support, Marshalls Garden makes it
Backdoorshoes has had a busy year, with the launch of some of its best-loved designs yet. From the bestselling Lavender to the bold Leopard and the updated men’s Chilli, there’s a style for every garden, doorstep and quick trip outdoors.
Designed for comfort and convenience, Backdoorshoes are lightweight, waterproof and slip on in seconds – no laces, no fuss! Made from a durable, vegan-friendly EVA formula, they’re built to last, without cracking or perishing. Plus, with removable, washable insoles, they stay fresh and ready for whatever the day brings.
Available in women’s sizes 3 to 8 and men’s sizes 8 to 14, these cult favourites are perfect for everything from gardening to popping out to the bins. Find out more at backdoorshoes.co.uk


10 PAIRS TO GIVE AWAY
We have 10 pairs of Backdoorshoes, each worth £34.95, to give away


SPECIAL OFFER – SAVE 20%


Use code KG20% at the checkout to receive 20% off your next purchase from Backdoorshoes. Offer valid until May 31, 2026.

2
BUNDLES TO GIVE AWAY

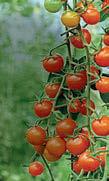

easier than ever to enjoy homegrown harvests. For more advice and inspiration, visit marshallsgarden.com
We have two prize bundles, each worth £152.51, to give away

Eco-paint specialist Thorndown makes high-performing water-based paints, with architectural-grade VOC-free pigments that go on looking beautiful for years. Designed to be the best for outdoor use, they are also great indoors.

VOUCHERS TO GIVE AWAY
Thorndown’s water-repellent Wood Paint is available in 73 colours – including new Egret White (pictured) – as well as UV Clear for a natural timber look. Its Wall Paint, in a choice of 57 colours, is a durable high-performance flat matt paint made with the same VOC-free exterior-grade pigments and blend of resins.
For greenhouse or conservatory shading, Thorndown’s Peelable Glass Paint, made with a 100% recycled plastic resin, comes in a choice of 35 opaque or translucent colours and whites. Roller it on to the panes – and at the end of the season, just peel it off!
The range also includes a Wood Preserver and a Stain Blocking Primer. Visit thorndown.co.uk to find out more.
We have six £55 vouchers for the Thorndown online shop to give away

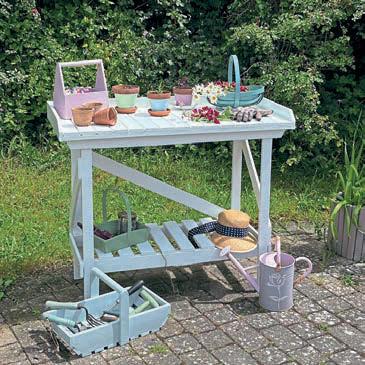

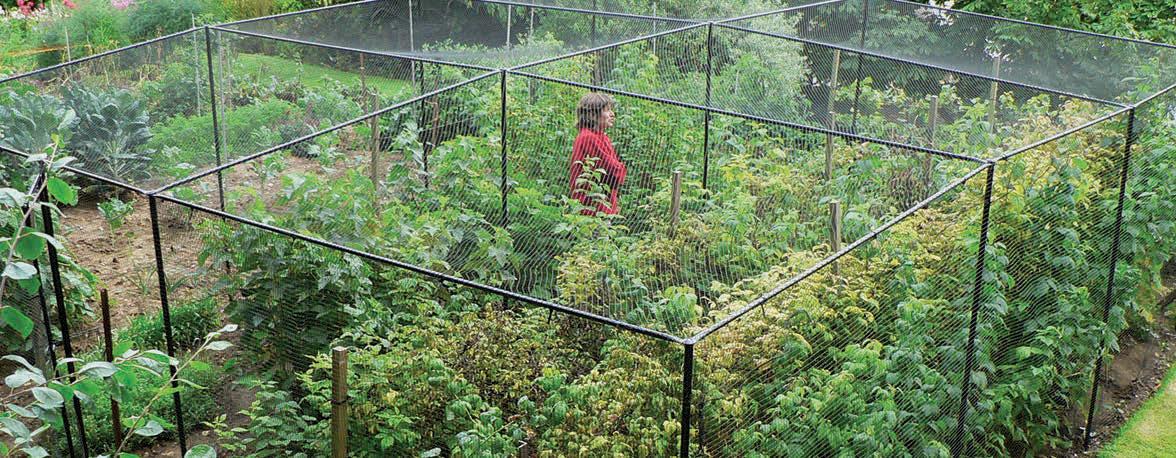
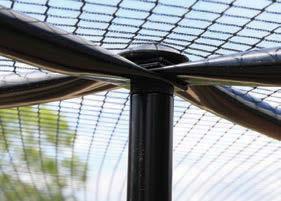

Simply fill in the details below and return to us at: Kitchen Garden April 26 Giveaways, Kelsey Media Ltd, PO Box 99, Horncastle, Lincolnshire LN9 6LZ. You can also enter online for free at: kitchengarden.co.uk
Closing date for entries: Thursday April 30, 2026
DT BROWN & CO tel 0333 003 0869 www.dtbrownseeds. co.uk
DOBIES SEEDS tel 0844 736 4209 www.dobies.co.uk
MR FOTHERGILL’S SEEDS tel 0333 777 3936 www.mr-fothergills. co.uk
JUNGLE SEEDS tel 01491 614765 www.jungleseeds.co.uk
KINGS SEEDS tel 01376 570000 www.kingsseeds.com
MARSHALLS SEEDS tel 01480 774555 www.marshallsgarden. com
MEDWYN’S SEEDS tel 01248 714851 www.medwynsof anglesey.co.uk
MOREVEG tel 01823 681302 www.moreveg.co.uk
THE ORGANIC GARDENING CATALOGUE tel 0844 693 4977 www.organiccatalogue. com
PLANTS OF DISTINCTION tel 01449 721720 www.plantsofdistinction. co.uk
THE REAL SEED CATALOGUE tel 01239 821107 www.realseeds.co.uk
W ROBINSON & SON LTD tel 01524 791210 www.mammothonion. co.uk
SARAH RAVEN tel 0345 092 0283 www.sarahraven.com
SEEDS OF ITALY tel 0208 427 5020 www.seedsofitaly.com
SHELLEY SEEDS tel 01244 317165 www.shelleyseeds.co.uk
SIMPSON’S SEEDS tel 01985 845004 simpsonsseeds.co.uk
SUFFOLK HERBS tel 01376 570000 www.kingsseeds.com
SUTTONS tel 0844 736 4208 www.suttons.co.uk
THOMPSON & MORGAN tel 0844 573 1818 www. thompson-morgan.com
UNWINS SEEDS tel 01480 443789 www.unwins.co.uk
PENNARD PLANTS tel: 01749 860039 www.pennardplants.com
To enter: Once you have supplied your details, cut out and send this coupon to the address above and you will automatically be entered into the following competitions: Marshalls bundle ✔ Backdoorshoes ✔ Thorndown ✔
Give your seedlings the very best start with Haxnicks Rootrainers – the original propagation system trusted by professional growers and home gardeners alike. Rootrainers feature unique deep cells that encourage strong, straight root growth, unlike standard seed trays. As roots reach the base, they are naturally air-pruned, creating a dense, healthy root system that establishes faster and reduces transplant shock. The hinged design lets you check on progress without disturbing the roots. Available in a range of sizes, they can be reused season after season.
Prices: from £7.99 plus £4.99 p&p haxnicks.co.uk
Tel: 0117 934 1795
SAVING:


10% off all Haxnicks products until December 31, 2026


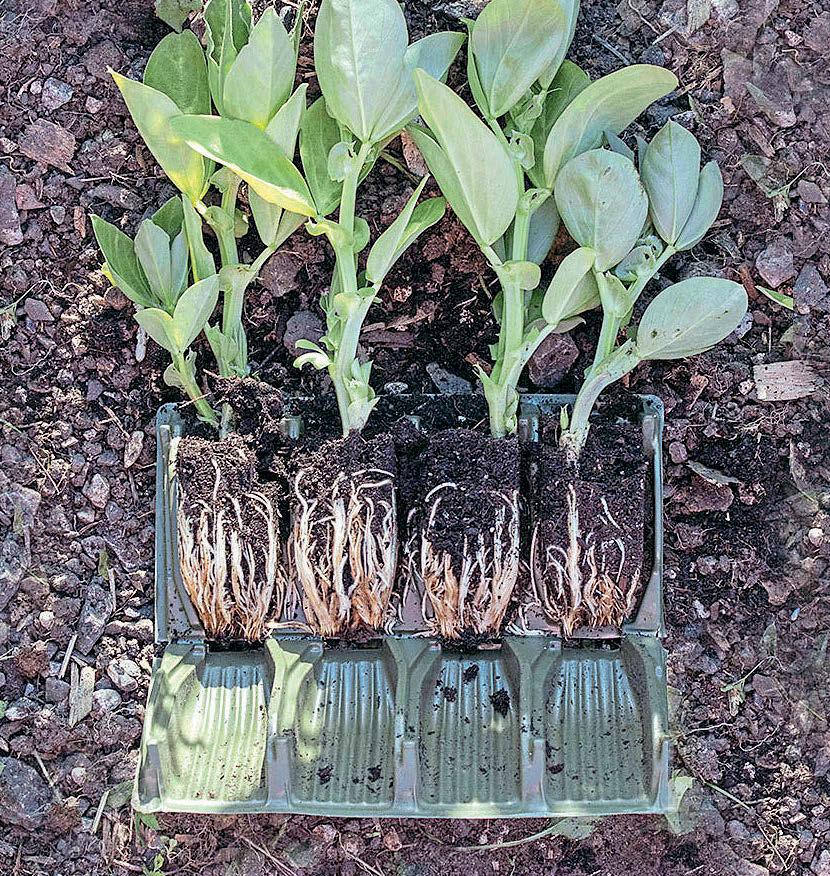


Are you a subscriber to Kitchen Garden magazine? Then visit mudketeers.co.uk for details of how you can take advantage of the exclusive subscriber-only deals on these pages!
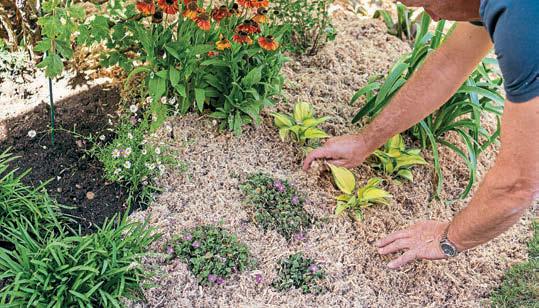
New from Thompson & Morgan, INCREDiMulch Plus is a premium wood-fibre mulch with an advanced slow-release feed, claimed to be the only mulch to combine effective weed suppression and moisture retention with season-long feeding. Enriched with NPK fertiliser and 10 essential micronutrients, it releases nutrients in line with temperature over six months, increasing feed as the weather warms to

maximise growth, flowering and crop production. Providing up to 40 times more nutrients than ordinary mulches, it feeds plants every time it rains or is watered. It also discourages slugs, snails and adult vine weevil. Made from responsibly sourced wood fibre, it contains a natural binding agent that helps it stay in place.
Prices: £12.99 for 10 litres, £19.99 for 50 litres, plus £6.99 p&p thompson-morgan.com Tel: 0333 400 0033
Extend and enhance your growing space with GardenSkill’s new Metal Raised Bed and Vegetable Planter for Garden and Patio. Made from corrosion-resistant galvanised steel with a cream finish, it stands 43cm (17in) high, offering generous root depth and reducing bending, kneeling and weeding. The base is open to ensure good drainage. There are two size options –120cm (47in) by 60cm (23½in) and 180cm (71in) by 90cm (35½in). Assembly is straightforward using the included fixings.
SUBSCRIBER
SAVING:


Tel: 01902 725055 by 90cm (35½in). Assembly is straightforward
10% off until April 30, 2026


Prices: Small £36.98, Large £47.98, plus £6.95 p&p gardenskill.com


New from Spear & Jackson, Razorsharp Cut and Hold Secateurs provide a solution for gardeners with reduced mobility – or who are pruning in an awkward spot. The ‘cut and hold’ feature grips stems after cutting, removing the need to ferret out the prunings. The forged aluminium handle is durable yet lightweight, and the high-carbon steel blades deliver clean, precise cutting. A two-step catch offers adjustable cutting width, and the built-in rubber shock absorber reduces strain on your hand.
Price: £29.99 spear-and-jackson.com Tel: 01142 814242


Perfect as gifts, Seedball’s new Wildflower Grow Kits come in tin planters containing everything you need – just add water! Available in two varieties – Chamomile and Forgetme-not – each kit includes a coir disc which expands when hydrated, creating nutrient-rich compost. Also included are three seed balls to place on top of the hydrated coir. The
tins feature beautifully eye-catching designs and are made from Welshmined tinplate, with a special varnish to help protect them. Once the flowers have bloomed, the tins can be reused for indoor plants or storage.
Prices: £13 each or £20 for both tins, plus £4 p&p seedball.co.uk
Tel: 0208 802 5565


The Beverin 20 from Alpen Swiss Tools is a compact, high-performance electric chainsaw delivering precision cutting in a lightweight, easy-to-handle package. Its ergonomic design makes it comfortable for extended use, while the two 20V batteries let you work for longer. It features two-handed operation and can tackle branches up to 20cm (8in) in diameter. A dual-way 2A charger is included, along with a complete toolkit and accessories for maintenance.
Price: £499 alpenswisstools.com/burton-mccall.co.uk (UK distributor) Tel: 0116 234 4600
The new Felco 483 Garden Leaf Bag is a rugged, high-capacity solution for collecting garden waste. Made from premium Oxford fabric that resists tearing and abrasion, it has a hard plastic bottom that can be dragged across rough surfaces without damage, while the heavy-duty stitched handles let you move it easily. A Velcro-secured side pocket offers a safe place to keep tools to hand. It has a generous 150-litre capacity, and folds flat for compact storage.
Price: £30 world.felco.com
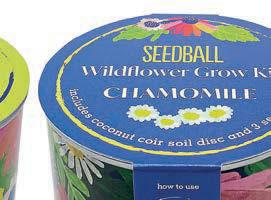

* REMEMBER: To claim your exclusive discounts you MUST first go to mudketeers.co.uk and log in using your subscriber number to discover the voucher codes required. Terms and conditions may apply
Strong, durable and impressively lightweight, Wilkinson Sword’s Ultralight Digging Spade is up to 40% lighter than a traditional spade, so it’s ideal for prolonged use and perfect for gardeners who find heavier tools cumbersome. The stainless steel head features serrated edges to break through heavier soil, while the ergonomically designed D-grip handle ensures comfort and control.
Price: £34.99 wilkinsonsword-tools. co.uk


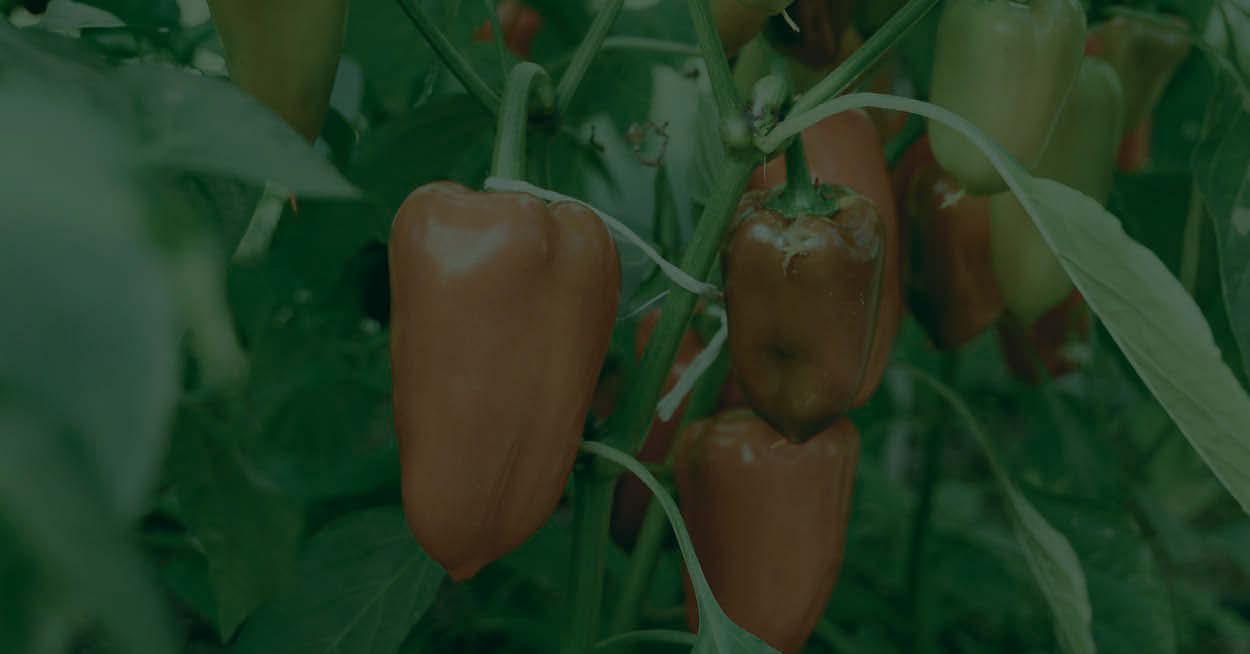

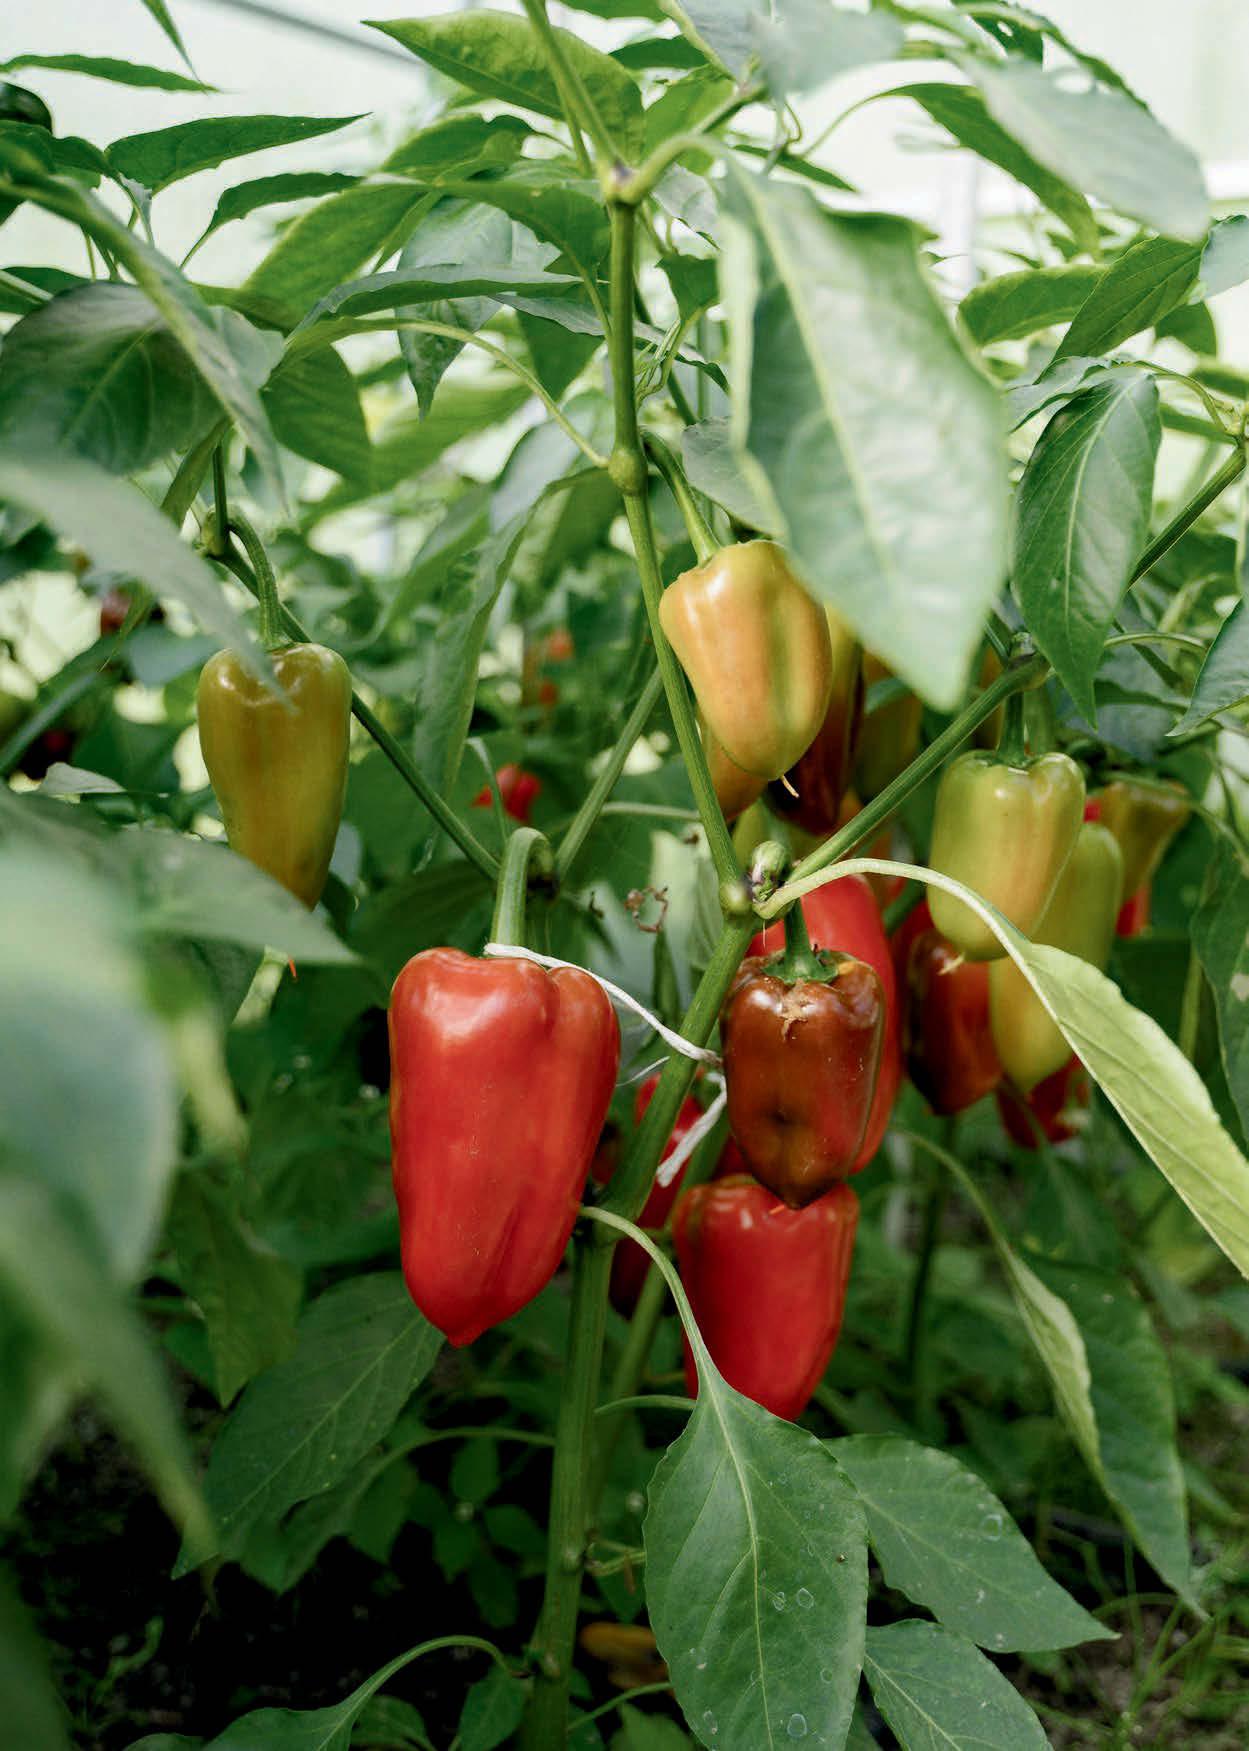


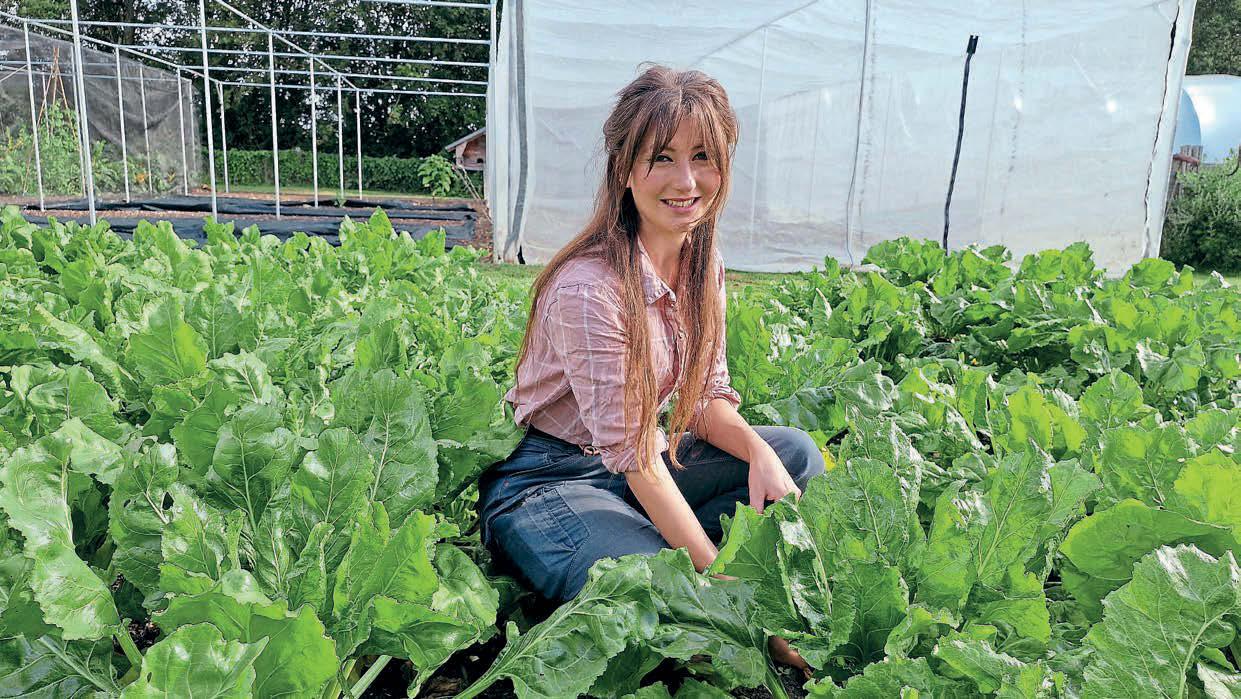

Sophie Atkins from Garden Organic’s Heritage Seed Library gives a glimpse into the seed sowing process at the library – and shares tips for your own propagation preparation
April is the month when seed sowing really picks up at the Heritage Seed Library, with glasshouses brimming with young plants and seedlings. e soil begins to warm up, and lengthening daylight hours breathe life back into growing spaces.
Every year we sow thousands of seeds from hundreds of varieties. Growing your own vegetables from seed o ers innumerable bene ts. It is a vital part of providing quality food for your table and of taking steps to reduce your environmental impact.
Although garden centres sell vegetable plug plants, these are usually pricey, o er a limited range of varieties, and can be grown in peat or treated with chemicals. Long transits and inconsistent care can result in stunted growth, di culty establishing after transplanting, and bolting.
Instead, you can grow your own produce that would otherwise be too expensive or di cult to nd. Packets of seed can be sourced from seed swaps and neighbours, and you can select varieties best suited to your tastes and growing conditions. is could mean resistance to pests or diseases, the ability to cope with di erent soil types or a wider range of colours and avours. is greater diversity of crops helps to nurture biodiversity and enhance food security.
ere’s no need to buy specialist equipment for seed sowing. At the Heritage Seed Library we wash and reuse pots, but for home growing, you can repurpose items you would otherwise throw away, such as toilet rolls, yoghurt pots and fruit punnets. For labels, try wooden ice lolly sticks.
You don’t need a glasshouse or polytunnel either – a windowsill will provide seeds with enough warmth and light to germinate. Just remember to move pots further in if a frost is forecast and return them to their spot in the morning when the temperatures have risen.
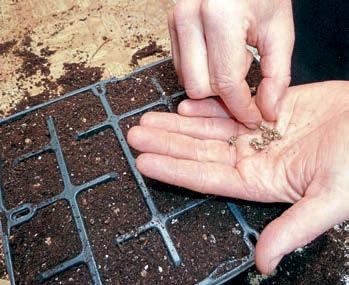
ere are only two essential purchases. One is the best-quality, peat-free compost you can a ord. You need seed compost for sowing and multipurpose compost for pricking out seedlings. A multipurpose compost may not be necessary if you already have home-produced garden compost you can use instead.
e second essential is a watering can with a ne rose that won’t dislodge seeds or newly germinated seedlings while watering. Look for roses labelled ‘ ne’ or ‘seedling’ as they are designed with this in mind.
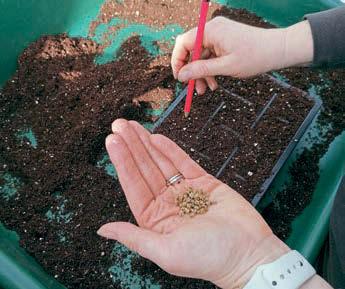
First half of the month
Hardier crops like beetroot, spinach, radishes, lettuces, spring onions, early carrot varieties, parsnips, early peas, and broad beans can be direct-sown now. Fleece or cloches may be needed to protect emerging seedlings from spring frosts. Watch out for mice eating your peas and beans and slugs, which will prey on all young seedlings. If your soil is still too cold or wet, either wait for warmer weather or start with small amounts of seed indoors. Remember to choose hardy varieties. Start tender crops like indoor cucumbers and tomatoes off on your windowsill.
Later in the month
Direct sow all the above, as well as maincrop peas, carrots, and some brassicas such as summer cabbages and autumn cauliflowers. Watch out for slugs! Indoors, tender crops like pumpkins, courgettes, runner beans, French beans and sweetcorn can be started off and planted out when the last frosts have passed. In warmer areas, you may be able to direct sow some of these more tender crops, but be aware that it’s a risk and even with frost protection, you may still lose some. Direct sowing from the end of May onwards would be better.
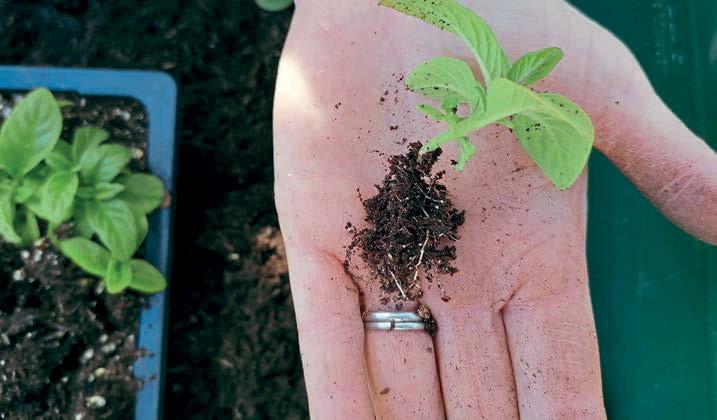
Because the Heritage Seed Library works with precious varieties, all seeds are started in glasshouses where the plants receive the best care. is also helps extend the growing season, which is important for earlier cropping and seed saving. e only exceptions are carrots and parsnips, which must be direct sown as they cannot cope with any root disturbance, and spinach, which is liable to bolt in glasshouse conditions.
For home growing, direct sowing not only reduces inputs but can also yield healthier results, as plants are stronger because their root systems have not been disturbed, and they are naturally hardened to outdoor conditions. Carrots, parsnips and fastgrowing cash crops such as lettuce can all be direct sown this month, and broad beans do well with protection from hungry mice. All bene t from cloches or eeces if frosts are forecast.
One downside of direct sowing is that weed seeds can germinate as quickly as, or even quicker than, your veg, making it hard to tell what needs removing. For this reason, broadcast sowing is best left for owers once vegetables are established.
Runner beans and French beans are more tender and must be left until the weather is warmer and all risk of frosts has passed. If you wish to sow them earlier, start them o inside.
Staggering your seed sowing ensures a steady harvest and helps reduce produce gluts. Sowing all your veg or a whole seed packet at once not only wastes resources but also means an overwhelming amount of pricking out, transplanting and, ultimately, eating!
Seed packets usually note the time until harvest, to help you plan how often to sow successions based on how much you realistically eat each week. Share spare plants with neighbours, local allotment or gardening groups. Heritage varieties are an asset for kitchen gardens, as they often crop more slowly over a longer period, resulting in a steady harvest of better- avoured produce. ■
• To learn about seed sowing and growing, head to gardenorganic.org.uk, where you can also find out how to support the charity by becoming a member.
Seed swaps are events where people come together to donate or swap seeds and sometimes plants. They enable the exchange of seed varieties with cultural significance or that are especially adapted to the locality. Not only do they nurture relationships and build strong, resilient communities around home growing, but these events also conserve seed varieties that would otherwise have been lost and encourage a resilient food system for everyone. Plus, you’ll also save money!
Events can be found through your local gardening or allotment group or by searching online, but you can also check Garden Organic’s seed swap page on its website.
The Heritage Seed Library conserves more than 800 at-risk vegetable varieties and makes a small number available to its members in its annual seed list. As part of its 50th anniversary celebrations, the living library is also sharing seed with communities across the country through its seed relay (gardenorganic.org.uk/hsl-50anniversary). This unique event, which runs until October 2026, will see a golden envelope filled with packets of heritage seeds travel throughout the UK. At each stop-off point, a packet of seed will be taken from the envelope to be sown, grown, saved and shared.
Find out more about seed conservation and saving your own seeds at gardenorganic.org.uk/hsl
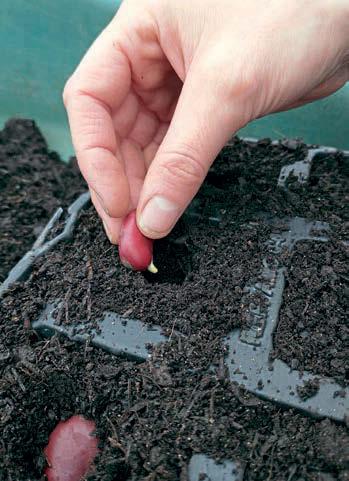
Horticultural fleece is one of the simplest ways to protect early crops, but just how much difference does it really make? KG editor Rachel Graham puts it to the test

To nd out how much di erence horticultural eece makes to early crops, I set up a simple side-by-side comparison in one of the veg beds. Half the bed was left uncovered, while the other was protected beneath a low eece tunnel supported by hoops. Both sections were planted at the same time so that the only real di erence between them would be the eece cover.
Before planting could begin, the bed needed to be cleared and levelled. Removing weeds and lightly cultivating the soil gives young plants the best possible start and ensures seeds have good contact with the soil surface. Once prepared, the bed was divided so one section could be covered while the other remained open to the elements.
A simple series of metal hoops pushed into the soil forms the framework for the eece cloche. ese create a low tunnel that keeps the cover o the plants while trapping a layer of slightly warmer air close to the soil surface.
Getting the hoops evenly spaced and properly upright is a little trickier when working alone, as each one needs to be pushed rmly into the soil while keeping the row straight. Once the rst couple were in place, however, the rest quickly followed and the frame took shape.
e eece was then draped over the hoops and secured along the edges using plastic clips. ese hold the cover rmly in place, but they do take a fair bit of pressure to snap on. While that should prevent the eece from lifting in windy weather, it may make regular access a little awkward, as the clips need to be removed each time the tunnel is opened for watering or weeding.
Low eece tunnels like this are quick to install overall, but it’s worth allowing a few extra minutes if you’re working on your own.
Young broad bean and pea plants, each around 10cm tall, were planted in both sections of the bed. Lettuce seedlings pricked out from modules were planted between them to provide another crop for comparison.
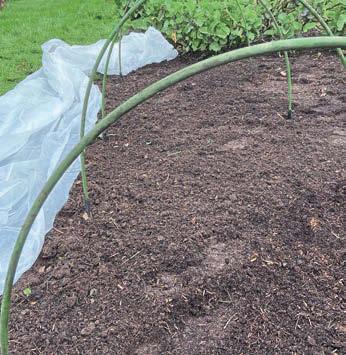
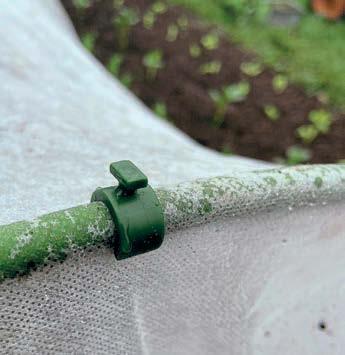
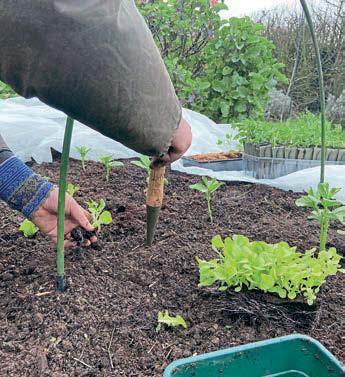
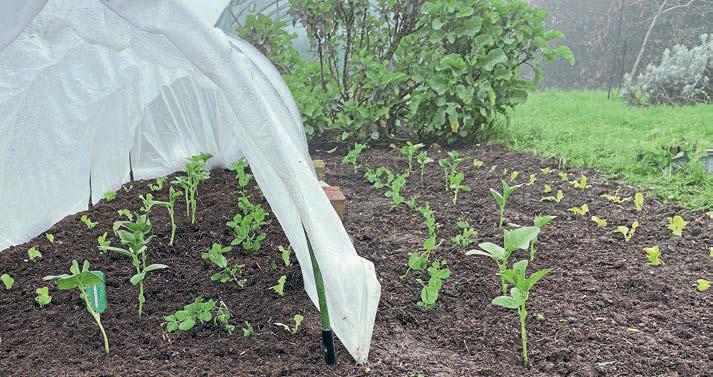
Planting identical crops in both sections ensures that any di erences in growth should come down to the eece cover rather than the plants themselves.
Fresh sowings of peas, beans and lettuce were also added to both sections of the bed to compare germination under eece and in the open. e seeds were sown into the same rows as the transplants so conditions would be directly comparable.
To understand how the eece a ects soil warmth, thermometers were inserted at two depths in both the covered and uncovered sections of the bed at around 5cm deep, which re ects conditions for newly sown seeds, and around 10cm deep, representing the deeper root zone of young plants.
Over the rst couple of weeks the covered soil was consistently a little warmer near the surface, typically by around 1-2°C. e di erence was less noticeable deeper down, where temperatures tended to remain similar in both sections of the bed.
On brighter days the uncovered soil occasionally warmed slightly faster, as the
eece also di uses sunlight and reduces direct solar heating at the soil surface. In practice, eece tends to smooth out temperature swings rather than dramatically increasing soil warmth. By reducing wind exposure and slowing heat loss overnight, the eece creates a steadier microclimate around the soil and young plants.
A fleece cloche isn’t designed to dramatically heat the soil, but it does create a slightly milder and more sheltered environment. Soil near the surface was typically around 1-2°C warmer under fleece, while deeper temperatures remained similar this early in the year. The real advantage is protection: the cover reduces wind exposure, smooths out temperature swings and creates a calmer microclimate for young plants. It also acts as a useful barrier against birds and other early-season pests that can quickly damage tender seedlings.
Although the trial is still ongoing, the eece tunnel immediately creates a noticeably calmer environment for the plants. e cover reduces wind exposure and traps a small pocket of warmer air close to the soil surface. Even a small increase in temperature can in uence early growth at this time of year, so it will be interesting to see whether the plants under eece establish more quickly over the coming weeks. ■

(AGM is the RHS Award of Garden Merit. Under RHS garden trials these varieties performed particularly well)

SLUGPLUG 100% BRITISH


Natural wool UK slug pellets form a protective barrier around flower beds and vegetable patches, helping deter slug and snail activity. The texture irritates pests, limiting movement and reducing leaf damage. 3.5 litres. Was £9.99, now £8.99


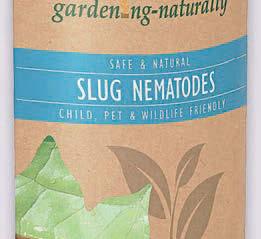
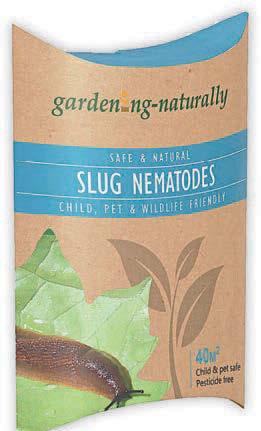

This pack of two slug traps provides a safe method to reduce slug and snail activity outdoors. Use with beer or yeast bait to attract pests naturally from an approximate two-metre radius.
Was £6.49, now £5.84


Slug nematodes are microscopic worms that target slugs in soil. Once applied, they locate the slug, enter the body and feed internally, helping reduce slug population in the garden. Treats 40 square metres.


Was £14.99, now £13.49
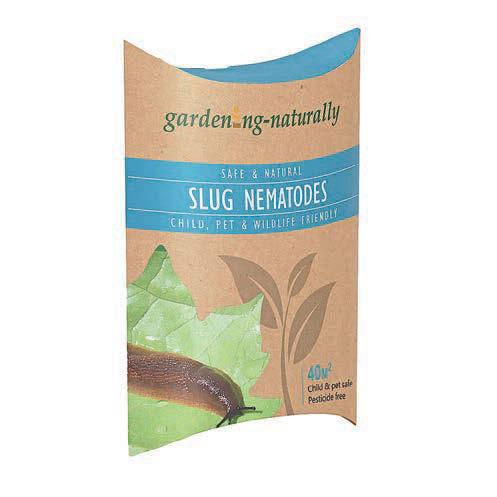


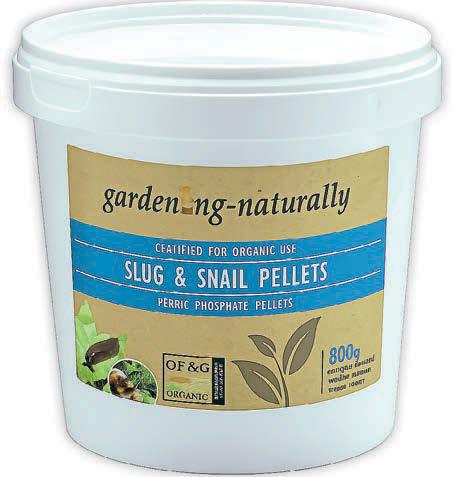
Approved for organic gardening, these pellets biodegrade in soil and break down into iron and phosphate, adding nutrients to plant growth areas while helping manage slug activity in beds and borders.
Was £14.99, now £13.49
25MM X 13.7 METRES
Protect your garden naturally with copper slug tape. It deters slugs and snails on contact, triggering a mild reaction that prompts them to retreat, safeguarding pots, raised beds, and greenhouses.
Was £7.99, now £7.19


These 10cm-diameter copper slug rings protect plants by deterring slugs and snails, promoting healthier growth for seedlings and young plants. Reusable, they offer an eco-friendly, natural pest control solution.
Was £19.99, now £17.99
You can order online or by post. To order online, visit: gardening-naturally. com and enter the discount code KG04 at checkout. To order by post, please send the completed form to: Offer KG04, Gardening Naturally,


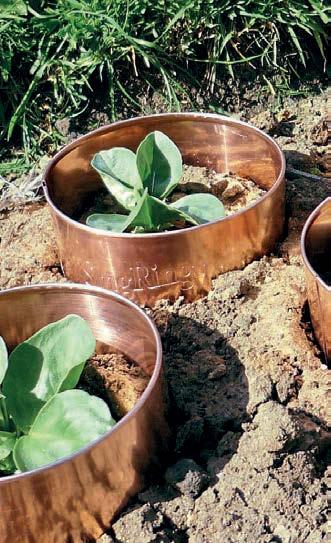

Strawberry mats impregnated with copper help protect strawberry plants from slugs, snails and weeds. Forming a barrier at the base, it supports cleaner fruit and reduces the risk of pest damage.
Was £9.49, now £8.54

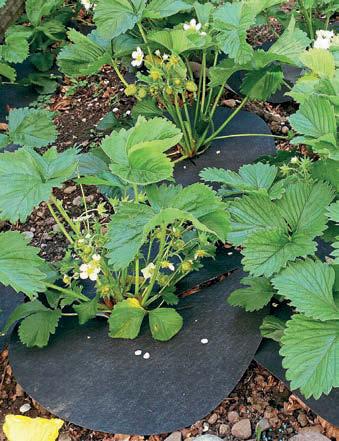

Unit 27, Blackworth Industrial Estate, Highworth, SN6 7NA. Please add £5.49 P&P to your order. Orders despatched within 2-3 working days, unless otherwise stated. Offer is subject to availability, and in the event that this offer is
oversubscribed, we reserve the right to send suitable varieties of the same or a higher value. Offer closes on May 31, 2026, or while stocks last. Delivery to UK only. Full product details and T&Cs at gardening-naturally.com
I enclose my cheque payable to Gardening Naturally or please debit my Visa or Mastercard account (delete as applicable )


Anna Cairns Pettigrew celebrates the season’s produce with four simple recipes. Light, fresh and full of flavour, they make the most of early harvests from the veg patch


This light, fresh lasagne is a great alternative to the classic tomato-based version. Use fresh or no-boil pasta, or boil dried sheets for three minutes before assembling
Serves 4
Dish: 20-23cm/8-9in baking dish
Prep time: 35 minutes
Cook time: 30 minutes
Ingredients
Vegetable filling
■ 250g (9oz) asparagus spears, woody ends trimmed, divided
■ 1 leek, trimmed and sliced (about 200g/7oz)
■ 150g (5oz) fresh spinach
■ 1 tbsp olive oil
■ 200g (7oz) cottage cheese
■ 40g (1½oz) grated Parmesan
■ ½ tsp salt
■ ¼ tsp black pepper
■ Zest of 1 lemon

White sauce
■ 3 tbsp butter
■ 5 tbsp plain flour
■ 600ml (20fl oz) milk
■ ½ tsp salt
■ ¼ tsp nutmeg (optional)
Assembly
■ 9-12 lasagne sheets, fresh or no-boil
■ 125g (4½oz) mozzarella, sliced or grated
■ Reserved asparagus tips
■ Extra 20g (¾oz) Parmesan for topping
Method
1. Cut the tips from the asparagus (about the top 4-5cm/2in) and set aside. Chop the remaining stems.
2. Heat the olive oil in a large pan over medium heat. Cook the leek gently for five minutes until soft. Add the asparagus stems and cook for 3-4 minutes, then stir in the spinach and cook until just wilted
(2-3 minutes). Season with salt, pepper and lemon zest.
3. Blend the vegetables briefly in a food processor to a coarse paste.
4. Transfer to a bowl and mix with the cottage cheese and Parmesan. Adjust seasoning.
5. For the white sauce, melt the butter in a saucepan. Stir in the flour and cook for about 30 seconds. Gradually whisk in the milk until smooth. Simmer for five minutes until thickened, then season with salt and nutmeg.
6. Spread a thin layer of white sauce in the baking dish. Layer the pasta sheets and vegetable mixture.
7. Finish with a layer of pasta, the remaining white sauce, mozzarella, asparagus tips and Parmesan.
8. Bake at 200°C (180°C fan/390°F/gas 6) for 30 minutes until bubbling and golden. Rest for 10 minutes before slicing.
A comforting mash with sweetness from the sweet potatoes, salty feta and the bite of spring onions. Serve on its own or alongside grilled vegetables
Serves 4
Prep time: 10 minutes
Cook time: 20 minutes
Ingredients
■ 1 large potato, peeled
■ 2 medium sweet potatoes, peeled
■ ½ lemon
■ 1 fresh red chilli, deseeded
■ A handful of fresh coriander
■ A small bunch of spring onions
■ 100g (3½oz) feta cheese
Method
1. Place the potatoes in a pan, cover with water and bring to the boil. Cook for 15-20 minutes until tender.
2. Finely chop the chilli, spring onions and most of the coriander together and place in a bowl.
3. Crumble in the feta and squeeze over the lemon juice.


4. Drain the potatoes and leave to cool slightly, then mash roughly with a fork. Add to the bowl and mix well.
5. Season to taste, garnish with the remaining coriander and serve.
A quick, comforting lunch. Creamy tuna with crunchy celery and spring onion is piled onto toasted English muffins and baked until the cheese bubbles
Serves 2
Prep time: 10 minutes
Cook time: 12 minutes
Ingredients
Crisp asparagus coated in Parmesan and breadcrumbs and baked until golden. Perfect spring finger food
Serves 4
Prep time: 20 minutes
Cook time: 20 minutes
Ingredients
■ 500g asparagus spears, woody ends removed
■ 2 eggs, lightly beaten
■ 2 tbsp plain flour
■ ½ tsp smoked paprika, plus extra to serve (optional)
■ 50g (1¾oz) panko or white breadcrumbs
■ 50g (1¾oz) Parmesan, grated
■ 1 lemon, half zested and juiced, the rest cut into wedges
■ 1 tbsp olive oil
■ Mayonnaise or onion and garlic dip, to serve
Method
1. Preheat the oven to 200°C (180°C fan/390°F/gas 6). Pour the olive oil into a baking tray and place in the oven to heat.
2. Put the flour, eggs and breadcrumbs into separate shallow bowls. Mix the Parmesan and lemon zest into the breadcrumbs.
3. Dip each asparagus spear first in flour, then egg, then breadcrumbs, using different hands for wet and dry ingredients.


■ 1 × 150g tin tuna, drained
■ 2-3 tbsp mayonnaise
■ 1 tsp Dijon mustard
■ 2 spring onions, finely sliced
■ 1 celery stick, finely diced
■ ¼ tsp salt
■ ¼ tsp black pepper
■ 4 English muffins, split
■ 120g (4oz) mature Cheddar, grated
Method
1. Flake the tuna in a bowl with a fork. Stir in the mayonnaise and mustard until creamy.
2. Add the spring onions and celery. Season with salt and pepper and mix well.
3. Lightly toast the muffin halves on the cut side. Place on a baking tray and divide the tuna mixture between them.
4. Sprinkle with the grated Cheddar.
5. Bake at 200°C (180°C fan/390°F/gas 6) for 10-12 minutes until the cheese melts and the edges are golden. Serve immediately.
4. Remove the hot tray and arrange the asparagus in a single layer. Roast for about 20 minutes until golden and crisp, turning halfway.
5. Serve with a sprinkle of paprika if liked, with mayonnaise or dip and lemon wedges for squeezing over.

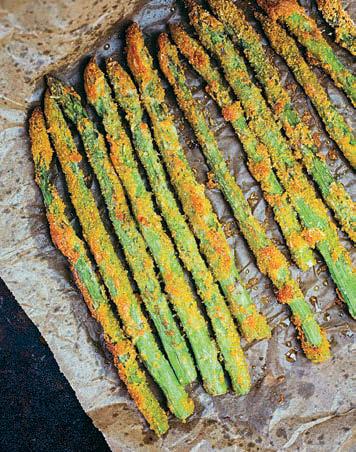

There’s always a noticeable shift in the air as the new growing season begins. Sarah Purser says hello to April, the month of momentum


By April the garden usually settles into a rhythm. Growth feels assured and con dence returns. April is a popular month for gardeners and non-gardeners alike. ere is a noticeable shift in the air – the light is brighter and the days are longer. Spring has nally arrived. e long Easter weekend stretches out ahead, giving even the most tentative growers the chance to spend proper time outside and really get cracking (excuse the pun) on the new growing season.
April is the month of momentum.
Despite loving the chaos and abundance of the summer months, I have a real a ection for April’s neatness. Everything is greening up and looking beautiful but, for the most part, borders are still de ned, paths are visible, and the whole garden feels fresh and ordered.
My spring bulbs bring me enormous joy this month. I grow many di erent varieties of da odil and I never tire of them. As they begin to fade, I deadhead the spent owers but leave the foliage to die back naturally. at untidy-looking growth is quietly feeding the bulb for next year and patience here is always rewarded.
April is also the month of apple blossom, and it rains down on our garden like confetti. Last year I actually collected and dried some of it to use as confetti at my sister’s wedding – a small way of sharing the garden beyond its boundaries.
April showers are not just a saying – they are genuinely helpful in the garden. When repairing bare patches in the lawn with a little grass seed, the regular rainfall usually helps it establish well without too much intervention. ose showers are also a good reminder to check that rainwater collection systems are working properly. As the days warm up, having a good supply of rainwater becomes invaluable.
Weeds, of course, are also quick to respond to warmer days and sunshine, so April is a good time to keep on top of them with a littleand-often approach. Ten minutes here and there can make all the di erence and prevent jobs building up later.

When it comes to seed sowing, there is very little you can’t sow in April. I think of it as a bridge month – the last chance to sow early crops on one side, while the autumn and winter vegetables begin on the other. Outdoor sowing also becomes more reliable now, though I still keep an eye on the forecast.
Starting pumpkins and squash is always one of my favourite April jobs. Last year my favourites were Little Gem and Jack Be Little for climbing, along with some sugar pumpkins that o ered great ground cover. is year I’m particularly excited to try growing saved seed from a Crown Prince squash from our local pumpkin patch. ere is something satisfying about continuing that cycle when so many Halloween pumpkins are discarded each year.
Once sowing gets under way in April, potting on quickly becomes a regular task. Whether you prefer to do a little at a time or set aside a longer session, both approaches keep seedlings moving and prevent things getting out of hand. It’s a useful reminder that progress matters more than perfection.
April is when I usually turn my attention to building pea frames and putting up new climbing supports. Last year’s sweet pea wall was a particular joy and reminded me how much vertical growing can add – not only in productivity and space saving, but also beauty. Finishing beds and building structures in both the garden and at the allotment is always satisfying. As a theatre teacher and theatre lover, there is a sense of setting the stage this month. Once the groundwork is done, the owers and vegetables can take centre stage for the summer ahead.
April is when I plant my second early and maincrop potatoes and earth up the rst earlies as their shoots emerge. It’s one of those grounding jobs that never loses its appeal.


Although April can be busy, it’s worth pausing now and then to watch the bees and other bene cial insects returning to the garden. Alongside them, of course, the ‘pests’ also arrive. Rather than ghting a constant battle, I’m trying to focus more on balance this year – encouraging wildlife, planting diversely and accepting that some sharing is inevitable.
e longer evenings are one of April’s greatest pleasures. ere is time to garden after work, linger outside a little longer, chat with neighbours and even enjoy the rst tentative moments of alfresco dining.
Our local allotment sales and plant swaps are popular this month too, o ering chances to share surplus plants, discover new varieties and connect with other growers. ose small community moments are as valuable as anything we grow.
April is productive, busy and full of promise, and I try to remind myself that progress matters more than perfection. e garden is gathering pace, the beds are lling and the season stretches out ahead.

So step outside and enjoy it – because before we know it the garden will be over owing and April’s calm order will be just a memory. Spring is nally here. ■
• Sarah Purser is a gardener with a particular interest in seasonal growing and kitchengarden living. She shares her projects on social media as @sundaysinthegarden
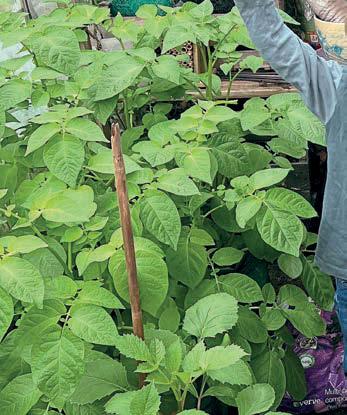
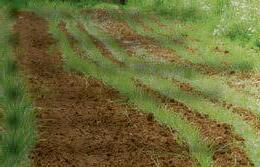


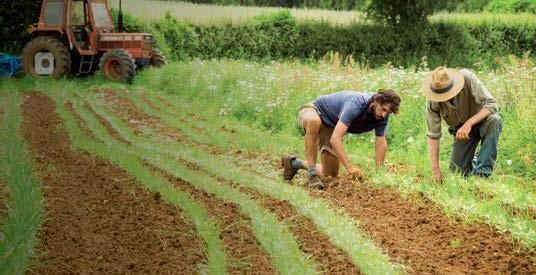


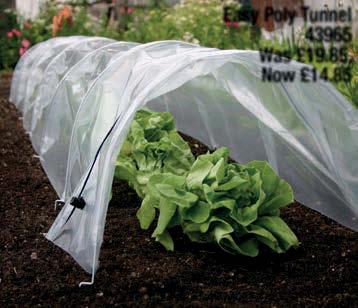


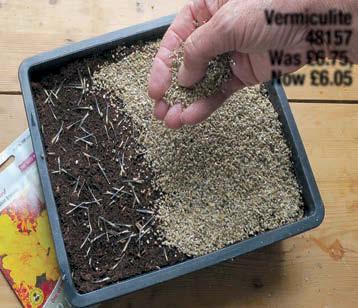


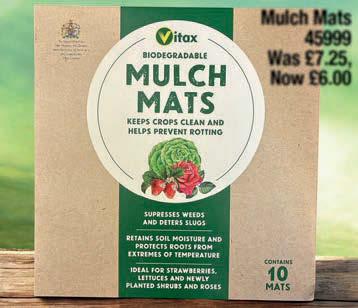


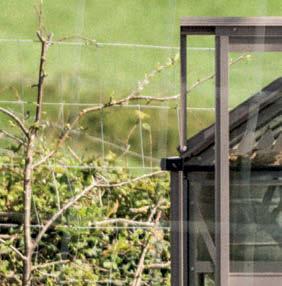


Feelthejoy,inagreenhousethathaseverything youneedtogarden. We’vecombinedelegance withincrediblestrengthandfunctionality,to giveyoutheperfectplacetoprepareand nurtureallyourplants,asgreenshoots appearandnaturestirstolifeoncemore.