

Guide of photography
as a tool for youth employability

The “Guide of photography as a tool for youth employability” was developed as a result of Erasmus+ Mobility of youth workers “Capture The Future” ref. nr.: 2024-1-LT02-KA153YOU-000238563 Training course that took place in Spring of 2025 in Lithuania with a great input from all the participating youth workers from Lithuania, Estonia, Poland, Slovakia, Hungary, Latvia, Czech Republic and Romania. The participants completed the training course equipped with the essential tools to empower their proteges in achieving the maximised results in their job search, in turn making them better youth workers for future generations. The goal of the project was to develop knowledge, abilities and attitudes of 32 youth workers from 8 non-profit organizations from from Lithuania, Estonia, Poland, Slovakia, Hungary, Latvia, Czech Republic and Romania on photography to empower young people to increase their employability. During the project we successfully reached the following objectives: increased the level of knowledge, abilities and positive attitudes of the participating youth workers in engaging youth in photography to facilitate the access of youths to the labor market, as well as increased the capacities of the 8 partner organisations in organizing events, activities and workshops for youths on the topic of photography that can higher their chances to access the labour market. We would like to thank our partic project such a success!
Asociacija “Keliauk pirmyn”, Lithuani

CAMERA SETTINGS
In photography, understanding the exposure triangle is the key to achieving perfectly balanced and professionallooking photos. The exposure triangle consists of three basic components: aperture, exposure time and ISO sensitivity. In this article, you'll learn how each of these factors affects your photography and how to adjust them properly to achieve optimal results.
Exposure triangle: APERTURE, SHUTTER SPEED, ISO

APERTURE
Aperture: the amount of light entering the camera The aperture is the opening in the lens that controls the amount of light entering the camera. Aperture is expressed by the number f and its values vary depending on the type of lens. The higher the aperture number, the smaller the aperture opening. When shooting in bright lighting conditions, you will use a higher aperture number to limit the amount of light that
that enters the camera. With a higher aperture number, the background is just as sharp as the foreground. On the contrary, when shooting in low light, you'll use a lower aperture number to open up the aperture so that you get as much light into the photo as possible. A low aperture number produces a blurred background effect. Lower aperture value is mostly used for portrait photos, where the camera is exposed to the most amount of light, therefore making the background blury and focus is directly on one object unlike with the higher value of the aperture, the shutter is the smallest therefore small amount of light gets through the lens and the focus shifts on all the objects in the picture regardless of the distance from the camera ' s point of view.

ISO Sensitivity Abreviation stands for International Organization for Standardization, which sets the standards that represent light sensitivity of a given photo, which you may see at the pictures below. Differences: Higher setting number indicates higher sensitivity to any light source caught on the picture, which may result in a more grainy picture with a sign of static effect. Whereas low ISO sensitivity is the way to go in well-lit scenarios. Most of the photographers advocate for always going for the low ISO number (mostly around 100, if possible, for its natural outcome).
Applying ISO in different settings:
ISO 100 - The best choice for bright scenarios (most likely outside on sunny days).
ISO 400 - Best to use indoors with a little less lightning or outside on cloudy days.
ISO 800 - In case of shooting indoors without any additional lighting.
ISO 1600 - In dark settings or poorly lit interiors, a high ISO is essential. To capture motion clearly, pair it with a quick shutter speed.


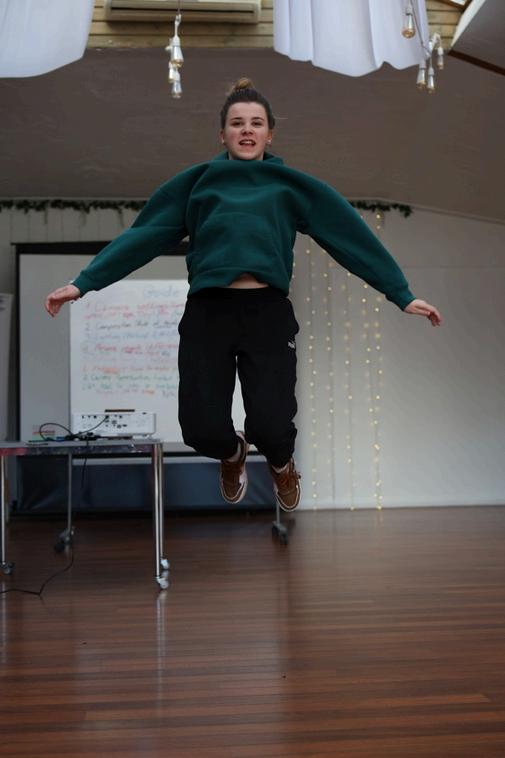
Exposure time
Exposure time (or shutter speed) is the amount of time the camera sensor is exposed to light. The time is displayed in fractions of a second in the camera, usually from 30 seconds to 1/4000th of a second. This factor is crucial when capturing motion. A short exposure time (e.g. 1/400) is suitable for capturing motion without blur, while a long exposure time (e.g. 1/15) can be used to create a dynamic motion image with a blur effect. It is important to keep in mind that long exposure times can also cause undesirably blurry photographs if the camera is held unsteadily in the hands. In this case, it is advisable to use a tripod to avoid unwanted blurring.


ISO 800
ISO 125
Composition
Composition in photography stands for the way we lay the picture out and how we position subjects within the frame to get the most aesthetic and eye-pleasing photos. The purpose of good composition is to enhance visual impact on every viewer through photography. To achieve that you need to focus on precise framing, arrangement and placement.

Here are 9 composition techniques how you can master your pictures:
1. Rule of Thirds
Dividing the image into a 3x3 grid and placing key elements along the lines or intersections for a balanced, dynamic composition.


2. Leading Lines
Using lines (e.g. roads, rivers, fences) to guide the viewer’s eye toward the main subject or focal point.


3. Symmetry
Creating a mirror-like balance in the photo, often with centered subjects for a harmonious, striking effect.

4. Reflections
Using water, glass, or other reflective surfaces to create symmetry or add visual interest.


5. Frame within a Frame
Using elements (e.g. windows, doors, or arches) to create a natural border around the subject, adding depth and focus.

6. Fill the frame
Getting close to the subject or zooming in to eliminate distractions and create a more powerful impact.


7. Negative Space
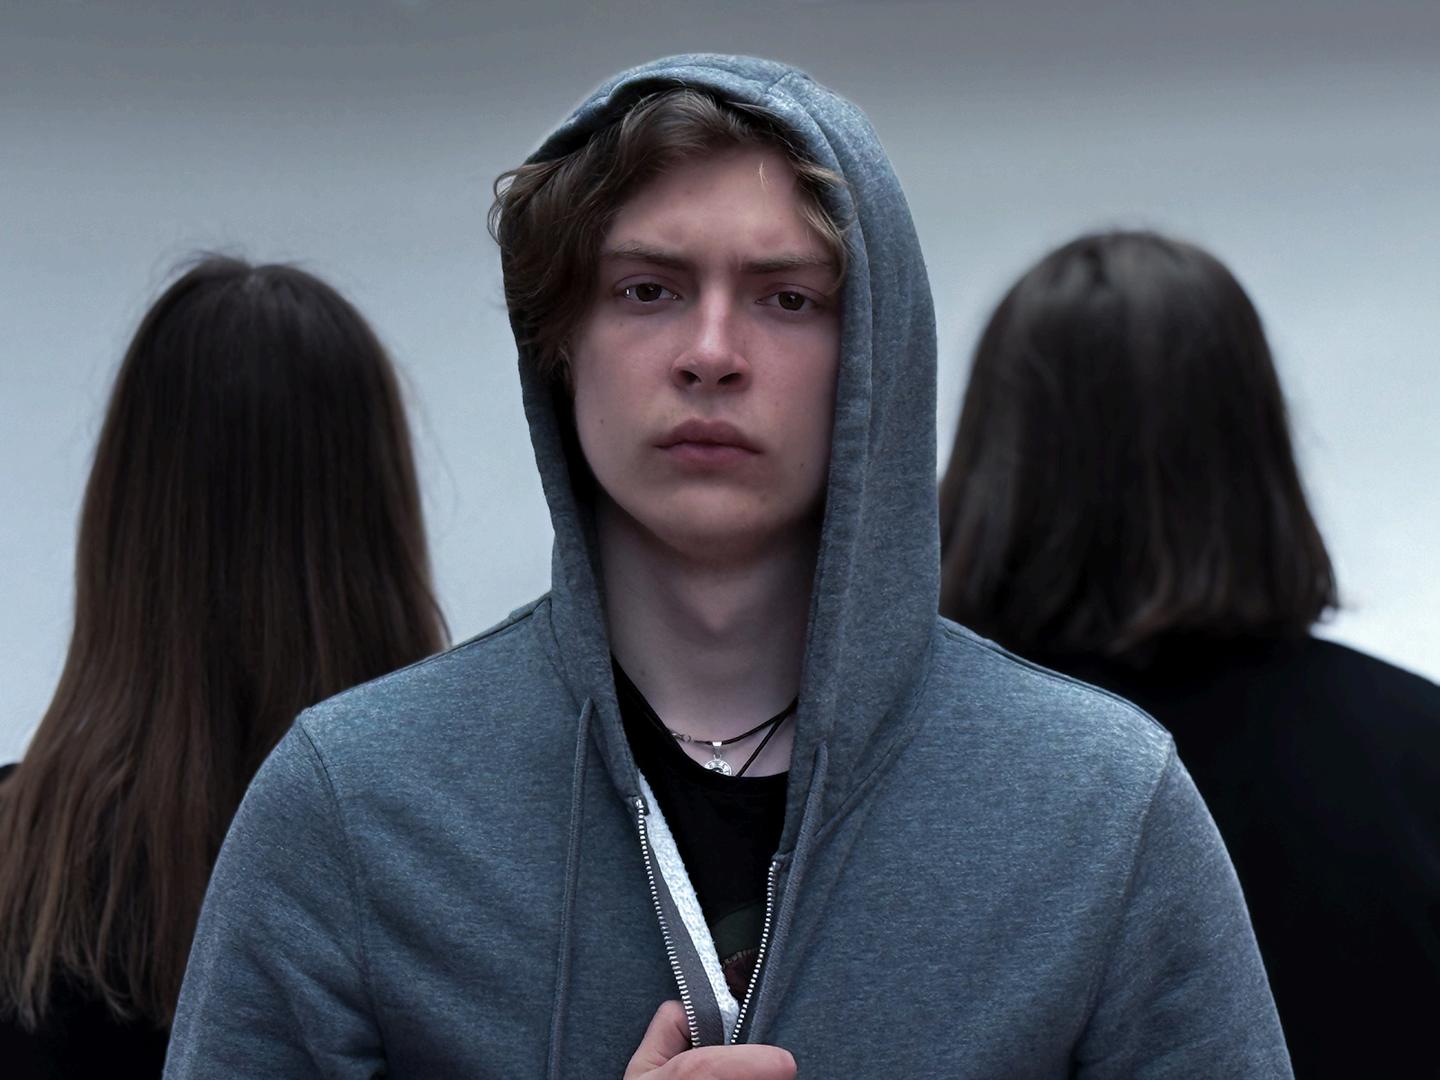
Leaving empty space around the subject to emphasize simplicity and draw attention to the main focus.


8. Colour Contrast
Using opposing colors (complementary or bold contrasts) to make the subject stand out and create visual appeal.


9. The Golden Ratio
A spiral-based composition that leads the viewer’s eye through the image in a naturally pleasing way (also known as Fibonacci spiral). Composition has been widely used in art (e.g. Mona Lisa), architecture (e.g. Parthenon) etc.

LIGHTNING
Which are the origins and what’s light? Photography is derived from the Greek word's “photos” meaning light and “graphie” meaning lines or drawing, representing “drawing with light”. Lighting in photography, either it is from natural or artificial sources, its purpose is to enhance the quality of image and prepare the final subject with best results. There are different techniques, each of them creates different effects on the subject, helping achieve various moods, colours and emotions. There are two main light sources: natural and artificial light. Each has its benefits and can lead to similar results, but it’s crucial to know which, when and how to choose them. Natural light is unpredictable and uncontrollable, while artificial light is a very useful tool regardless of time or natural phenomena.
Types
Some of the essential types of lighting used by all professional photographers in the studio are:
1. Rembrandt lighting
Is well-known for its small triangle of light on one cheek. It increases the depth and dramatic effect on portraits.
Position the key light at a 45-degree angle from the subject.
Raise the light above eye level and angle it downward. The nose shadow should connect with the cheek shadow to form a small lit triangle.
2. Buterfly lightning
Butterfly lighting creates a symmetrical shadow under the nose, often used in beauty photography.
Place the key light directly in front and slightly above the subject.
Use a reflector below the chin to soften shadows.
Ideal for glamour and portrait photography.
3. Split lighting
Split lighting divides the face into equal parts, one that is lit entirely and a shadowed one. It’s used for emphasizing dramatic and moody result on the subject.
Position the key light at a 90-degree angle from the subject.
Keep the shadowed side mostly dark with minimal fill light.
Used for artistic or high-contrast portraits.
As one can notice, there is no picture without light, it allows us to vary different aspects of our photography, from moods, colours, contrasts to emotions. Once you understand these characteristics of lighting how to use, then you’ll be able to be as creative as possible and not limit to the setup or other tools.
POSING
Posing is one of the key parts in photography that does much more than just arranging how people stand or sit. It helps shape the entire look and feel of the photo. It's important because it can show the subject's personality, create balance in the image, and make people feel something when they look at it.
Why is posing important in photography: Shows personality: A good pose can bring out the subject's unique character and highlight their best features. It makes the photo feel more personal and special.
Creates emotions: The way someone is posed can tell a story or show feelings. Like happiness, confidence, or thoughtfulness. This helps viewers connect with the photo.
Makes photos look better: Posing helps create flattering angles and improves the overall look of the image. For example, turning the body slightly or adding movement can make a portrait more interesting. Helps people feel comfortable: Not everyone knows how to pose naturally. When photographers guide their subjects into relaxed and natural positions, it makes them feel confident and look authentic in photos.

Good posing can turn a simple picture into a strong and meaningful image. If it's a casual moment, or a planned portrait. Knowing how to pose people well helps photographers create photos that stand out and tell a story. Remember, if the model appears uncomfortable in a photo, it's not their fault, it's yours.
1. Getting models comfortable
The important role of a photographer is to make the model feel relaxed. Because if the model is stressed or tense it will make a photo look forced and unnatural. The best way is to give the model a compliment or have an open, honest and pleasant conversation; you can ask them to tell some story, etc. After that, the model relaxes, smiles, and the photographer can capture real and honest emotions. This moment will allow you to capture a genuine expression and make your message more powerful.


2. Posing men
A masculine pose should emphasize confidence, strength, and a natural presence. Key elements to focus on include body angles, hand placement, head positioning, and weight distribution.
Body Angle and Jawline Definition
The right angle is essential for creating a strong, masculine pose. Men generally look better when photographed from a slightly lower angle, which enhances the jawline and gives a more dominant appearance.
Showing the Shoulders for Strength
Shoulders should be relaxed yet slightly squared to create a broad and powerful look. A slight forward lean or shifting one shoulder toward the camera can enhance the sense of control and presence.
Hand Placement for a Relaxed Yet Confident Look
Hand positioning plays a crucial role in conveying masculinity and ease. Some effective poses include hands in pockets for a casual, effortless look; arms crossed for a more assertive and stronger stance; one hand in a pocket while the other rests on a hip or touches the chin, adding variety and depth.
Weight Distribution for a Grounded Stance
Shifting weight slightly forward or keeping it evenly distributed helps the pose feel balanced and natural.

3. Posing women
Posing women for photography is an art form that blends creativity, technique, and an understanding of how to enhance natural beauty. The goal is to create a balance between flattering the subject and conveying the desired mood or story of the photo. Female posing often focuses on curves and elegance. Whether it’s for fashion, portrait or candid moments, the right pose can elevate an image, bringing out the best in the subject.
Elegance and curves
Posing women often empathises elegance and curves. That is the reason why a good posture plays a huge role. Good posture not only enhances confidence but also helps create a flattering silhouette. A straight back and relaxed shoulders prevent the body from looking slouched or stiff, which can detract from the overall impact of the photo. Additionally, a slight shift in weight, like placing more weight on one leg, can create natural curves and add a sense
sense of movement to the pose. This type of posing creates S-shaped body posture and accentuates curves.
Hand placement
In posing women, hand placement plays a crucial role as it can significantly impact the overall composition, convey emotion, and enhance the natural flow of the body. Properly placed hands can soften a pose, create curves, and prevent the body from looking stiff or awkward, ultimately helping to bring balance and harmony to the photograph. Hands are often placed on the waist, playing with hair or interacting with surroundings, which also makes a photo more interesting.

The power of angles
To deliver your concept and emphasize an emotion, a great tool is knowing how to use certain angles. A slight turn of the body (45 degrees) creates dimension. Taking your photo from the lower angle - from the ground even - will give your subject a more powerful stance. This angle could be perfect while portraying confidence, or adding more height, length to the model etc.
Going the opposite way - taking a picture from above makes your subject look more vulnerable, small and has a shortening effect.


EDITING TOOLS GUIDE
Lightroom
A commonly used basic photo editing tool is Adobe Lightroom.
Main editing options are:
Exposure
Contrast
Shade Highlights
Altering and balancing different colors
It's possible to add effects to your photograph e.g. texture, clarity, grain, vignette, blur. You can also change detailssharpness, noise and color control. Plus, there are additional tools like lens corrections. More adjustments can be made while selecting specific object on the picture and making mask - you can change properties of masked objects without changing the rest of the photograph. Main modules of Lightroom are Library and Develop. Moreover, Lightroom gives you an opportunity to store your pictures in Creative Cloud. Main modules of Lightroom are Library and Develop. Moreover, Lightroom gives you an opportunity to store your pictures in Creative Cloud.


Photoshop
This program can be used for multiple tasks, starting from color correction to retouching.

Basic steps to achieve the perfect version of your photo:
1. Open the picture in Photoshop. If you open: RAW format, then the file opens in Raw filter, and you can start working with it.
JPEG, then the file opens directly in the main workspace.
2. Start with color correction, if you haven’t done that in Lightroom. Go to Filter > Camera RAW Filter and adjust your photo. The main functions to use:
Light (Exposure, Contrast, Highlights, Shadows, Whites, Blacks)
Color (adjust Temperature, Vibrancy, Saturation)
Effects (to add Grain/Vignette for vintage effect or make the photo sharper with Texture and Clarity)
Curves (to control the bright and dark spots manually by dragging the curve up or down and the intensity of different shades like green, pink, blue or yellow)
Color Mixer (to edit the colors’ saturation, luminance and hue)
Color Grading (to change the colors for specific parts of the photo, for example, add green to shadows)
3. Go back to Workspace and start retouching with Remove tool to clean the photo from distracting sport like blemishes etc.
4. Adjust shadows and highlights with the method of Dodge and Burn. For that:
Go to Adjustment layers, press Curves. Make the Curve up or down, depending on whether you want to brighten or darken the places.
Press command + I to invert the layer.
Take Brush Tool, make sure that in Default Background and Foreground colors you have white color on top. Paint the spots by clicking one by one on the place you want to change.
5. Use AI to remove or change details.
To remove:
Take lasso tool and choose the area.
Press generative fill, leave the text bar empty and wait. Choose the variation you like the most.
To change:
Take lasso tool and choose the area.
Press generative fill, write your request and wait.
Choose the variation you like the most.
6. You can change the forms of bodies, faces etc. by using Liquify function. For that go to Filter > Liquify and change the tool you need and make changes.
Snapseed
Snapseed is a simple and powerful photo editing tool used in mobile phones. Snapseed is developed by Google, available for both Android and iOS devices.

The tools which are in this software are wide from basic editing like brightness, saturation and HSL tools to more interesting tools like double exposure. And it also supports RAW format.
Here are some key editing tools in Snapseed:
Tune image - Tuning images by basic light controls like brightness, Contract, Saturation, Shadows etc.
Curves - It's advanced editing tool that gives you precise control over the tone image.
Expand - We can expand the photo by using expand tool. But it's not working every time perfectly.
Healing - This tool is used for removing unwanted objects.
Brush- We can brush one area and control burn, saturation, temperature and exposure.
Selective -We can select one spot from the photo, and we can adjust Brightness, Contrast, Saturation and Structure. We can adjust the size of that spot and copy that spot to paste anywhere.
Lens blur - This tool helps for blurring the area and even control the strength of blur.
Double exposure - This is a creative tool that allows you to blend multiple images together to have a layered effect.
It's a highly recommend mobile editing tool because of high quality, no ads and minimalist user interface.

PHOTOVOICE
In photovoice you can combine storytelling with photography to empower marginalized communities, to reflect on their challenges, experiences and bring awareness to certain social problems or any kind of issues they face. Photovoice helps people gain agency in sharing their stories, reveals hidden or overlooked issues and it can build collective understanding and action.
Message
The message behind every picture is the most powerful aspect of photovoice, because you can show emotions that you cannot express any other way, so photography can express your ideas and feelings.


Lightning
Light contrast expresses the importance of the subjects that you photograph, it can also highlight or hide certain objects. Shadows can symbolize mystery, oppression while light represents hope.
Temperature
Warmth/coldness of the picture can transmit emotions, for example warmth shows happiness, calmness or love, while coldness shows sadness or distance.

Posing/Expression
The expression of a model’s face or body language is really important for sending a message, because it visually shows the emotion the photographer wants to transmit.

Posing is also important because body language is part of non-verbal communication which is the main way people understand each other.

Colors
Bright colors tend to show more positive emotions meanwhile mild colors in pictures are calming and create a serene atmosphere.

Black & white pictures can be dramatic; black represents a bold and powerful presence while white creates balance and space.

CAREER OPPORTUNITIES
Photography and editing skills can lead to a wide range of career opportunities, from working in public or private companies to becoming a freelancer. Many businesses today rely on high-quality visual content to promote their products and services online, especially through social media and websites. This means skilled photographers and editors are in demand. With the right discipline and entry investment in equipment you can build your portfolio and seek out employment opportunities.
Working on a contract in a company can give you the stability of a fixed income but it's sometimes likely for you to have less creative freedom. Knowing your own preferences towards the type of employment you prefer will help you navigate your career path. You can work in a private organization, company, media outlet, state institution (e.g. become a public relations specialist as part of a creative team).

Freelancing gives you the freedom to choose your own clients and projects, but it also requires strong selfpromotion and business skills. One of the crucial skills of a freelancer is identifying your niche in order to attract the right clients. A niche is a specific area of photography (such as portraits, weddings, fashion, travel, etc.) that you focus on and build your reputation around. By specializing, you show potential clients that you are an expert in that area, which helps you stand out in a competitive market. At this point you can also ask yourself to what extent you want to pursue photography artistically and commercially. According to your answer, you will know whether you are looking for individual clients, companies, art galleries or curators.
Once you have found your niche, building a strong personal brand is key to growing your career. Your personal brand is how you present yourself and your work to the world. It includes your visual style, your communication, your online presence, and the values standing behind your photos. To build this brand, you can use social media platforms or a personal website to showcase your best work, tell the story behind your photos, and connect with your audience. Reaching the right people requires patience.
Being consistent in your style and messaging helps people remember you and understand what kind of work you do. This makes it easier for the right clients to find you and trust your abilities. Over time, a clear niche and strong personal brand can lead to more opportunities, repeat clients, and a steady income doing what you love.

The illustrative photographs of the "Guide of photography as a tool for youth employability“ were taken during the project by the participants.
https://visualeducation.com/understanding-theexposure-triangle/
https://www.outdoorphotographyschool.com/what-isaperture-in-photography/
Adobe, What is ISO in photography and how to use it. Ivy Chen
25.8.2023 Skillmea Tím
https://www.liveabout.com/photographer-525676 https://www.unitemps.com/career-advice/careers-inphotography/