D-Alu Suspension for KE-Interior System DA-0003-DK-04 DA-0003-US-05 Samling D-alu skinner Sæt skinner op efter tegninger og
D-Alu Rail System montagevejledninger medleveret systemet.
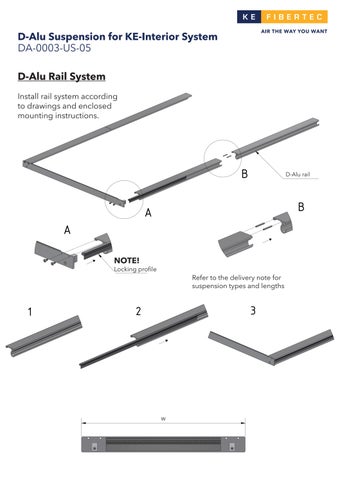
Install rail system according to drawings and enclosed mounting instructions.
B
D-Alu D-alu rail skinne
B
A A ! VIGTIGT ! NOTE!
Låse-profil Locking profile
Se i følgesedlen hvilke typer skinne
Refer to theder delivery notemed for til og længder skal være dette System. suspension types and lengths
1
3
2
W