elevated instant ramen

Inspiration, Ideas & Ideology
Josh Ratza, Founder & Chef of
Recipes Developed by Josh
Ratza

Written by Josh Ratza
Food Photography by Quinn Zerkel
Recipe & Copyediting by Quinn Zerkel
Cover Art by NoMe Edonna


Josh Ratza, Founder & Chef of
Recipes Developed by Josh
Ratza

Written by Josh Ratza
Food Photography by Quinn Zerkel
Recipe & Copyediting by Quinn Zerkel
Cover Art by NoMe Edonna


The Story of Setsunai
History of Ramen
Pantry
Cooking Instant Ramen
Shio Coconut Ramen
Salmon Ramen
Beef & Avocado Ramen
Tonkotsu Ramen
Black Garlic & Sweet Corn Ramen
Spicy Pork Ramen
Setsunai Pork Ramen
Miso Veggie Ramen
Spring Veggie Ramen
Fall Veggie Ramen
Breakfast Mazemen
Spicy Ground Pork Mazemen
Scallop Mazemen
Miso Black Cod Mazemen
Instant Ramen Chèvre Cheesecake
Instant Ramen Ice Cream Sandwich
Ajitama Eggs
Chili Crisp & Chili Oil
Yum Yum Shiitake Mushrooms
Pickling 101
Pickled Red Onions
Pickled Root Vegetables
Dressings

Defining this Japanese word so simply will not do justice to the nuance of its meaning, which is a feeling of simultaneous sorrow and joy. The way I’ve interpreted the word as it pertains to the feeling around our restaurant’s dining experience is:
“A longing sense of regret or pining for something that you no longer have.”
During a former period of my life as a potter, I began to make large ceramic fermentation crocks to support my growing passion for food fermentation and pickling. This dual hobby was the catalyst for what would suddenly become a major shift in my existence. Going on to create this little place known as Setsunai Noodle Bar has become such a significant and meaningful chapter of my life.
Since 2017, I have been handcrafting ramen and udon noodles in a small restaurant space on Lopez Island, 25 miles off the NW coast of Washington State. This endeavor began one year prior as a seasonal pop-up operation, serving my signature kimchi and other fermented veggies over simple handmade noodles and broth.
The necessity for these flavors quickly became apparent, thanks to the excitement and support from our incredibly encouraging and food-loving community. We’ve since evolved into what we are today - an isolated, quirky little noodle shop that probably would not exist outside of our island microcosm.
Over time, we have become a food destination focused on bringing Japanese-inspired fare to our small island. Everything we do, we do it with respect to the origin of this storied cuisine. We make our food fresh from scratch every day and we do our best to use local produce, meats and other goods from the many farms that dot the landscape here.
Our eyes, minds, hearts and bellies are focused on the connection to this land and its inherent scarcity, which are integral elements of our existence here. Our artistic expression through food allows the seasonal agriculture of our region to shine. We are privileged to have the opportunity to provide this style of food to our community and the continual support of our customers to present our dishes in a unique way.

Brought to Japan from China in the 1800s through Yokohama’s Chinatown, ramen arrived on the scene in 1859 as an adaptation of Lamian, Chinese hand-pulled noodles in broth. Eventually coming to symbolize desperation, ramen has seen Japan through some difficult times. Post World War II, the United States donated mass amounts of wheat to Japan to help combat starvation. As a result, ramen noodles became an affordable and widely available food source.
Pre-cooked and dried instant ramen was created by Momofuku Ando in 1958 as a way to bring this proletariat food out of ramen shops and into peoples’ homes as it required minimal time or effort to prepare. The recipe and process have changed very little over the years.
Ramen arrived to the United States in 1971 as “instant ramen.” Over the span of the last 50 years, it has remained a cheap and accessible food product. Ramen has become more mainstream in the States since the introduction of the ramen shop, largely spearheaded by David Chang’s Momofuku Noodle Bar (an obvious nod to the creator of instant ramen). Since opening Momofuku in New York City in 2004, ramen shops have popped up from coast to coast all over the U.S.
Ramen restaurants can now be found in most major cities. In some cases there will be a handful of different ramen shops, but in Japan, you cannot throw a stone without hitting a ramen shop. With over 10,000 ramen-ya or ramen-ten across the country, that kind of saturation is difficult to imagine. Somehow they all survive and thrive, which is a huge testament to ramen culture.
The first instant ramen product to hit shelves in the U.S. was the Nissin Chicken Ramen that is still popular today. In 1971 came the Cup Noodles with its iconic styrofoam packaging and flavoring already mixed in...all you had to do was add boiling water and keep the lid closed! These days, there are a plethora of instant noodles on the market with some really great varieties coming from Korea and even the United States.
The intention behind instant ramen has always been to provide an affordable and effortless meal. If this level of accessibility welcomes more folks into the world of ramen, then I am 100 percent on board with instant ramen. But...how can we make it better? Let us explore the possibilities. This book will show you how to turn ordinary instant noodles into an even more delicious, elevated and balanced meal.
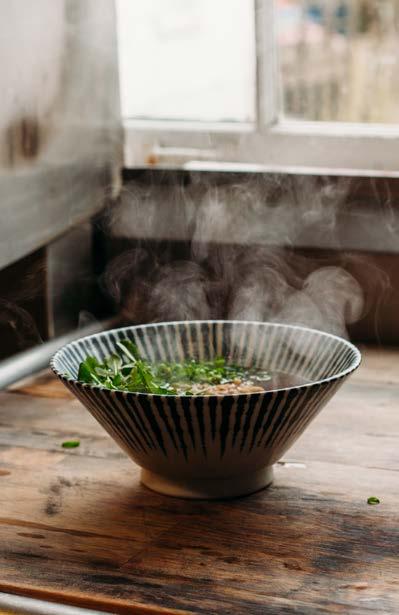
Building up a pantry of various instant ramen is a bit like stamp collecting. These blocks have an almost infinite shelf life and you can find different varieties almost anywhere - from gas stations along the road during your travels, Asian specialty stores, or even your local grocer. Discovering new brands and flavors is fun and exciting! I’ve especially enjoyed bringing home new varieties found while traveling abroad.
Aside from the instant ramen blocks and provided flavor packets, what else might one need to keep in the pantry in order to elevate their instant ramen when the craving hits? This is by no means a comprehensive list, simply a place to start. We have broken the pantry needs into categories to help you compartmentalize all of the possiblities and combinations!
With so many varieties available nowadays, it’s hard to know where to begin when choosing a base for your ramen bowl. The main differences you will find across various instant ramen packages are noodle thickness and flavors of the seasoning packets. Aside from the occasional oil or sauce packet provided, that’s really all there is to it. A few of our favorites:
Sapporo Ichiban, Nissin Demae, Maruchan, Buldak, Samyang, Shin, Momofuku, Mila, Ichiran, Chapaghetti, Maggi, and Public Goods.
Some of these brands are easy to find, while others take time and effort to obtain. There are reasons to collect all of them! The packages are often colorful and fun to look at. I suggest putting them in a place where they can be admired. That may seem silly to some, but to a ramen head, it just makes sense.

The best miso is expensive miso...there’s no beans about it. For the uninitiated, miso is made from Koji, a mold called Aspergillus (which grows on grain), beans, and salt. It is a long process to make high quality miso. Personally, I prefer a 1-year-old miso. Some of the 2 or 3 year aged miso made from ingredients that most people would consider unnecessary are worth exploring but be warned, some of you might find them unpalatable.
A Basic Guide to Miso:
White Miso - mild flavor
Brown Miso - medium flavor
Red Miso - medium to bold flavor
By far my favorite miso in the U.S. is a woodfired style from South River Miso. They make an Adzuki Bean Miso that is slightly sweet, and still very savory. This adds a deep umami flavor to the broth. I adore this flavor profile with salmon or even in dressings!
Your fridge is another great resource for ramen accompaniments. The shelf life is obviously shorter than your cupboard, but we should definitely talk about what to keep on hand if you’re planning to elevate your instant ramen at any moment. Keep in mind that some of these ingredients are very non-traditional. This doesn’t make them “wrong” to eat in ramen. Perhaps it’s just not what you may be used to seeing in your ramen bowls.
Eggs: Ajitama Eggs keep for about 1 week in the fridge. They are best to eat after 24-48 hours of marinating, but that doesn’t mean they won’t keep any longer. You will simply notice a change in texture of the yolk after about 48 hours (i.e. less jammy or more firm). These could still have great flavor, but it’s not quite the ideal softness that comes from a 24-hour marinated Ajitama Egg.
Vegetables: A full list of potential ramen ingredients would fill a whole chapter, so let’s go over a few:
Green onion (scallion), fresh leafy greens, fresh herbs, frying greens, cabbage, carrots, daikon radish, squash, mushrooms, broccoli, green beans, cauliflower, arugula, spinach, shugiku (a very popular Asian Chrysanthemum green), chard, kale...pretty much anything from the fridge that seems complementary.
Pickled Vegetables: Red onions, radish, cabbage, carrots, etc.
This is an incredibly tasty way to incorporate veggies into your ramen bowl. More information and pickling methods are here in this book!
When it comes to salt, I prefer and almost always use Sea Salt. There are many varieties out there, so use one that you’ll enjoy throughout all of your cooking. Since all of the recipes in this book are fairly simple in nature, you can really use any salt you like (keeping in mind the size of the grain or flakes when you season your dish).
My prefered cooking oil is Sunflower Oil. It has a high flash point for cooking on the stove, and also emulsifies well in dressings. It is quite neutral tasting and widely available. My second choice (the oil I use for frying) is Rice Bran Oil.
In this book, we will show you how to make a basic Chili Crisp and Chili Oil, but by all means, purchase them from your favorite restaurant or grocer. I think having a few Chili Crisp options on hand is a must, as they are very versatile and complement many different genres of foods.
It probably goes without saying that Sriracha and Tabasco are always welcome as basic hot sauce staples. Feel free to go wild with your collection! If you’re traveling and find a hot sauce maker at the local farmers market with some killer heat or flavor, grab it! Locally on Lopez Island, we have a favorite called Chicaoji (which is made using chipotle peppers, cacao beans and goji berries), and it is the bomb! The flavor bomb, if you will.
So many possibilities! You can get creative using canned goods to bulk up your instant ramen bowls.
Vegetarian: Bamboo shoots, sweet corn, tomatoes, mushrooms and coconut cream are a few of my favorites.
From the Ocean: Any bivalve or small fish with a hint of smoke are delightful. Spanish tinned octopus, oysters or sardines are worth picking up. Smoked salmon is always a yes, if you can find it. Tinned mackerel is a category that is very specific to Asian stores and there are generally three options: miso, plain and tomato. My favorite option is miso!
Broth: There are also ways to elevate the broth in your instant ramen. Of course you can just use the flavor packet but know that using veggie or meat-based stocks can be a very easy way to bring new life to your ramen. To season your broth, you could use the included flavor packet, salt, tamari or shoyu.
If you have time to make broth from scratch or you happen to have homemade broth in the freezer, use it! A high quality broth will definitely elevate your instant ramen to new heights.
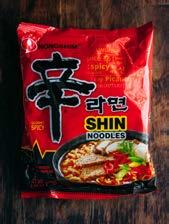
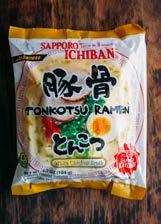
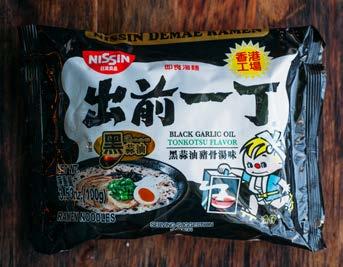

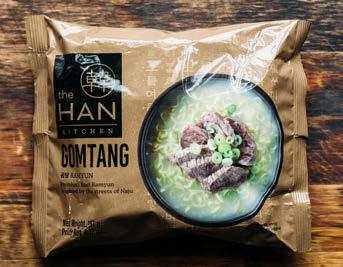
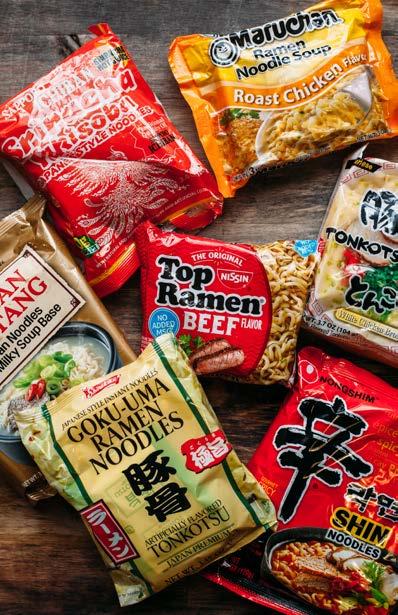
You may already be familiar with where you can find good instant ramen. If not, here is my best advice: Visit an Asian Market near you.
There will be many things that might be new to you, but I know that your market will welcome you, as did mine. They’ll help you explore their cuisine and you will be taking some exciting things home.
There will be a whole ramen aisle and while standing there, you may feel a bit overwhelmed. Don’t fret, you’ll be fine! No matter which ramen you bring home, it’ll be great. However, we have selected certain instant ramen brands that we feel suit the following recipes better than others.
The recipes in this book use some easy-to-find instant ramen and also some harder-to-find instant ramen. The elusive ramen are some of my favorites, and I would encourage you to track them down. If for some reason you are unable to find an Asian Market with a decent ramen selection, you can always turn to online ordering...there’s no shame in it.
If you still cannot find a specific ramen that we have named in a recipe, just substitute an easy-to-find option. There isn’t a big enough difference in the instant ramen to make these recipes not taste good. So if the ramen hunt is holding you up, please use what you have.
It is worth noting that when traveling abroad, you will find some of your favorite ramen brands with regional twists that you might not expect. While traveling in Mexico this past winter, I found several Nissin instant ramen labeled “Picante,” which only means “Spicy,” but upon eating the ramen, I noticed that the type of pepper used was smoky and had a different flavor profile from the “Spicy” package that I’d normally find back home.
Have a look through this book and go have some fun in the kitchen! Tag us on Instagram with pictures or videos of your Elevated Instant Ramen inspired creations!


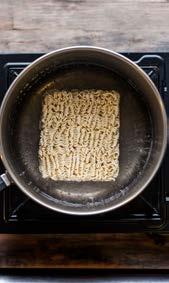
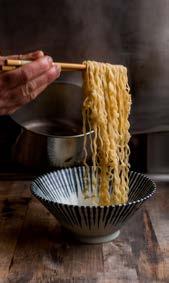


Cooking instant ramen is simple, but there are some things to think about before you begin. Following these practices can fortify the structure of the instant ramen noodles and boost the flavor of the broth. In the event that you’ve never cooked instant ramen or just have some questions about the process, here are a few basics to consider.
•In some of the following recipes, we have provided instructions that utilize the same noodle-cooking water for your broth, as that is what’s generally called for on the instant ramen package instructions. Some recipes have you discard the cooking water and build a new broth.
•Start with 2 cups of water to boil 1 standard instant ramen block.
•There is nothing wrong with using the same noodle-cooking water to build your broth, but if you want to elevate your instant ramen, starting off with clean water for your broth is recommended!
•If you plan to discard the cooking water, then it doesn’t matter how much water you use to cook the ramen block. However, the provided flavor packets are most effective in smaller amounts of water or broth.
•If you plan to use the same noodle-cooking water as your broth, make sure to begin with a proportionate amount of water so that you have a concentrated amount of liquid after cooking the noodles.
•Be sure to always read the package instructions provided on every type of instant ramen. Noodles may vary by weight or thickness and require more or less water, and/or a longer or shorter cook time.
•Instant ramen noodles are already salted when they’re made. Unlike cooking Italian pasta, you do not need to salt the water when you boil instant ramen.
•You don’t have to pour all of the broth over your noodles when it’s time to eat. Use an amount of liquid that best suits each ramen bowl.
•A bonus science lesson: instant ramen noodles use capillary action to bring broth up to your mouth, which is one reason they are often wavy or crimped. They also look cool that way and have a fun texture!

To begin, bring the pot of water to a boil, then decrease heat to a steady simmer. Drop in the ramen block and wait about 1-2 minutes. If the water doesn’t cover the block completely, flip it over and wait another minute. After a total of 2-3 minutes, the ramen block should be soft enough to untangle from block form into loose noodle strands.
Once the noodles have been untangled a bit (using chopsticks or a fork) and are loose and wavy, gently swirl them around with your tool for another minute. Taste a noodle. If you prefer your noodles more firm (al dente), use a shorter cook time. If you prefer your noodles softer, let them cook slightly longer. After a total time of about 4 minutes, your noodles will be done cooking.
Once the noodles are cooked to your liking, gently transfer them with tongs (or a skimmer) into a colander over the sink to drain. If you plan to use the same water to build your broth, be sure to reserve the pot of noodle water.
Run cold water over the noodles to shock them into this state of doneness. This will allow the noodles to hold their structure in the hot broth for a longer duration.
Proceed with the recipe of your choice!
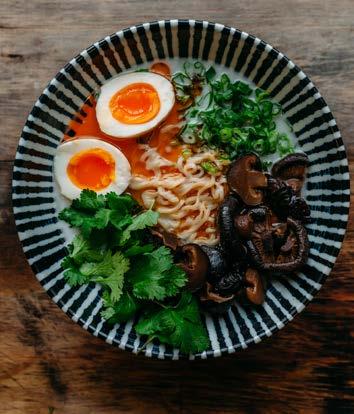
This is by far my favorite instant ramen hack and it is surprisingly easy to make. Take the time to make the Yum Yum Shiitake Mushrooms found in the later part of this book...you won’t regret it! To make this dish vegan, use a vegan instant ramen pack (or season the broth using salt instead of the chicken flavor packet) and omit the Ajitama Egg.
Cook the ramen as shown in our Cooking Instant Ramen section using 2 cups of water. Once the noodles are cooked slightly al dente, remove them from the pot with tongs or a skimmer and place them into your serving bowl. Discard the cooking water. In the same small pot, whisk the coconut milk (or coconut cream cut with water) with the provided chicken flavor packet and bring to a low simmer, then remove from heat.
In your serving bowl of cooked noodles, add cilantro, scallions, Ajitama Egg and Yum Yum Shiitakes. Pour over the broth that we’ve created, and top with Chili Oil. Optional toppings can include pan fried chicken thigh, togarashi spices, duck breast or even pork belly. Pickled Red Onions are also a popular topping!
• 1 pack of Maruchan Roasted Chicken Ramen
• 2 cups water (for cooking, then discard)
• Provided chicken flavor packet
• 1 1/2 cups canned coconut milk, or 1 cup canned coconut cream + 1/2 cup water
• 1/3 cup thinly sliced scallions
• Handful of cilantro leaves, whole or torn
• Yum Yum Shiitake Mushrooms
• Chili Crisp or Chili Oil
• 1 Ajitama Egg
• Pickled Red Onions, optional
Start by cooking the instant ramen using 2 cups of water. The beef flavor packet included is pretty subtle. I’ve added a little miso to the ingredient list to compensate in case you find the broth a little underseasoned, though the additional miso is not essential.
After cooking the ramen, place the noodles into your bowl using tongs or skimmer. Heat the same small pot with about 1 1/2 cups of noodle-cooking water (or clean water if you prefer), the beef flavor packet and miso (if using). Bring the broth to a low simmer, then turn off the heat.
Heat a pan or skillet to medium-high and add 1-2 tablespoons of neutral oil. Heat the oil until it shimmers. Sear the Sockeye salmon fillet skin side down for about 2 minutes. Season the top of the fillet with a hefty pinch of salt. Using a fish spatula, gently flip the fillet onto the flesh and reduce the heat to medium. Let the fish cook for another minute, or until your meat thermometer reads an internal temperature of about 110 degrees F.
Add the seared salmon to the bowl of cooked ramen. Add scallions, fresh greens and wakame. Pour the hot broth over the top. Garnish with a lemon wedge and a bit of fresh dill.
• 1 pack of Maruchan Beef Top Ramen
• 2 cups water (for cooking, but use 1 1/2 cups as your concentrated broth)
• Provided beef flavor packet
• 1-2 tsp. dark red or dark brown miso (optional)
• 1 serving of Sockeye salmon, seared
• Handful of arugula leaves
• 1/4 cup thinly sliced scallions

• Small handful of Wakame seaweed
• Sprigs of fresh dill
• Lemon wedges, for serving
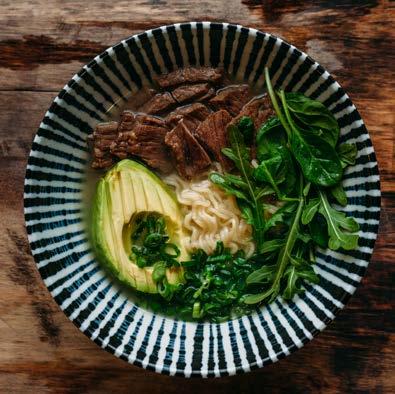
Another simple ramen recipe with a whole different flavor profile. Gomtang is Korean beef broth and it is lip smacking delicious! Begin by cooking the instant ramen as shown in our Cooking Instant Ramen guide, then transfer the noodles to a serving bowl. Whisk the flavor packet (whether it is dried or liquid) into the cooking water. Bring the broth to a gentle simmer, then turn off the heat.
If you have some Shabu-shabu style ribeye that is already thin-cut, go right to the Beef Marinade instructions in this recipe. If you are using a piece of un-cut beef, slice the beef as thin as you can and transfer it to a separate bowl. Combine all of the beef marinade ingredients together, and pour the mixture over top of the sliced beef. Let the beef marinate for at least 5 and up to 20 minutes.
Get your pan or skillet ripping hot and flash fry the marinated beef on both sides. This probably takes about 1-3 minutes total, depending how you prefer your meat cooked. Add the cooked beef, sliced avocado, scallions and greens on top of the cooked noodles, then pour the hot broth over top. Enjoy!
Ingredients:
• 1 pack of Korean Gomtang Ramyeon (any brand)
• 2 cups water
• Provided flavor packet
• 1/3 pound of lean beef such as Ribeye or London Broil
• 1/2 an avocado, sliced lengthwise into 1/4” segments
• 1/4 cup of thinly sliced scallions
• Handful of fresh greens, like baby arugula or spinach
• Beef Marinade (for 1 serving):
• 2 TB tamari or soy sauce
• 1/4 tsp freshly ground black pepper
• 1/4 tsp freshly ground coriander seed
• Pinch of Japanese green peppercorn (Sansho)
We’re using Sapporo Ichiban instant ramen which was originally from Japan, but now manufactured in the U.S. “Ichiban” means “number one” (Best Ramen in Sapporo). Master the Ajitama egg, and this ramen recipe will be a go-to in your cooking repertoire. If you find a true Ajitama egg to be elusive, then hard-boiled, fried or poached eggs will do...but an egg is essential! We also love to use back bacon or Canadian bacon, as it is a bit leaner than traditional belly bacon.
Before boiling the instant ramen noodles, preheat the oven to 375 degrees F. Lay the bacon on a parchment-lined rimmed sheet pan and put it in the oven for about 10 minutes. In a small pot on the stovetop, cook noodles as directed using 2 cups of water. Once they’re done, transfer the noodles to your serving bowl and reserve the pot of cooking water for later. Finish plating your ramen. Add sliced scallions, whole or halved Ajitama egg and the oven-cooked bacon.
Bring the pot of cooking water back up to a simmer (or, if you have chicken broth, toss the cooking water to elevate your instant ramen!). Whisk the flavor packet into the broth or cooking water. Taste for seasoning and pour the broth over the noodles. What you’ll have now is the most basic version of Tonkotsu Ramen. Beyond this stage, there aren’t any hard and fast rules for dressing up your ramen. Check out the following pages for some great Tonkotsu variations!
• 1 pack of Sapporo Ichiban Tonkotsu Instant Ramen
• 2 cups water for cooking (reserve for broth, if using)
• Provided flavor packet
• 2 cups chicken broth (if using in place of cooking water)
• 1/4 cup thinly sliced scallions
• 1 Ajitama Egg
• 2 pieces of cooked back bacon

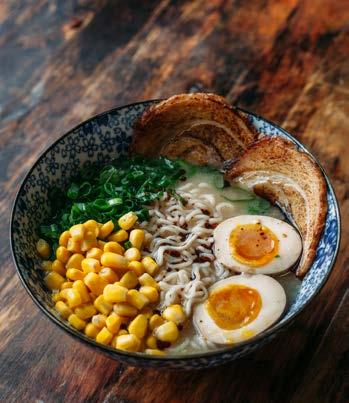
• 1 pack of Nissin Black Garlic Instant Ramen
• 2 cups water
• Provided flavor packet and oil
• 1/3 cup thinly sliced scallions
• 1 Ajitama Egg
• 1/4 cup sweet canned or thawed frozen corn
• (2) 1/4” slices of cooked back bacon or Chashu pork

• 1 pack of Shin Black Instant Ramen
• 2 cups water
• Provided flavor packet
• 1/3 cup thinly sliced scallions
• 1 Ajitama Egg
• (2-3) 1/4” cooked slices of pork belly or Chashu pork
• Nori sheets, sliced into thin strips
This is Setsunai’s house pork ramen, which has been our restaurant’s most popular noodle bowl since the beginning! We are a non-traditional noodle shop, so you won’t find this kind of ramen anywhere else. If you are into a more “traditional” pork ramen, just think of this recipe as “a bowl of noodles that tastes great,” and rejoice that you can make it for yourself at home!
At Setsunai, we use local pork belly and smoke it using local Alder wood chips at low temperature for a couple of hours. We then switch to Chashu-style cooking, which is a pot of tamari, ginger, garlic and green onion ends simmered for another 2 hours. This results in a smoky, ultra tender, melt-inyour-mouth pork belly slab. After it is chilled for several hours, it is ready to cut, fry thick slices to a golden crisp and serve whole on top of our noodle bowls. You don’t need a fork or knife, just chopsticks and a decent set of chompers!
We also make our own broth from scratch, but you can just use store-bought chicken stock and some of the provided flavor packet to season. Typical tonkotsu requires pork and chicken (and optionally, duck) bones and needs at least 10-16 hours to develop the ideal body and flavor.
• 1 pack Sapporo Ichiban Tonkotsu Ramen
• 2 cups water (for cooking, then discard)
• Provided flavor packet
• 2 cups chicken stock (for the broth)
• 1/4 cup thinly sliced scallions
• 1 Ajitama Egg
• 2 pieces cooked pork belly or back bacon (or, try smoking and cooking your own!)
• 1/4 cup chopped chard, sautéed with sesame oil
• 1/2 cup fresh shungiku or arugula
• 1 small shallot, thinly sliced and fried in oil until crispy
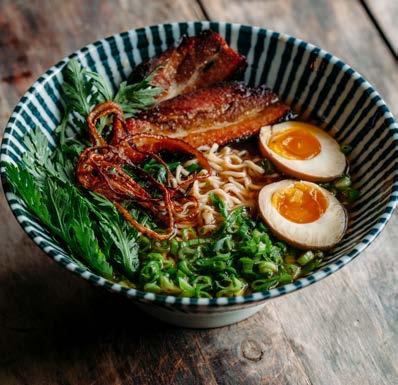
There are some great flavor combinations when making a vegetable-based instant ramen, and they may already exist in your fridge. However, you can take it to the next level by visiting your local farmers market and make it something local, seasonal, and unique!
It all starts with the instant ramen itself. By far my favorite vegan instant ramen pack is Shin Green. There are many others on the market and they are all decent. Truly the best place to find a vegan ramen is at an organic food market. They generally carry a few varieties, while conventional stores mostly carry only name-brand or meat-based instant ramen.
I think it is also important to note that seasonality plays a large role in how to dress up your instant ramen. Here are four different styles, one for each season of the year:
Winter - Seared squash and shiitake mushrooms
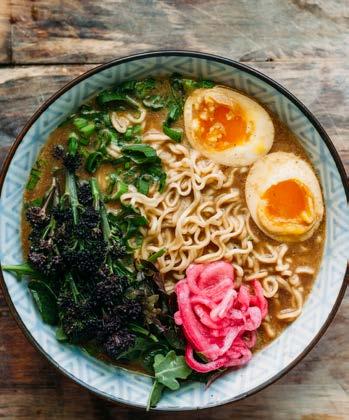
Spring - Broccoli shoots and fresh greens, like shungiku or arugula
Summer - Seared green beans and cherry tomatoes
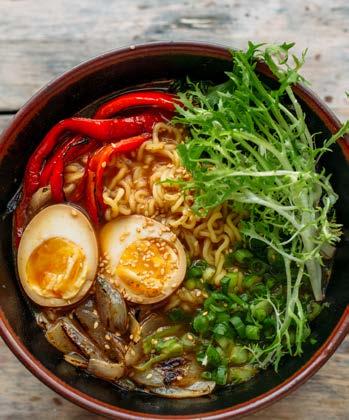
Fall - Roasted carrot or sweet red peppers and yellow onion
Another important ingredient is MISO! The flavor packet in any instant ramen is just fine to use on its own, but fresh miso mixed into the broth will really round out the flavor of a vegetarian or vegan ramen. Ingredients for two different seasonal vegetable ramen recipe ideas are on the following pages!
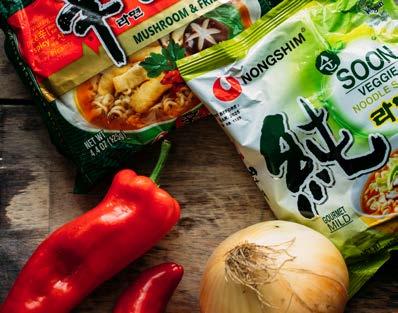
First, prepare the veggies! Oven roasting is my preferred method, but if you’re short on time, a pan sear will do. Thicker vegetables like root veggies or squash may need a bit of water to steam them through until tender.
For one serving, add 1/4 cup of water and the sliced veggies to a pan increasing the heat to high. Once the liquid has reduced to zero, turn the heat down to medium. Add a drizzle of neutral oil and let everything cook, undisturbed, for a few minutes to get a nice sear on your precious cargo. Add a pinch of salt and flip the veggies. Once the other sides are also seared, remove pan from the heat and set veggies aside.
Cook the instant ramen and transfer to a serving bowl. Discard the noodle-cooking water. In a small pot, add 2 cups of cold water and heat until simmering. Whisk in the provided flavor packet and 2 teaspoons of quality miso (see notes on miso in Pantry section). Carefully incorporate the miso with the water, then remove the pot from heat. Never boil miso. Place the cooked veggies, sliced scallions and Ajitama Egg onto the cooked noodles and pour the hot vegetable broth over top.
• 1 pack of Shin Green Instant Ramen
• 2 cups of water
• Provided flavor packet
• 2 tsp miso (see miso notes in Pantry section)
• 1 Ajitama Egg
• 1/3 cup thinly sliced scallions
• 1/2 cup chopped kale
• 1/2 cup fresh baby arugula, spinach or shungiku
• Purple sprouting broccoli florets
• Pickled Red Onions
• 1 pack of Shin Green Instant Ramen
• 2 cups of water
• Provided flavor packet
• 2 tsp miso (see miso notes in Pantry section)
• 1 Ajitama Egg
• 1/3 cup thinly sliced scallions
• 1/2 cup of a bitter chicory (like frisée or radicchio), torn
• 1/2 cup of chopped and seared yellow onion
• 1 medium sweet or spicy red pepper, sliced and seared
• Sesame seeds for garnish and texture
What is Mazemen? It is simply ramen noodles without broth. The word translates to “mixed noodles”. Mazemen is sometimes called Abura Soba or Mazesoba and is thought to have originated in Nagoya, Japan.
Because there is no broth, Mazemen is a very customizable dish. This allows for some creative freedom with delicious sauces, oils, dressings and other tasty toppings like barbecued meats. The following Mazemen recipes are extremely versatile and can be made with a host of different fixings...even our Breakfast Ramen!

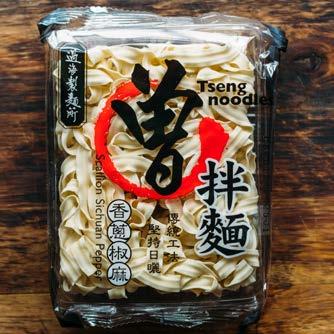
There are plenty of great instant ramen varieties suitable for this style of noodle dish. Here are a few I’ve found that lend themselves well to Mazemen dishes:
Buldak makes a number of “stir-fry” noodle varieties, but be warned they tend to use artificial flavoring. If that’s not your thing, try Sapporo Ichiban Yakisoba. I also appreciate Chapagetti, a great saucy-style instant noodle.
You may notice while exploring the Mazemen category that the noodle style will stray from “ramen” noodles; though that’s not the focus of this book, it is okay. Don’t limit yourself from noodle options, as the end goal here is to make tasty food. With that said, go out and peruse those instant noodle aisles to see what looks inspiring!


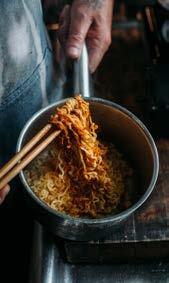

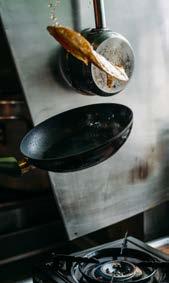


G
ood morning! Ramen for breakfast!? YES, PLEASE!!!
If you can prepare Bacon and Eggs, then this ramen dish can be yours! Bacon is not the only meat option here.Try pork or breakfast sausage, veggie bacon, veggie sausage, or breakfast ham! If you want a softer, runnier egg experience, then a fried or poached egg are great options for this savory breakfast.
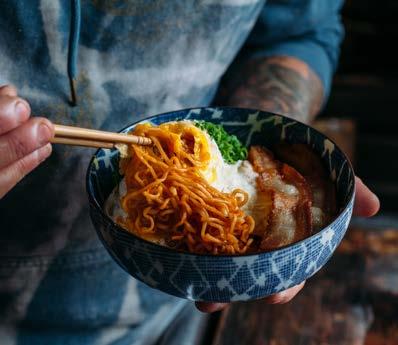
Preheat the oven to 375 degrees F. Lay the bacon or sausages on a parchment-lined rimmed sheet tray. Put the meats in the oven for about 10 minutes or until your desired doneness has been achieved. Meanwhile, fry or poach a couple of eggs.
Cook the instant ramen as per package instructions. Drain off all of the water. Gently toss the noodles with the flavor packet until well incorporated, then plate. Add the sliced scallions, cooked eggs and meat on top. Chili Oil or Chili Crisp is a perfect accompaniment to this mazemen dish. Now you’re ready to have an amazing morning! Or is it dinnertime already? No matter what time of day, you will love this scrumptious meal!
• 1 pack of Shin Black Instant Ramen
• 2 cups water (for cooking, then discard)

• Provided flavor packet
• 2 eggs, cooked sunny side up, over-easy or poached
• 2 pieces of soft-cooked bacon, breakfast sausage or ham
• 1/3 cup thinly sliced scallions
• Chili Crisp and/or Chili Oil, optional
Hearty and spicy, this mazemen is one of my go-to ramen dishes to make when I don’t feel like having broth, but need something filling to eat. A salad with a cool ranch dressing rounds out this meal. We have included an easyto-make Dill Ranch Dressing later on in this book!
• 1 pack of Sapporo Ichiban Sriracha Yakisoba Instant Ramen
• 2 cups water (for cooking, then discard)
• Provided flavor packet
• 1/2 cup chopped Napa cabbage
• 1/4 cup thinly sliced leeks (or scallions)
• 1/3 pound ground pork
• 1-2 tsp Chili Oil
• Salad:
• 2 cups Spring salad mix, torn or roughly chopped
• Dill Ranch Dressing
• Sesame seeds, pepitas, sunflower seed mix for texture


Start by cooking the instant ramen per packaging instructions. After cooking, drain the water through a colander in the sink and rinse the noodles with cold water. Heat an 8-10” pan on medium-high and add 1 tablespoon of cooking oil. Add the leeks, cooking for 3 minutes, or until fragrant. Add the cabbage. Toss and cook for another 2 minutes.
Add the ground pork and cook it through. Mix in the flavor packet and 1-2 teaspoons of Chili Oil until combined. Toss in the cooked noodles and stir until ingredients are well incorporated. Place the noodle mix onto a plate or bowl and prepare the side salad.
If you have fresh garden greens, good on you! The rest of us will be going to the farmers market or local grocer. In a small bowl, toss the greens with our Dill Ranch Dressing, or use store bought. Plate the salad and sprinkle with the seed mix. This meal is satiating and pairs well with an ice cold lager!
Instant ramen never looked so fancy! Honestly though, scallops are very easy to cook and generally easy to find at your local fish market. You can also buy them frozen. We like Weathervane scallops, but any type will work in this dish. Since we’re going *fancy*, this is an opportunity to use as high quality noodle as you can find, like Public Goods Ramen Noodles. If you aren’t comfortable with scallops or you have an allergy in the house, try using crab, lobster or halibut.
• 1 pack of high quality instant ramen
• 2 cups water (for cooking, then discard)

• 2 TB Yum Yum Sauce (the saucy byproduct from the Yum Yum Shiitake Mushroom recipe)
• 3 Weathervane scallops
• 1 TB unsalted butter
• 1 TB neutral cooking oil
• 1 garlic clove, smashed
• Salad:
• Fresh Spring green mix
• Toasted Sesame Dressing
• Sesame seed mix for garnish and texture
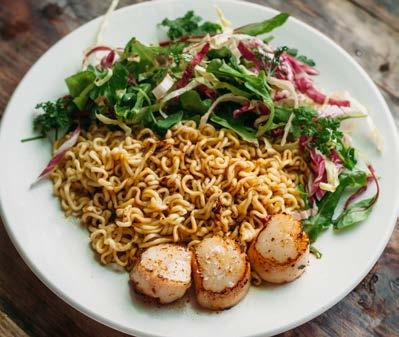
Cook the instant ramen and immediately rinse the noodles in cold water. Toss noodles with Yum Yum Sauce and plate.
With a paper towel, pat the scallops dry and set aside. Bring a small 8-inch pan to medium-high heat on the stove. Add 1 TB of unsalted butter and 1 TB of neutral oil, plus a smashed clove of garlic. Carefully add each scallop to the hot pan and grab a spoon for basting. To baste the scallops, tilt the pan slightly so that the fats pool enough to scoop up big spoonfuls of liquid.
Continuously baste each scallop with the garlic-infused fats for about 2 minutes. Flip the scallops and baste on the other side for another 1-2 minutes. With practice, you’ll learn to cook scallops just how you like them. Plate them with a pinch of flaky salt next to the Yum Yum noodles. Drizzle the hot garlic butter over the noodles. If you’re going for low fat, discard the butter. Dress the greens alongside and enjoy your fancy little meal!
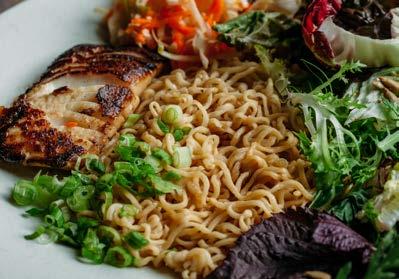
This baby requires a bit of effort, but all good things do. You will need to quick-pickle seaweed, make a crushed sesame paste, marinate black cod in miso (or a local fish that you like) and make a small salad with our Toasted Sesame Dressing.
Pickling seaweed is easier than it sounds. Arame is very easy to find. Sea Palm might take some searching. They have distinctly different textures so I recommend using both together, but using Arame alone will be sufficient. It’s a seaweed that’s already been shredded, cooked, and sundried. Start by placing 1 TB of each seaweed in water for about 20 minutes to rehydrate. Next, replace the water with rice vinegar and pickle for 20-30 minutes. Drain the liquid and your pickled seaweed is ready to eat!
As to the sesame paste, you can purchase it directly from a grocer. It is called Neri Goma (or sesame paste); it is different from Tahini in that it is roasted. You could also make your own by toasting sesame seeds and grinding them with a bit of sesame oil using a mortar and pestle, or with a high power blender.
To make the toasted sesame paste mixture (which will coat the noodles), whisk together 1/4 cup of tamari, 1/4 cup of sesame paste and 1 TB of honey.
For 1 serving of cod, whisk together 2 TB miso, 1 TB cornstarch and 1 tsp mirin. Marinate the fish for 12-24 hours in the fridge.
Cook the instant ramen and rinse noodles in cold water. Put the ramen into a mixing bowl and toss with 2 TB of the toasted sesame paste mixture and 1 TB of noodle cooking water. Plate the ramen, scatter a hefty pinch of pickled seaweed atop.
Thoroughly pat the cod dry with a paper towel so that it won’t stick to the skillet. Heat a pan to medium-high and add 1-2 TB of oil. Sear the cod fillet in the hot pan for about 2 minutes. Gently flip it over and continue to cook. Black cod is a fatty fish and difficult to overcook. If you don’t have a temperature probe, a good doneness indicator is that the fillet layers will start to flake and spread open.
Plate the cod fillet alongside the sesame coated ramen noodles. Dress up a side salad with Toasted Sesame Dressing (see Dressings) on the same plate and voila! Bon appétit!
If you think about it, a cheesecake crust could be made from so many things! Here we give instructions on how to make it out of instant ramen! Can you believe!? It is not difficult to do, tastes incredible and will be a great conversation starter at parties! Plus, with this crust recipe, just think of all the other fun dessert possibilites...


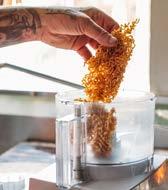
Start by cooking four ramen blocks in a pot of dissolved sugar water (1 cup of sugar to 4 cups of water). Once tender, let the noodles drain really well, then fry them until golden brown and crispy. To fry, use a pot of hot neutral oil, or even an airfryer.
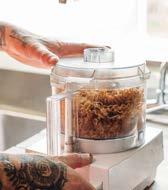
Add the sweetened fried noodles to a large food processor. Pulse to break up the noodle clumps. Then, while the machine is running, slowly pour in 1 1/2 sticks (3/4 cup) of melted butter. Scrape down the sides with a spatula, then pulse until you have a coarse but uniform sandy texture. Evenly spread the crust onto a rimmed 1/4 sheet tray lined with parchment paper (with some extra overhang to later lift the cake out of the pan). Press the crust down with your hands or with a spatula to fill all the gaps to form an even, flat layer. Freeze for about 1 hour or until hardened.
Meanwhile, make the cheesecake filling. In a stand mixer with whisk attachment, whisk together 16 oz of room temperature cream cheese and 8 oz of room temperature chèvre (creamy goat cheese) on medium speed until smooth. Whisk in 3/4 cup of sugar. Add 3 large eggs, whisking each egg between additions. Scrape down the sides of the bowl using a spatula. Continue to mix until very smooth. Lastly, whisk in 1 teaspoon of pure vanilla extract.
Preheat the oven to 350 degrees F. Once the ramen crust has hardened, pour the filling onto the crust and spread it evenly to all the edges. Gently drop the pan onto the counter a few times to allow the filling to flatten and remove any air bubbles. Place the cheesecake on the center oven rack and bake for 27-30 minutes. Keep an eye on it until it looks firm and set. It shouldn’t brown. Overbake and it’ll crack, underbake and it will be too soft to slice into firm squares.
Remove from oven and allow it to firm up and cool about 20 minutes. Then, move it to the fridge to cool for at least 1 hour. You should then be able to use the overhanging parchment to gently lift the whole cheesecake from the pan. Place it onto a cutting board and use a large sharp knife to cut the cheesecake into your desired sized slices. We like to further adorn our cheesecake with Cajeta, a delicious goat’s milk caramel. We also add seasonal fruits, berries, edible flowers, grilled figs or Italian prune plums to really take the flavors, textures and appearance of this cheesecake to the next level!



CH E E S E


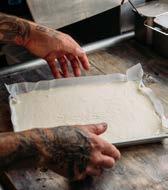
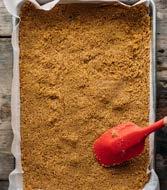


This is the stuff of my childhood dreams. Does it make sense? No, but who cares! What’s most important is that it is both fun to make and fun to eat.
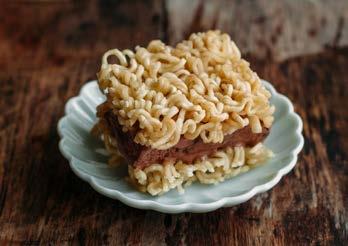
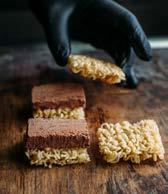
Open a square pack (or multiple packs for many sandwiches) of Nissin ramen (any type). Discard the flavor packets, or give them to a friend. 1 square pack of instant ramen will yield 4 small ice cream sandwiches.
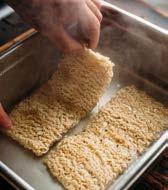
Place the ramen blocks onto a rimmed baking sheet or casserole dish. In a pot, heat and whisk 1 cup of sugar and 4 cups of water until it comes to a light boil and the sugar is fully dissolved. Remove pot from heat and pour the syrup over your ramen blocks until just submerged.
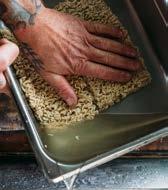
After 2-3 minutes, you can gently unfold and open up your ramen blocks like a book. Do not let them soak for more than 10 minutes, as they will absorb too much sugar water and burn when frying. Gently press the flat noodle rectangles down as you tilt and drain off excess liquid, taking care to keep their shape intact. Place the pan of ramen blocks into the freezer.
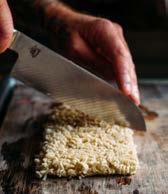
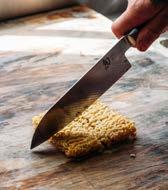
Once frozen solid, use a metal spatula to transfer the ramen rectangles to a cutting board. Cut each rectangle in half, creating two even squares per rectangle (1 instant ramen pack).
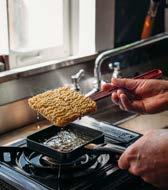
Time to fry! I use a square rimmed egg pan that I picked up from a local market for about $10, which helps keep the ramen blocks square while frying. I have also used a round pan and chopsticks or spatula to gently reshape and maintain the squareness of the ramen block while frying.
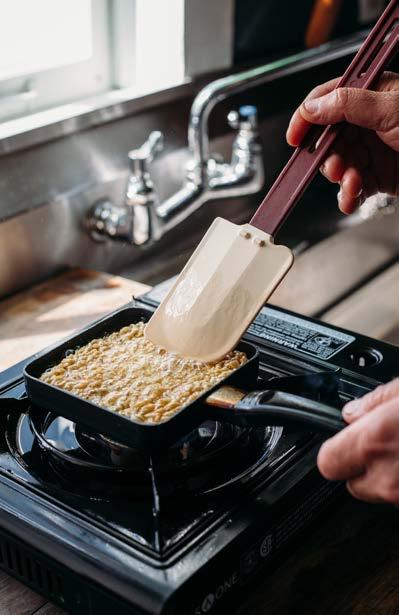
Heat the neutral (high heat) oil, enough to fill your frying pan about half way. Carefully fry the ramen block for about 2 minutes. Gently flip with a firm rubber spatula, frying for an additional 30 seconds to 1 minute.
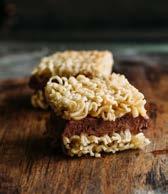
Lift the block with the spatula, allowing excess oil to drip off. Move to a cutting board, and immediately cut into 4 squares. They should be slightly crunchy, not soggy. Let the squares cool before adding your ice cream.
Cutting the ice cream into matching squares takes a little practice; if you find ice cream in a square container, it will make this task easier. Once you cut the ice cream squares to size and build your ice cream sandwich(es), re-freeze them before serving. Enjoy this funny little treat!!!

I C E C R E A M



S A N D W I C H


The Made from Scratch section is where you will find all of the personal recipes that we want to share with you! Each recipe is a little project in and among themselves. These are the elements that will really elevate your instant ramen (and your personal cooking) to no end.
Some of the following recipes take a bit of (inactive) time for flavor or texture to develop, while some of them can be prepared and used right away. All the same, this is where you will find some of the cherished recipes that have become the backbone of our restaurant. Making all of these elements from scratch or preparing them fresh for daily service is super important to us. We are grateful when we hear our guests give recognition to the amount of time, attention, and love that go into preparing all of these delectable morsels!


J I T A M A



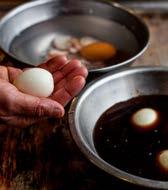
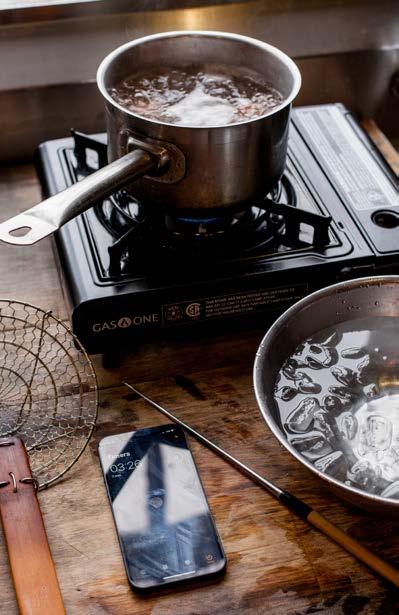
The Ajitama Egg (or Ramen Egg) method may take some practice to perfect. Egg size, egg temperature, burner size and burner strength will vary. Two very important key elements to successful Ajitama Eggs: use room temperature eggs before cooking and an ice bath after cooking (which is simply a medium bowl of ice water at the ready).
Start by pricking a small hole on the smaller side of the egg(s). Bring a small pot of water to a boil and add 1 teaspoon of baking soda (scale up if you’re making a larger batch). Gently place the eggs into the boiling water and set a timer for 7 minutes.
After 7 minutes, immediately use a slotted spoon or skimmer to remove the eggs from the pot and submerge them into the prepared icewater bath for about 5-10 minutes. This stops the eggs from continuing to cook and allows the whites and jammy yolk to cool and set to perfection.
Gently tap and crack the shell on each end. Use your clean fingernails to peel off the whole shell soon after the ice bath (as they sit, they don’t like to peel very easily). You can play around with the cook time until you achieve your ideal egg yolk. Yolk texture preferences are up to you to discover!
•Soft and runny: 5-6 minutes
•Jammy: 7 minutes (depicted in these photos)
•More firm: 8-9 minutes
•Hard boiled: 10+ minutes
Place the peeled eggs right into the following marinade recipe.

• 1 cup Tamari or Soy Sauce
• 1/4 cup high quality Mirin (sweet rice wine)
• 3 cups water
Combine and whisk the ingredients in a container where the marinating liquid will cover the peeled eggs. Other ingredients you could add to the marinade are grated ginger, grated garlic and/or sugar, but we prefer to keep it simple. Marinate the peeled eggs for 12-24 hours in the fridge. Once they’ve marinated for 24 hours, the yolks will firm up a bit. Keep the egg whole or slice it in half and place it on top of your ramen bowl. Enjoy Ajitama Eggs within 48 hours of marinating for best results!
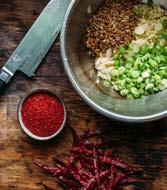
The #1 thing to note when working with hot oil: Be SUPER careful! Please do not burn your skin in the name of tasty food toppings. If you’re not comfortable handling hot oil, please go buy a jar of Chili Crisp! Fly By Jing makes an excellent version and Lao Gan Ma is another staple worth mentioning. Making Chili Crisp is not difficult and I don’t mean to be alarmist. I’m just here to forewarn you to proceed with caution as the process can be a bit intense, especially if making something like this is a new undertaking.

• 2 cups of high-temp neutral oil (grape seed or sunflower)
• 2 bay leaves
• 1 star anise
• 2 cardamom pods
• 1 whole clove
• 1 bundle of scallions, thinly sliced
• 2-4 inch knob of ginger, peeled and minced
• 5 cloves of garlic, finely sliced
• 1/4 cup dried chile de arbol, cut into 1/4” pieces
• 1/4 cup sunflower seeds
• 1 TB sesame seeds
• 1/4 cup gochujang
• 4 oz toasted sesame oil
• 4 oz shoyu or tamari
This recipe yields a fairly large batch of Chili Crisp with Chili Oil, so scale it up or down. It makes a great gift if you have a lot! Start by adding the oil to a pot on medium-low heat. As the oil heats, add the first set of ingredients, the aromatics: bay leaves, star anise, cardamom pods and clove. Cook for about 10 minutes until the cardomom pods start to darken. Don’t burn the ingredients as they will add a bad taste to the oil. Skim large ingredients from the oil and discard.
While the aromatics are cooking, gather and prep the edible ingredients. Finely chop the scallions, peel and finely chop the ginger, thinly slice the garlic, and cut the arbol chiles into 1/4” pieces. If you find that there is not enough time to prep these while the aromatics are cooking, remove the pot of oil from heat and reheat it once your ingredient prep is all done.
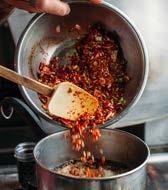
The burner should now be set to about medium heat. When you are all prepped and the oil reaches about 300 degrees F, slowly add the chopped edible ingredients a little bit at a time. Be very careful, as the oil will bubble up if you add too much at once. After you have added all of the edible ingredients to the oil, continue to stir until everything is slightly browned. Take your time and do not walk away from the stove!
Turn off the heat and add the toasted sesame oil. Wait about 10 minutes, then very slowly add a bit of tamari. If it doesnt foam up too much, add a bit more. Repeat this process until all of the tamari has been incorporated. You will now have both Chili Crisp and Chili Oil! Store in a glass jar in the fridge for more longevity, or keep it at room temperature for 1 week if you plan to use it up sooner.


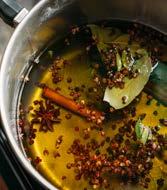

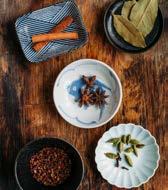





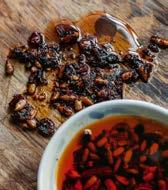
Once you start pickling shiitake mushrooms, you will never stop. They are delightful. A bit of backstory behind these little flavor bombs...when making dashi, lots of dried shiitakes are used to deepen the flavor. You’re left with a bunch of mushrooms after straining them from the broth. To give credit where credit is due, we must thank David Chang for putting out his cookbook Momofuku and sharing this solution for utilizing the leftover shiitakes! It is not only simple, it is ingenious. This recipe will not only yield incredible pickled shiitakes, but a separate sweet and savory sauce as well. These will make you say, “Yum Yum!!!”

• 2 cups baby shiitake mushrooms
• 1 cup granulated sugar
• 1 cup tamari or shoyu
• 1 cup + 1/4 cup water, separated
• 1 TB freshly minced ginger
• 1 TB freshly minced garlic
• 2 TB cornstarch


Add 1 cup of water, the shiitake mushrooms, sugar and tamari to a pot. Bring the mixture to a simmer. Cook on medium heat, stirring occasionally for 10 minutes. Strain the shiitakes over a bowl and set them aside.
Pour the Yum Yum liquid back into the pot over medium heat. Stir in the minced garlic and ginger. In a small bowl, whisk 1/4 cup of water and 2 TB cornstarch until fully dissolved. Add the cornstarch slurry to the pot and stir. Once it comes to temperature, it will thicken quickly. As soon as the liquid coats the back of a spoon, remove the pot from heat.
Store the pickled shiitakes and Yum Yum Sauce in separate containers in the fridge. The sauce will thicken as it cools. Scale this full recipe up or down, or simply make the Yum Yum Sauce on its own (omitting the shiitakes). Drizzle Yum Yum Sauce on noodles, rice, veggies, meats... everything!
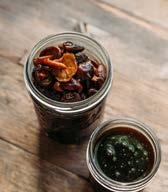
Quick Pickling is a very easy method to prolong the life of vegetables while adding tons of flavor. There are countless ways to do this. Having explored fermentation and pickling for many years, I am eager to share what I have learned!
On the following pages you’ll find itemized recipes that you can follow exactly, but I think it’s important is to think about the principles of pickling so that you have a decent understanding and tool set to explore pickling on your own.
Essentially, quick pickling is adding vinegar (of your choice) to foods and letting time do the work, exchanging the vegetables’ water content for the vinegar through osmosis. Wow! From there, you can explore what other ingredients you might like to add to the jar before the pickling magic takes place.
You’re able to speed up the process by raising temperature of your pickling liquid, which can help reduce the resistance of your veggie. This could incidentally also lead to mushy veggies; sometimes warm vinegar works better (as in the case of pickling onions). However, with something like sweet or hot peppers, even a short simmer can work wonders in getting ready to eat pickles quicker.
Aside from vinegar, one might consider adding salt and/or sugar to the veggies. Both of these can add a huge flavor boost to your pickles. As one might expect, it is a personal taste experience. The salt and sugar measurements will differ based on which particular vegetable and also the person who is pickling! Usually, a hefty pinch of salt is more than enough for a quart jar, and usually the same goes for sugar. Sweet pickling can raise the level of sweetness and alter the taste of the vegetable quite dramatically.
Exploring quick pickling will be fraught with trial and error. If your memory is anything like mine, I would suggest keeping a small food journal with your notes each time you experiment with a pickling project. If you find something totally inedible, I give you permission to get rid of it right now! In most cases, it won’t become more edible a year from now, so just thank the veggies for the teachable moment and ditch ‘em. Making mistakes is an important part of learning!
Labeling is also really important. We label our pickling projects with a date and what’s inside. Most of these things will last from one to three weeks, but it is good practice to periodically toss things that are not being eaten. Or, plan a special meal to use up pickling projects taking up space in your fridge and create space for new pickling projects! Hello, rice bowls with many toppings! And (obviously) noodle bowls!
Other components to consider before you pickle something are your choice of aromatics. A typical spice mix for pickling contains several ingredients like cardamom, clove, cinnamon, bay leaf, etc. However, you can keep it simple and use just one or two spices to really steer a pickled veggie toward a certain flavor profile (a great example of this approach would be the classic Dill Pickle). One of my favorite aromatics is Sansho, a Japanese green peppercorn. You can leave it whole and eat around it, or crush it into a powder first and add to the pickling mix.
Pickling red onion is probably the easiest of veggies to pickle. It takes about 15 minutes to prepare and can be ready to eat within a couple of hours or the following day, depending which method you use.
Start by peeling the skins off of two large red onions and cut off the root end. Using a mandolin to slice will get you thinner and better onions, but a large knife works well enough. If using a mandolin, set it just above the most thin setting. Holding the growing end as a knob, you can safely slice your onions down as far as you dare.
If using a knife, cut the onion in half through the center equator so that you see concentric onion ring circles on each interior surface. Set the onion upright on the cutting board and dig your fingernails into the flesh to hold it firm and steady (and to keep your fingertips away from the knife) while you slice the onion rings as thinly as possible.


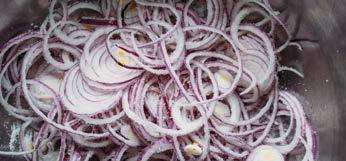


Put the sliced onions into a large bowl and add a 1/2 cup of sugar per large onion. Add a hefty pinch of salt and gently massage the onions until all of the sugar and salt are completely coating the onion rings. Let them rest for about 10 minutes, then put them into a glass jar. Cover them with vinegar. I prefer rice vinegar here, but use what you like. White distilled or apple cider vinegar work well too.
If you’re in a hurry, you can heat the vinegar to a simmer and pour it over the onions. Add the lid, shake the jar and put it into the fridge. They will be tasty and ready to use in a couple of hours. Pickled onions last a couple of weeks in the fridge.
Pro tip: Add aromatics to the vinegar for an extra bout of flavor. Bay leaf, coriander seed, black peppercorn, star anise and cardamom are some examples. Combining them is also encouraged. The best way to do this is to simmer the aromatics with the vinegar for 5-10 minutes, strain them out, let the vinegar cool, then pour it over the onions.
Learn to pickle those hardy vegetables that require some extra time before you can eat them. This category is broad, but we’ll cover a couple of different methods, which will hopefully give you a good foundational knowledge to expand upon!
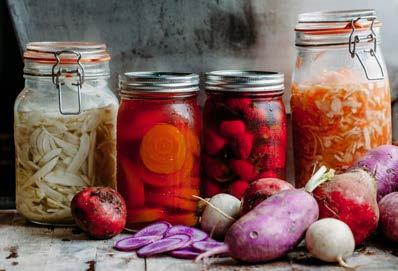

Pickling root veggies is a great way to extend their life and offer something fun to eat. This works great for carrots, daikon radish, small onion bulbs, turnips and beets, to name a few.
Start by washing and peeling your veggies. If they are not too beat up, you can skip peeling. I’d say most root veggies require a bit of peeling. Cut them into a shape and size that you would like to eat (slices, coins, shreds, sticks, spiralized, etc.). There is no wrong method here; cut them however you like and think of how you’ll utilize certain shapes or sizes of pickled root veggies throughout different meals or dishes. Pack them into a quart jar and add about 1-2 teaspoons of sea salt.
In a sauce pan, pour in 1 part Marukan Sushi-Su (a sweet rice vinegar product), 1 part seasoned rice vinegar, and 1 part water. Bring to a simmer and turn off the heat. Carefully pour the vinegar mix over your veggies to fill up the quart jar.
If you want the veggies to be spicy, sprinkle 1-2 tablespoons of Togarashi or Gochugaru powder on top of the veggies before filling the jar with the vinegar mix. Tighten the lid on the jar and give it a good shake to mix it all up.
I put mine in a dark but warm part of my kitchen for a couple of days, then open them up and give ‘em a taste. Label the veggies with name and date and store them in the fridge. They should last a couple of weeks. It’s really that simple!
Here are three dressing recipes that are relatively easy to make. The beauty of making your own dressings is twofold. You can tweak things to your liking by removing or adding ingredients and you can choose the quality of your ingredients. I find that with most manufactured food products, profit margins get in the way of the overall quality of ingredients. It feels good to make things from scratch and make them your own.
Start by adding 1 cup of good quality neutral oil into a blender followed by 1 cup of Marukan Sushi-Su rice vinegar. Add 2-3 TB of yuzu juice, 2 tsp of fresh ginger paste and 1 TB of whole sesame seeds. Blend until smooth. Pour into a squeeze bottle or a quart jar. Label and keep refrigerated.
Add 1 cup of good quality neutral oil into a blender followed by 1 cup of Marukan Sushi-Su rice vinegar. Add 1-2 TB of tamari or shoyu, 2 TB of whole toasted sesame seeds. Blend until smooth. Pour into a squeeze bottle or a quart jar. Label and keep refrigerated.
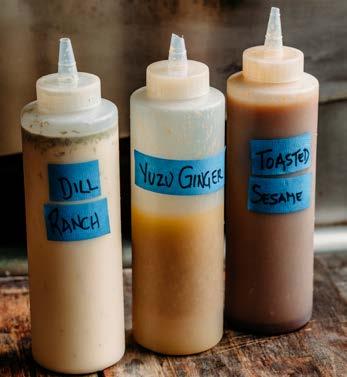
We like to use a thin drinking yogurt made with goat’s milk, but buttermilk will work just fine. Add 2 cups of buttermilk or goat’s yogurt to a blender, 1/2 cup of kewpie (Japanese mayo) and 1-2 TB of chopped fresh dill (dried dill will work when fresh is not available). Blend until smooth. Pour into a squeeze bottle or a quart jar. Label and keep refrigerated.
It has been a pleasure to share some of our ramen world with you. We hope that these recipes will inspire you to have more fun in the kitchen and to explore the food aisles with more vigor than before.
Stepping excitedly into a new-to-you grocery store, seeing and smelling all of the different foods and goods can be truly thrilling. Exploring these places will lead you further into the unknown, allowing you to discover what you don’t yet understand. After putting these new ingredients, recipes and methods into practice, you will be filled with a sense of accomplishment and growth.
If you have ever dined with us at our restaurant and later experience feelings of longing for the meal that you enjoyedthis is Setsunai.
We encourage you to flip through this book and feel a sense of empowerment when you recreate a similar joyful food experience for yourself at home.
Sharing food is the common thread that bonds us together as humans. It always has and it always will. Through food, we learn that we are not so different from each another, we find commonality as a species, and we learn to appreciate and love one another.
Here’s to another bowl of noodles.


