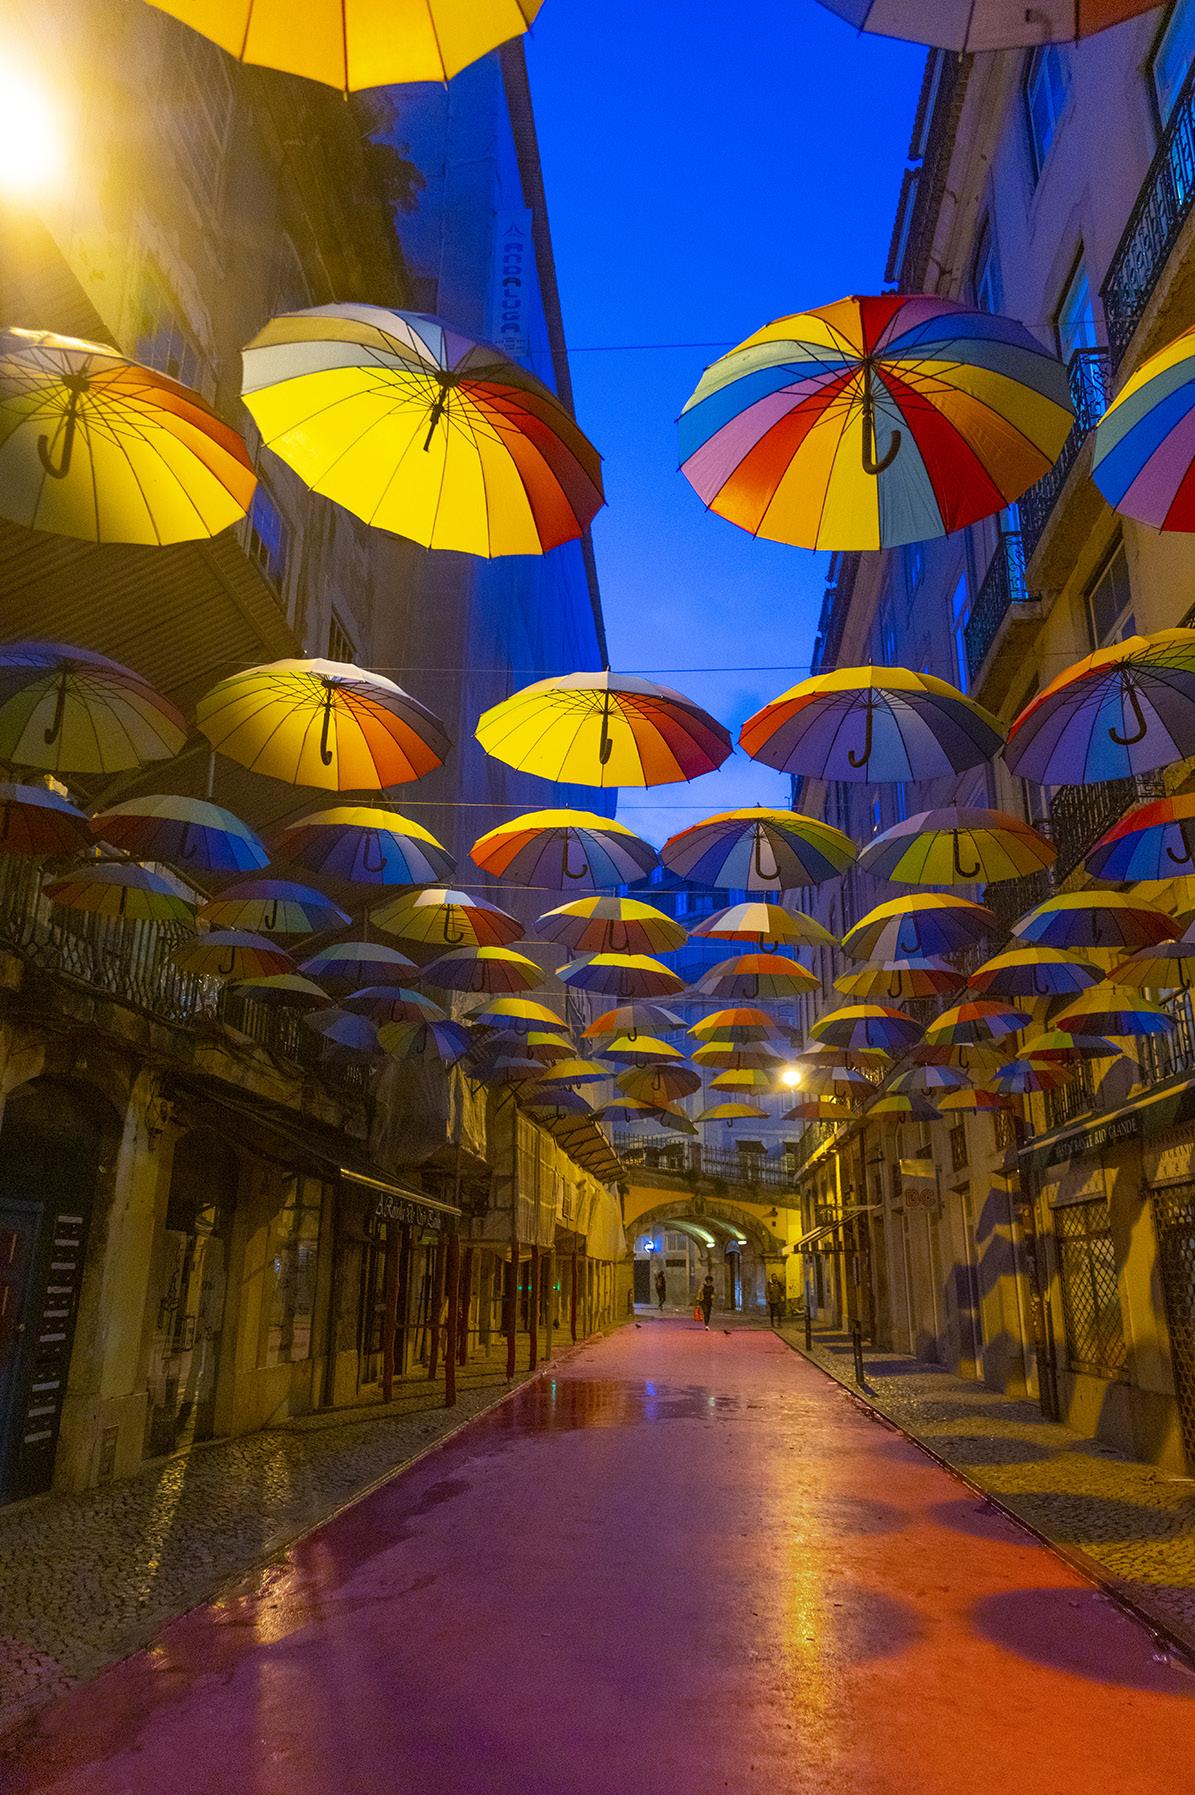
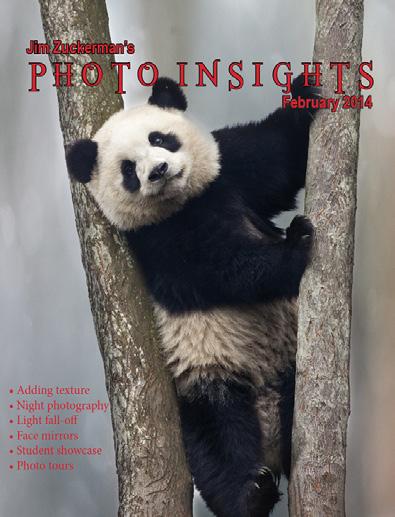
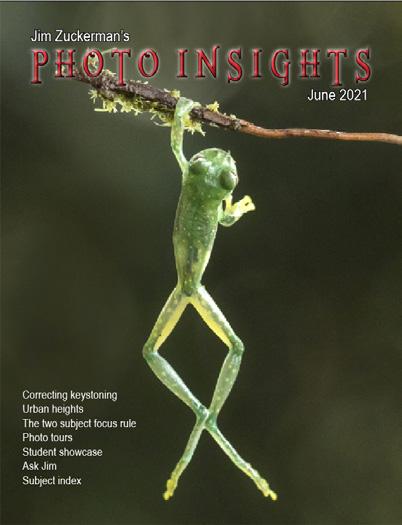
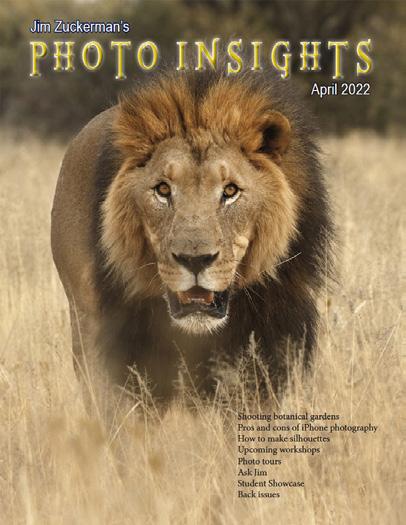
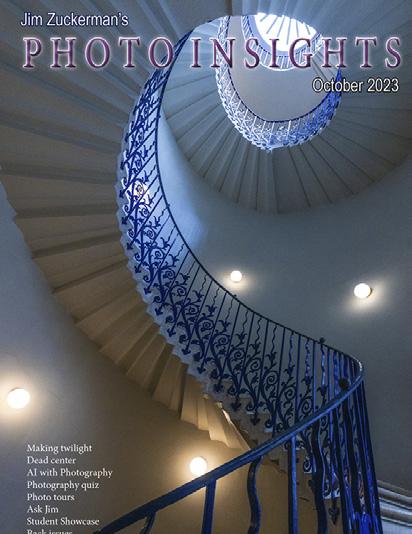
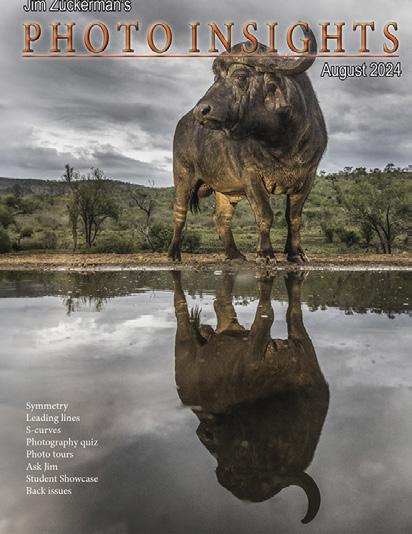
21. What's wrong with this picture? 24. Short and Sweet
26. Ask Jim
27. Photography tours
29. Student Showcase
35. Past issues
43. Subject index
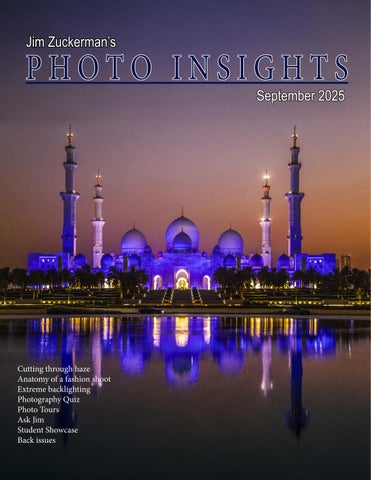
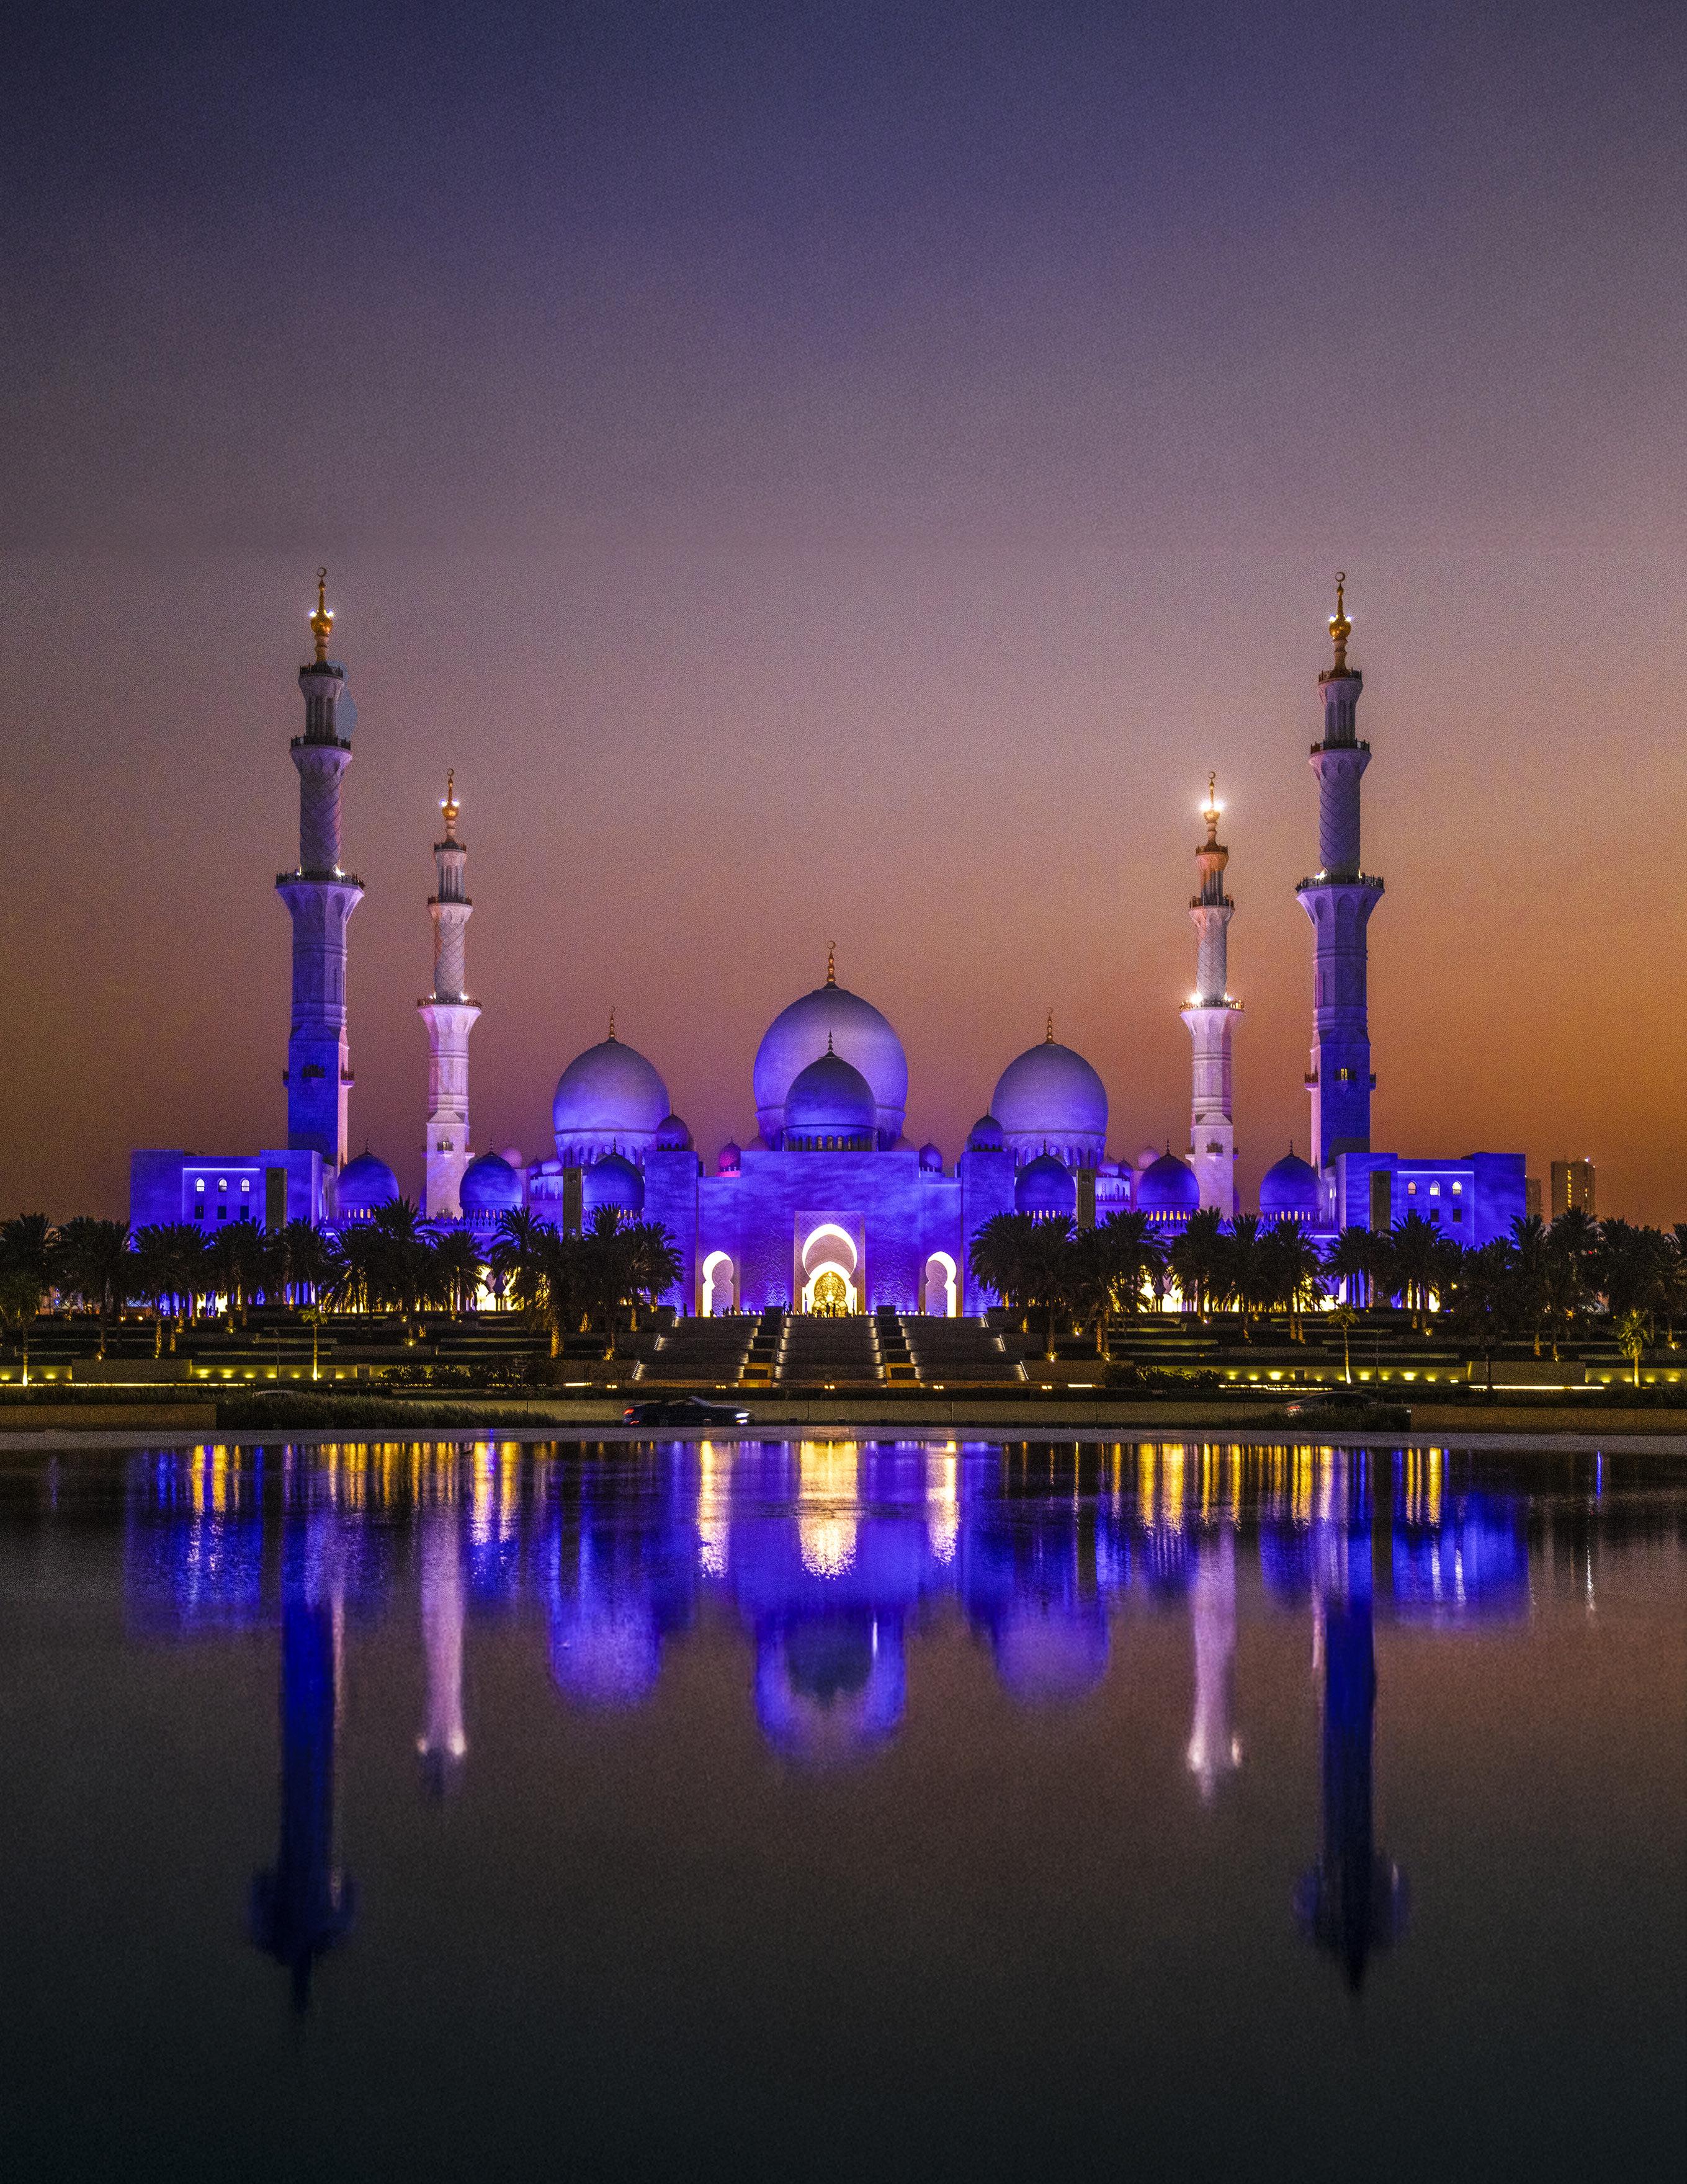
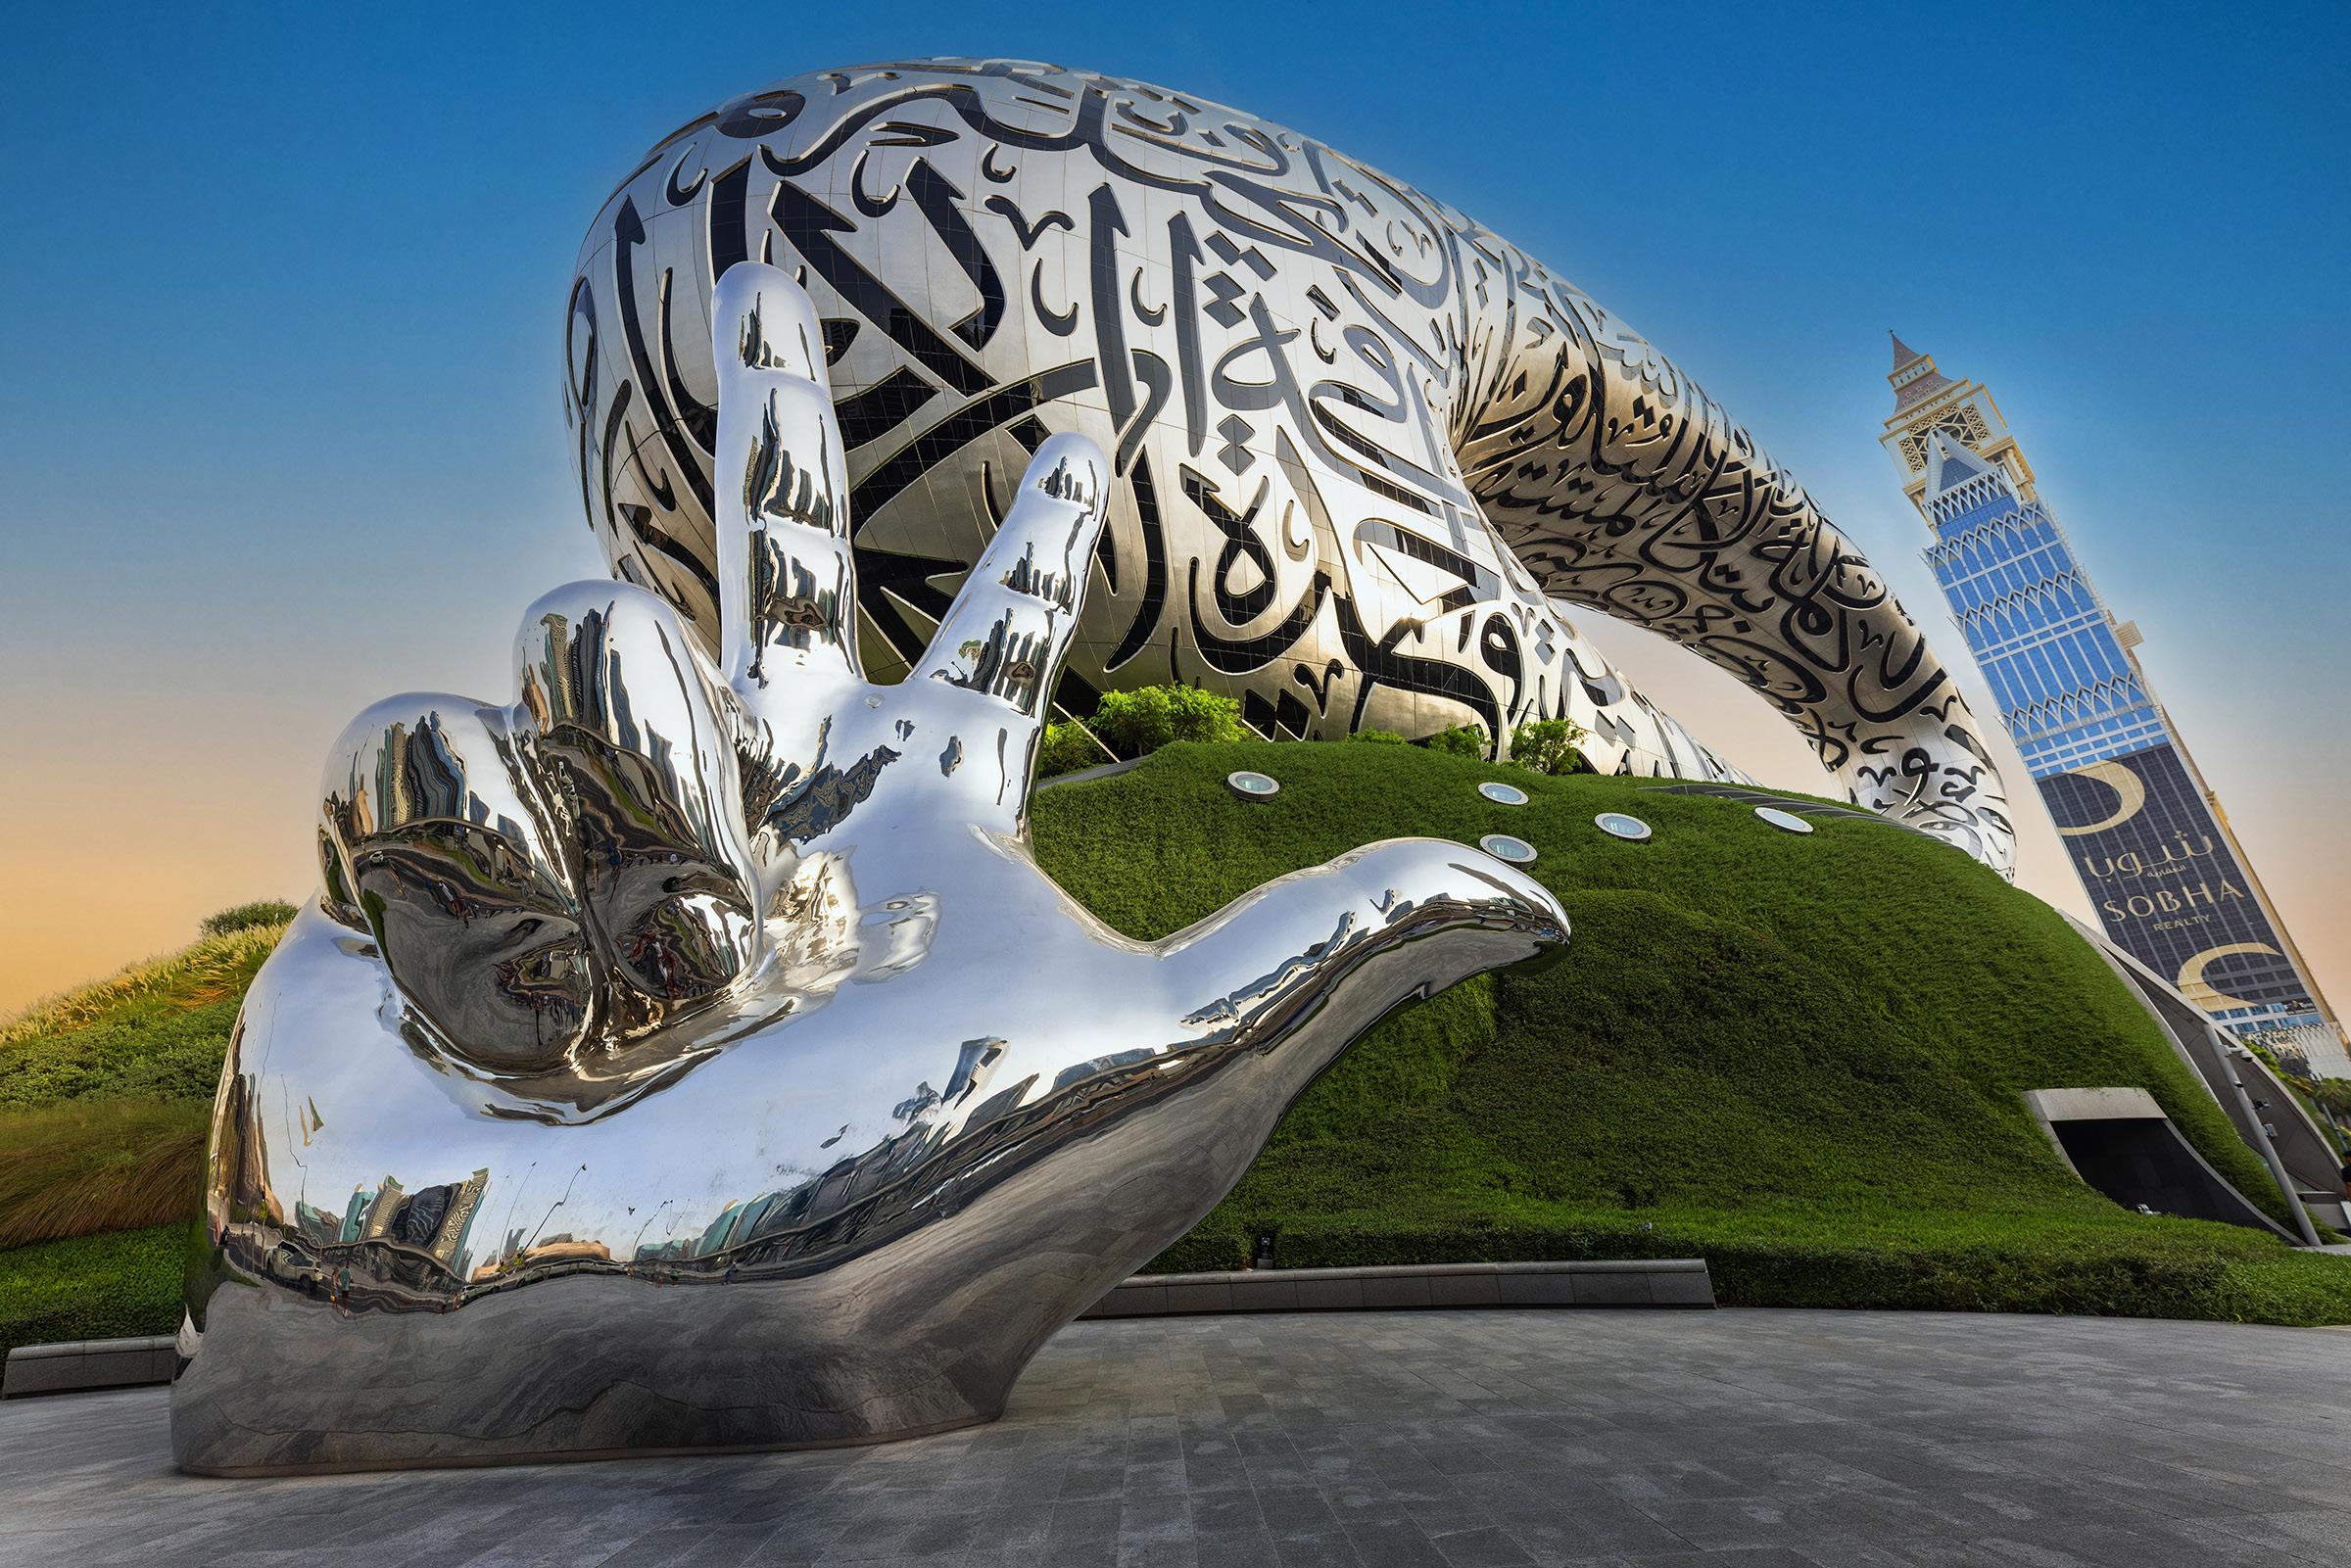
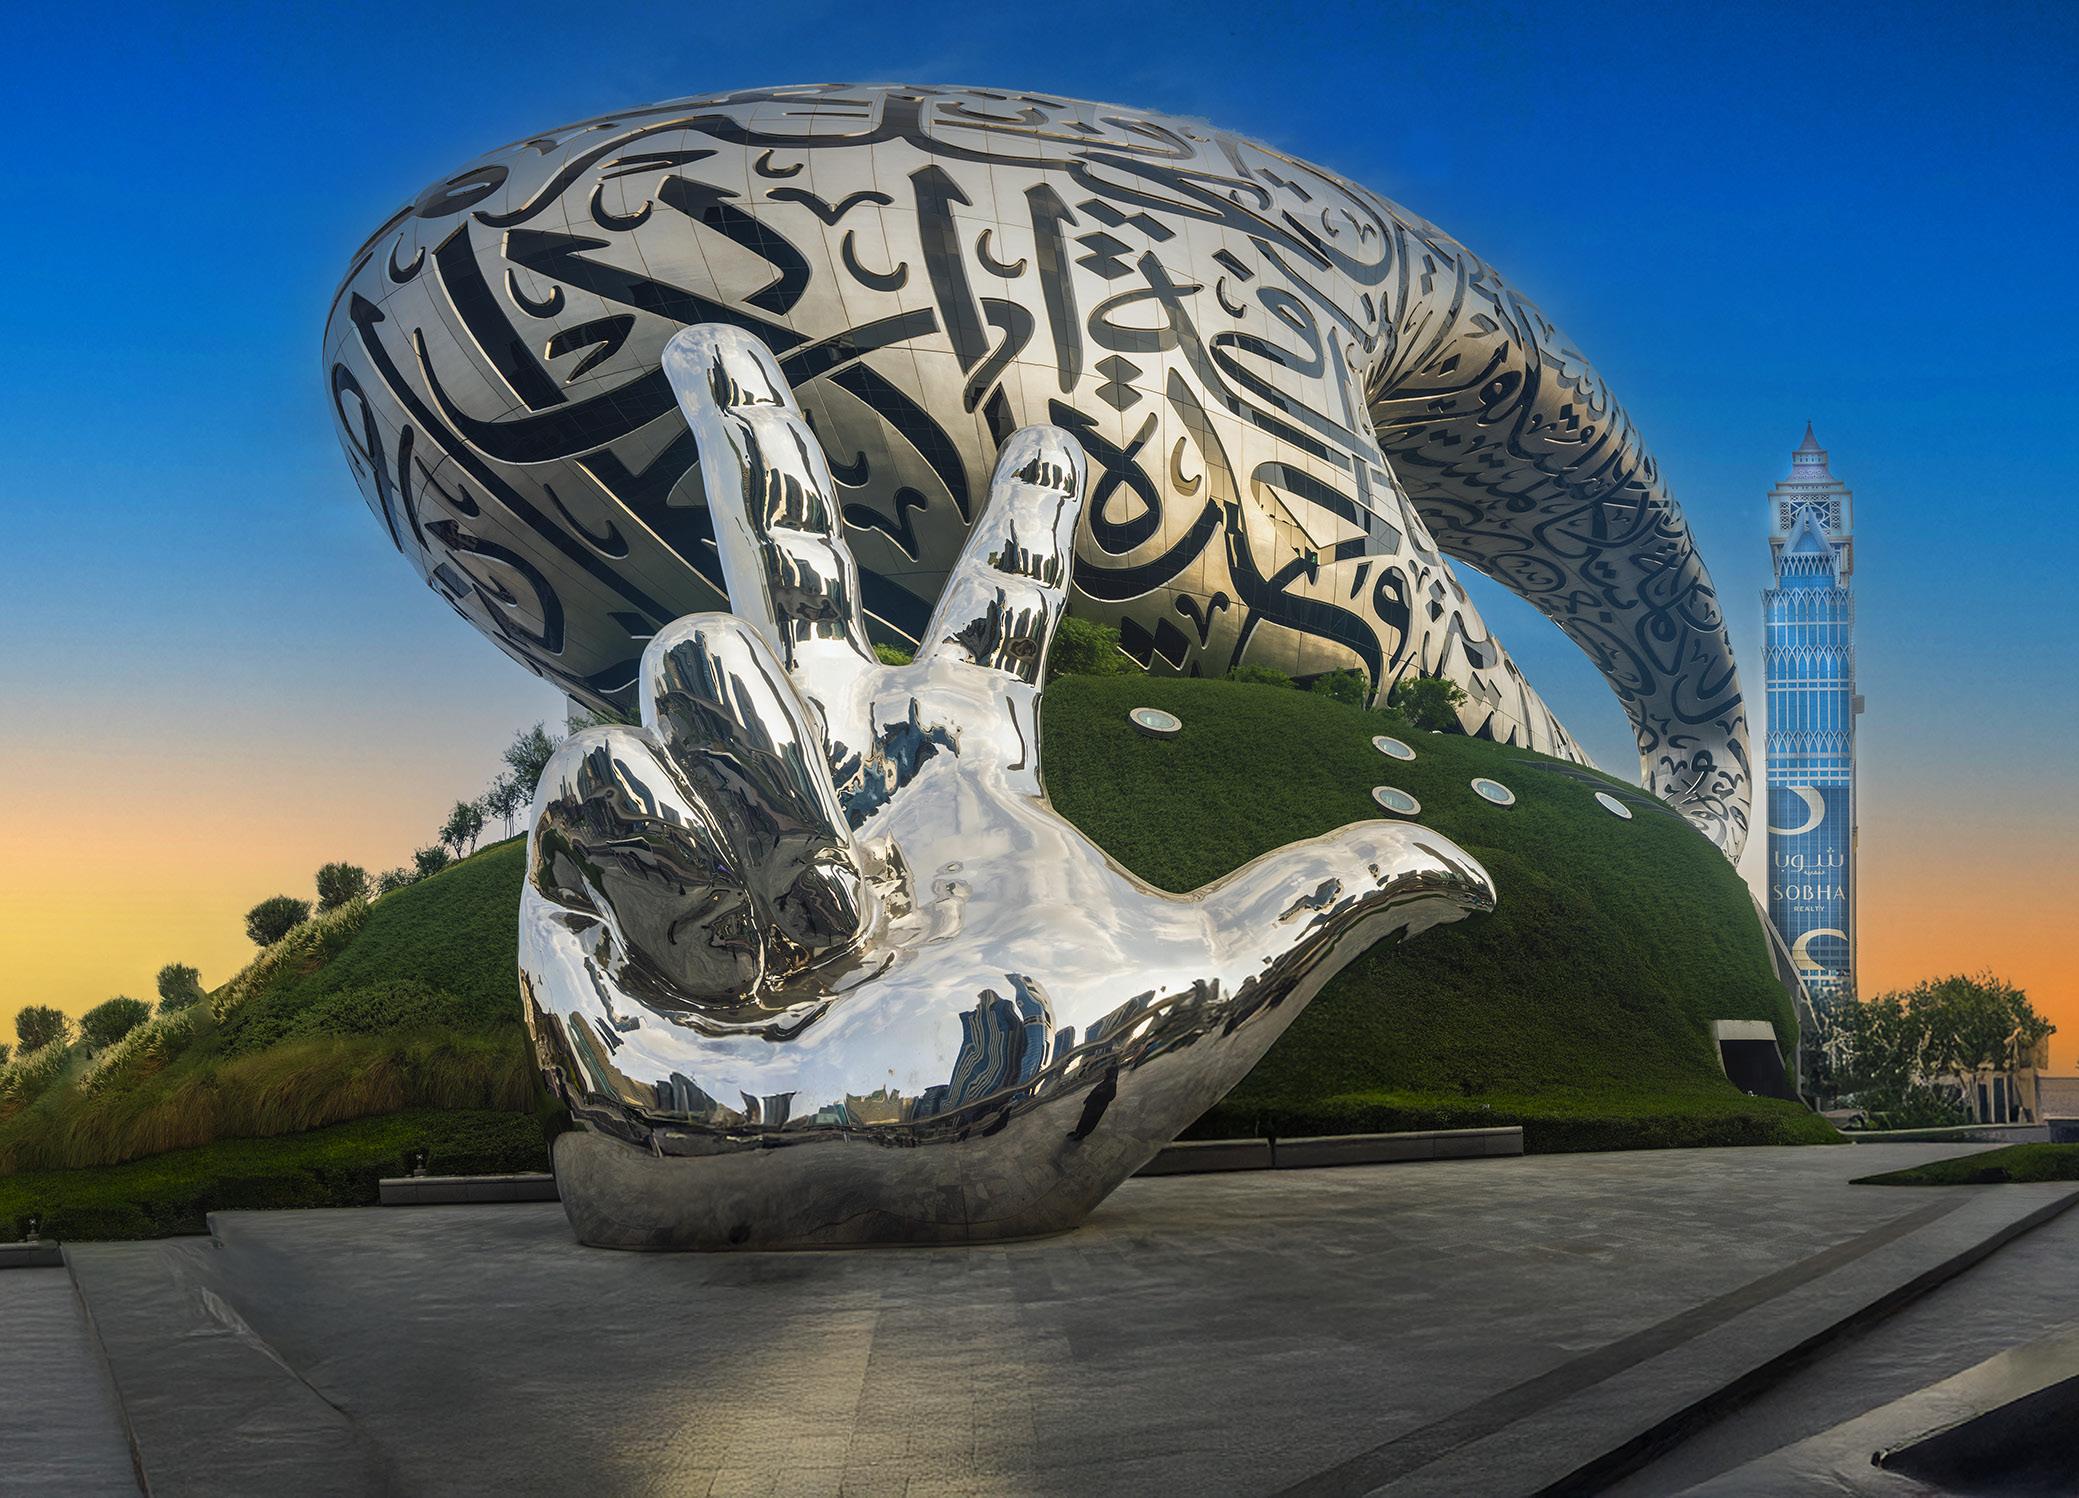
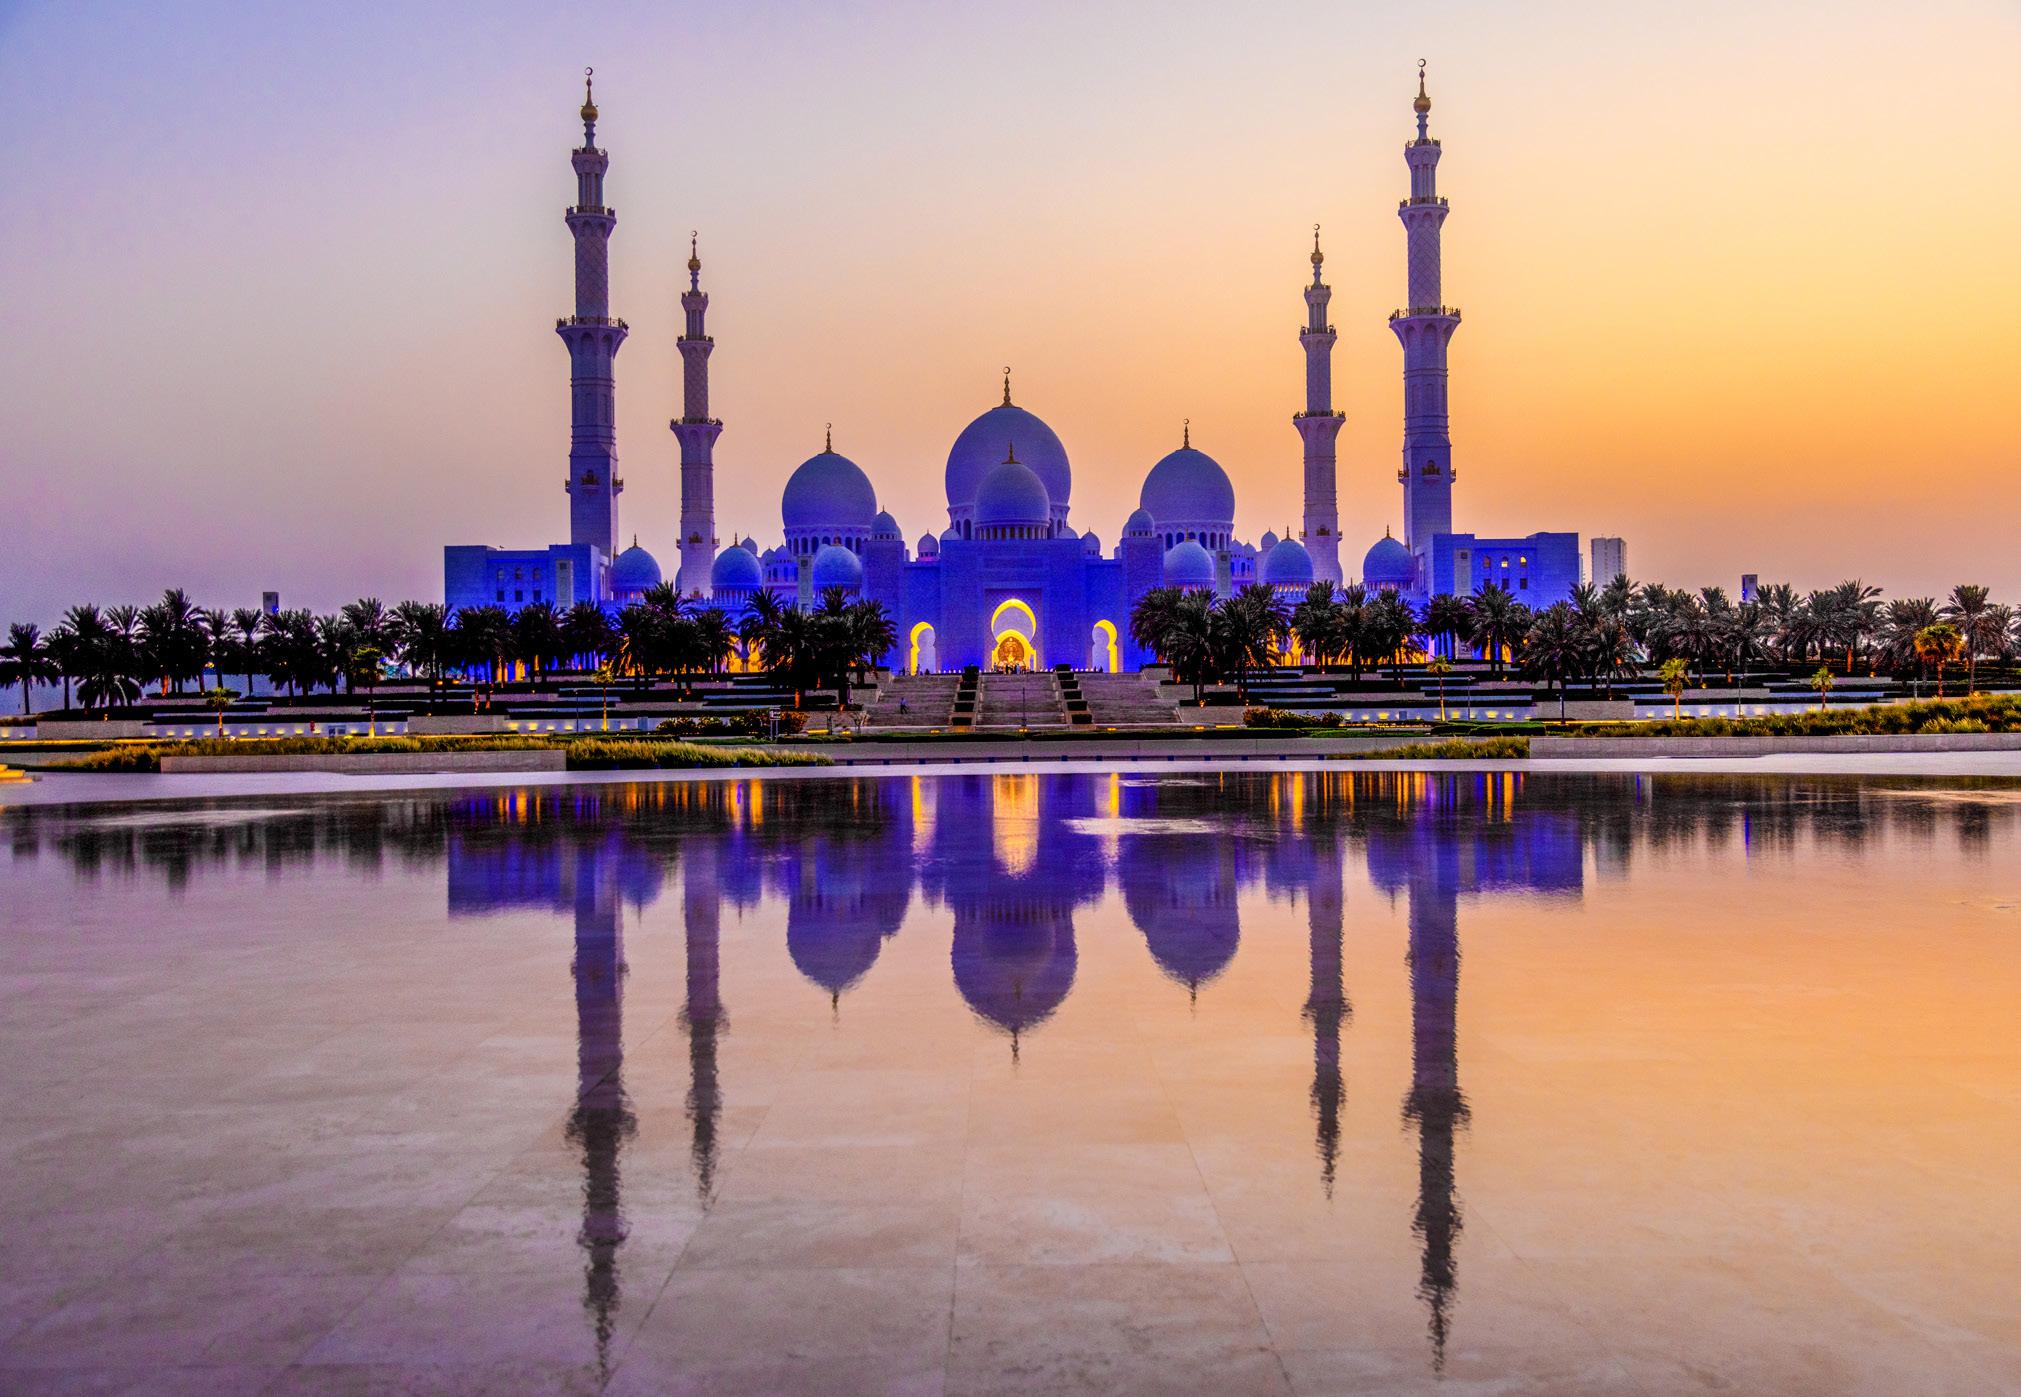
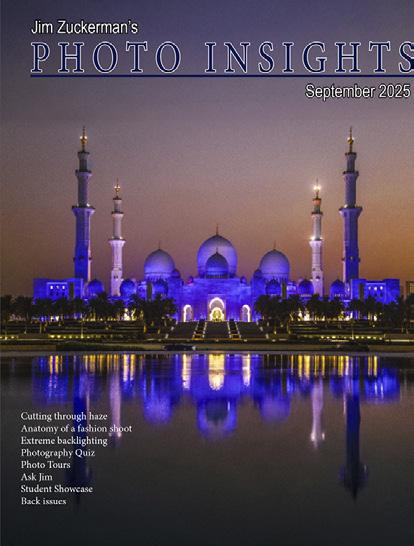
On the cover: The Grand Mosque at dusk, Abu Dhabi, United Arab Emirates. This page: A chrome heart and the Burj Khalifa, Dubai, United Arab Emirates.
Bhefore the Internet, I used several different kinds of resources to seek out photo locations, such as postcards, calendars, photo magazines, travel magazines, and Insight Guides. I will still scan a postcard stand once in a while to see if a particular subject, angle or time of day appeals to me, something I might have missed in my research.
With the advent of the Internet, though, the amount of information we have at our fingertips is truly amazing. And one of the best online resources for photographers for finding great photo opportunities is Location Scout. If you are going to London, for example, or Denver or Beijing or anywhere, search for Location Scout . . . and then name the place. On my recent trip to Dubai in the United Arab Emirates, I studied the photographs on 'Location Scout Dubai'. This helped me tremendously in getting started in a place I didn't know until I got there.
In addition to the excellent images, most of the people who contribute to this site give you the location where the picture was taken, their recommended lenses, and other considerations that affect your picture taking. Often, there is a map pinpointing the spot from which the picture was taken. This site is so helpful. If you travel independently and want to save a lot of time wandering around not knowing where to go to get great pictures, make use of Location Scout. I'm sure you'll find it invaluable.
Jim Zuckerman photos@jimzuckerman.com
www.jimzuckerman.com
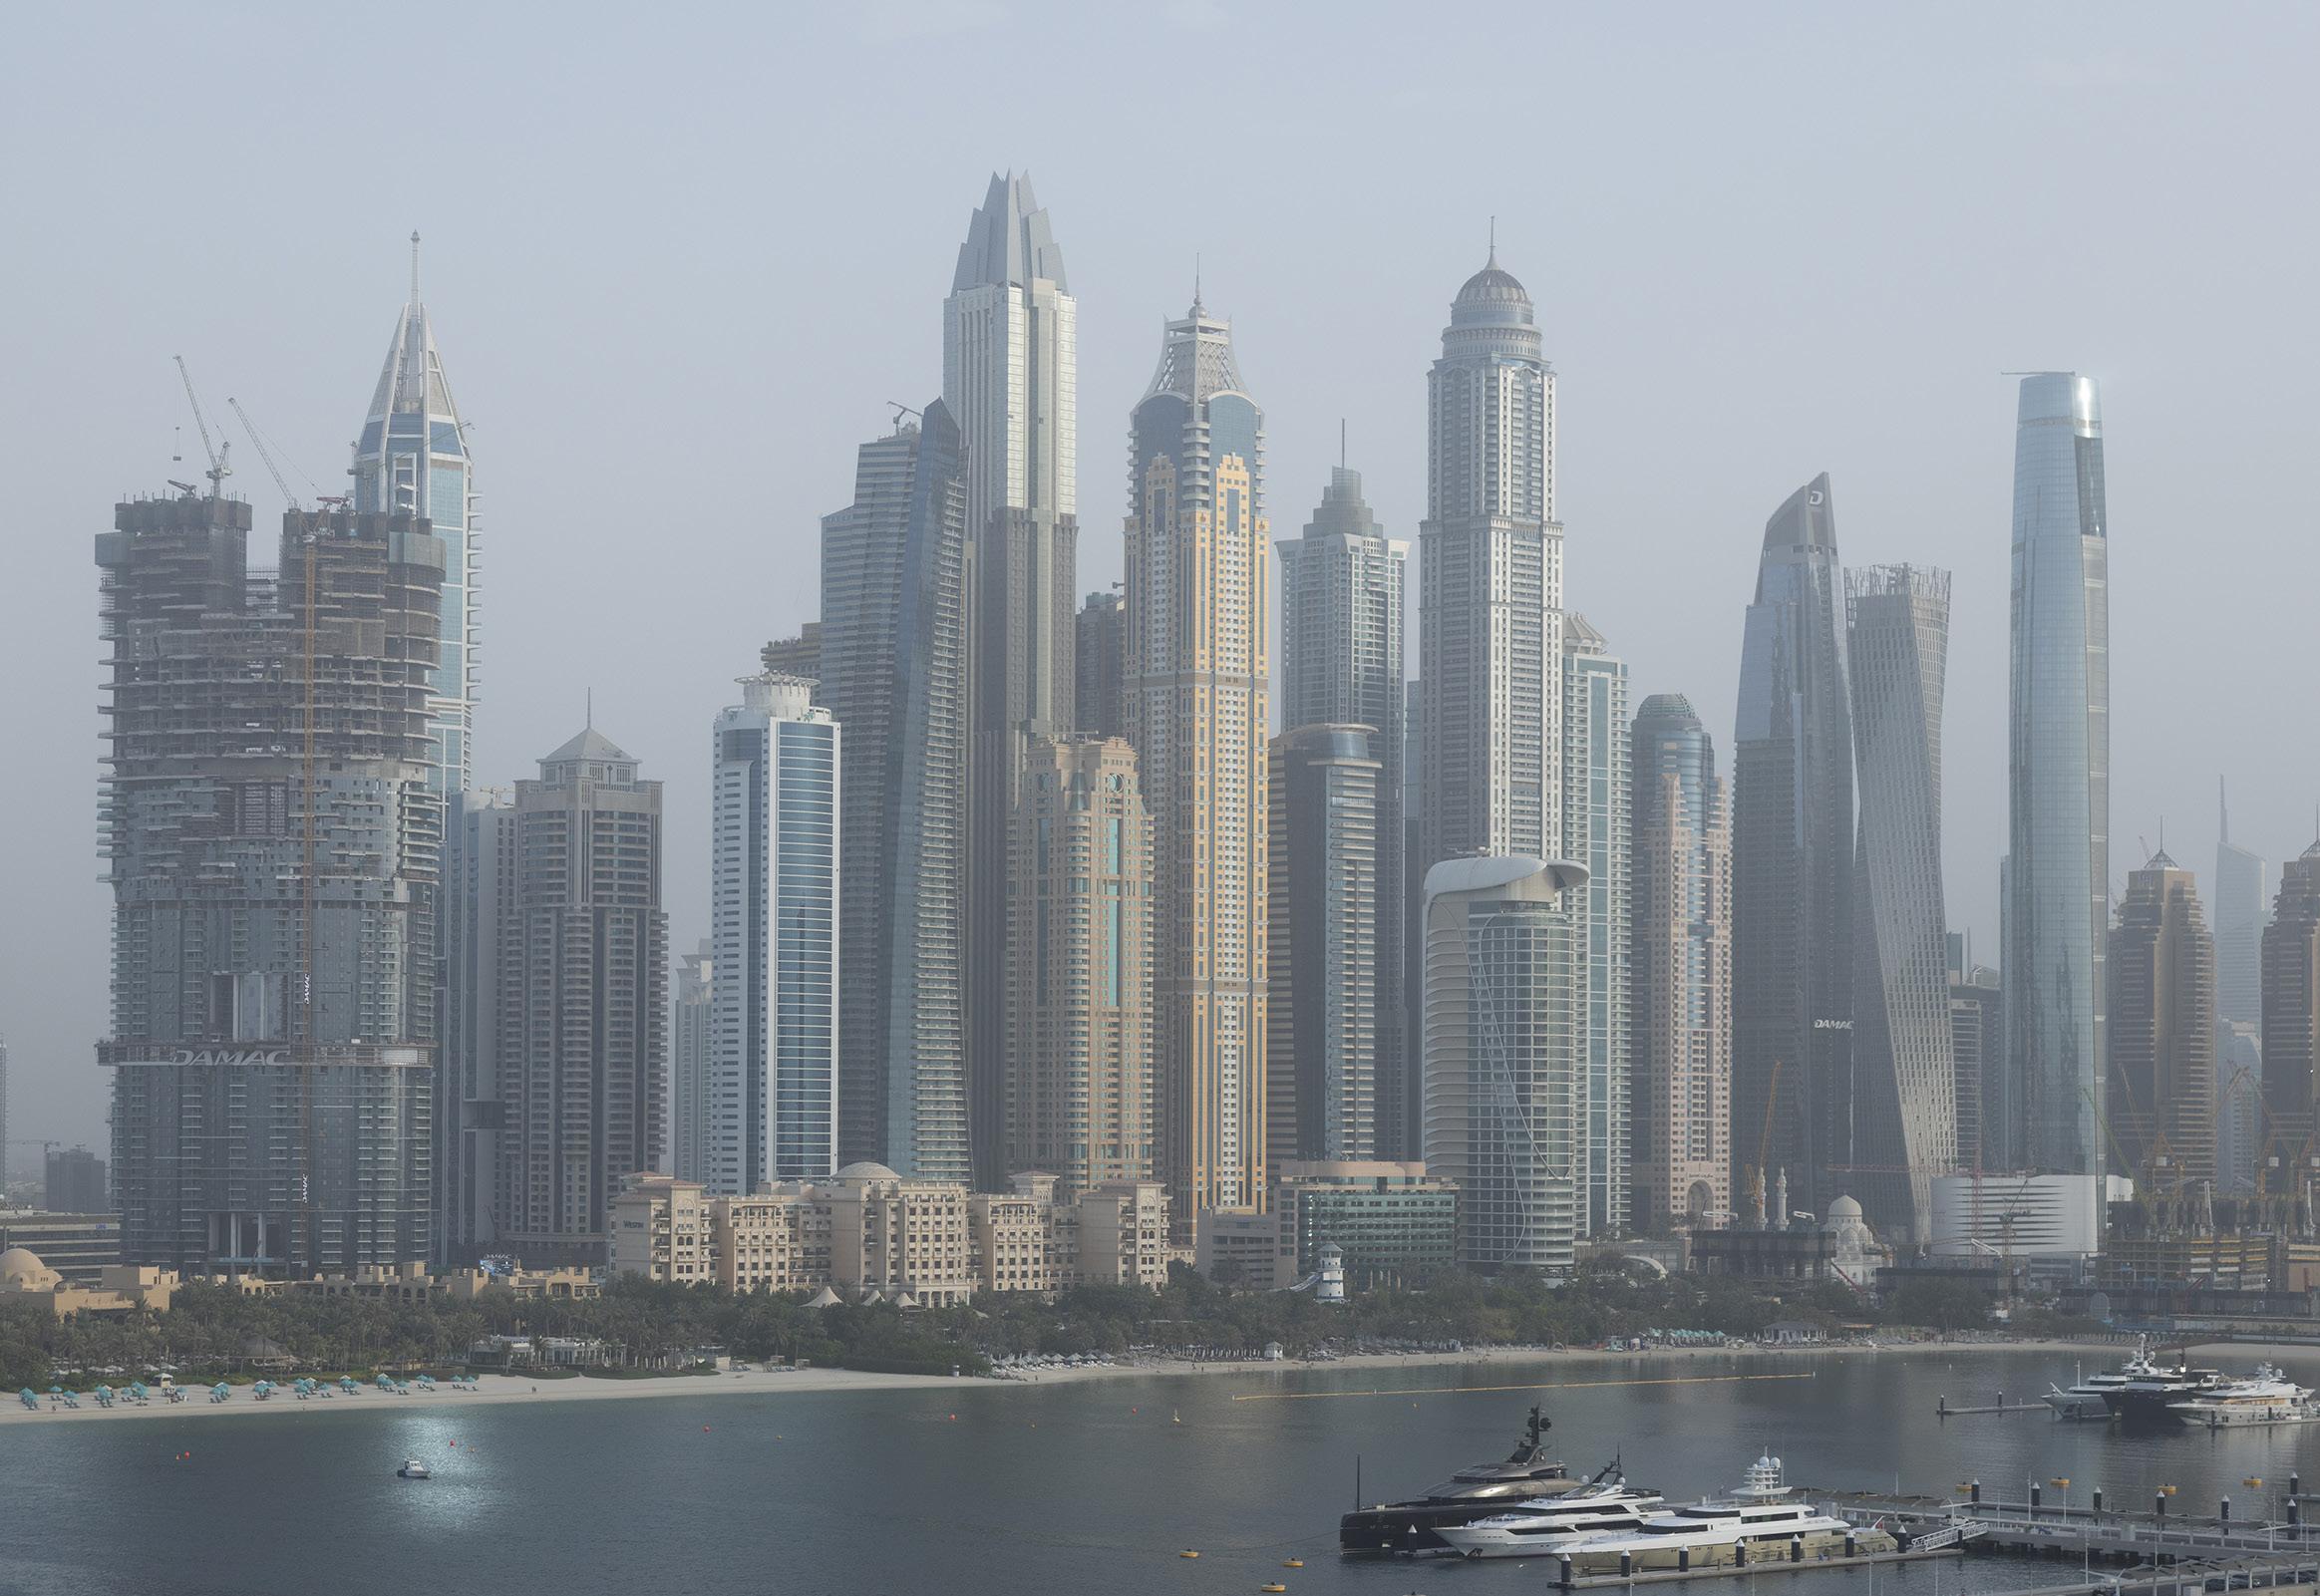
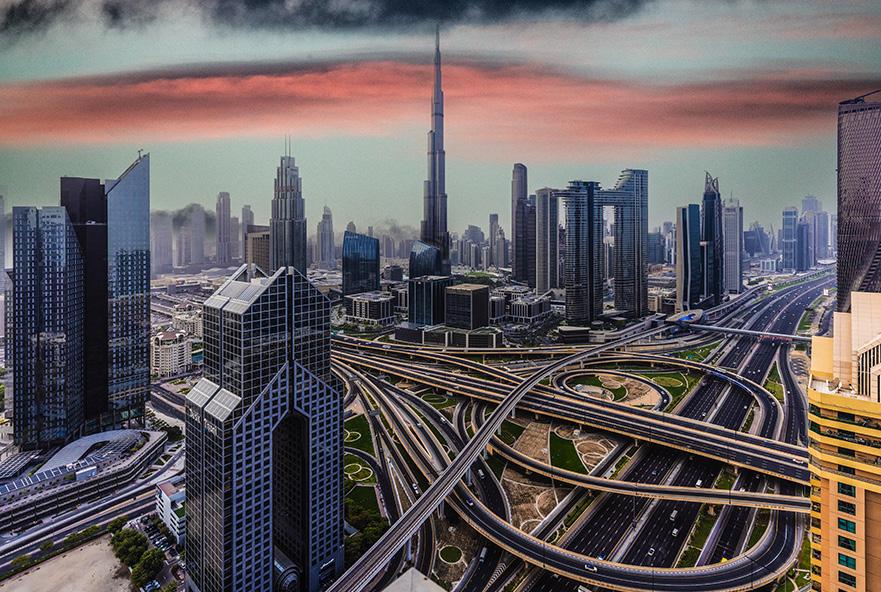
LHast month I was in Dubai. It was hot, humid, and very hazy. I was there researching a photo tour, and since the United Arab Emirates is in the desert, I expected clear skies and very dry air. The air is clear and much cooler from October to March, so in August I was stuck with haze all through the day. The skies were never blue and color was unattractively dull and muted.
The picture below is one of Dubai's skylines. I shot this from my hotel balcony at 4:30 in the afternoon. I was hoping the low angled sun would cut through the haze and provide more contrast,
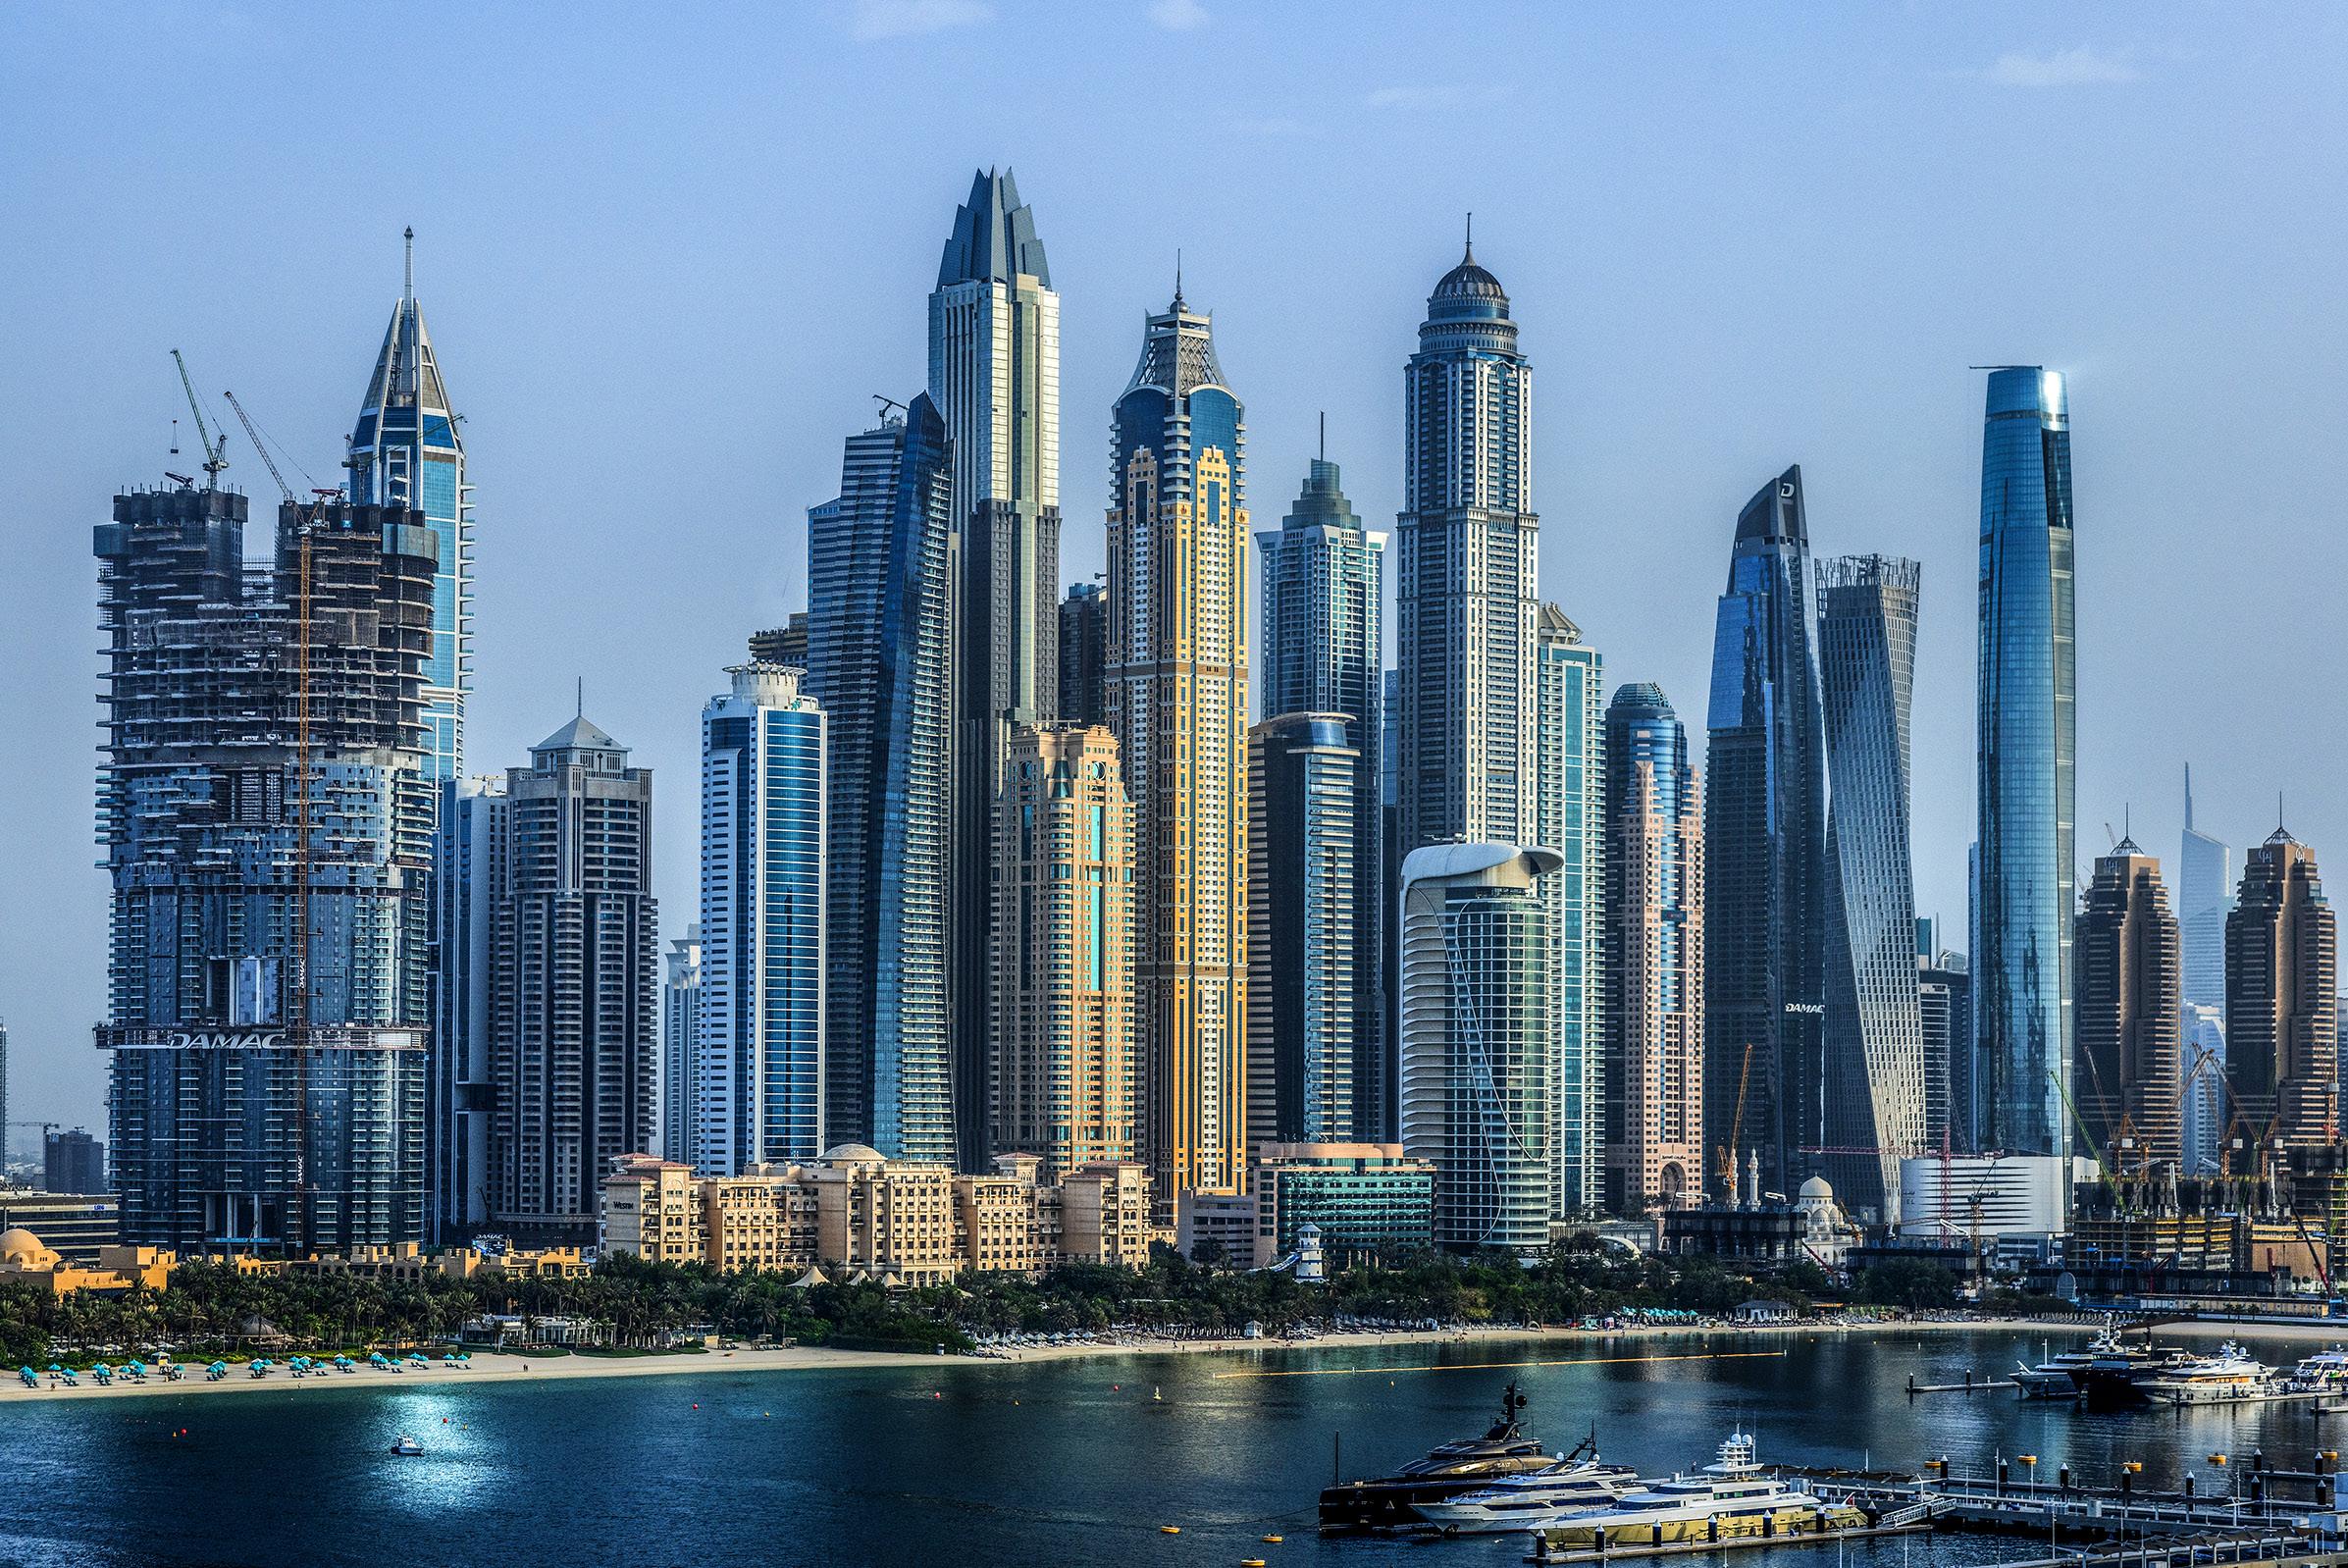
but it didn't. So the only option I had to make this image look good was to use postprocessing. Here is the procedure I used to improve the original capture; the result is shown on the next page. I used Adobe Camera Raw (Filter > Camera Raw Filter) to do this. Lightroom has the same features.
1. Add contrast. I moved the contrast slider to the right to increase contrast. As you do that, though, watch both the shadows and the highlights. If you add too much contrast, highlights start to blow out (meaning they lose detail and texture) and they approach or
become solid white. If this happens, move the contrast slider back toward the left a bit to correct the problem. The same goes for the shadows. If they become too dark and start to lose detail, move the contrast slider back to the left.
2. Add clarity. I moved the clarity slider to the right. This sharpens the mid-tones and, in the process of doing that, the image pops more. In essence, it cuts through the haze.
3. Add color saturation. To accomplish this, I moved the vibrance slider to the right. In addition, I moved the saturation slider to the right. I rarely use the saturation slider because it adds too much yellow in most situations, and one would think in combination with the vibrance slider, it might very well be overkill. The image might look
garish with way too much color saturation. However, it looked good due to the extreme desaturation of color from the haze. I tried it and it worked.
4. I now opened the image in Photoshop, and it was vastly improved. It still needed a little more punch, though. So, I immediately brought it back into ACR with Filter > Camera Raw Filter. I applied the clarity slider one more time, and the result is below.
In the past when we all shot film, the best tool we had to mitigate hazy conditions was a skylight or UV filter or, possibly, a polarizing filter. We could also print our hazy image on contrasty paper. However, these techniques don't come close to what we can now accomplish with a few sliders, in real time, and with infinite subtlety. §
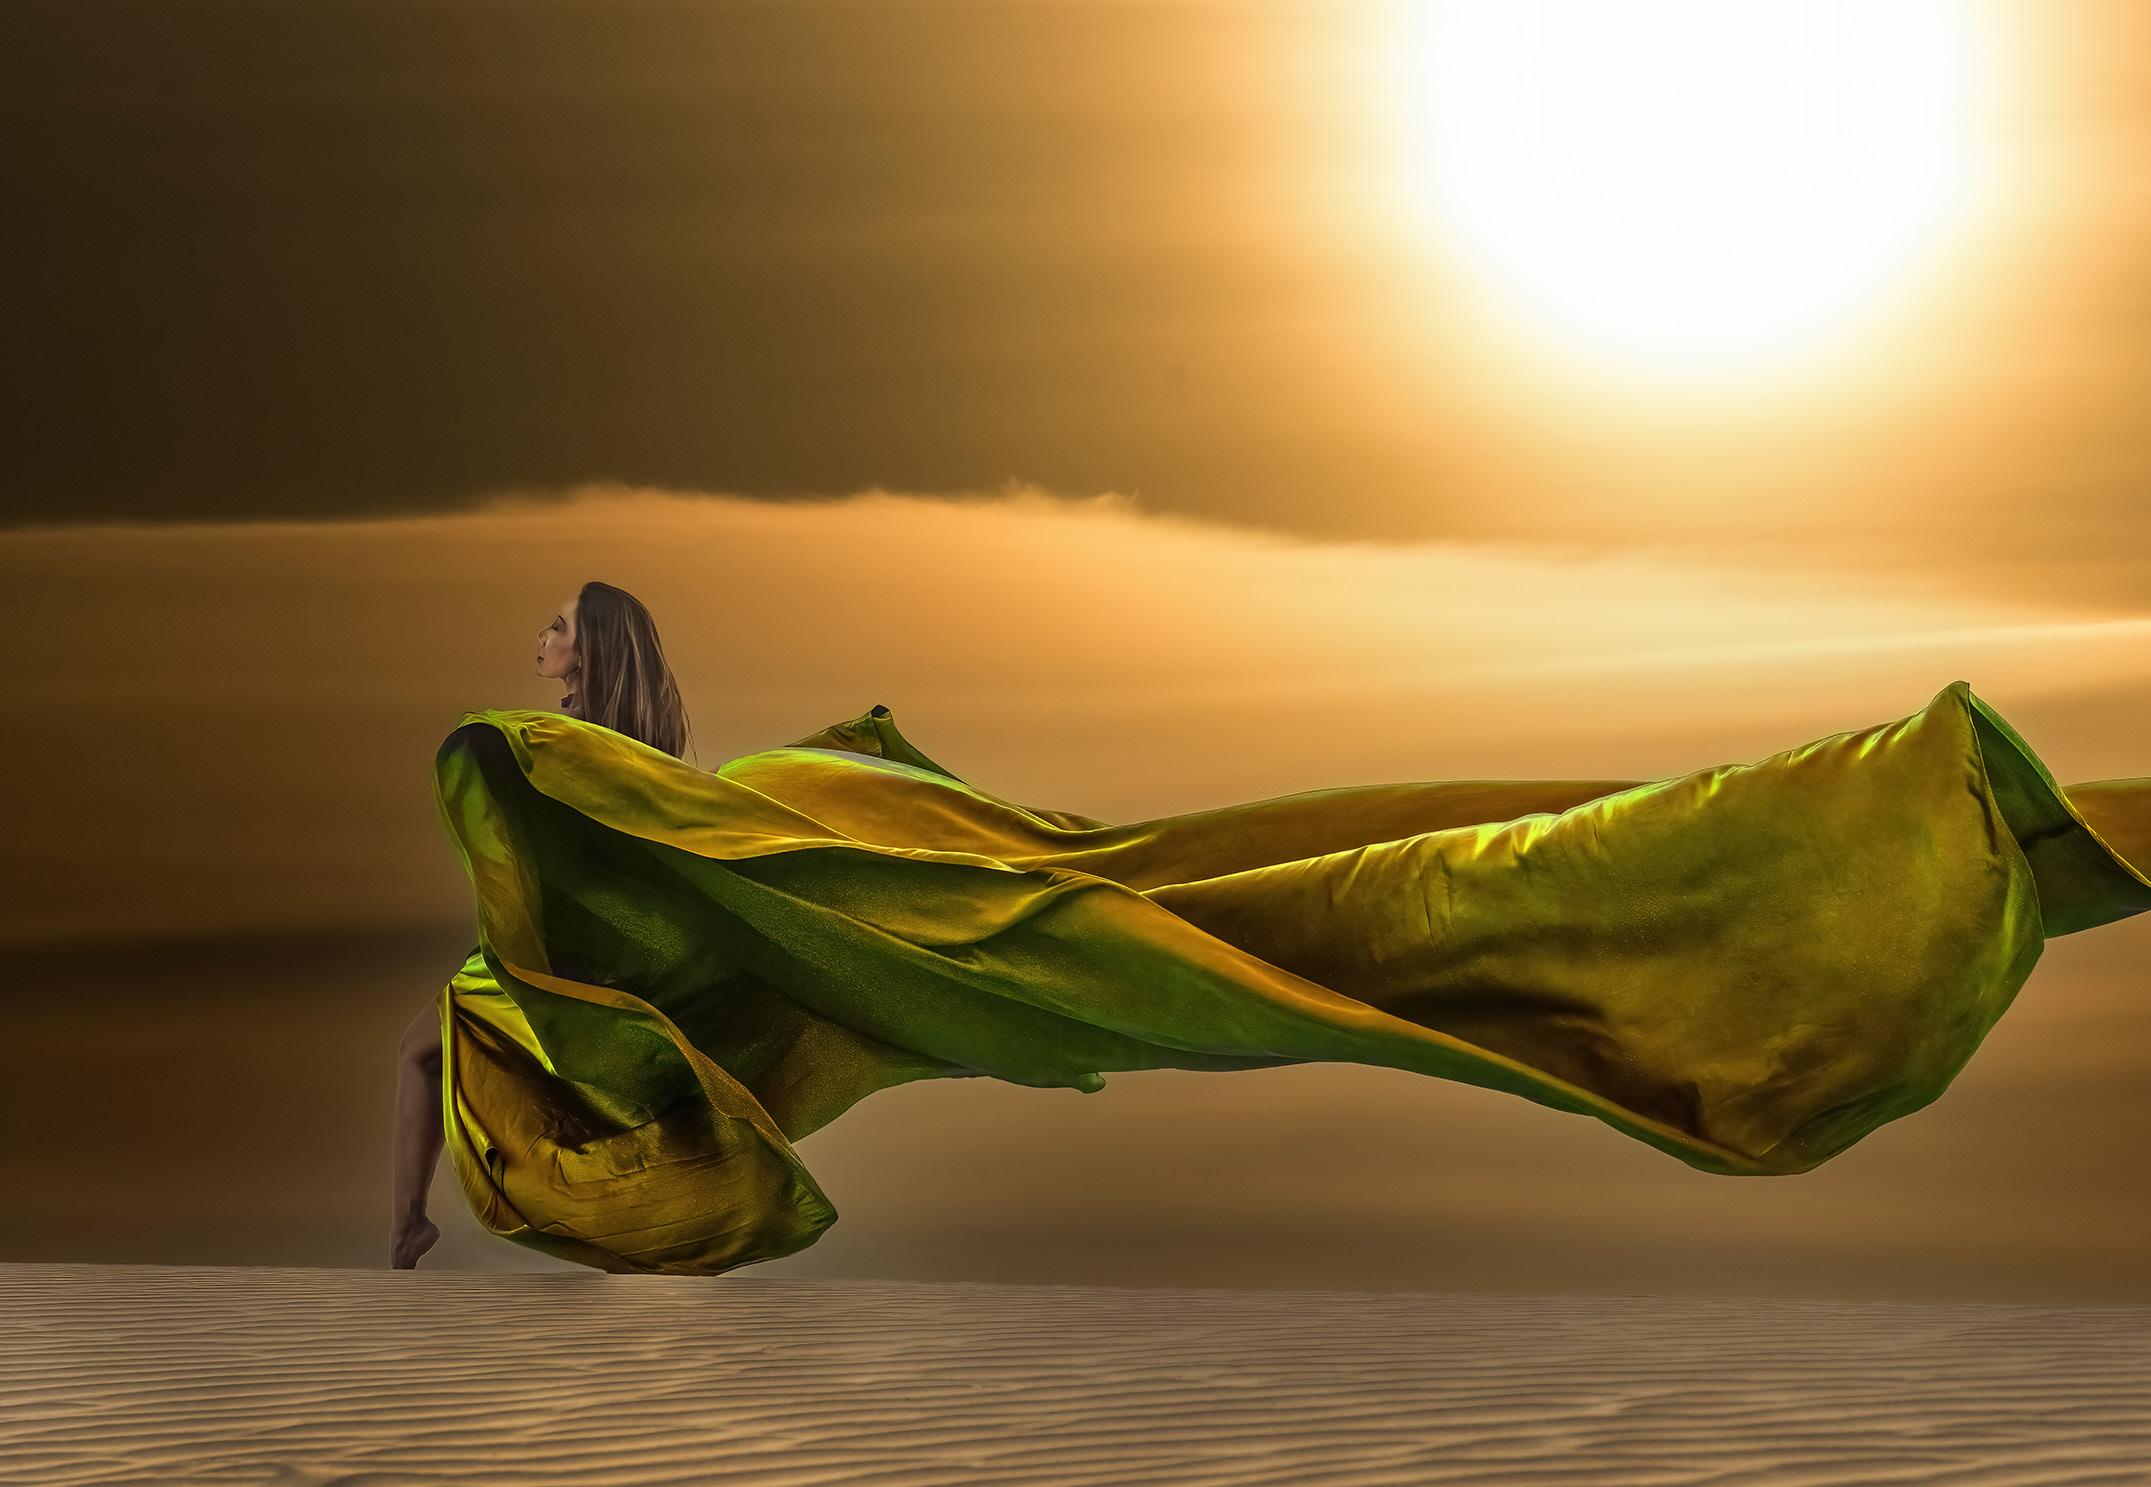
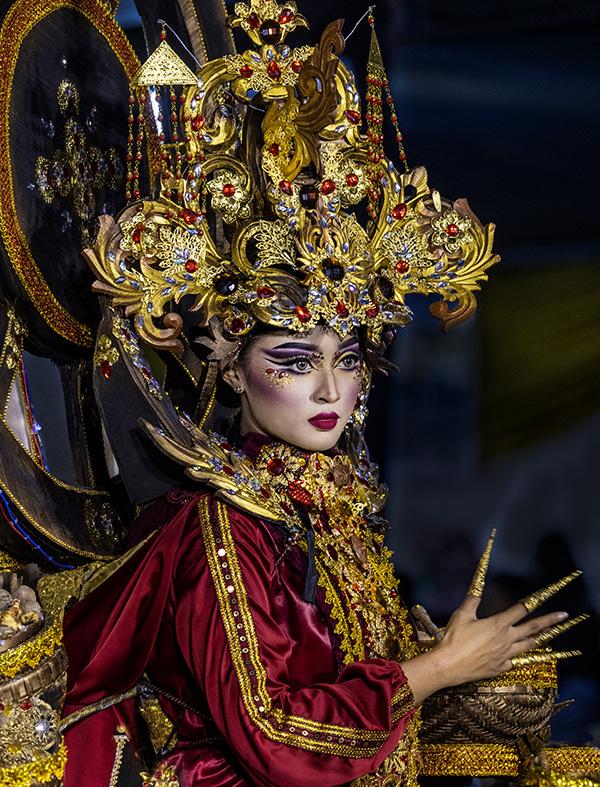
Anatomy of a FASHION SHOOT
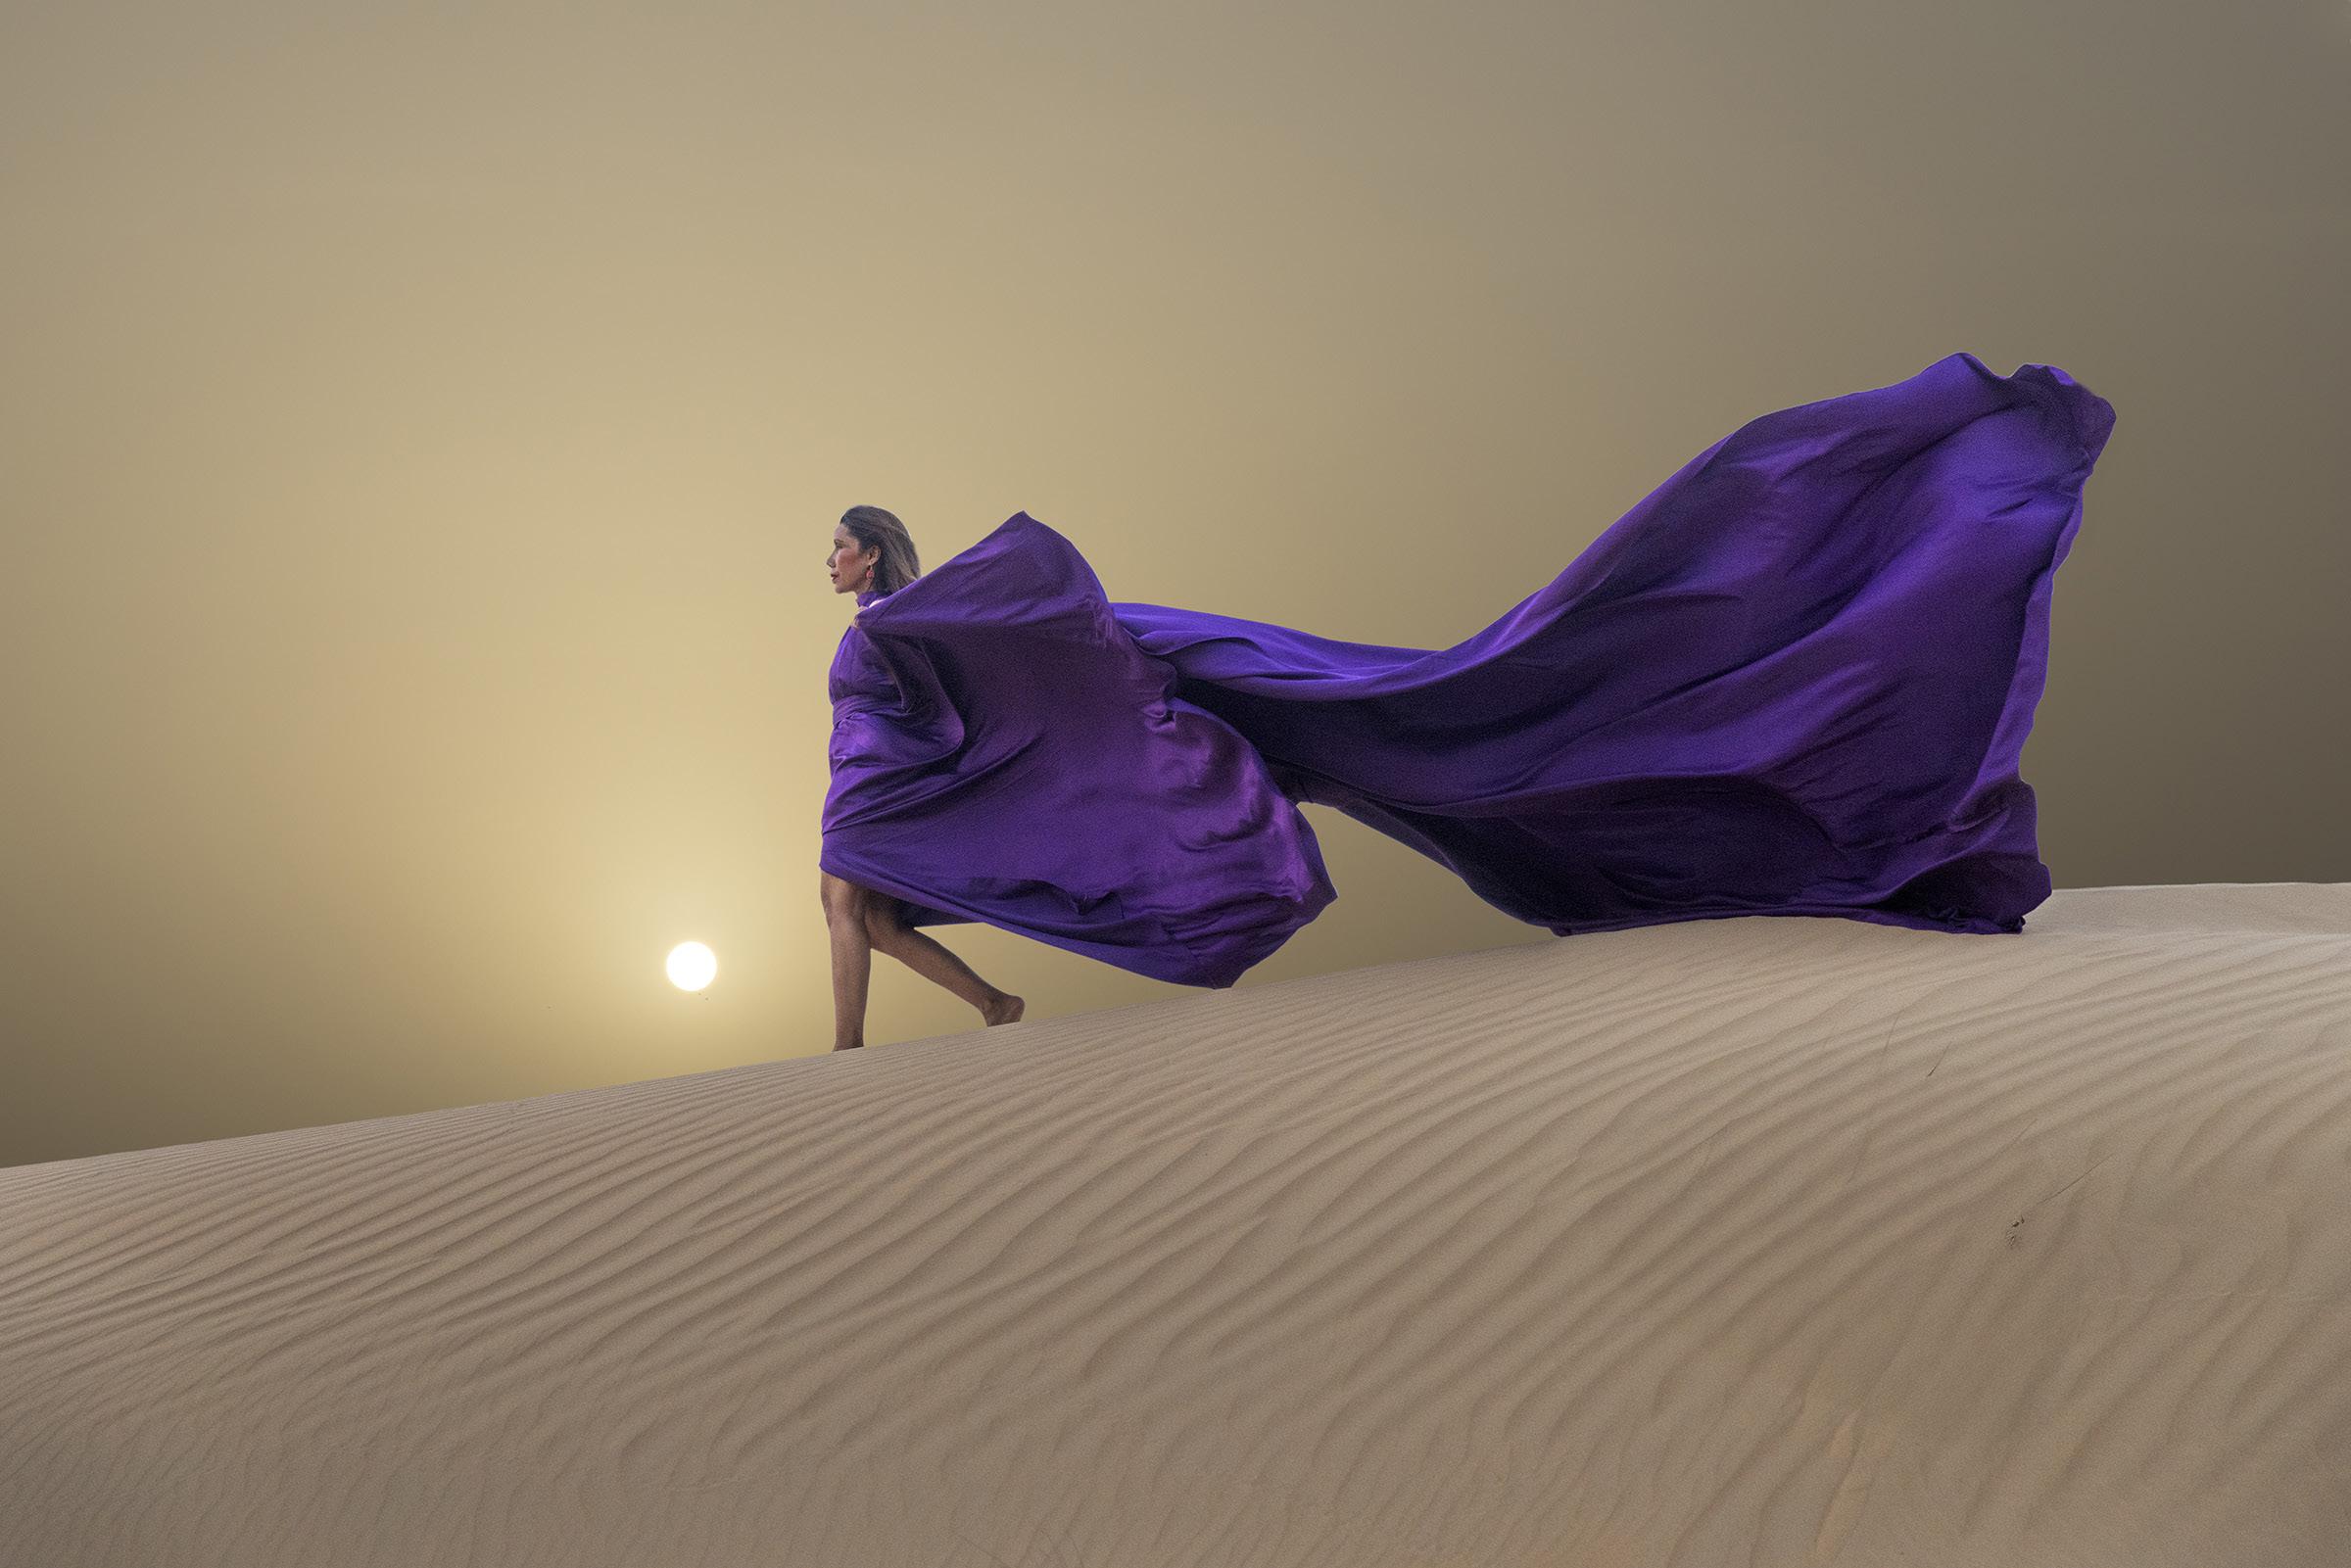
There is a company in Dubai that offers what they call a 'flying dress' photo session in the desert. In planning a photo tour to this fascinating place, I thought my clients might really enjoy this. So, I booked a late afternoon shoot in a desert location and used my wife, Indiana, as the model.
The idea was that a model wears a dress with a very long train, and the fairly constant and dependable wind would, in essence, make the dress fly. It seemed like a lot of fun. The lo-
cal photographer who set this up for me asked what color dress I wanted, and I chose purple -- knowing, of course, I could use Photoshop later to make the fabric any color I wanted as you can see on the next page.
[I changed the color of the dress by selecting it with the quick selection tool, and then I used Image > Adjustments > Hue/saturation to change the color. I moved the hue slider until I liked the new color.]
Once we arrived at the desert location, the first thing I noticed was the scattered clumps of vegetation. I wanted a clean dune with no plants at all, and fortunately there were several of those. I felt the desert scrub vegetation would be distracting and interfere with the attractive graphic lines of the ripples in the sand.
Next, I realized I didn't want dunes to be in the background. Instead, I wanted the sky. It was quite hazy, but the low angled sun was still quite pronounced. I took a test shot and, as I suspected, when exposing for the dress the background sky was totally blown out. I definitely didn't want a white background, so I took a shot of the sun, knowing the only way to make this work was to take two images and composite them together later. I underexposed the sky enough to retain definition
in the ball of the sun and to make the entire sky sufficiently dark so it wasn't overwhelming in the final composite.
If there isn't any wind, an assistant holds up the train of the dress and drops it. The thin, lightweight silk fabric falls gracefully and makes a great picture. We did have wind, however, but the assistant still had to hold the dress up to allow the breeze to give it lift. In each case, the fabric starts contorting and waving too quickly for the assistant to get out of the frame. Therefore, it's necessary to use Edit > Generative Fill to eliminate her.
The position of my wife's legs was important, so I asked her to separate them attractively. It turned out that the best leg positions occurred when she ran along the crest of the dune. This produced dynamic angles and seemed more
natural than a posed image. It's not easy running in sand, especially with a head wind, but Indiana was able to do it for about 10 to 15 feet. That also helped create some great shapes in the fabric. This made a great video, too.
My current camera's fastest frame rate is 20 fps. I felt that was too much for this kind of picture. So, I used the camera on mechanical, not electronic, shutter, at 12 fps. That allowed me to capture every nuance of the flowing fabric without having to unnecessarily edit thousands of frames. In reviewing the images when I finally got home, I had a lot of good frames to choose from.
The shutter speed I chose was 1/500th of a second. This was fast enough to freeze the flying fabric. The light was muted, and this forced my
ISO to be 2500 with an f/5.0 aperture. I didn't need the sky to be sharp since I was going to replace it, so depth of field was pretty much irrelevant. That's why I used a relatively large lens aperture.
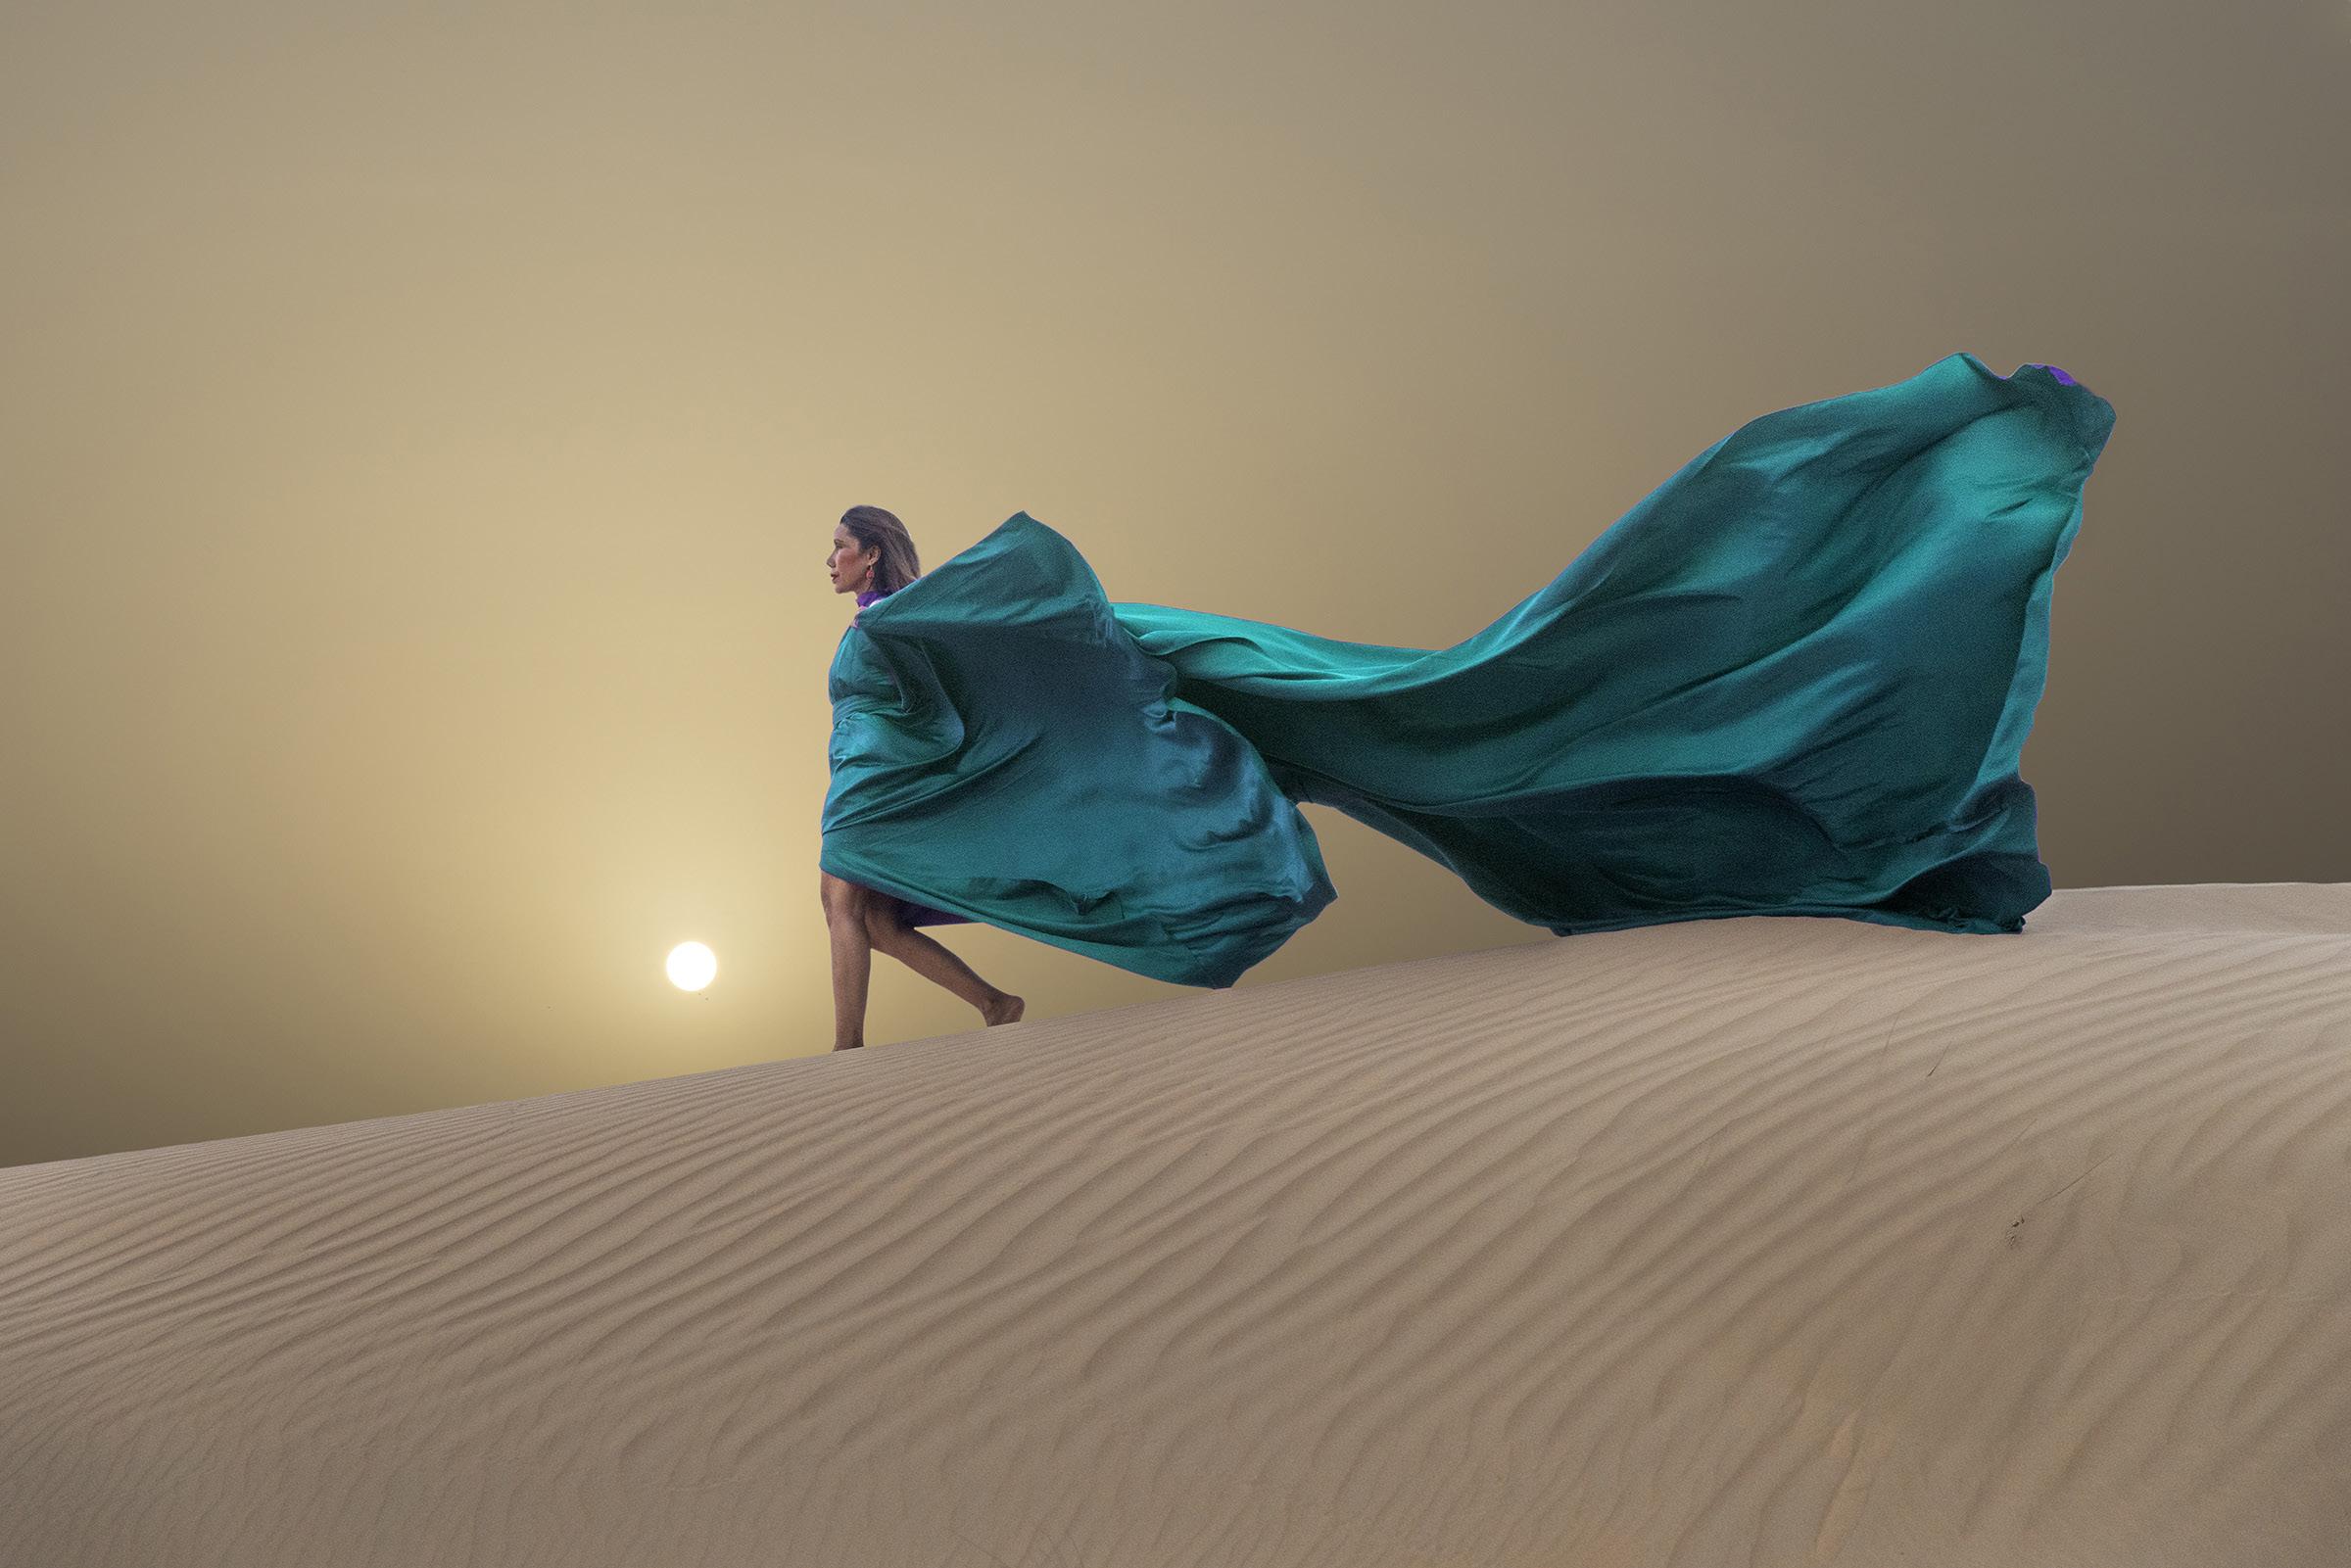
For the image below, I experimented with another sky. I'm not sure if I like the huge sun because it does detract from the rest of the image, but the colors blend with the sand very nicely. In addition, I made the dress gold to match the sky. Finally, I added some makeup to my wife's eyes, lips, and cheek typical of what a fashion model would have. To do this, I chose the color in the foreground color box at the bottom of the tools palette and then selected the brush tool. I lowered the opacity of the tool to 20% so when the color was applied, the skin would show through as it should. §
EXTREME BACKLIGHTING
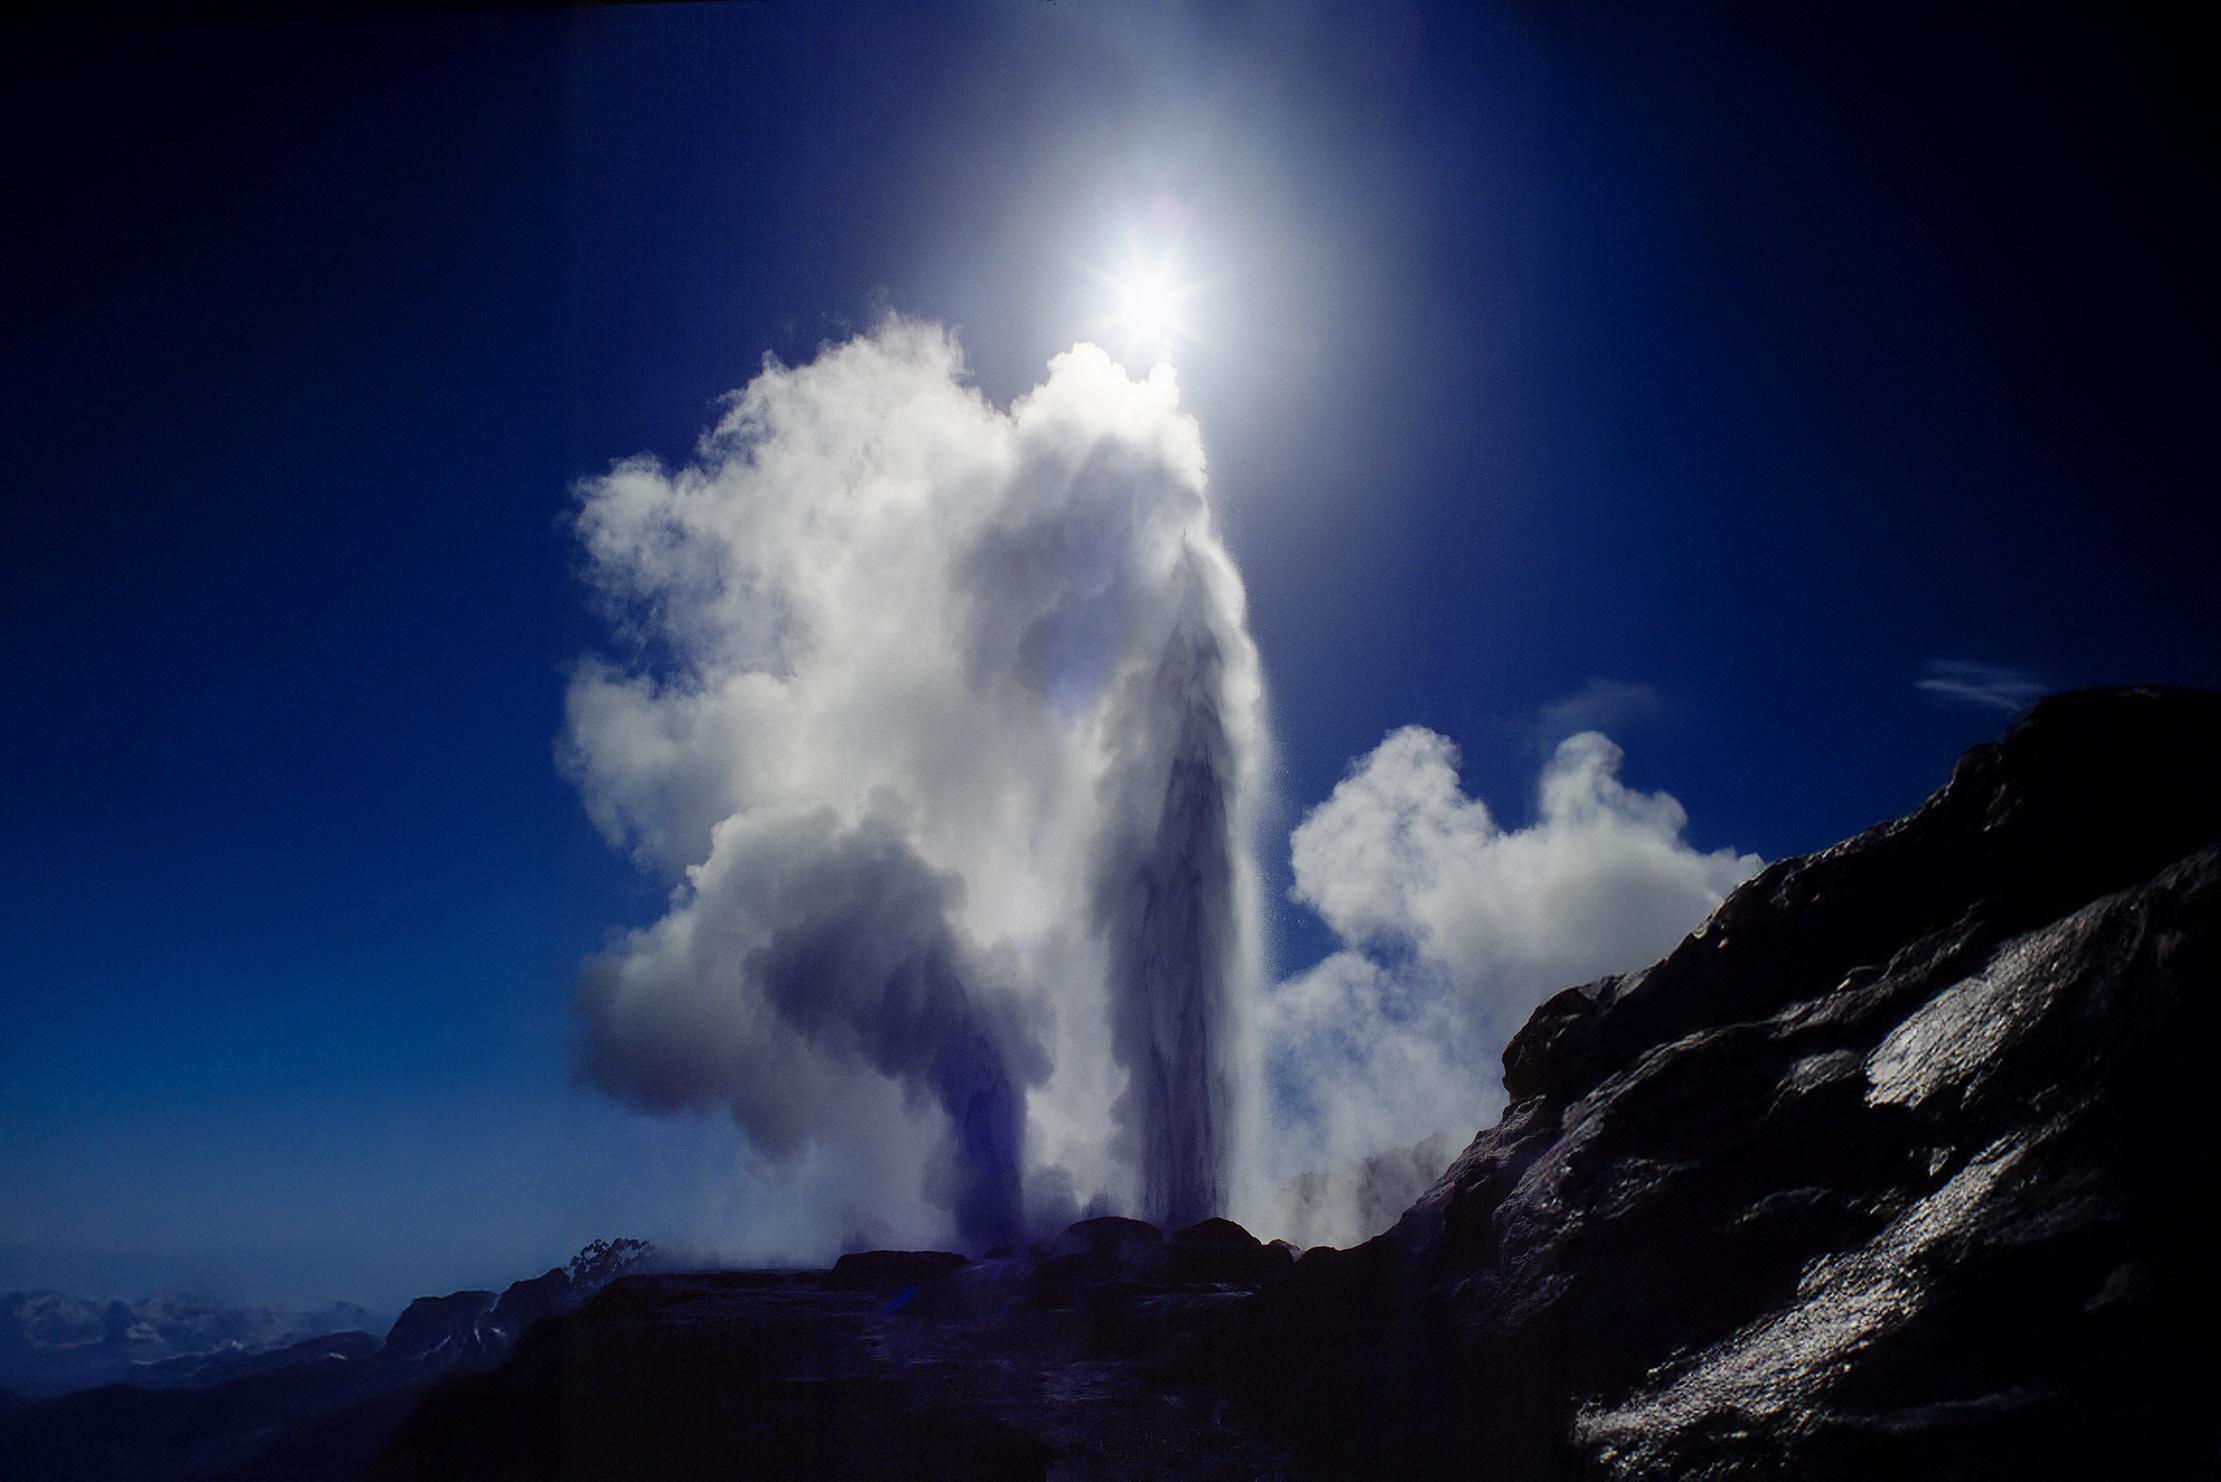
During my photo tours, very often I am asked about camera settings. The situation that elicits the most questions is backlighting, particularly when the contrast between highlights and shadows is extreme. Nowhere is this more acute than when shooting into the sun.
Is there an easy answer to what the camera settings should be? Well, not really. The bottom line is, what kind of exposure do you want? In the picture of a geyser at Rotorua in New Zealand, below, the underexposure produced a dramatic image in which the
shadows went black, the sun was defined as a small hotspot, and the sky also went very dark.
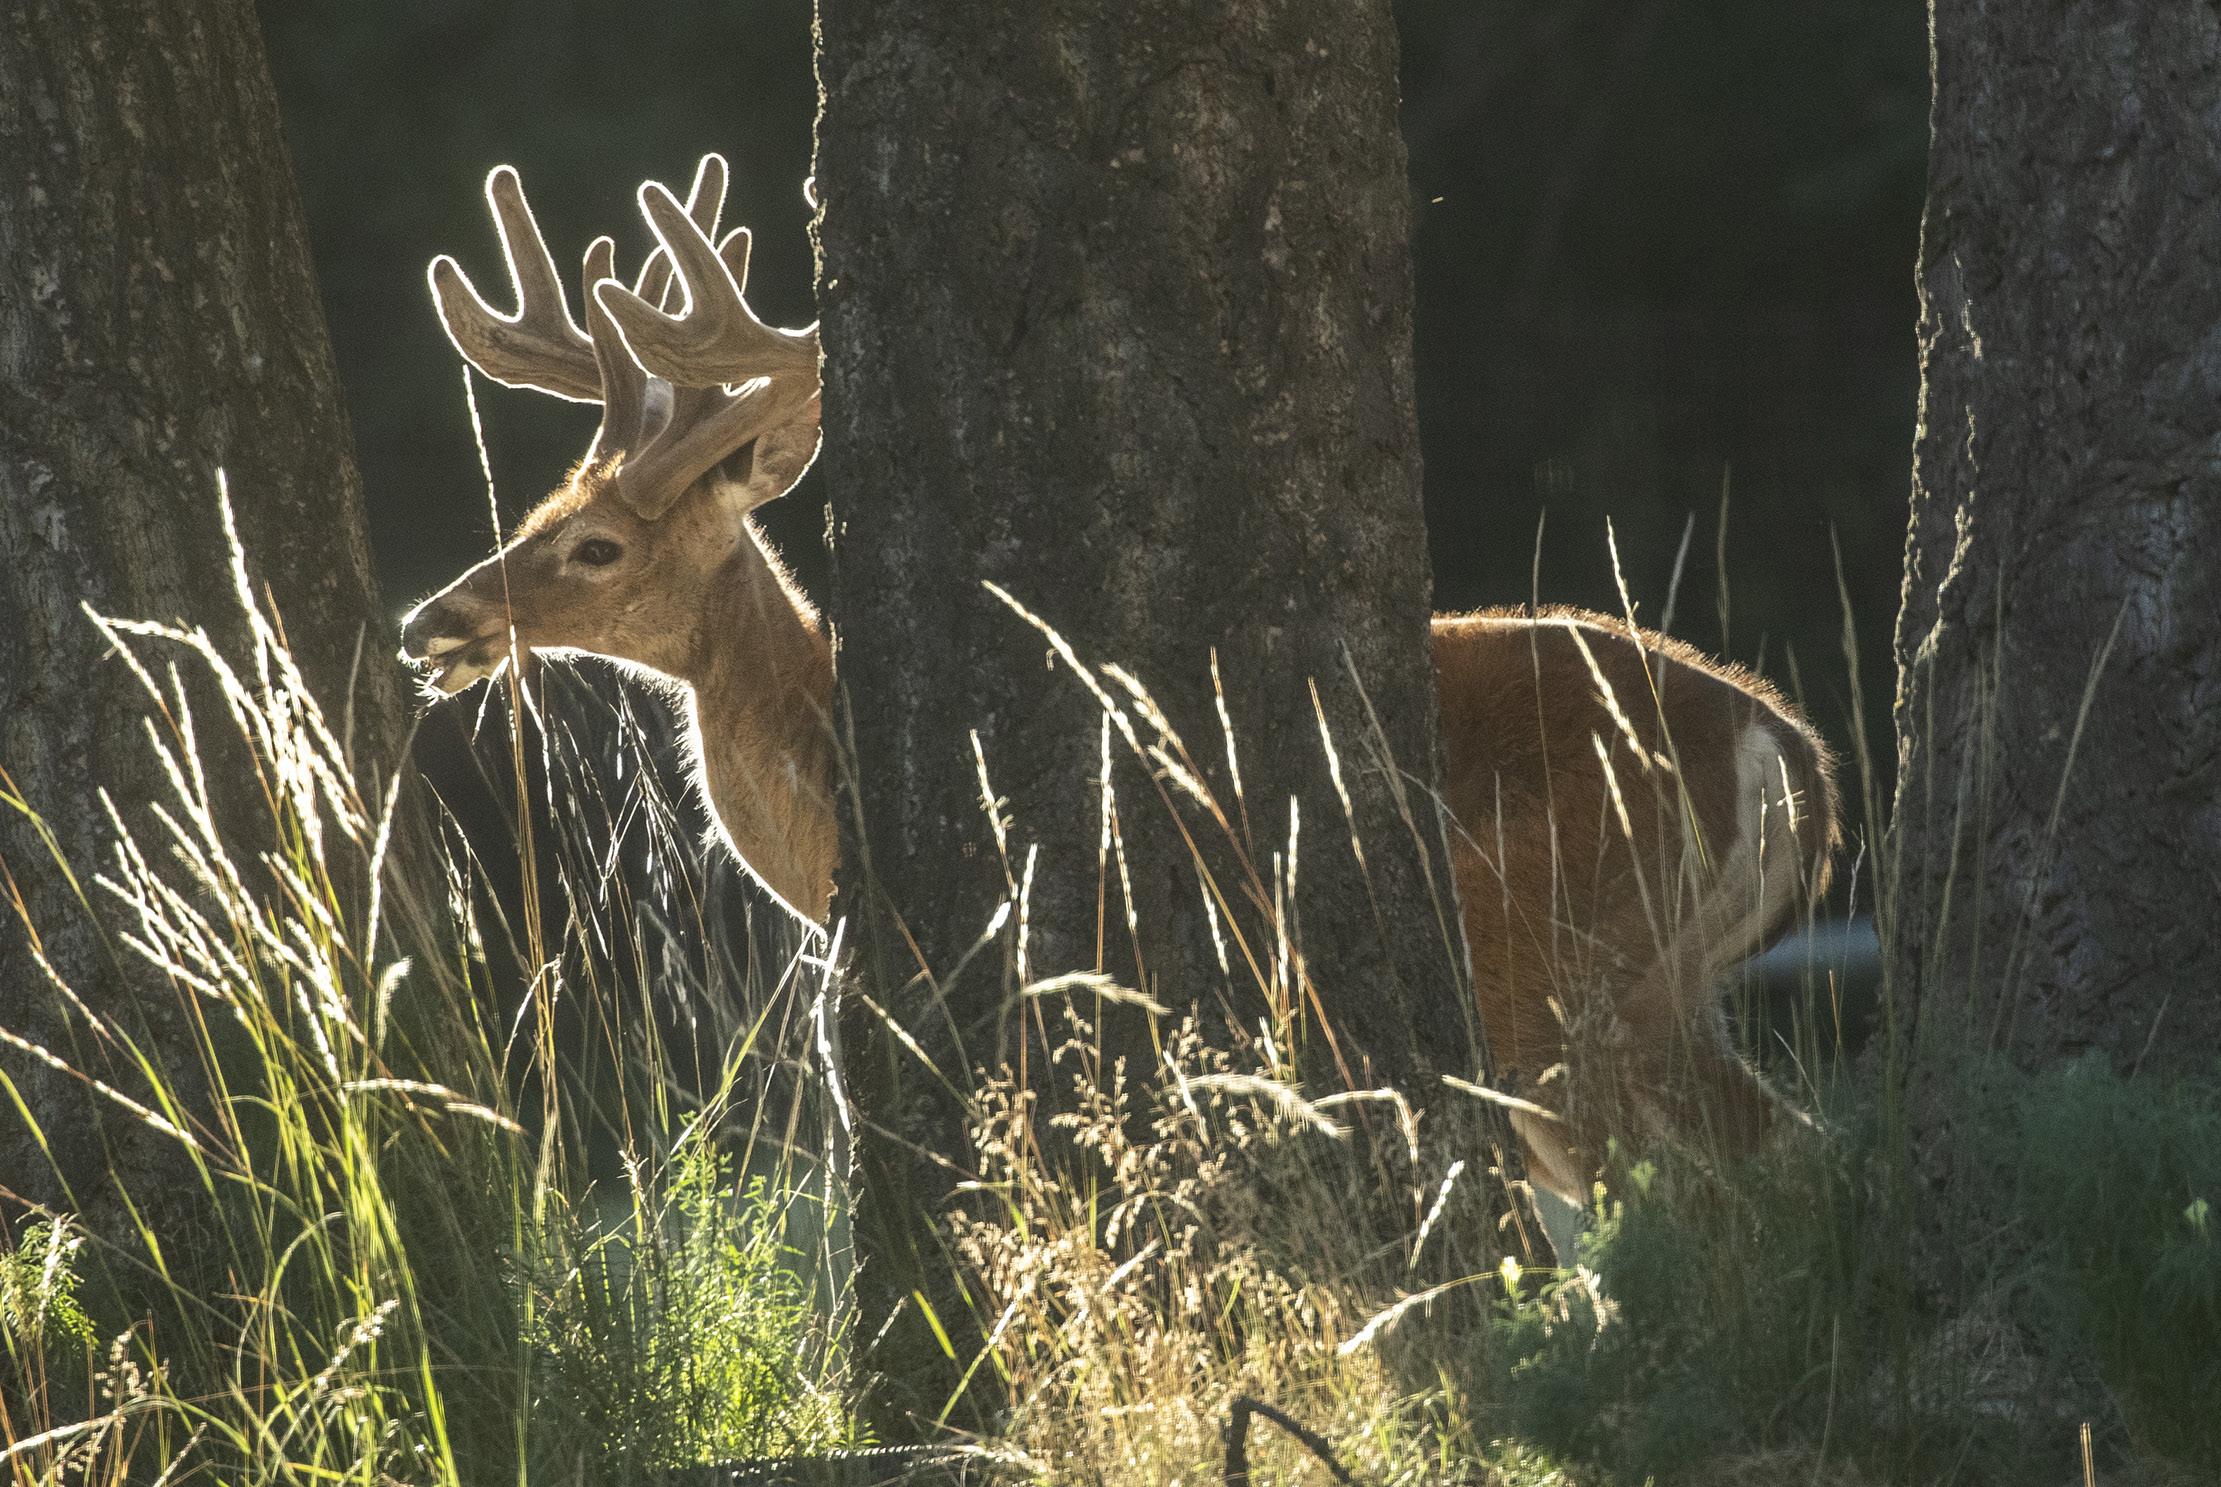
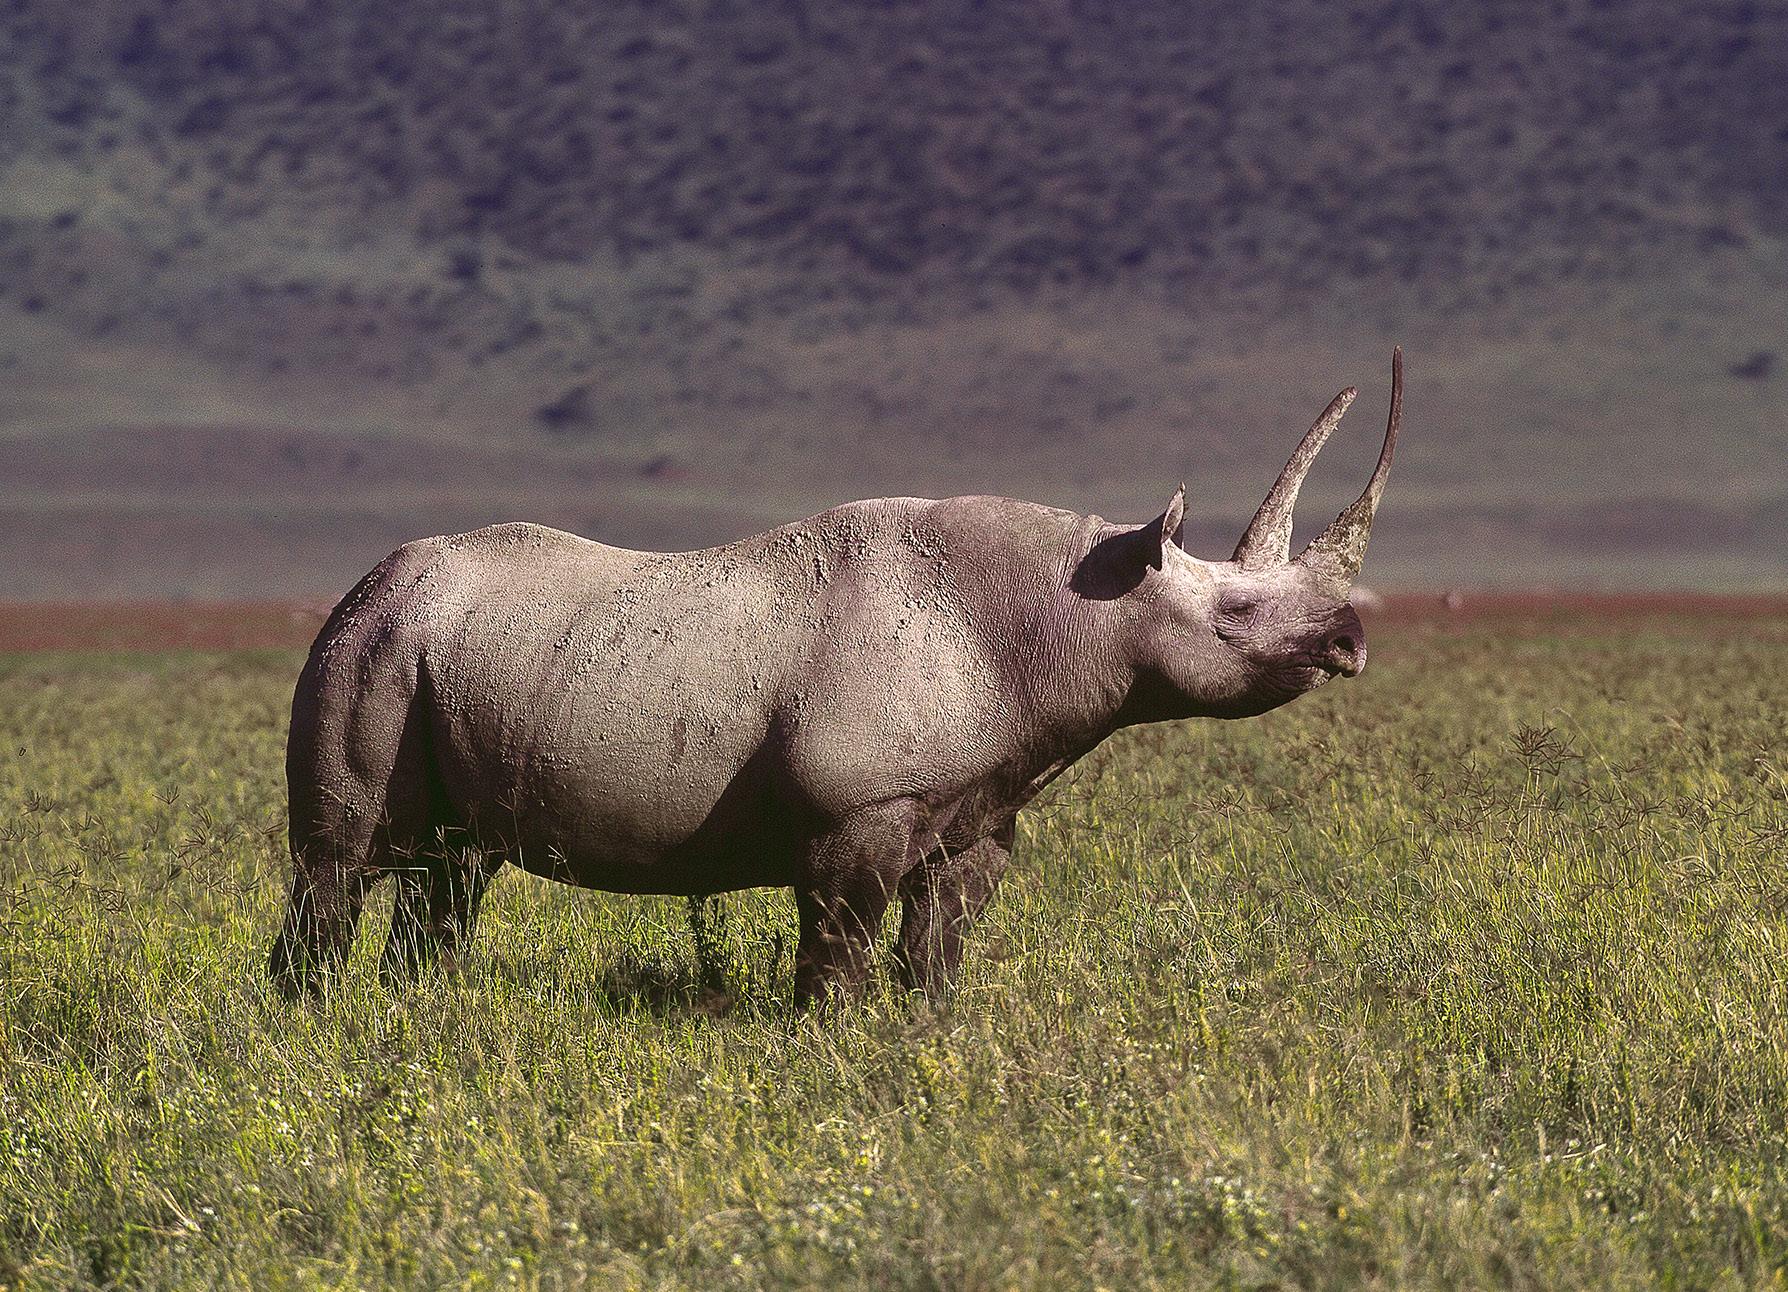
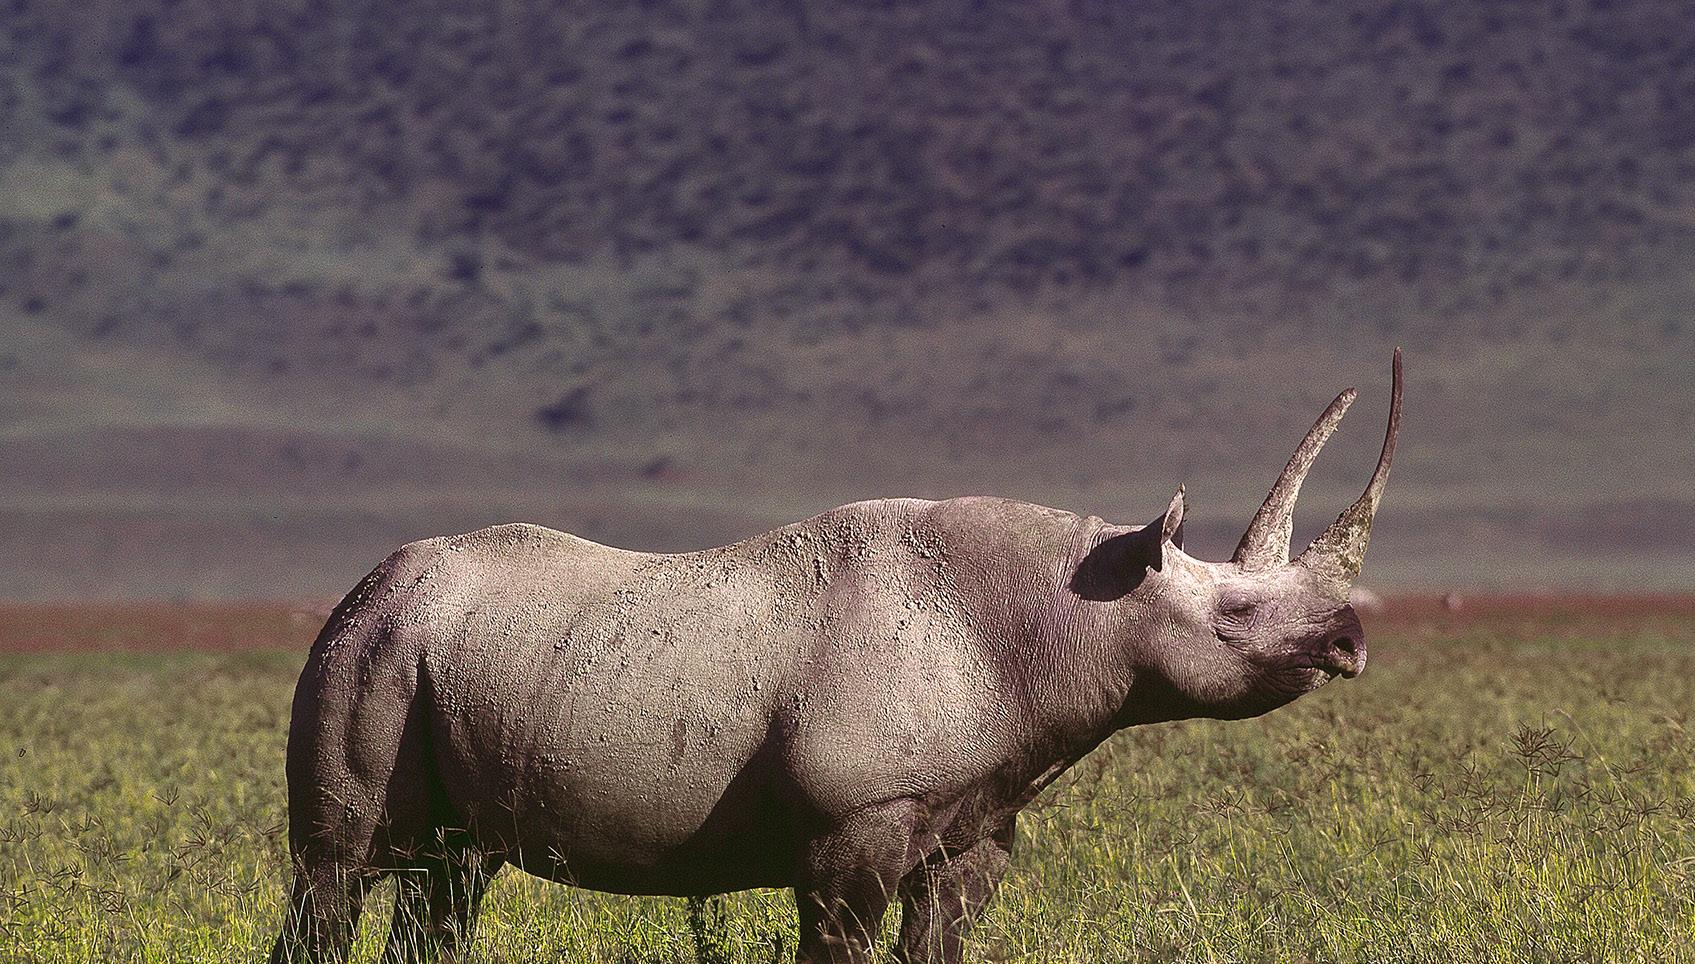
In the shot of the deer on the next page, the backlighting is also extreme but in a different way. The sun was not included in the frame, but in contrast with the dark shadows, the rim lighting on the animal is several f/stops lighter.
In these situations, you can't depend on a light meter. It might give you what you want and it might not. Sure, you can adjust exposure after-the-fact in post-processing, but only up to a point. If highlights are blown and/or shadows go solid black, there is no fixing that.
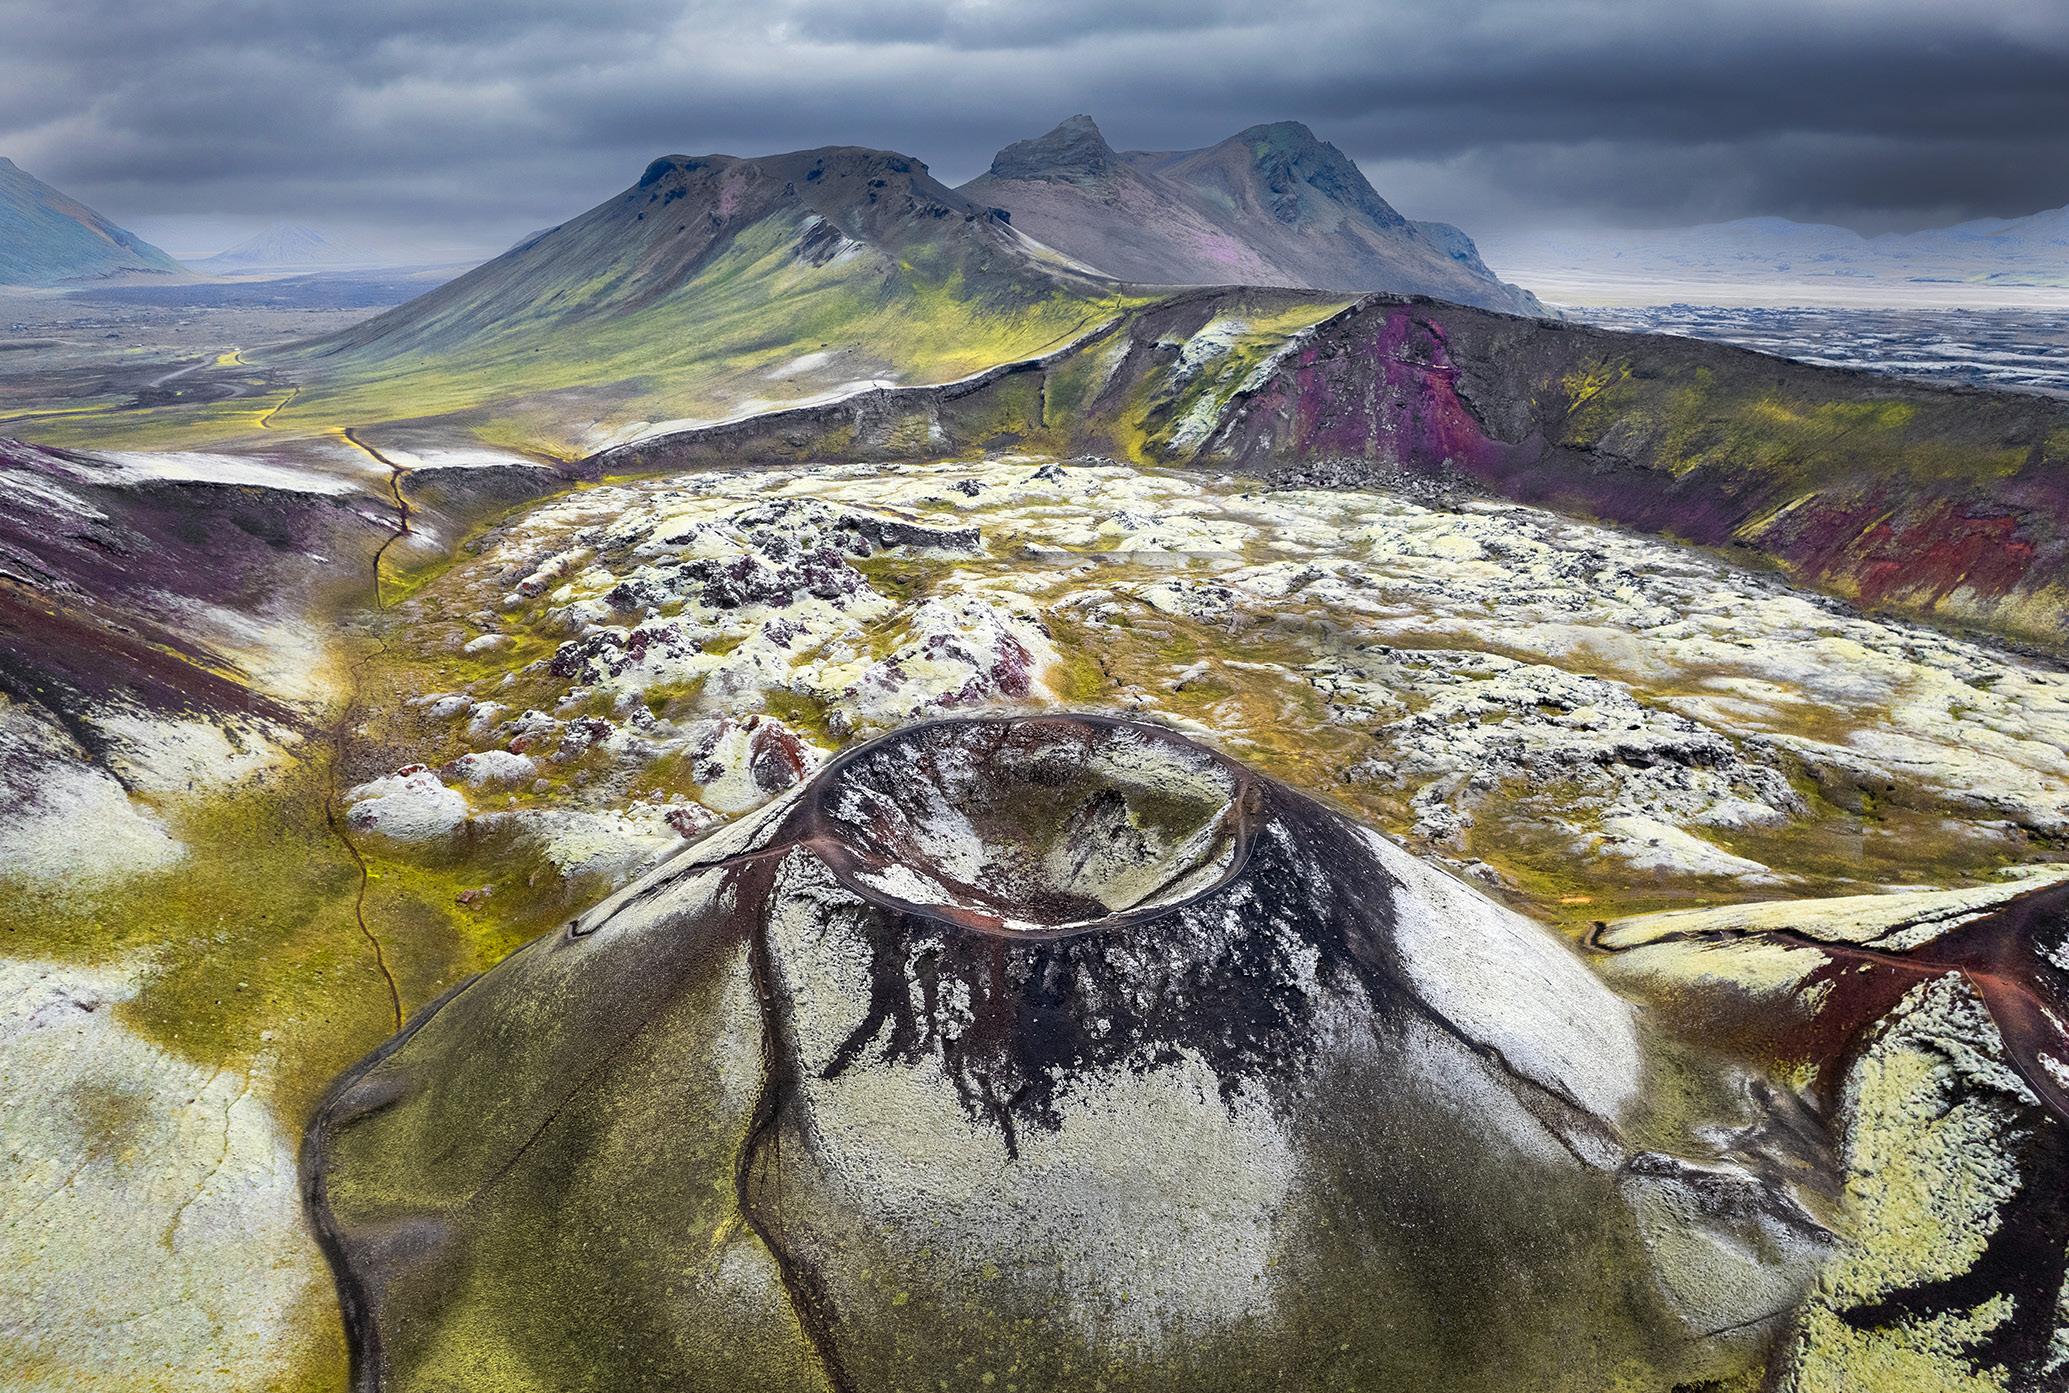
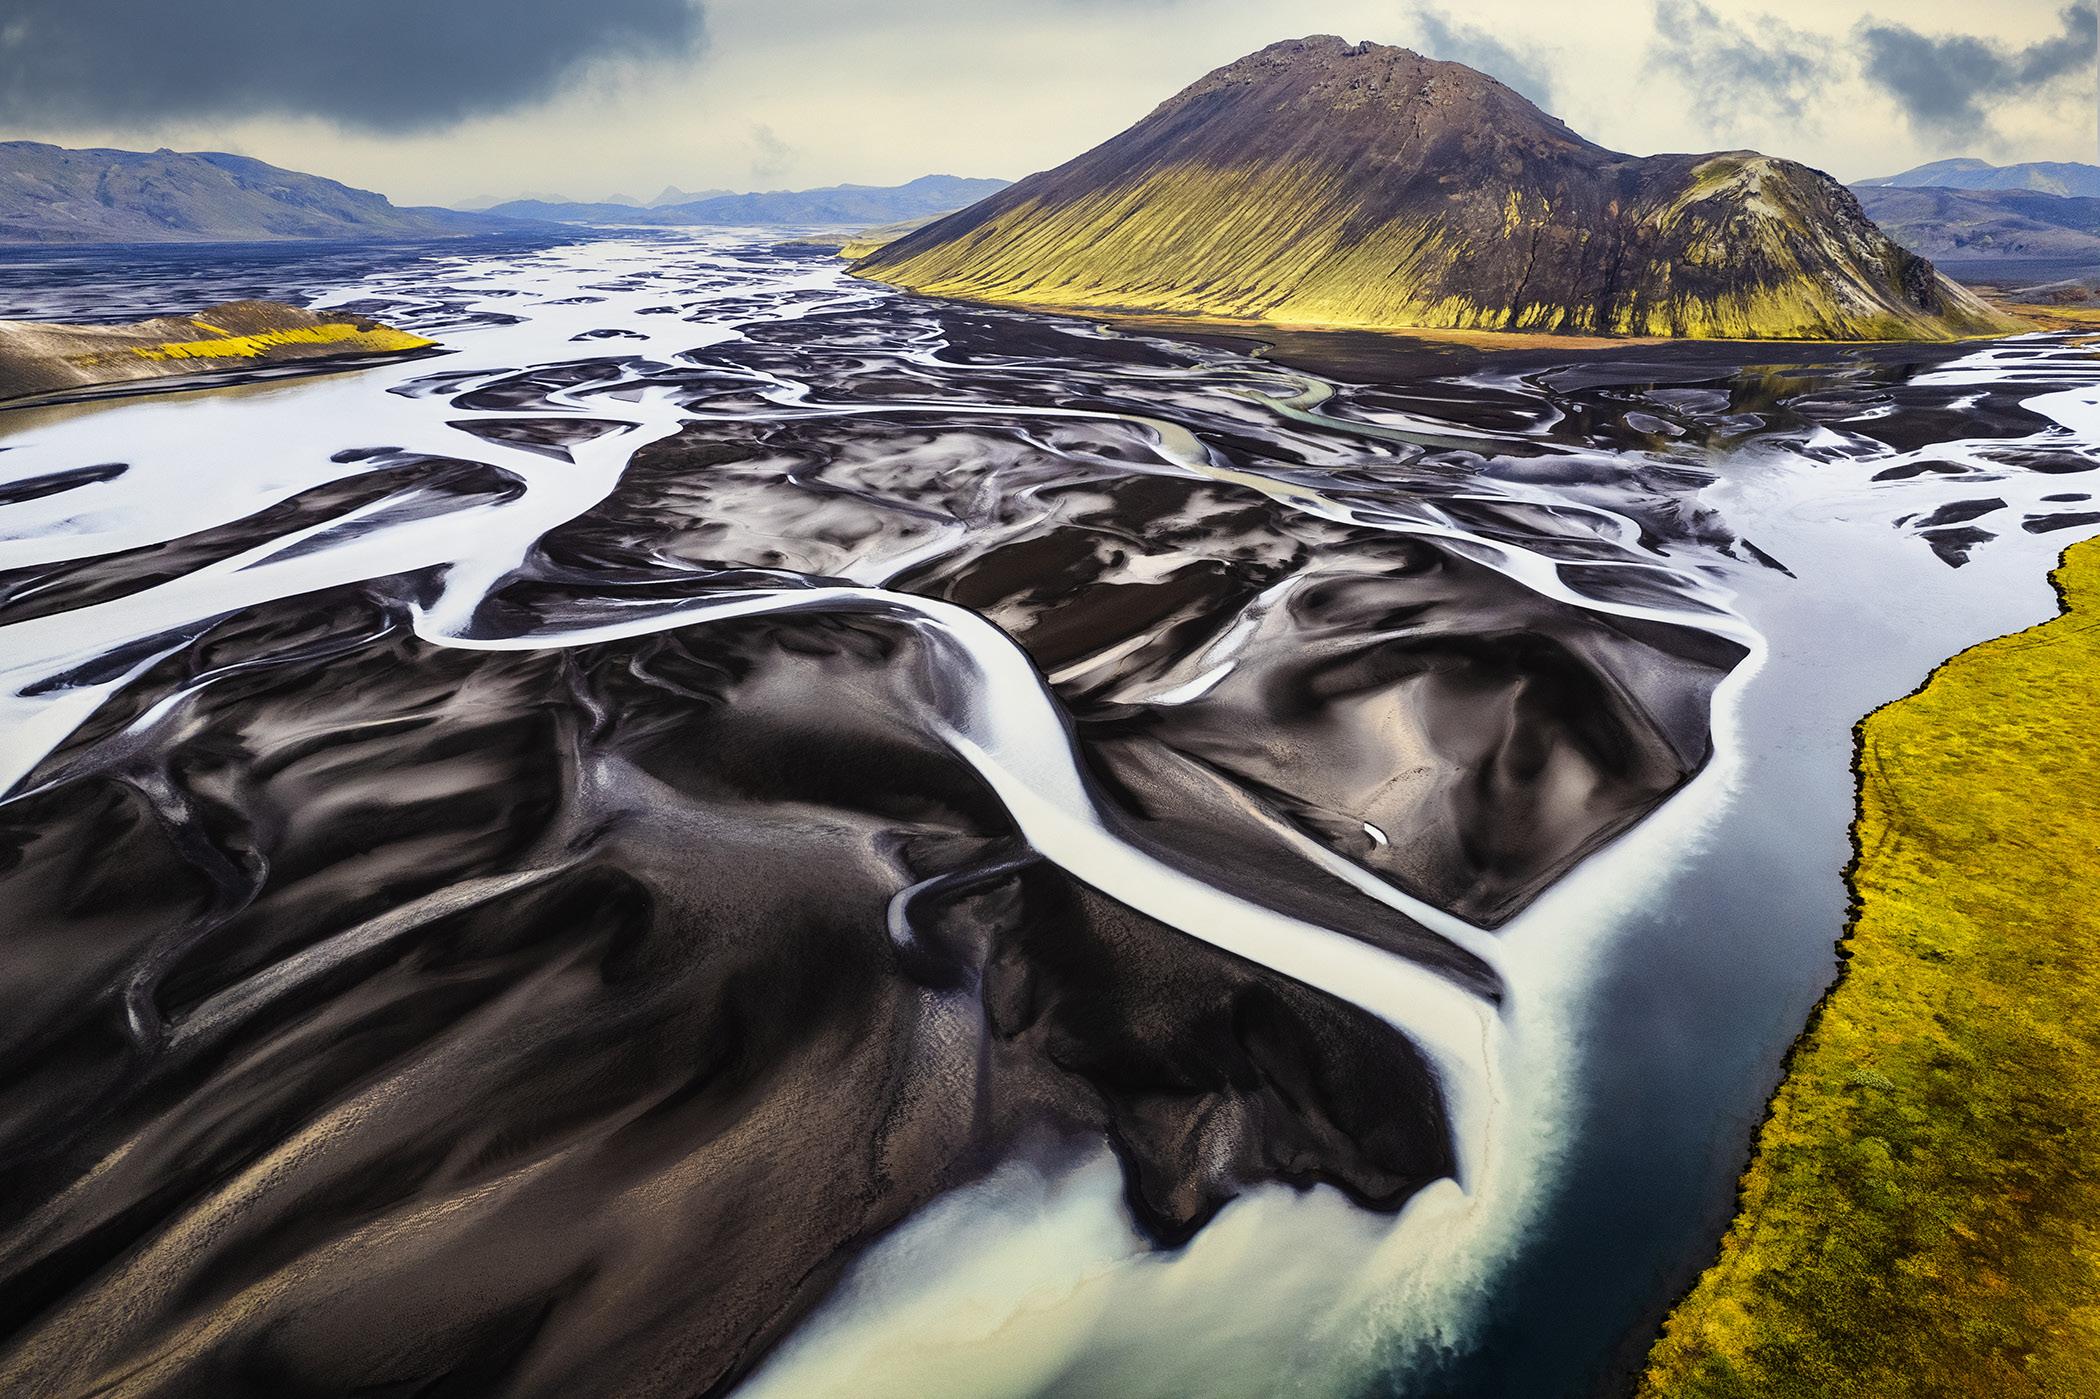
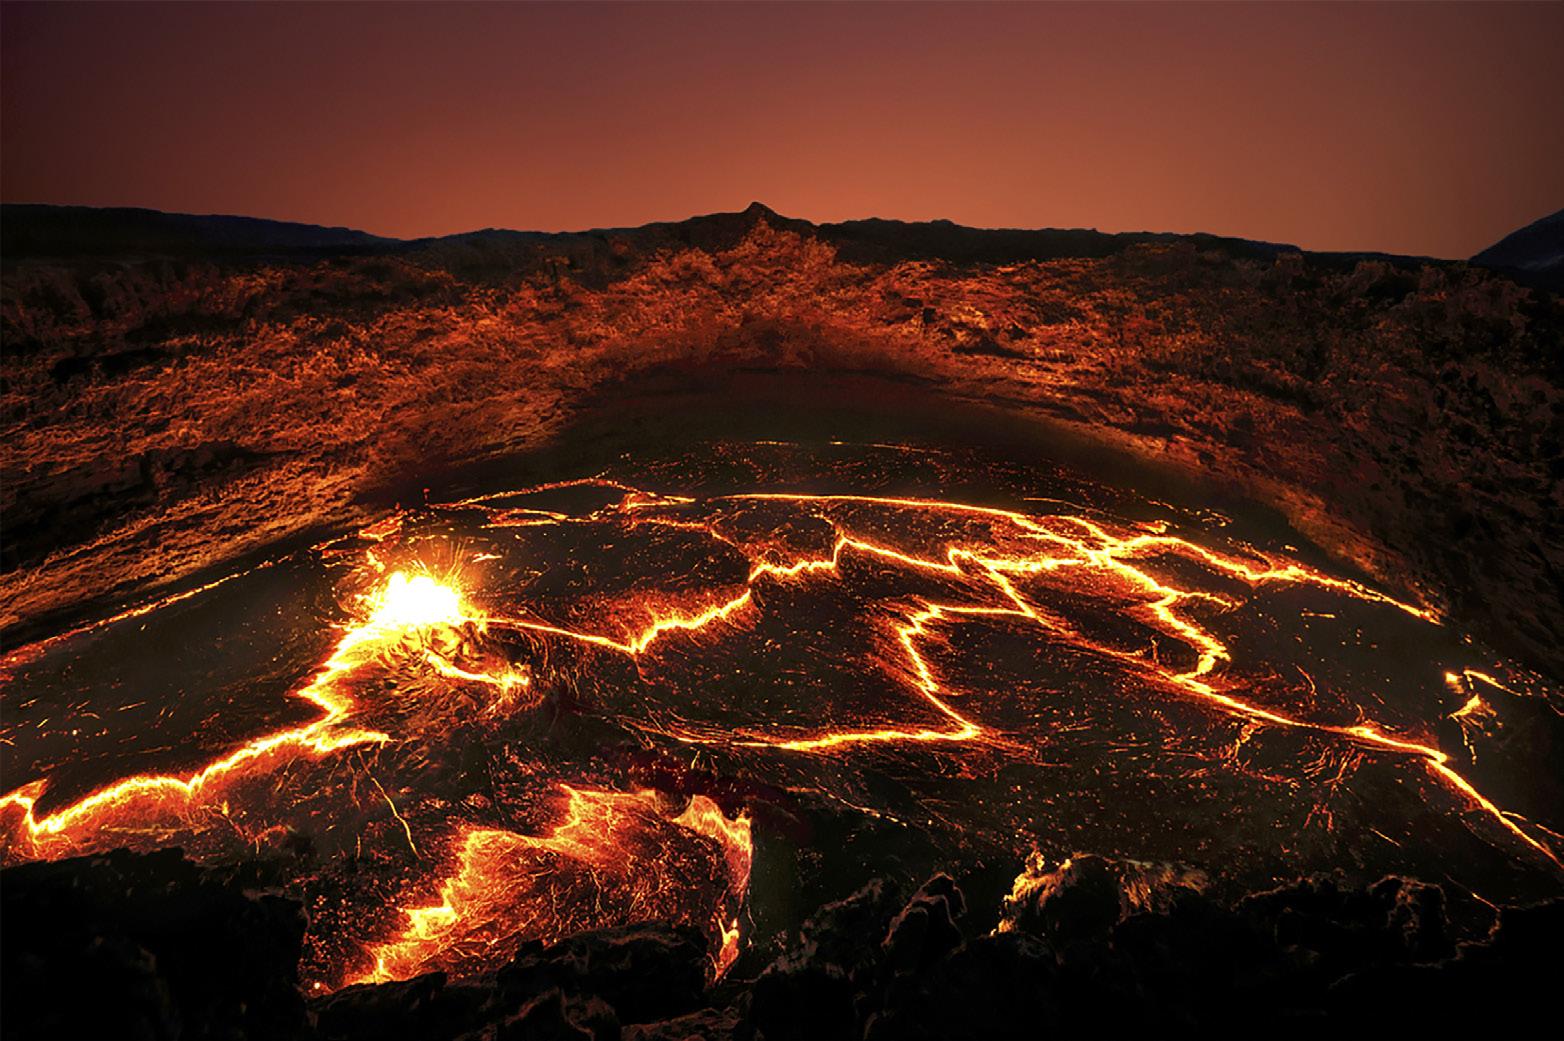
Iceland Drone Tour
August 24 - September 2, 2026
When we all shot film, and we didn't have the immediate feedback of our exposures on the LCD screen on the back of the camera, my standard approach to backlighting was 1/125 at f/8 with 64 ISO film. F/11 was the setting for a bright sunny day and f/5.6 for shade. F/8, therefore, was a compromise between the two and it worked in most situations.
The digital realm is more precise, and because we can see the results of our camera settings immediately, we can tweak them according to our taste. Therefore, I don't use pre-assumed settings. Instead, I assign one of the dials on my camera for the ability to move one of the settings easily and quickly without having to go into the camera's menu. Digging into the menus when you want to tweak the exposure takes time, and it's easy to lose photo opportunities.
To prevent this, I assign the rear dial on the camera body to the ISO. I set my exposure mode to manual, and in this way the shutter speed doesn't change nor does the lens aperture when the exposure is being changed. This is ideal. If your shutter or aperture changes as you vary the exposure, you might end up with a shutter speed that's too slow or too fast for a particular subject, or your lens aperture may give you too much or too little depth of field. Many photographers use the exposure compensation feature to tweak exposure, and that's fine -- but again, the unintended consequences could be lessthan-desirable shutter or aperture settings.
When shooting digital in the early days -- 2005 to 2015 -- noise was a significant problem, and I never allowed the ISO to vary. With my first digital camera, the Canon 1Ds Mark II (which cost $8000), 3200 ISO was completely unusable
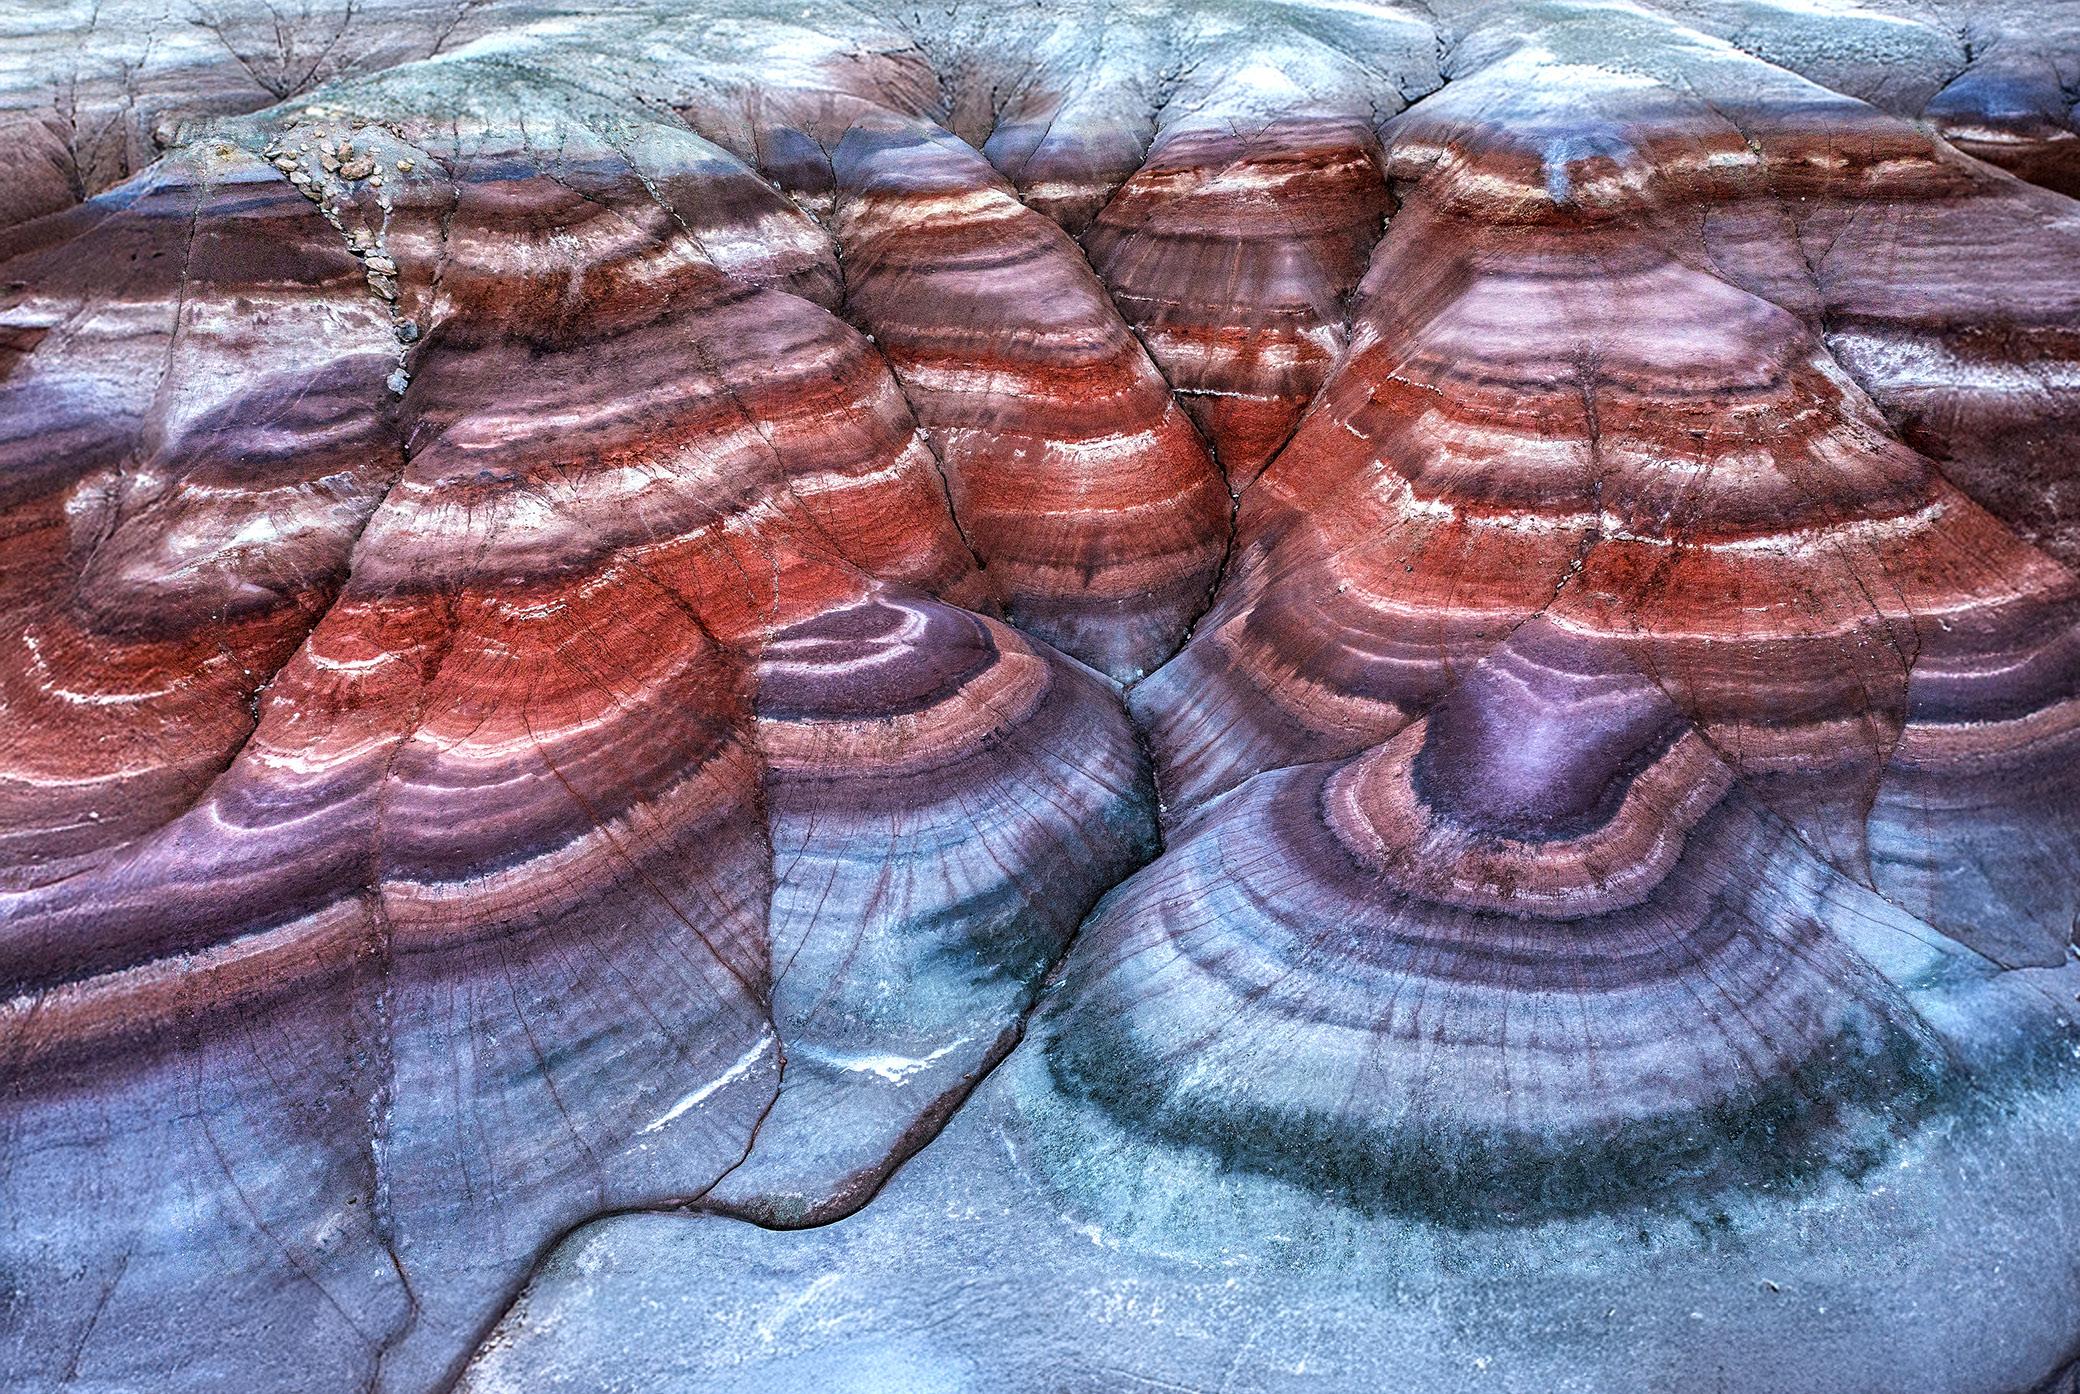
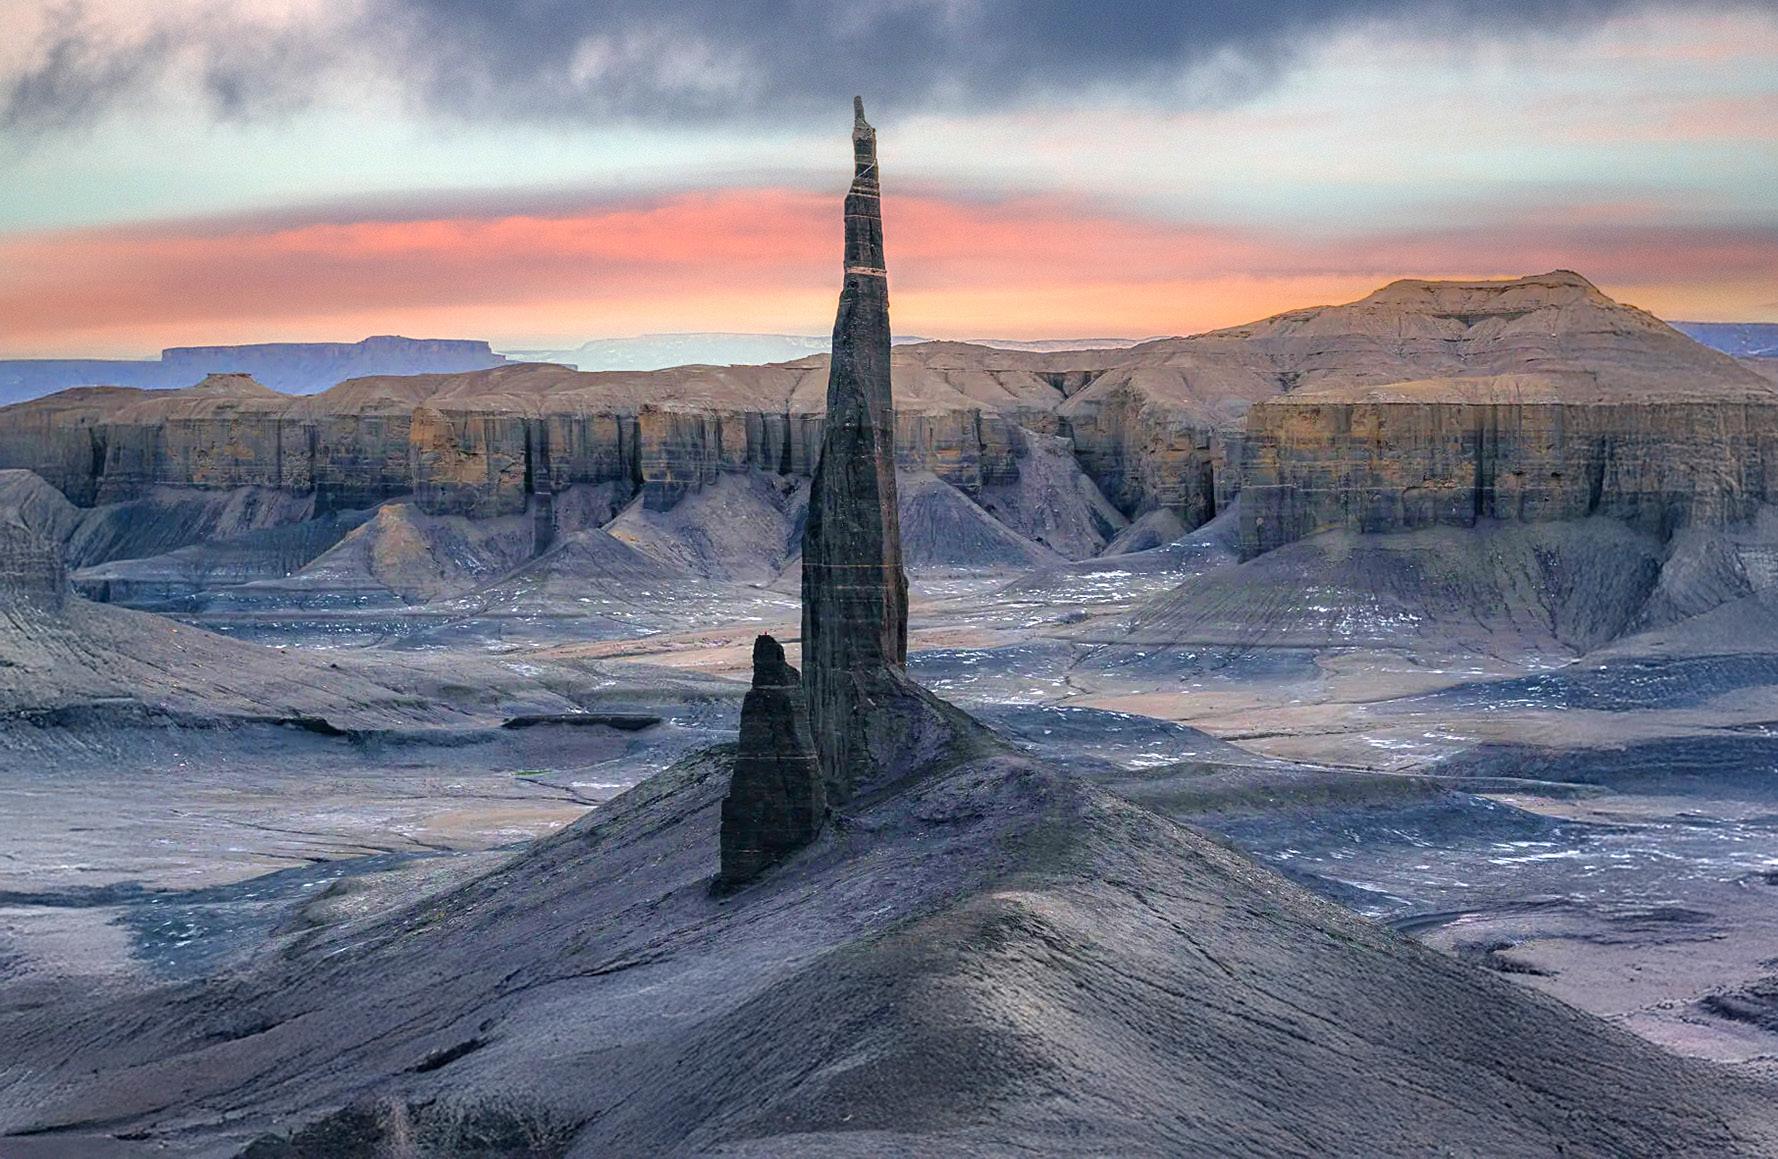
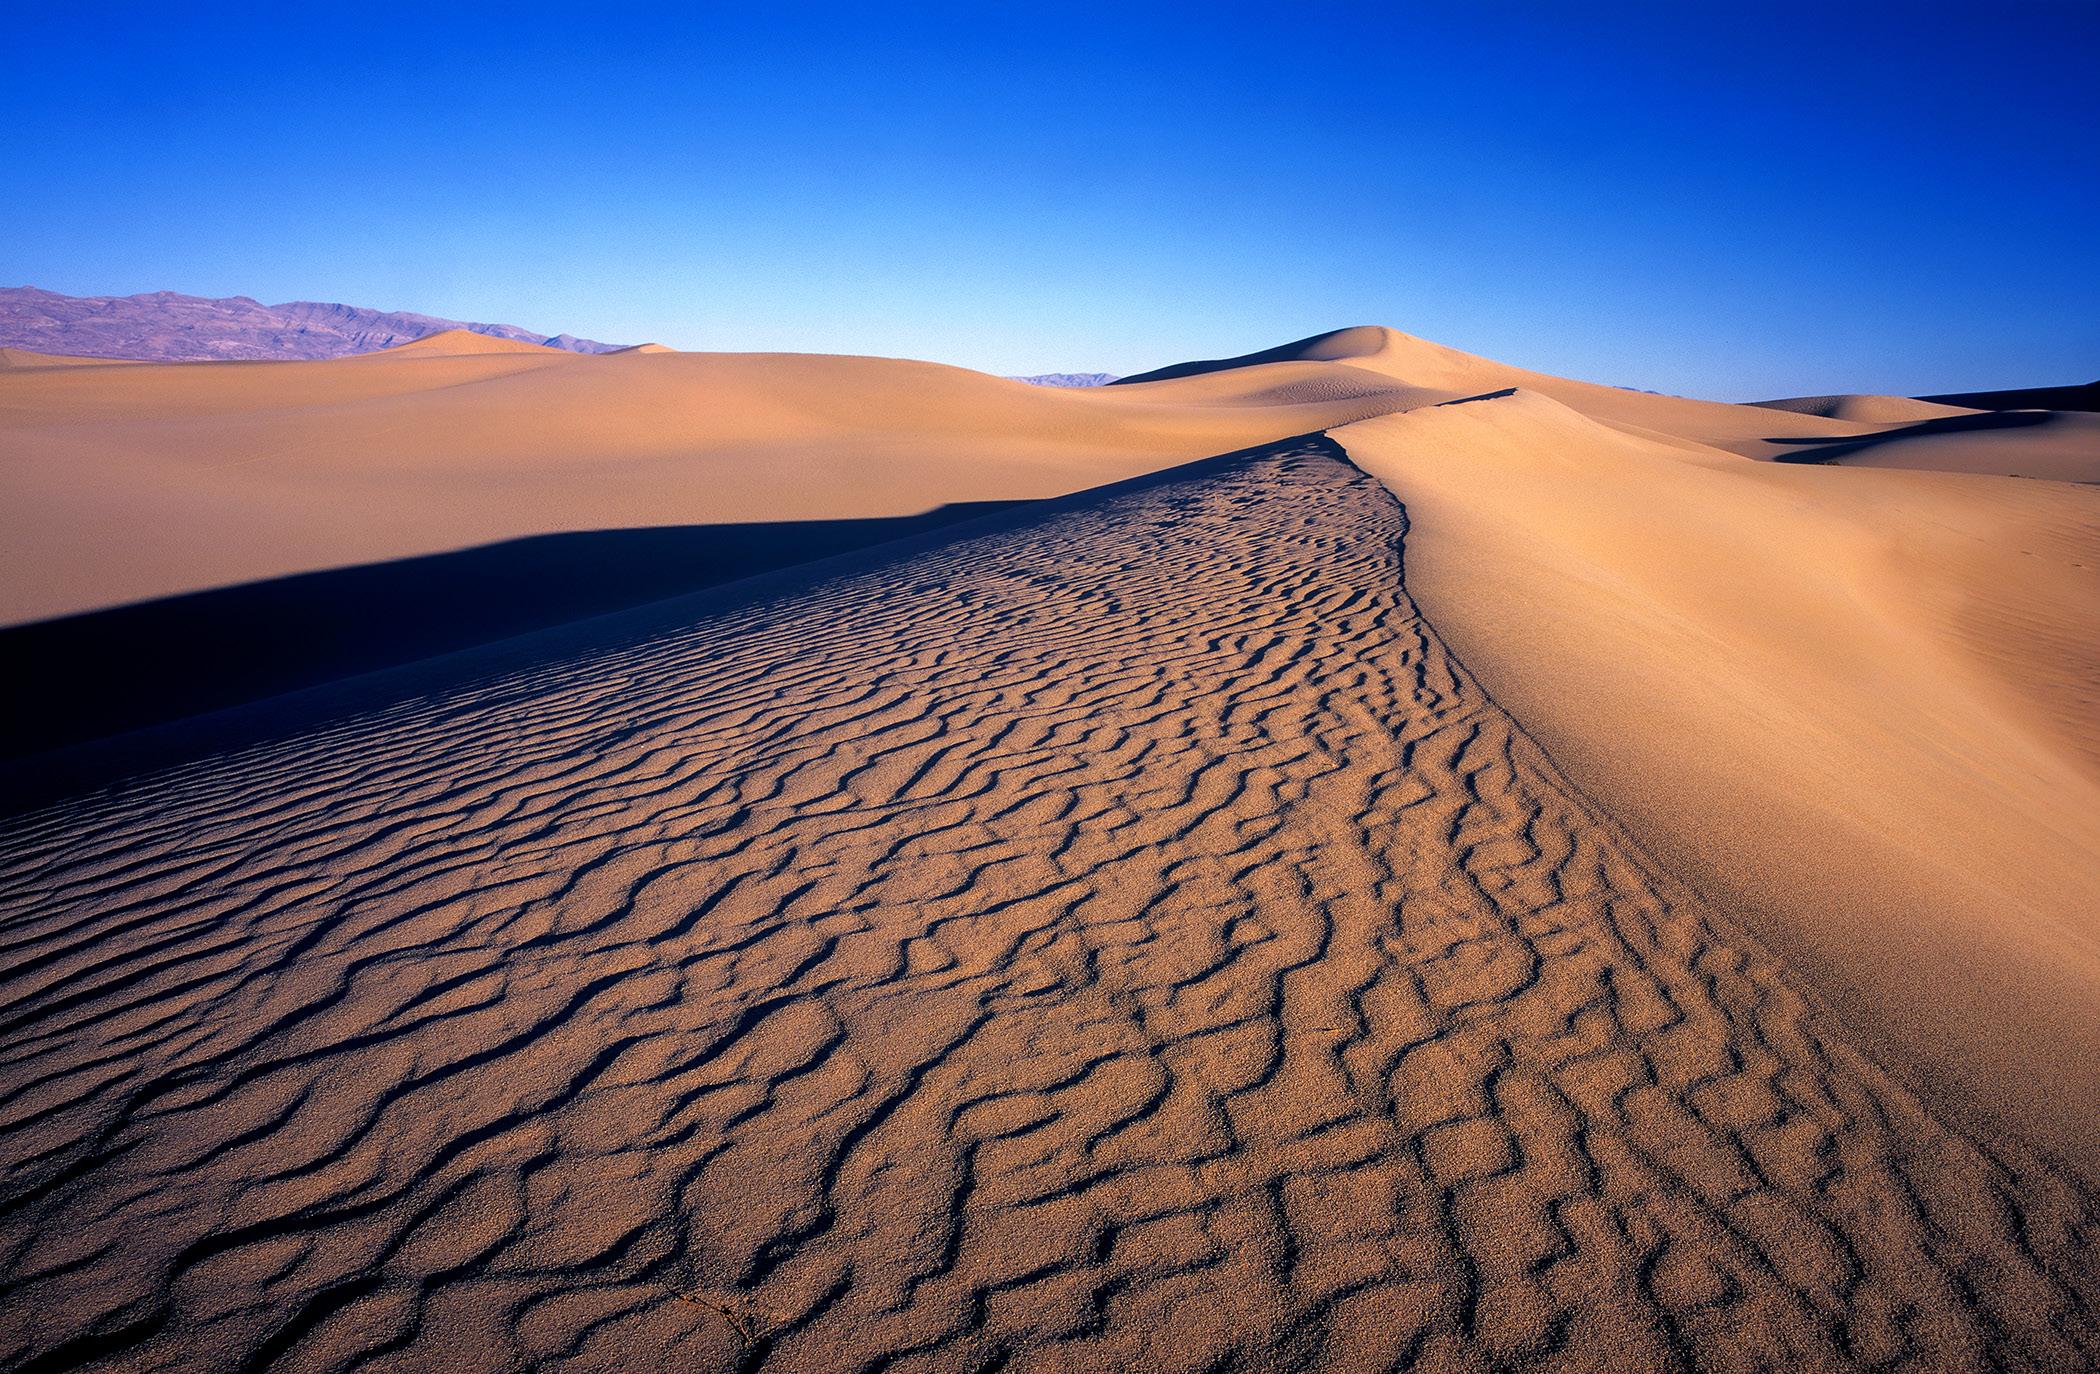
Bentonite Hills, Utah
April 17 - 22, 2026
Photo Tour
because the noise was horrific. I tried to keep all my shots at 1000 ISO or less.
Today, especially because we have Topaz DeNoise AI, 3200 ISO is commonly used. I have images shot at 12,800 ISO, and with the application of the Topaz software, the images look great.
All this is to say that only varying the ISO is a sensible approach to tweaking the exposure while, at the same time, the shutter speed and the aperture remain unchanged. In this way, you have total creative control.
As I vary the ISO, I can see in the viewfinder the exposure changing. As soon as the backlit image looks good, I shoot. With this method, there is no guesswork at all. The results are exactly as I expected. §
Exotic Birds of Colombia
Sept. 23 to Oct. 3, 2026
Pantanal Photo Tour, Brazil
Jaguars in the wild, birds in flight, caiman, otters and more
Dec. 1 - 9, 2025
Hyacinth macaw in flight
Photography Quiz
1. You can eliminate people in a photo, even if they are standing still, with stacking frames.
a. True
b. False
2. The terms White Balance and Color Temperature are, in terms of photography, synonymous.
a. True
b. False
3. A studio softbox is designed to make light:
a. Directional
b. Contrasty
c. Warmer
d. Soft and diffused
4. A 'snoot' is a tool photographers use in the studio to:
a. Narrow a light source to a small spot
b. Spread a light source over a large area
c. Alter the color of the light source
d. None of the above
5. You should never compose a subject dead center in the frame.
a. True
b. False
6. Given the same lens aperture, say f/16, in which camera is that aperture physically the largest if you were measure the diameter?
a. A Nikon or Canon full frame digital camera
b. A Hasselblad medium format digital camera
c. A 4x5 large format camera
d. An 8x10 large format camera
7. The biggest challenge for macro photography is:
a. Direct sunlight
b. The wind
c. Freezing moving subjects
d. All of the above
8. In Photoshop, you can convert black into any other color.
a. True
b. False
9. The problem HDR addresses in photography is:
a. Exposure
b. Color balance
c. Noise
d. Contrast
10. X-ray machines in airports do not adversely affect digital sensors even if you exposed images at high ISO settings like 6400 and above.
a. True
b False
Answers on page 46
UPCOMING PHOTO WORKSHOPS
FROG & REPTILE WORKSHOP in Kansas City
This is an exciting macro workshop in which you will be able to photograph about 40 species of colorful dart frogs and exotic reptiles. Held in a hotel conference room, Jim sets up natural backgrounds for outstanding photos. The photo at left shows a Jackson chameleon with the background replaced in Photoshop.
June 13 - 14, 2026
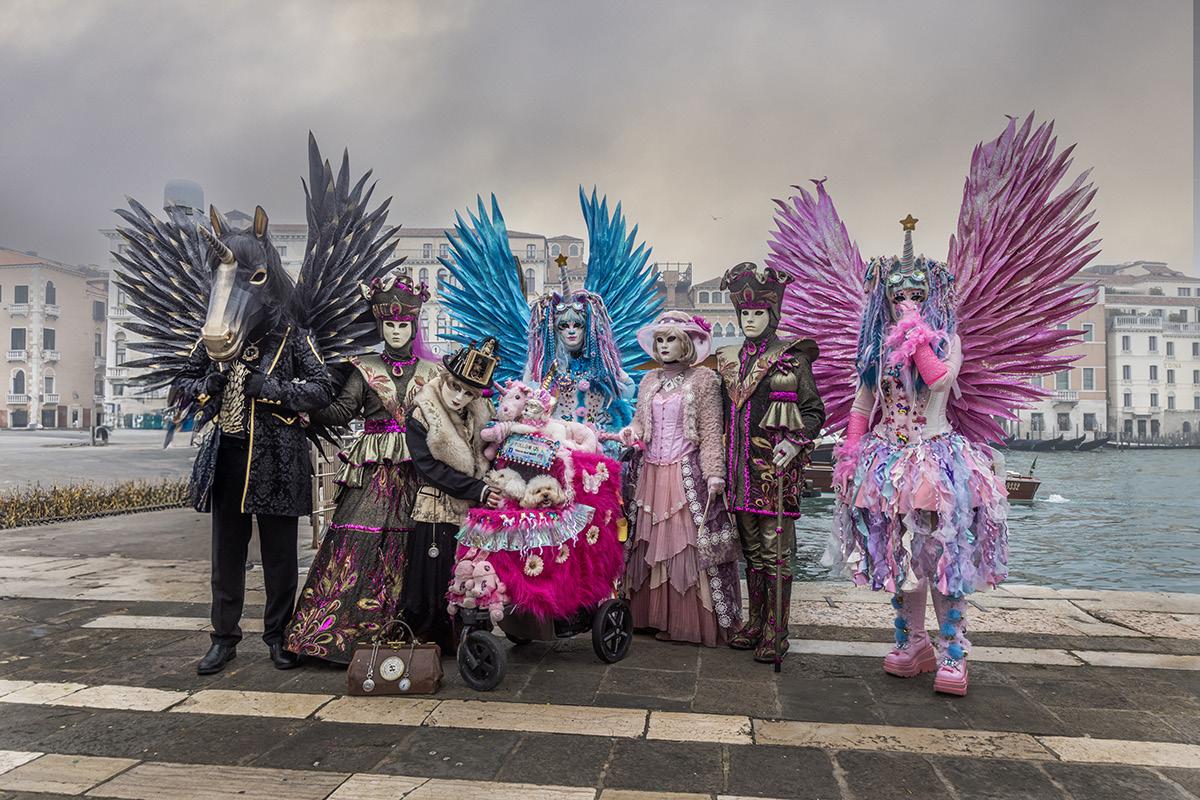
CARNIVAL IN VENICE
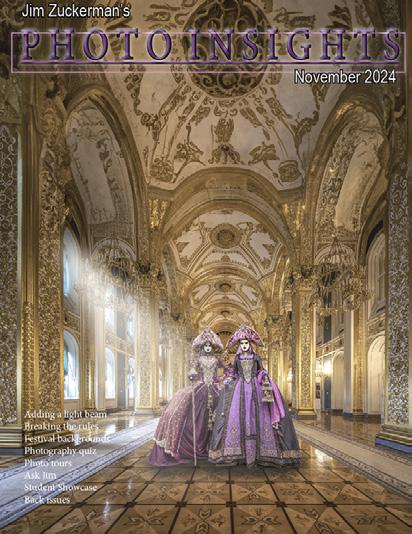
Photograph amazing costumes in a Medieval environment. We shoot inside a 16th century palace, in an iconic gondola, in a stunning bedroom with traditional Venetian decor, and at other great locations. The photography as well as the experience is phenomenal.
February 7 - 13, 2026
TEXAS BIRDS
Get up close and personal to many species of exotic and colorful birds. We shoot from a blind and get frame-filling shots of cardinals, green jays, crested caracaras, painted buntings, and more. Based in McAllen, Texas.
May 12 -15, 2027
eBooks
Click on any ebook to see inside
India Tiger Safari
May 20 - 30, 2026
What's Wrong with this Picture?
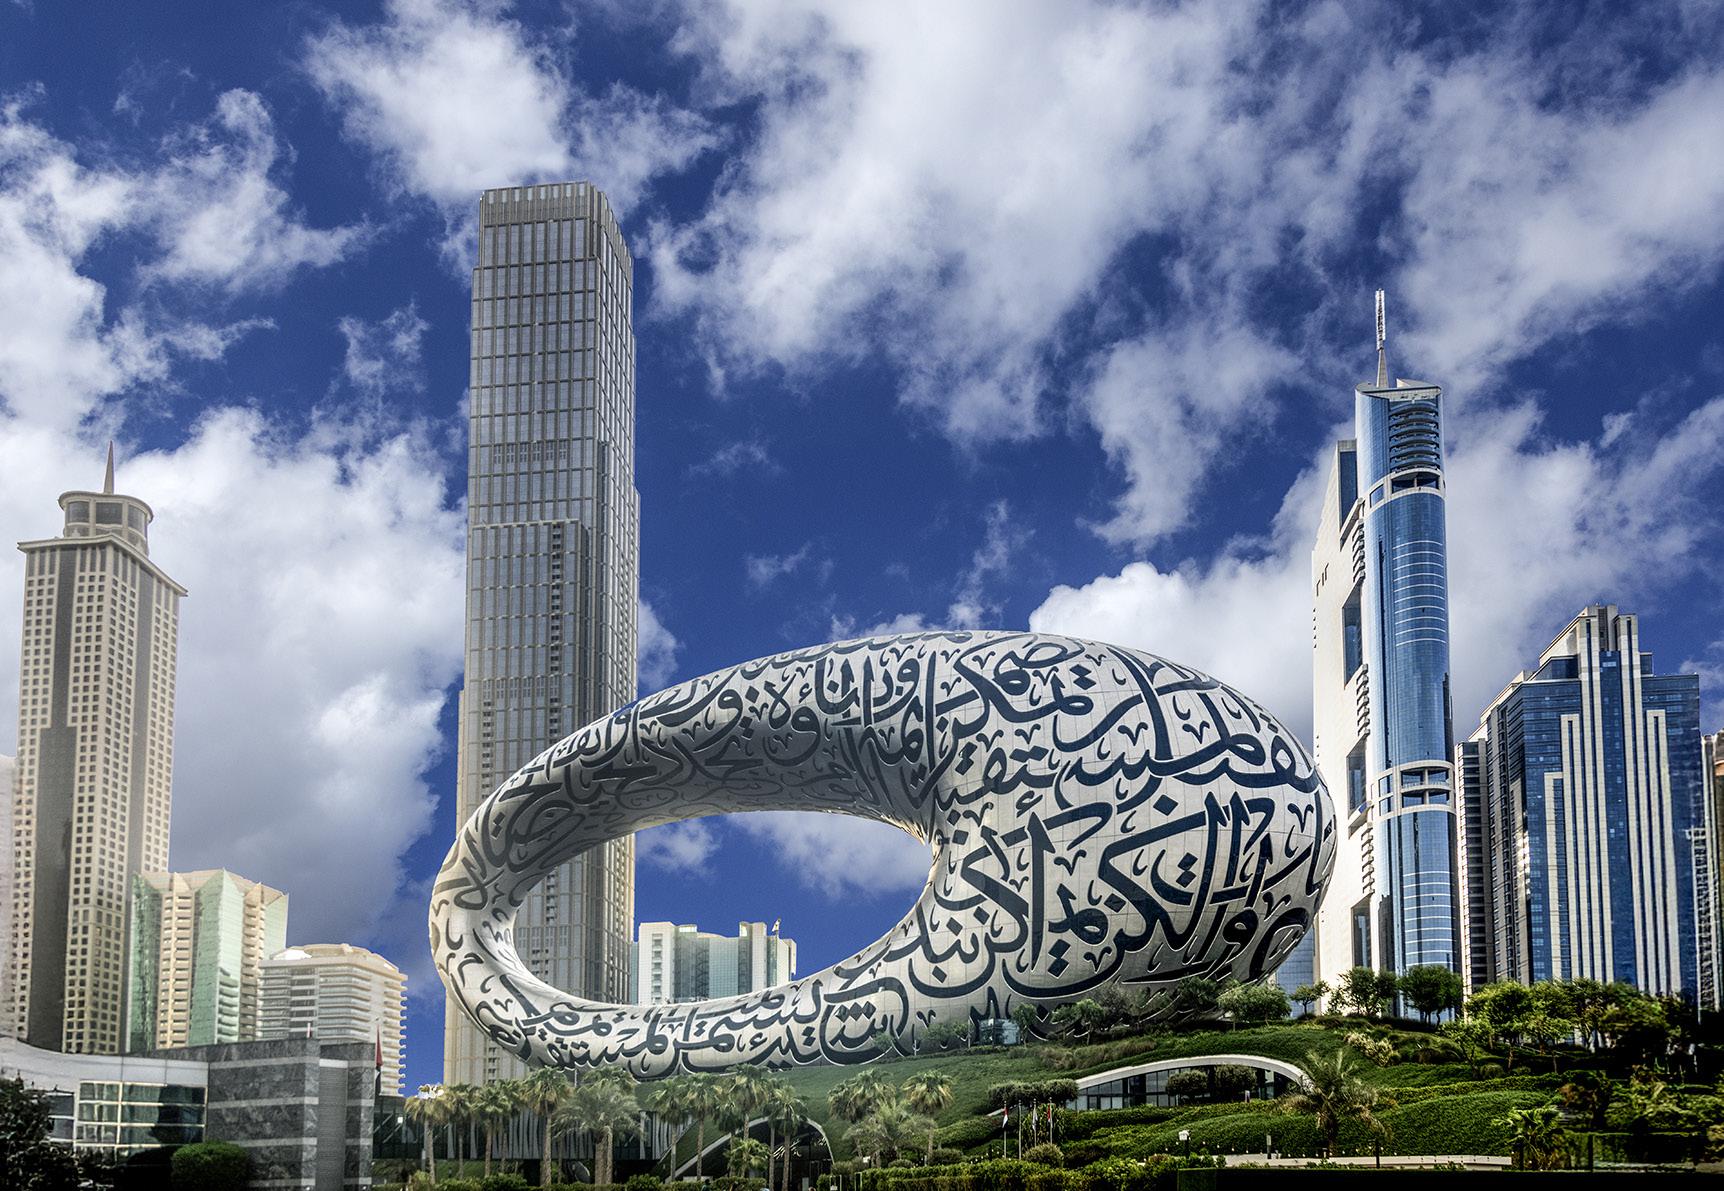
When you angle the camera upward such that the 'film plane', i.e., the plane of the digital sensor, is oblique to the plane of the subject, keystoning occurs. In other words, vertical lines angle inward. This happens with any subject -- trees, buildings, powerline towers, etc.
In this shot of the brilliantly designed Museum of the Future in Dubai, this kind of distortion is readily seen in the ridiculous angle of the building in the background. The wider the angle lens and the greater the oblique angle, the more vertical lines lean inward. Sometimes this works. Most of the time, in my opinion, it doesn't. I chose an extreme example in which the leaning building looks pretty stupid. This obviously has to be corrected.
I saw the problem in the viewfinder, of course. I actually expected it because I was using a 14mm wide angle. I could have corrected it by holding the camera such that the plane of the digital sensor was perpendicular to the ground and parallel with the building, but that would significantly change the composition for the worse. There would have been too much foreground.
My solution, then, was to switch lenses to my 24-105mm zoom. I then did a 5-shot panorama, overlapping each frame by about 50%. The camera was held vertically, and the back of it was parallel with the scene. That meant the highrise building in the background didn't lean in such a ridiculous manner.
Doing panos in place of using a wide angle lens can solve a number of problems, especially distortion. It also increases the resolution of the final image should you need a large hi res file. §
On Safari: Kenya
March 22 - 31, 2026
SHORT AND SWEET
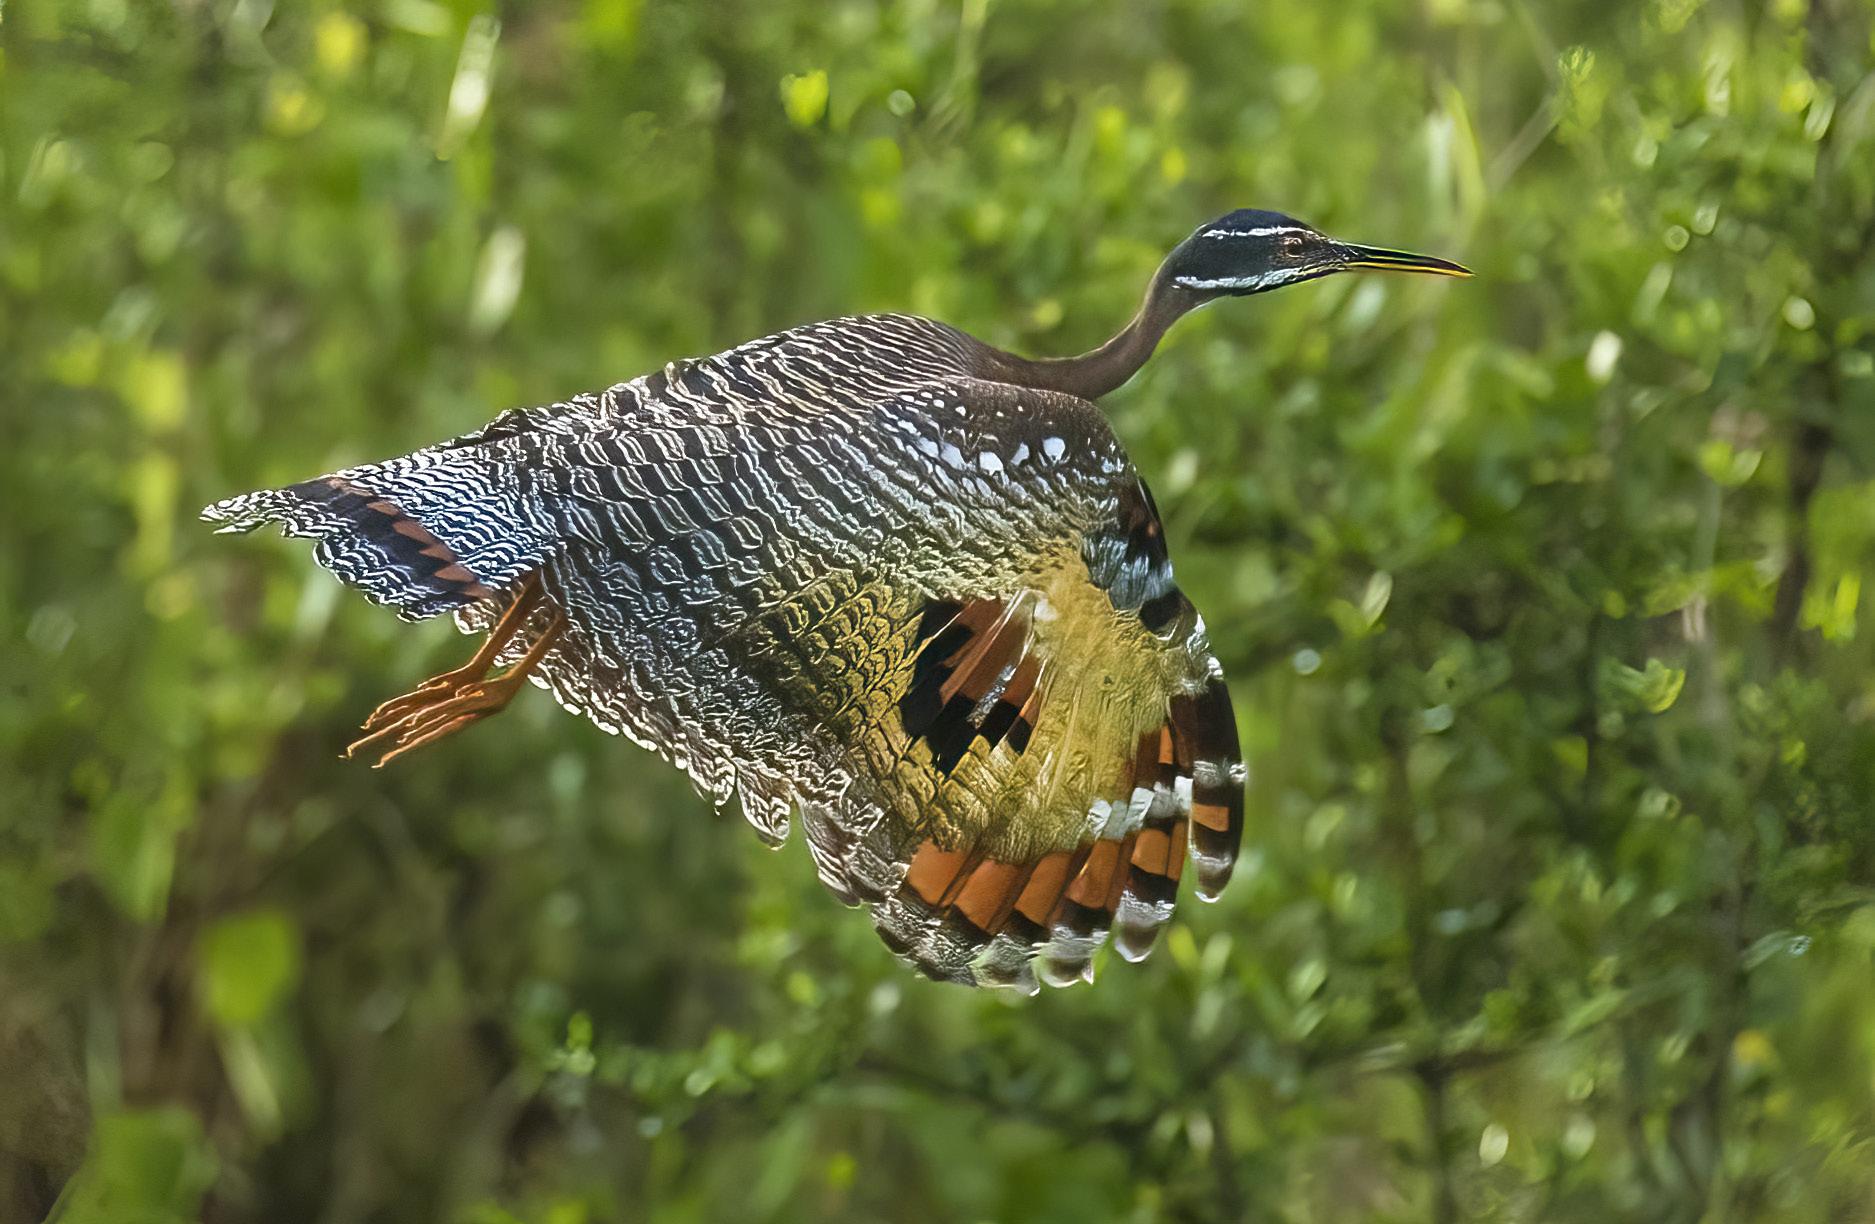
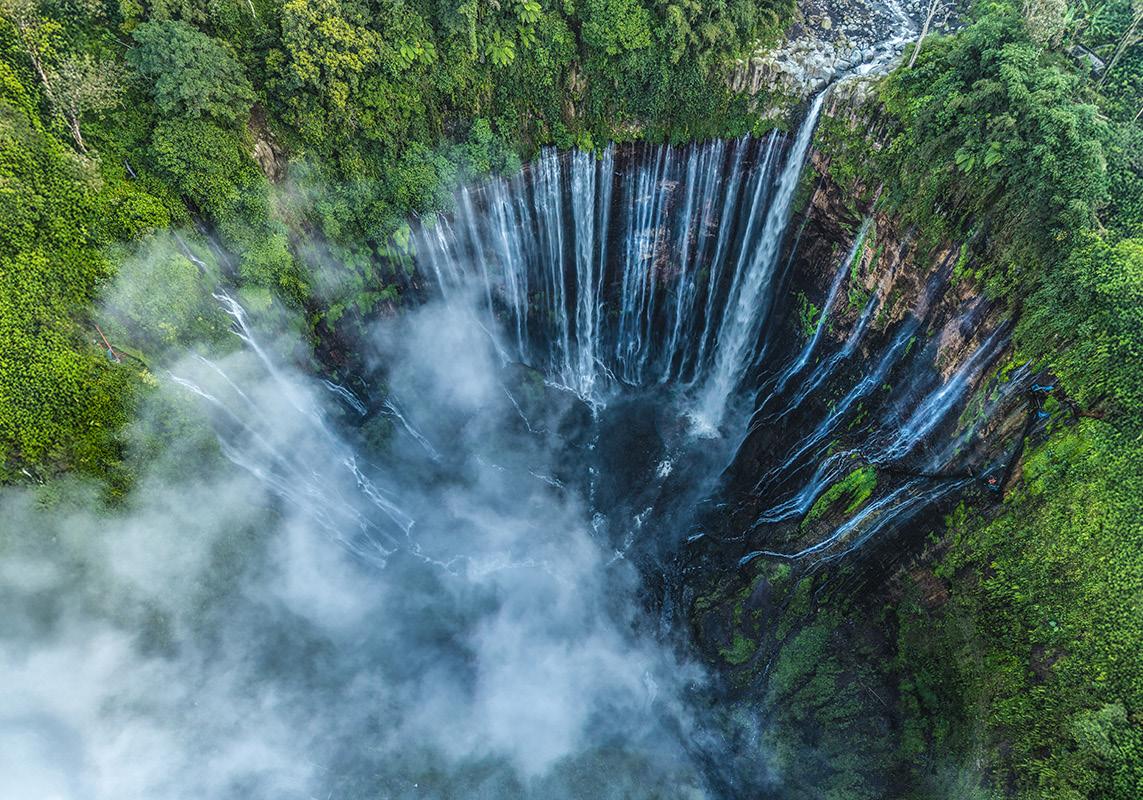
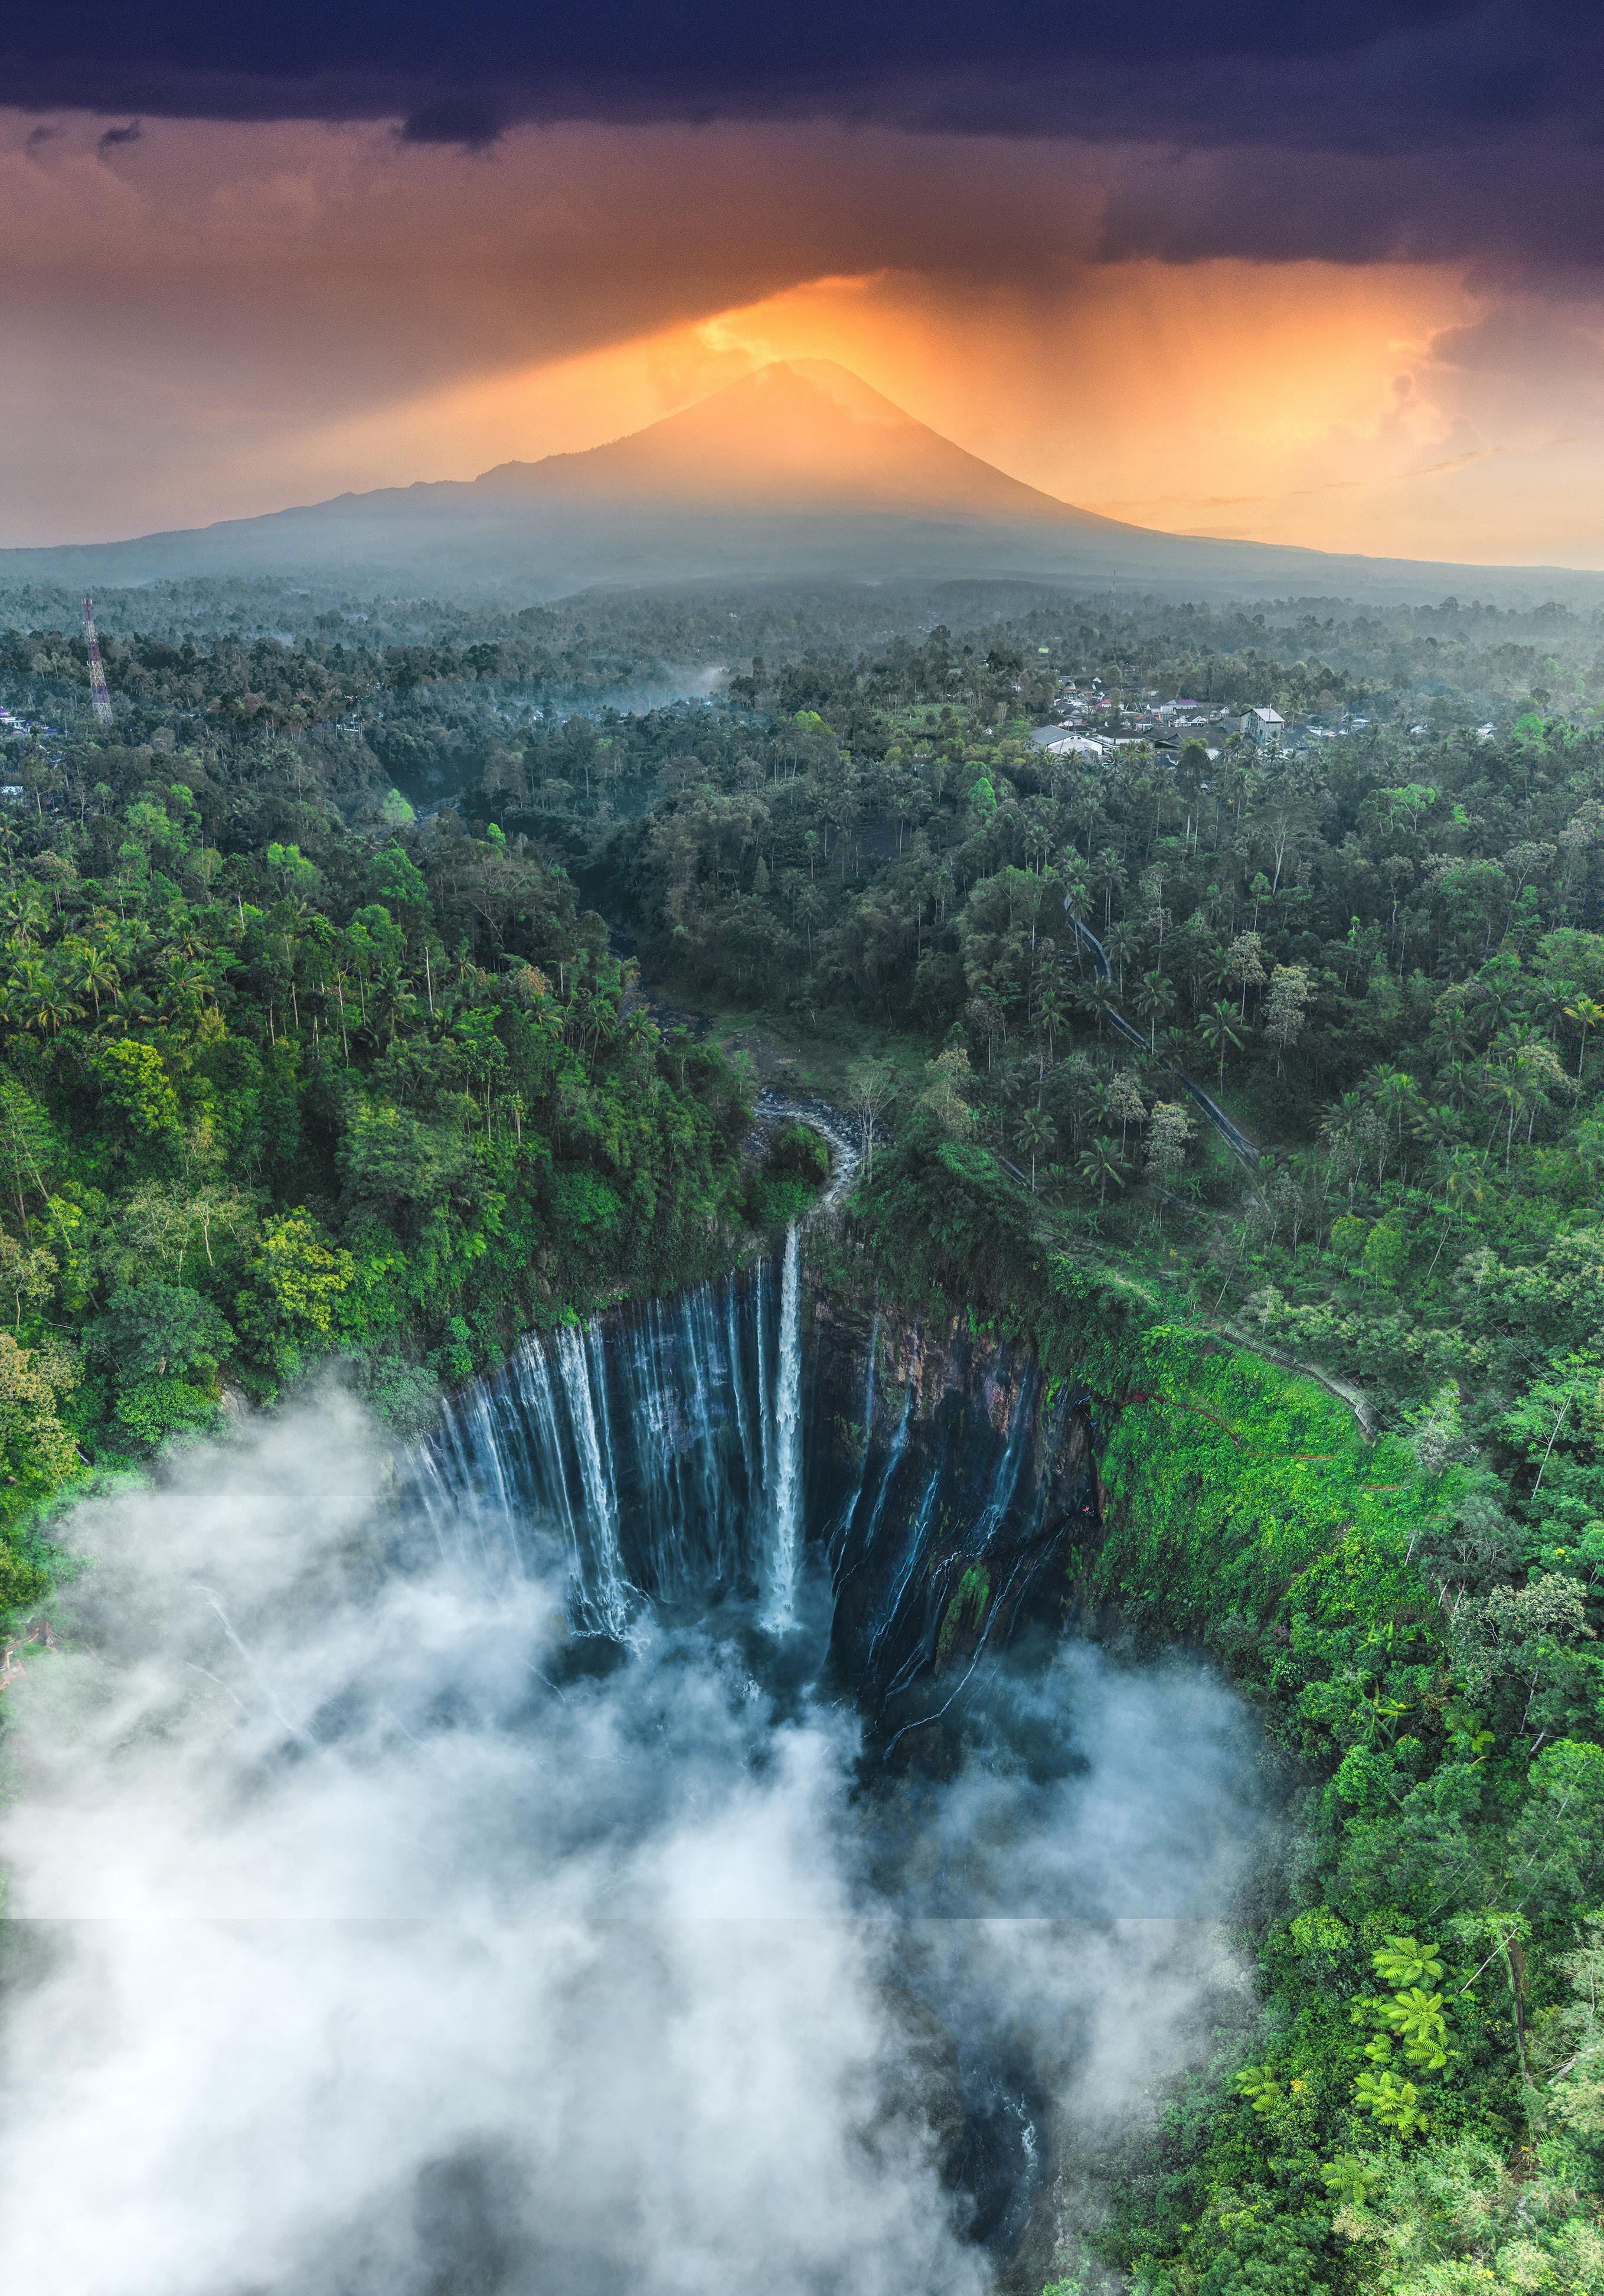
1. A drone offers you perspectives that were once only possible from helicopters, and those were usually not available. If they were, the cost was often prohibitive. Consider getting a drone and revitalize your photography. This is Tumpak Sewu waterfall in Indonesia photographed from 120 feet above the falls.
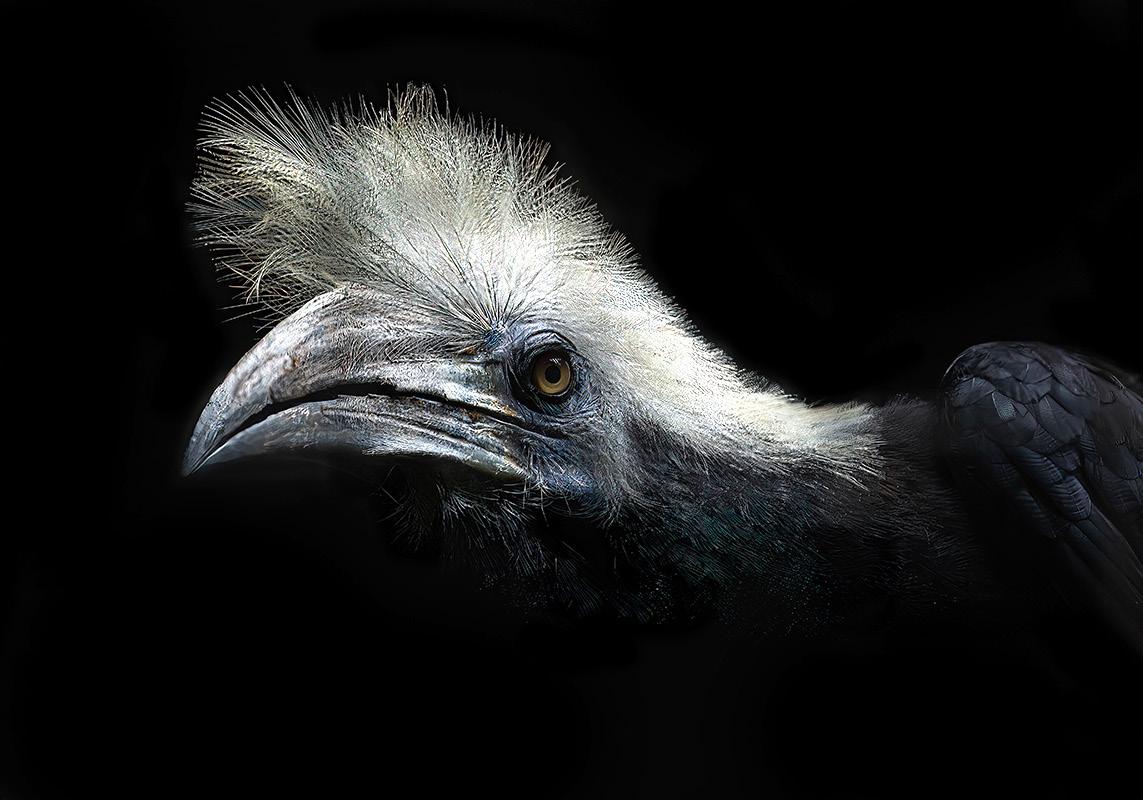
3. You can never go wrong with black as the background, even with nature subjects. It is dramatic, nondistracting, and it always works. This white-crested hornbill is an example. By exposing for a light subject against a shadowed backdrop, the darker elements usually go black, giving you a powerful image.
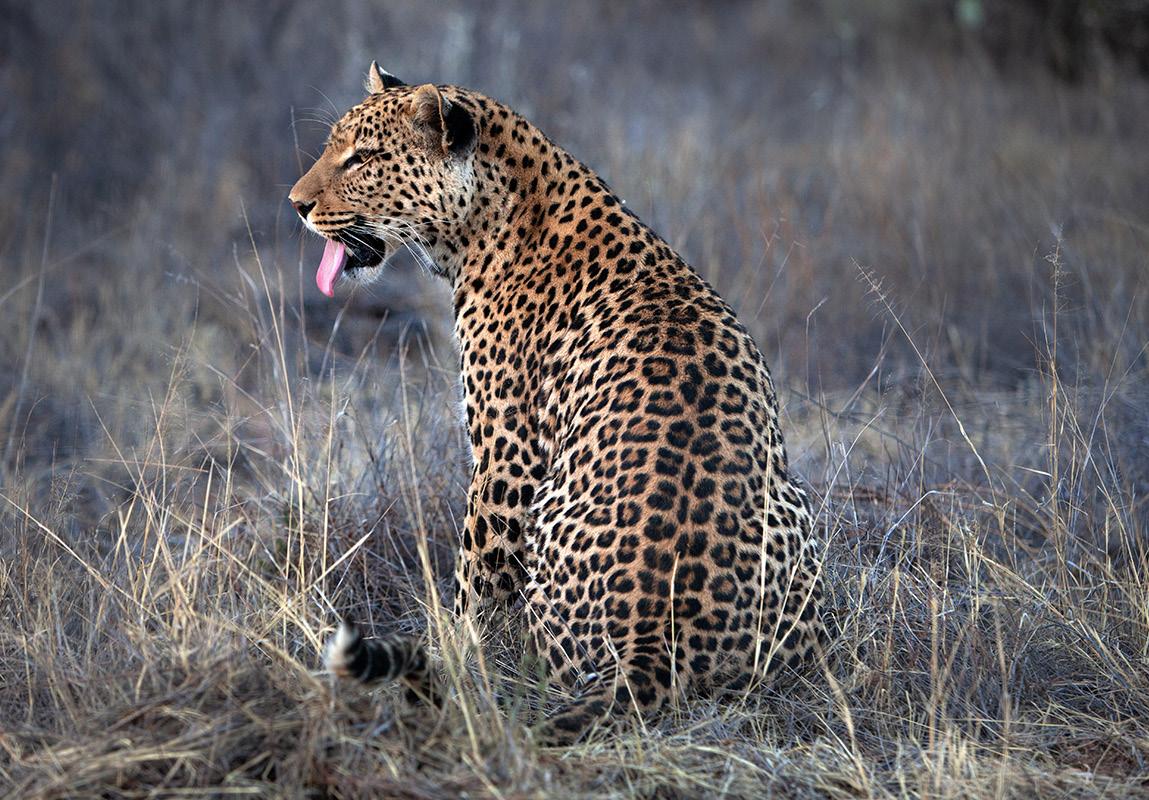
2. With a long lens, it's very easy to focus on the head of an animal while another part of the body is soft, like the back of this leopard which is closer to the camera. Make sure you have enough depth of field. Depth of field is governed by f/stop, subject-camera distance, and focal length.
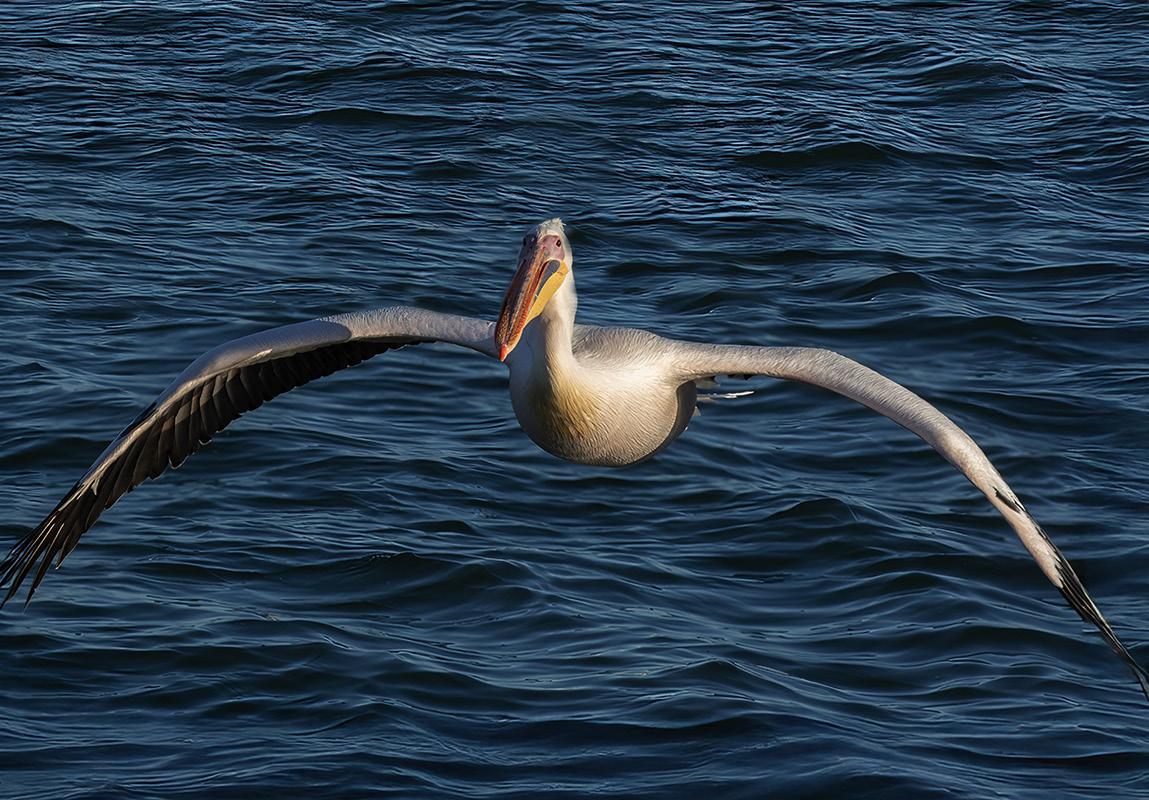
4. When shooting birds in flight, the faster the frame rate, the better. It means you can catch every nuance of the position of the wings, creating a lot of choices in editing. I shot this African white pelican in Namibia at 20 fps. Many cameras now have 30 fps, and for fast flying birds, that's a great thing to have. §
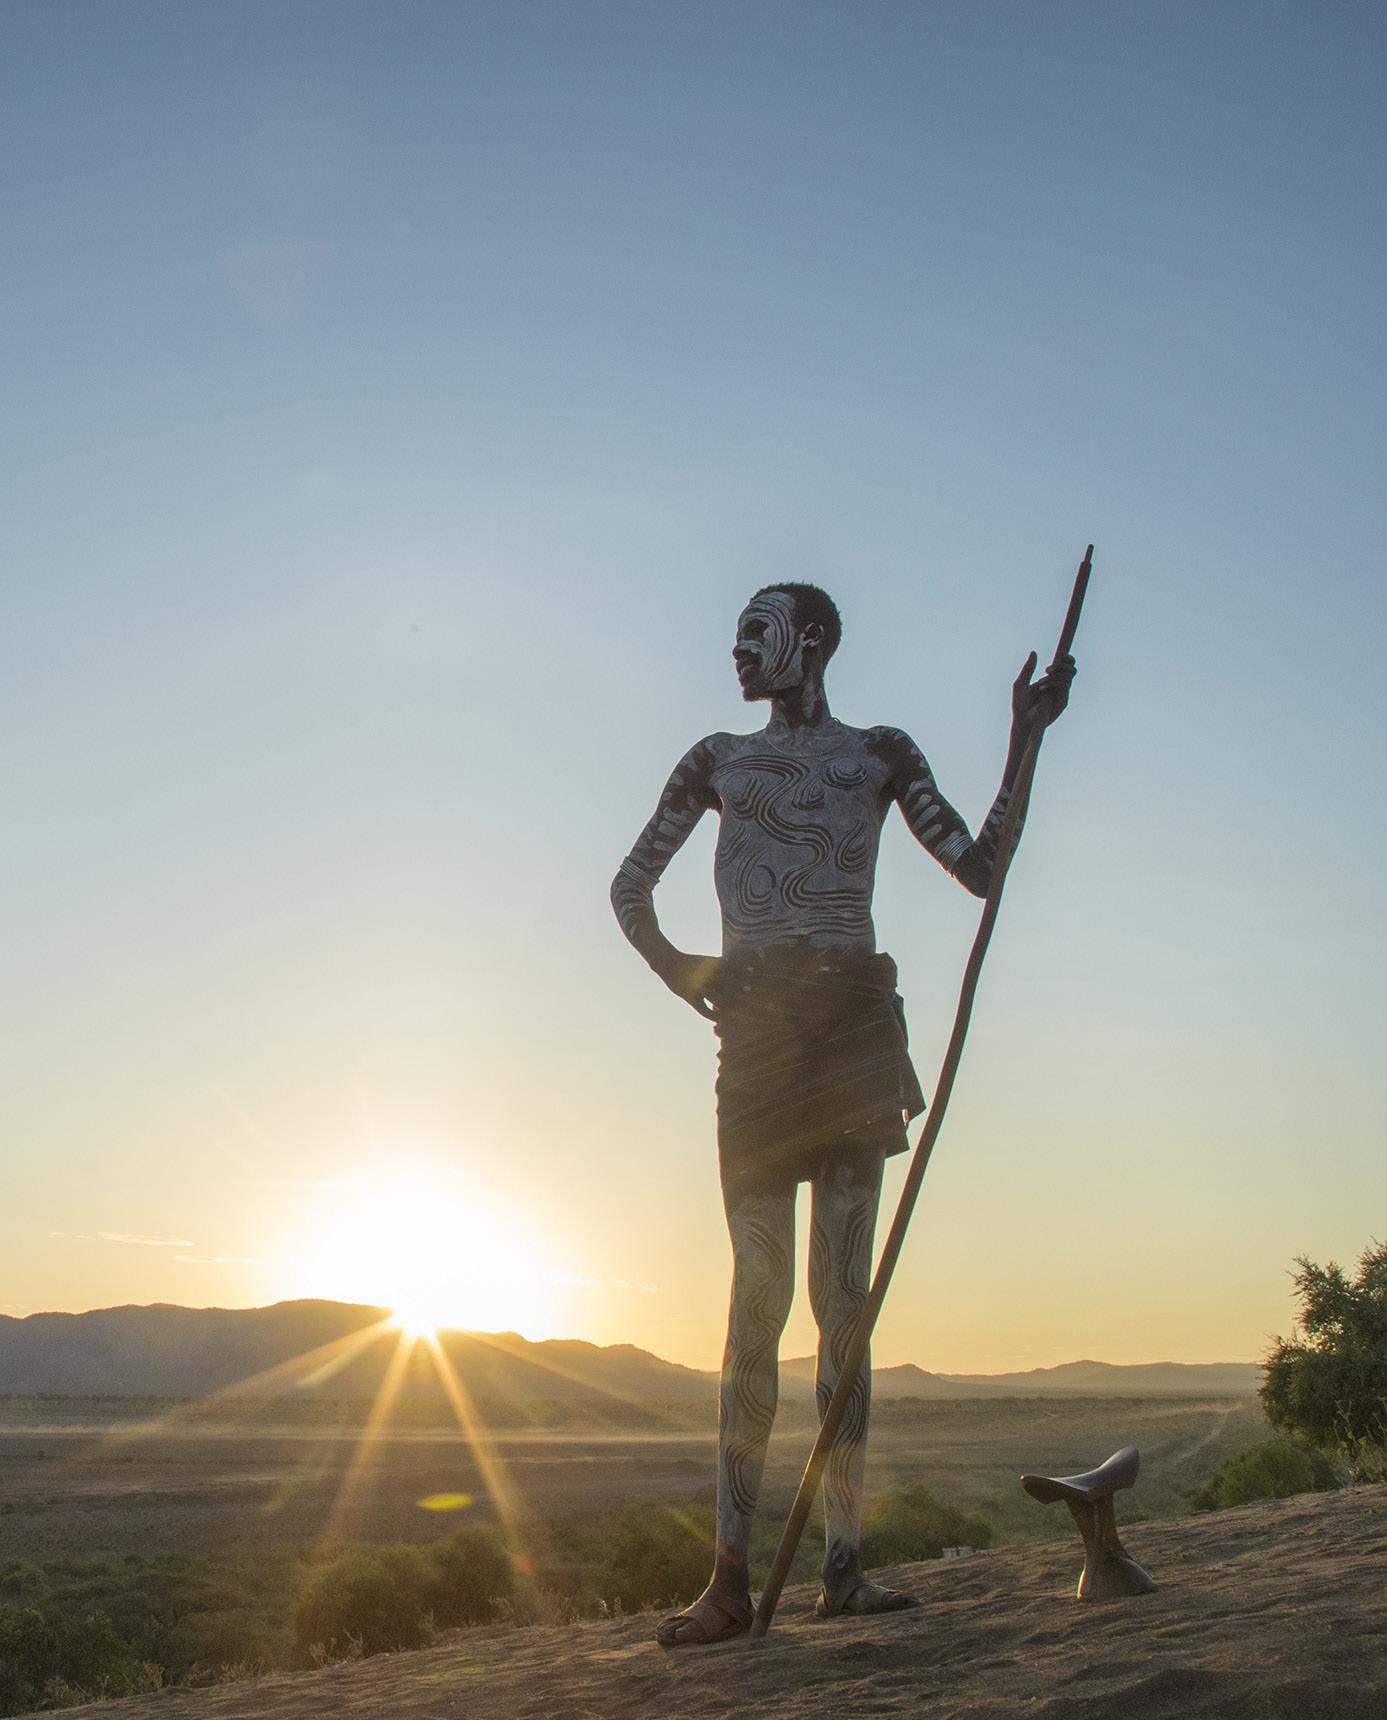
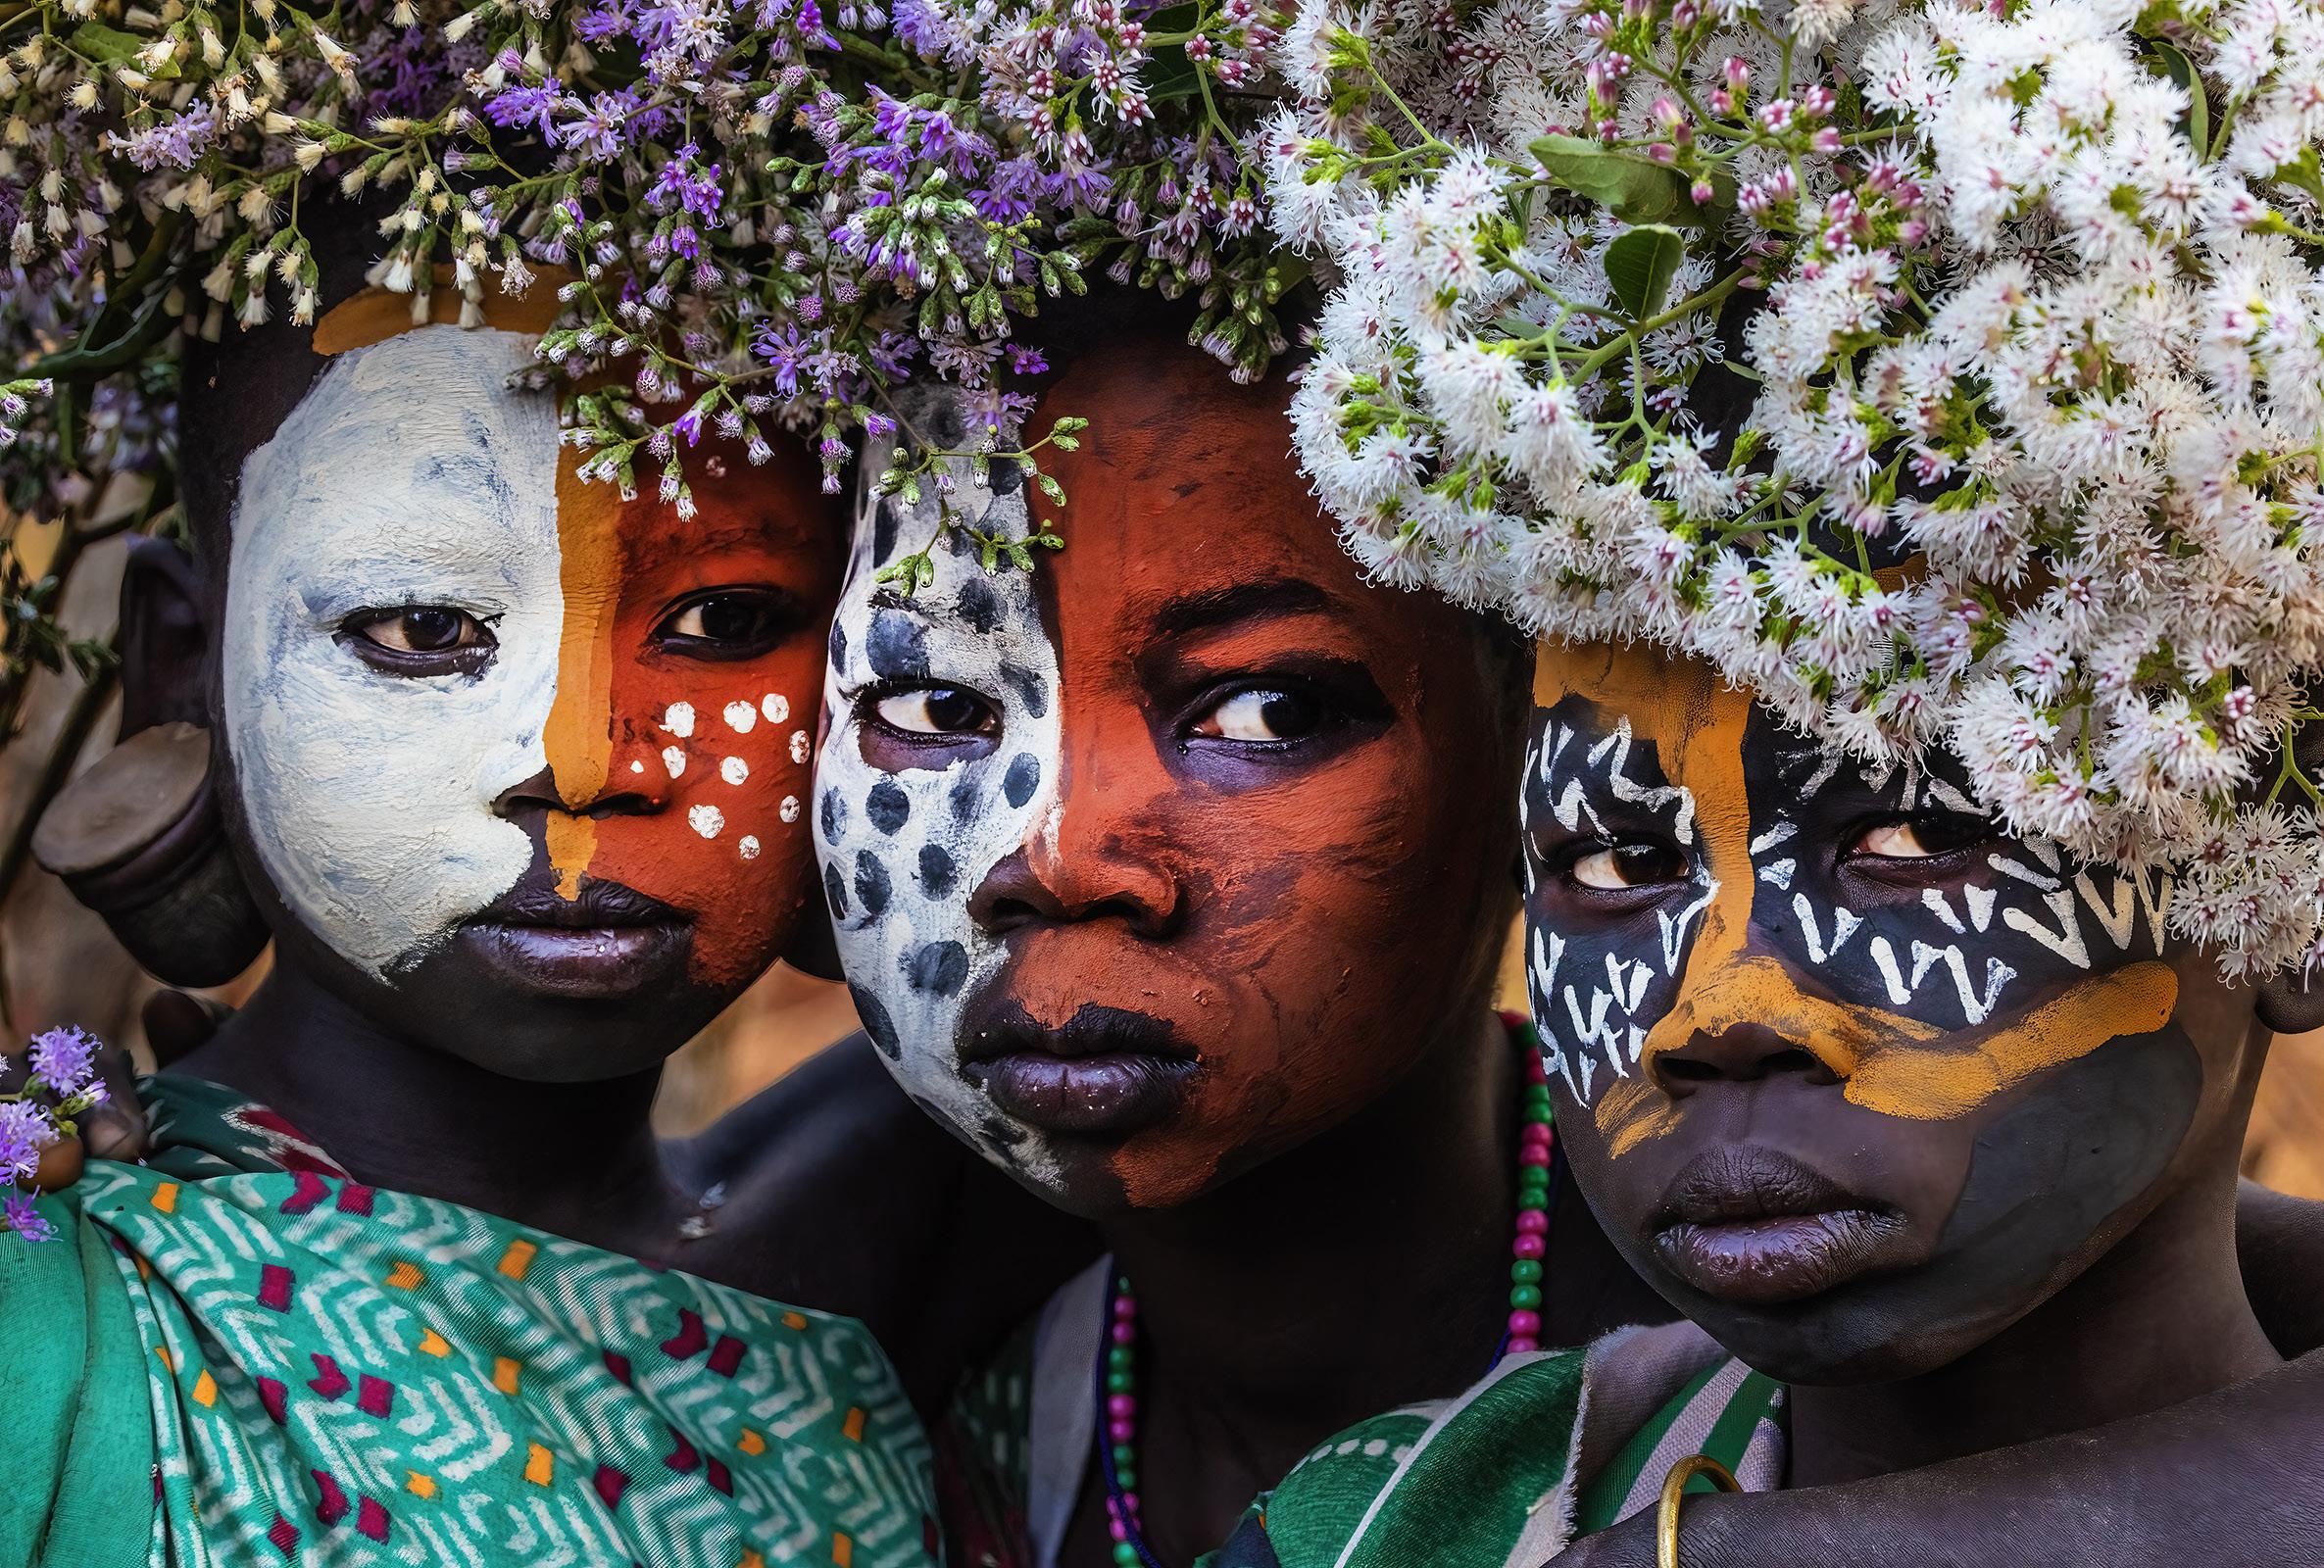
Ethiopia Photo Tour
Primitive tribes Active volcano Rock-hewn churches Bizarre landscapes
January 5 - 18, 2027
ASK JIM
Every month, Jim answers a question from his online students, from people who participate in his tours and workshops, or from subscribers to this magazine. If you have a question you’d like Jim to answer, please drop him a note at photos@jimzuckerman.com.
Q: Jim . . . Sometimes I forget to clean the front glass element of my lenses, and then I'll notice some dust specks on them. But these don't show up in the pictures. Where does dust have to be for it to show up in the pictures?
Larry Cochran, Biloxi,
Mississippi
A:
If the dust particle is large enough and it's residing on the front glass element of the lens, it may show up as a subtle smudge in your pictures, especially when using a wide angle lens. The smudge can be eliminated by using the generative fill command in Photoshop.
For dust to be defined so it's clearly noticed in a digital file, it has to be on the digital sensor itself. If you see dust in the viewfinder image, that won't show up on your pictures. With mirrorless cameras, dust is not a problem like it used to be with mirrored cameras. In the past, dust was a major issue when there was a lot of sky in the composition.
When you do remember to clean the glass on your lenses, clean both the front and rear glass elements.
Partial List of Photography Tours 2025 - 2026
AUTUMN in JAPAN
Nov 2025
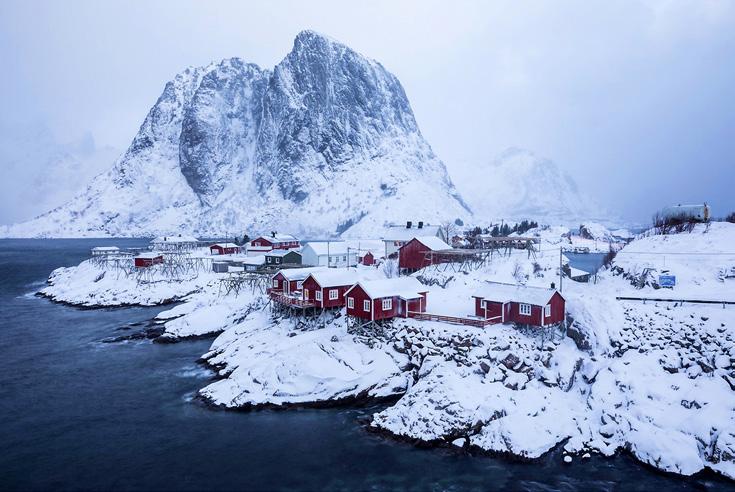
LOFOTEN ISLANDS
Jan/Feb 2026
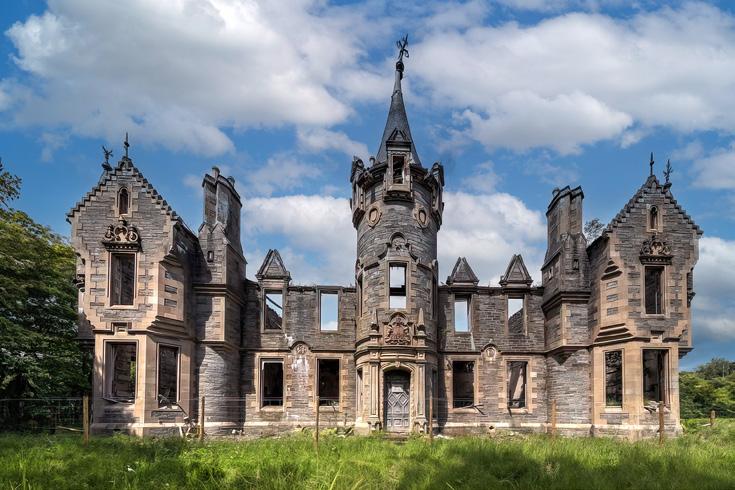
SCOTLAND'S PAST
May 2026
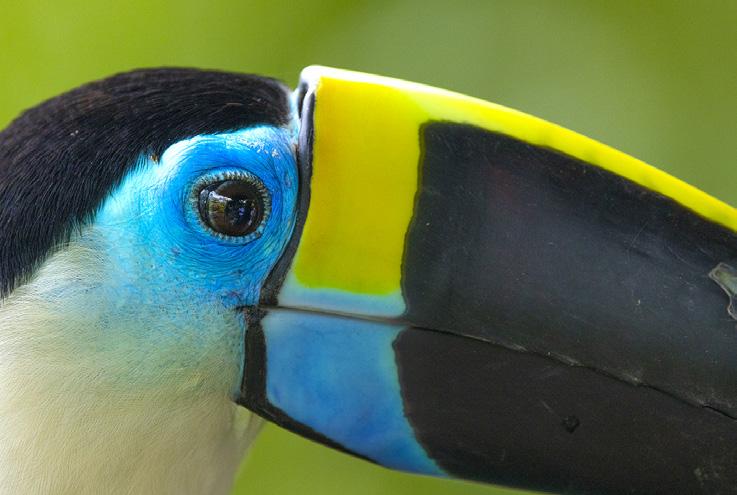
EXOTIC COLOMBIA BIRDS
Sept/Oct 2026
PANTANAL, BRAZIL Dec 2025
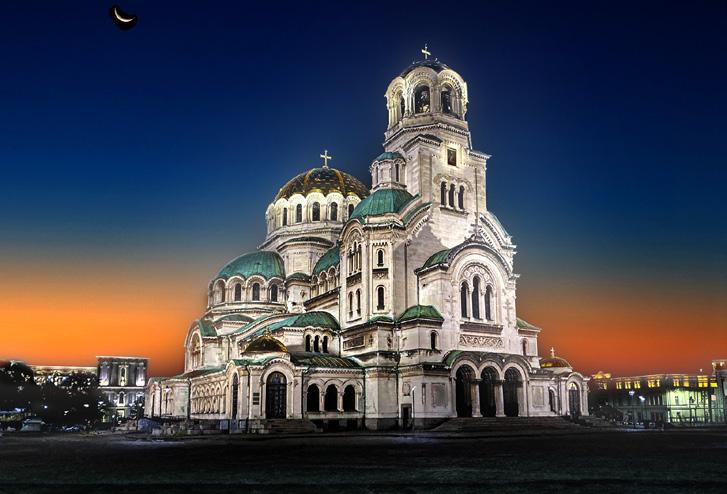
BULGARIA PHOTO TOUR
Feb/March 2026
INDIA TIGER SAFARI May 2026
WILDLIFE Oct 2026
CHINA Jan. 2026
BENTONITE HILLS, UTAH Apr 2026
ICELAND DRONE TOUR
Aug/Sept 2026
Nov 2026
DUBAI & ABU DHABI
INDONESIA
Dubai & Abu Dhabi
November 14 - 22, 2026
STUDENT SHOWCASE
Each month, Jim features one student who took beautiful and inspiring images on one or more of his photography tours or workshops. It’s really fascinating how photographers see and compose such different images even though we may go to the same places. Everyone takes great photographs on Jim’s trips.
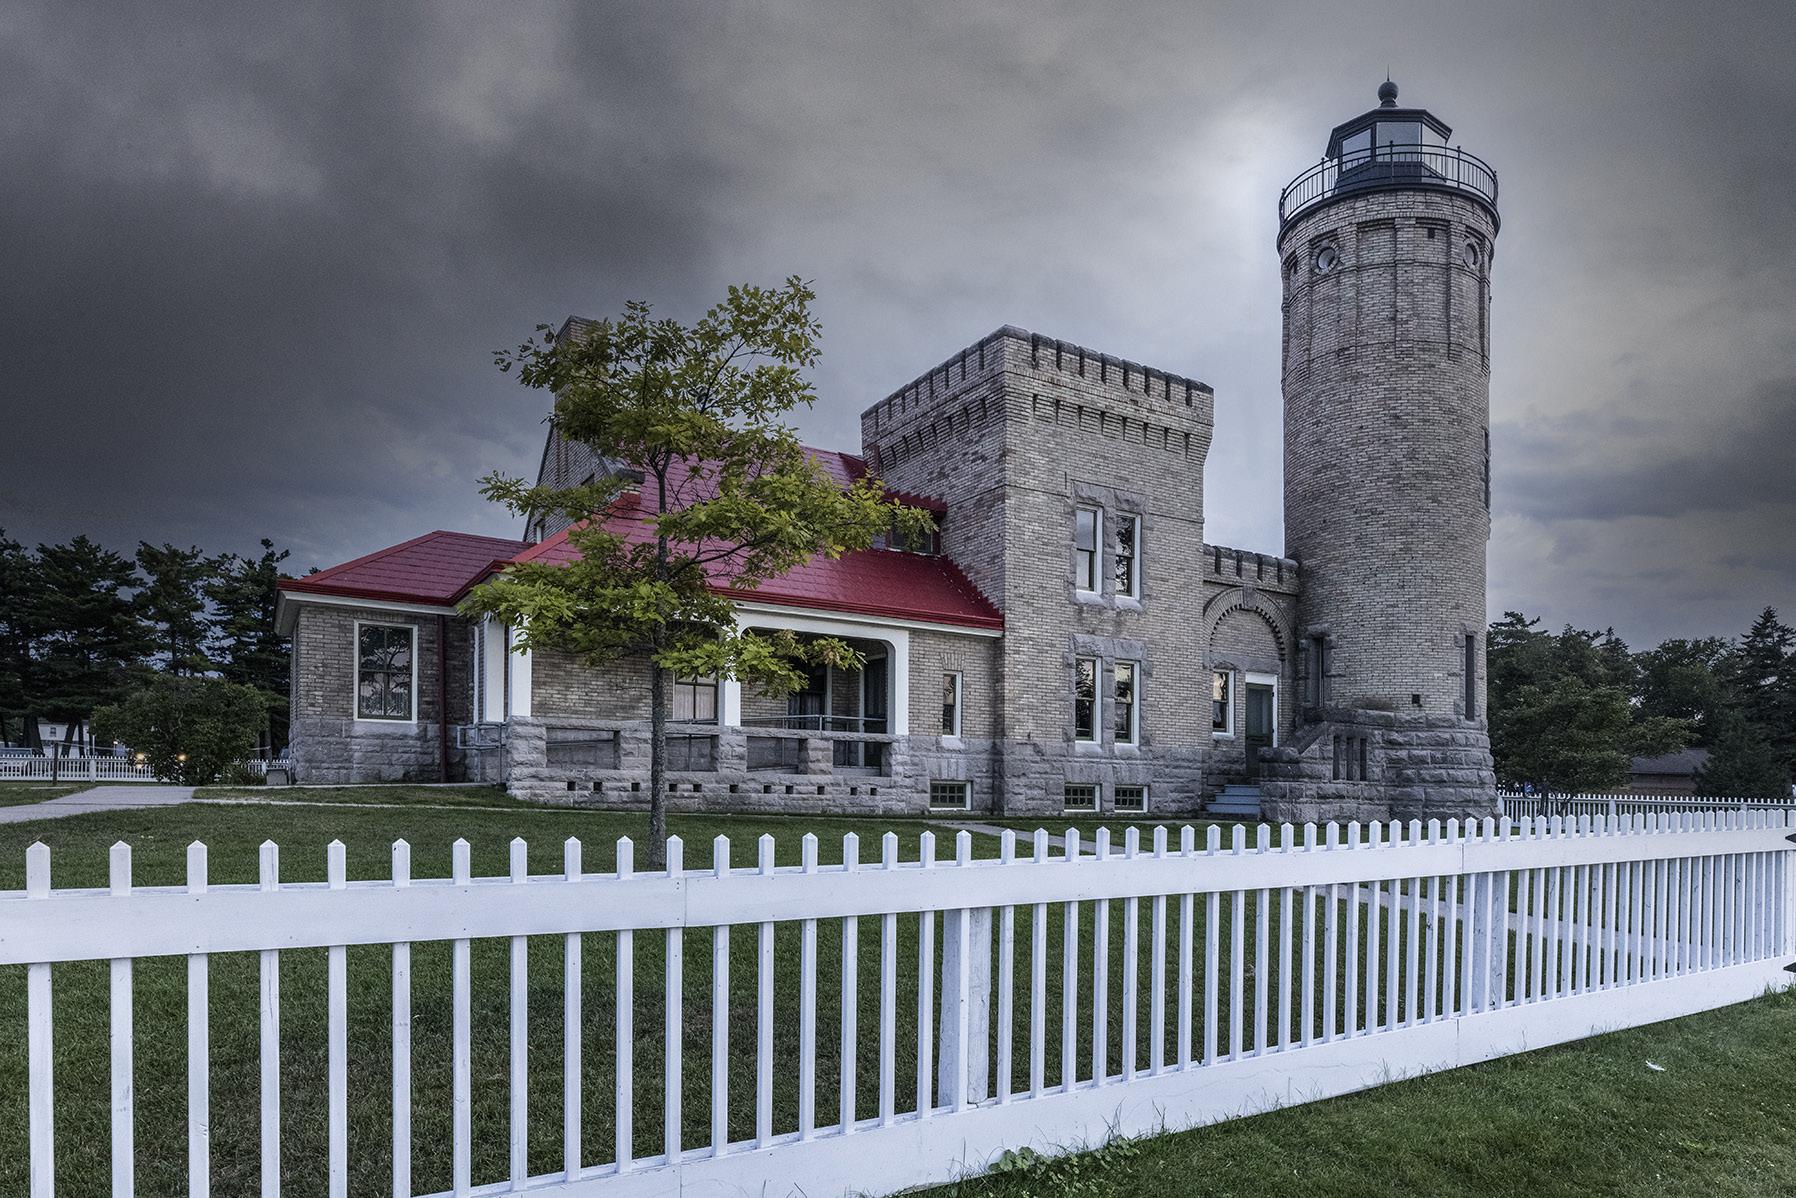
Toby Edwards, Traverse City, Michigan Michigan's Historic Lighthouses photo tour, The Palouse photo tour, Portugal photo tour, Kenya photo tour.
T O I N S I G H T S you would like to read. Jul. ‘19 Jan. ‘20
Subject index for past Photo Insight issues
1/3 focus law Jul. ‘15
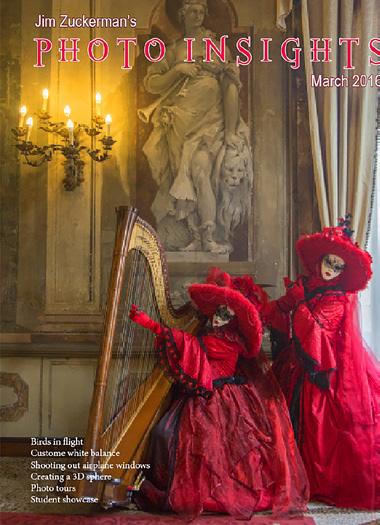
3D sphere Mar. ‘16
90 degree finder Mar. ‘13
Abstracts in soap Feb. ‘15
Abstracts, Shooting Mar ‘19
Aerial photography Jun. ‘13
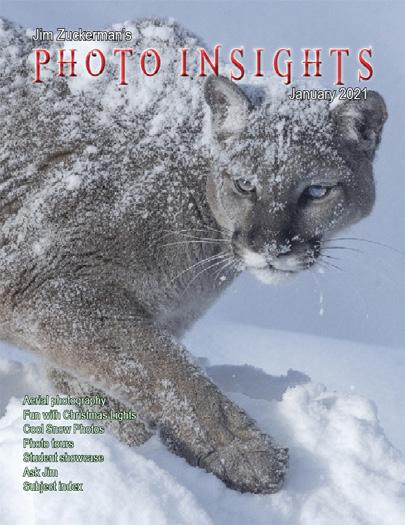
Aerial photography Jan. ‘21
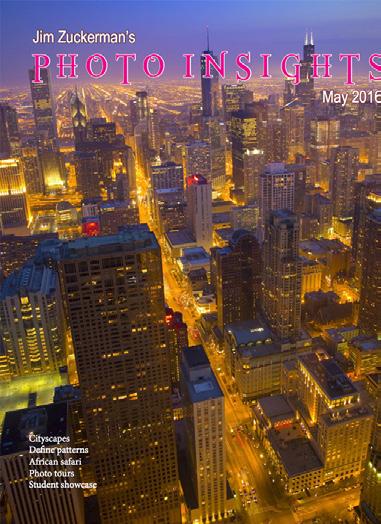
African safari May ‘16
AI plus Photograpjhy Oct. ‘23
AI, Photos-to-AI Oct. '24
Airplane windows Mar. ‘16
Alien landscapes Jan. ‘13
Anatomy of 8 photographs Jan. ‘16
Anatomy of an Action Shot Feb. ‘24
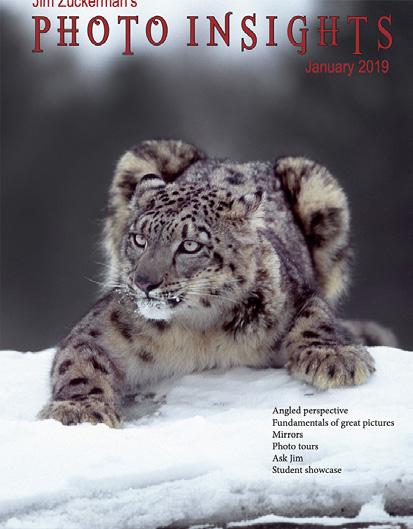
Angled perspectives Jan. ‘19
Aperture vs. shutter speed May ‘14
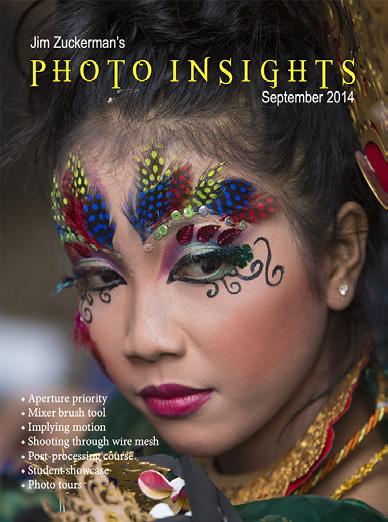
Aperture priority Sept. ‘14
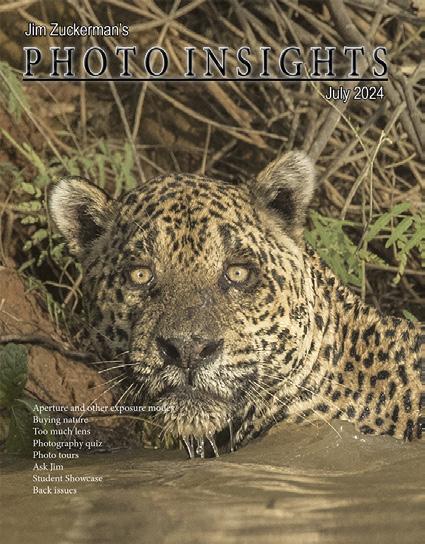
Aperture priority and other modes Jul. ‘24
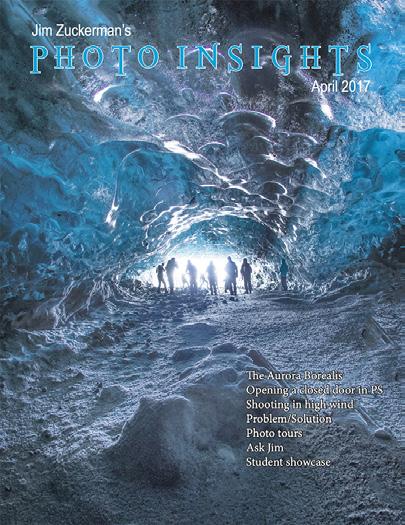
Aurora Borealis Apr. ‘17
Autofocus, When it fails Aug. '25
Auto white balance Dec. ‘13
Autofocus, when it fails Apr. ‘15
Autofocus failure Aug. ‘15
Autofocus failure Jan. ‘17
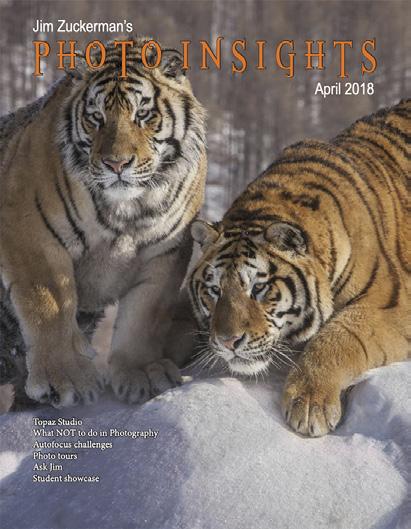
Autofocus challenges Apr. ‘18
Auto ISO Nov ‘17
Auto White Balance Mar’ ‘21
Autumn Foliage Sep. ‘18
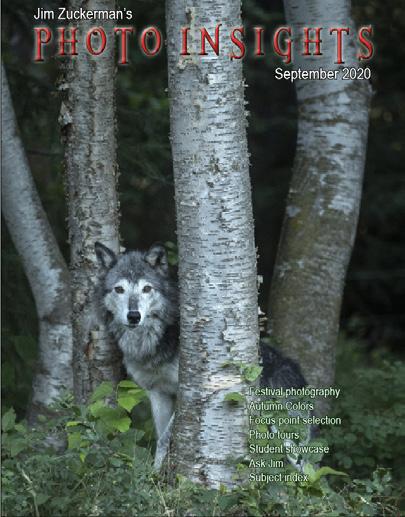
Autumn Color Sep. ‘20
Autumn foliage photography Oct. ‘21
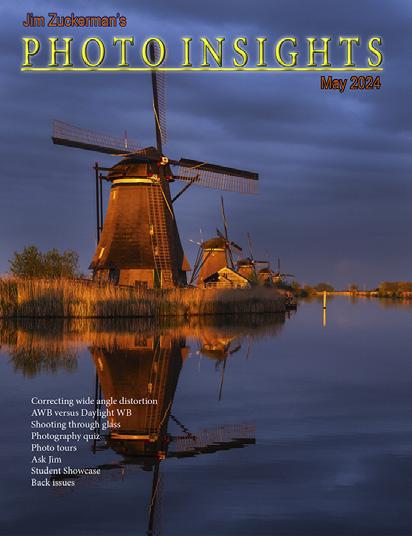
AWB versus Daylight WB May ‘24
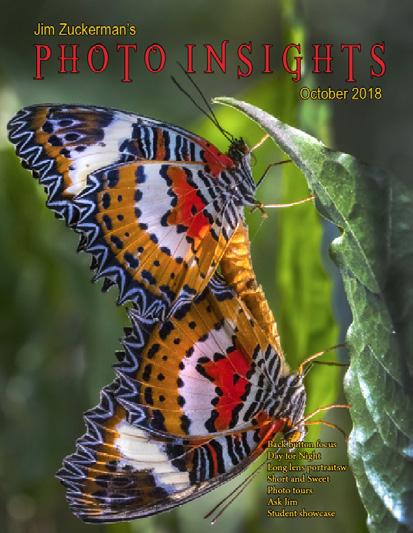
Back button focus Oct. ‘18
Backgrounds, wild Nov. ‘12
Backgrounds, busy Apr. ‘13
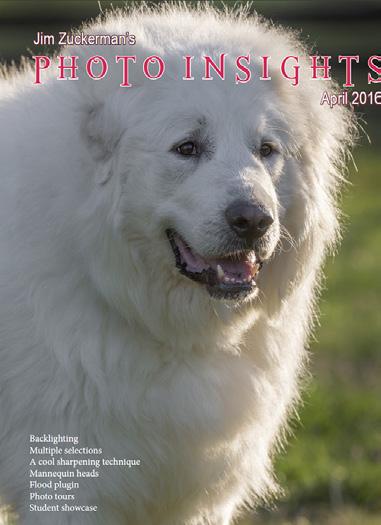
Backlighting Apr. ‘16
Backlighting Oct. ‘22
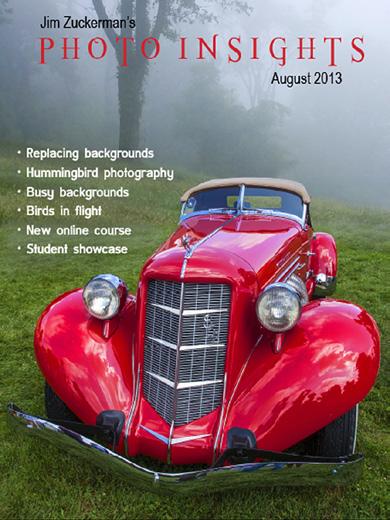
Birds in flight Aug. ‘13
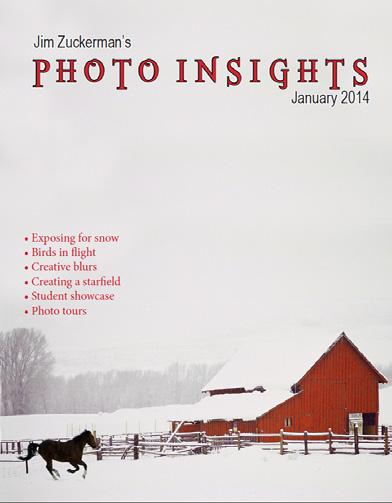
Birds in flight Jan. ‘14
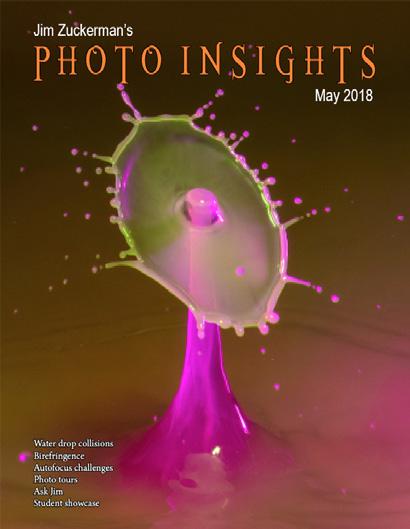
Birefringence May ‘18
Birefringence Dec. 24
Birds in flight Mar. ‘16
Birds in flight, camera settings Jan. ‘23
Birds in flight, camera settings Dec. '24
Bird Photography Jun ‘19
Black backgrounds Aug. ‘23
Blacklight photography Feb. ‘21
Black velvet Mar. ‘14
Black and white conversions Mar. ‘17
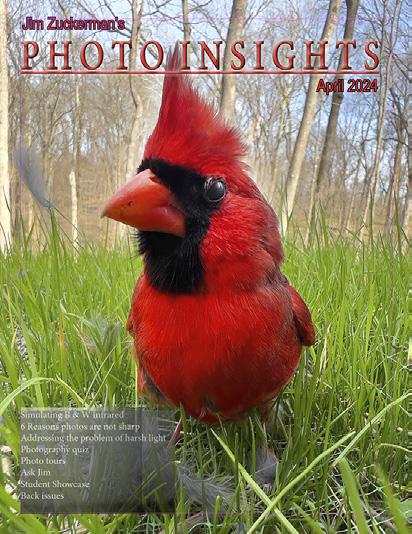
Black and white infrared Apr. ‘24
Black and white solarization Sep. ‘17
Black and white with color Jan. ‘20
Black and white plus color Mar. ‘23
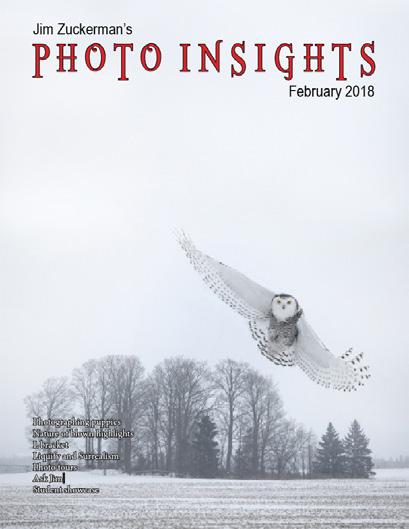
Blown highlights Feb. ‘18
Blue monochromes Jan. ‘22
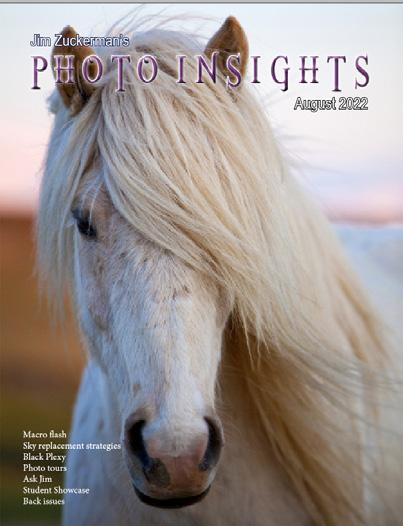
Black Plexy Aug. ‘22
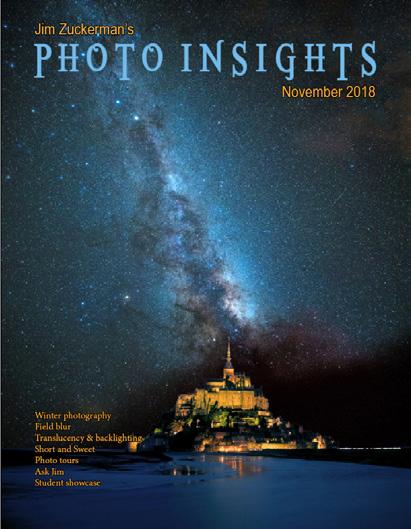
Blur, field Nov. ‘18
Blur technique Oct. ‘17
Bokeh Jun. ‘15
Botanical gardens, shooting Apr. ‘22
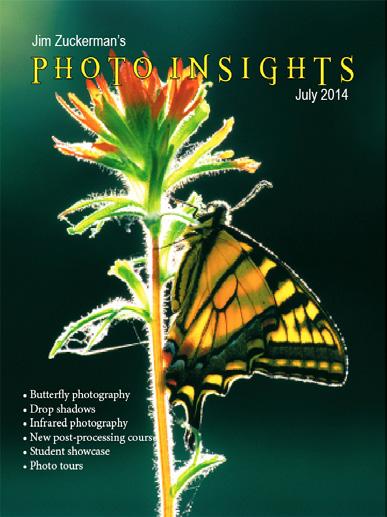
Butterfly photography Jul. ‘14
Buying nature Jul. ‘24
Camera buying guidelines Dec. 21
Camera settings for landscapes Feb. ‘23
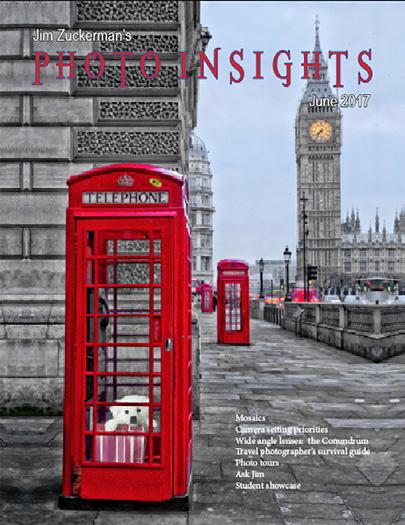
Camera setting priorities Jun. ‘17
Canon R5 Mar. ‘21
Capturing lightning Jun. ‘13
Capturing lightning Jun. ‘24
Capturing what you don’t see May ‘21
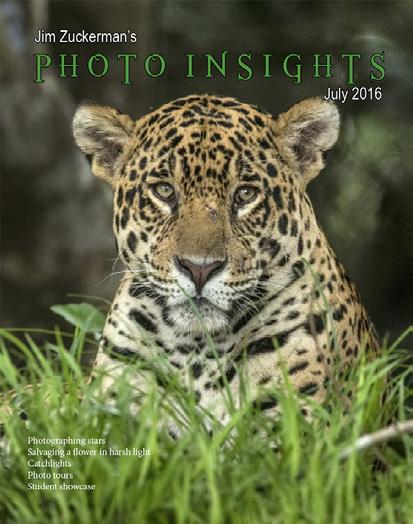
Catchlights Jul. ‘16
Changing perspective May ‘21
Cheap flash stand Apr. ‘13
Children photography Jun. ‘14
Choosing a telephoto lens Dec. ‘20
Chromatic aberration May ‘13
Chrome Dec. ‘18
Cityscapes Aug. ‘14
Cityscapes May ‘16
Clone tool, fixing an issue Sep. ‘17
Clone tool technique Jul. ‘20
Color theory Nov. ‘23
Composites and Light Dec. ‘17
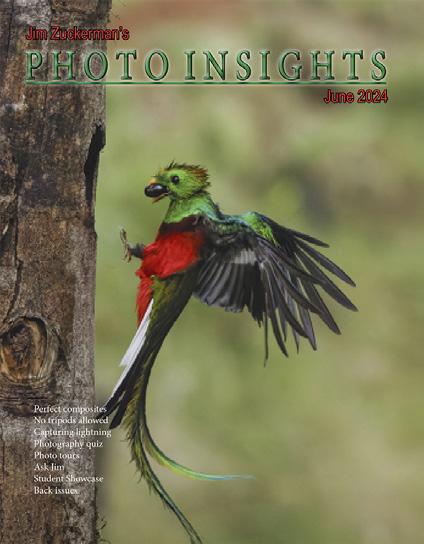
Composites, Secrets to perfect Jun. ‘24
Compositing images Apr. ‘19
Compositing, 7 steps Jan. 22
Composites, How to make Aug. '25
Composition, different approach Jan. ‘15
Content-aware, New Aug. ‘20
Content aware move tool Jan. ‘23
Contrast vs. exposure Jul. ‘15
Contrast, When it is good Sep. '24
Converting to black and white Mar. ‘22
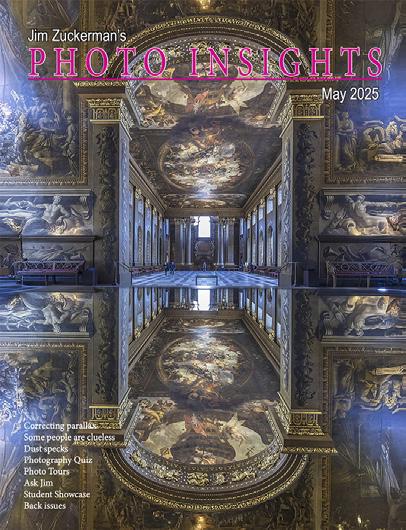
Correcting keystoning Jun. ‘21
Creating a star field Jan. ‘14
Creating Art out of Motion May ‘22
Creating a Sketch Dec. ‘17
Creative blurs Jan. ‘14
Custom functions Jul. ‘23
Cutting through haze Sep. '25
Dark backgrounds Nov. ‘19
Dawn photography Jan. ‘17
Dawn photography Feb. ‘17
Dead center Jan. ‘13
Dead center Oct. ‘23
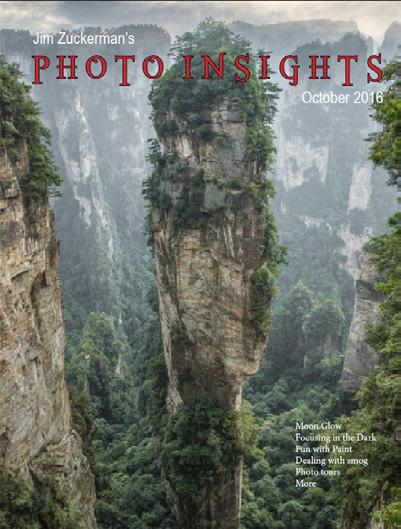
Dealing with smog Oct. ‘16
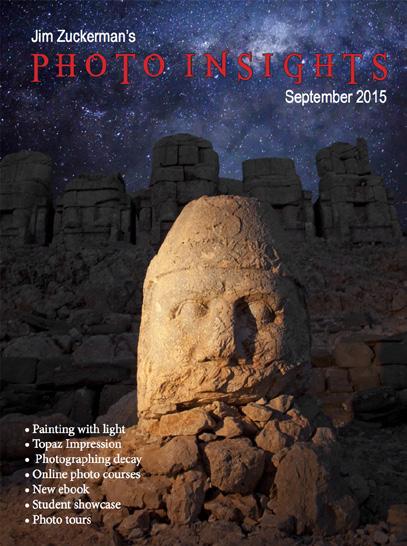
Decay photography Sep. ‘15
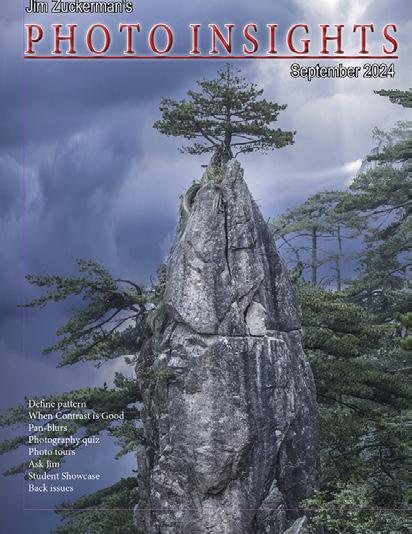
Define Pattern Sep. ‘18
Define Pattern Sep. '24
Depth of field Aug. ‘16
Depth of field confusion Jan. ‘20
Depth of field and distance Dec. ‘18
Depth of field and obliqueness May ‘21
Depth of field, shallow Apr. ‘20
Depth of field vs. sharpness Nov. ‘20
Diagonal lines, Using Aug. '25
Double takes Apr. ‘20
Drone photography Mar. ‘23
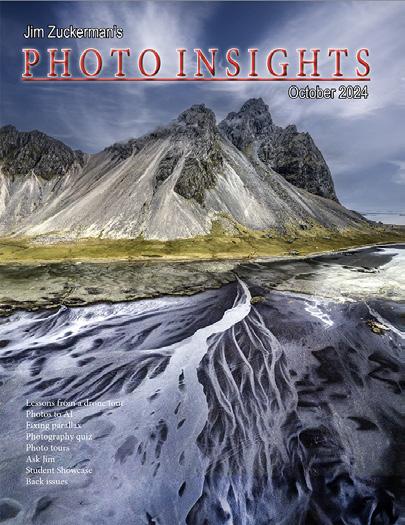
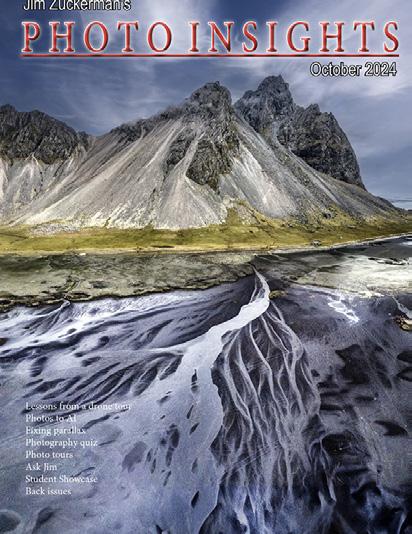
Drone, Lessons from a tour Oct. '24
Drop shadows Apr. ‘19
Dust, Minimizing Aug. ‘19
Dust specks May '25t
eBook, how to make Jan. ‘13
Elevated vantage points Aug. ‘23
Eliminating people from photos Jun. ‘22
Embedded in Ice Oct. 17
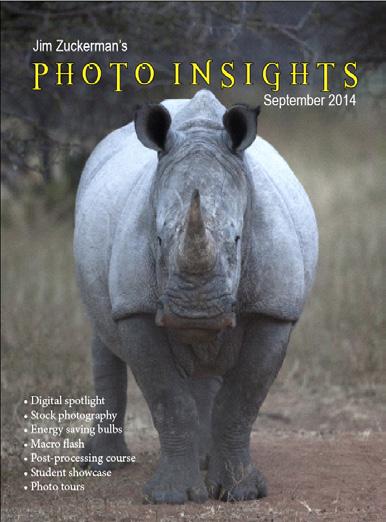
Energy saving bulbs Sep. ‘14
Equidistance and telephoto lenses Apri. ‘23
Exploring the power visuals of AI Mar. ‘23
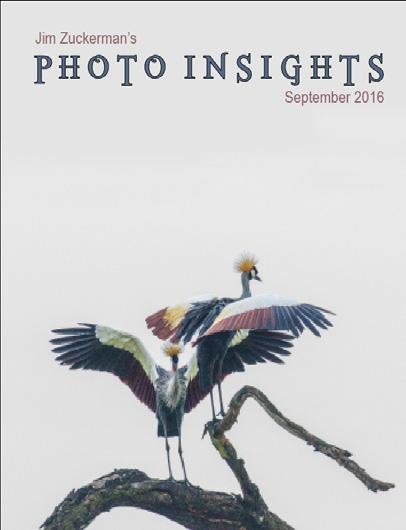
Exposing for the sun Sep. ‘16
Exposure, the sun Jul. ‘13
Subject index for past Photo Insight issues
Exposing for snow
Exposure technique
Dec. '24
Sep. ‘13
Exposure, snow Jan. ‘14
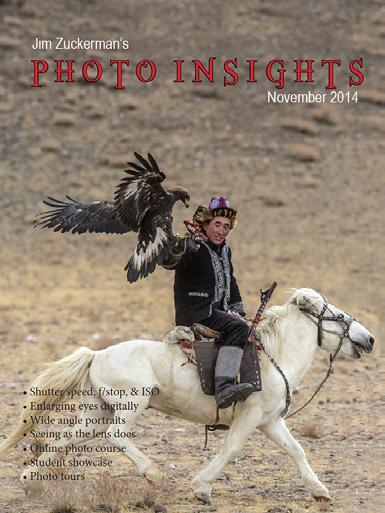
Exposure triangle Nov. ‘14
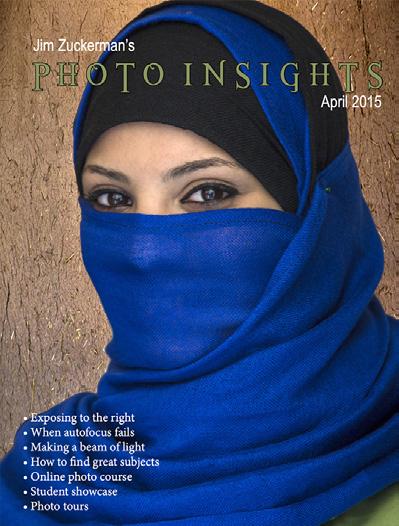
Exposure, to the right Apr. ‘15
Exposure compensation
Sep. ‘16
Exposure compensation Mar. ‘21
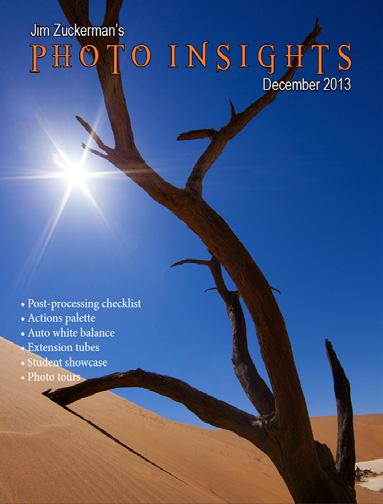
Extension tubes Dec. ‘13
Extension tubes Jul. ‘23
Extreme backlighting Sep. '25
Face sculpting
Apr. ‘21
Face sculpting Feb. ‘22
Fashion shoot, Anatomy of a Sep. '25
Festival photography Sep. ‘20
Fill flash Sep. ‘13
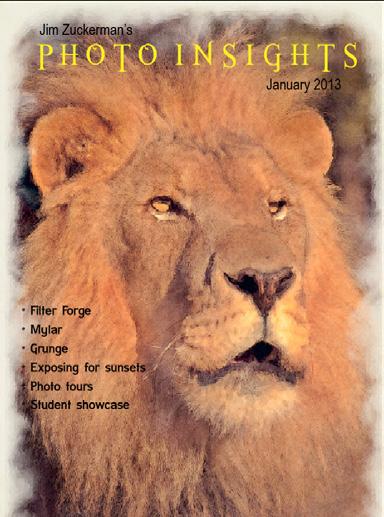
Filter forge Feb. ‘13
Fireworks Jul. ‘13
Fireworks, Compositing Jun ‘20
Fisheye lenses May ‘13
Fisheye lenses Feb. ‘15
Fisheye fantasies Oct. 21
Fixing parallax Oct. '24
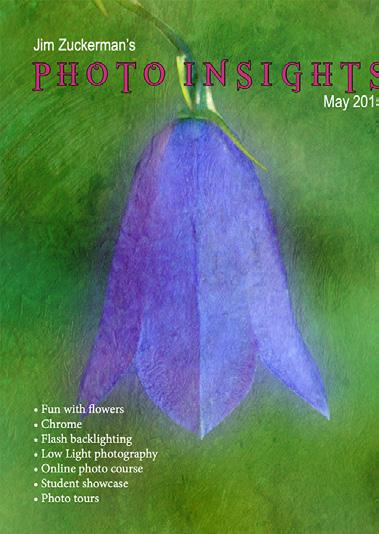
Flash backlighting May ‘15
Flash, balancing exposure Oct. ‘15
Flash, balancing off-camera Dec. ‘18
Flat art
Sep. ‘16
Flexify 2 Mar. ‘20
Flood fixes problems Nov. ‘19
Floral Portraits, Indoors Aug. ‘21
Flowers May ‘15
Flower photography Apr ‘21
Flowers in harsh light Jul. ‘16
Focus on the eyes Dec. ‘20
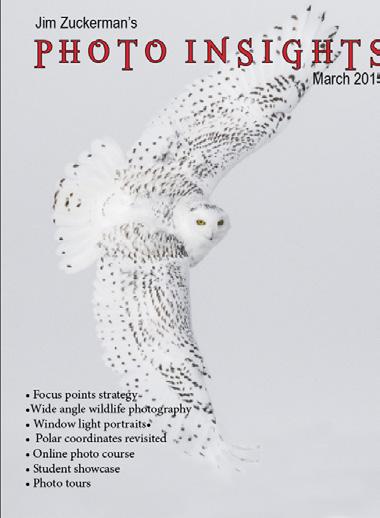
Focus points Mar. ‘15
Focus points Sep. ‘20
Focus stacking Mar. ‘17
Focus stacking Aug. ‘19
Focusing in the dark Oct. ‘16
Foreign Dancers, Photographing Nov’ 17
Foreign models Jun. ‘13
Fractals, generating Sep. ‘13
Fractals Jul. ‘19
Framing May ‘17
Framing Jan. ‘24
Freezing ultra action May ‘17
From Terrible to Beautiful Aug. ‘19
Fun with paint Oct. ‘16
Fundamental ingredients Apr. ‘13
Fundamentals That Make Great Photos Jan. ‘19
Fun With Christmas Lights Jan. ‘21
Fun with Food
Graphic Design Jul. ‘20
Garish imagery Dec. ‘15
Generative fill Jun. ‘23
Getting money for used gear Jan.’ 22
Getting the blues out Dec. ‘23
Great subjects Apr. ‘15
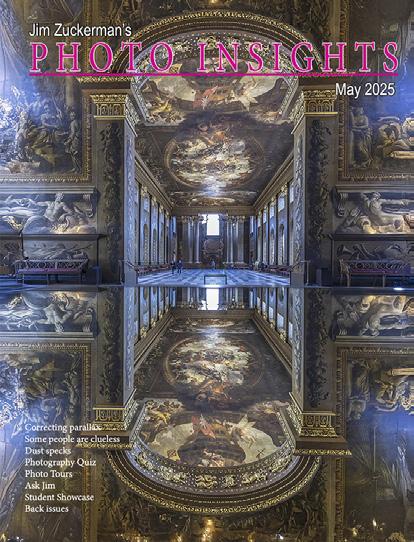
Great ceilings & HDR Panos Jul. ‘19
Green screen Mar. ‘13
Ground level shooting Oct. ‘22
Grunge technique Feb. ‘13
Harsh light, the problem of Apr. ‘24
Heavy Lens Debate, The Feb. ‘23
Helicopters, Shooting from Mar. '25
HDR, one photo Apr. ‘13
HDR at twilight May ‘13
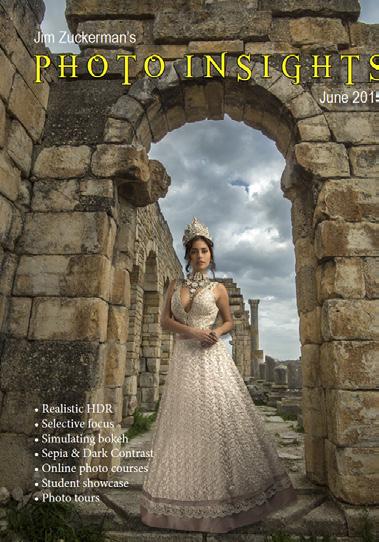
HDR, realistic Jun. ‘15
HDR, hand held Dec. ‘16
HDR, hand held Nov ‘17
HDR, hand held Jul. ‘18
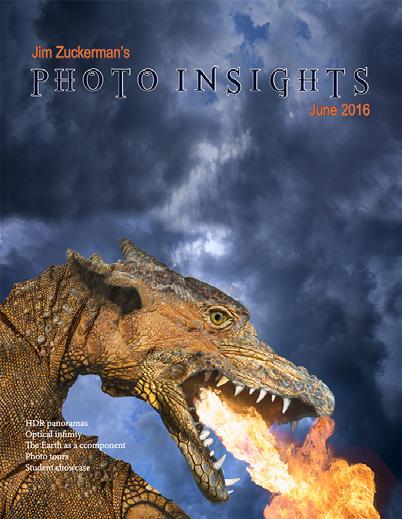
HDR panoramas Jun. ‘16
HDR, choosing the number of frames Jun. ‘22
High wind Apr. ‘17
Highlights Apr. ‘14
Highlights, overexposed Feb. ‘15
Histograms, Why I Don’t Use Jun ‘19
Histogram problems Apr. ‘20
Home nature projects Jun. ‘23
Hotels with a view Mar. ‘20
Humidity Oct. ‘13
Hummingbird photography Apr. ‘13
Hyperfocal distance Jul. ‘13
Image resizing Aug. ‘18
Implying motion Sept.‘14
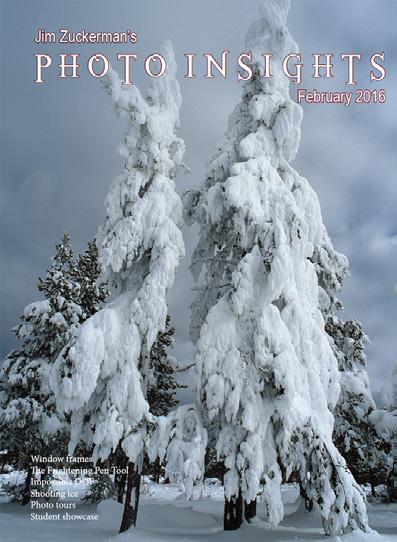
Impossible DOF Feb. ‘16
Impossible DOF Jan. ‘17
Indestructible camera bag Dec. ‘14
Infrared photography Jul. ‘14
Insane ISO settings Dec. ‘22
Interiors Oct. ‘15
iPad: Loading photos Aug.‘17
iPhone photography, pros and cons Apr. ‘22
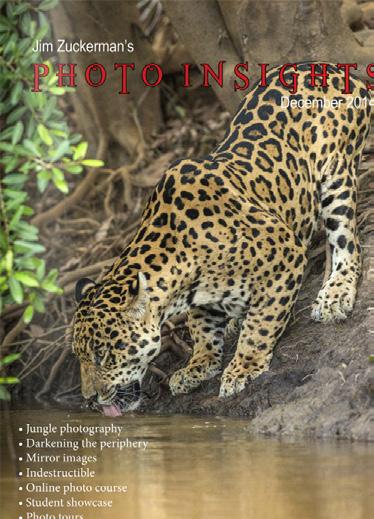
Jungle photography Dec. ‘14
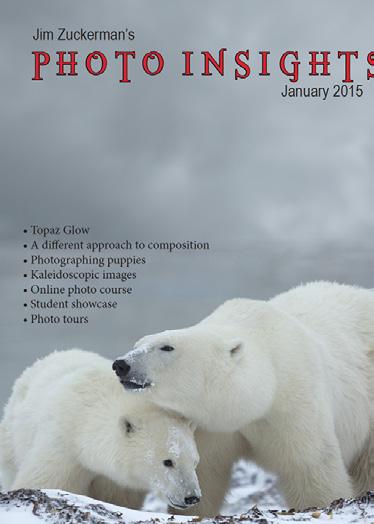
Kaleidoscopic images Jan. ‘15
Kaleidoscopis images Aug. ‘20
Keystoning Nov. ‘23t
Keystoning, correcting Aug. ‘15
L Bracket Feb. ‘18
L Bracket Feb. ‘21
Landscape photography Dec. ‘12
Landscape photography Apr. ‘14
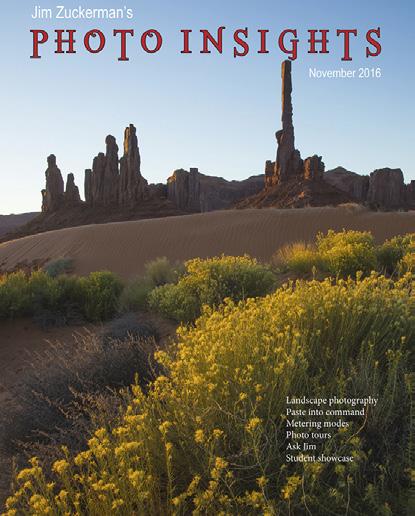
Landscape photography Nov. ‘16
Layer Masks, The Power of Feb. ‘22
Leading Lines Aug. '24
Lessons Learned from Extreme Cold Feb. ‘24
Light fall-off Feb. ‘14
Light painting Dec. ‘21
Lighting a face Oct. ‘13
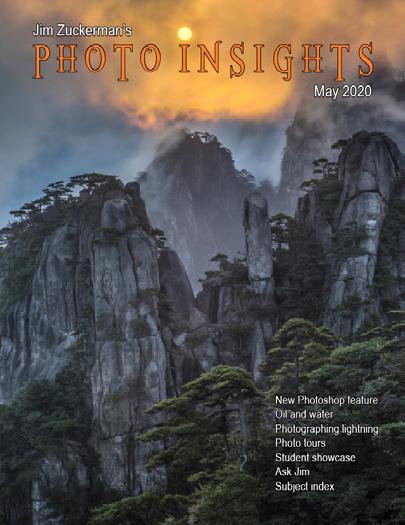
Lightning photography May ‘20
Liquify Feb. ‘18
Liquify Distortions Sept/Oct. ‘19
Lenses, Essential Aug. ‘23
Long lens portraits Oct. ‘18
Long Lenses for Flowers Jul. ‘20
Low light photography May ‘15
Luminar 4 Jan. ‘20
Macro flash Nov. ‘12
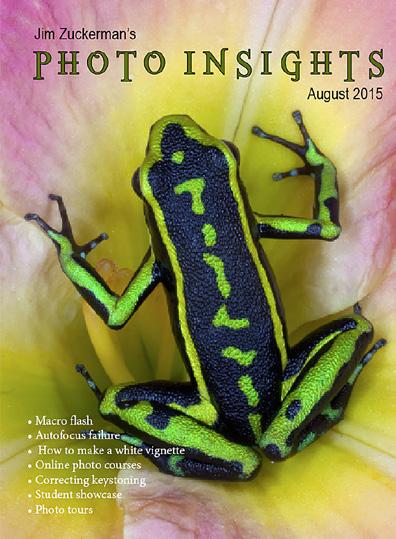
Macro flash Sep. ‘14
Macro flash Aug. ‘15
Macro flash Aug. ‘22
Macro flash advantage Feb. '25
Macro photography and DOF Feb. ‘22
Macro trick May ‘19
Managing soft focus Jul. ‘21
Mannequin heads Apr. ‘16
Subject index for past Photo Insight issues
Metering modes
Meters, How They Work
Meters, when they fail
Nov. ‘16
Jul. ‘18
Dec. ‘16
Metering situations, Impossible Jul. ‘19
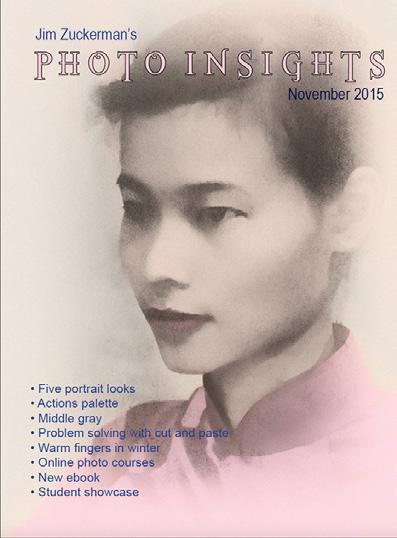
Middle gray
Nov. ‘15
Midday sunlight, The Challenge of Feb. '25
Milky Way, Photographing the Aug. '25
Minimizing dust on the sensor Nov. ‘21
Optical infinity Jun. ‘16
Mirrors Jan. ‘19
Mirror images May ‘23
Model shoot
Moon glow
Jan. ‘17
Oct. ‘16
Mosaics Jun. ‘17
Mundane to Ideal Nov. ‘19
Museum photography Mar. ‘13
Museum photography Aug. '25
Natural Light Portraits Aug. ‘21
Negative space Jan. ‘16
Neon edges on black Aug. ‘14
Neutral Density filters Jun. ‘18
New depth of field preview Mar. ‘24
New shooting style Mar. ‘24
Neutral Density filters and water Mar. ‘22
Night photography Feb. ‘14
Night Safaris Jun. ‘18
Night to Twilight Dec. ‘17
Noise reduction Feb. ‘17
Off-camera flash
Oil and water
Jan. ‘24
May ‘20
Online Nature Mar. '25
Organization of photos Mar. ‘18
Out of focus foregrounds Jan. ‘20
Paint abstracts
May ‘13
Paint abstracts Aug. ‘21
Painting with light Sep. ‘15
Pan-blurs Sep. '24
Panning motion Dec. ‘16
Pano-Mirrors with a twist Jan. ‘18
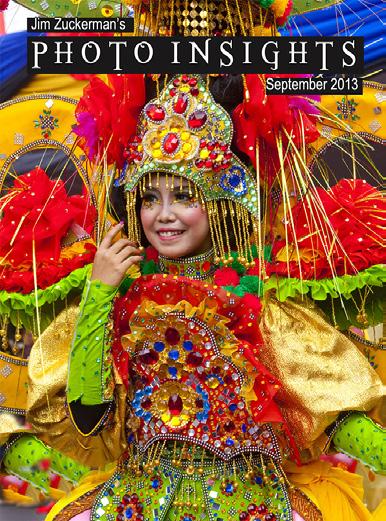
Parades Sep. ‘13
Parallax, Correctingt May '25
Parallelism Nov. ‘19
Parallelism and DOF Feb. ‘21
Perspective, Super Exaggeration of Dec. ‘21
Photo shsaring Apr. ‘23
Photo terms Nov. ‘22
Photographing Christmas Dec. ‘23
Photography to Art Dec. ‘17
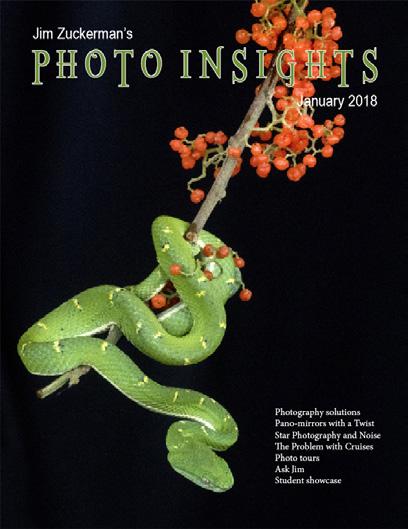
Photography solutions Jan. ‘18
Photoshop, content Aware Nov. ‘12
Photoshop, sketch technique Apr. ‘13
Photoshop, replace background Apr. ‘13
Photoshop, actions palette Dec. ‘13
Photoshop, layer masks Feb. ‘13
Photoshop, the clone tool May ‘13
Photoshop, soft foliage Oct. ‘13
Photoshop, mixer brush tool Sept. ‘14
Photoshop, b & w with color Jun. ‘14
Photoshop, drop shadows Jul. ‘14
Photoshop, creating texture Feb. ‘14
Photoshop, face mirrors Feb. ‘14
Photoshop, liquify Mar. ‘14
Photoshop, face mirrors Aug. ‘14
Photoshop, digital spotlight Sep. ‘14
Photoshop, enlarge eyes Nov. ‘14
Photoshop, darken the periphery Dec. ‘14
Photoshop, mirror images Dec. ‘14
Photoshop, beam of light Apr. ‘15
Photoshop, polar coordinates Mar. ‘15
Photoshop, chrome May ‘15
Photoshop, actions palette Nov. ‘15
Photoshop, cut and paste Nov. ‘15
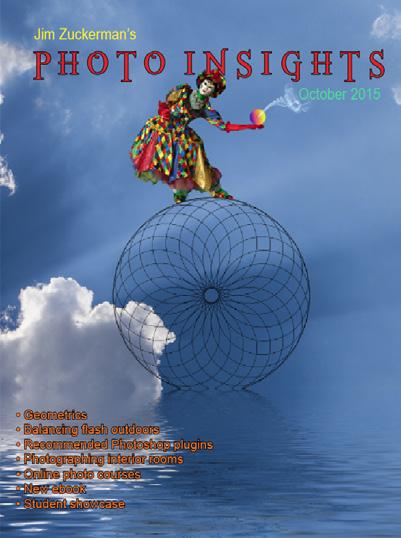
Photoshop, geometrics Oct. ‘15
Photoshop, plugins Oct. ‘15
Photoshop, multiple selections Apr. ‘16
Photoshop, sharpening Apr. ‘16
Photoshop, Flood plugin Apr. ‘16
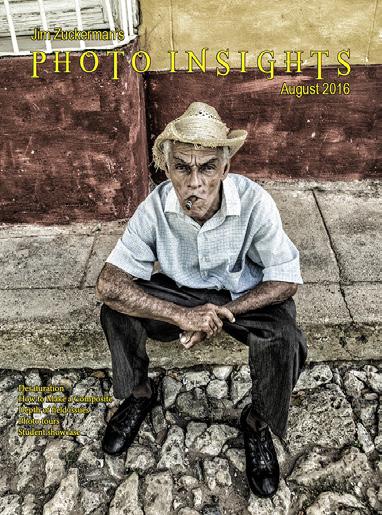
Photoshop, Desaturation Aug. ‘16
Photoshop, making a composite Aug. ‘16
Photoshop new tool May ‘20
Photoshop, place one element behind Aug. ‘18
Photoshop, the pen tool Feb. ‘16
Photoshop, canvas size Jan. ‘16
Photoshop, using the earth Jun. ‘16
Photoshop, define patterns May ‘16
Photoshop, paste into Nov. ‘16
Photoshop, b & w with color Feb. ‘17
Photoshop, open a closed door Apr. ‘17
Photoshop, palettes May ‘17
Photoshop, My favorite plugins Jan. ‘20
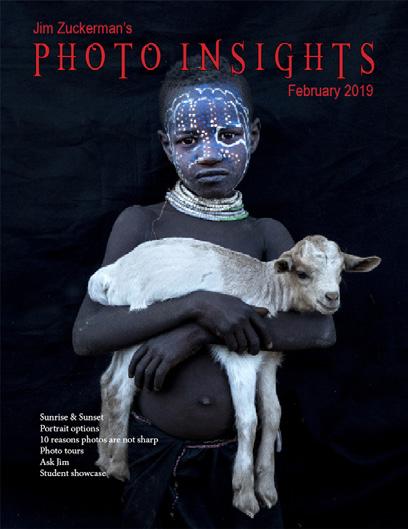
Portrait options Jan. ‘19
Portrait techniques Nov. ‘15
Portraits Mar. ‘13
Portraits, mixed lighting Aug. ‘14
Portrait Professional Nov. ‘19
Portraits, Lens choice Sept/Oct. ‘19
Portraits, side lighting Sep. ‘17
Portraits, window light Mar. ‘15
Portraits, outdoors May ‘17
Post-processing checklist Dec. ‘13
Post-processing: Contrast Aug. ’17
Practicing graphic design, Part I Dec. ‘22
Practicing graphic design, Park II Jan. ‘23
Practicing graphic design, Part III Feb. ‘23
Pre-capturing technology May ‘23
Predictive Focus Sep. ‘18
Problem/solution Apr. ‘17
Problem Solving in Photoshop May ‘22
Problem with cruises Jan. ‘18
Protecting extremeities from the cold Dec. ‘22
Protecting highlights Dec. ‘12
Puppies Jan. ‘15
Puppy photography Feb. ’18
Rays of Light Mar. '25
Reflections Feb. ‘13
Reshaping faces Oct. ‘22
Restoring old photos Jun ‘20
Ring flash, advantages Jul. ‘21
Ring flash versatility Oct. ‘21
Rule of Odds May ‘22
S-curves Aug. '24
Safari May ‘13
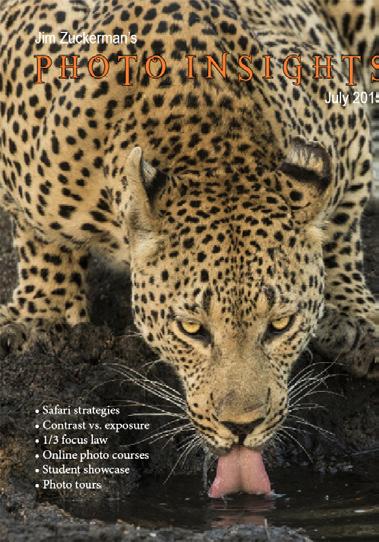
Safari strategies Jul. ‘15
Subject index for past Photo Insight issues
Self-critiques Jul. ‘13
Self-critiques Oct. ‘13
Self-critiques Nov. ‘20
Sensor cleaning Jun. ‘18
Sepia and dark contrast Jun. ‘15
Sepia, Traditional look of
Shade May ‘14
Shady side Jun. ‘18
Shadows define the shot Dec. ‘23
Shadows, Paying Attention to Mar. ‘18
Sharp, 6 reasons why photos are not Apr. ‘24
Sharpness problems Mar. ‘14
Shooting from helicopters
Shooting in Inclement Weather Nov. ‘22
Shooting thru glass May ‘24
Shooting through textured glass May ‘23
Shooting through wire mesh Sept. ‘14
Shooting into the light Jun ‘20
Side lighting Jan. ‘24
Silhouettes Jun. ‘13
Silhouettes, How to make Apr. ‘22
Silhouettes, Exposing for Sept/Oct. ‘19
Silvered landscapes Mar. ‘20
Sketch, How to Make Jun ‘19
Skies make or break a picture Aug. ‘21
Sky replacement Nov. ‘20
Sky replacement strategies Aug. ‘22
Snow exposure Nov ‘17
Snow exposure Nov. ‘19
Soap abstracts Aug. ‘23
Soft light Jan. ‘13
Smart phone photography May ‘19
Some people are clueless May '25
Stained glass Mar. ‘17
Star photography and noise Jan. ‘18
Stock photography Sep. ‘14
Sunrise & sunset Jan. ‘19
Symmetry Aug. '24
Tamron 150-600mm Apr. ‘14
Ten reasons photos are not sharp Jan. ‘19
Texture, Adding Mar ‘19
Texture Mapping in 3D Jul. ‘21
To Polarize or not to Polarize Jun. '25
Too much lens Jul. ‘24
Topaz AI Gigapixel Mar ‘19
Topaz glow Jan. ‘15
Topaz glow Sep. ‘17
Topaz Impression Sep. ‘15
Topaz Remask 5 Oct. ‘17
Topaz Simplify 4 Dec. ‘12
Topaz simplify 4 Jun. ‘14
Topaz Studio Apr. ‘18
Total solar eclipse, How to shoot Mar. ‘24
Translucency & backlighting Nov. ‘18
Travel photography Feb. ‘ 13
Seeing as the lens does Nov. ‘14
Seeking Cool Snow Photos Jan. ‘21
Selective filtering Mar. ‘18
Selective focus Jun. ‘15
Quiz answers
1. b 2. a 3. d 4. a 5. b 6. d 7. d 8. b 9. d 10. a Your score 90% - 100%: You could have been a pro 80% - 89%: Your glasses probably need a new prescription 70% - 79%: Just don’t quit your day job