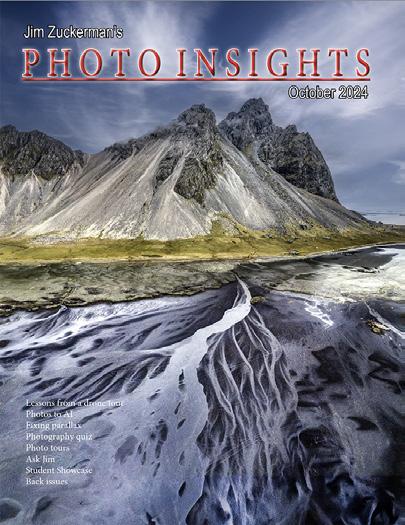
Jim Zuckerman’s
P H O T O I N S I G H T S
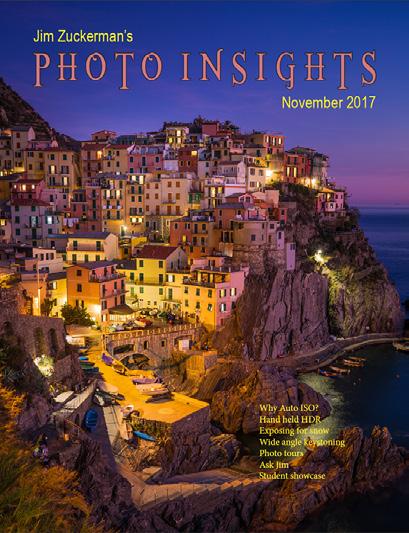
March 2026
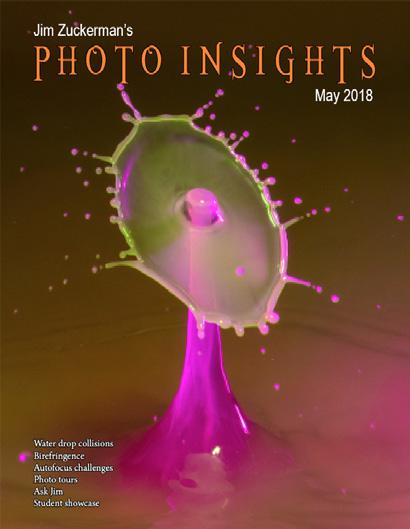
White Balance: Whats the best setting
Chemical Crystals
Exposing for silhouettes
Photography Quiz
Photo Tours
Ask Jim Student Showcase
The Story Behind the Picture
Back issues
Table of Contents
4. White Balance: What's the Best Setting
7. Photographic Chemical Crystals
13. Exposing for Silhouettes
17. Photography quiz
19. Jim’s eBooks
22. What's wrong with this picture?
25. Short and Sweet
27. Ask Jim
28. Photography tours
30. Student Showcase
36. The story behind the picture
38. Past issues
46. Subject index
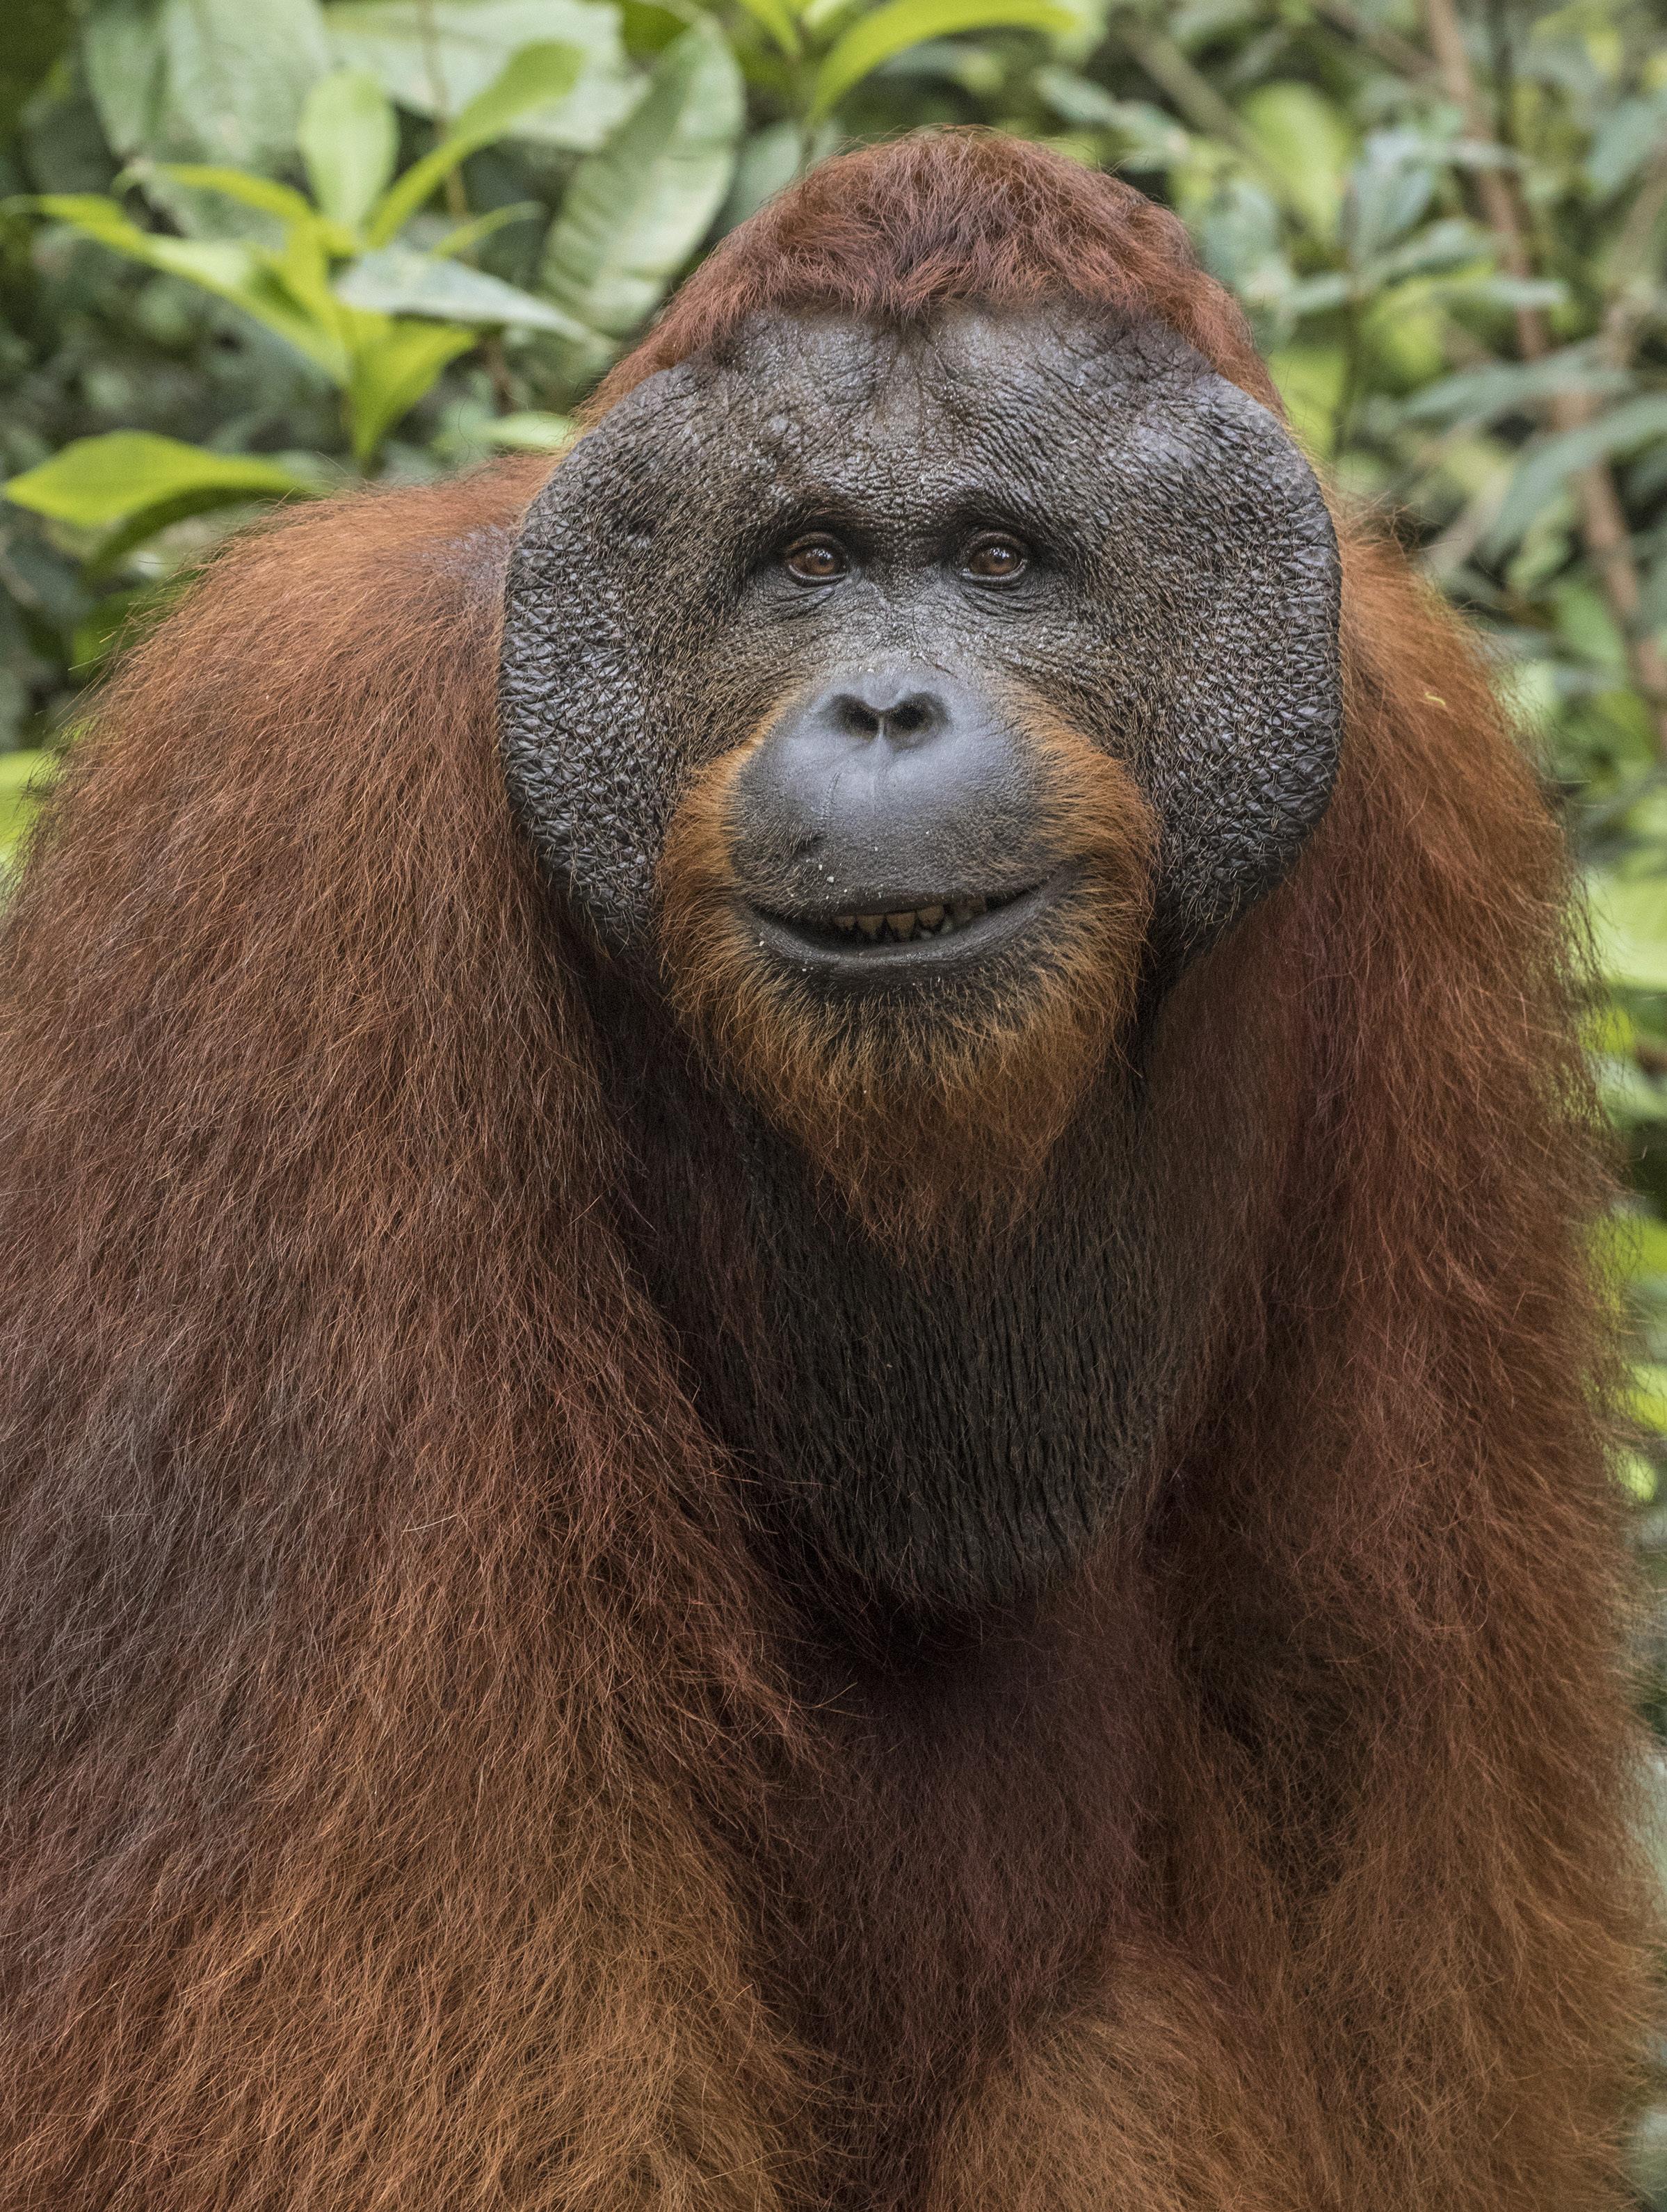
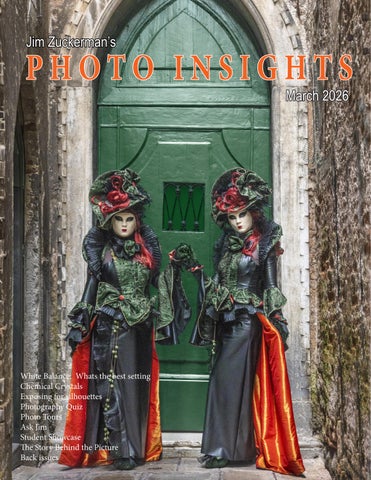
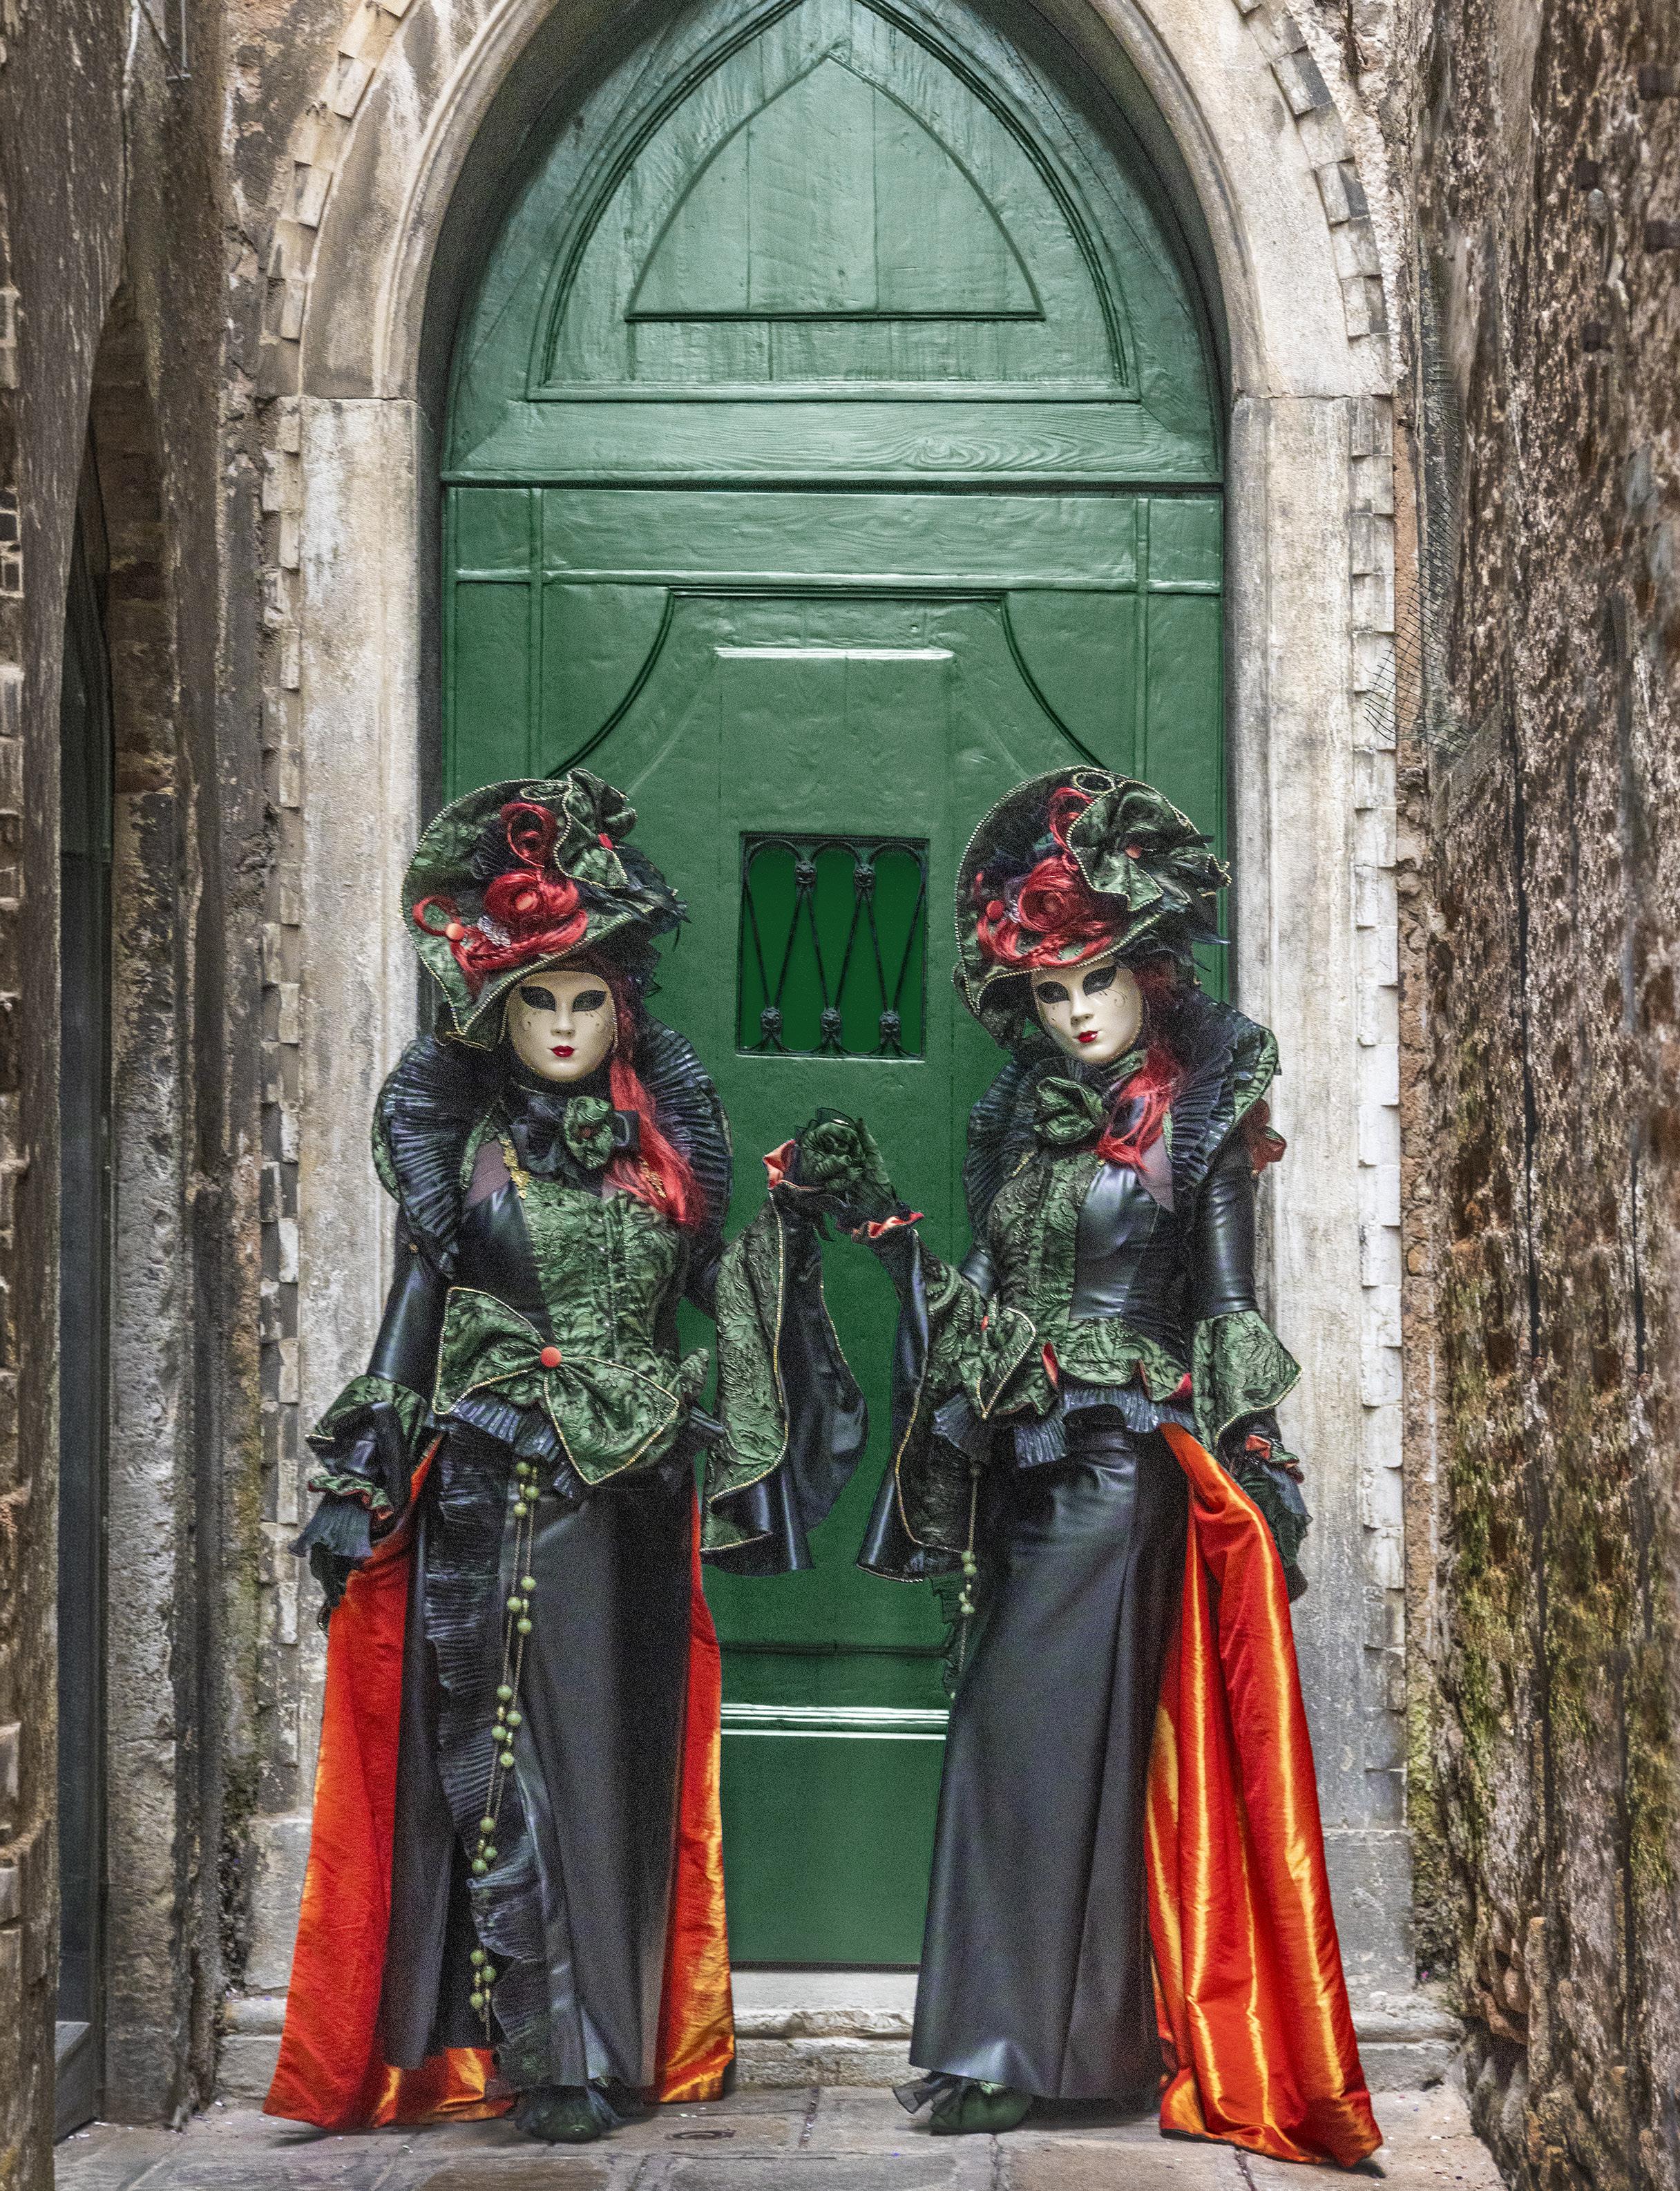
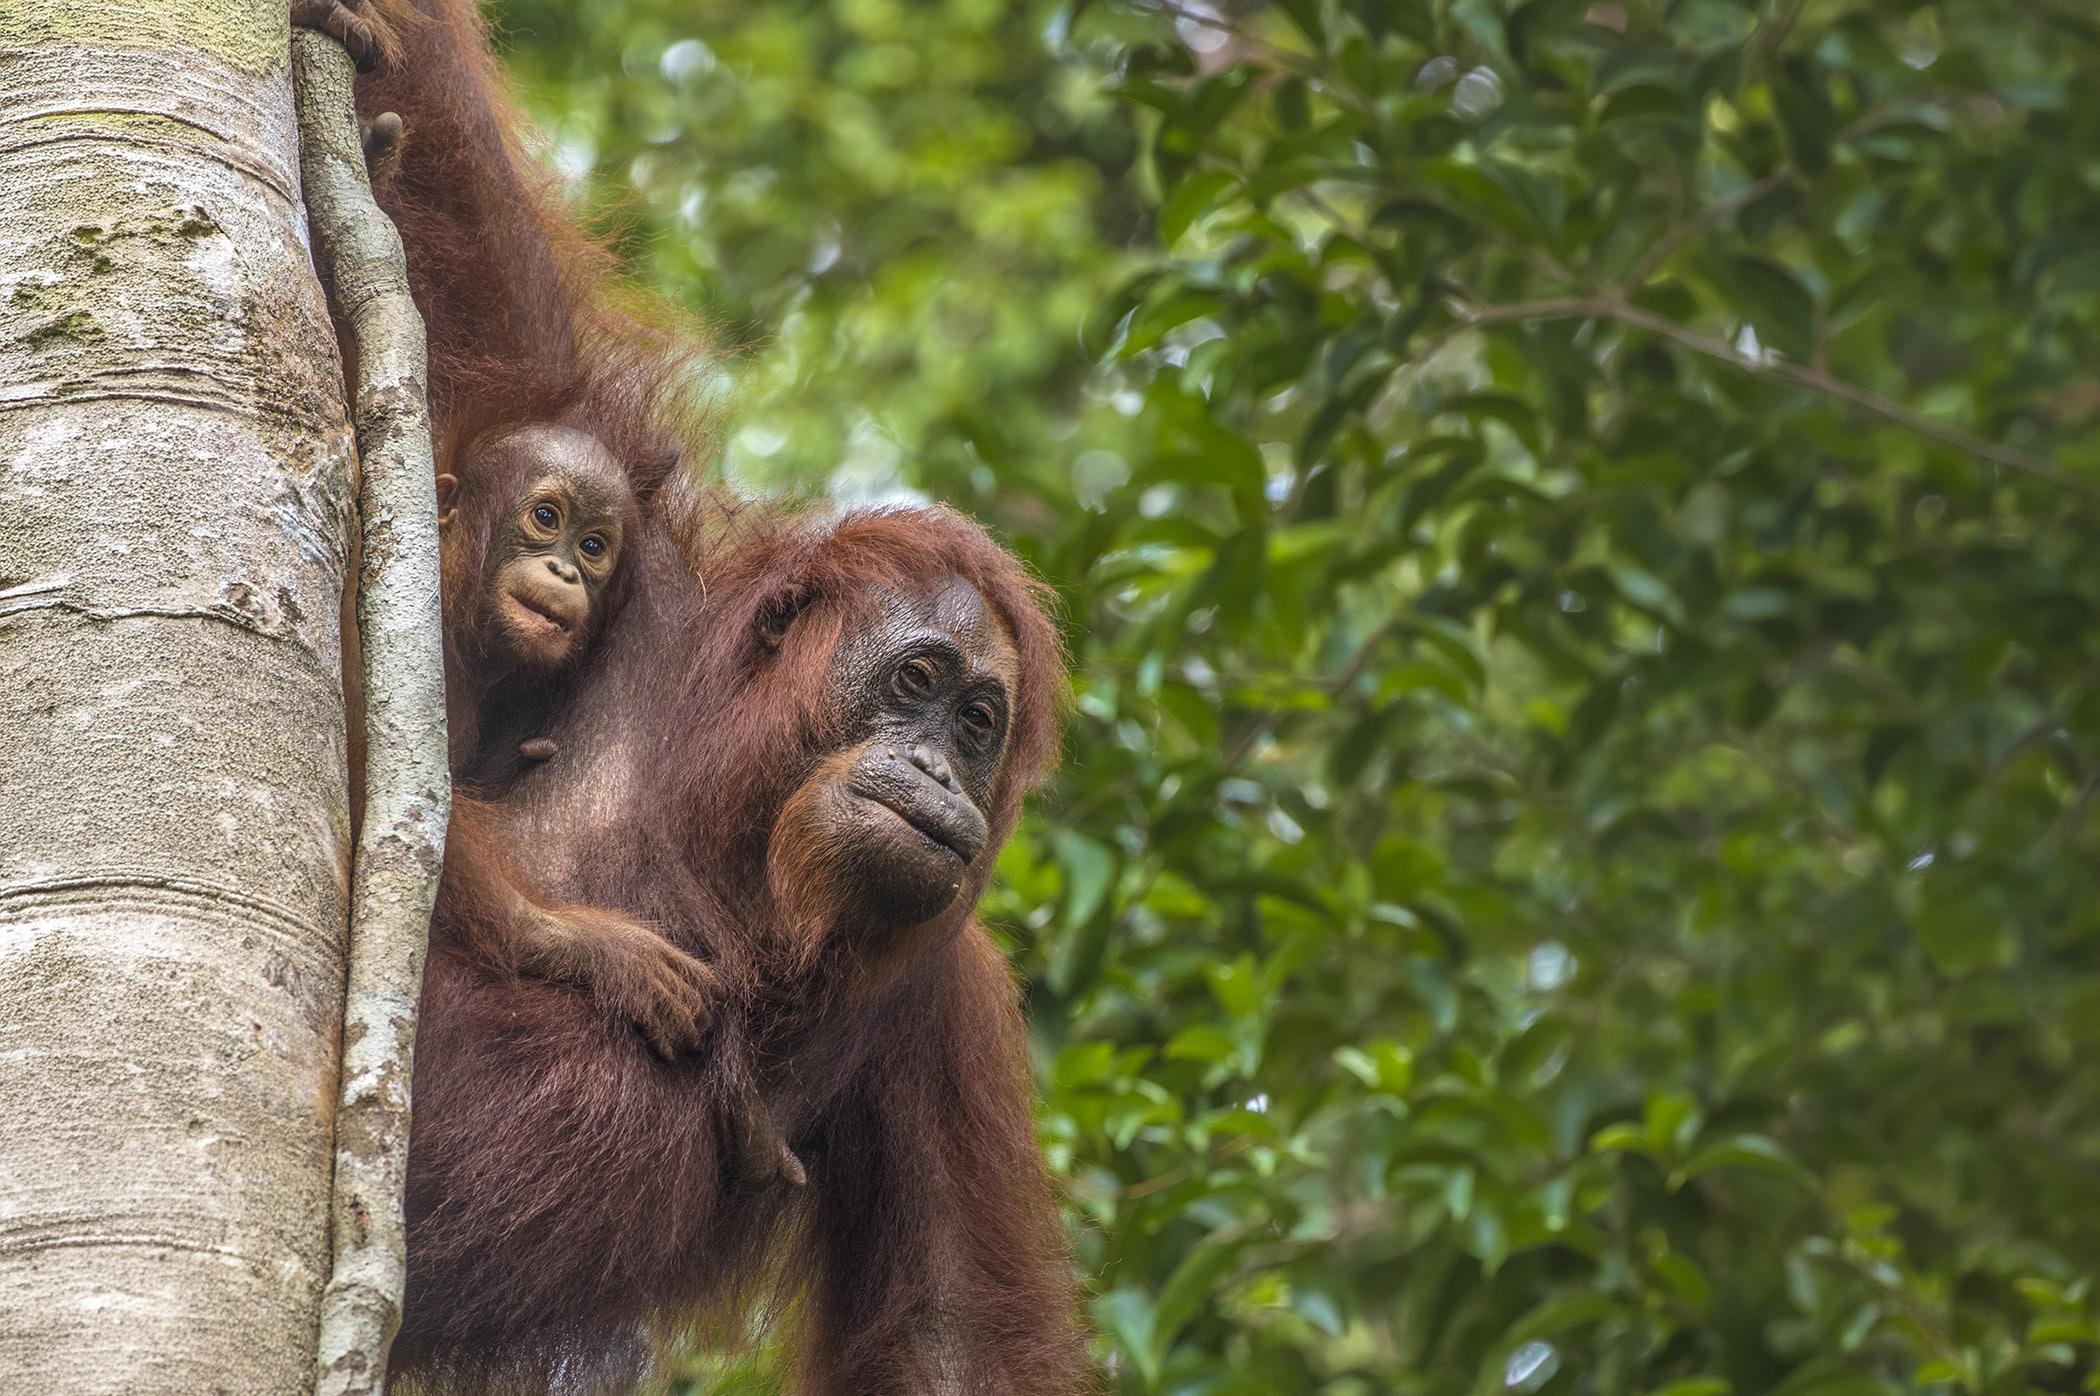
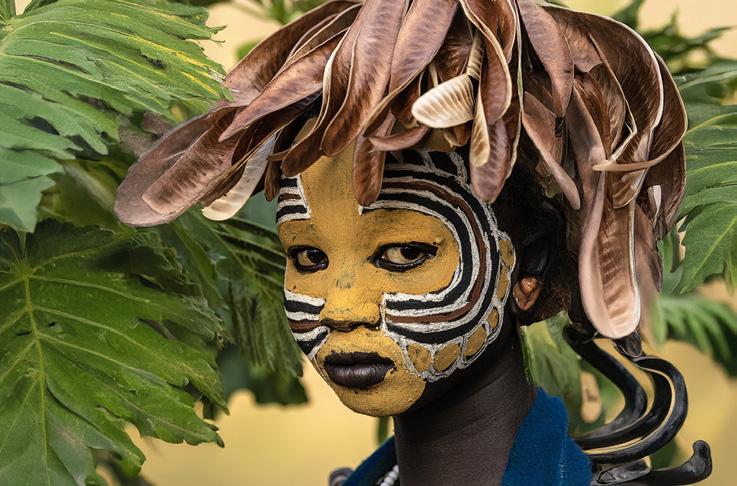
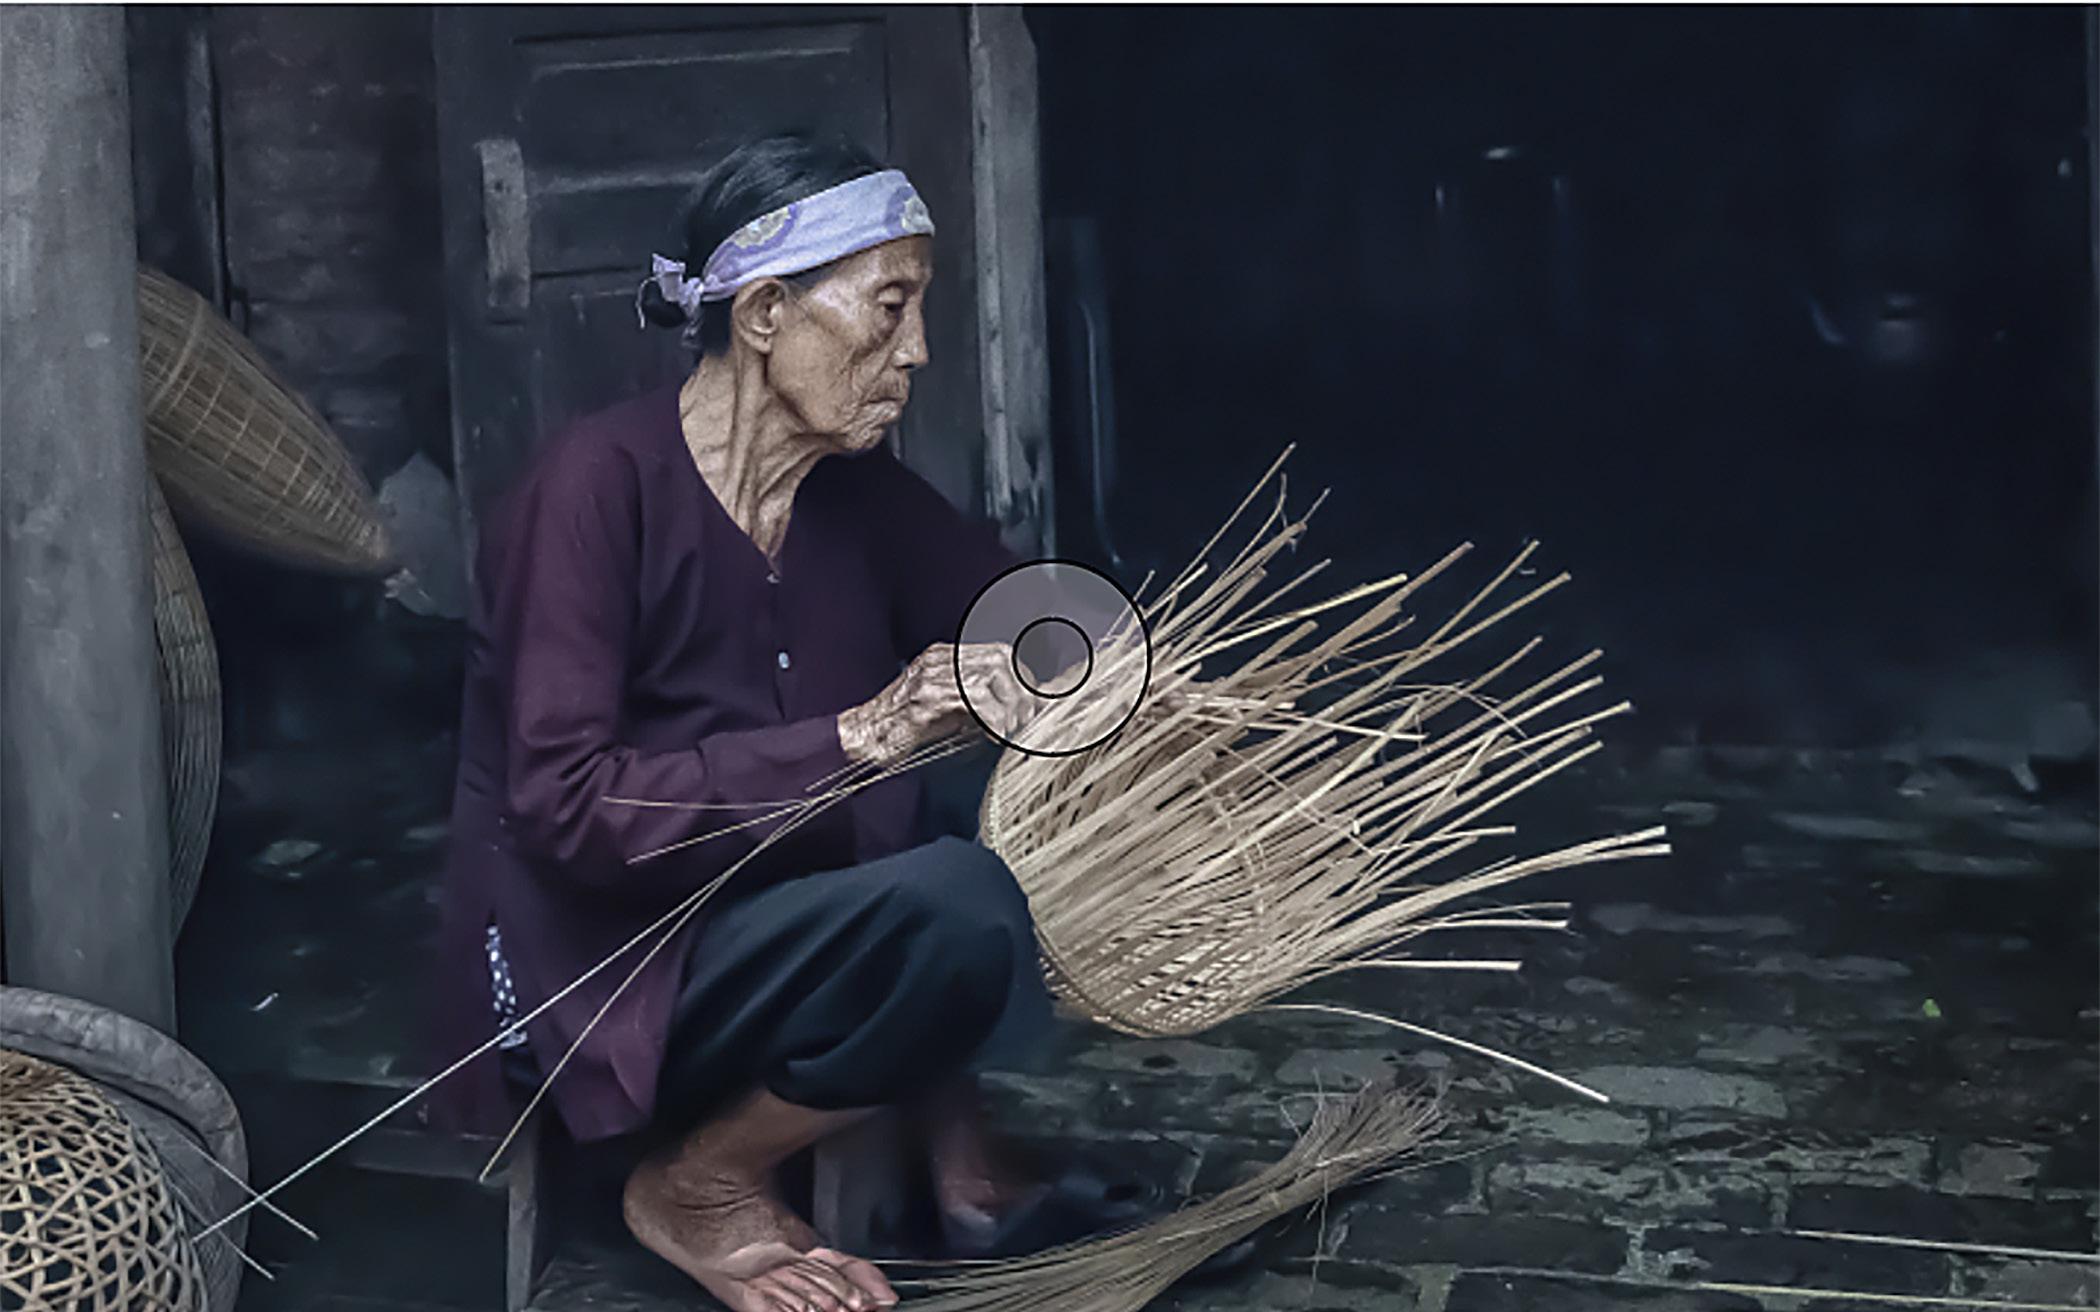
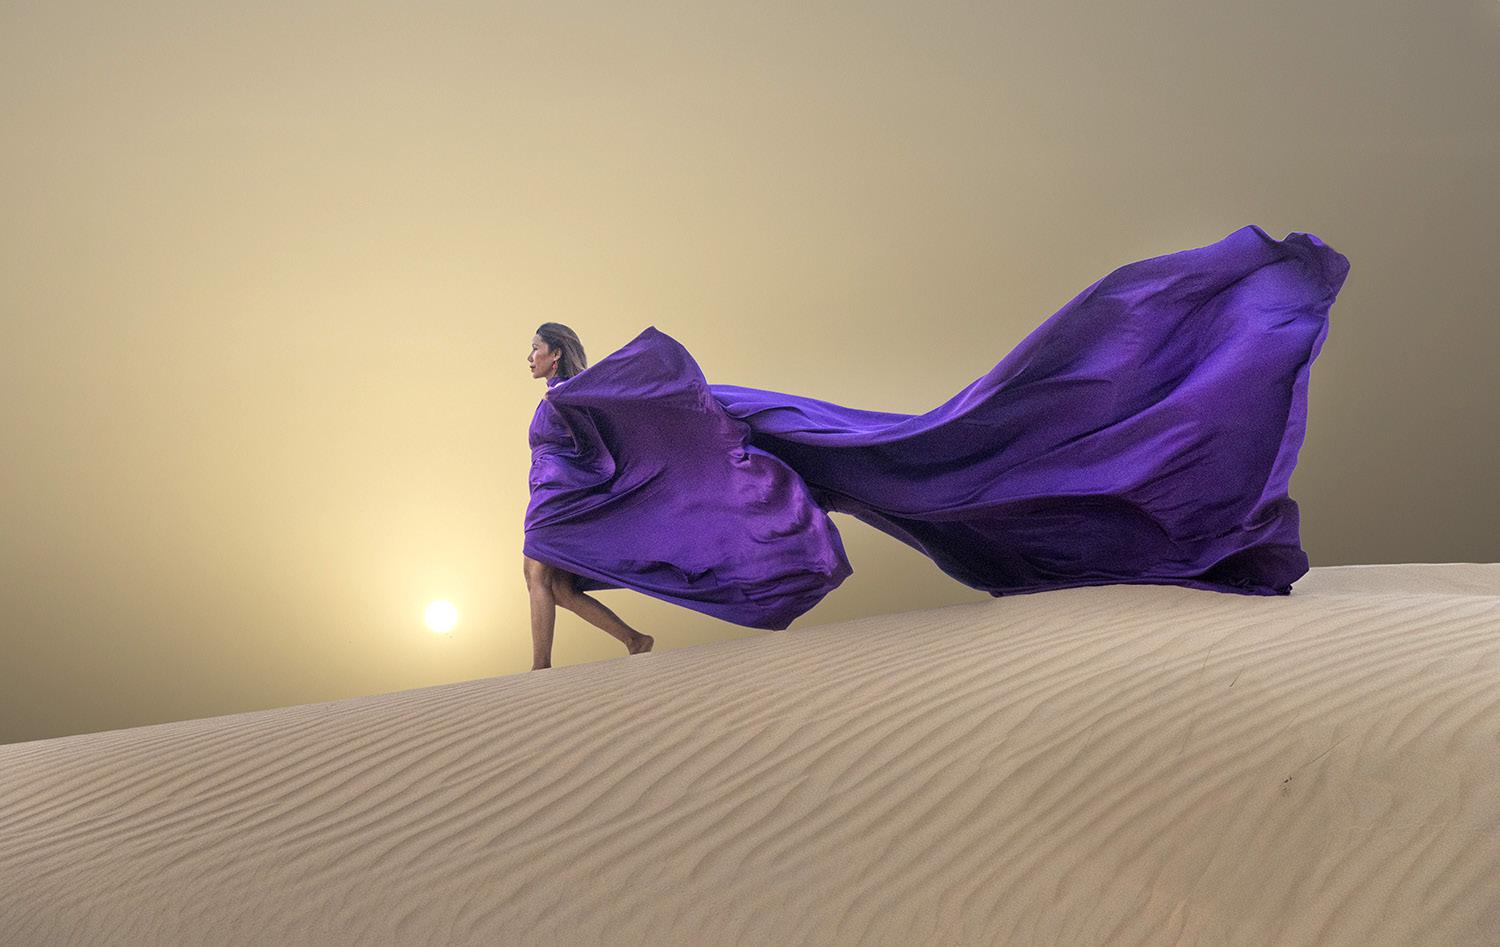
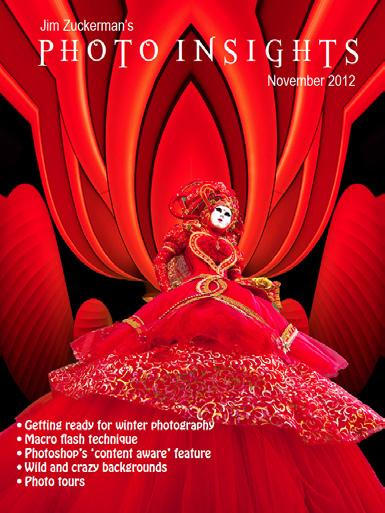
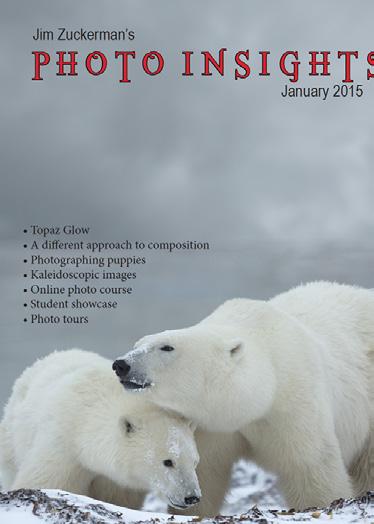
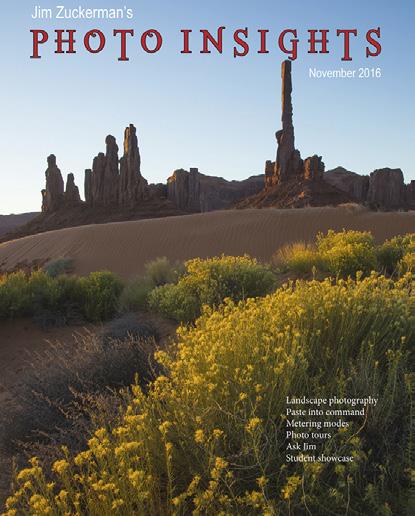
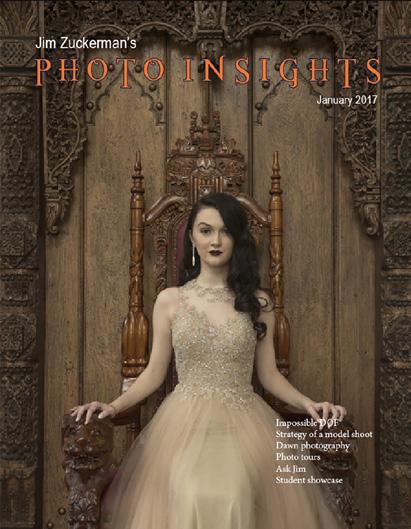
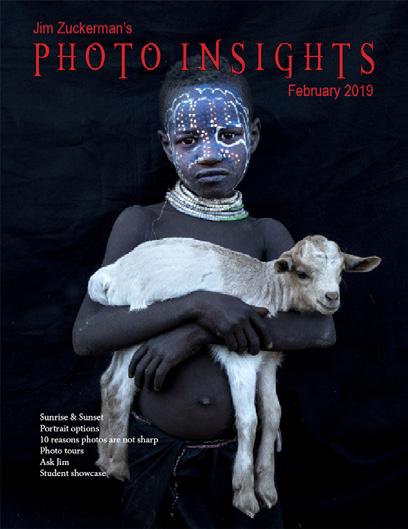
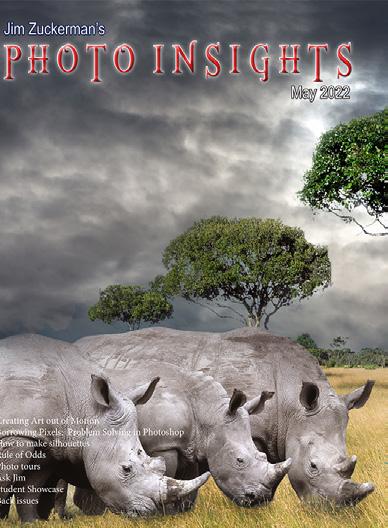
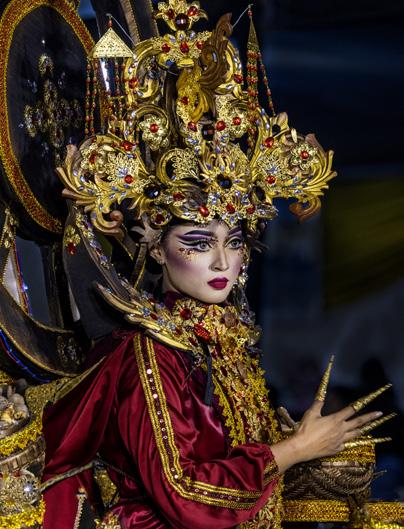
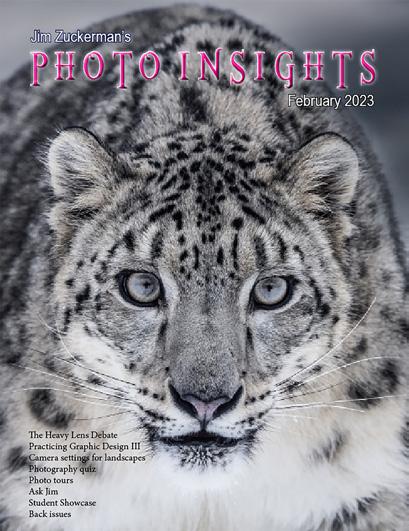
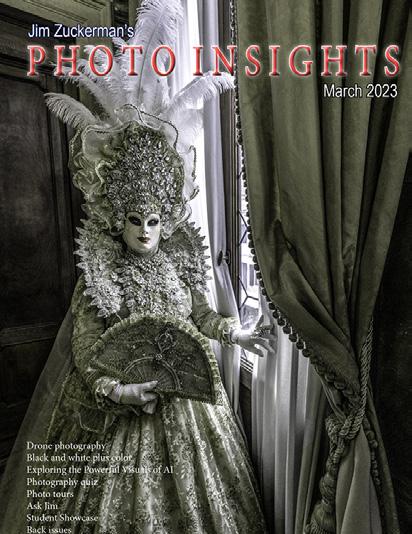
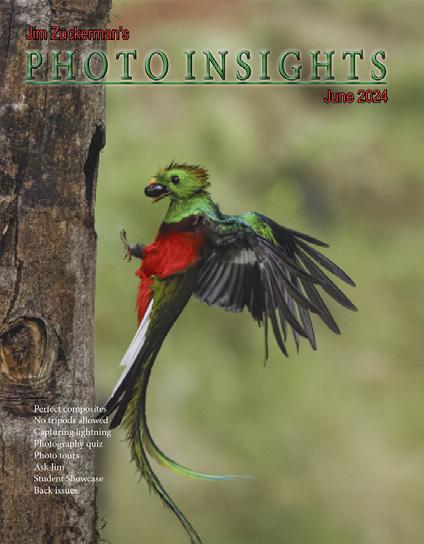
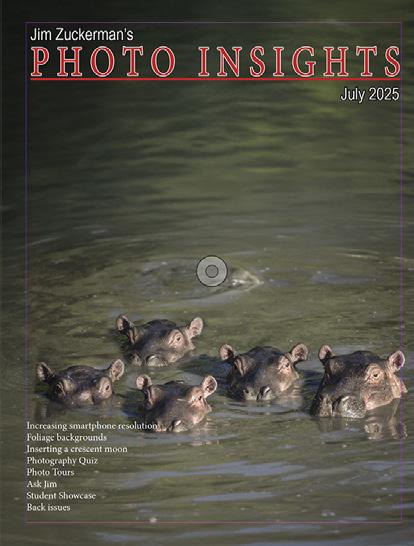
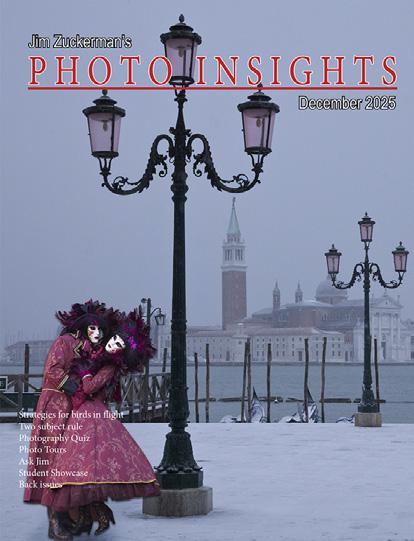
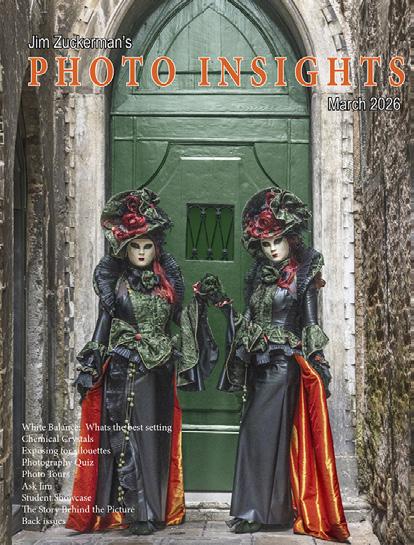
On the cover: Costumed models in front of a medieval, gothic door in Venice, Italy, during carnival. On this page: A wild orangutan smiling for the camera in Indonesia's portion of Borneo.
Reality checks put things in perspective at times. The next time you complain about how expensive lenses are and how heavy they are to carry, let me give you a sense of scale. I did some research online and found truly outrageous lenses and price tags.
Let’s start with the Sigma 200-500mm f/2.8 telephoto. It costs $26,000 and weighs 34.6 pounds (15.7 kilograms). It comes with a workout guide for developing your biceps. At such an affordable price, you might consider getting two of them -- one as a backup, just in case.
A lens that’s perfect for sports, wildlife, and photographing aliens on Neptune is Canon’s 5200mm f/14 mirror lens. It weighs in at 220 pounds, and its minimum focusing distance is 400 feet. A few years ago it was offered on eBay for $45,000, but no one bought it. It’s hard to understand passing up such a deal.
For those of you who shoot Hasselblad, you might want to give yourself a present for your next birthday and buy the Zeiss Apo Sonnar T 1700mm f/4 for only $100,000. It’s well worth the price . . . after all, you get what you pay for. But you’ll have to buy a crane as well because it weighs 564 pounds (256 kilos), and I doubt the lens fits into the overhead compartment on any commercial aircraft known to mankind.
For you Nikon shooters, the Nikkor 6mm fisheye is a must have. It covers an astonishing 220 degrees and is a no-brainer at $160,000. It only weighs 11.4 pounds. You could be the first on your block to own one.
Leica has certainly stepped up to the plate with its 1600mm f/5.6 telephoto. It’s only $2,000,000. It was made specifically for a Sheikh in Qatar, so it’s a one-off. If you were lusting after this lens, I’m sorry, but as far as I know, it’s not for sale at this time.
To make you feel little and insignificant when you look at the contents of your camera backpack, Zeiss made the 50mm Planar f/0.7. This is one of the largest apertures in the history of photography, and Zeiss sold six of these lenses to Nasa for a cool $23,100,000 each. If you have to have one of these lenses, I would definitely recommend adding it to your homeowner’s insurance policy.
Jim Zuckerman photos@jimzuckerman.com www.jimzuckerman.com
WHITE BALANCE
What's the best setting?
Most of my clients who travel with me on photography tours set their white balance to auto. I disagree with this choice and here's why.
When you are shooting in the middle of the day, roughly from 10am to 4pm, there is no difference between using auto white balance or daylight white balance (daylight, sunny, and direct sun are all the same -- various camera manufacturers use different names for the same thing). The colors in your pictures will be identical.
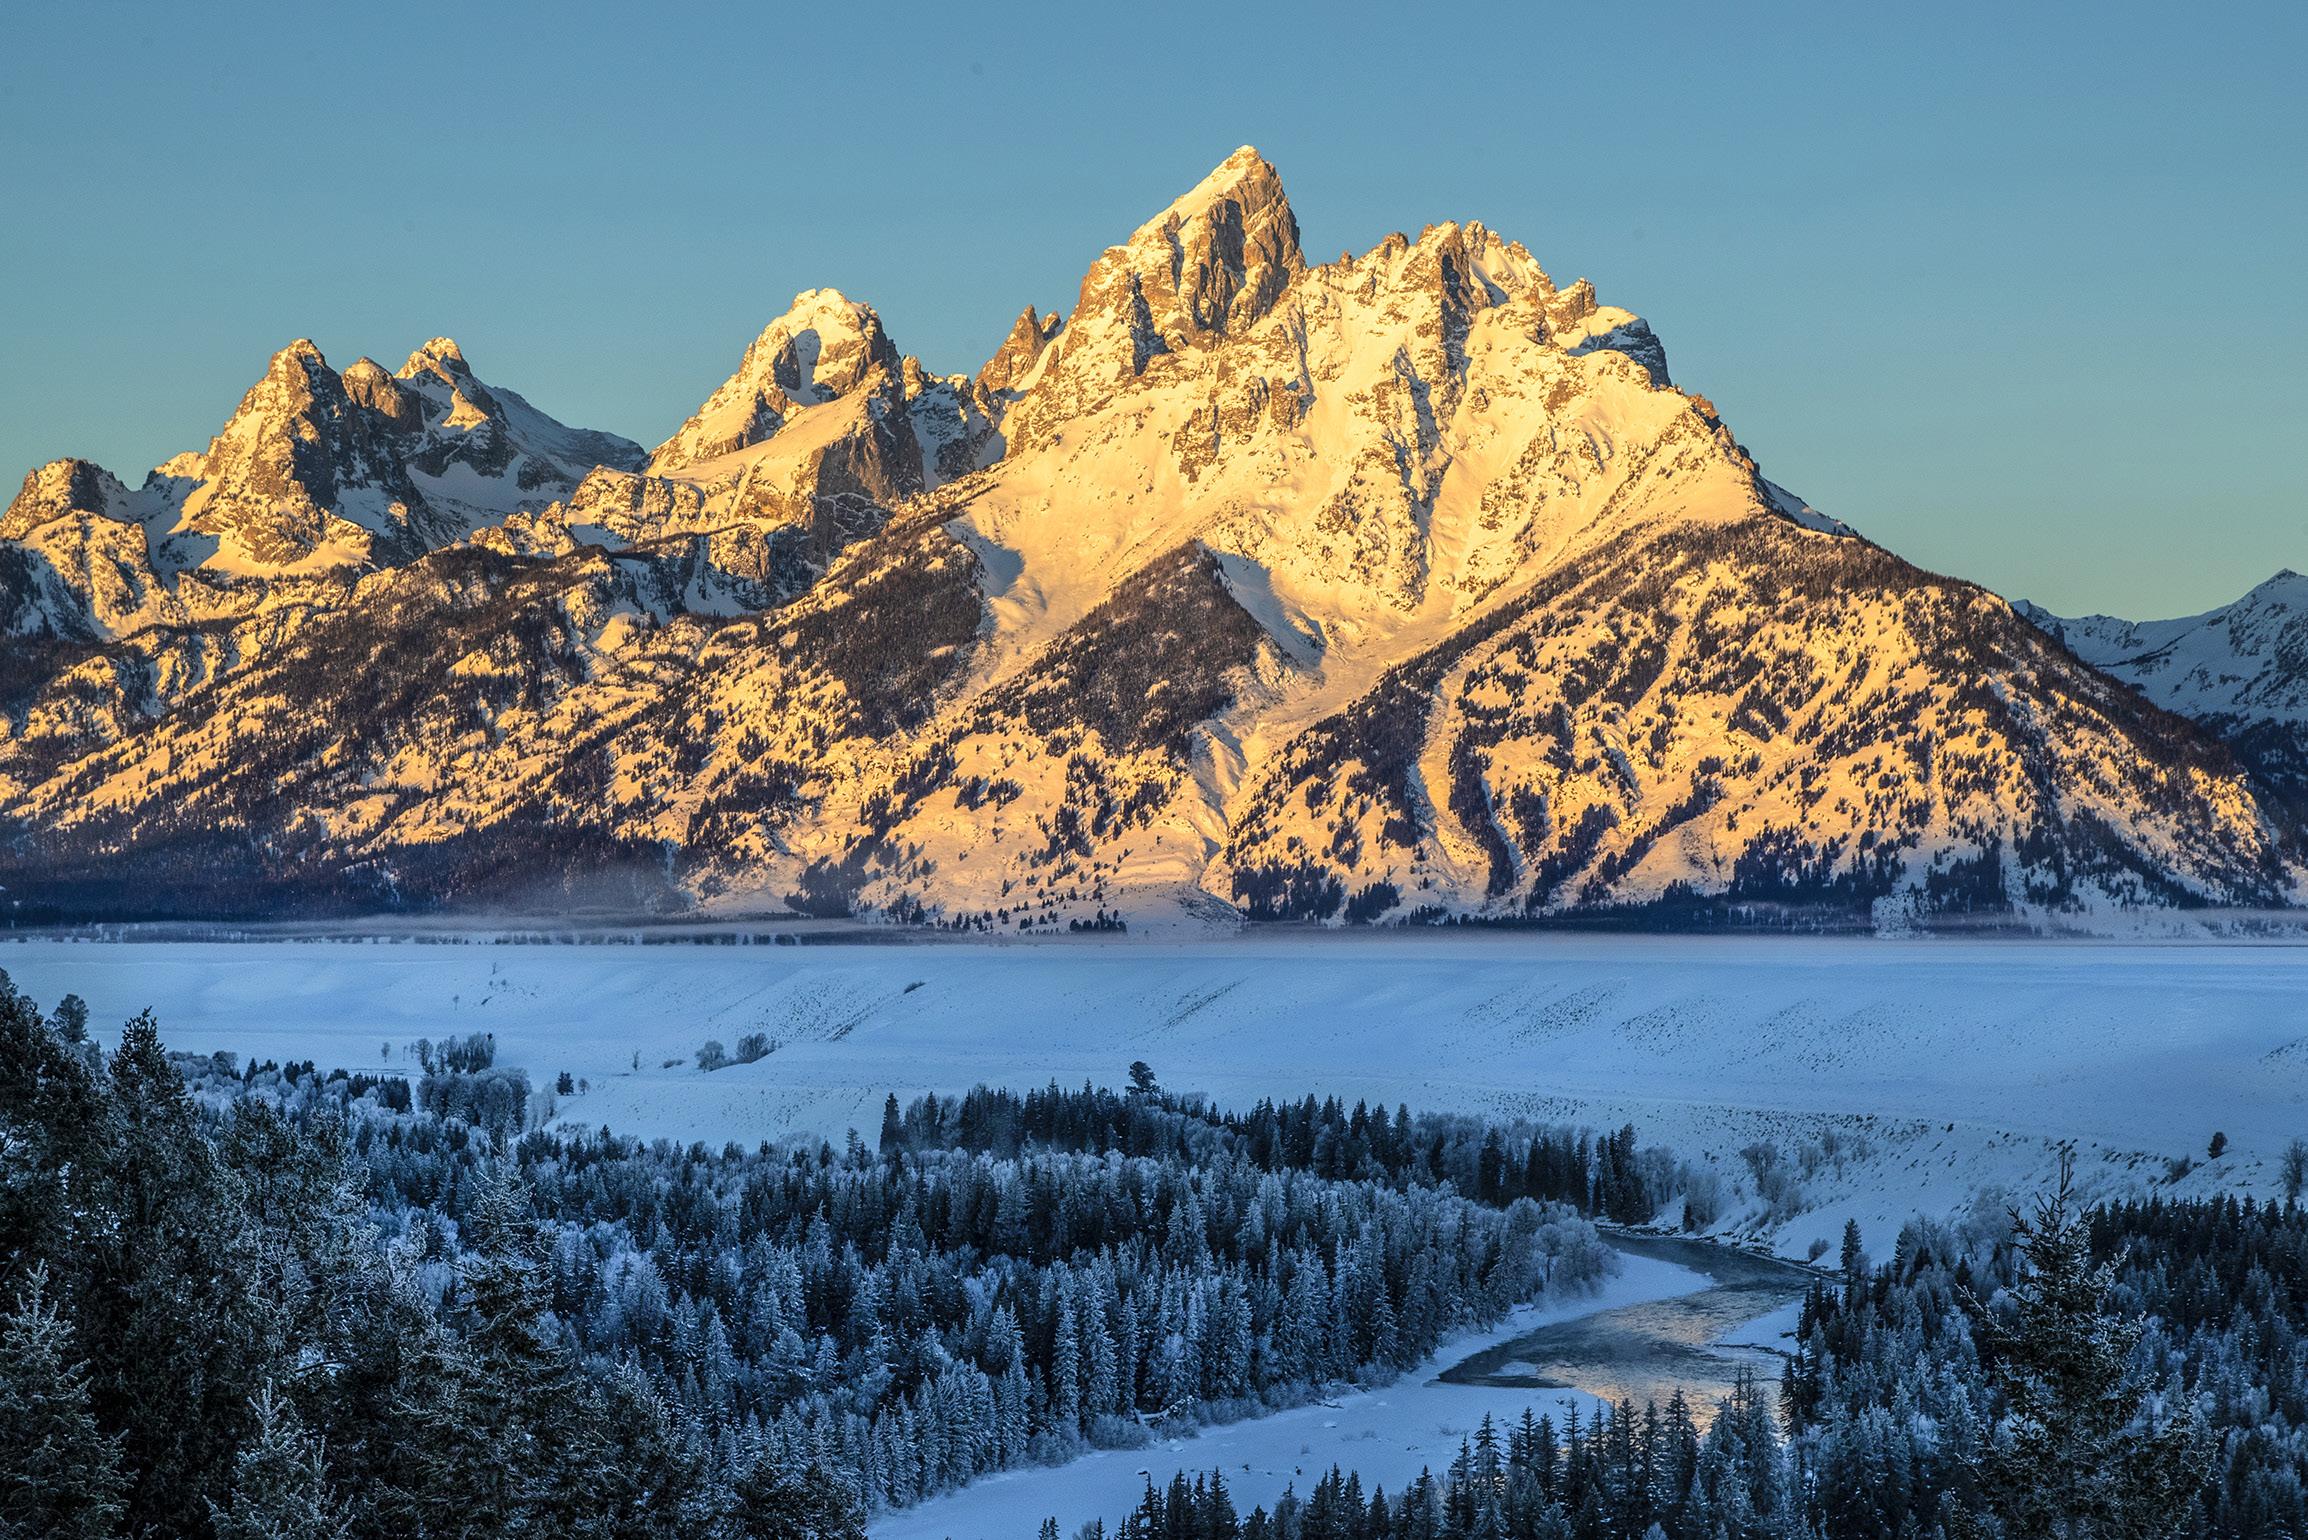
When the sun is close to the horizon at sunrise and sunset, the color of the light is golden. Specifically, it is red and yellow. When you set the camera's white balance to daylight, the colors in the photographs will be exactly what you see. The winter shot of the Grand Tetons in Wyoming, below, is an example The golden color on the mountains in the photograph is exactly what I saw when I was standing there taking the picture.
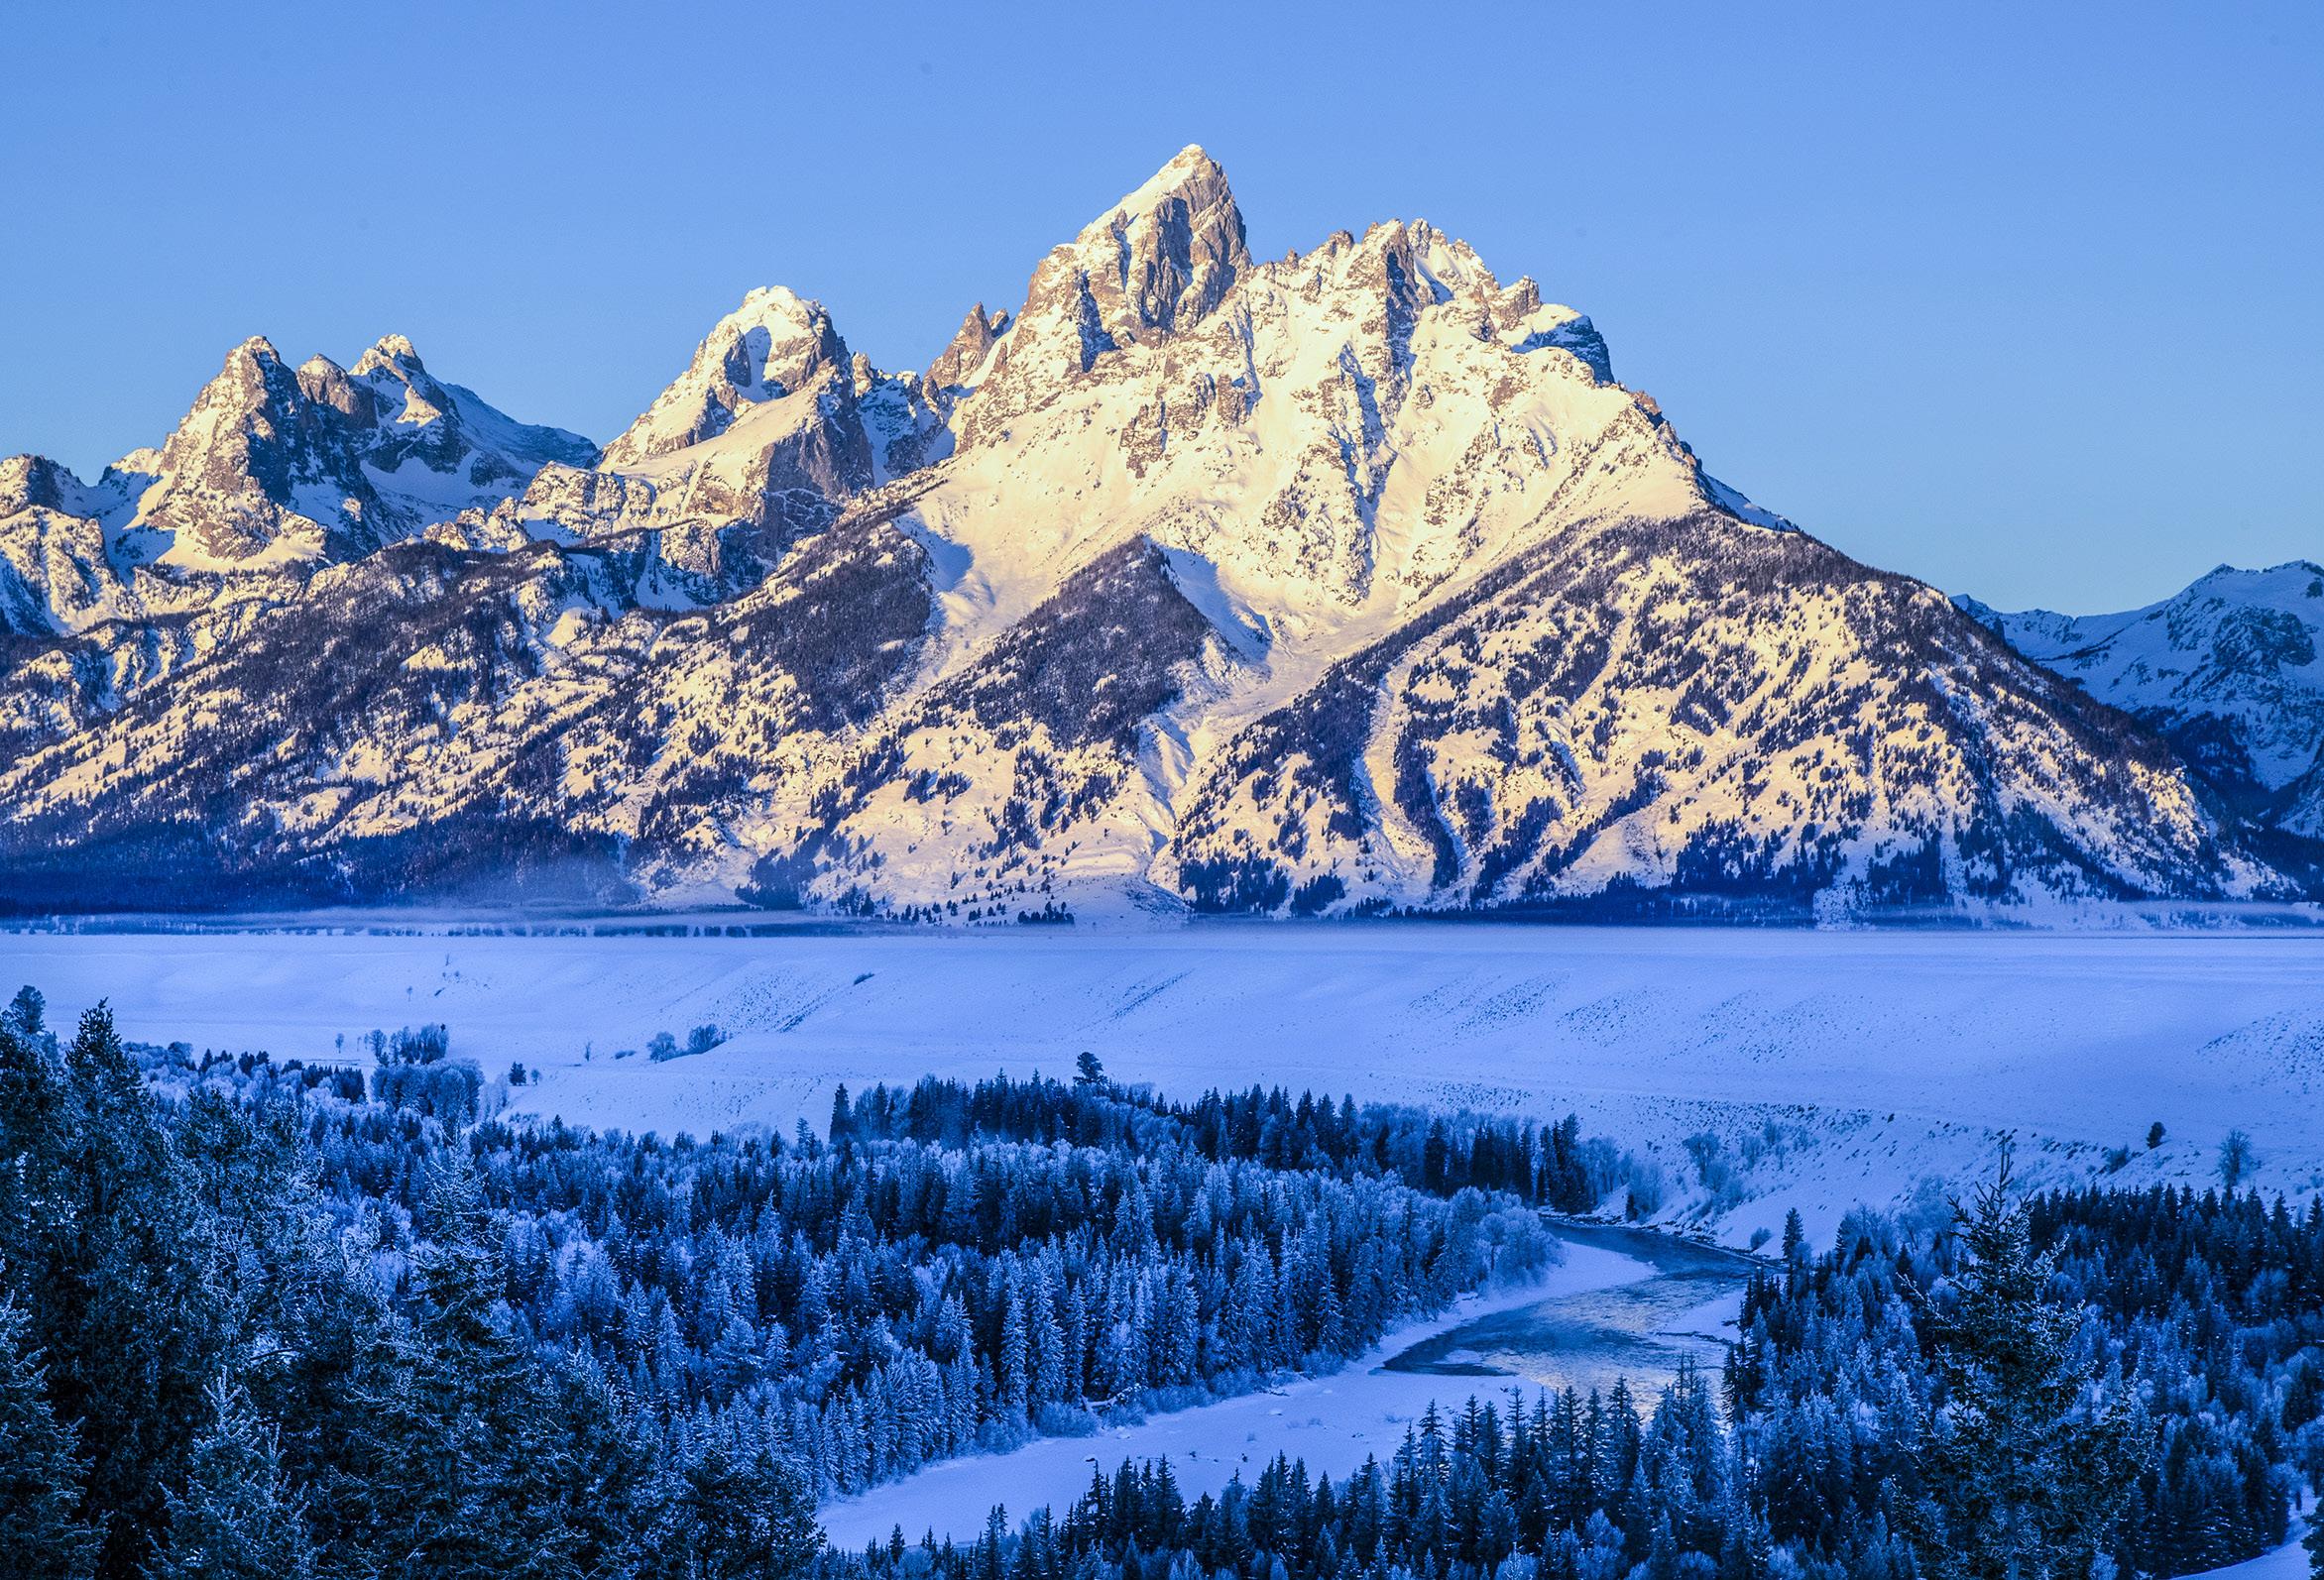
If the camera's white balance is set to auto, the
algorithm is programmed to "correct" the color of the light. That means auto white balance eliminates the beautiful golden tones of the low anged sunlight and makes it white. The image below shows how the AWB eliminated the golden color we photographers love and turned it into white light.
Assuming you are shooting in RAW mode, the sunset color can be recovered in Lightroom or ACR by manipulating the Color temperature slider. But if you are taking many pictures of a beautiful sunrise or sunset, that means you would have to do that to all your shots. Why go through the trouble?
This is why I leave my camera on daylight white balance all the time. There are three situations in which I use another setting.
1. When shooting indoors with tungsten (i.e. incandescent) lighting, I use the white balance setting designed to produce accurate color with this type of light. I'm referring to the traditional lightbulbs that we all grew up with in our homes. Various camera manufactures give this white balance setting different names -- it will be either indoors, tungsten, incandescent, or possibly 3200K.
2. Some indoor lighting scenarios use lights that are quite reddish. On the Kelvin temperature scale, daylight is 5500 degrees K; household incandescent bulbs are 3200K; and some venues like theaters use bulbs that are 2500K or even less. In these situations, I switch to manual white balance and choose 2500K which is usually the lowest number available.
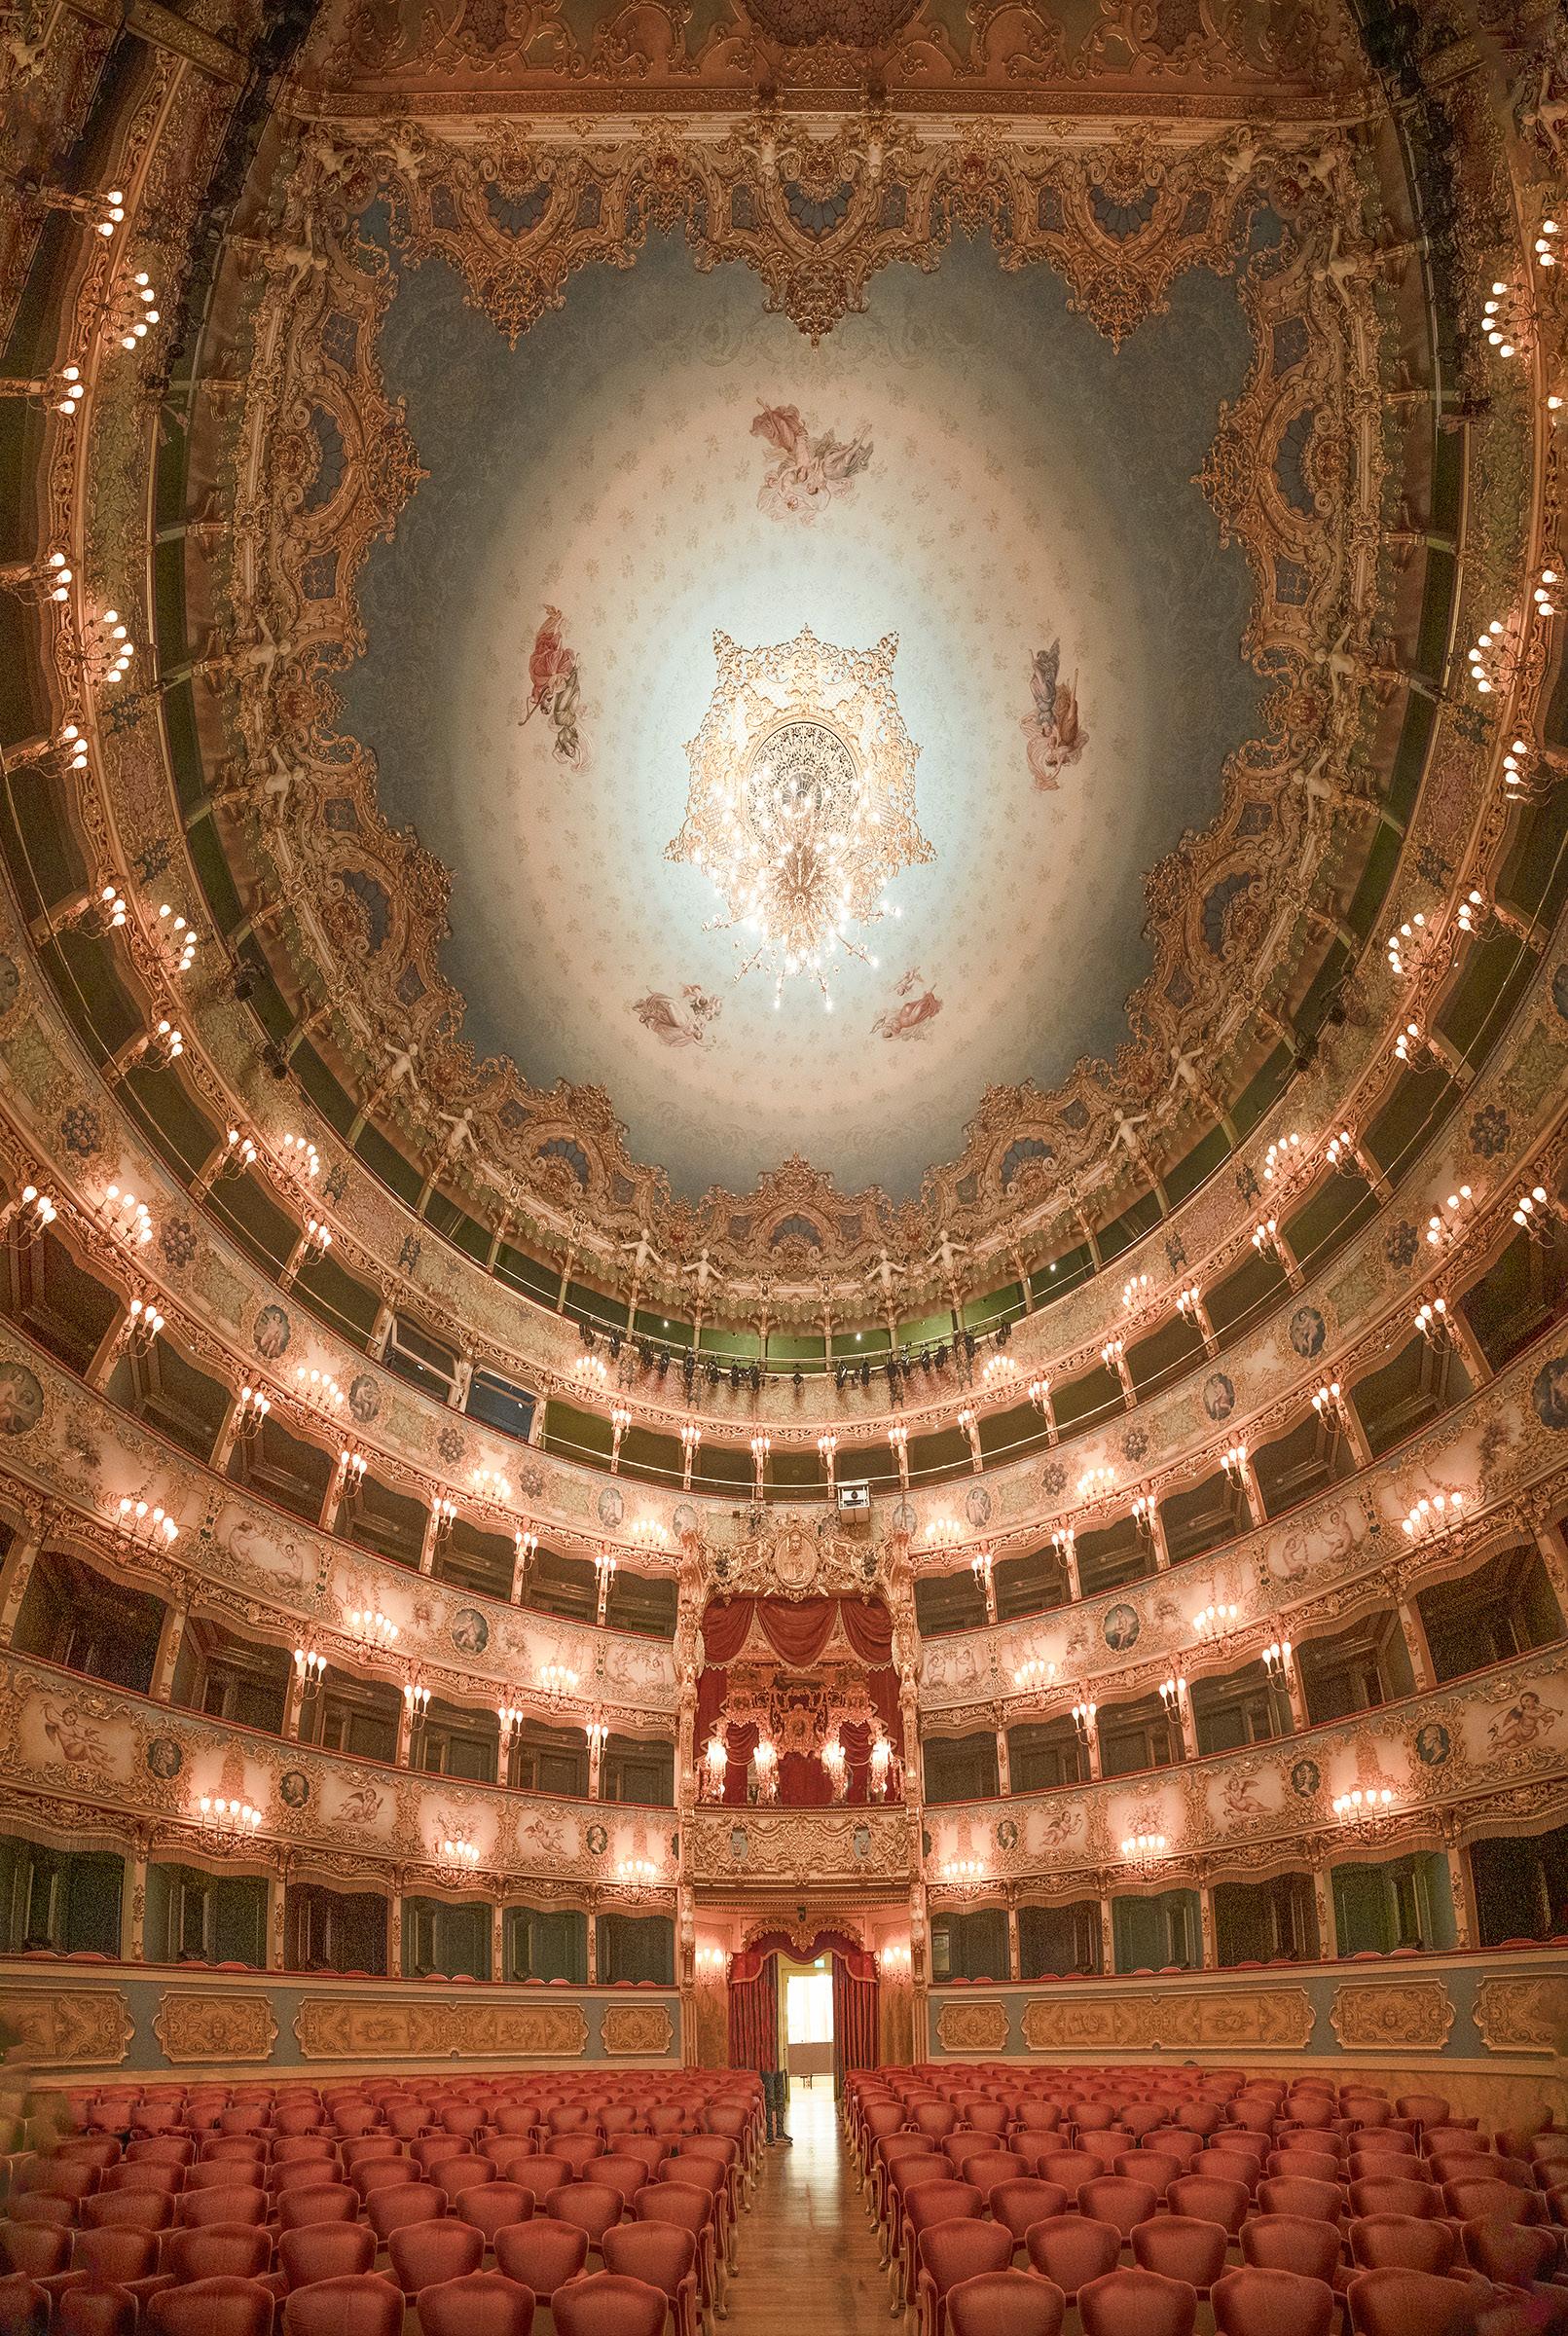
The picture below of La Fenice Theater in Venice, Italy, is an example of using 2500K. The lights photographed as red/yellow even when using tungsten white balance at 3200K. Manually choosing 2500K produced colors that were more accurate.
3. The third scenario when I don't use daylight white balance is when pho-
tographing Fluorescent lights and all of the new LED lights that are on the market now. Many of these light fixtures are imbued with various types of colors to make them warmer, cooler, or something else. The traditional white balance calibration system was not made for these 'funky' colors.
The only sensible approach is -- in this case -to use auto white balance. You won't really know exactly how the camera will interpret a particular fluorescent fixture or some off-color bulb, but in post-processing it's easy to manipulate individual colors. You can do this in Lightroom and Adobe Camera Raw as well as in Photoshop. You can tweak the colors to reflect what you saw, or you are able to create any type of fantasy by using wild and crazy colors.
Most people think AWB produces the best color in all situations. It doesn't. Don't let the camera think for you. You're in charge. §
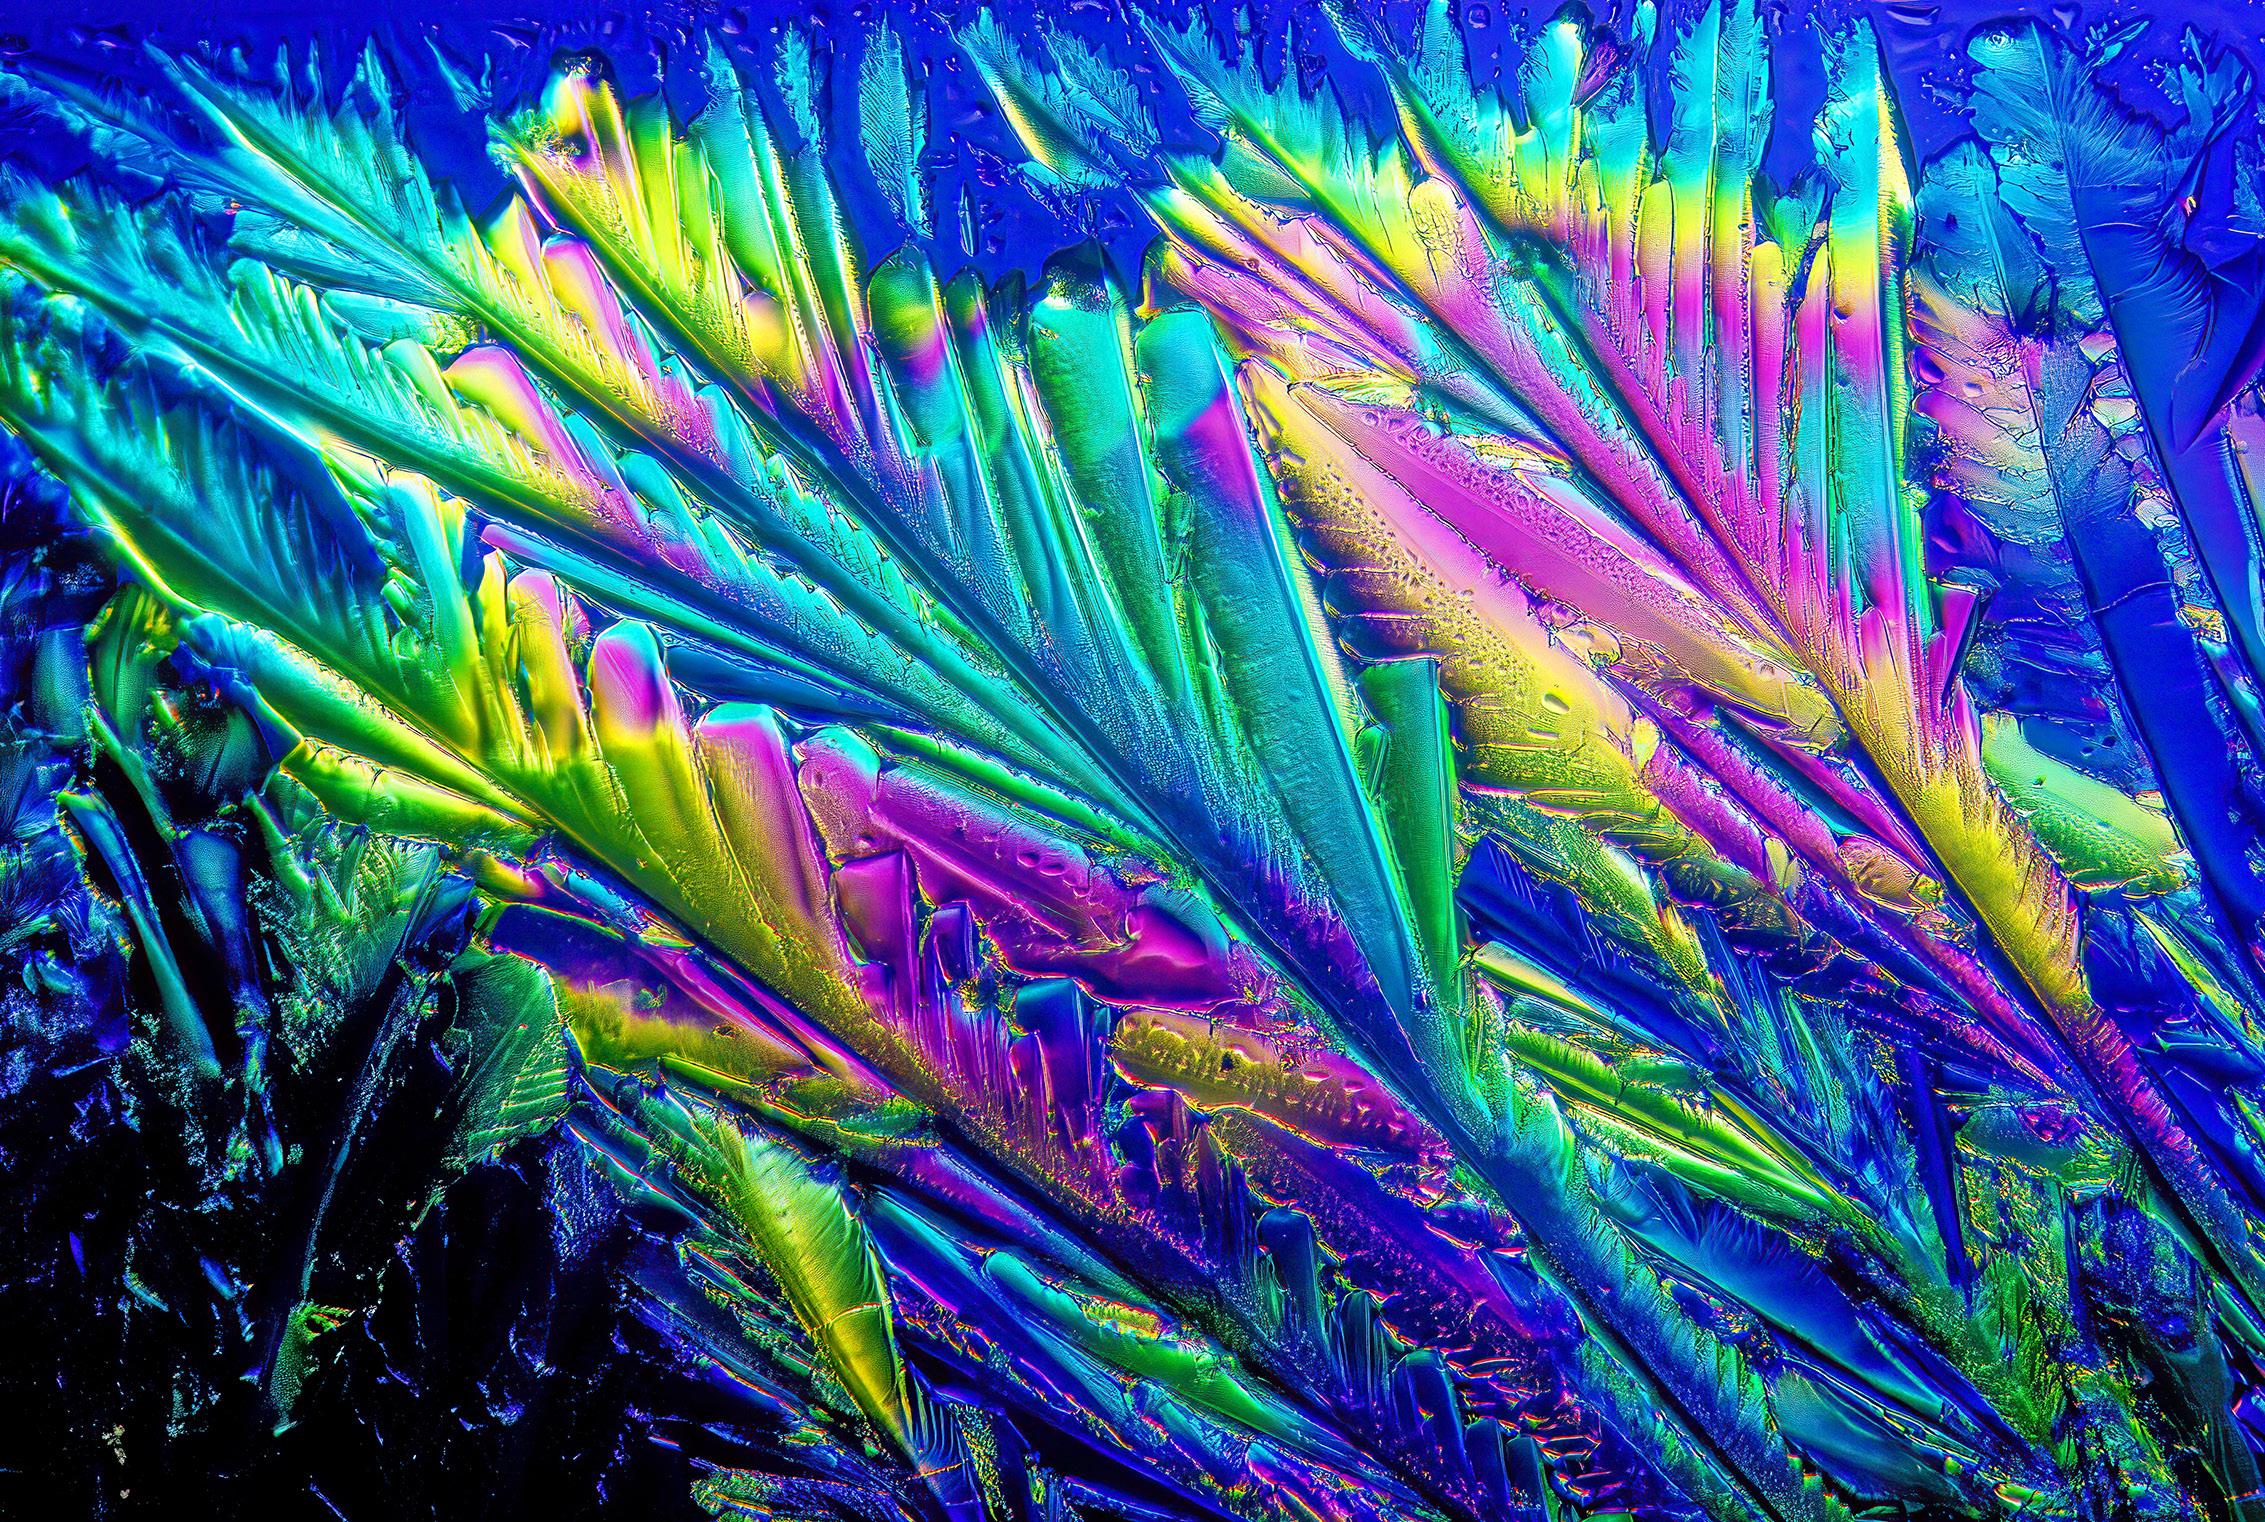
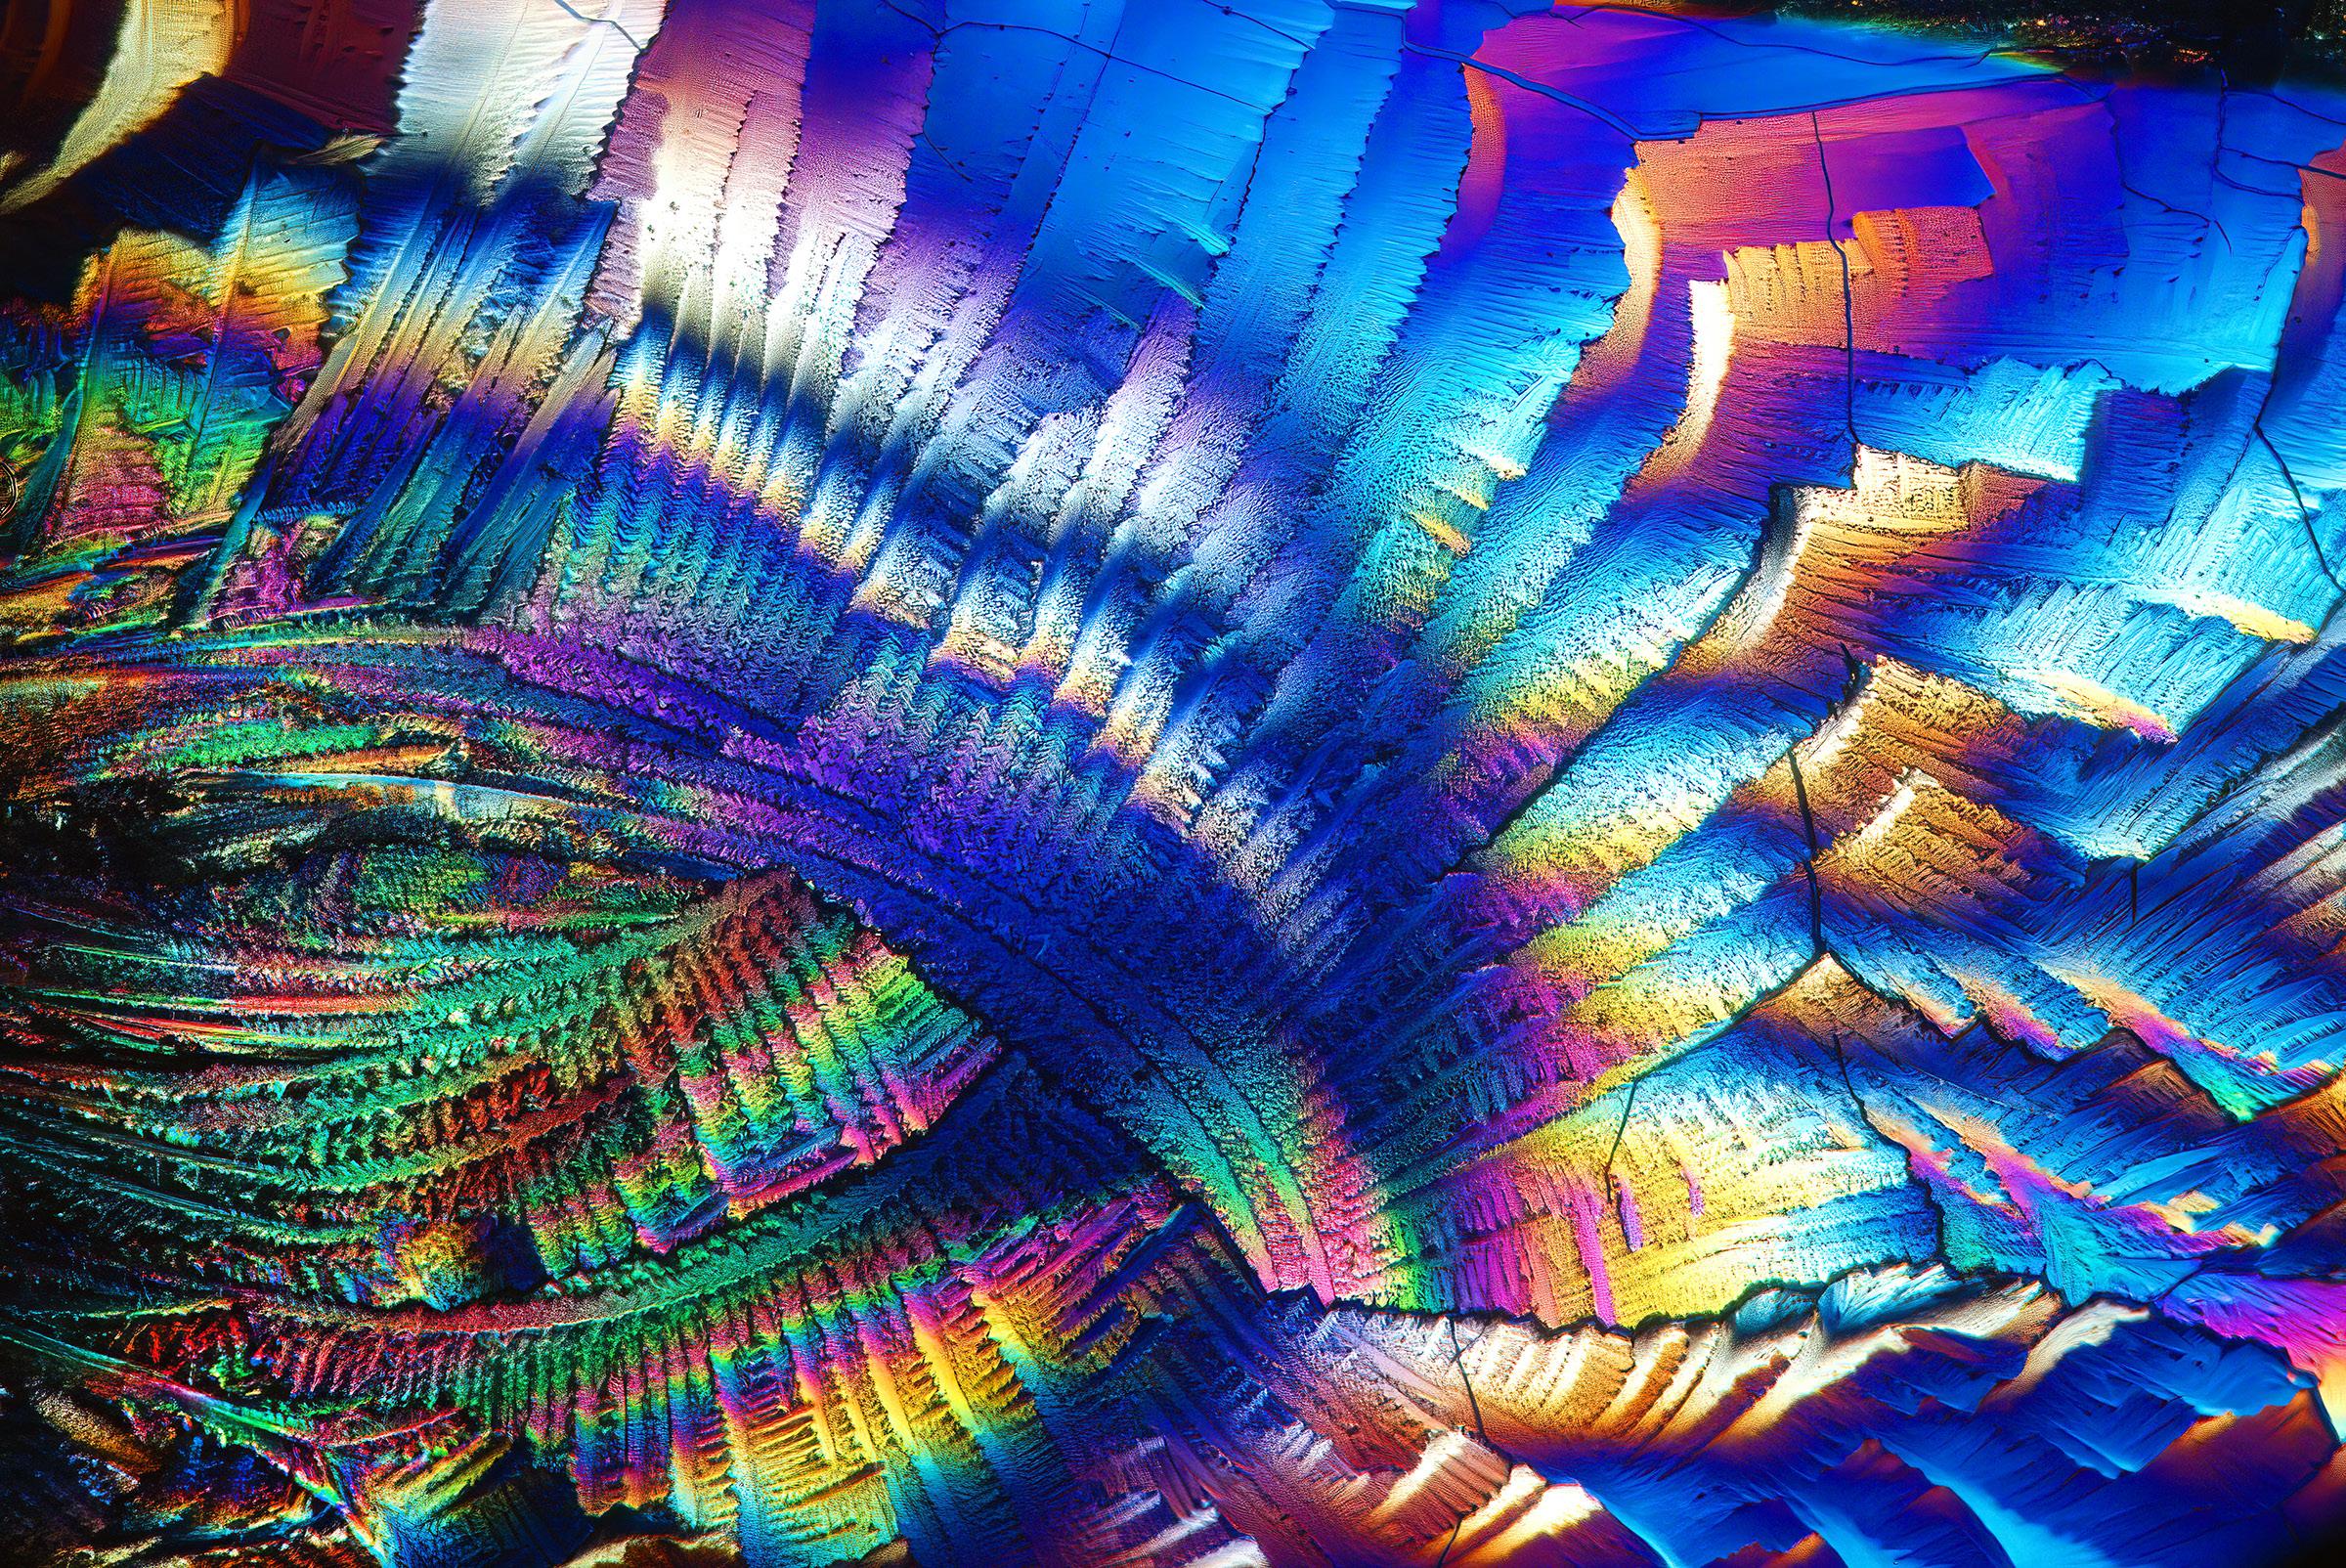
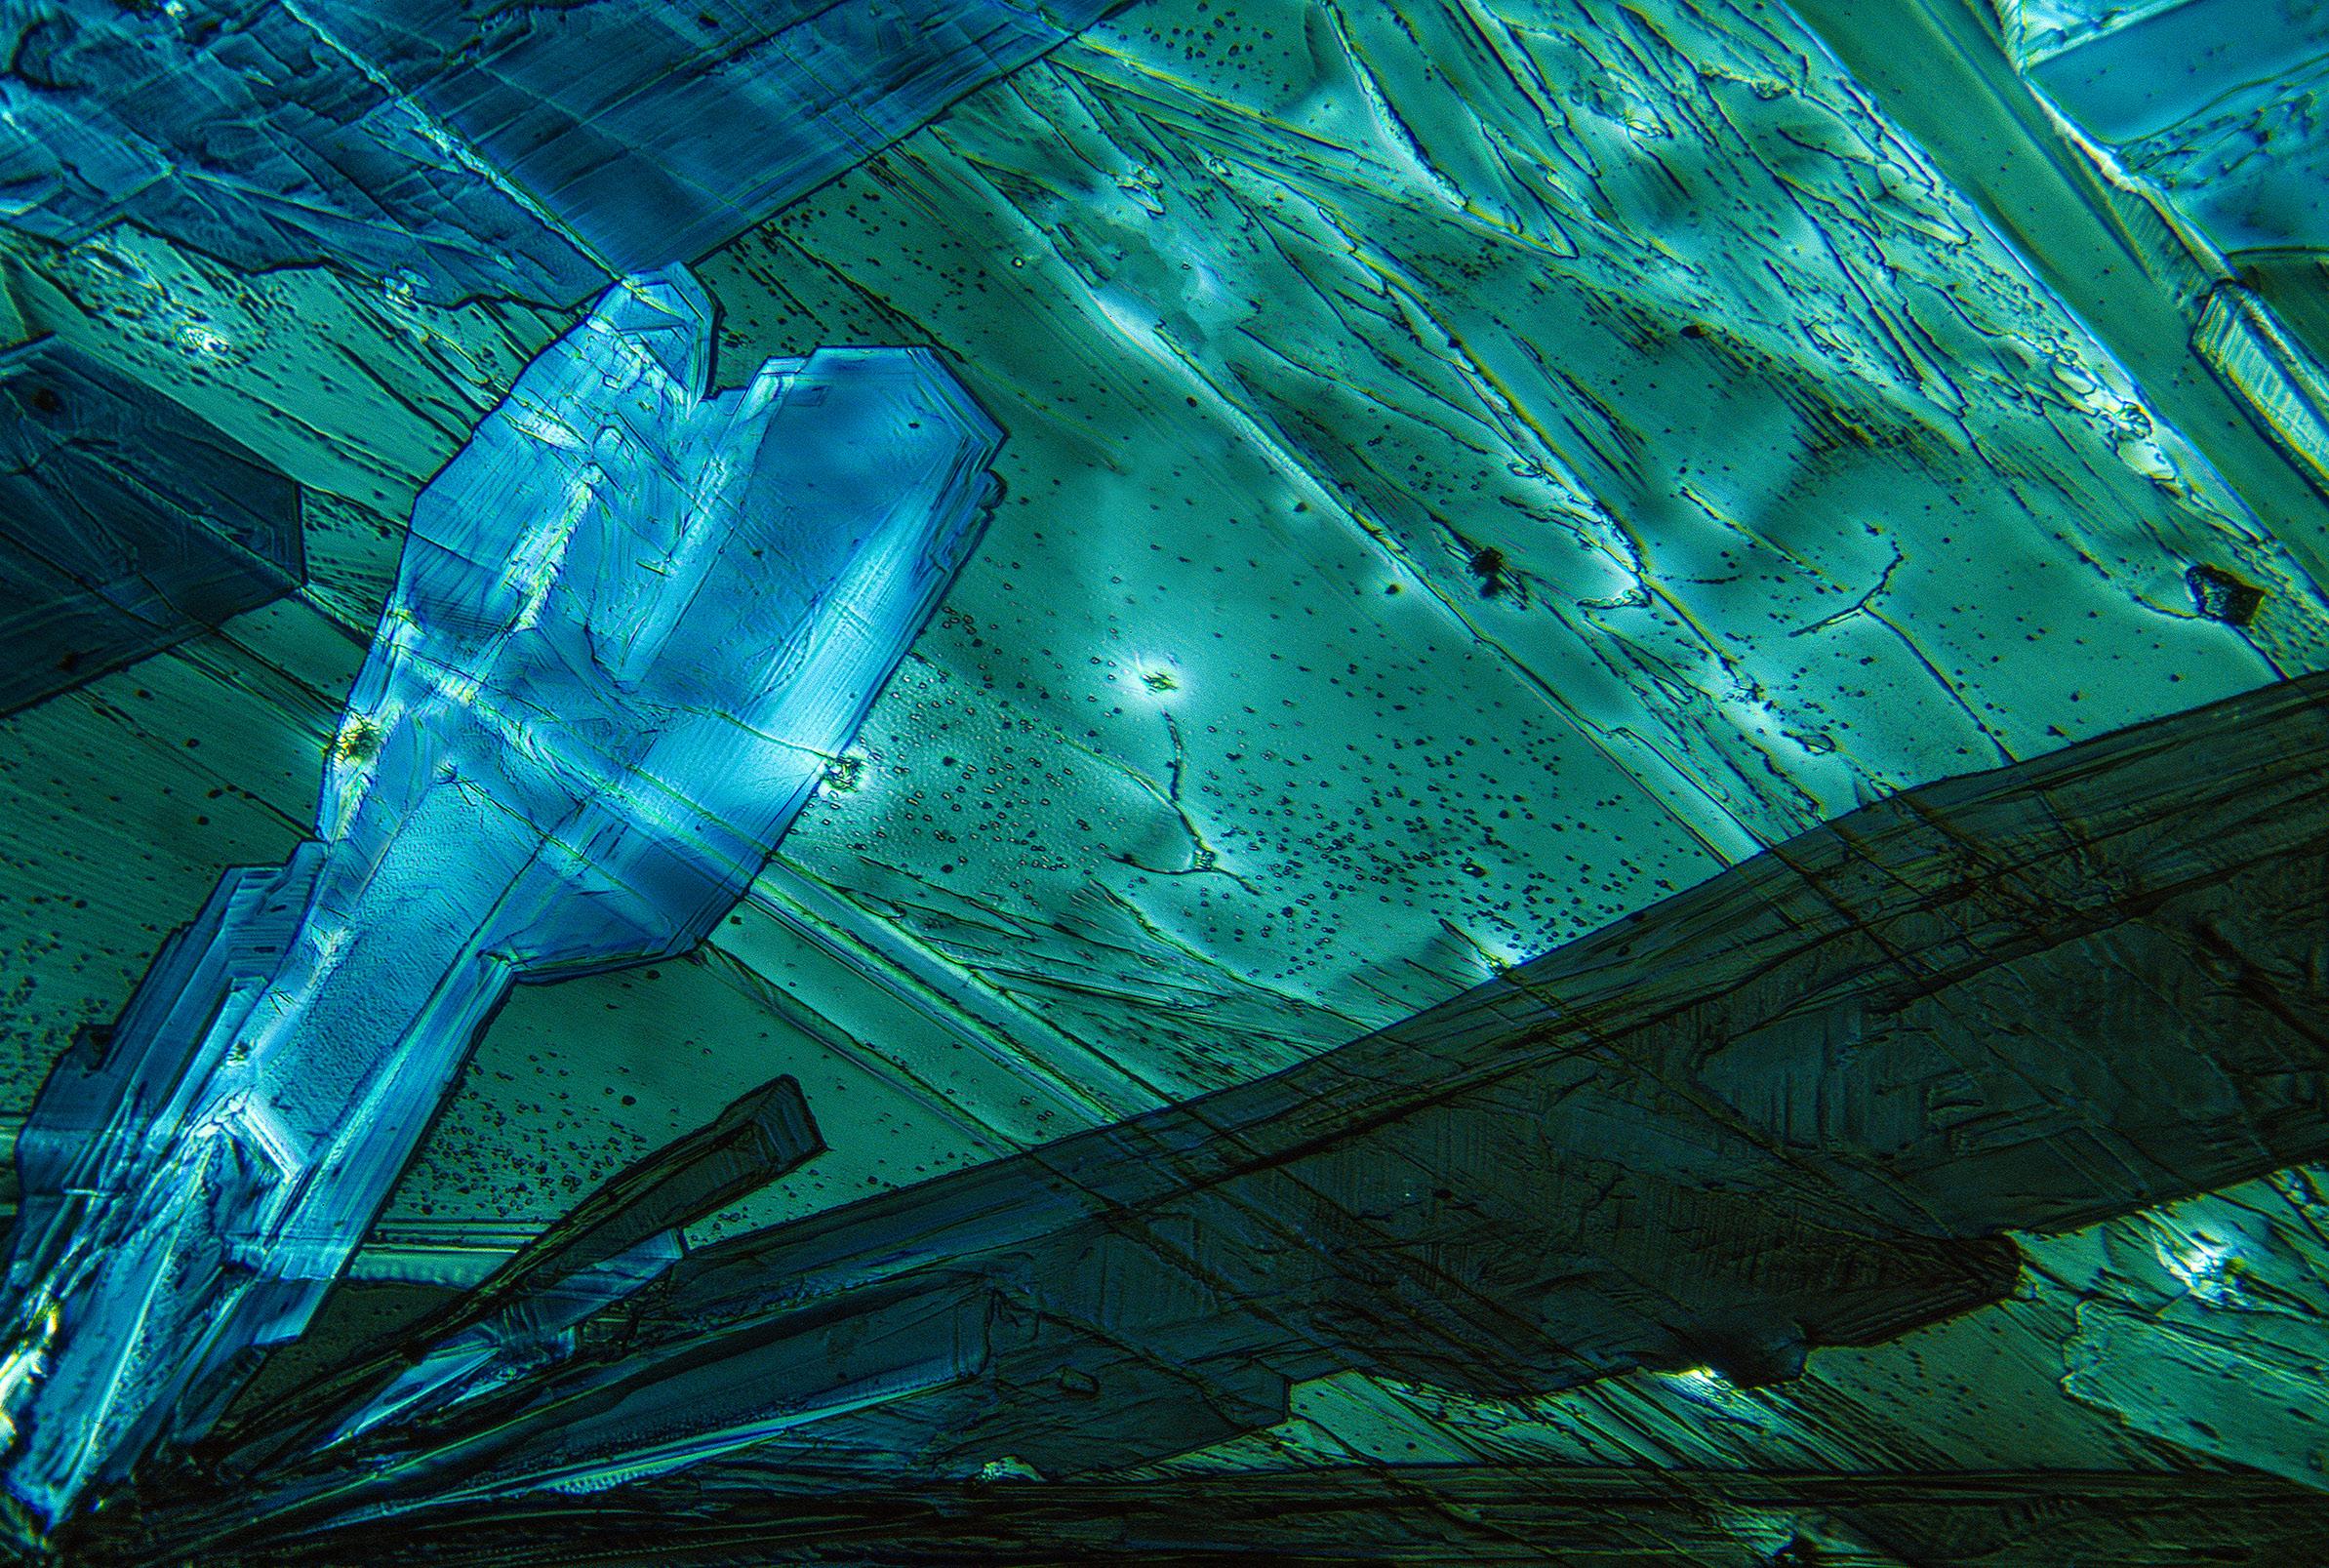
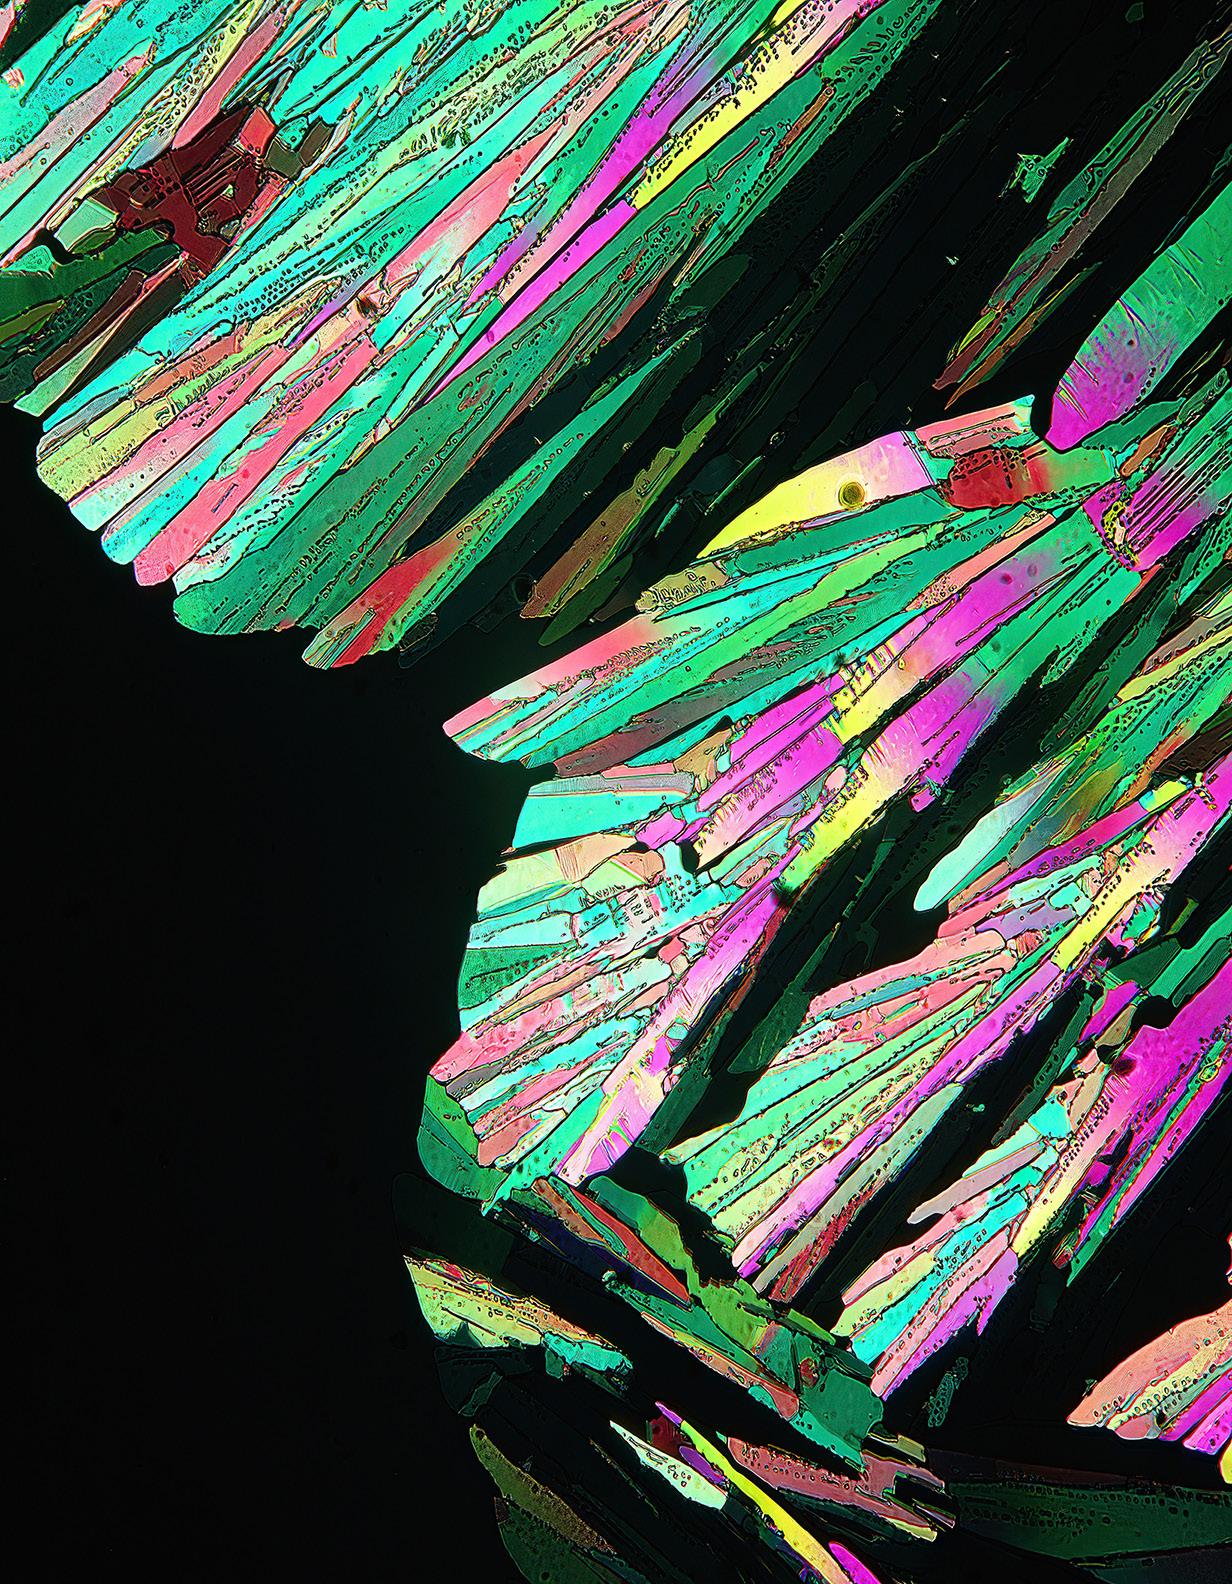
CHEMICAL CRYSTALS
One of the reasons I love photography is because it can lead you down so many paths that you may never have explored but for the passion of capturing wonderful images. One such path I've enjoyed experimenting with is the remarkable art in crystals, specifically the crystaline abstracts that form with certain types of chemicals.
The chemicals that produce the colors you see in this article are called birefringent. That means when the crytals are viewed through two polarizing filters they become ablaze
with color. One filter is placed on the camera lens and a piece of polarizing plastic (available from Edmund Scientific) is placed in front of the light source. The crystals have to be backlit.
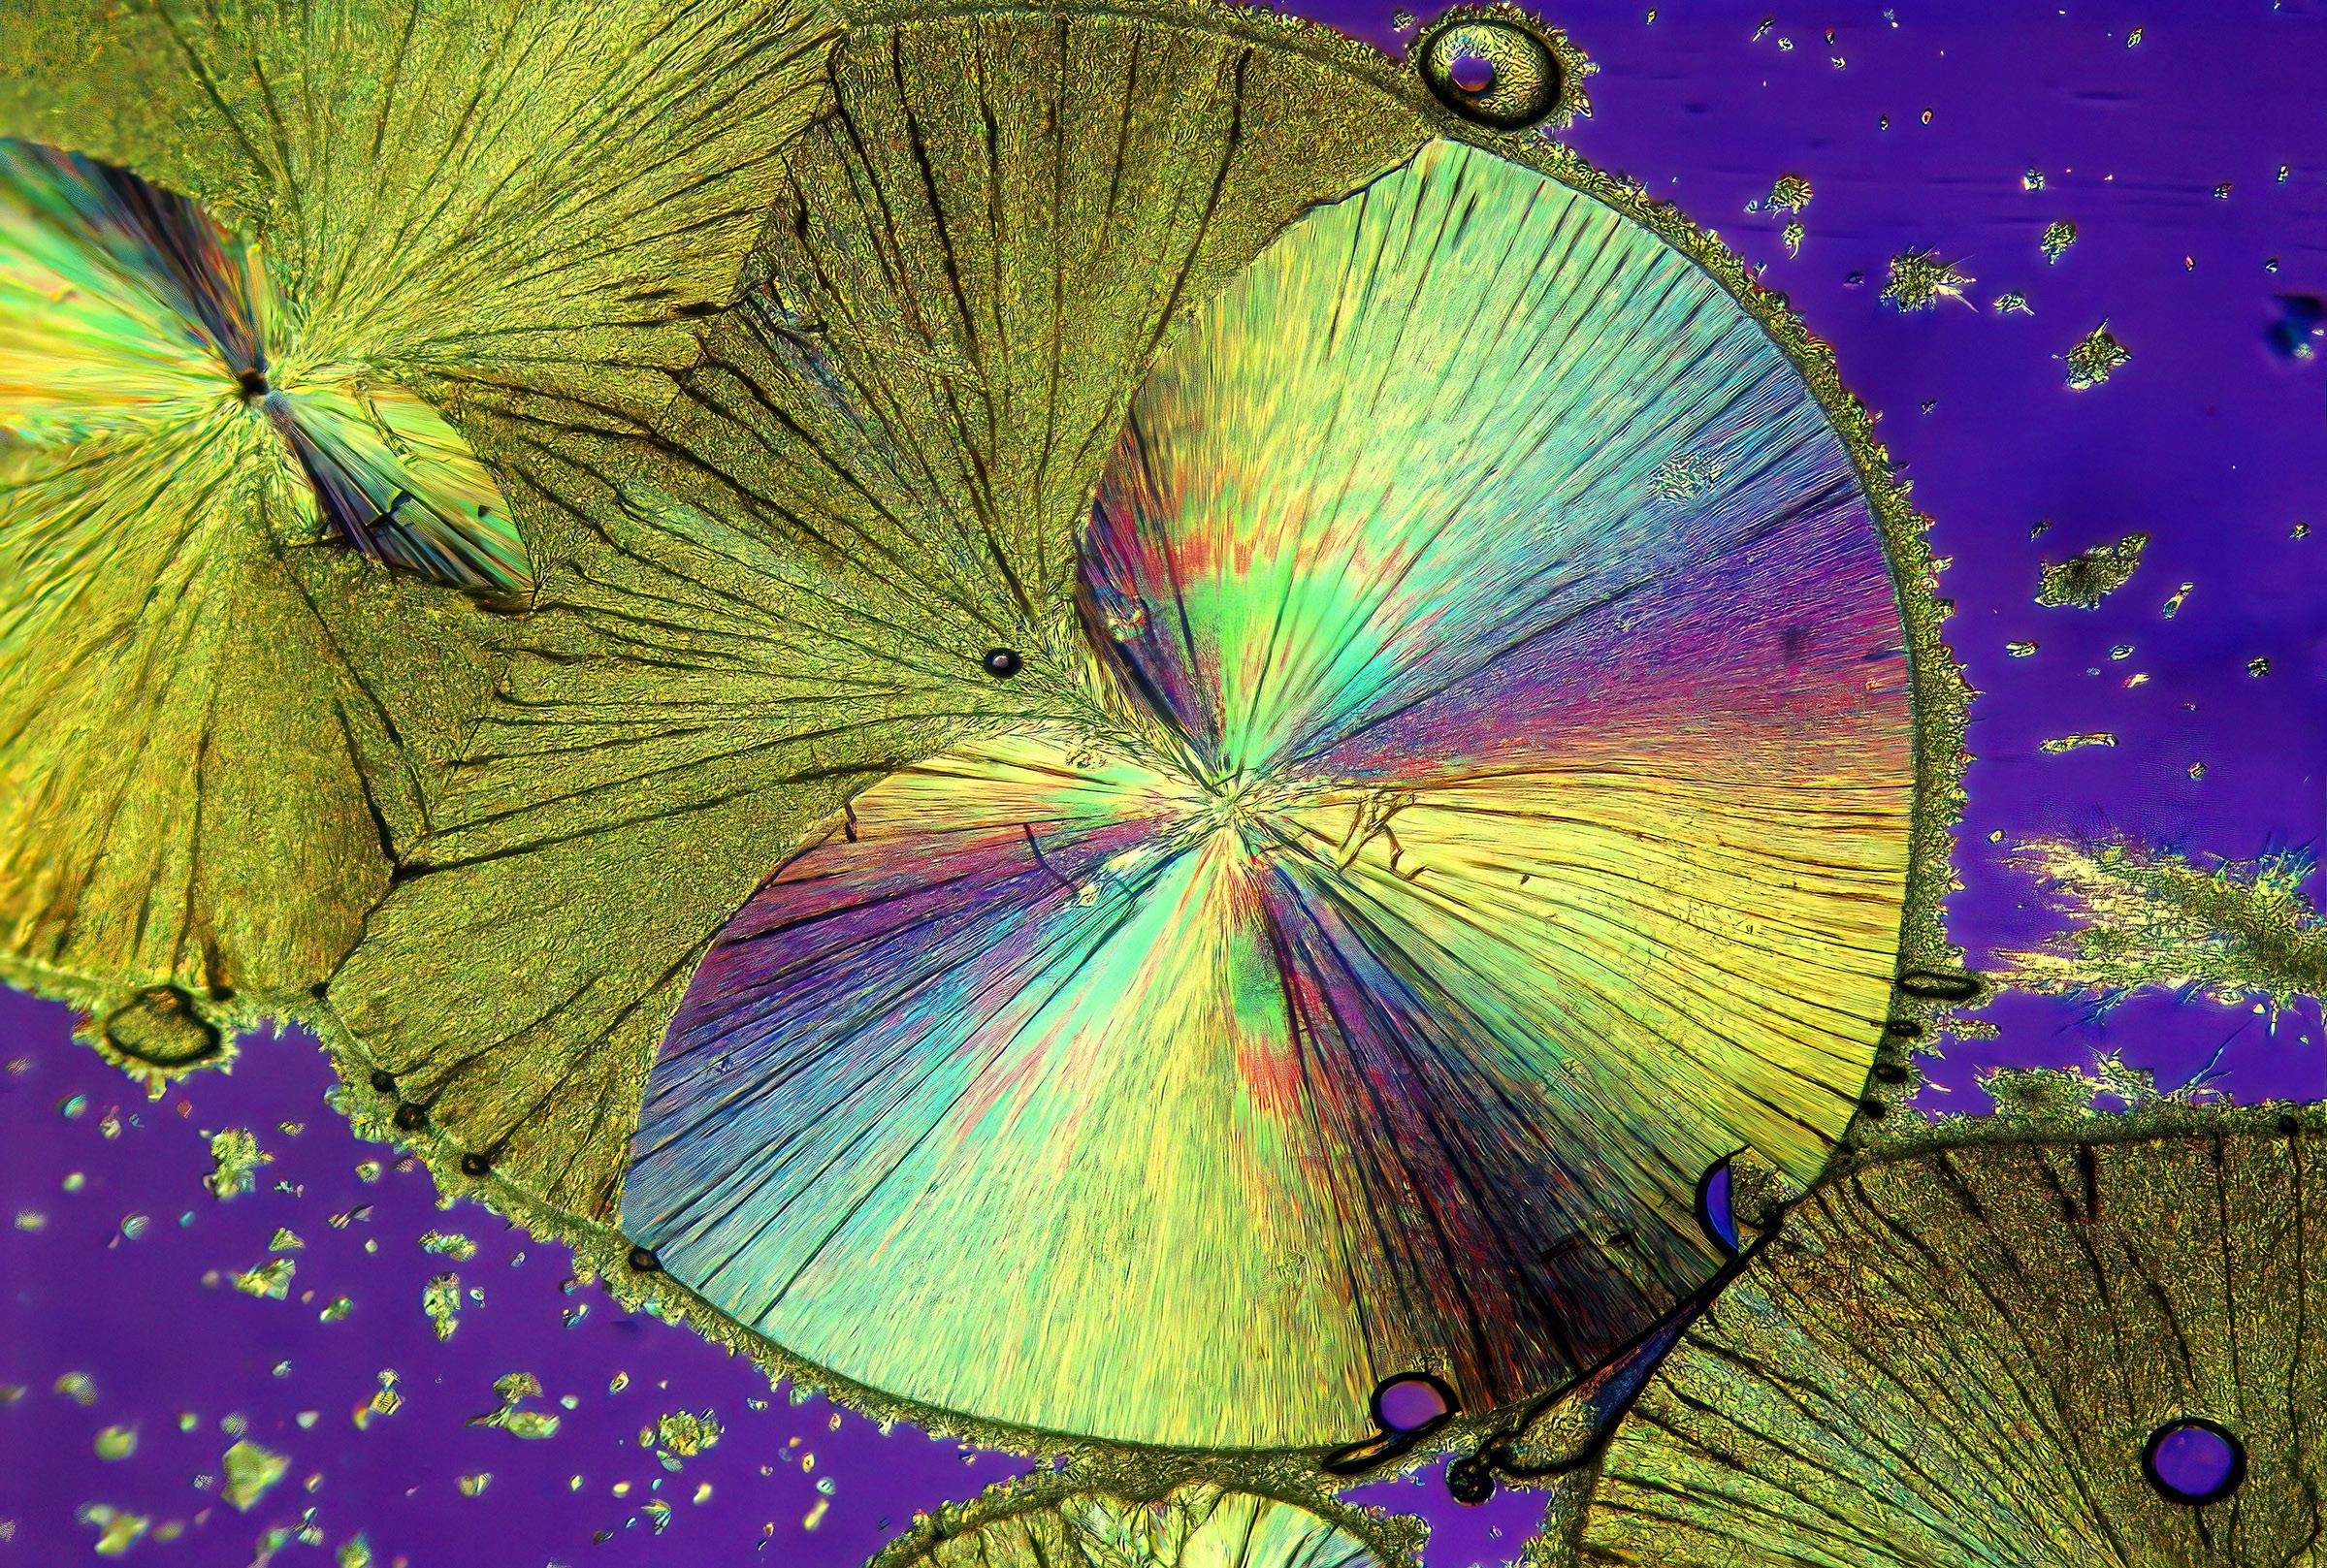
Examples of birefringent chemicals I used in this article are adipic acid, hippuric acid, epsom salts, moth balls, resorcinol, photographic fixer, and ascorbic acid (vitamin C). The picture below is a picture of ascorbic acid crystals.
There are two ways to photograph these crystals. If the crystals are large enough when they form, you can use a macro lens with extension tubes.
The more extension tubes you use, the greater the magnification. The crystals are quite small, so you will need significant magnification.
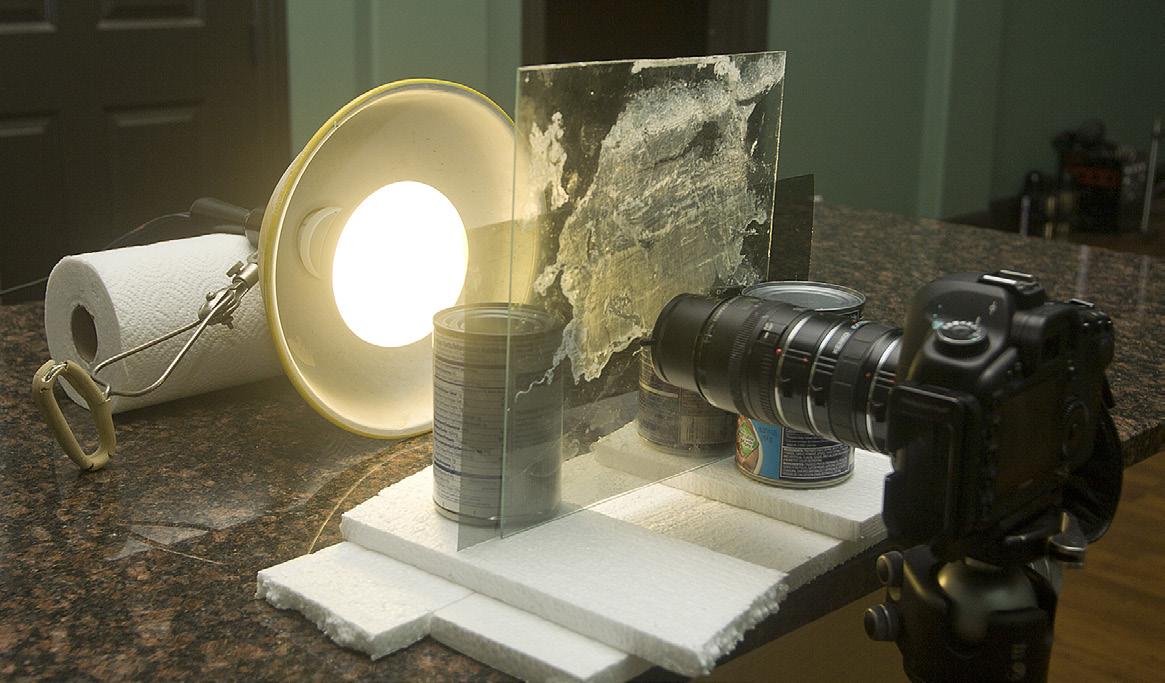
The picture at lower right shows my setup for epsom salts (I'll explain how to prepare the chemicals shortly). I smeared the chemical on a piece of glass about 12 inches square, supported the glass in a vertical position with 3 soup cans (silly, but it worked), and placed a photoflood behind the glass. The camera was on a sturdy tripod.
If you look closely you can see the sheet of polarizing material between the photoflood and the glass. I just leaned it up against the glass. On the front of the macro lens I used a screw-in polarizing filter.
For maximum depth of field, the back of the camera, i.e., the plane of the digital sensor, must be as parallel as possible to the plane of the glass. The crystal picture at the bottom right on the next page is what I got with this setup.
The second way to photograph crystals is with a microscope. I bought an inexpensive trinocular model from AmScope for $315. You have to
Adipic acid 60X
have a trinocular scope because that gives you two oculars to see and compose the crystals and one ocular for your camera.
The big advantage of using a microscope is magnification. As I said, the crystals are quite small. My standard magnification is 60X. The microscope has a built-in light-
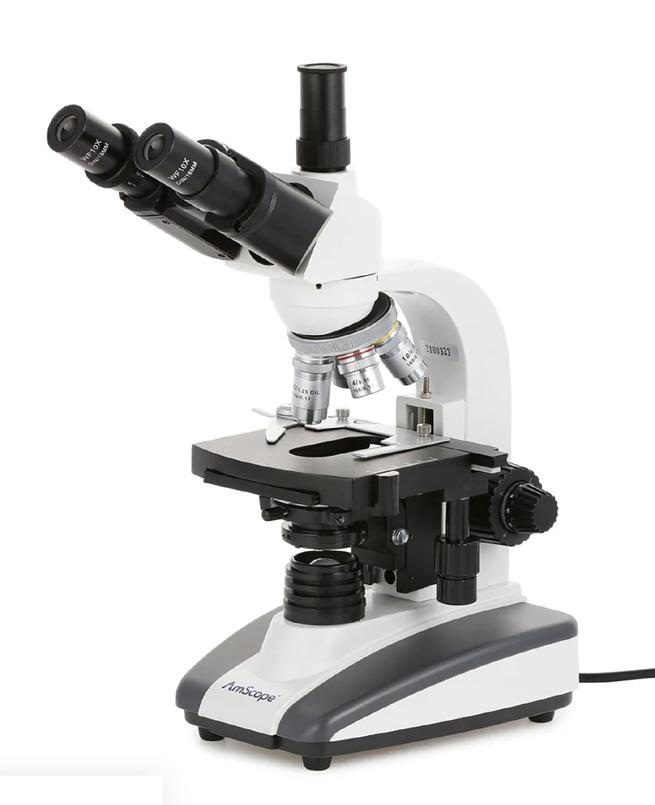
source for backlighting the crystals, and it also comes with several objectives (lenses) for more magification choices.
When you buy the scope, indicate to the seller what camera body you have so they can include the specific adapter needed to connect the camera to the third ocular.

Hippuric acid 60X
Chemical preparation
Products like epsom salts and moth balls are available in grocery stores. Photographic fixer, the type used to develop black and white prints in the darkroom, is still available through outlets like B&H and Adorama.
The other chemicals I use are available through various chemical supply companies you can find online. Two examples are TCI American and Fisher Scientific. You can also find suppliers on eBay. You only need very small quantities. Each of these chemicals should cost just a few dollars.
You will also need to buy a box of glass microscope slides. Edmund Scientific and Amazon are good sources for these.
The chemicals come in powder form. To prepare the microscope speciments, dissolve a small amount of the chemical in warm water. When fully dissolved, take an eye dropper and apply the chemical-imbued water onto a glass microscope slide. Let the water evaporate completely for a few hours, and now the crystals are ready to be seen and photographed.
Place the slide in the microscope, turn on the built-in lightsource, adjust the white balance to match the light, put the polarizers in place, and choose the best objective for the composition you want.
Because the magnification is high, there can be absolutely no movement in the camera when the picture is taken. Use the self-timer in the camera on the 10 seconds option.
By rotating either of the polarizers, the colors in the crystals change dramatically. It's fun to watch. The controls on the microscope allow you to move the glass slide so you can look for various compositions.
Exposure is controlled by the shutter speed and the ISO. You can't control the aperture because you removed the camera lens. Choose manual exposure mode. To fit the camera to the microscope's ocular, attach the adapter you purchased as part of the microscope package to the camera body, and that inserts into the appropriate tube in the trinocular head. The camera will be positioned such that the plane of the digital sensor is exactly parallel with the microscope slide. This gives you complete depth of field even without a lens aperture involved. §
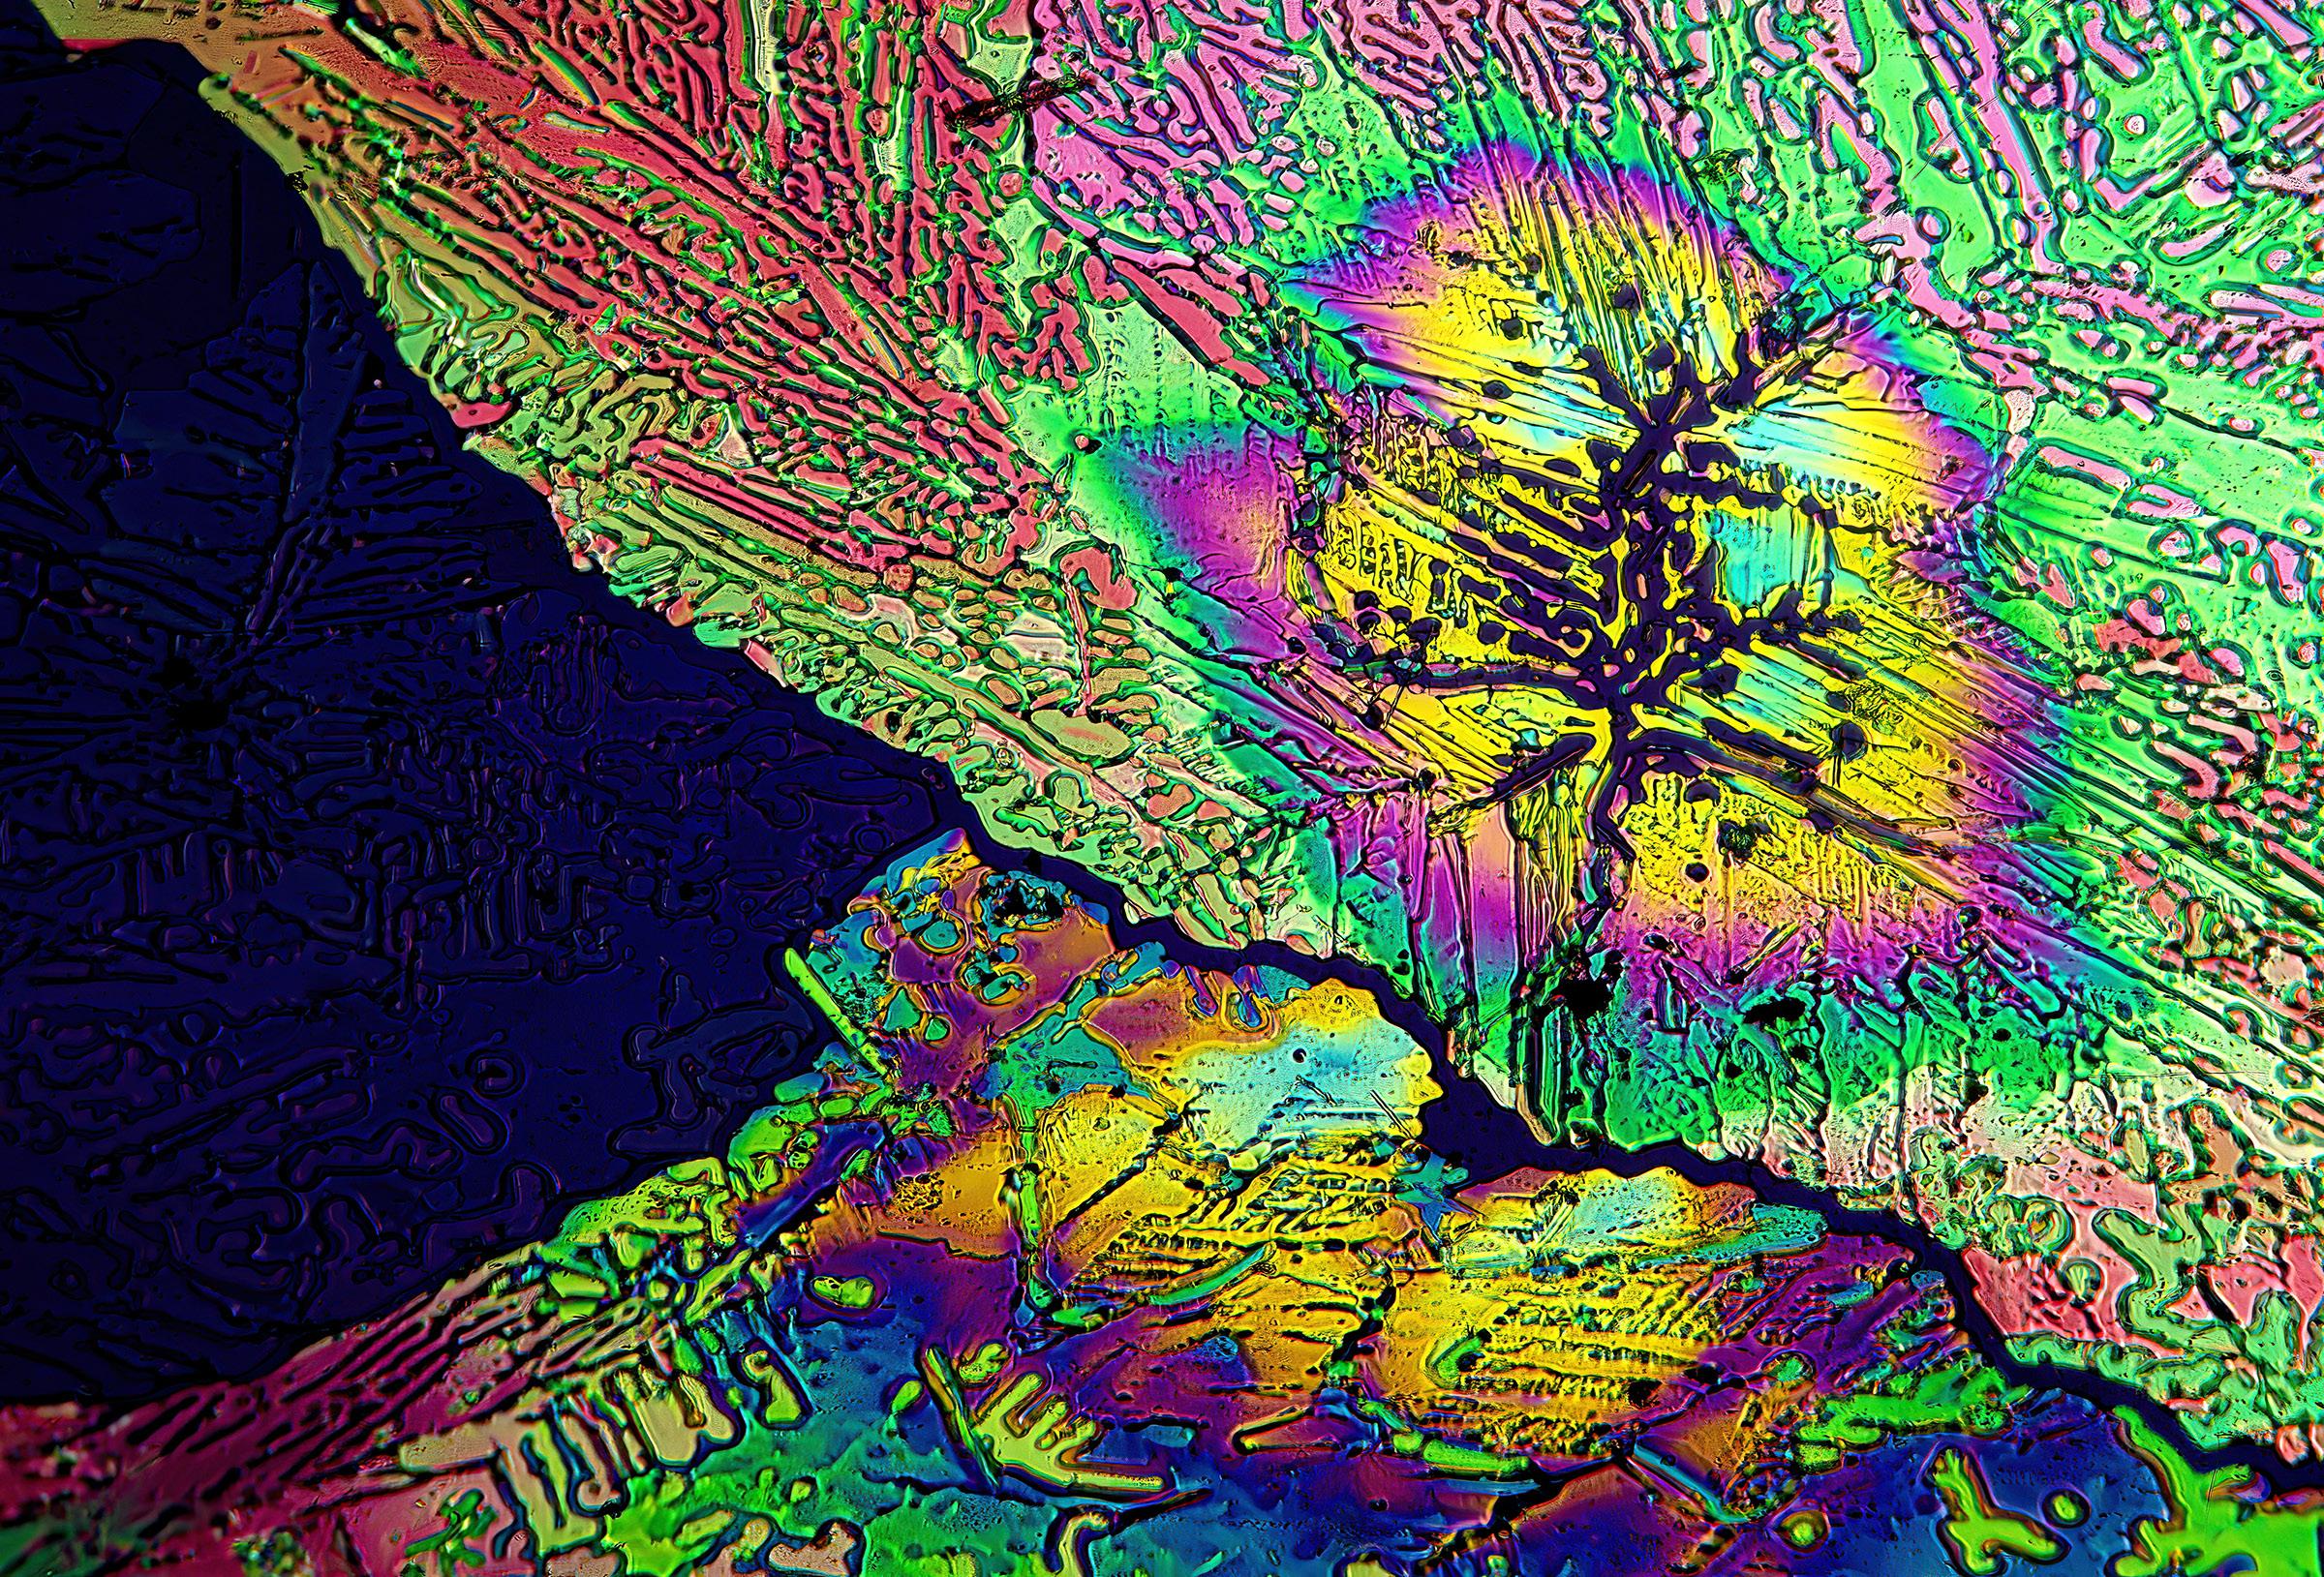
Moth balls 60X
Adipic acid 60X
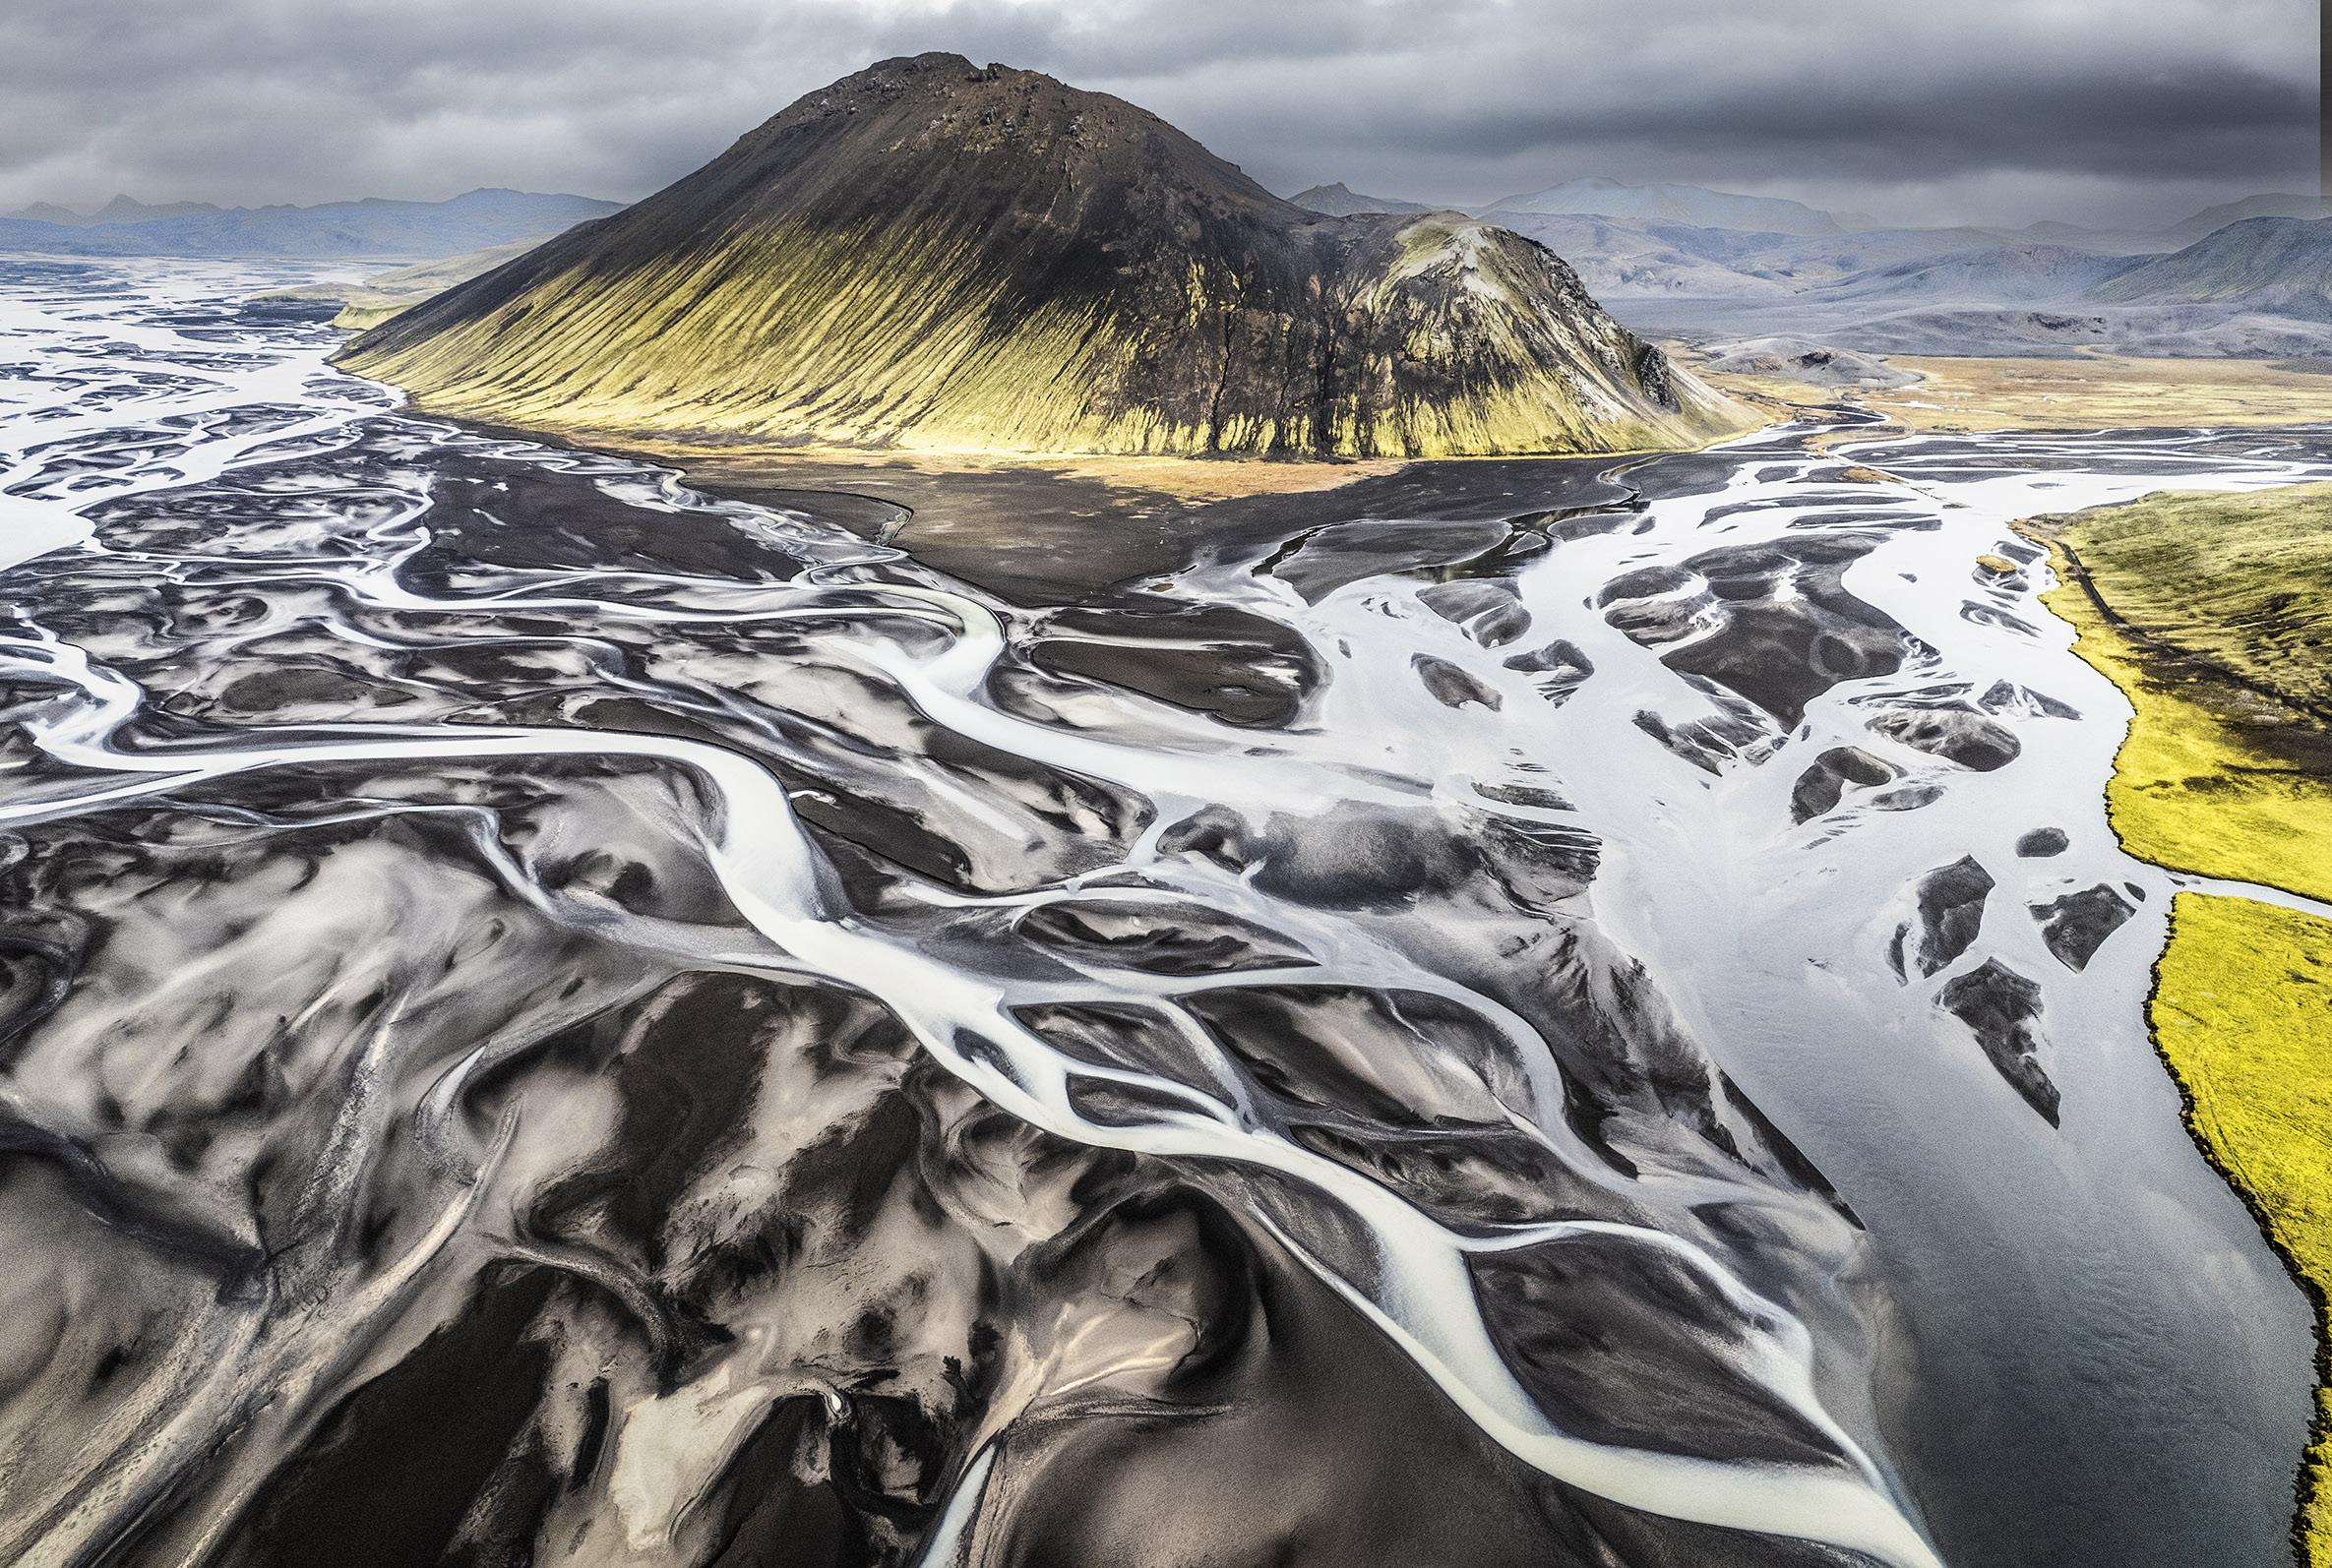
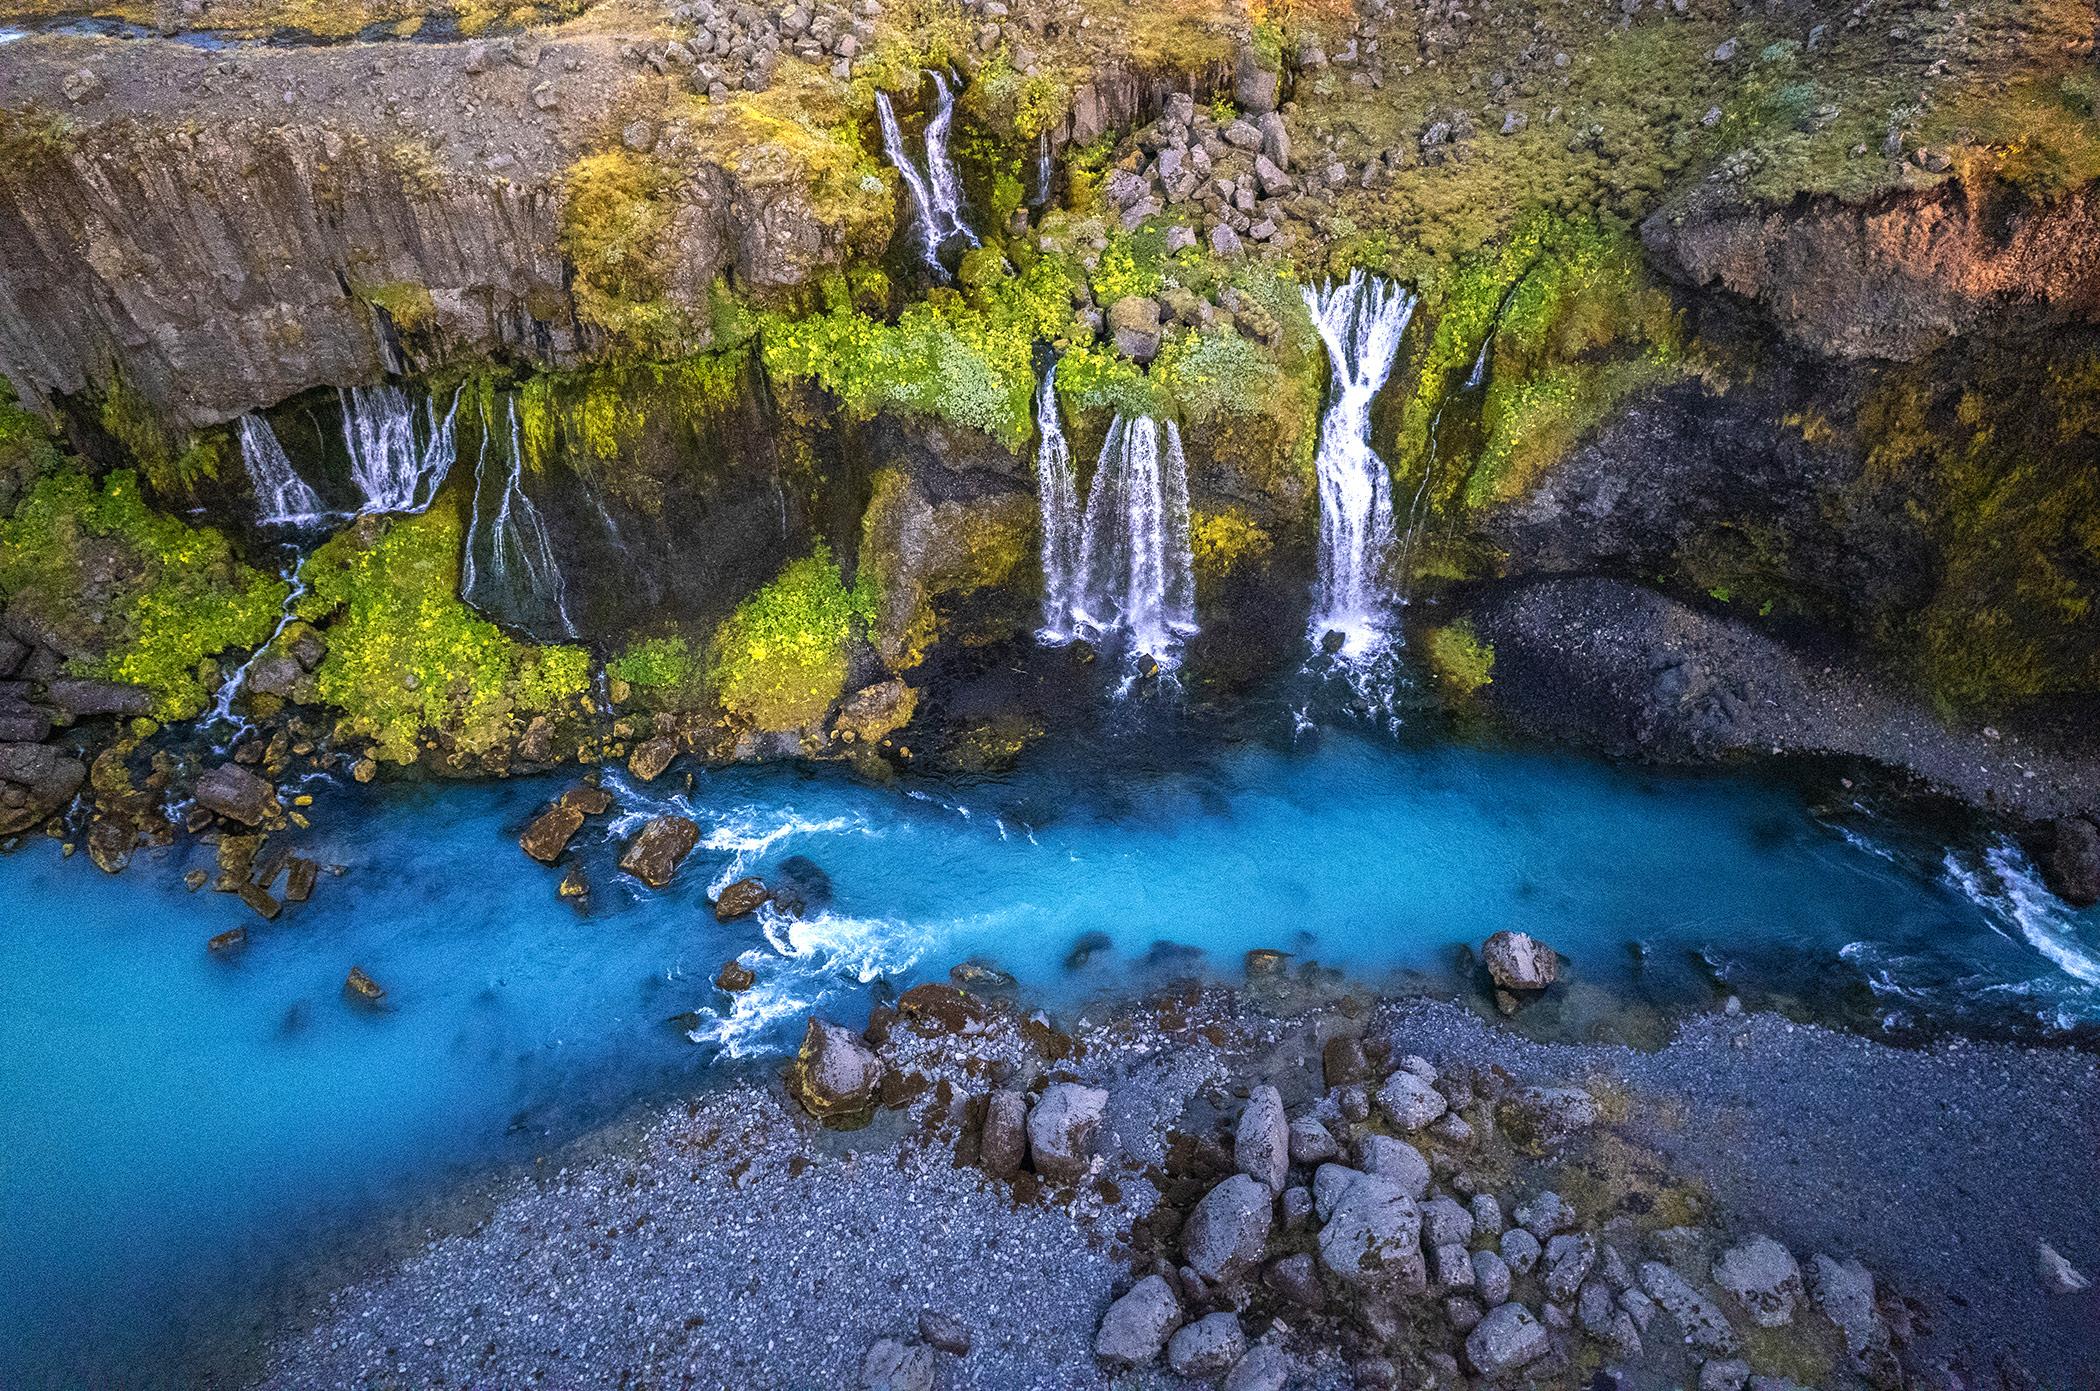
Iceland Drone Tour
August 24 - September 2, 2026
EXPOSING FOR SILHOUETTES
When we all shot film, exposure was the most insecure aspect of photography. Very contrasty situations like backlighting, rim lighting, sidelighting, and transillumination gave photographers headaches. Usually bracketing was the solution because we couldn't see how the exposures turned out until the film was developed.
Cameras are programmed to understand and interpret middle tones, which we call 'middle gray'. When areas of the composition are very bright and others are very dark, incamera meters try to average them together to come up with some kind of compromise exposure. That process still goes on in dSLR
and mirrorless cameras, but now we can see exactly what we're getting in the moment. There's no more guesswork.
When we are faced with a silhouetted subject, the first exposure is the camera's educated guess. It will be based on what percentage of the frame is dark versus how much is light, and how close to the center of the frame these tones are because meters take most of their information from the center of the frame.
Since we can instantly see the results, it's a simple matter to lighten or darken the image and then try again. It's so easy today.
As a result, the second or third attempt will be what you want. A perfect exposure. §

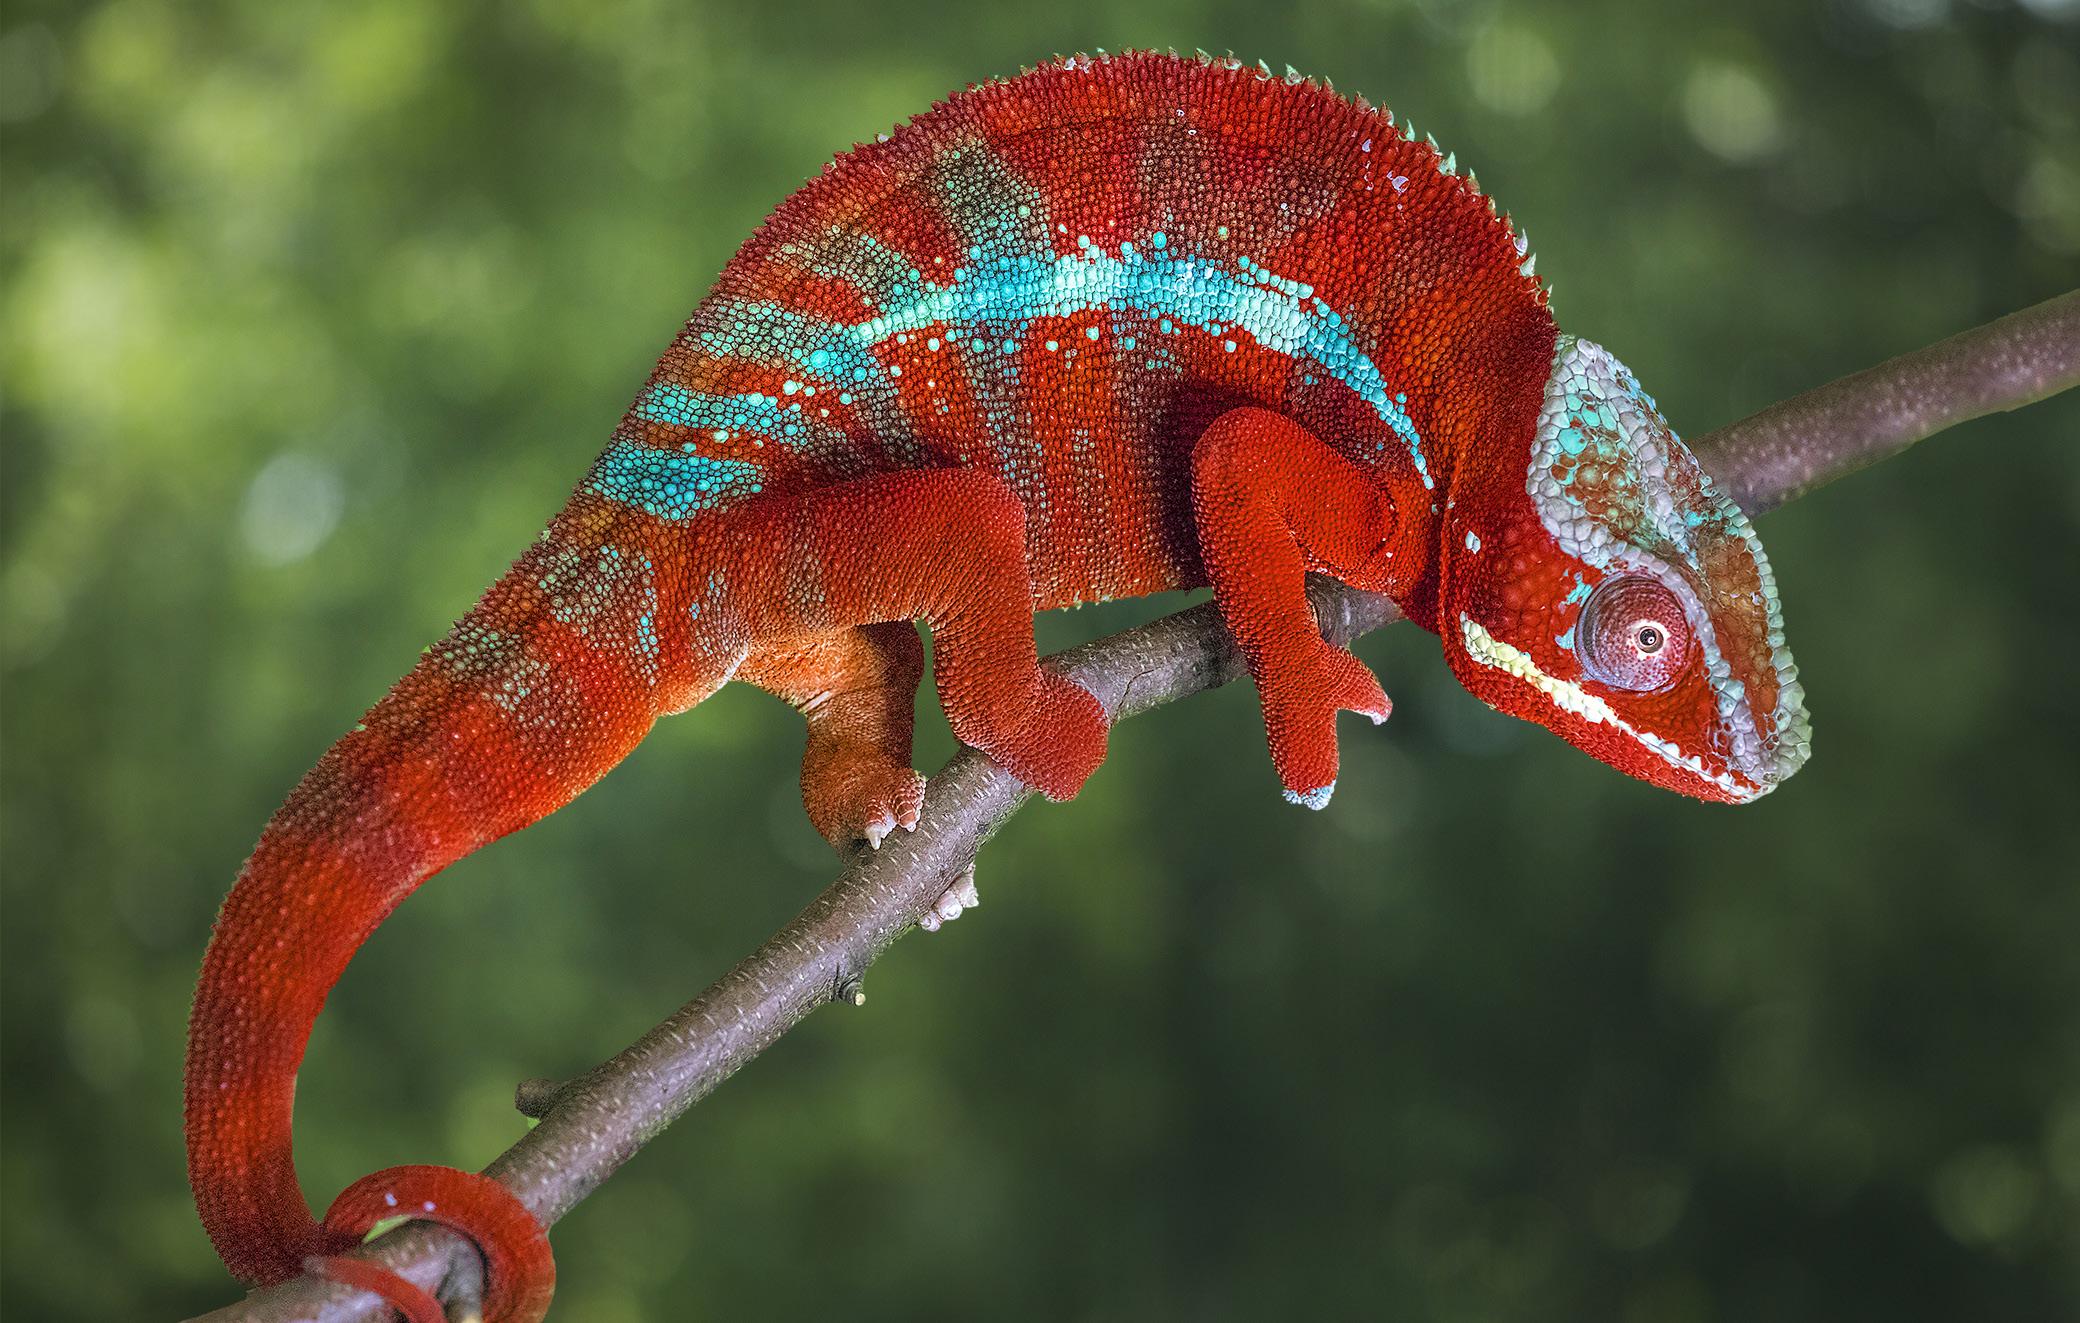
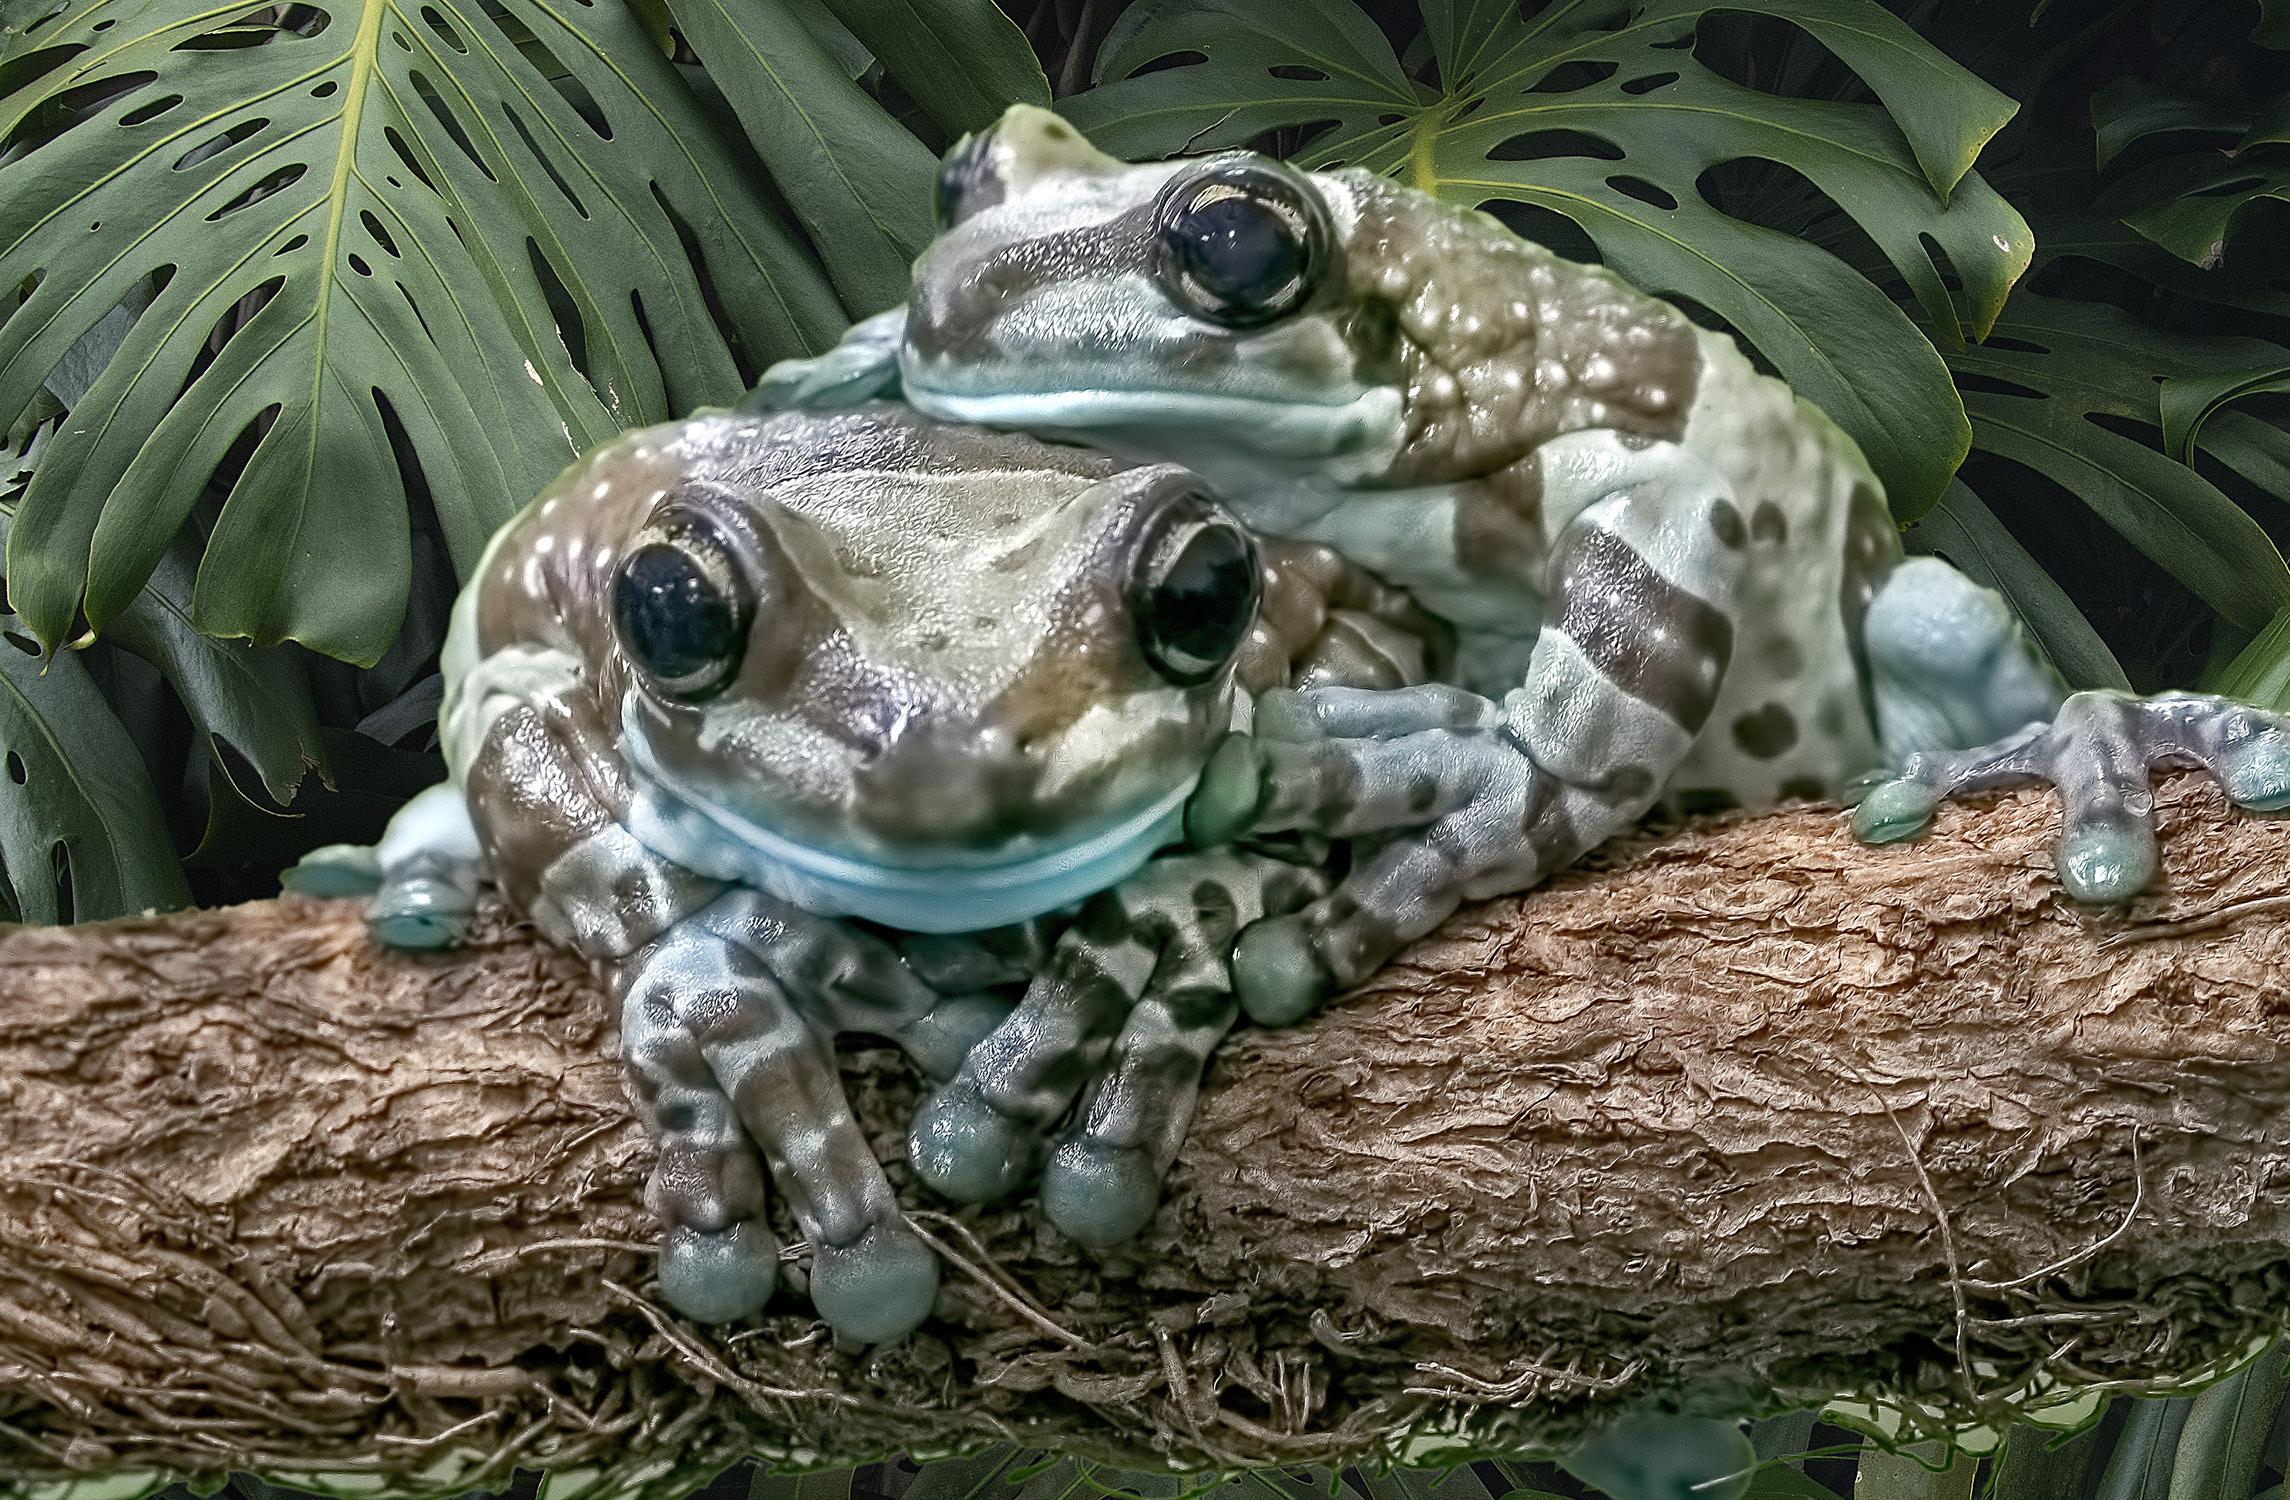
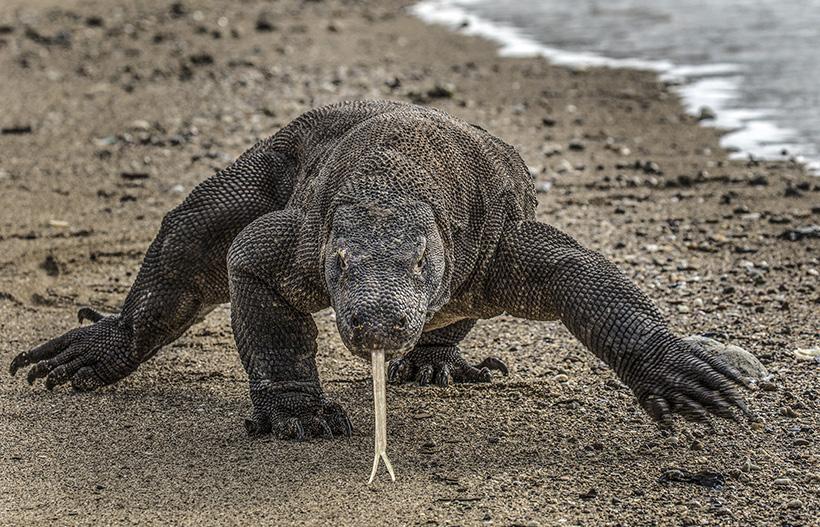
Frog and Reptile
Workshop
June 13 - 14, 2026
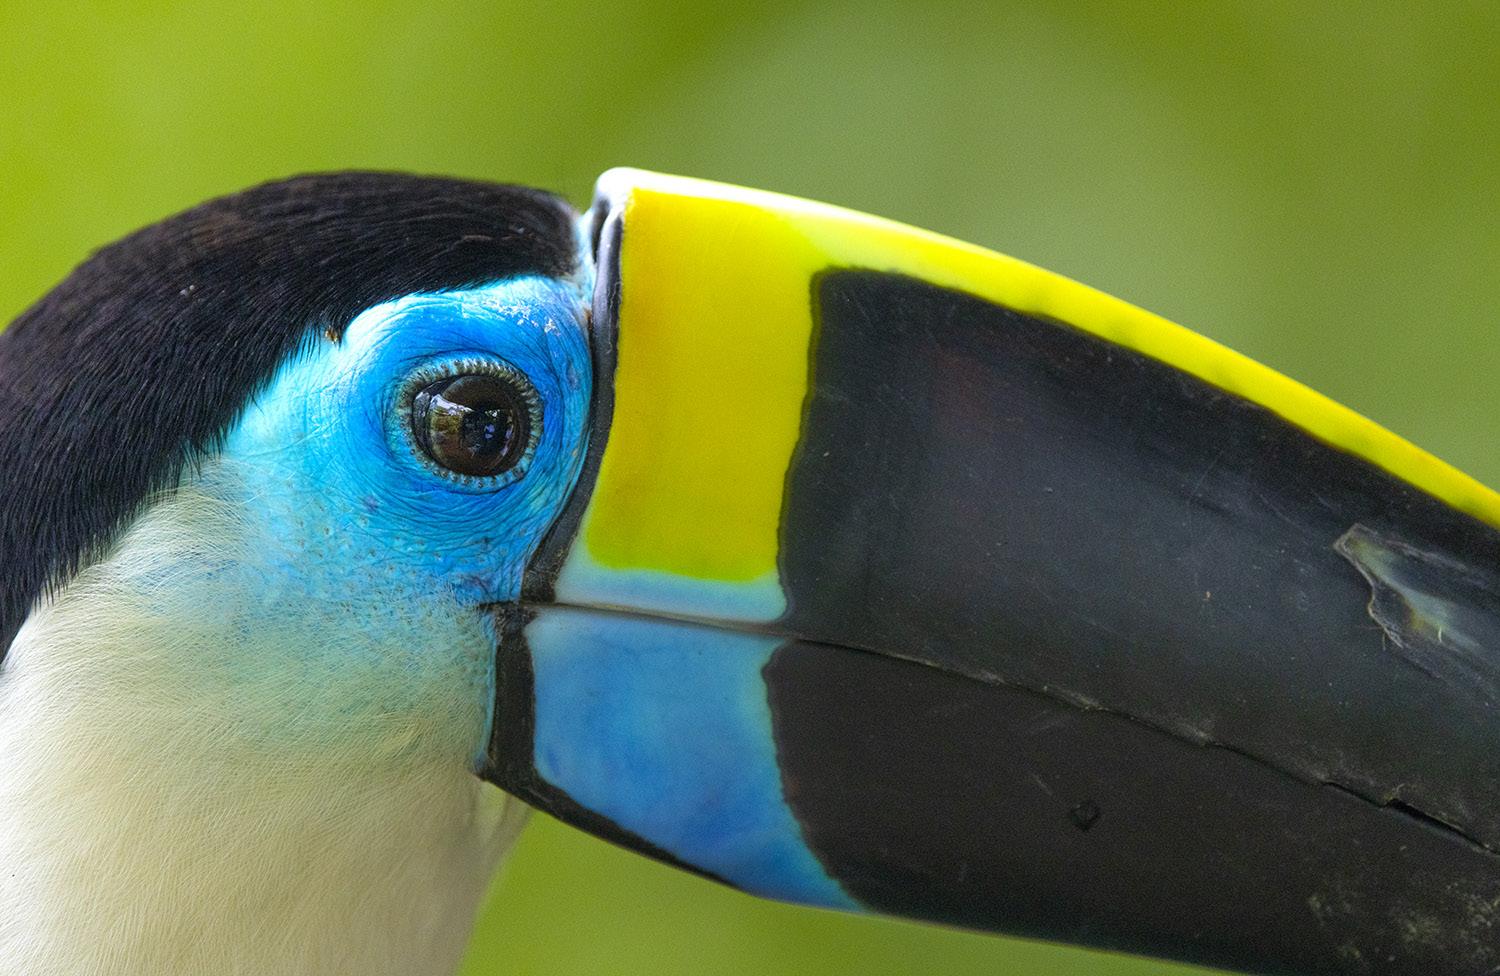
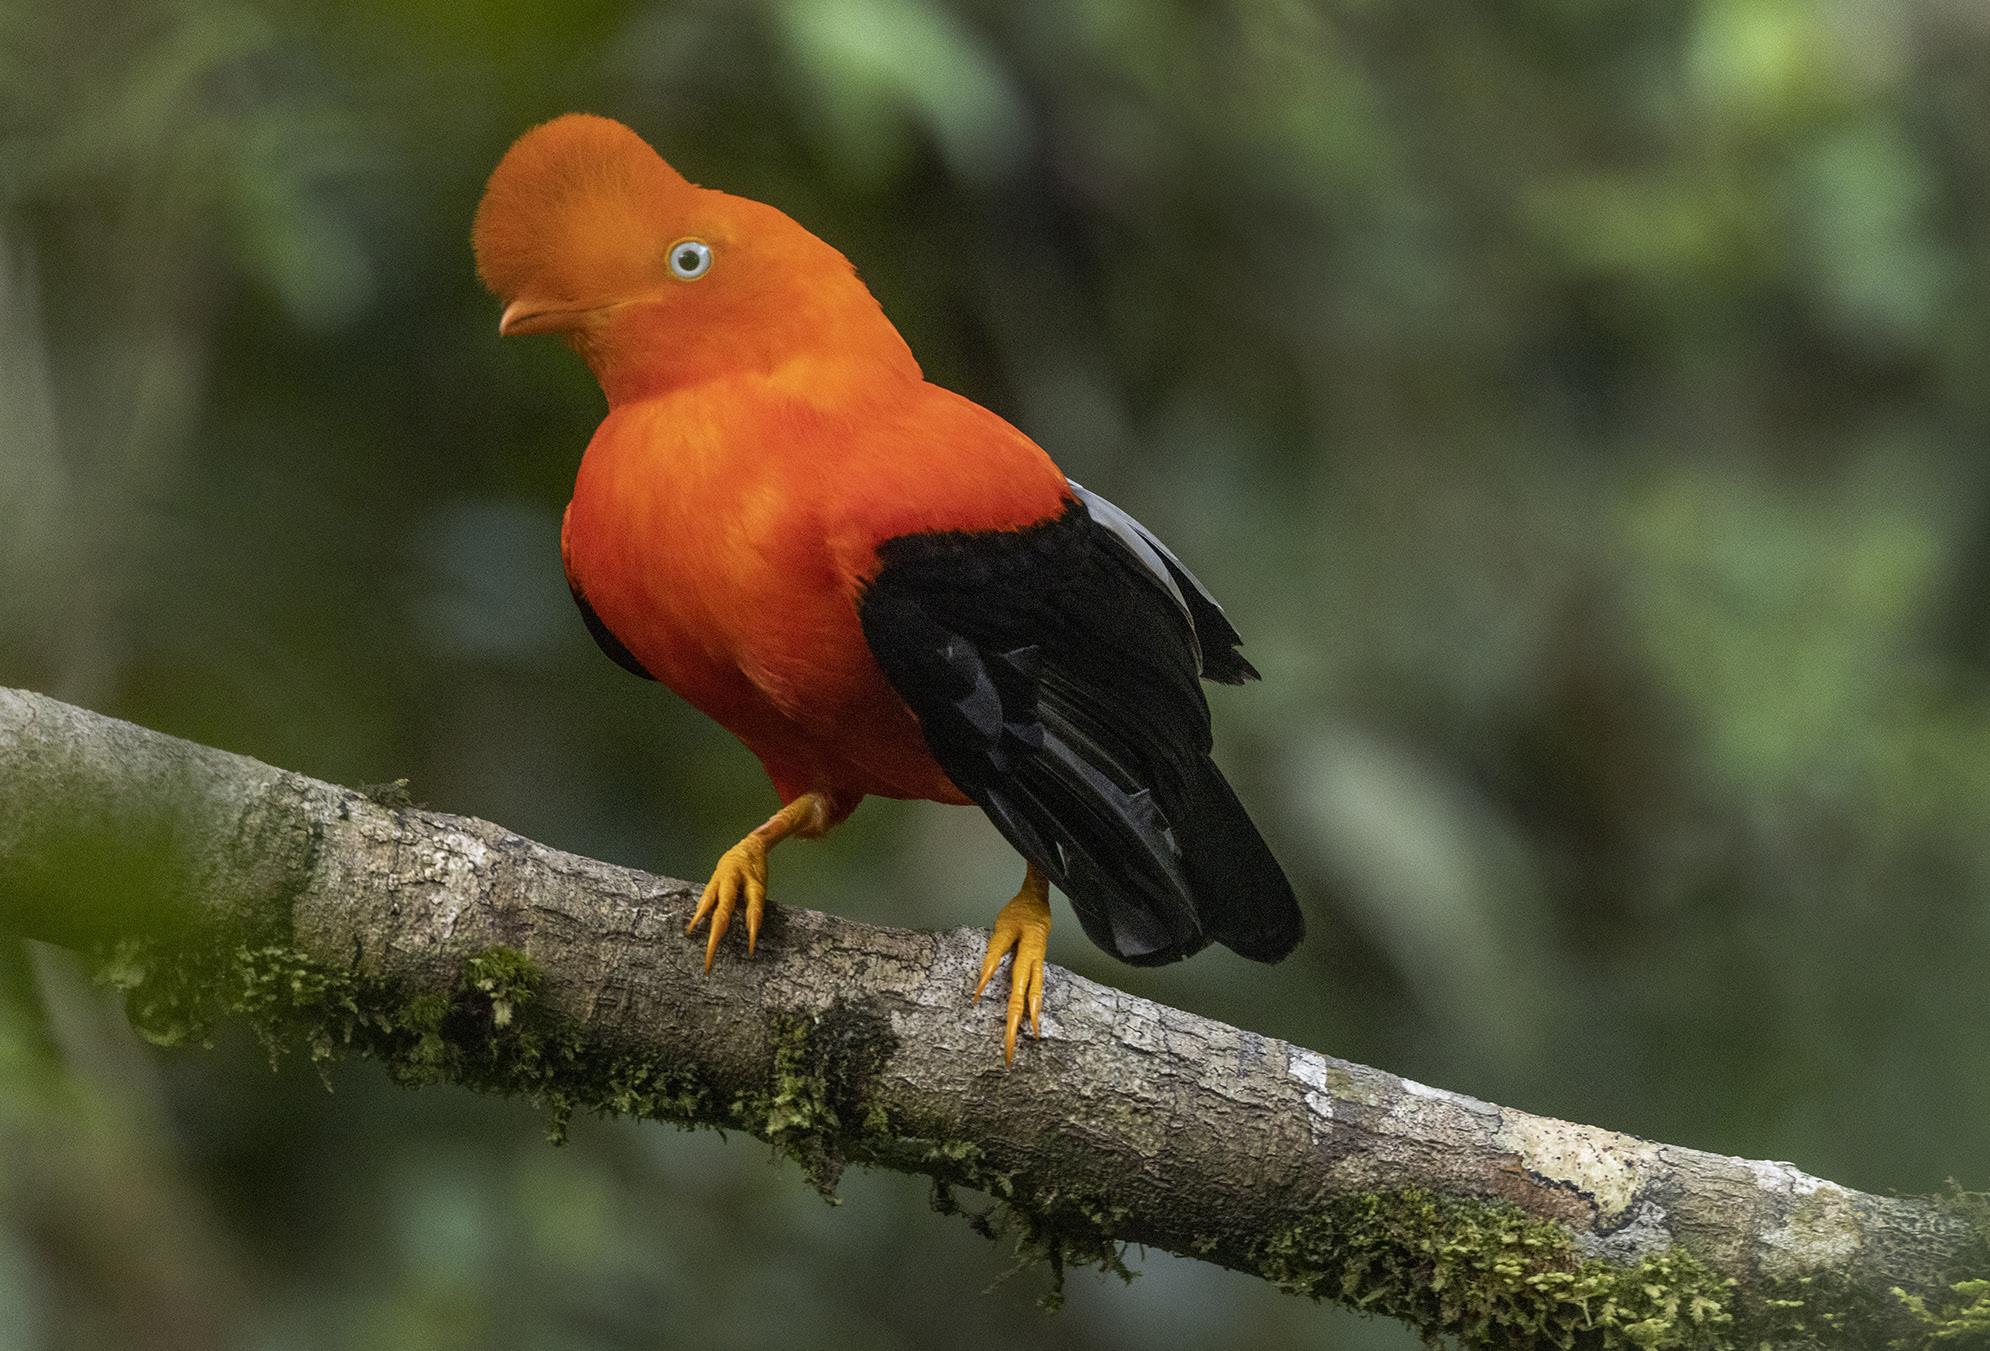
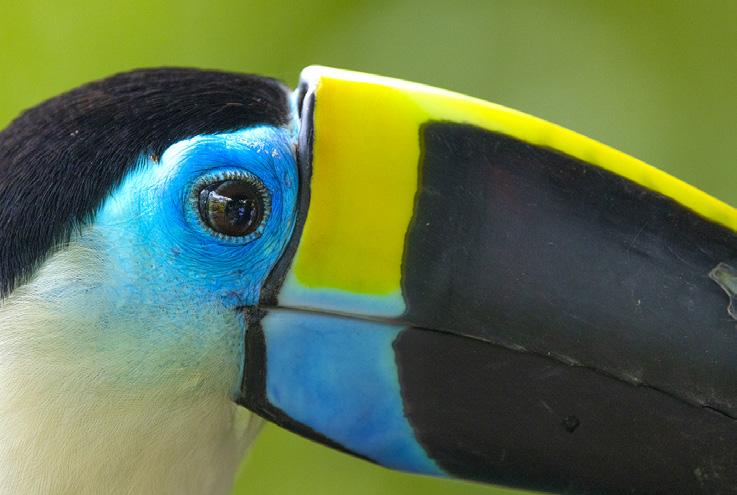
Exotic Birds of Colombia
Sept. 23 to Oct. 3, 2026
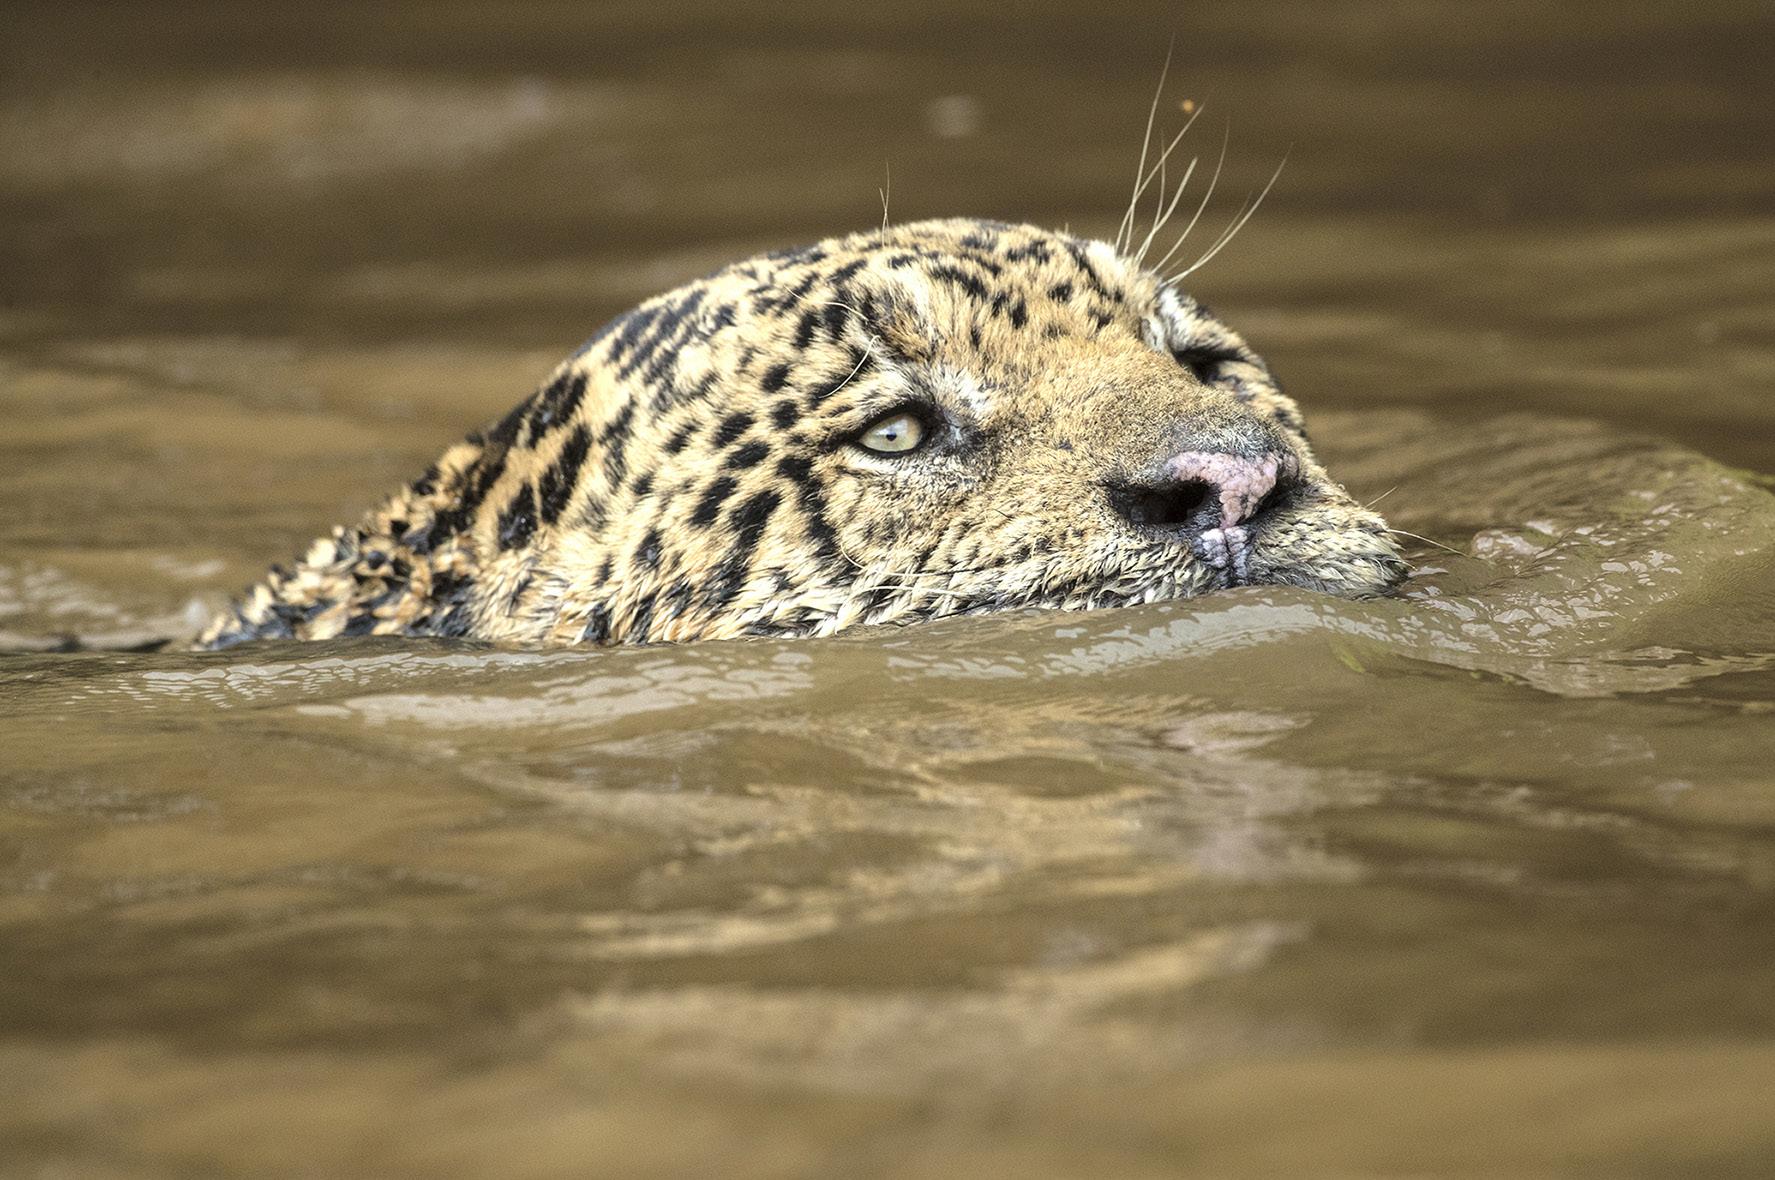
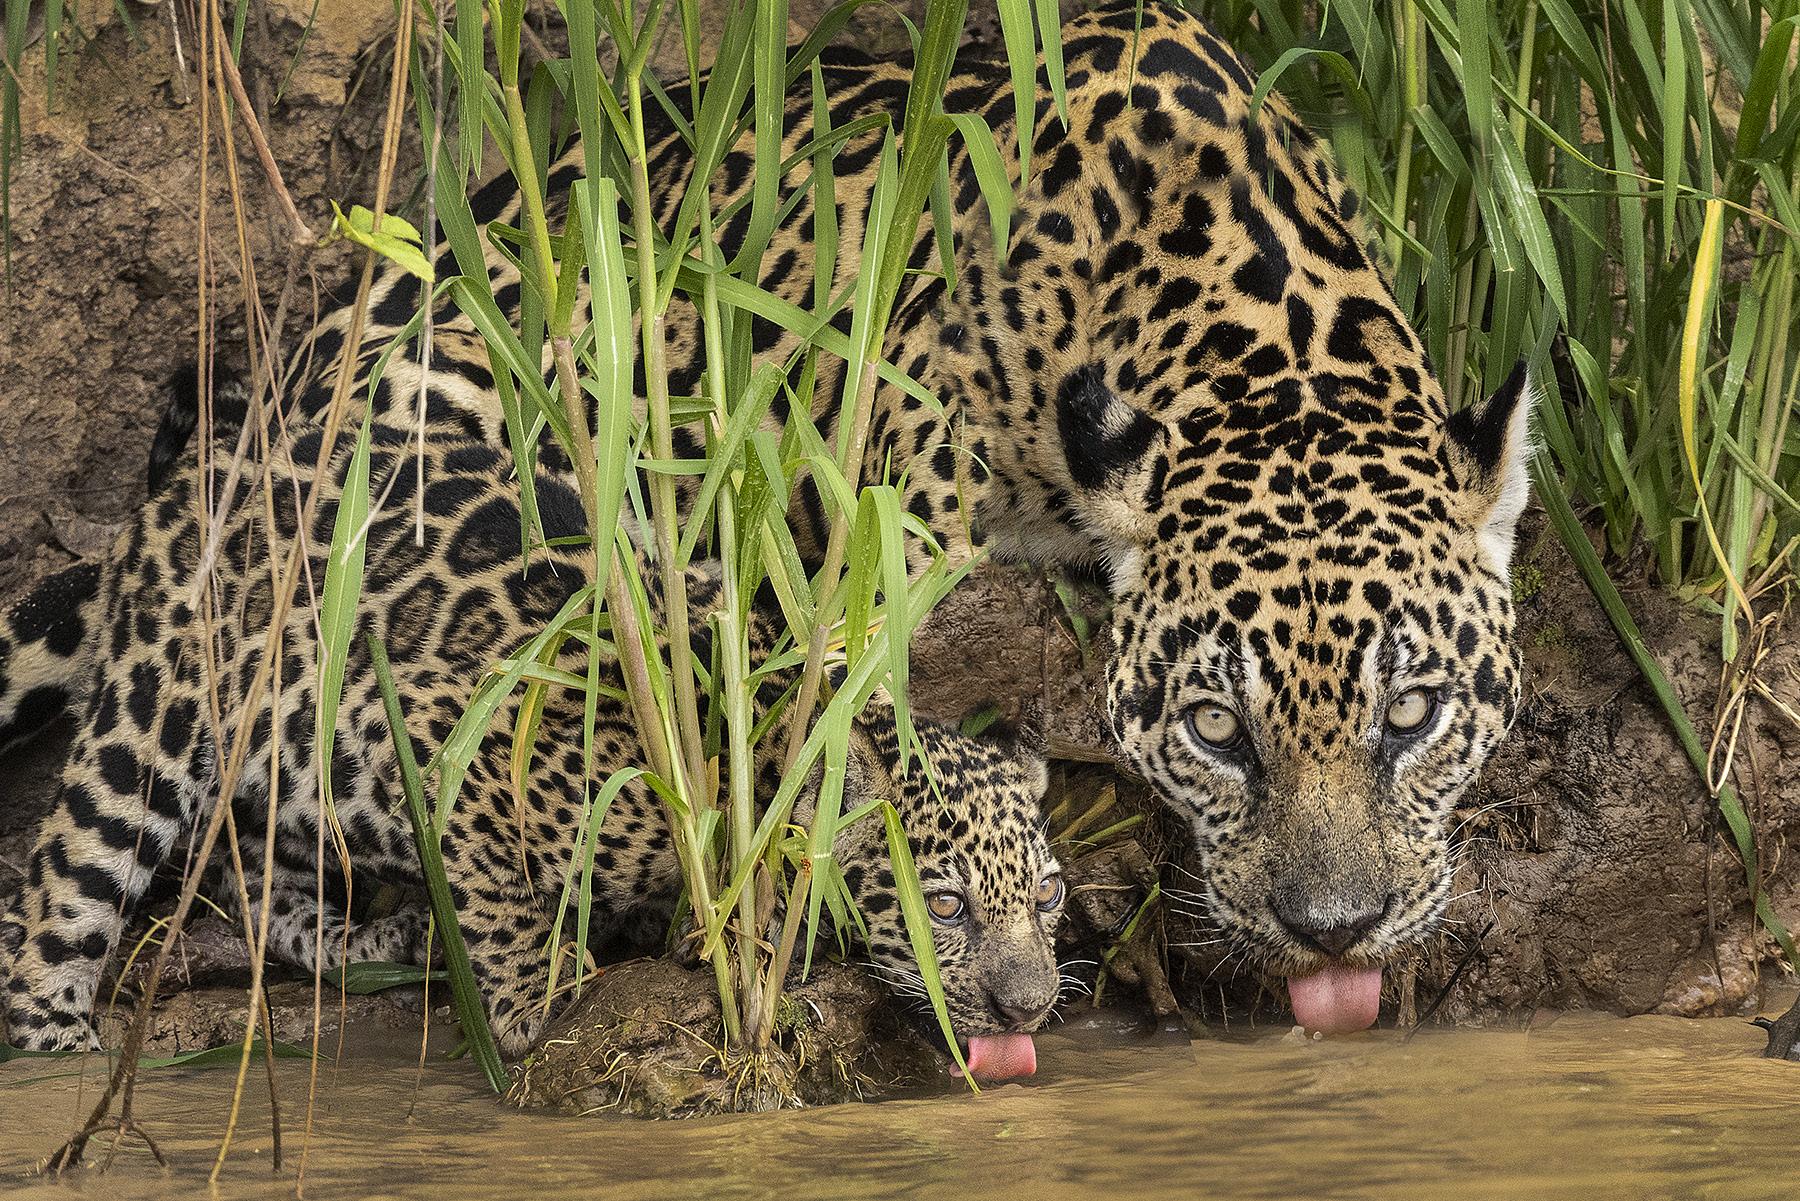
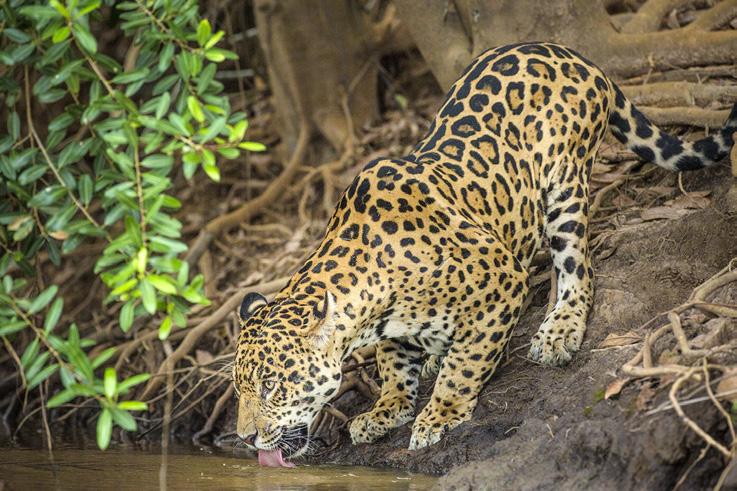
The Pantanal, Brazil
Nov. 23 - Dec. 2, 2026
Photography Quiz
1. When you photogaph snow, the camera's meter will typically:
a. Overexpose the pictures
b. Underexpose the pictures
c. Cause the histogram to spike on the right
d. Cause the histogram to spike on the left
2. Film speed numbers in ASA and ISO are identical.
a. True
b. False
3. When an area of a photo is blown out, i.e., it is solid white, you can recover the lost detail by using the burn tool in Photoshop.
a. True
b. False
4. When a neutral density filter is used, there is typically a slight blue color introduced to the images.
a. True
b. False
5. You can freeze the wings of a hummingbird with a shutter speed of 1/3200.
a. True
b. False
6. If you are shooting the Milky Way with a 14mm wide angle lens, the longest shutter speed you can use before star trails appear is:
a. 5 seconds
b. 15 seconds
c. 30 seconds
d. 60 seconds
7. What is the advantage of a large format camera over a 35mm camera?
a. The large format camera is inherently sharper
b. The large format image is enlarged less times to fill the same area
c. The large format camera has more depth of field
d. The large format camera is simpler to use.
8. A ring flash provides diffused light on a macro subject and it simulates light from a cloud cover.
a. True
b. False
9. In black and white photography, which two color filters are used to darken the sky?
a. Red and yellow
b. Green and blue
c. Blue and red
d. ND and green
10. Which type of lighting increases texture?
a. Window light
b Backlighting
c. Rim lighting
d. Sidelighting
Answers on page 50
UPCOMING PHOTO WORKSHOPS
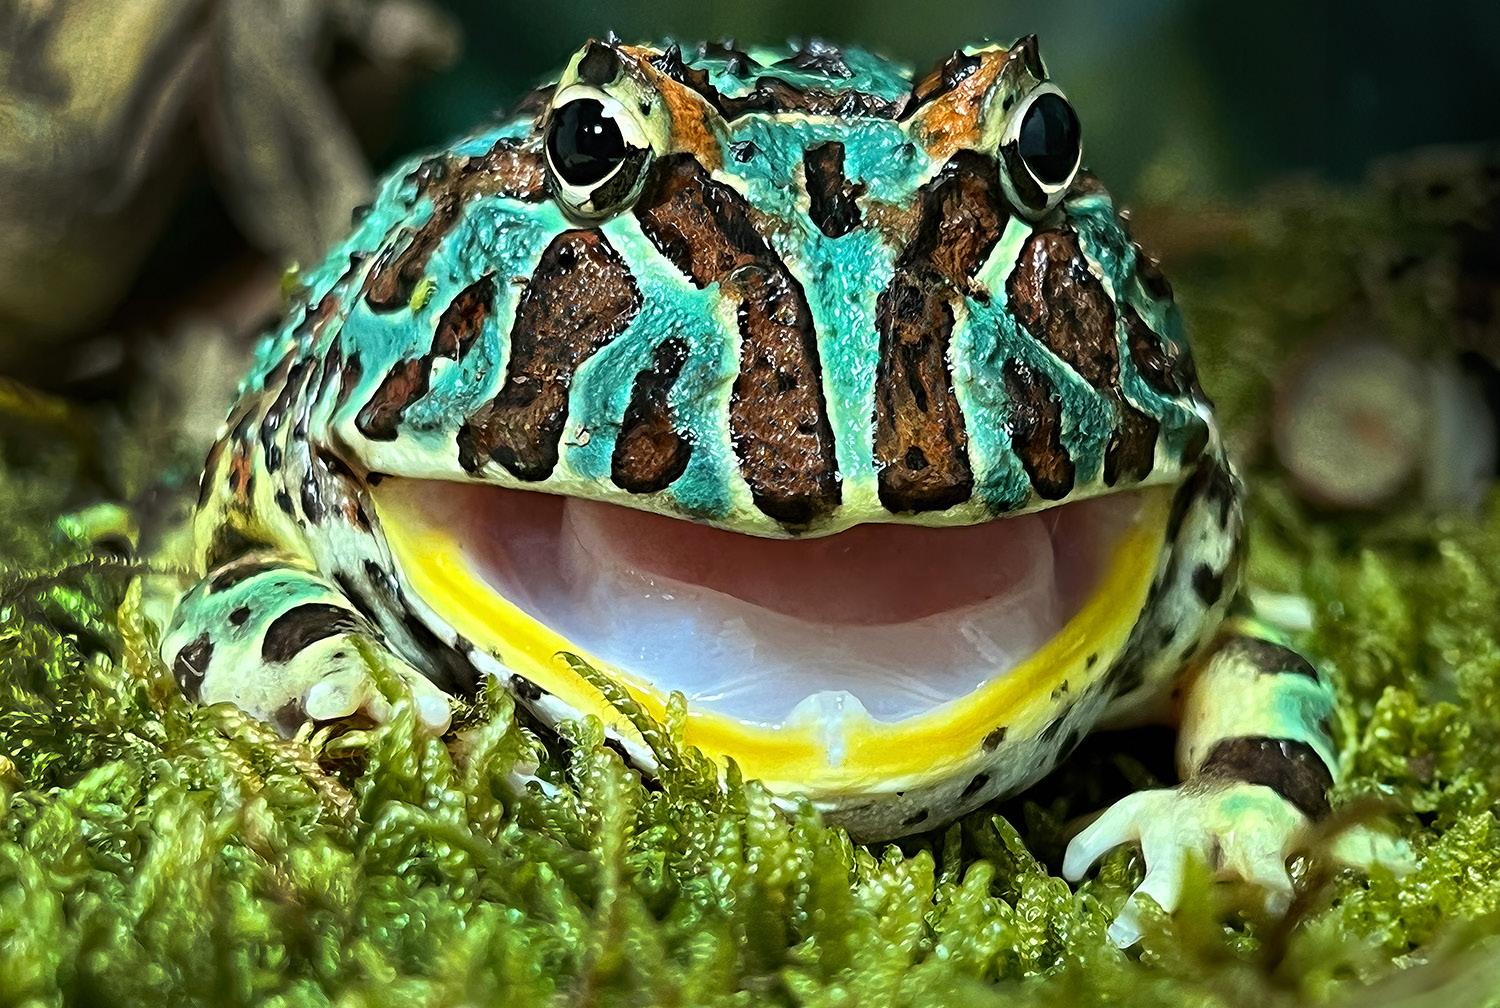
FROG & REPTILE WORKSHOP in Kansas City
This is an exciting macro workshop in which you will be able to photograph about 40 species of colorful dart frogs and exotic reptiles. Held in a hotel conference room, Jim sets up natural backgrounds for outstanding photos. The photo at left shows a Jackson chameleon with the background replaced in Photoshop.
June 13 - 14, 2026
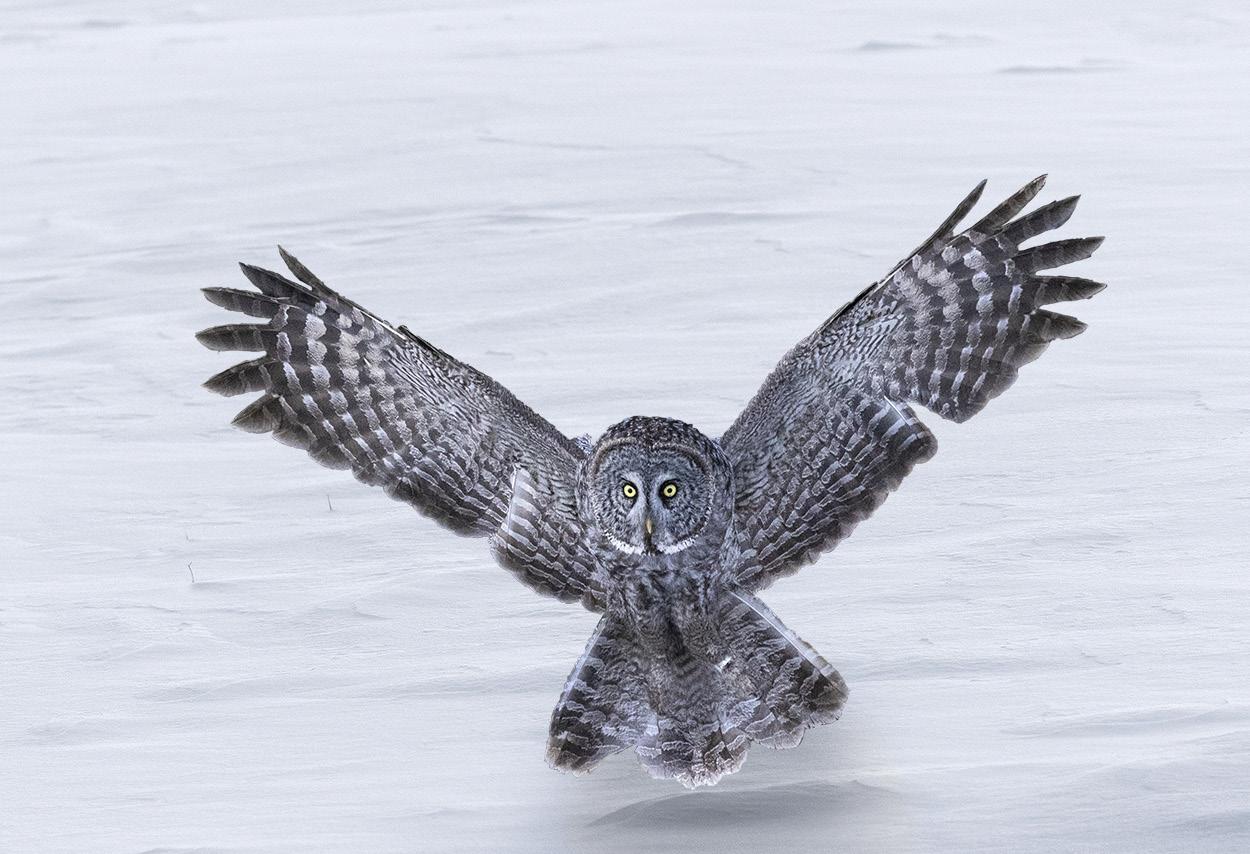
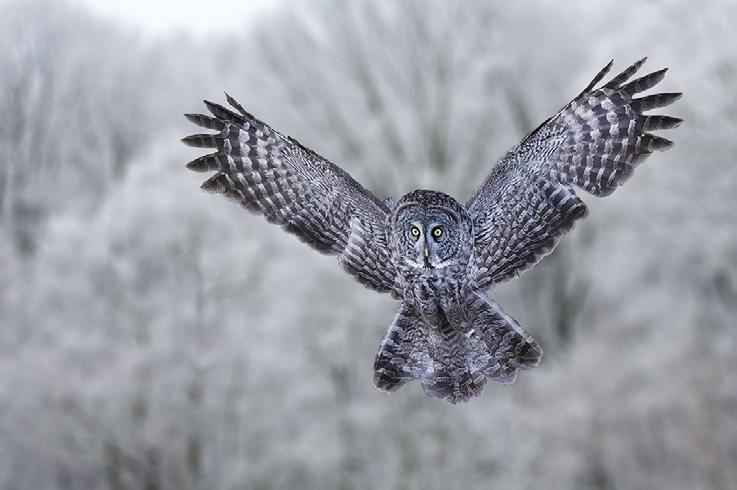
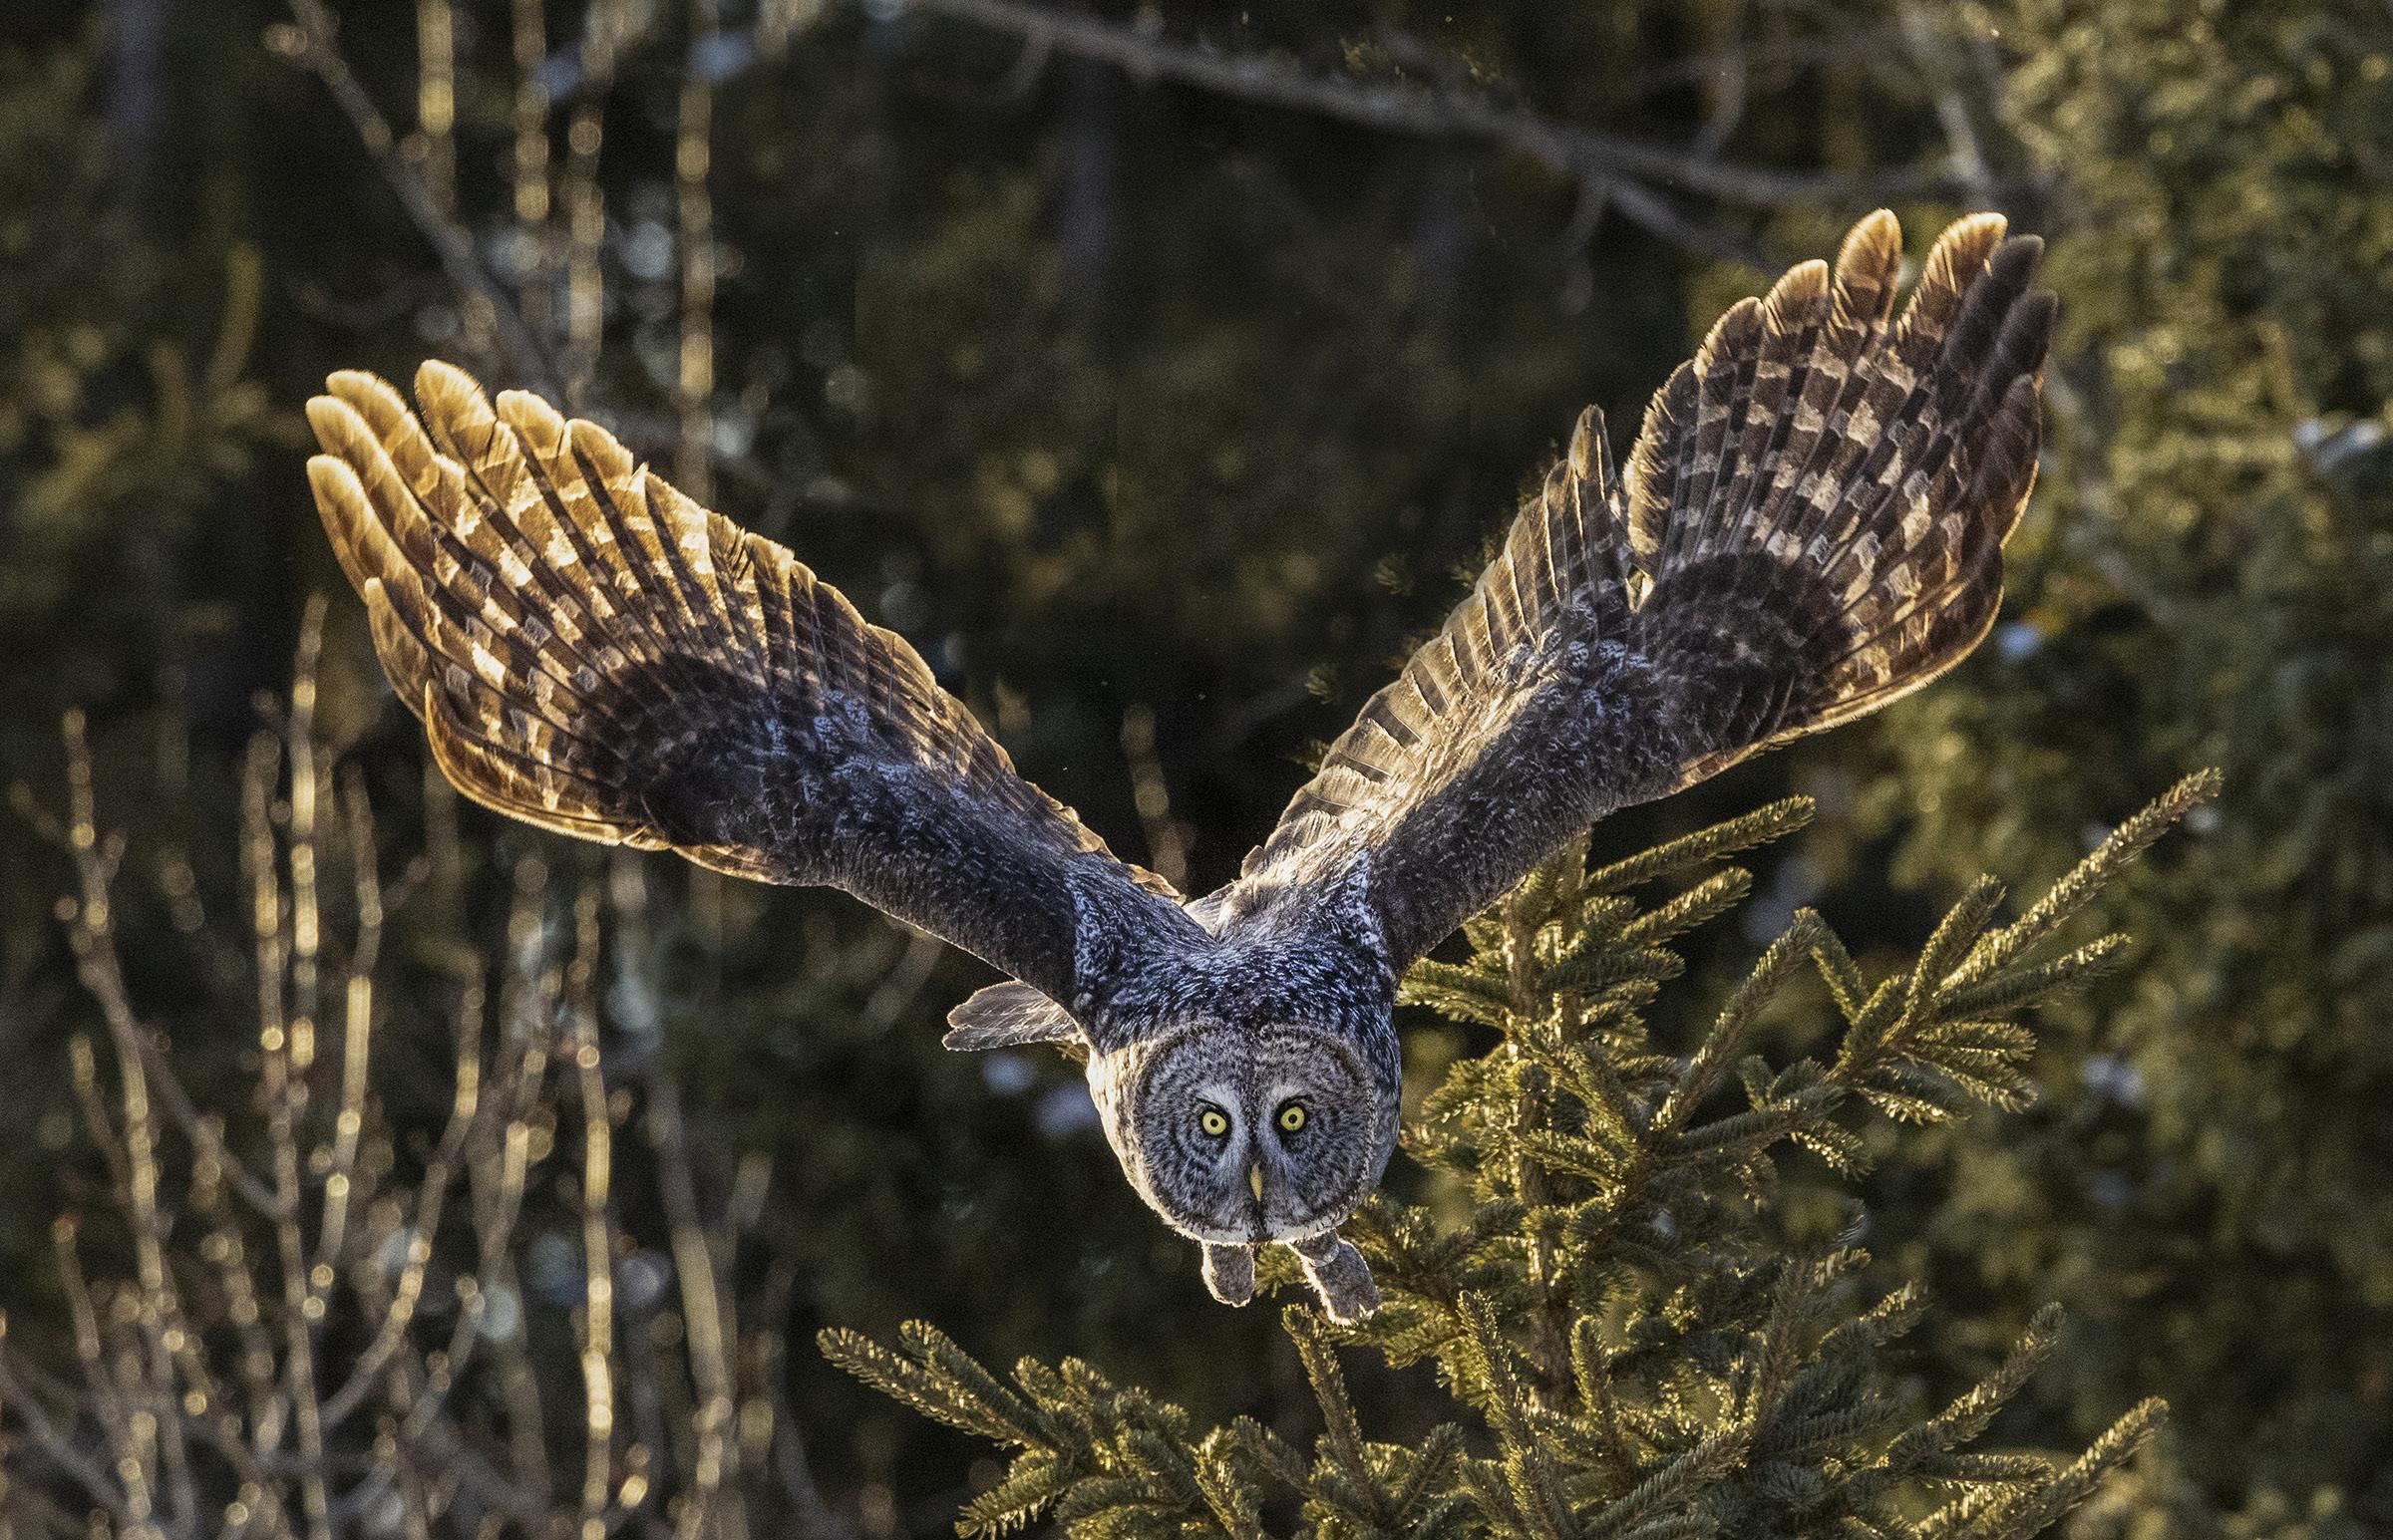
GREAT GRAY OWLS, CANADA
Get up close and personal with these spectacular birds flying with their magnificent wing spans. The slow flying owls are easy to photograph, even for beginners, and you will absolutely love your pictures!
February 13 - 18, 2027
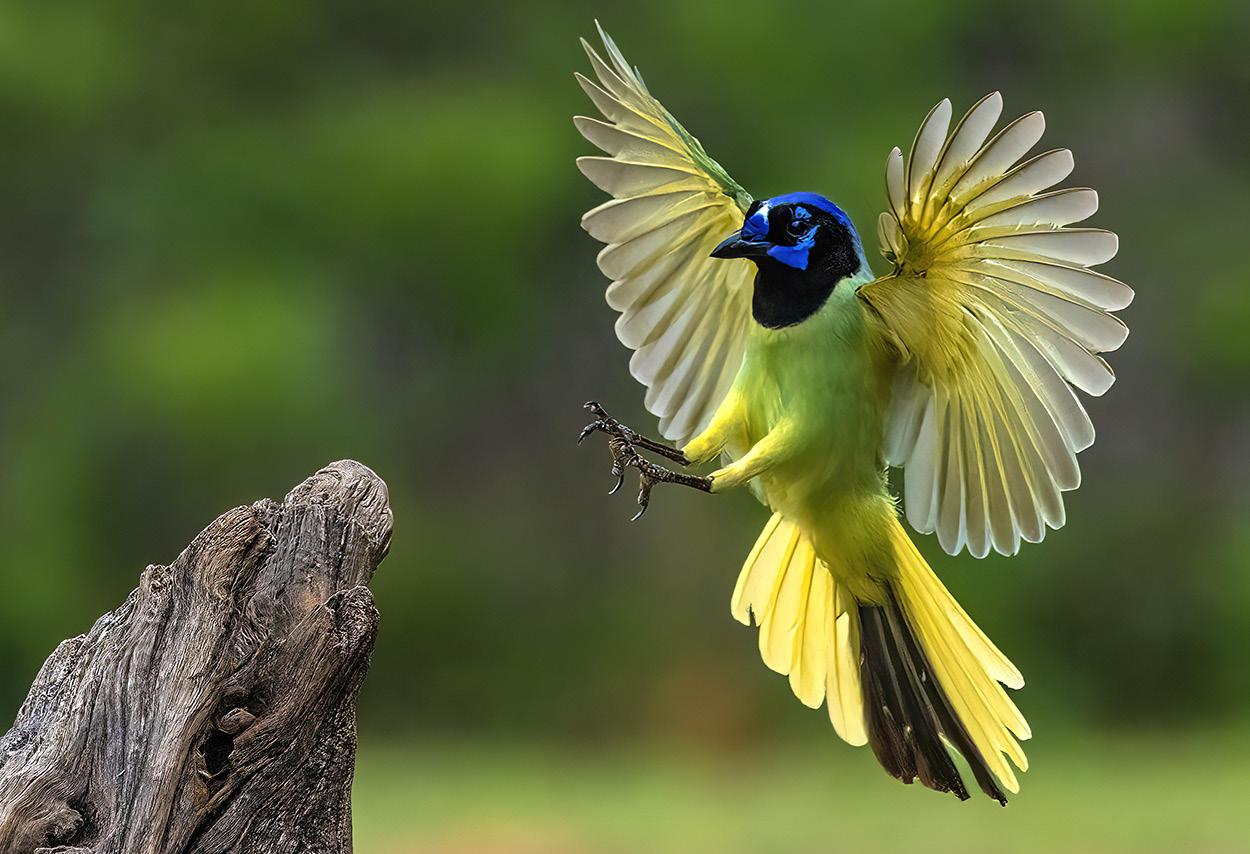
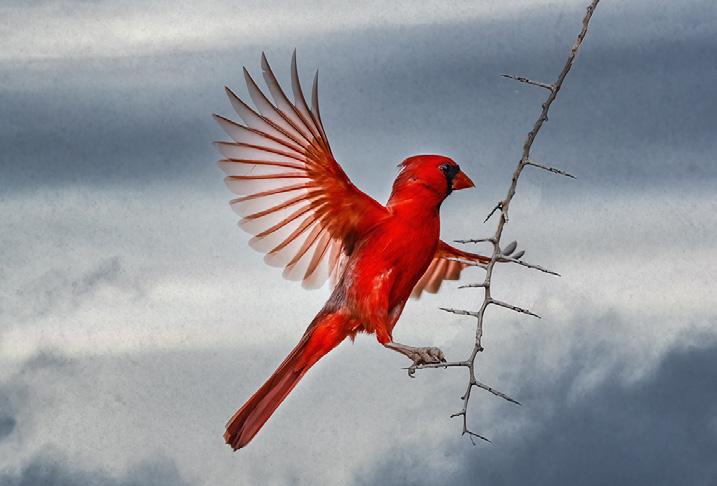
TEXAS BIRDS
Get up close and personal to many species of exotic and colorful birds. We shoot from a blind and get frame-filling shots of cardinals, green jays, crested caracaras, painted buntings, and more. Based in McAllen, Texas.
May 12 -15, 2027

Carnival in Venice
January 30 - February 5, 2027

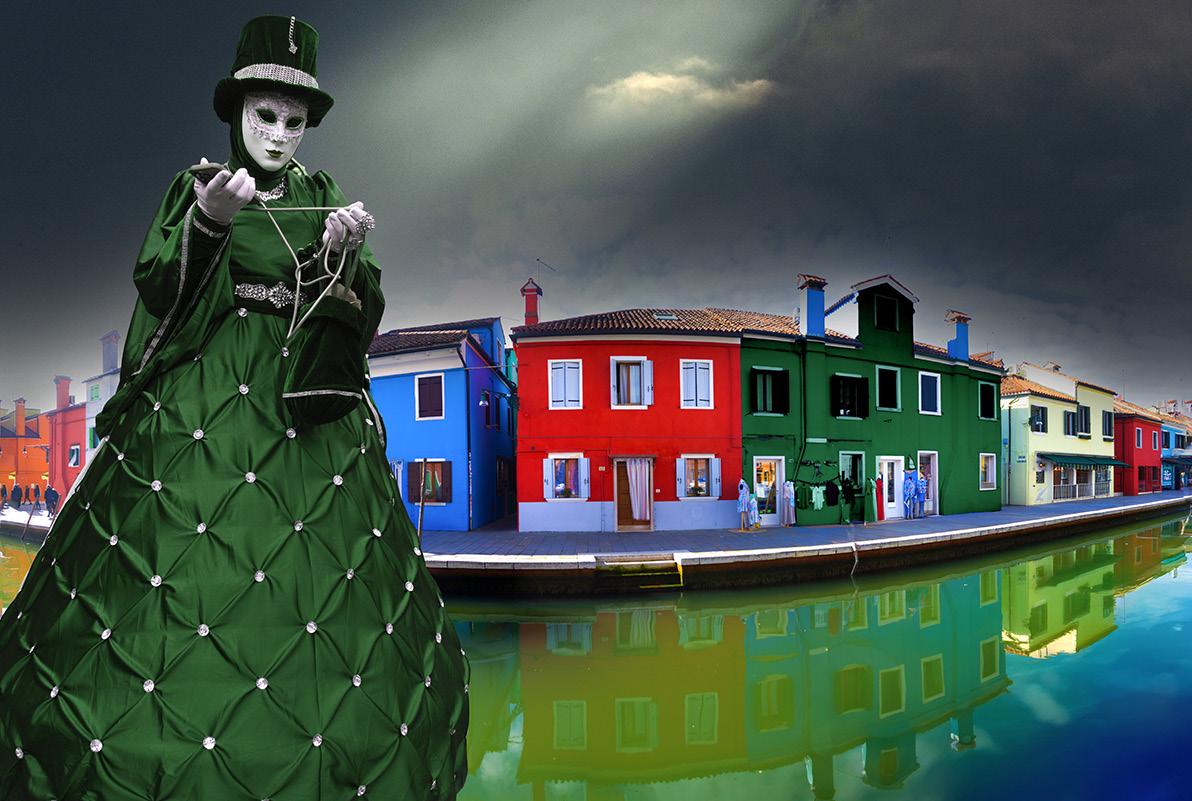
What's Wrong with this Picture?

Iphotographed this costumed model in Venice last month during carnival. The picture was taken from San Giorgio Island right across from San Marco Square. In my view, this image has three problems with it. First, it's too dark. Second, the boat in the background isn't attractive at all and it's somewhat distracting. And third, while the church right behind the model is beautiful, this angle of the city isn't appealing.
When I took this shot, I wasn't paying attention to the background because I intended to use Photoshop to create the ideal image. That's exactly what I did on the next page.
The medieval skyline of Venice isn't complete without the famous St. Mark's Campanile (the tower) known the world over. So, to create the appropriate as
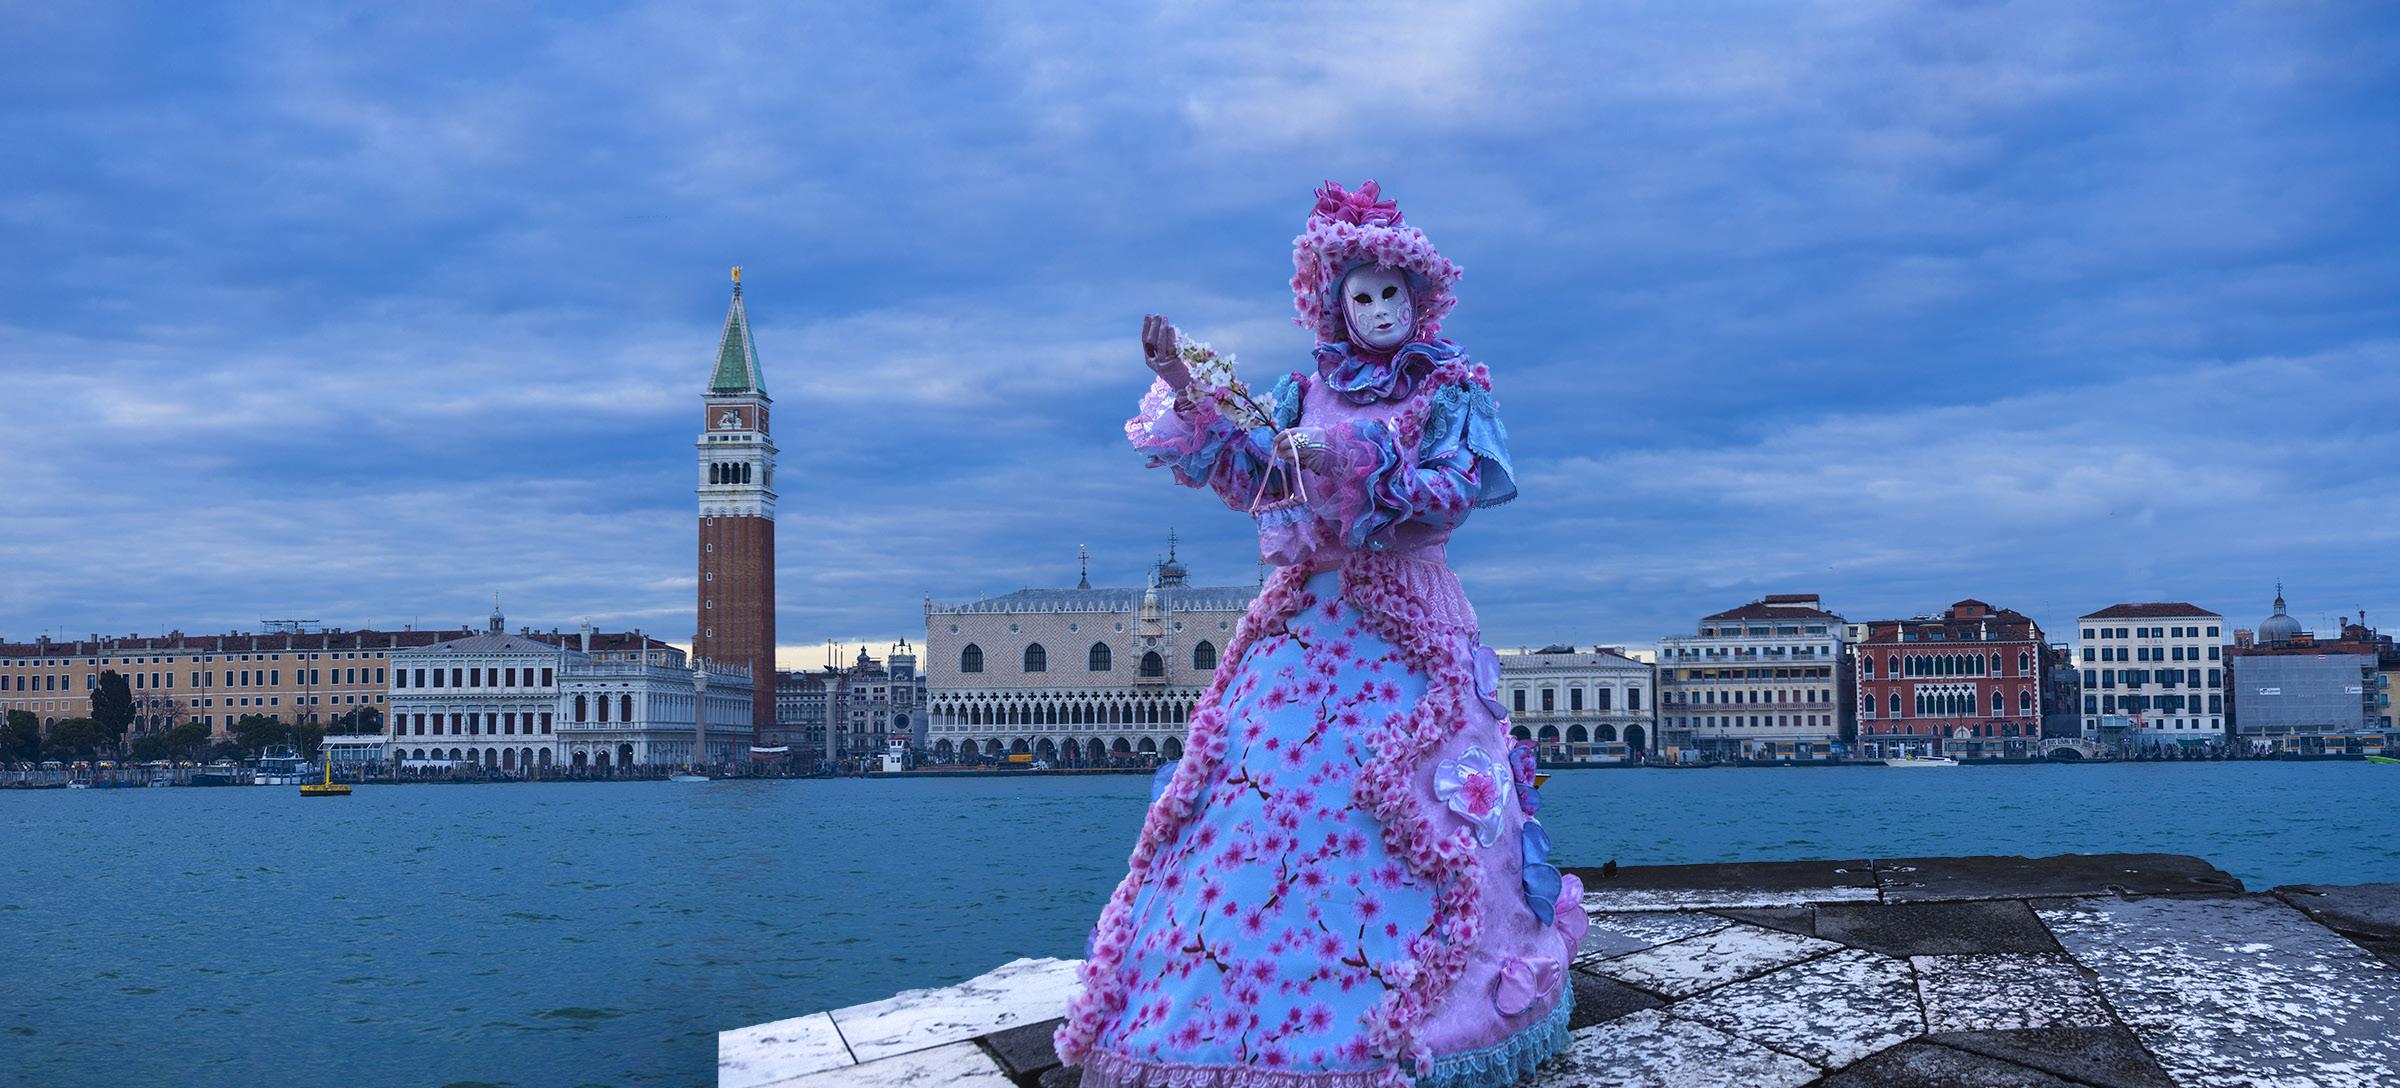
well as pleasing backdrop for the model, I took a 7-frame panorama shot of the skyline. This turned out to be much better than simply using a wide angle lens. The images were stitched together in Photoshop, and I pasted the model as well as the stone platform she's standing on in front of the city. I then used the dodge tool to lighten the costume and the mask.
A picture like this couldn't be taken with a single exposure. If I'd used a wide angle lens -- and this looks like a wide angle shot -- the buildings would appear much smaller and further away. If I had used a medium telephoto, the buildings wouldn't be sharp because there is so little depth of field with a telephoto lens.
Sometimes we have to use Photoshop to manipulate elements in a composition so the final image replicates what we see. This seems strange, but it's necessary at times. §
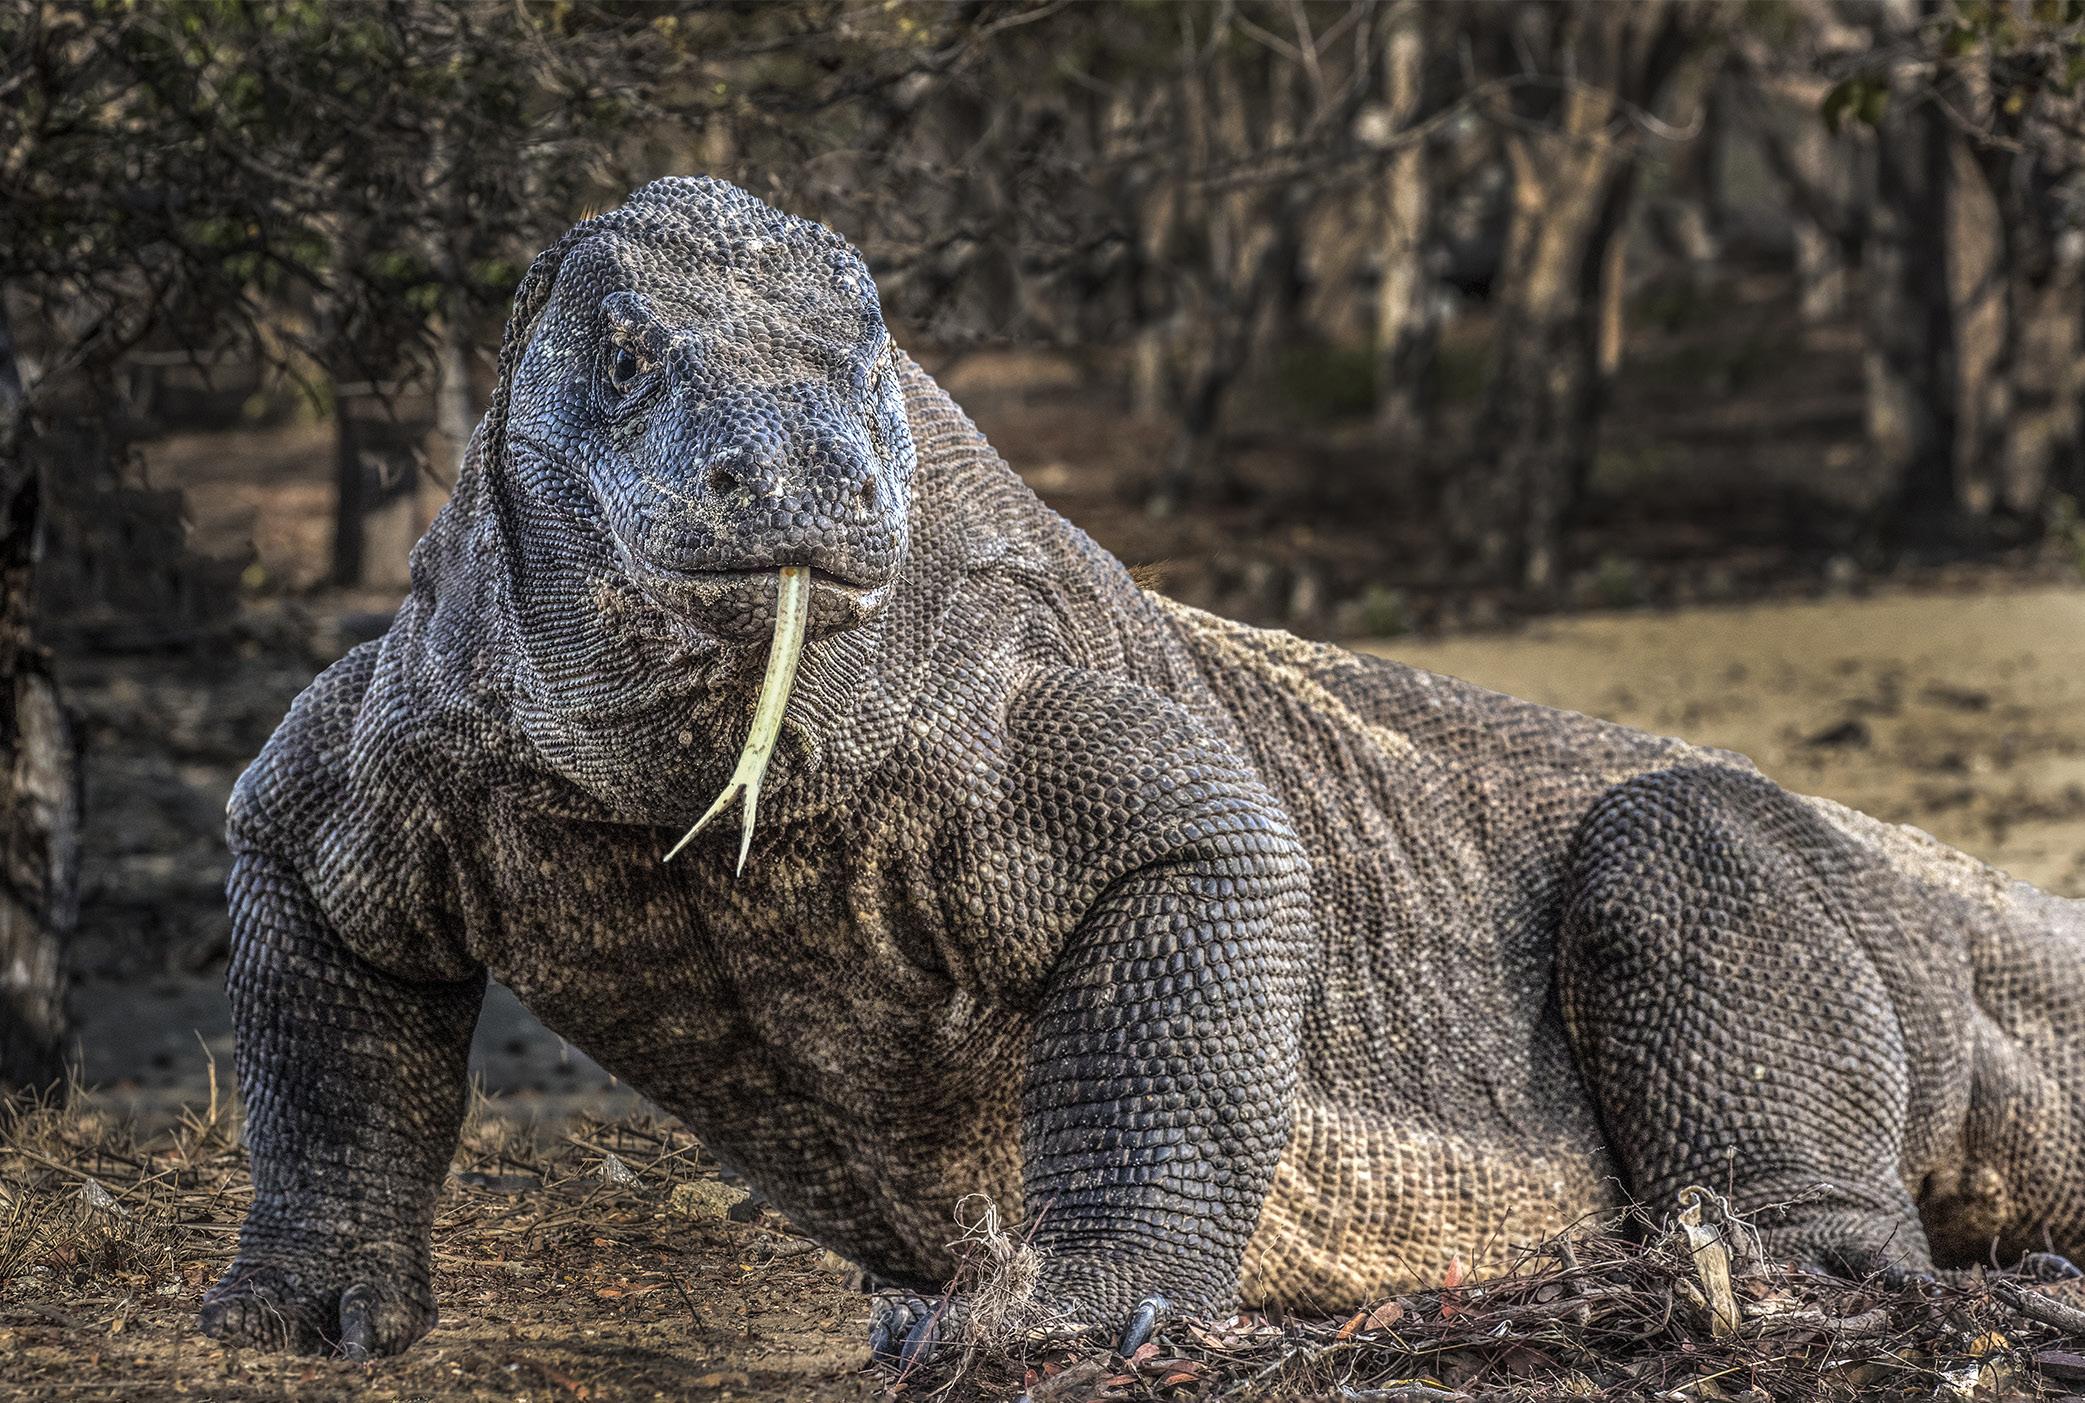
Indonesia Wildlife
October 29 - November 8, 2027
SHORT AND SWEET
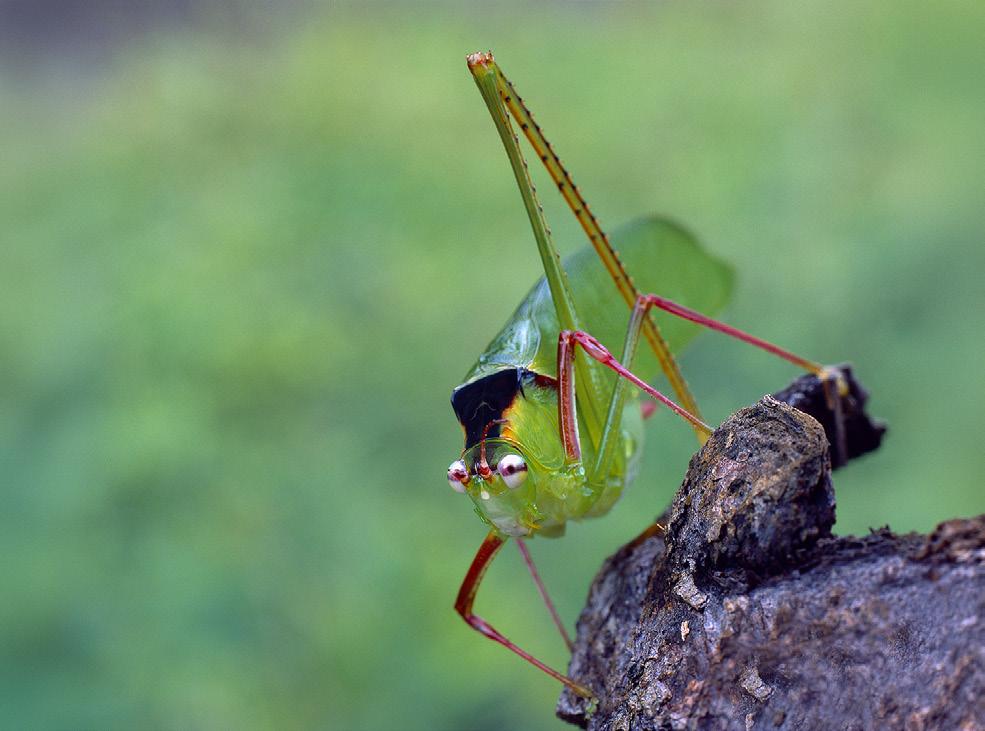
1. Some animals stay so still that long exposures from a tripod are possible. I photographed this insect in Borneo on the forest floor. It was quite dark, so I had to use a 4 second exposure. The subject is tack sharp because it was absolutely motionless.
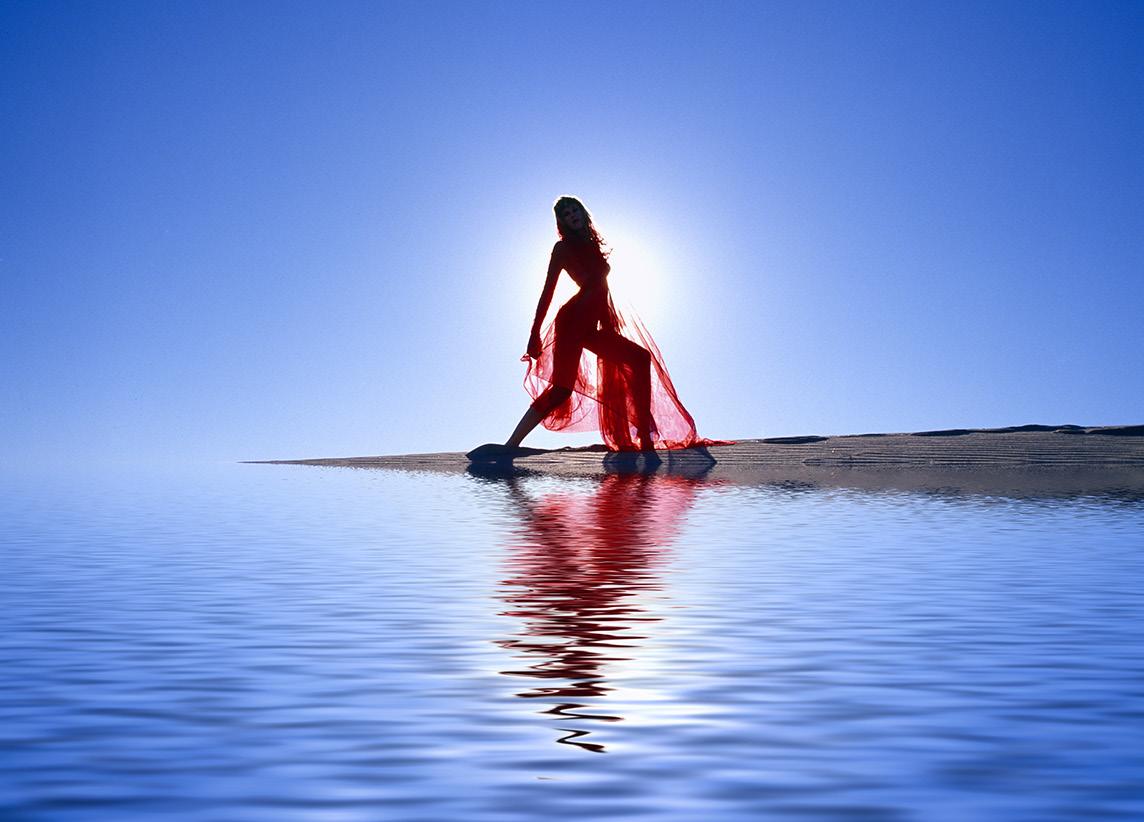
3. If you haven't used the Photoshop plugin, Flood, you are missing out. It makes realistic watery reflections, and once you have it, you'll start reflecting everything in your photo library. It's very easy to use: with one slider, you first establish the water line and then with another slider adjust waves in the water.
2. FraxPro is a very cool generater of beautiful fractals for the iPad. It costs $5. It generates hi res images that you can download to your computer and use in combination with various photographs. The fractal designs are stunning in and of themselves, too. There is no end to what you can create.

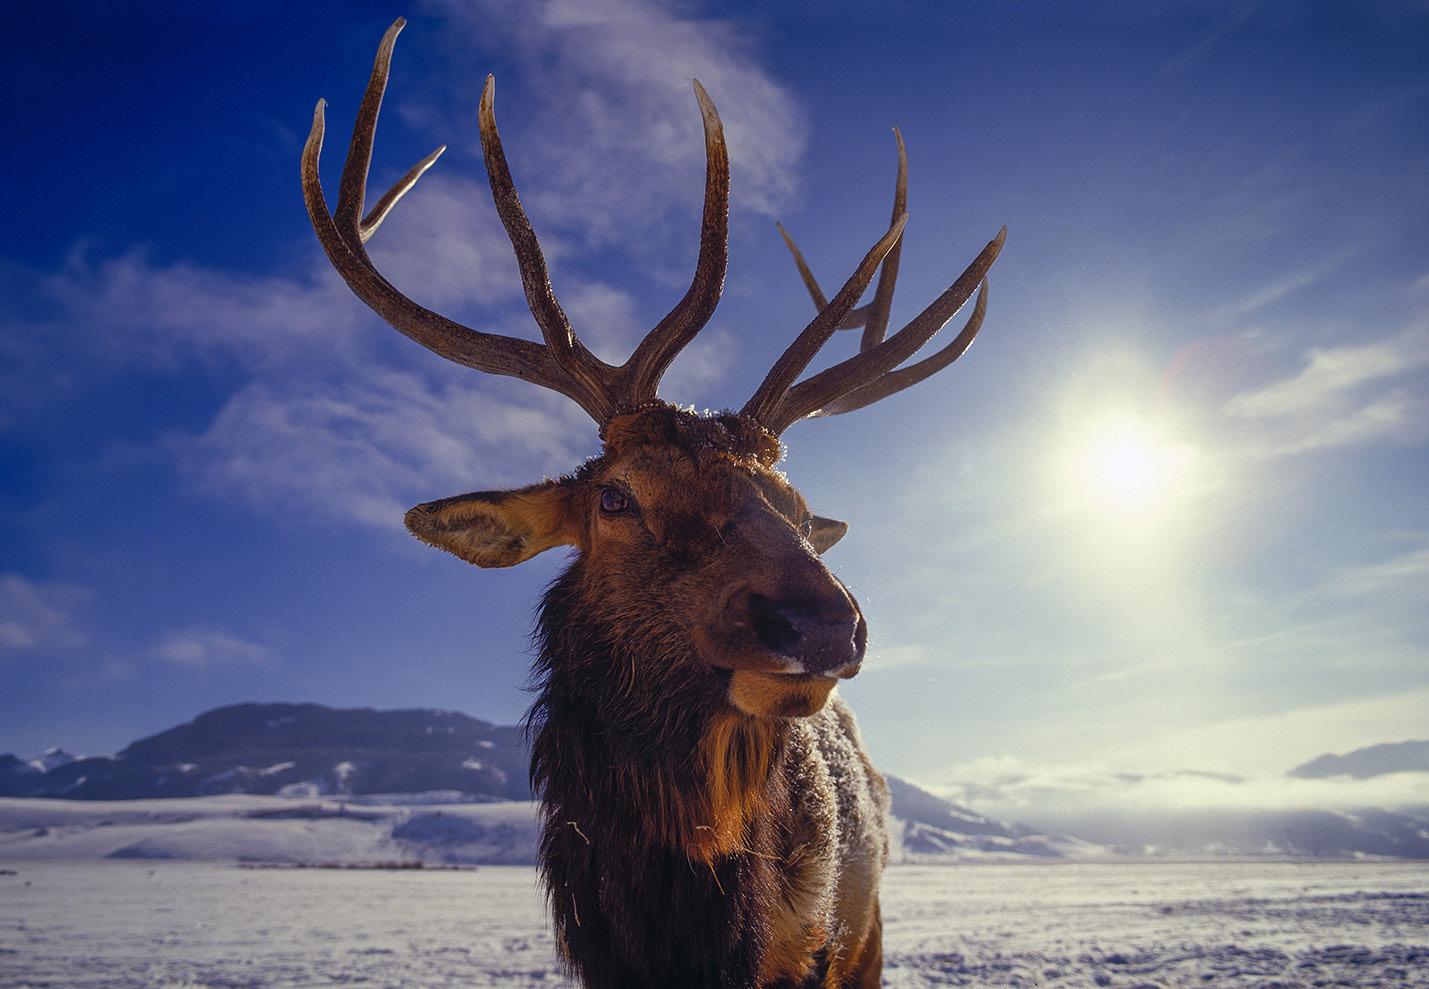
4. Wide angle images of animals are unusual because in order for the photographer to fill the frame with the subject, he or she has to be very close to it. So, when you can get a shot like this of an elk, the image really stands out. I took this picture through the fence that corrals hundreds of elk at Jackson Hole in winter. §
Ethiopia photo tour
Go back in time 20,000 years
January 5 - 18, 2027
ASK JIM
Every month, Jim answers a question from his online students, from people who participate in his tours and workshops, or from subscribers to this magazine. If you have a question you’d like Jim to answer, please drop him a note at photos@jimzuckerman.com.
Q: Jim . . .What are my options when an airline wants to weigh my carryon because there is a weight limit, usually about 7 or 8 kilos (15 to 17 pounds). This makes it really tough for photographers. Forcing us to check in our expensive camera gear is terrible.
Fred Lee, Cookville, Tennessee
A:
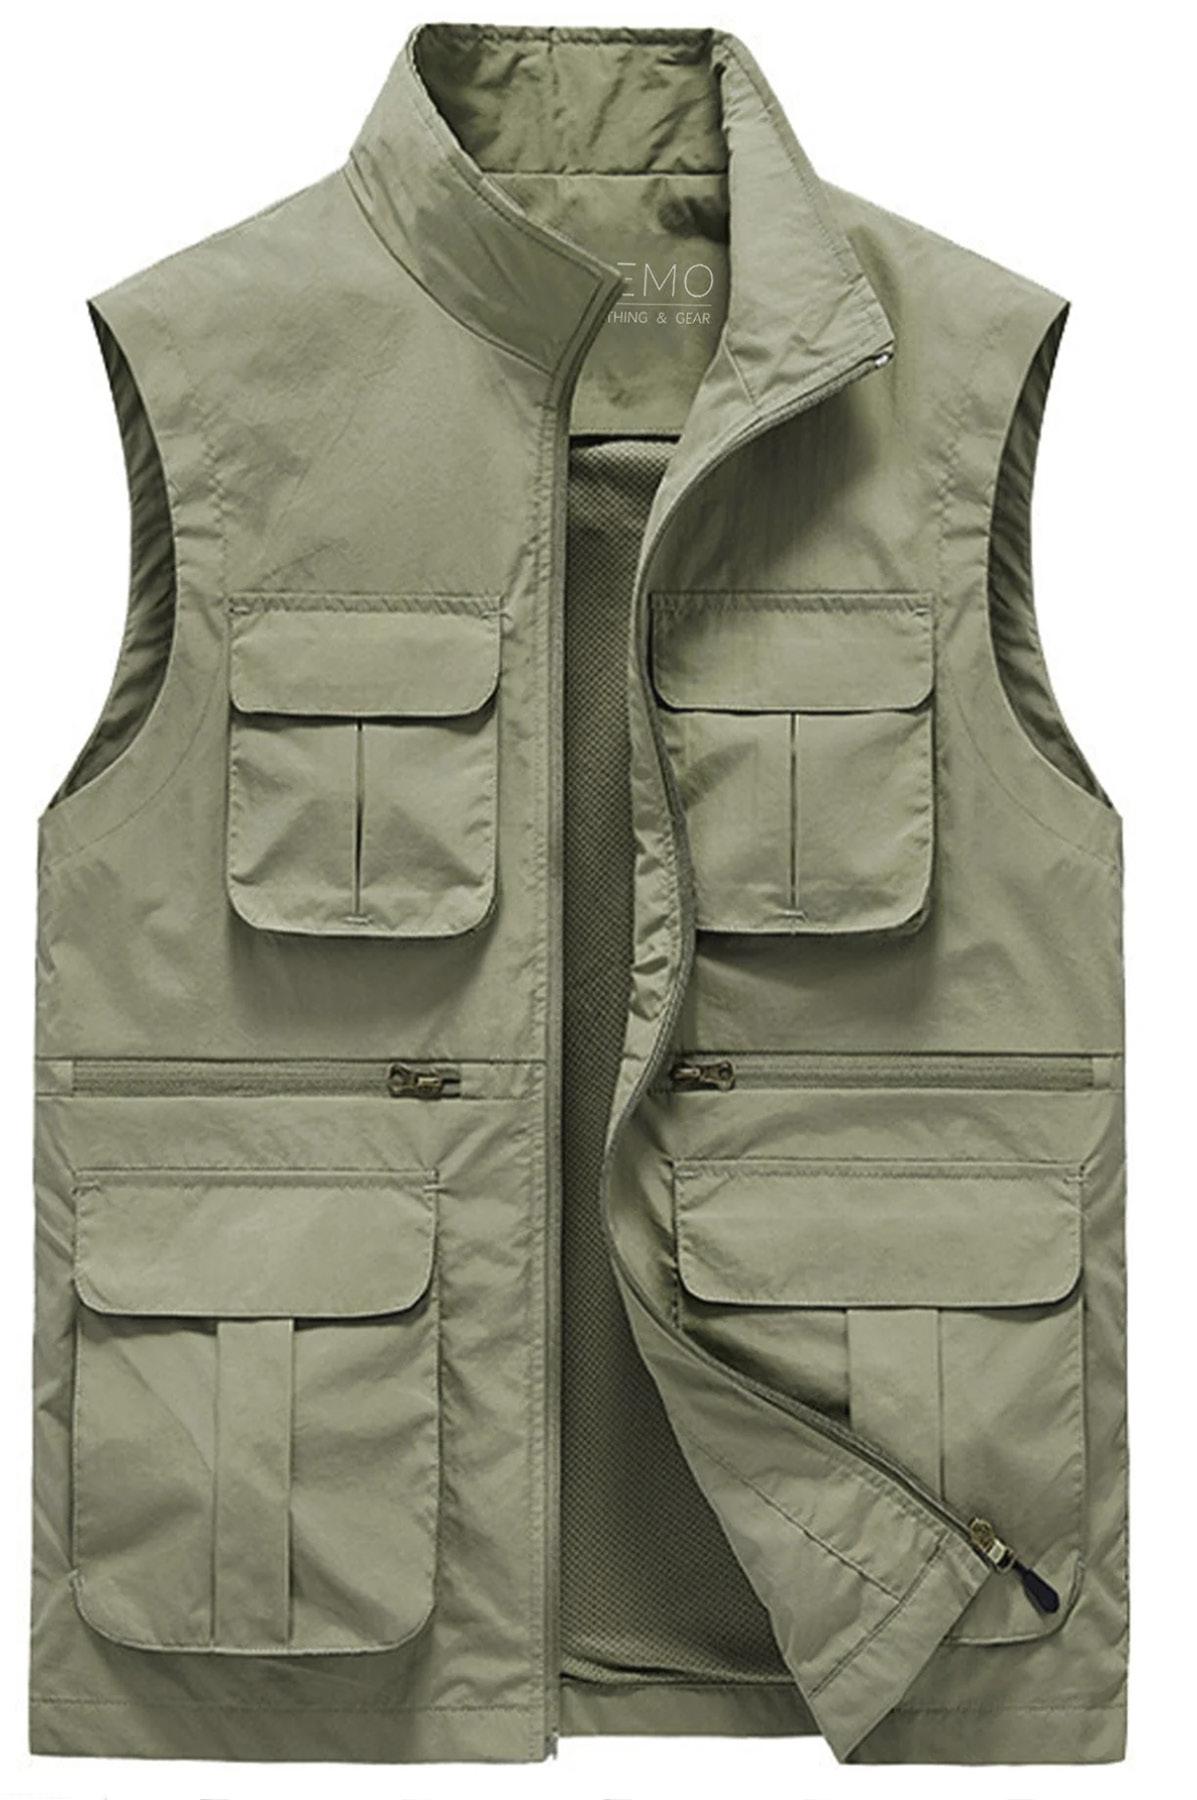
In this situation -- and I deal with this all the time -- the only option is to wear a photo vest with large pockets. The airlines never weigh what you wear. Therefore, you can fill the pockets in the vest with wide lenses and a camera body. Long lenses won't fit, but taking out a couple of lenses and a body will most likely allow you to pass the weight limit problem. If you don't end up needing to use the vest, fine. But at least you have a backup plan.
Partial List of Photography Tours
2026 - 2027
EXOTIC COLOMBIA BIRDS Sept/Oct 2026
THE PANTANAL, BRAZIL Nov/Dec 2026
CARNIVAL in VENICE Jan 2027

CHILE:THE DESERT to the SEA Oct 2027
ASIA for BEGINNERS Oct 2026
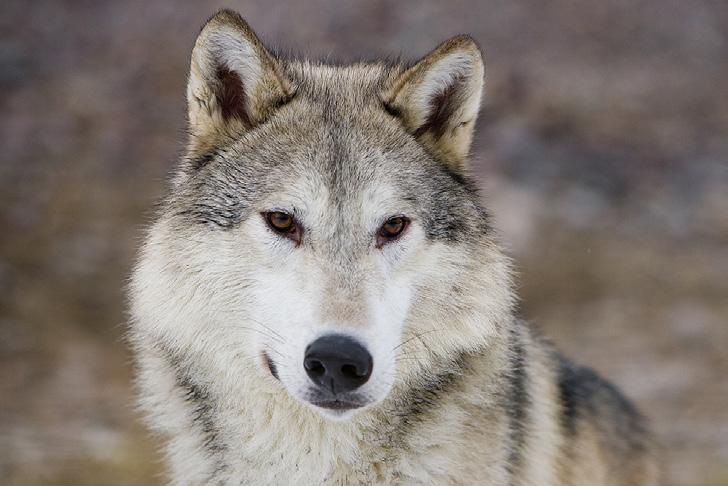
WINTER WILDLIFE WORKSHOP Dec 2026
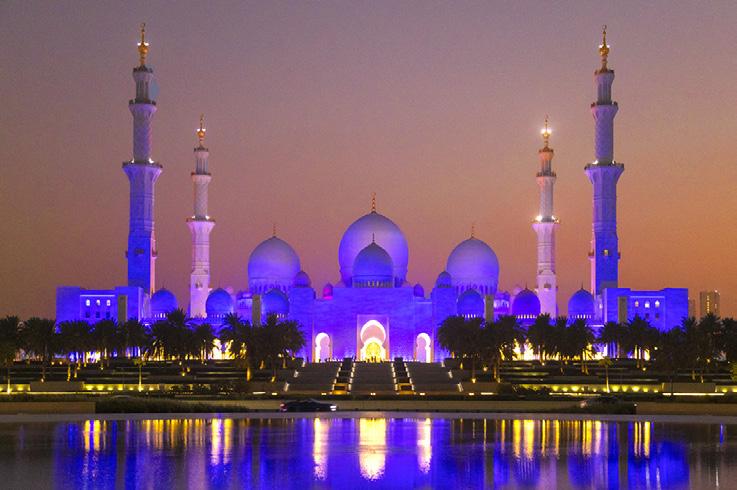
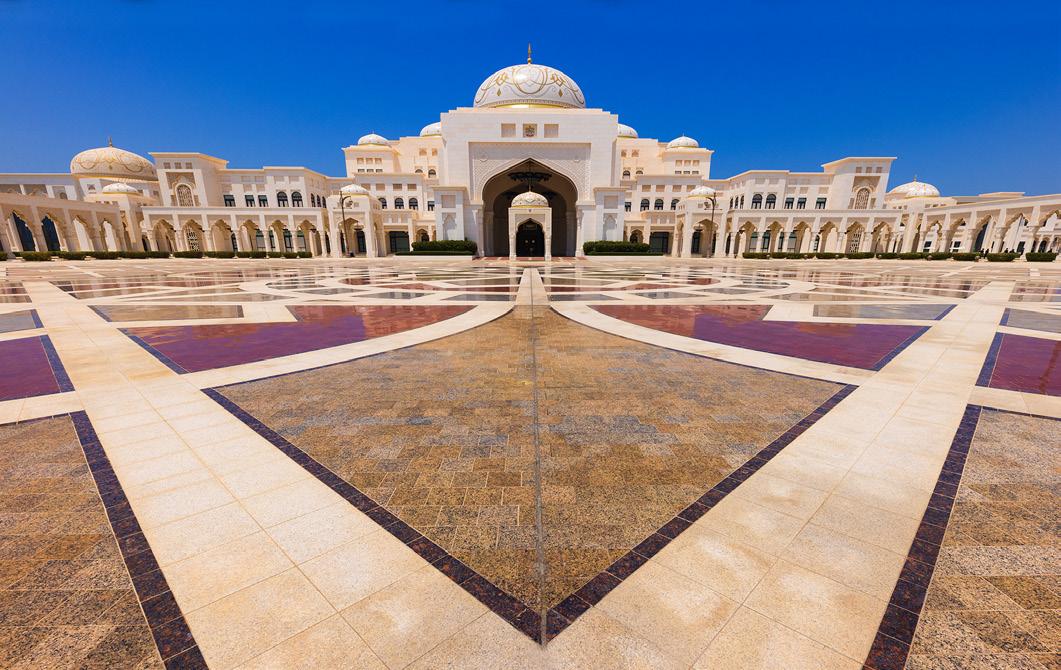
DUBAI & ABU DHABI Nov 2026
ETHIOPIA Jan 2027
TEXAS BIRDS WORKSHOP May 2027
GREAT GRAY OWLS Feb 2027 VIETNAM Oct 2027
INDONESIA WILDLIFE Oct/NOV 2027
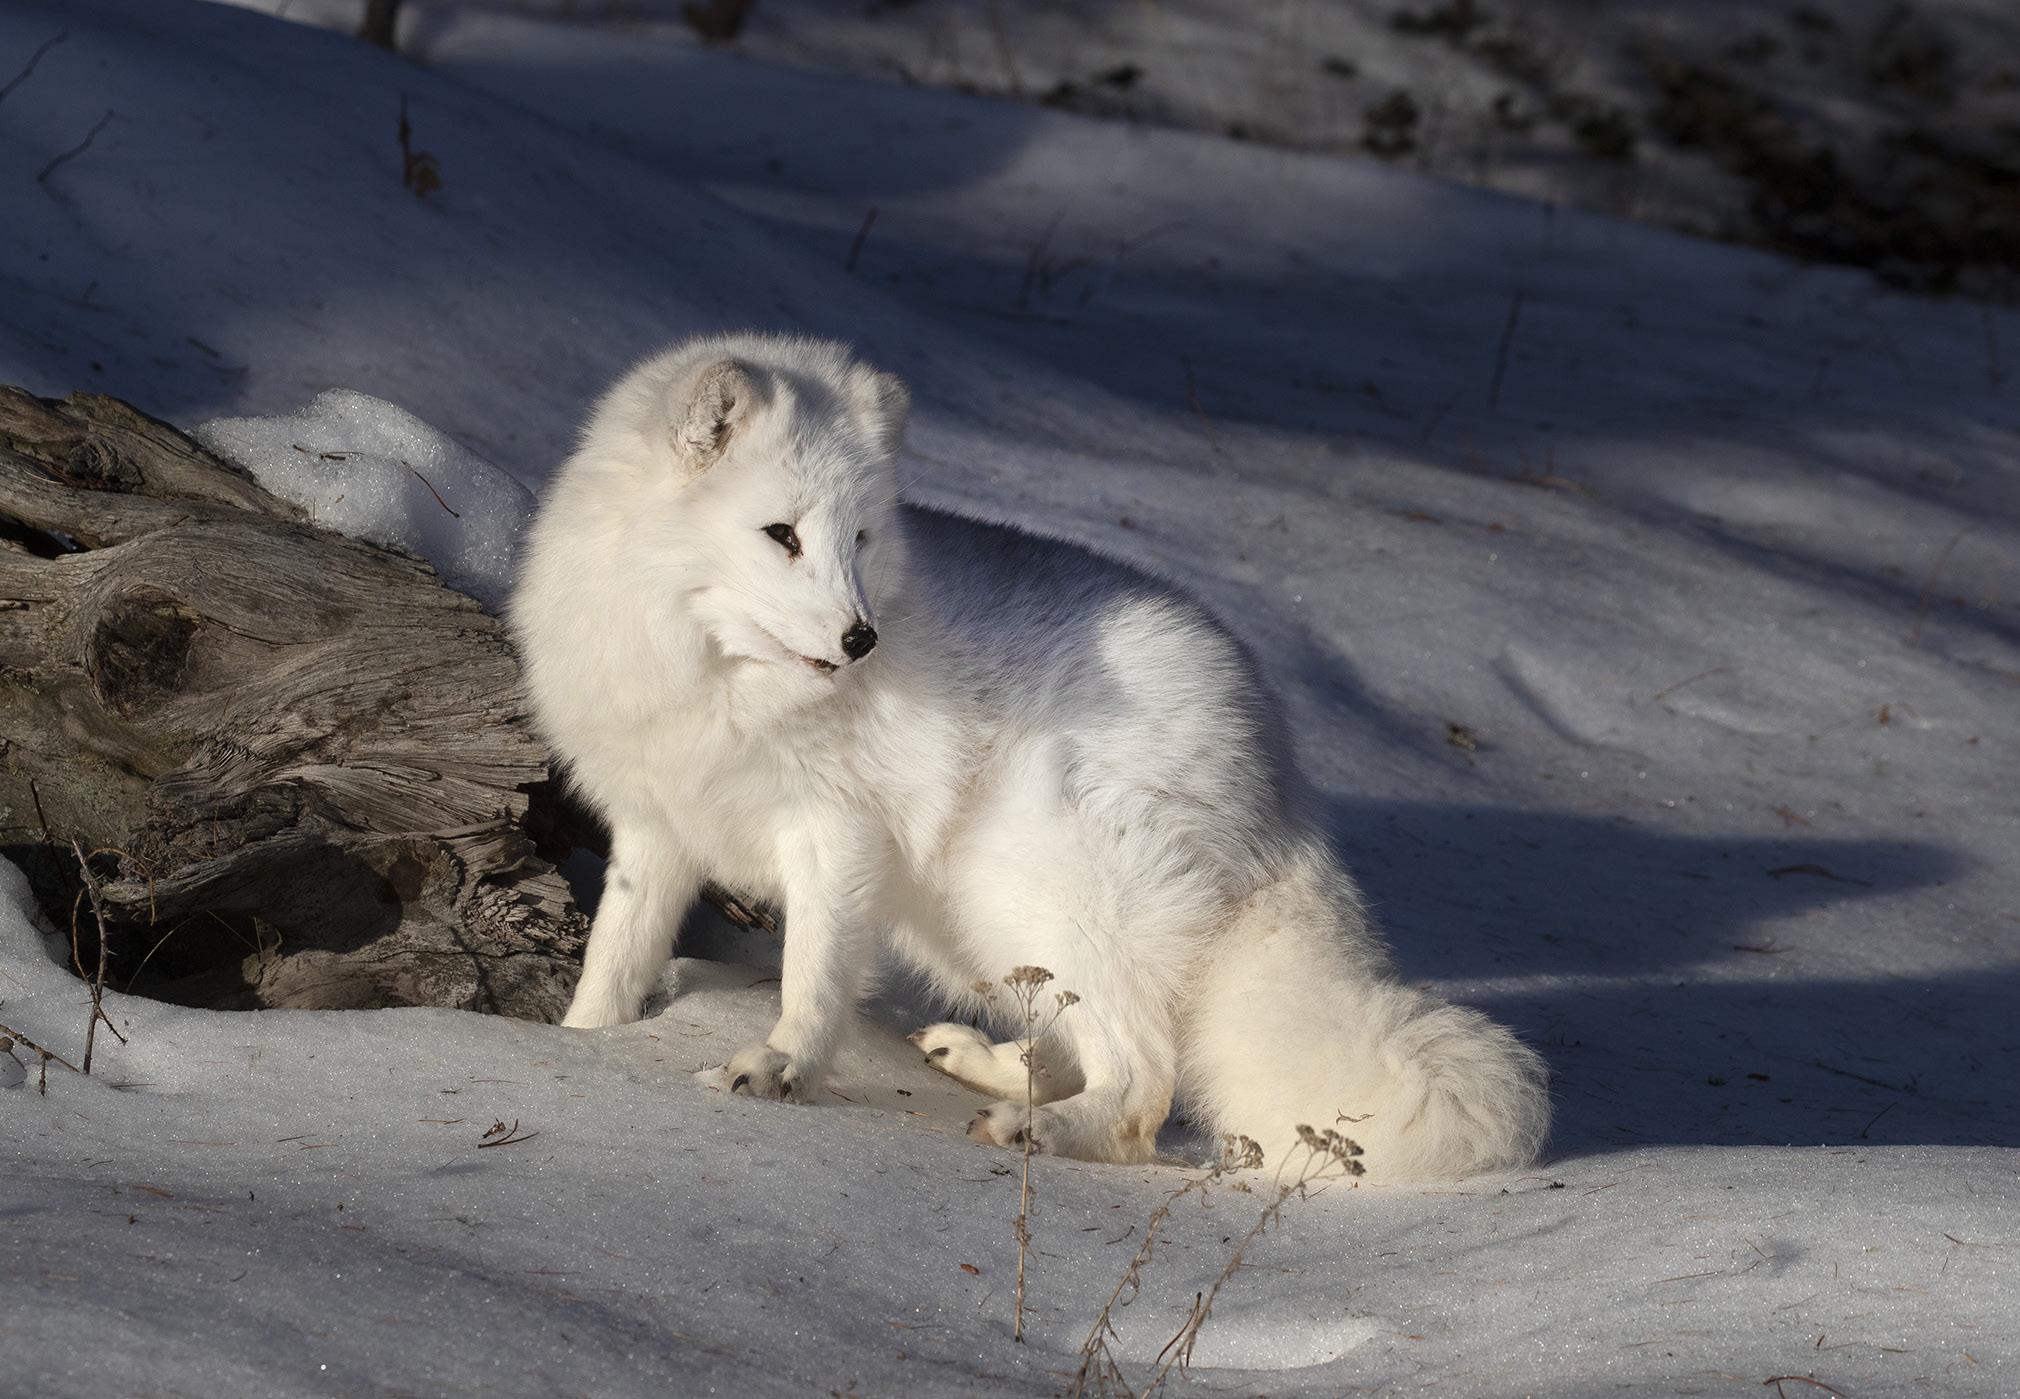
WINTER WILDLIFE WORKSHOP
December 16 - 20, 2026
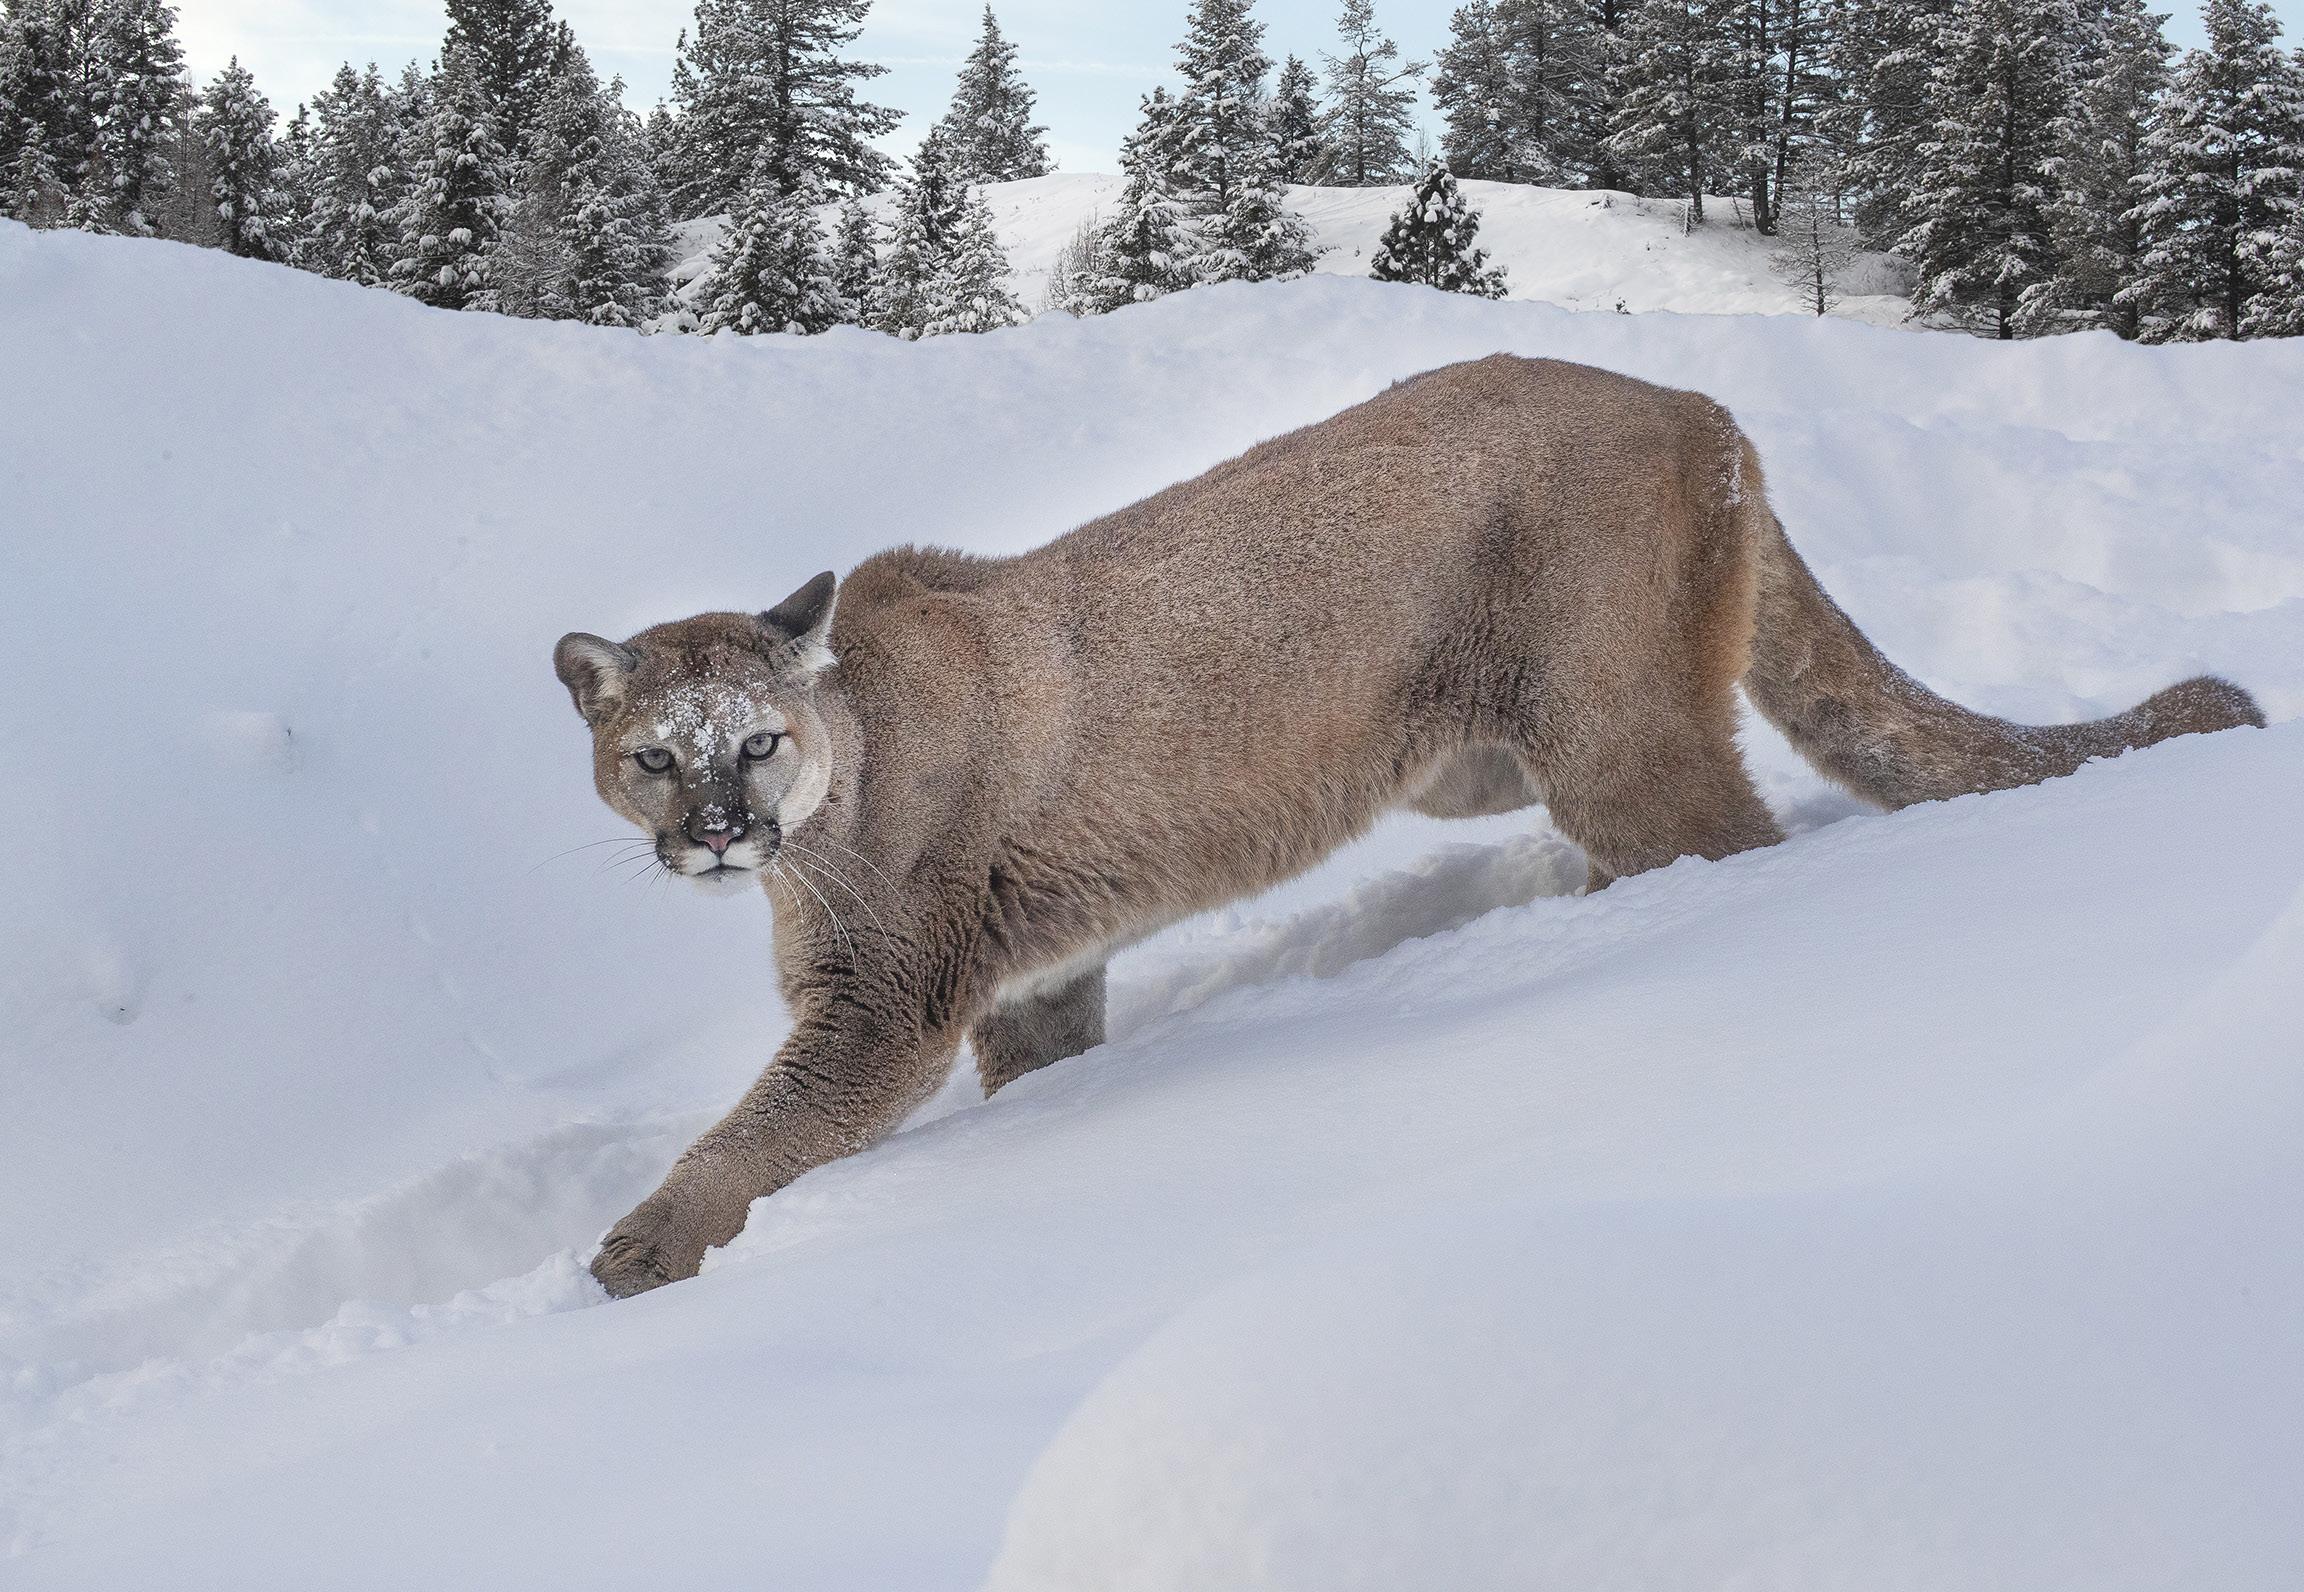
Mountain lion
Arctic fox
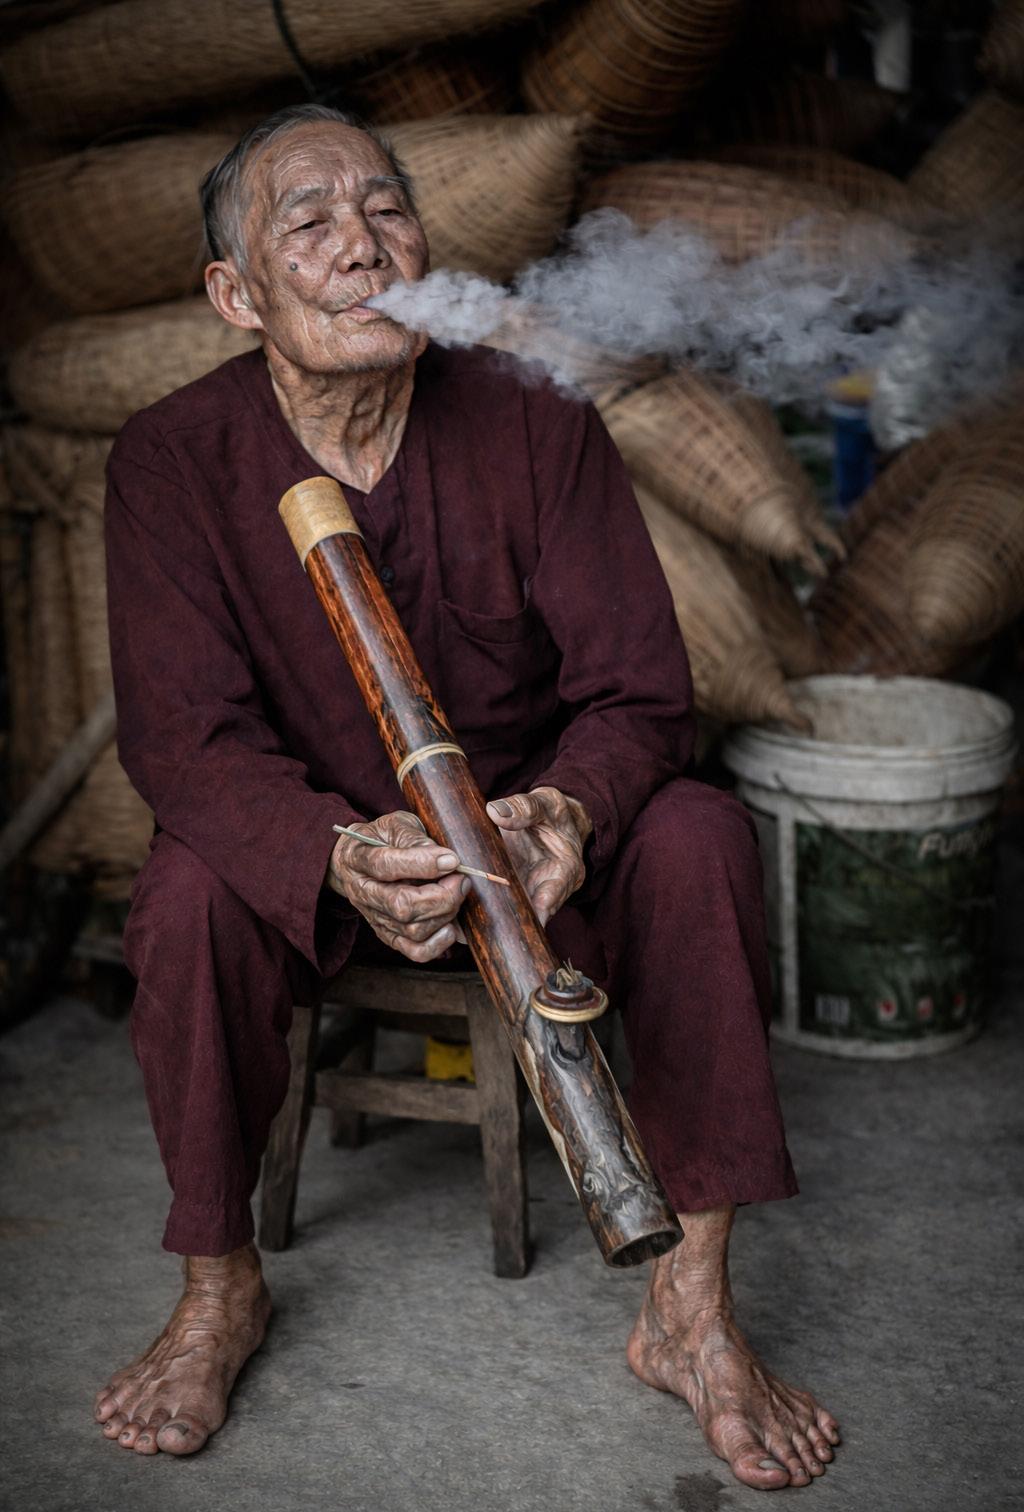
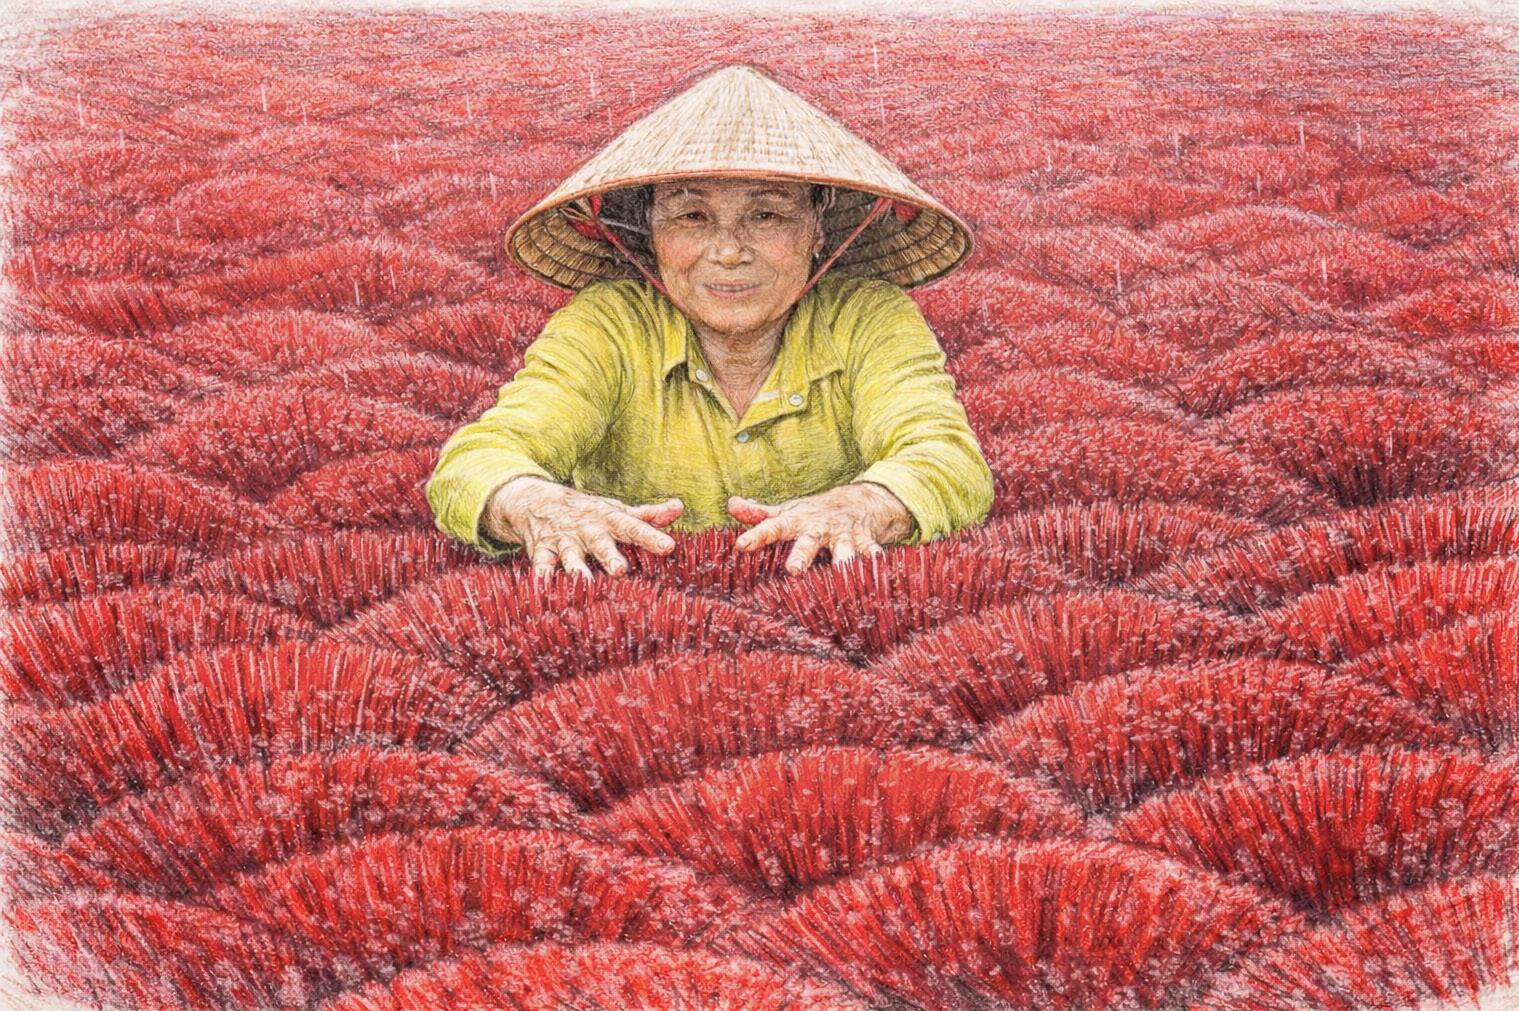
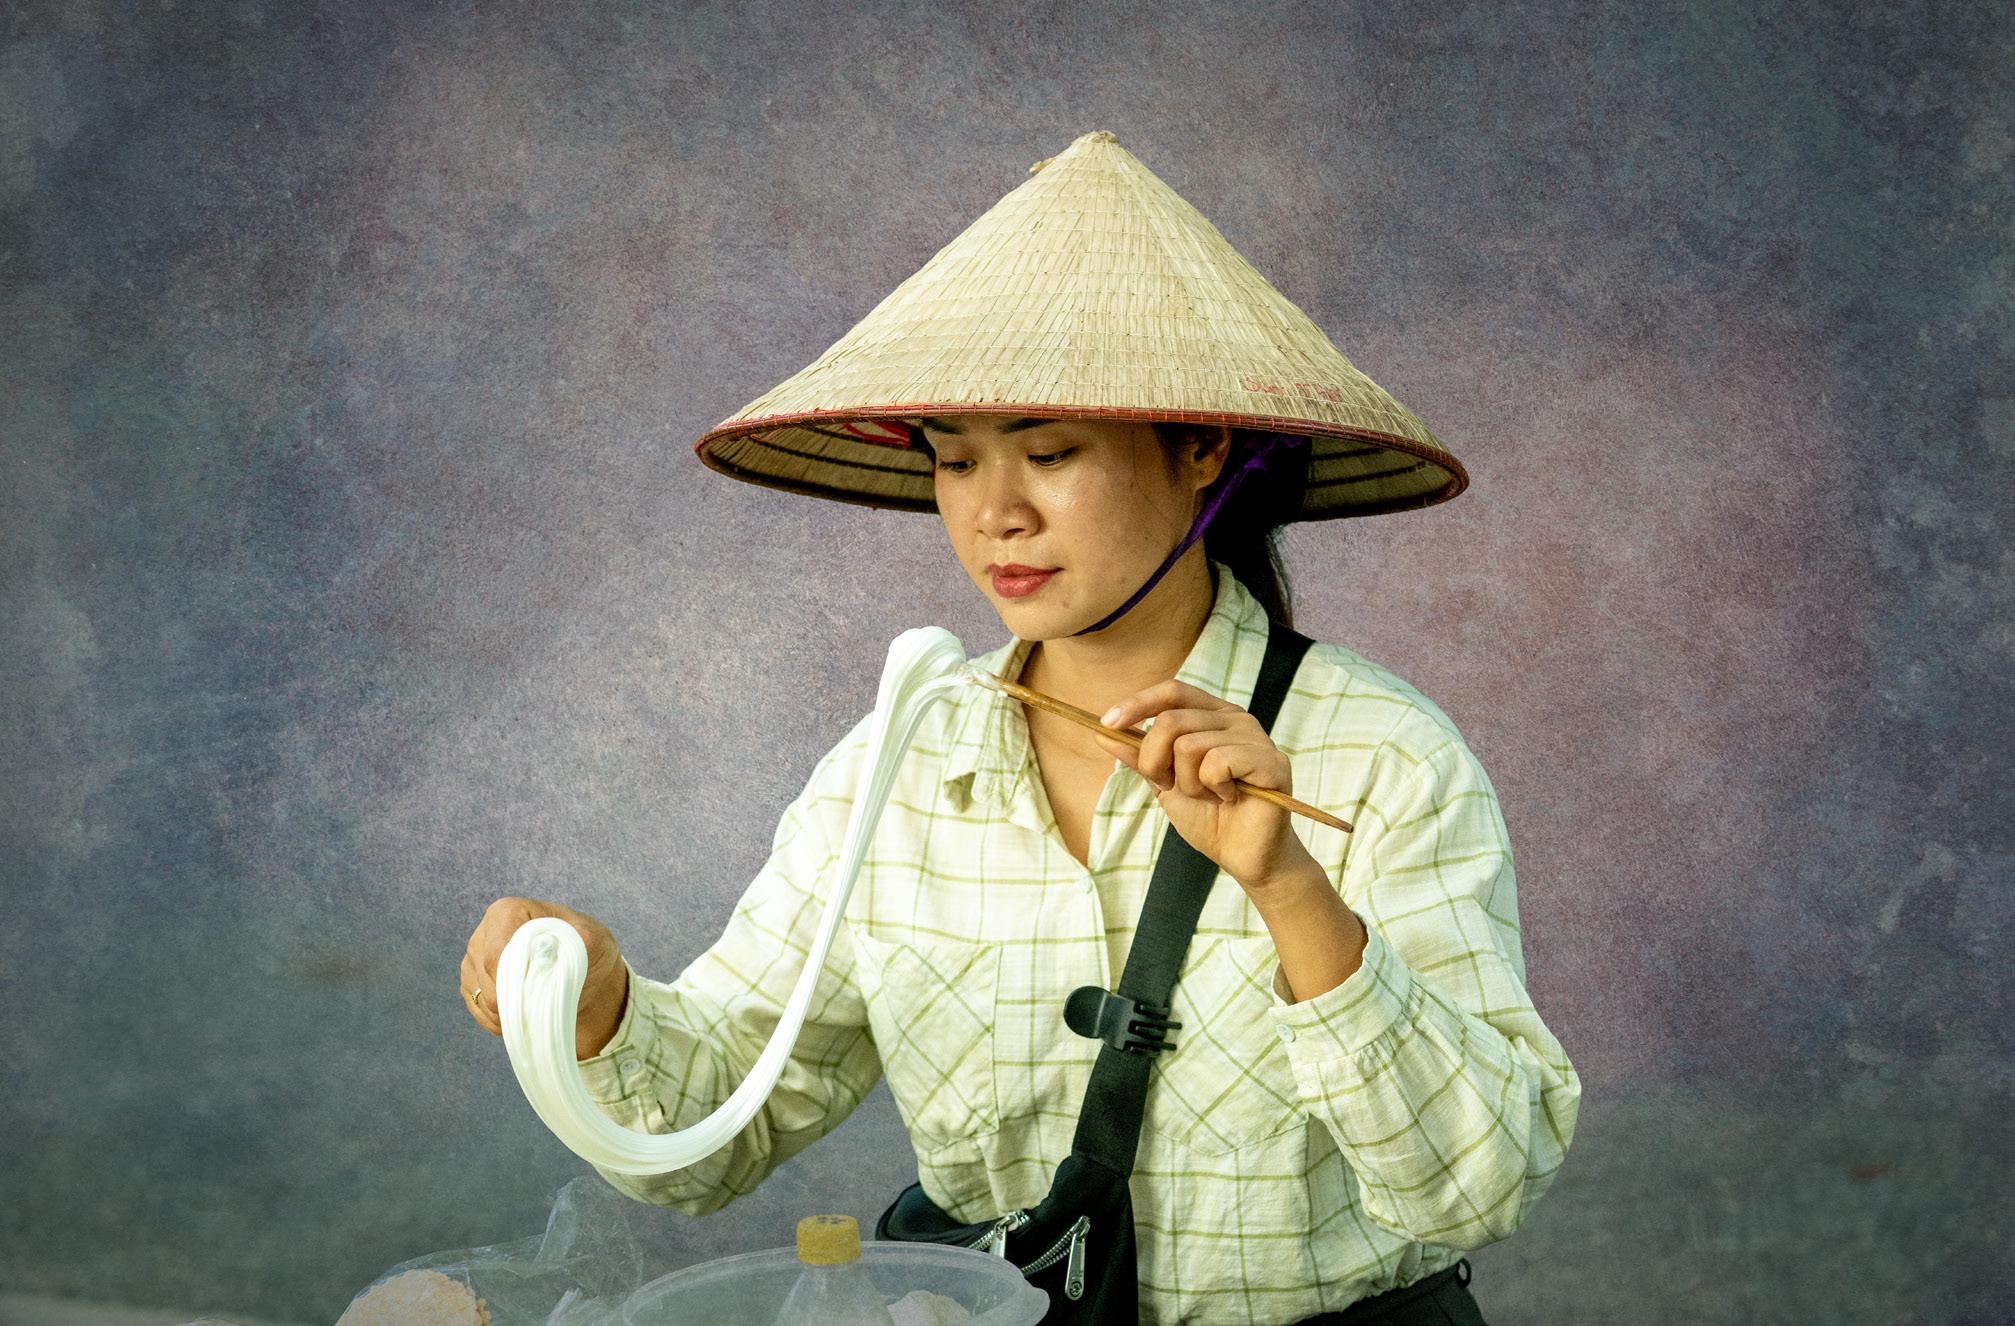
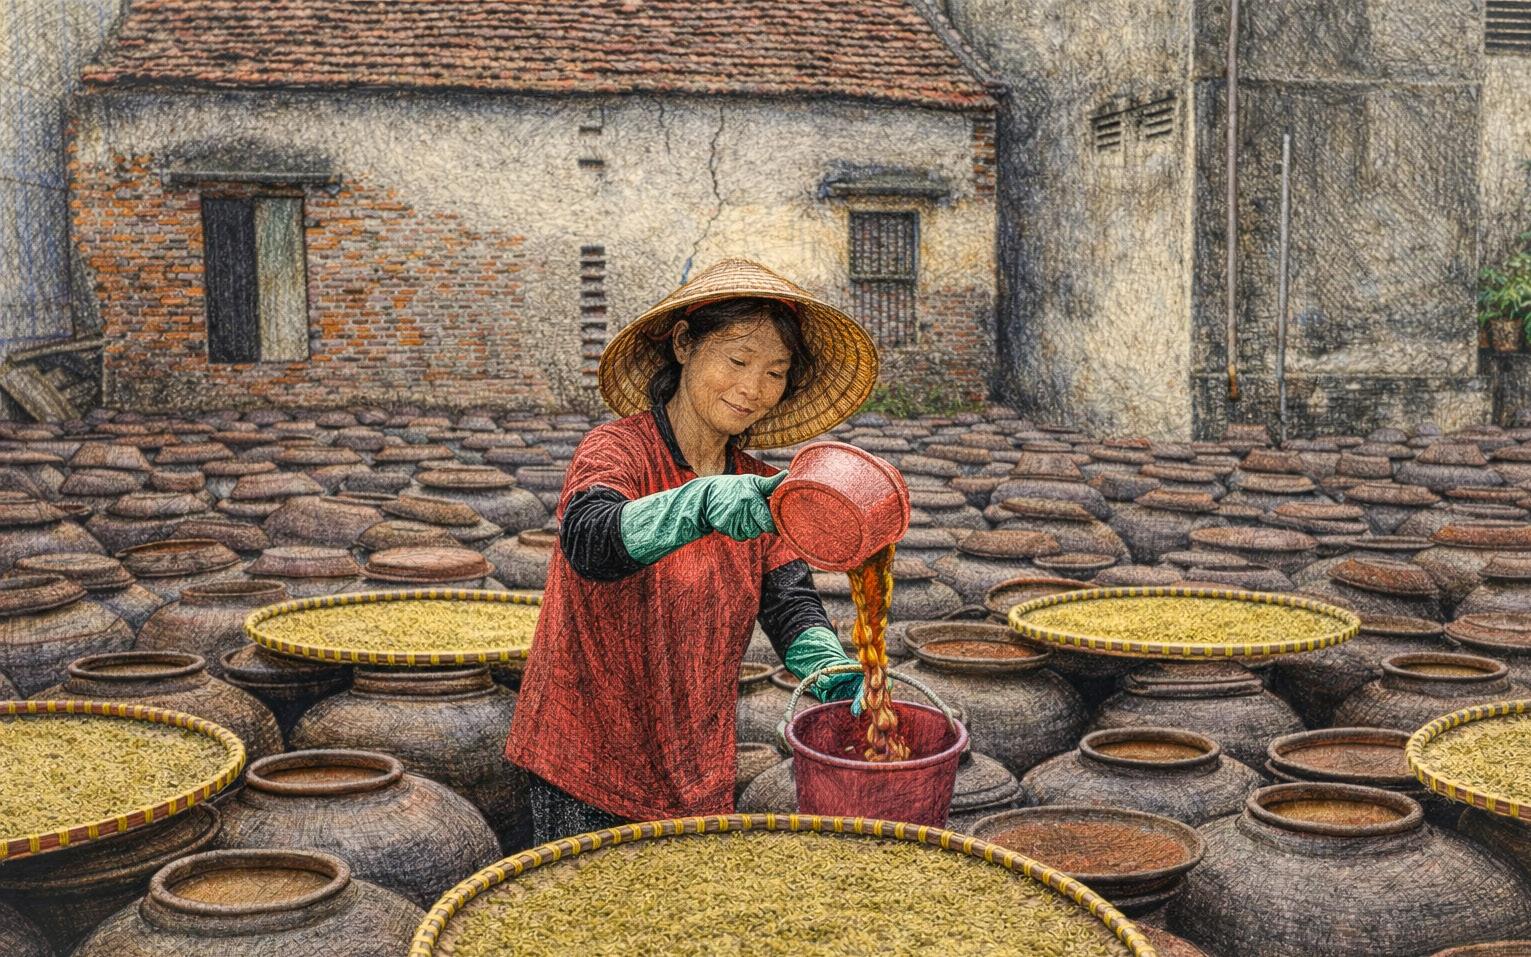
STUDENT SHOWCASE
Each month, Jim features one student who took beautiful and inspiring images on one or more of his photography tours or workshops. It’s really fascinating how photographers see and compose such different images even though we may go to the same places. Everyone takes great photographs on Jim’s trips. Bill Stark, Lakewood Ranch, Florida. Ethiopia photo tour, Vietnam photo tour, Frog and Reptile workshop, Indonesia photo tour, and 2 tours to China.
© Bill Stark
Student Showcase,
© Bill Stark
Student Showcase,
© Bill Stark
© Robert Dominis
© Hank House
© Bill Stark
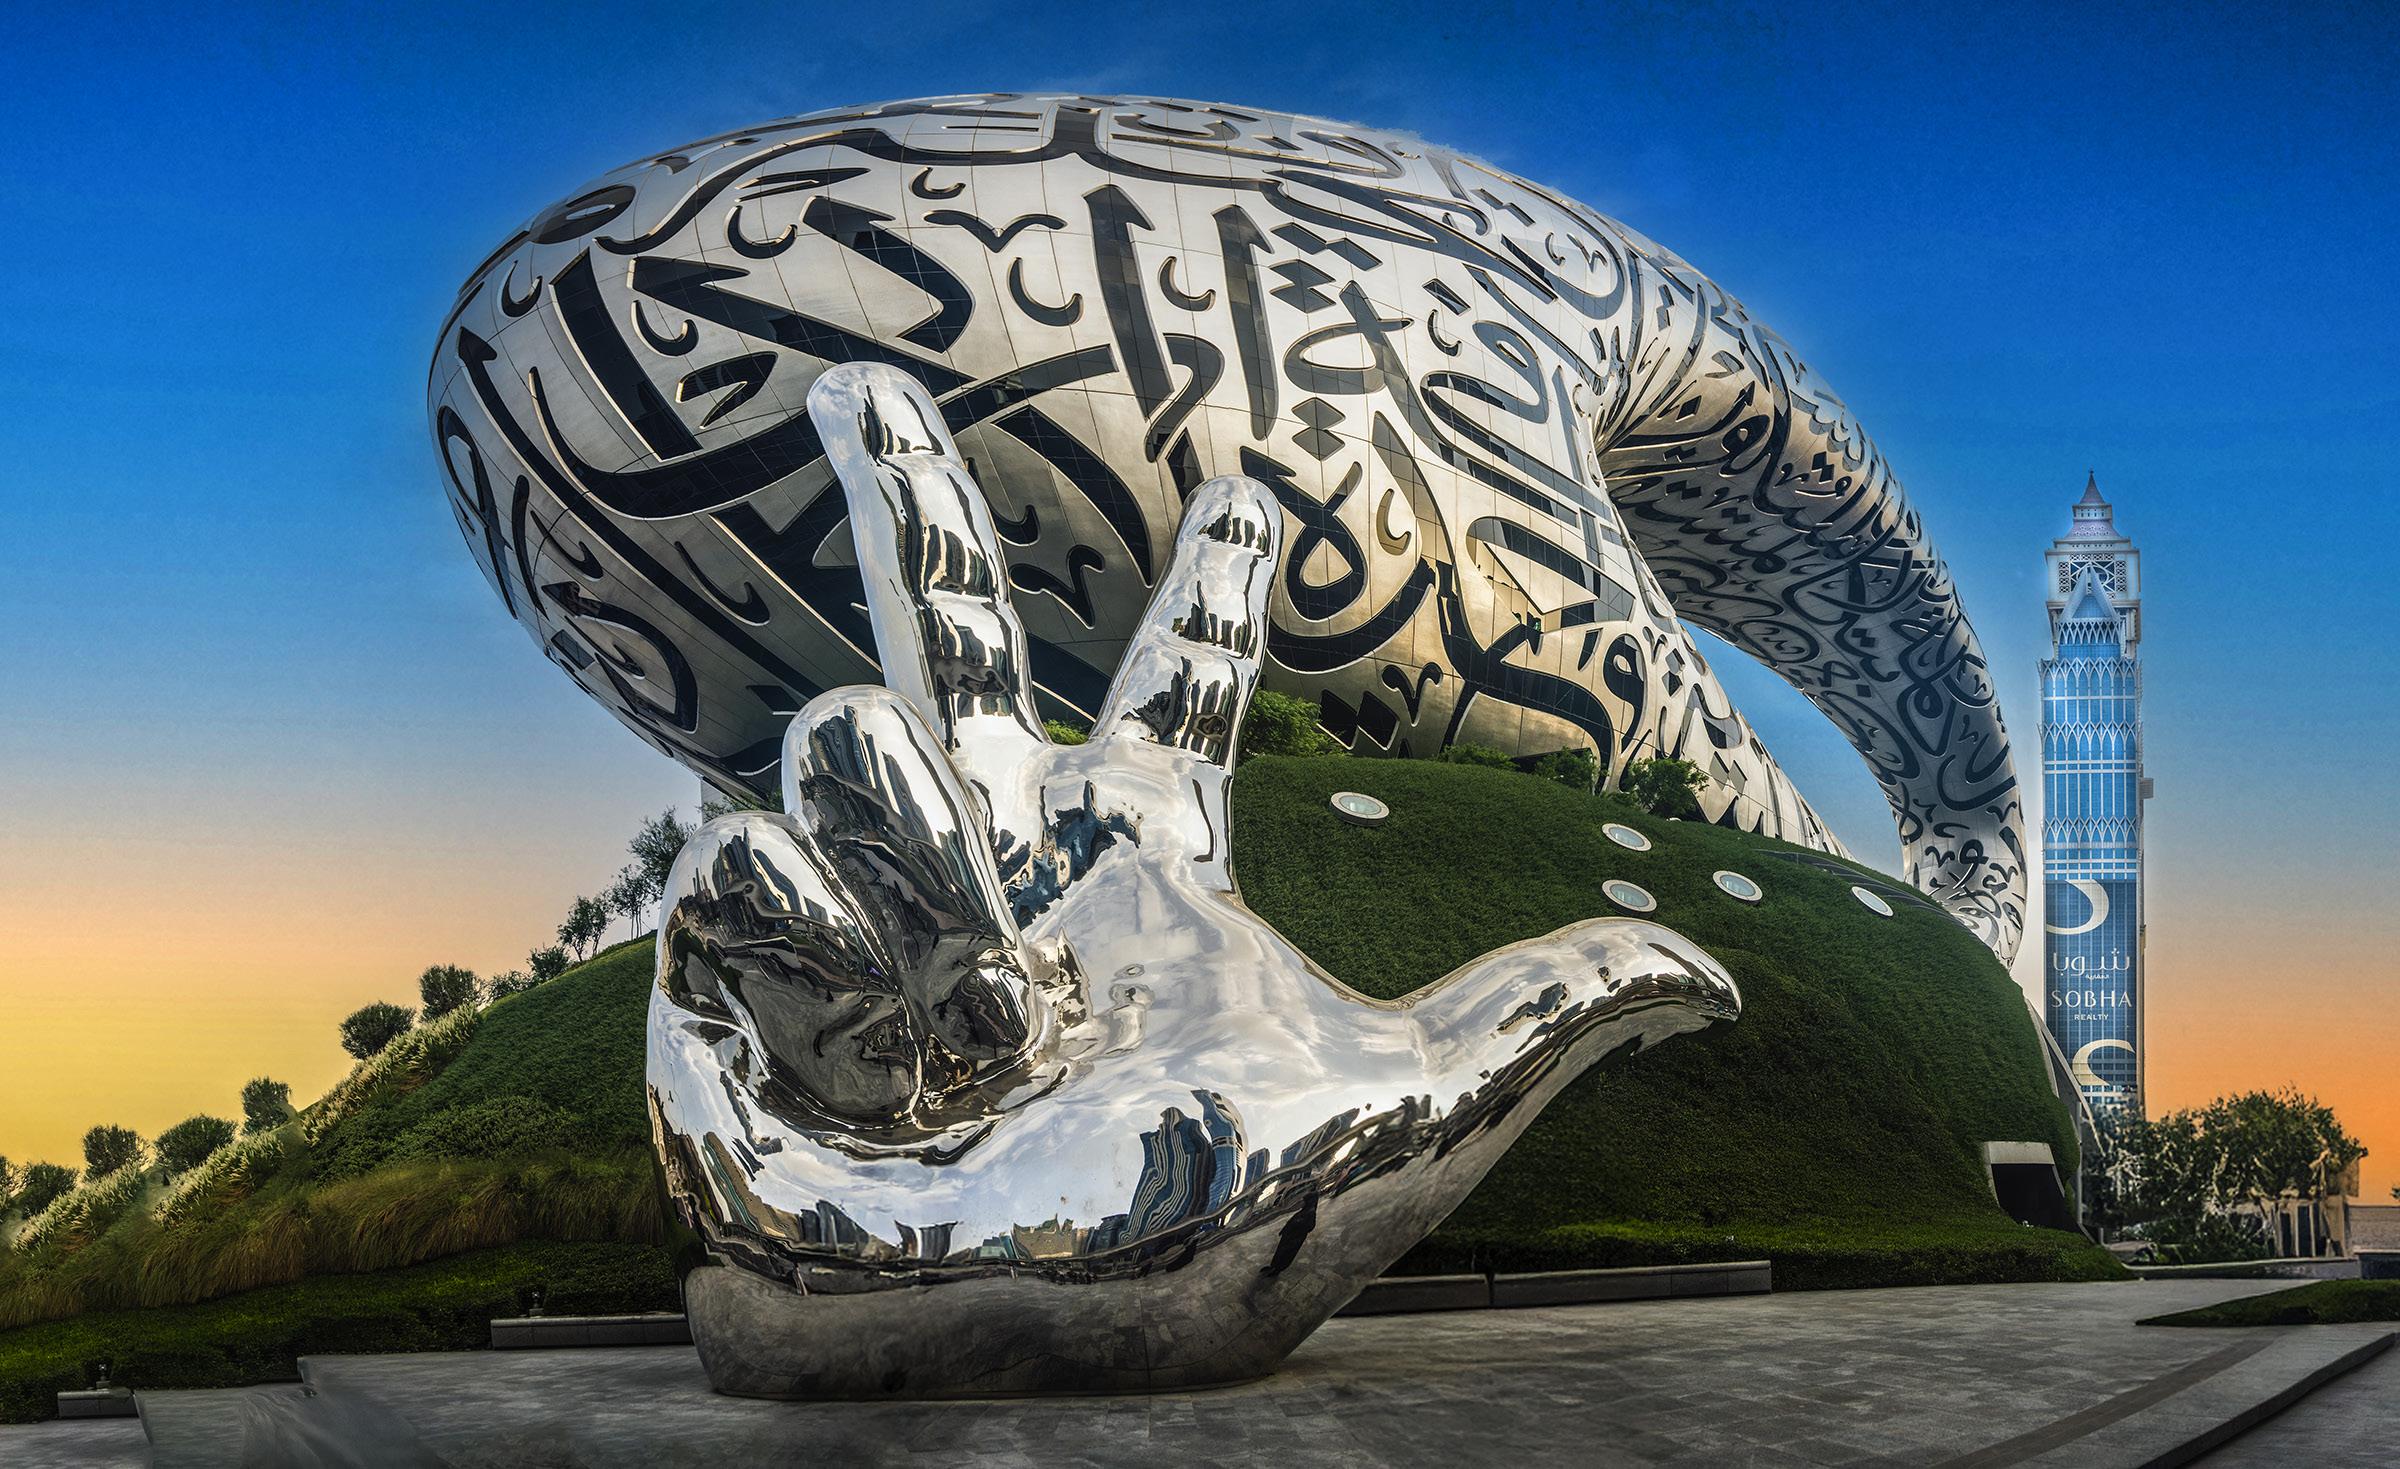
DUBAI & ABU DHABI TOUR
November 14 - 22, 2026
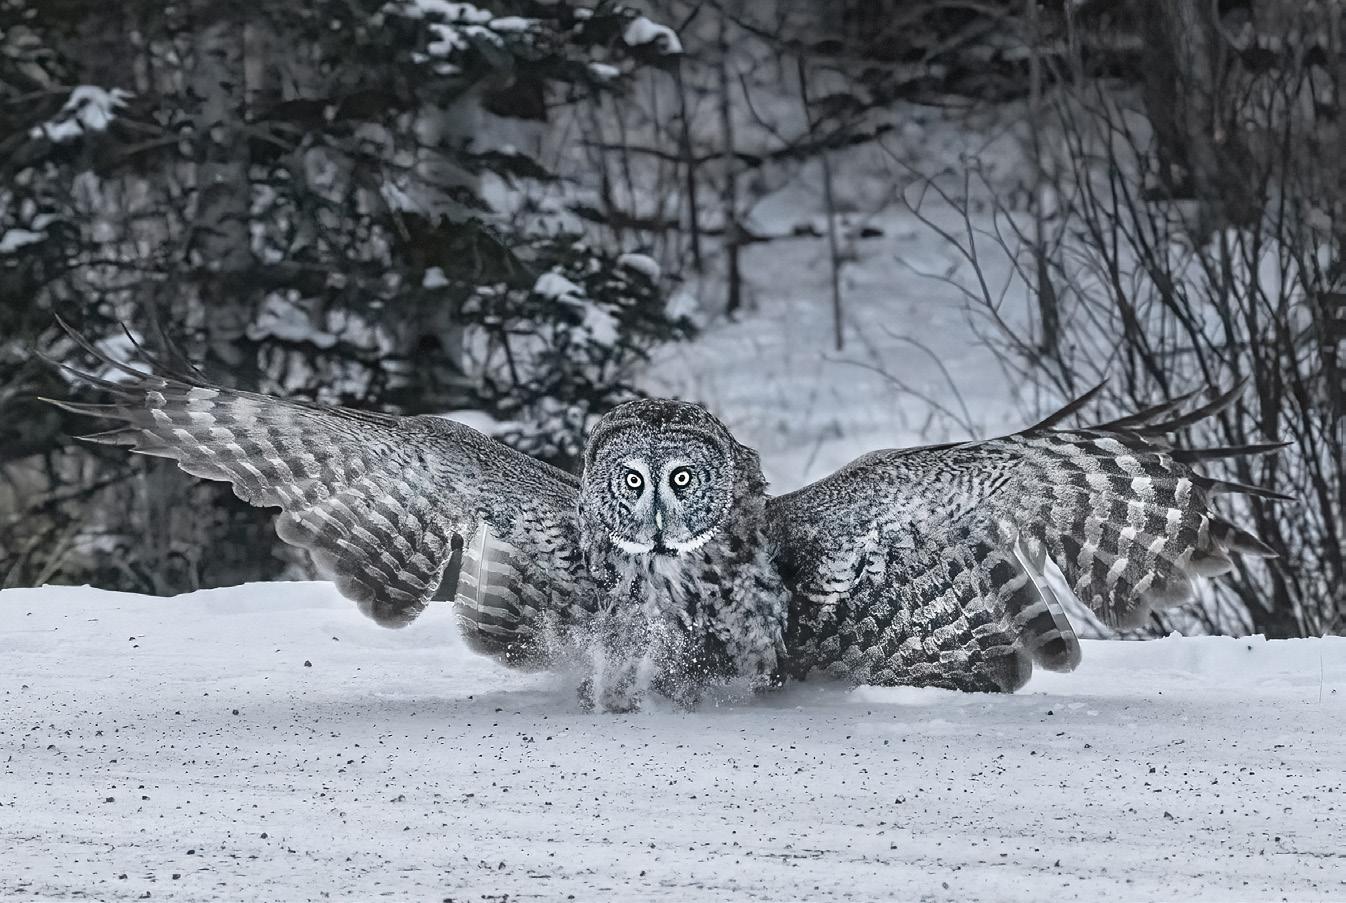
Great Gray Owls workshop
February 13 - 18, 2027
spectacular action shots
The Story Behind

Behind the Picture
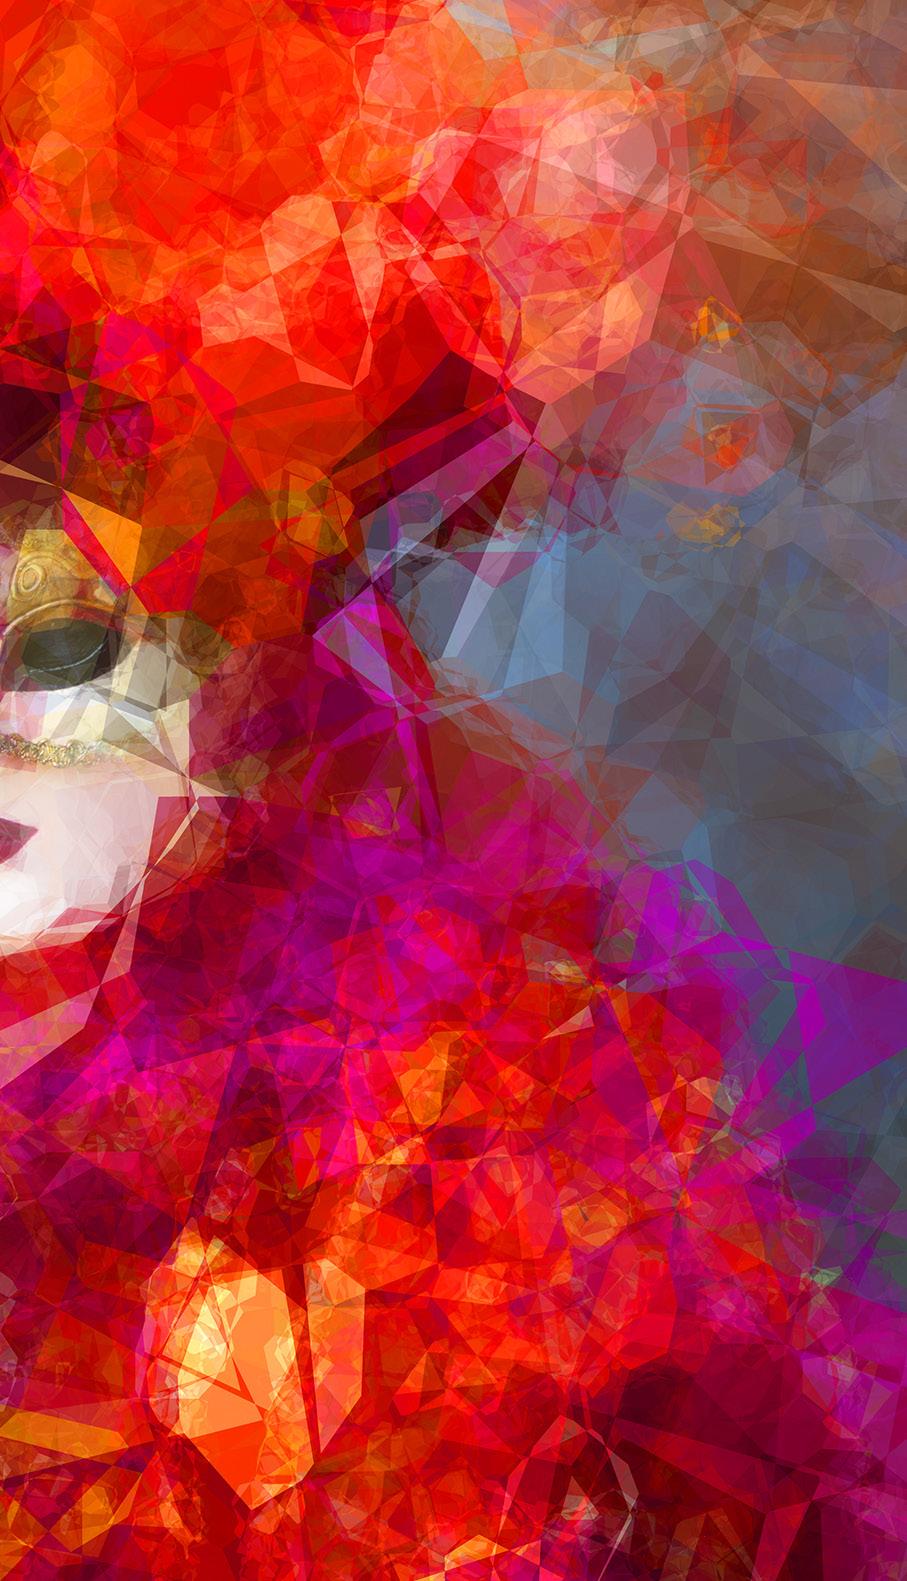
Ffrom the very beginning of my involvement in photography, I tried to turn my pictures into paintings -- or at least, images that looked more like paintings than photographs. I experimented with all kinds of techniques, but nothing I tried back then comes close to what we can do now.
The image at left started out as a portrait of a costumed model in Venice, Italy, during Carnival. One of the suite of effect filters I use is called Filter Forge. It consists of (give or take) 14,000 different filters. Really. It's truly amazing to have at your finger tips so many creative effects.
The filter I used on this image is called Shatter. The effect is similar to placing pieces of broken glass over an image. Within each filter, there are many sub-filters that allow you to tweak the effect in various ways. Exploring dozens or even hundreds of the filters in the program is engaging, intriguing, and ultimately very creative.


‘19 Jan. ‘20


Subject index for past Photo Insight issues
1/3 focus law Jul. ‘15
3D sphere Mar. ‘16
90 degree finder Mar. ‘13
Abstracts in soap Feb. ‘15
Abstracts, Shooting Mar ‘19
Aerial photography Jun. ‘13
Aerial photography Jan. ‘21
African safari May ‘16
AI plus Photograpjhy Oct. ‘23
AI, Photos-to-AI Oct. '24
Airplane windows Mar. ‘16
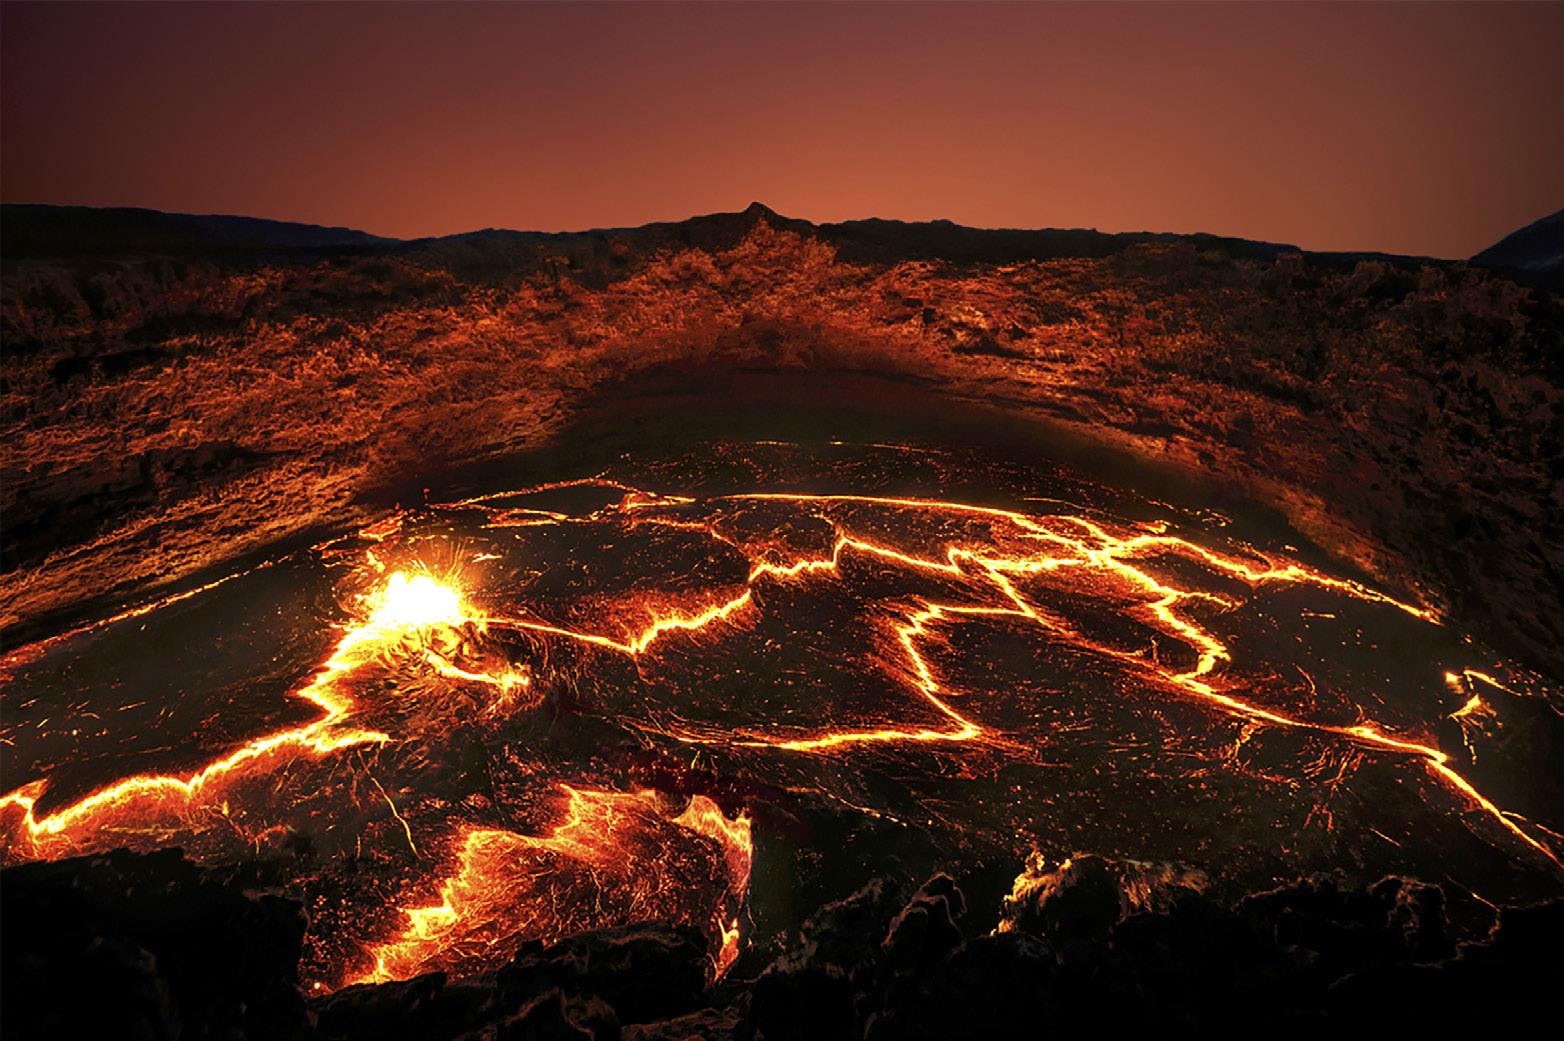
Alien landscapes Jan. ‘13
Anatomy of 8 photographs Jan. ‘16
Anatomy of an Action Shot Feb. ‘24
Angled perspectives Jan. ‘19
Aperture vs. shutter speed May ‘14
Aperture priority Sept. ‘14
Aperture priority and other modes Jul. ‘24
Aurora Borealis Apr. ‘17
Autofocus, When it fails Aug. '25
Auto white balance Dec. ‘13
Autofocus, when it fails Apr. ‘15
Autofocus failure Aug. ‘15
Autofocus failure Jan. ‘17
Autofocus challenges Apr. ‘18
Auto ISO Nov ‘17
Auto White Balance Mar’ ‘21
Autumn Foliage Sep. ‘18
Autumn Color Sep. ‘20
Autumn foliage photography Oct. ‘21
AWB versus Daylight WB May ‘24
Back button focus Oct. ‘18
Backgrounds, wild Nov. ‘12
Backgrounds, busy Apr. ‘13
Backlighting Apr. ‘16
Backlighting Oct. ‘22
Birds in flight Aug. ‘13
Birds in flight Jan. ‘14
Birefringence May ‘18
Birefringence Dec. 24
Birds in flight Mar. ‘16
Birds in flight, camera settings Jan. ‘23
Birds in flight, camera settings Dec. '24
Birds in flight, Strategies for shooting Dec. 25
Bird Photography Jun ‘19
Black backgrounds Aug. ‘23
Blacklight photography Feb. ‘21
Black velvet Mar. ‘14
Black and white conversions Mar. ‘17
Black and white infrared Apr. ‘24
Black and white solarization Sep. ‘17
Black and white with color Jan. ‘20
Black and white plus color Mar. ‘23
Blown highlights Feb. ‘18
Blue monochromes Jan. ‘22
Black Plexy Aug. ‘22
Blur, field Nov. ‘18
Blur technique Oct. ‘17
Bokeh Jun. ‘15
Botanical gardens, shooting Apr. ‘22
Butterfly photography Jul. ‘14
Buying nature Jul. ‘24
Camera buying guidelines
Dec. 21
Camera settings for landscapes Feb. ‘23
Camera setting priorities Jun. ‘17
Canon R5 Mar. ‘21
Capturing lightning Jun. ‘13
Capturing lightning Jun. ‘24
Capturing what you don’t see May ‘21
Catchlights Jul. ‘16
Changing perspective May ‘21
Cheap flash stand Apr. ‘13
Chemical crystals, photographing Mar. '27
Children photography Jun. ‘14
Choosing a telephoto lens Dec. ‘20
Chromatic aberration May ‘13
Chrome Dec. ‘18
Cityscapes Aug. ‘14
Cityscapes May ‘16
Clone tool, fixing an issue Sep. ‘17
Clone tool technique Jul. ‘20
Color theory Nov. ‘23
Composites and Light Dec. ‘17
Composites, Secrets to perfect Jun. ‘24
Compositing images Apr. ‘19
Compositing, 7 steps Jan. 22
Composites, How to make Aug. '25
Composition, different approach Jan. ‘15
Content-aware, New Aug. ‘20
Content aware move tool Jan. ‘23
Contrast vs. exposure Jul. ‘15
Contrast, When it is good Sep. '24
Converting to black and white Mar. ‘22
Correcting keystoning Jun. ‘21
Creating a star field Jan. ‘14
Creating Art out of Motion May ‘22
Creating a Sketch Dec. ‘17
Creative blurs Jan. ‘14
Custom functions Jul. ‘23t
Dark backgrounds Nov. ‘19
Dawn photography Jan. ‘17
Dawn photography Feb. ‘17
Dead center Jan. ‘13
Dead center Oct. ‘23
Dealing with smog Oct. ‘16
Decay photography Sep. ‘15
Define Pattern Sep. ‘18
Define Pattern Sep. '24
Depth of field Aug. ‘16
Depth of field confusion Jan. ‘20
Depth of field and distance Dec. ‘18
Depth of field and obliqueness May ‘21
Depth of field, shallow Apr. ‘20
Depth of field vs. sharpness Nov. ‘20
Diagonal lines, Using Aug. '25
Double takes Apr. ‘20
Drone flying in winter Feb. '26
Drone photography Mar. ‘23
Drone, Lessons from a tour Oct. '24
Drop shadows Apr. ‘19
Dust, Minimizing Aug. ‘19
Dust specks May '25t
eBook, how to make Jan. ‘13
Elevated vantage points Aug. ‘23
Eliminating people from photos Jun. ‘22
Embedded in Ice Oct. 17
Energy saving bulbs Sep. ‘14
Equidistance and telephoto lenses Apri. ‘23
Exploring the power visuals of AI Mar. ‘23
Subject index for past Photo Insight issues
Exposing for the sun
Sep. ‘16
Exposing for silhouettes Mar. '26
Exposure, the sun
Exposing for snow
Exposure technique
Jul. ‘13
Dec. '24w
Sep. ‘13
Exposure, snow Jan. ‘14
Exposure triangle
Exposure, to the right
Exposure compensation
Exposure compensation
Extension tubes
Extension tubes
Face sculpting
Face sculpting
Festival photography
Nov. ‘14
Apr. ‘15
Sep. ‘16
Mar. ‘21
Dec. ‘13
Jul. ‘23
Apr. ‘21
Feb. ‘22
Sep. ‘20
Fill flash Sep. ‘13
Filter forge Feb. ‘13
Fireworks Jul. ‘13
Fireworks, Compositing Jun ‘20
Fisheye lenses May ‘13
Fisheye lenses Feb. ‘15
Fisheye fantasies Oct. 21
Fixing parallax Oct. '24
Flash backlighting May ‘15
Flash, balancing exposure Oct. ‘15
Flash, balancing off-camera Dec. ‘18
Flat art
Sep. ‘16
Flexify 2 Mar. ‘20
Flood fixes problems Nov. ‘19
Floral Portraits, Indoors Aug. ‘21
Flowers May ‘15
Flower photography Apr ‘21
Flowers in harsh light Jul. ‘16
Focus on the eyes
Dec. ‘20
Focus points Mar. ‘15
Focus points
Sep. ‘20
Focus stacking Mar. ‘17
Focus stacking Aug. ‘19
Fogged lenses Jan. '26
Focusing in the dark Oct. ‘16
Foreign Dancers, Photographing Nov’ 17
Foreign models Jun. ‘13
Fractals, generating Sep. ‘13
Fractals Jul. ‘19
Framing May ‘17
Framing Jan. ‘24
Freezing ultra action May ‘17
From Terrible to Beautiful Aug. ‘19
Fun with paint Oct. ‘16
Fundamental ingredients Apr. ‘13
Fundamentals That Make Great Photos Jan. ‘19
Fun With Christmas Lights Jan. ‘21
Fun with Food
Graphic Design
Jul. ‘20
Garish imagery Dec. ‘15
Generative fill Jun. ‘23
Getting money for used gear Jan.’ 22
Getting the blues out Dec. ‘23
Great subjects Apr. ‘15
Great ceilings & HDR Panos Jul. ‘19
Green screen Mar. ‘13
Ground level shooting Oct. ‘22
Grunge technique Feb. ‘13
Harsh light, the problem of Apr. ‘24
Heavy Lens Debate, The Feb. ‘23
Helicopters, Shooting from Mar. '25
HDR, one photo Apr. ‘13
HDR at twilight May ‘13
HDR, realistic Jun. ‘15
HDR, hand held Dec. ‘16
HDR, hand held Nov ‘17
HDR, hand held Jul. ‘18
HDR panoramas Jun. ‘16
HDR, choosing the number of frames Jun. ‘22
High wind Apr. ‘17
Highlights Apr. ‘14
Highlights, overexposed Feb. ‘15
Histograms, Why I Don’t Use Jun ‘19
Histogram problems Apr. ‘20
Home nature projects Jun. ‘23
Hotels with a view Mar. ‘20
Humidity Oct. ‘13
Hummingbird photography Apr. ‘13
Hyperfocal distance Jul. ‘13
Image resizing Aug. ‘18
Implying motion Sept.‘14
Impossible DOF Feb. ‘16
Impossible DOF Jan. ‘17
Impossible metering situations Feb. '26
Indestructible camera bag Dec. ‘14
Infrared photography Jul. ‘14
Insane ISO settings Dec. ‘22
Interiors Oct. ‘15
iPad: Loading photos Aug.‘17
iPhone photography, pros and cons Apr. ‘22
Jungle photography Dec. ‘14
Kaleidoscopic images Jan. ‘15
Kaleidoscopis images Aug. ‘20
Keystoning Nov. ‘23t
Keystoning, correcting Aug. ‘15
L Bracket Feb. ‘18
L Bracket Feb. ‘21
Landscape photography Dec. ‘12
Landscape photography Apr. ‘14
Landscape photography Nov. ‘16
Layer Masks, The Power of Feb. ‘22
Leading Lines Aug. '24
Lessons Learned from Extreme Cold Feb. ‘24
Light fall-off Feb. ‘14
Light painting Dec. ‘21
Lighting a face Oct. ‘13
Lightning photography May ‘20
Liquify Feb. ‘18
Liquify Distortions Sept/Oct. ‘19
Lenses, Essential Aug. ‘23
Long lens portraits Oct. ‘18
Long Lenses for Flowers Jul. ‘20
Low light photography May ‘15
Luminar 4 Jan. ‘20
Macro flash Nov. ‘12
Macro flash Sep. ‘14
Macro flash Aug. ‘15
Macro flash Aug. ‘22
Macro flash advantage Feb. '25
Subject index for past Photo Insight issues
Macro photography and DOF Feb. ‘22
Macro trick May ‘19
Managing soft focus Jul. ‘21
Mannequin heads Apr. ‘16
Metering modes
Nov. ‘16
Meters, How They Work Jul. ‘18
Meters, when they fail Dec. ‘16
Metering situations, Impossible Jul. ‘19
Middle gray Nov. ‘15
Midday sunlight, The Challenge of Feb. '25
Milky Way, Photographing the Aug. '25
Minimizing dust on the sensor Nov. ‘21
Optical infinity Jun. ‘16
Mirrors Jan. ‘19
Mirror images May ‘23
Model shoot Jan. ‘17
Moon glow Oct. ‘16
Mosaics Jun. ‘17
Mundane to Ideal Nov. ‘19
Museum photography Mar. ‘13
Museum photography Aug. '25
Natural Light Portraits Aug. ‘21
Negative space Jan. ‘16
Neon edges on black Aug. ‘14
Neutral Density filters Jun. ‘18
New depth of field preview Mar. ‘24
New shooting style Mar. ‘24
Neutral Density filters and water Mar. ‘22
Night photography Feb. ‘14
Night Safaris Jun. ‘18
Night to Twilight Dec. ‘17
Noise reduction Feb. ‘17
Off-camera flash
Jan. ‘24
Oil and water May ‘20
Online Nature Mar. '25
Organization of photos Mar. ‘18
Out of focus foregrounds Jan. ‘20
Out of focus foregronds Nov. 25
Paint abstracts
May ‘13
Paint abstracts Aug. ‘21
Painting with light Sep. ‘15
Pan-blurs Sep. '24
Panning motion Dec. ‘16
Pano-Mirrors with a twist Jan. ‘18
Parades Sep. ‘13
Parallax, Correctingt May '25
Parallelism Nov. ‘19
Parallelism and DOF Feb. ‘21
Perspective, Super Exaggeration of Dec. ‘21
Photo shsaring Apr. ‘23
Photo terms Nov. ‘22
Photographing Christmas Dec. ‘23
Photography to Art Dec. ‘17
Photography solutions Jan. ‘18
Photoshop, content Aware Nov. ‘12
Photoshop, sketch technique Apr. ‘13
Photoshop, replace background Apr. ‘13
Photoshop, actions palette Dec. ‘13
Photoshop, layer masks Feb. ‘13
Photoshop, the clone tool May ‘13
Photoshop, soft foliage Oct. ‘13
Photoshop, mixer brush tool Sept. ‘14
Photoshop, b & w with color Jun. ‘14
Photoshop, drop shadows Jul. ‘14
Photoshop, creating texture Feb. ‘14
Photoshop, face mirrors Feb. ‘14
Photoshop, liquify Mar. ‘14
Photoshop, face mirrors Aug. ‘14
Photoshop, digital spotlight Sep. ‘14
Photoshop, enlarge eyes Nov. ‘14
Photoshop, darken the periphery Dec. ‘14
Photoshop, mirror images Dec. ‘14
Photoshop, beam of light Apr. ‘15
Photoshop, polar coordinates Mar. ‘15
Photoshop challenge Jan. '26
Photoshop, chrome May ‘15
Photoshop, actions palette Nov. ‘15
Photoshop, cut and paste Nov. ‘15
Photoshop fixes problems Jan. '26
Photoshop, geometrics Oct. ‘15
Photoshop, plugins Oct. ‘15
Photoshop, multiple selections Apr. ‘16
Photoshop, sharpening Apr. ‘16
Photoshop, Flood plugin Apr. ‘16
Photoshop, Desaturation Aug. ‘16
Photoshop, making a composite Aug. ‘16
Photoshop new tool May ‘20
Photoshop, place one element behind Aug. ‘18
Photoshop, the pen tool Feb. ‘16
Photoshop, canvas size Jan. ‘16
Photoshop, using the earth Jun. ‘16
Photoshop, define patterns May ‘16
Photoshop, paste into Nov. ‘16
Photoshop, b & w with color Feb. ‘17
Photoshop, open a closed door Apr. ‘17
Photoshop, palettes May ‘17
Photoshop, My favorite plugins Jan. ‘20
Portrait options Jan. ‘19
Portrait techniques Nov. ‘15
Portraits Mar. ‘13
Portraits, mixed lighting Aug. ‘14
Portrait Professional Nov. ‘19
Portraits, Lens choice Sept/Oct. ‘19
Portraits, side lighting Sep. ‘17
Portraits, window light Mar. ‘15
Portraits, outdoors May ‘17
Post-processing checklist Dec. ‘13
Post-processing: Contrast Aug. ’17
Practicing graphic design, Part I Dec. ‘22
Practicing graphic design, Park II Jan. ‘23
Practicing graphic design, Part III Feb. ‘23
Pre-capturing technology May ‘23
Predictive Focus Sep. ‘18
Problem/solution Apr. ‘17
Problem Solving in Photoshop May ‘22
Problem with cruises Jan. ‘18
Protecting extremeities from the cold Dec. ‘22
Protecting highlights Dec. ‘12
Puppies Jan. ‘15
Puppy photography Feb. ’18
Rays of Light Mar. '25
Reflections Feb. ‘13
Reshaping faces Oct. ‘22
Restoring old photos Jun ‘20
Subject index for past Photo Insight issues
S-curves Aug. '24
Safari May ‘13
Safari strategies Jul. ‘15
Seeing as the lens does Nov. ‘14
Seeking Cool Snow Photos Jan. ‘21
Selective filtering Mar. ‘18
Selective focus Jun. ‘15
Self-critiques Jul. ‘13
Self-critiques Oct. ‘13
Self-critiques Nov. ‘20
Sensor cleaning Jun. ‘18
Sepia and dark contrast Jun. ‘15
Sepia, Traditional look of
Shade May ‘14
Shady side Jun. ‘18
Shadows define the shot Dec. ‘23
Shadows, Paying Attention to Mar. ‘18
Sharp, 6 reasons why photos are not Apr. ‘24
Sharpness problems Mar. ‘14
Shooting from helicopters
Shooting in Inclement Weather Nov. ‘22
Shooting thru glass May ‘24
Shooting through textured glass May ‘23
Shooting through wire mesh Sept. ‘14
Shooting into the light Jun ‘20
Shooting through glass Nov. '25
Side lighting Jan. ‘24
Silhouettes Jun. ‘13
Silhouettes, How to make Apr. ‘22
Silhouettes, Exposing for Sept/Oct. ‘19
Silvered landscapes Mar. ‘20
Sketch, How to Make Jun ‘19
Skies make or break a picture Aug. ‘21
Sky replacement Nov. ‘20
Sky replacement strategies Aug. ‘22
Snow exposure Nov ‘17
Snow exposure Nov. ‘19
Soap abstracts Aug. ‘23
Soft light Jan. ‘13
Smart phone photography May ‘19
Some people are clueless May '25
Stained glass Mar. ‘17
Star photography and noise Jan. ‘18
Stock photography Sep. ‘14
Sunrise & sunset Jan. ‘19
Symmetry Aug. '24
Tamron 150-600mm Apr. ‘14
Ten reasons photos are not sharp Jan. ‘19
Texture, Adding Mar ‘19
Texture Mapping in 3D Jul. ‘21
To Polarize or not to Polarize Jun. '25
Too much lens Jul. ‘24
Topaz AI Gigapixel Mar ‘19
Topaz glow Jan. ‘15
Topaz glow Sep. ‘17
Topaz Impression Sep. ‘15
Topaz Remask 5 Oct. ‘17
Topaz Simplify 4 Dec. ‘12
Topaz simplify 4 Jun. ‘14
Topaz Studio Apr. ‘18
Total solar eclipse, How to shoot Mar. ‘24
Translucency & backlighting Nov. ‘18
Travel photography Feb. ‘ 13
Travel portraits Mar. ‘14
Travel tips Apr. ‘14
Travel photographer’s guide Jun. ‘17
Traveling Lighter Nov. '25
Tripods, not allowed Jun. ‘24
Tweaking exposure on the fly Apr. ‘23
Twilight photography in the rain Apr. ‘19
Twilight, Creating Oct. ‘23
Two subject rule Dec. '25
Tripods Mar. ‘18
Two subject sharp rule May ‘14
Two subject focus rule Jan. ‘20
Two subject focus rule Jun. ‘21
Urban heights Jun. ‘21
Ultra distortion May ‘18
Unusual Panos Nov. ‘22
Upside Down Reflections Aug. ‘21
Subject index for past Photo Insight issues Quiz answers
Warm fingers in winter Nov. ‘15
Water drop collisions May ‘18
What NOT to do in photography Apr. ‘18
When diagonals are distracting Feb. '26
When You Needed a Zoom Aug. ‘21
White on White Dec. ‘20
White on White Nov. ‘23
White vignette Aug. ‘15
White balance Feb. ‘15
White balance, what's the best Jun. '25
White balance, custom Mar. ‘16
White balance, What Jun. ‘23
Wide angle conundrum May ‘19
Wide angle distortion, correcting May ‘24
Wide angle landscape technique Aug. '25
Wide angle lenses Mar. ‘13
Wide angle portraits Nov. ‘14
Wide angle lenses Jun. ‘17
Wide angle lenses: Outside the Box Jun. ‘22w
Wide angle keystoning Nov ‘17
Wildlife photos with wide angles Mar. ‘15
Window light Dec. ‘15
Window light portraits Aug. ‘18
Window light portraits Feb. ‘24
Window frames Feb. ‘16
Winter photography Dec. ‘12
Winter bones May ‘13
Winter photography Dec. ‘15
Winter photography Nov. ‘18
Wire Mesh, Shooting Through Jul. ‘18
White balance Mar. '26
Workflow May ‘13
1. b 2. a 3. b 4. b 5. b 6. c 7. b 8. a 9. a 10. d
Your score
90% - 100%: You could have been a pro
80% - 89%: Your glasses probably need a new prescription
70% - 79%: Just don’t quit your day job
< 70%: You should really be using an iPhone
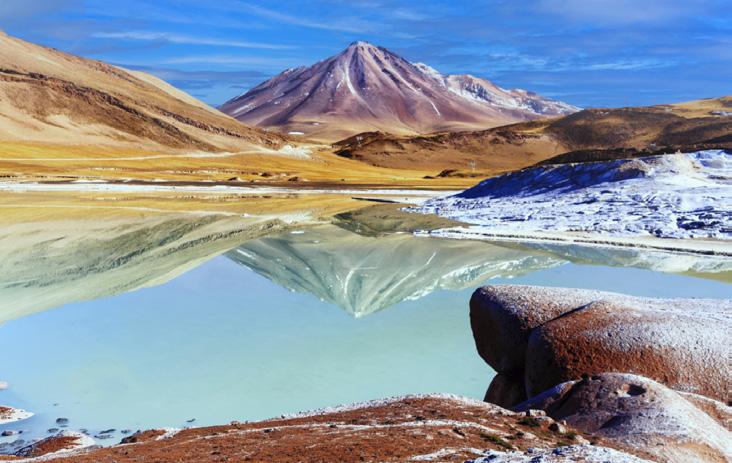
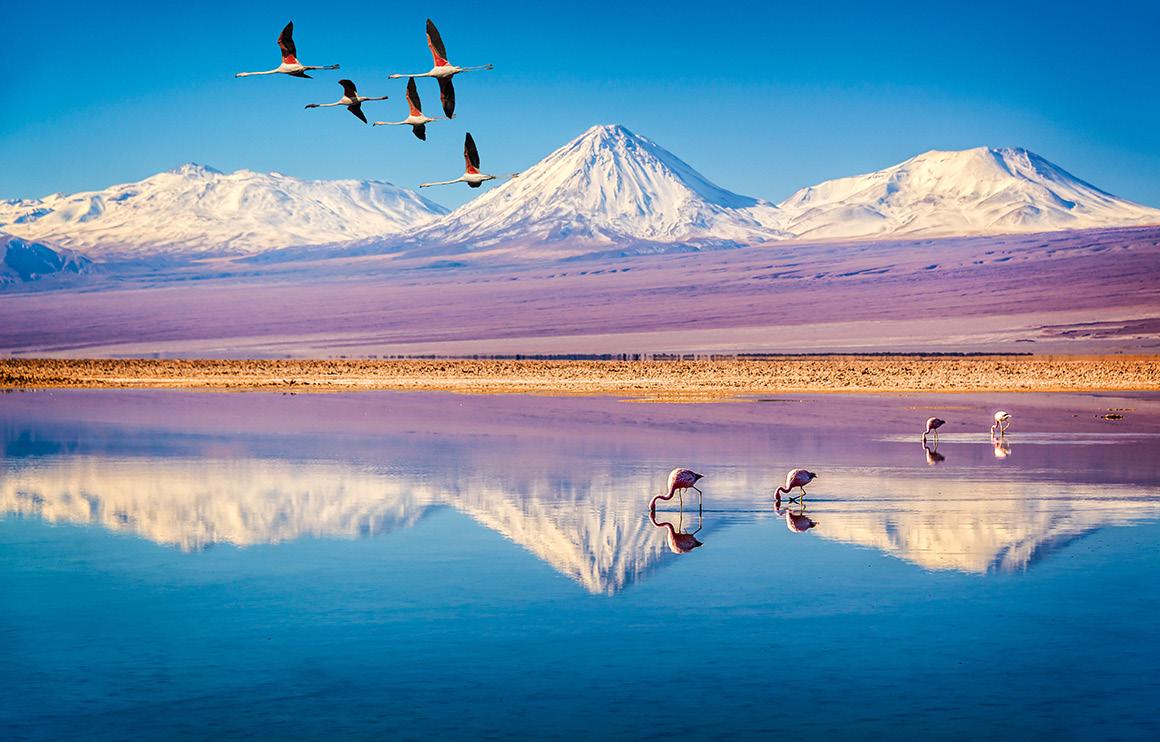
CHILE: THE DESERT to the SEA
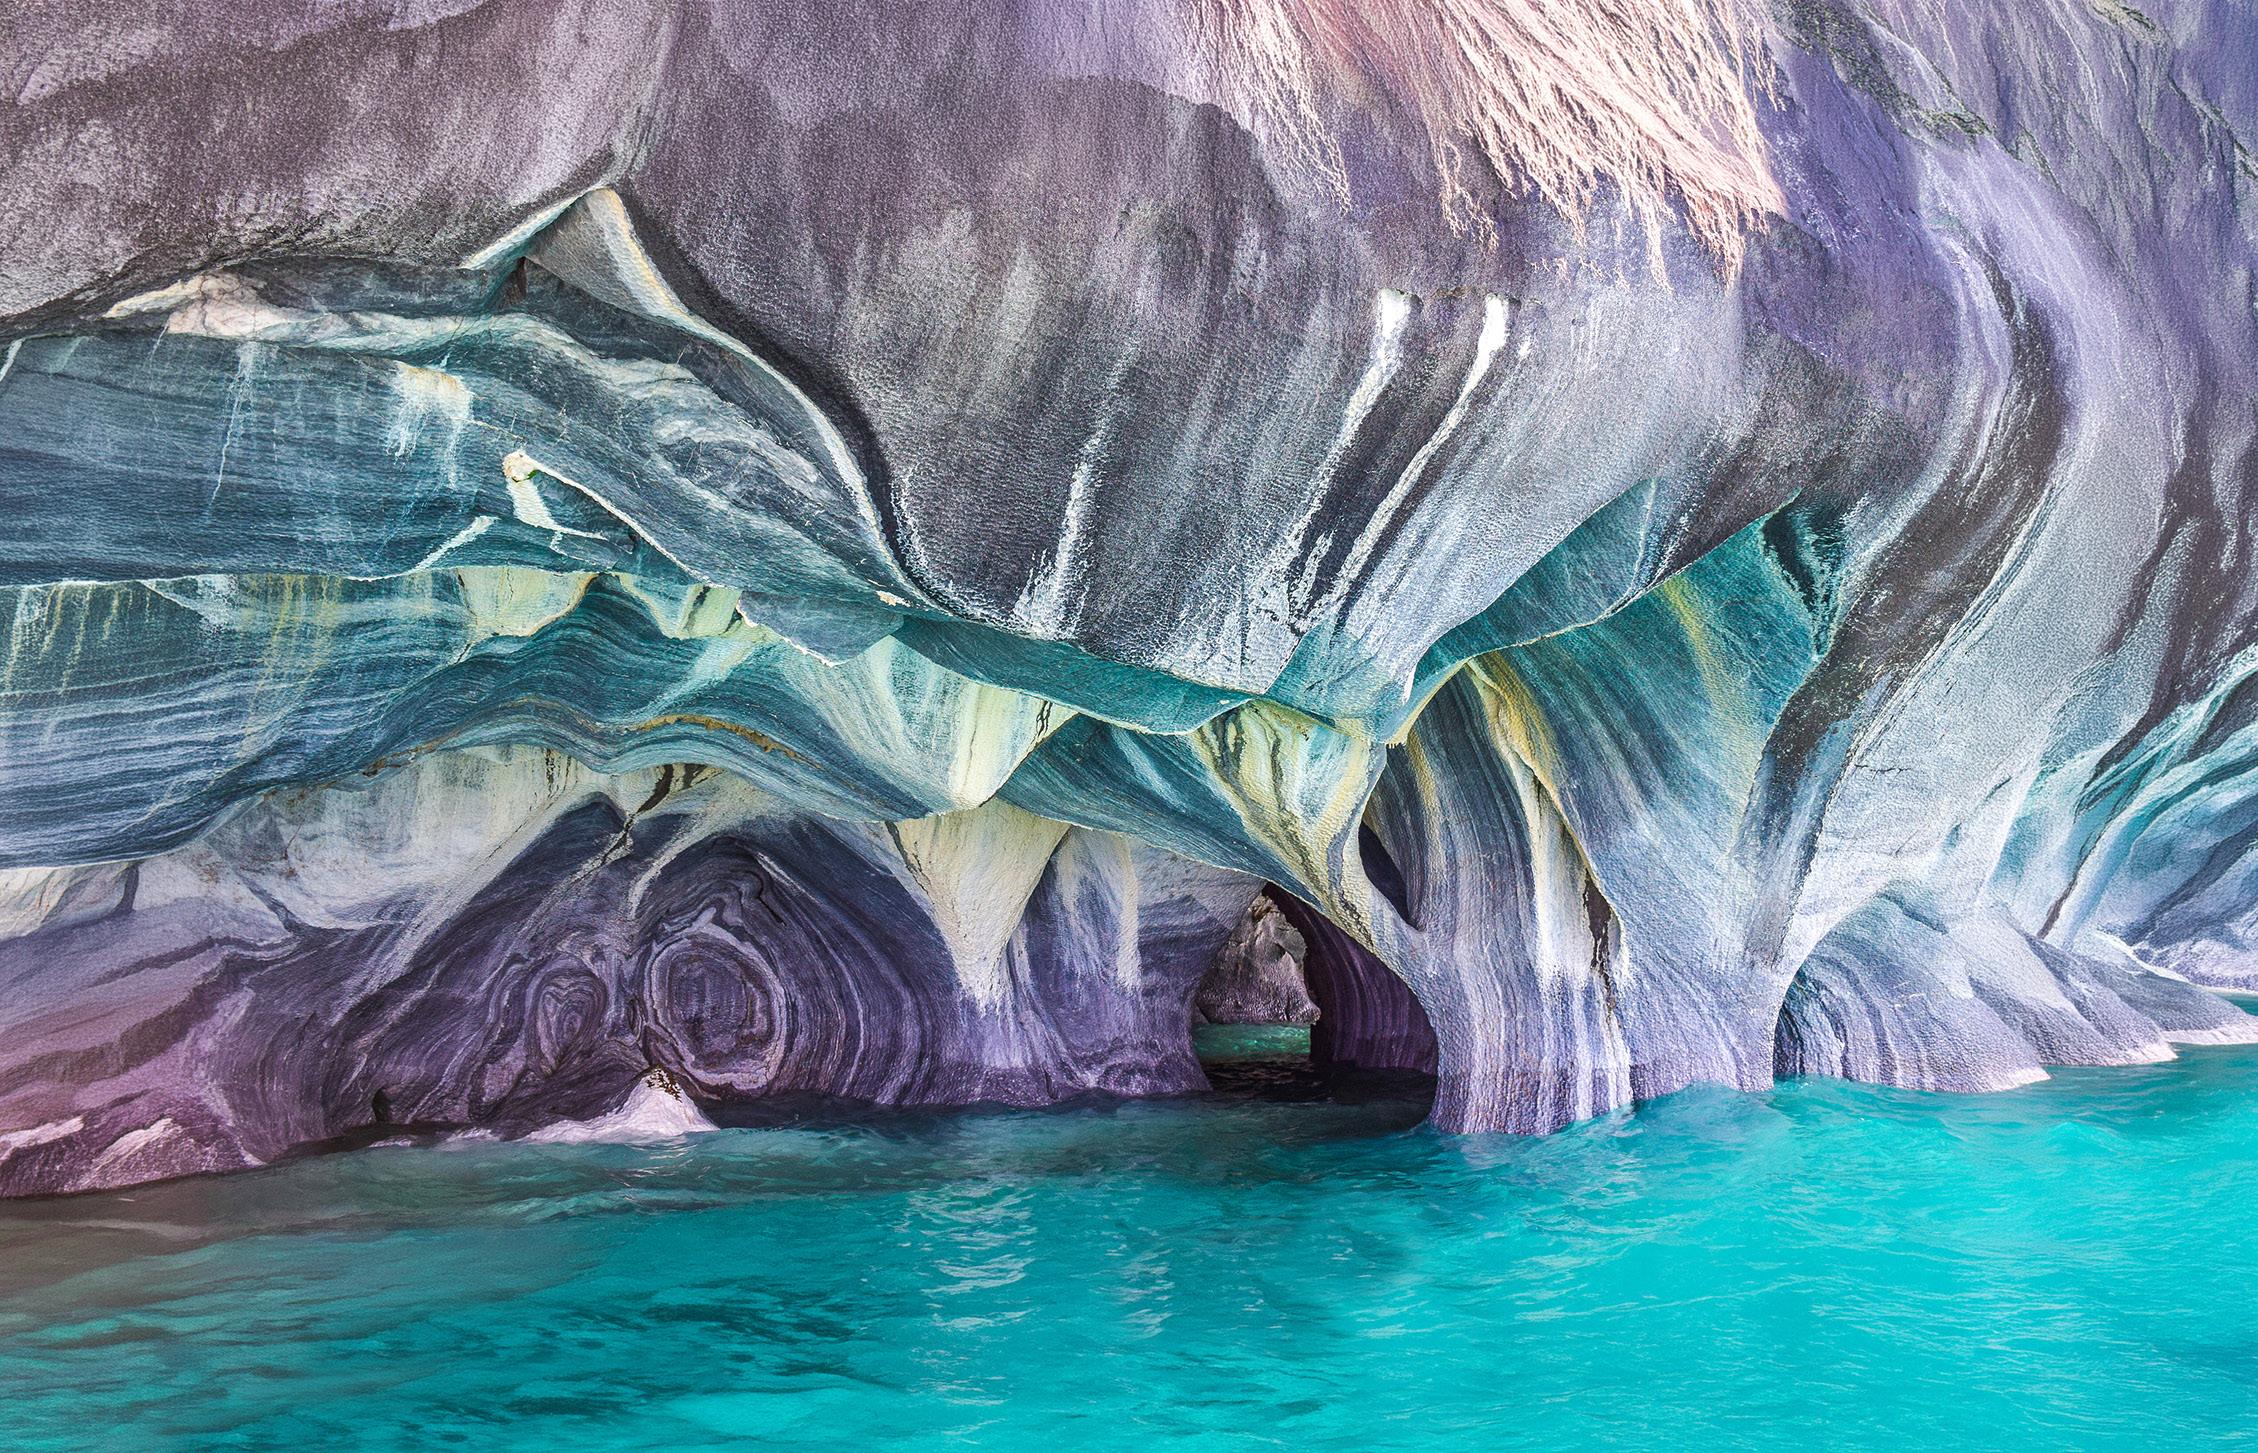
Marble Caves
Atacama Desert
Edited by Donald Moore
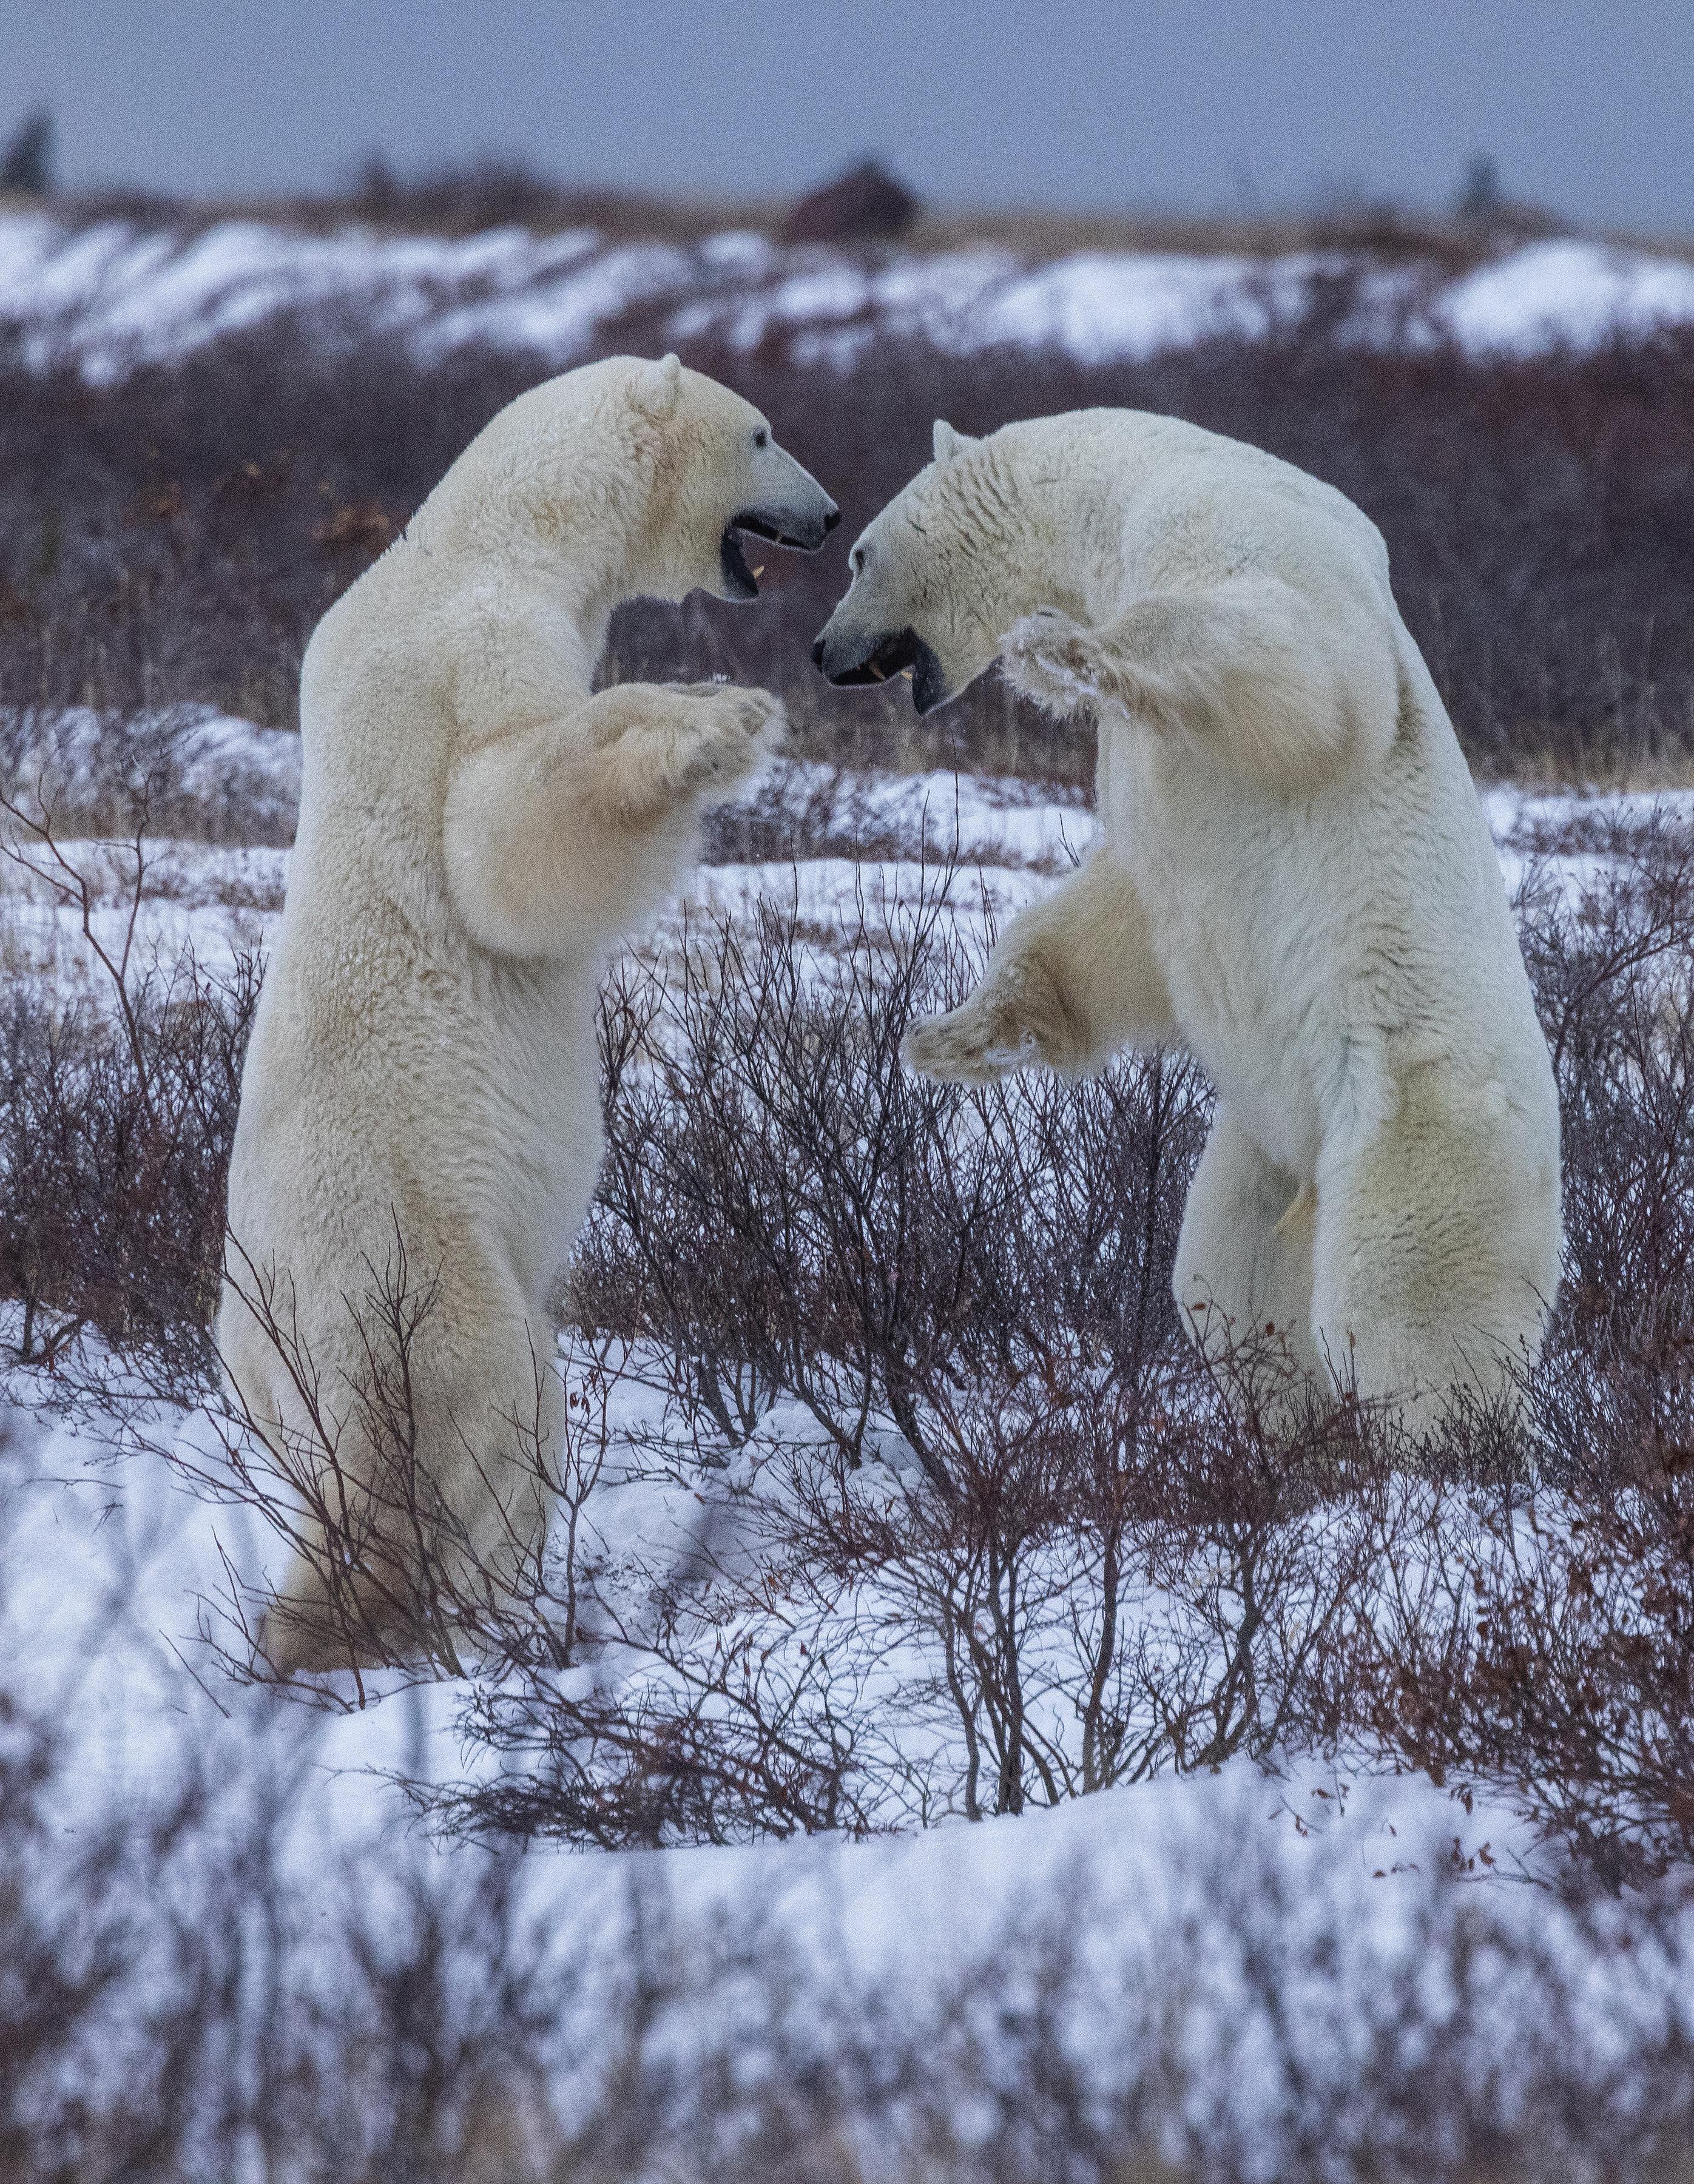
Polar bears sparring near Churchill, Manitoba, Canada