2 minute read
5.3.1 Add Layers


Menu Description Note:
Press an input source button in the SOURCE area on the device front panel to quickly select an input source for the layer. Scaling Mode The layer supports the following three scaling modes. Full Screen: The layer image fills the whole screen. Pixel to Pixel: The layer image is not scaled but displayed in the original size of the input source or the cropped source. Custom: Customize the layer size and the output image is scaled according to the layer size.
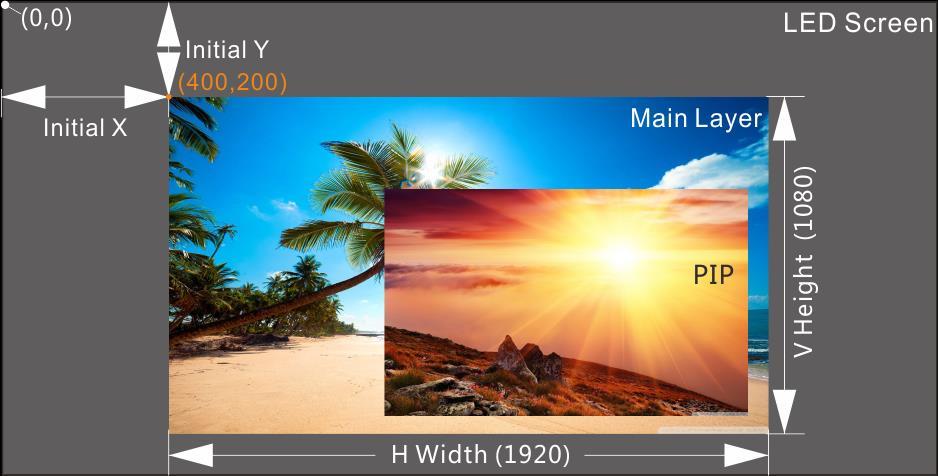
H Width Set the layer size in the horizontal direction. The width value ranges from 64 to 32768. V Height Set the layer size in the vertical direction. The height value ranges from 64 to 32768. Initial X Set the horizontal distance between the top left corner of the layer and the top left corner of the screen.
Initial Y Set the vertical distance between the top left corner of the layer and the top left corner of the screen.
Priority Adjust the layer z-order. The greater the value, the more front the layer. The value ranges from 1 to 3. 1: The layer locates at the bottom. 3: The layer locates on the top. Input Crop Crop the input source image and display the cropped part on full screen. Status: Turn on or turn off the cropping function. H Width: The size of the cropped part in the horizontal direction. The value ranges from 64 to the width of the current input source. V Height: The size of the cropped part in the vertical direction. The value ranges from 64 to the height of the current input source. Initial X: Set the start position for the cropping in the horizontal direction. The value defaults to 0. Initial Y: Set the start position for the cropping in the vertical direction. The value defaults to 0.
Opacity Set the transparent degree of the layer image. The greater the value, the more opaque the layer image; the smaller the value, the more transparent the layer image. 0%: Transparent 100%: Nontransparent
Button Operations
Step 1 Press the MAIN, PIP 1 or PIP 2 button in the CONTROL area on the device front panel to quickly open the layer and the device screen displays the corresponding layer settings screen.
MAIN: Main layer PIP1/PIP2: PIP layer 1 and 2
Step 2 Press an input source button in the INPUTS area to quickly select an input source for the layer.
Menu Operations
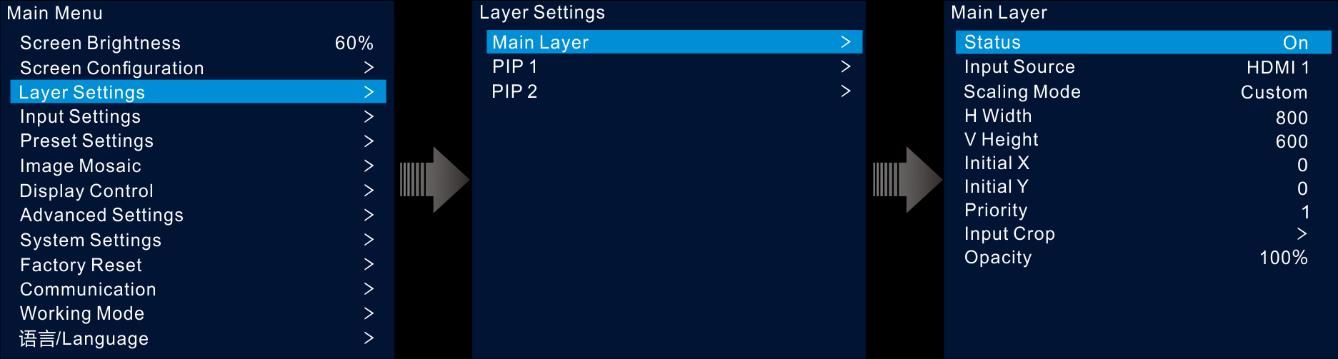
Step 1 On the home screen, press the knob to enter the main menu screen.
Step 2 Rotate the knob to select Layer Settings and press the knob to enter the layer settings screen.
Step 3 Rotate the knob to select Main Layer, PIP 1 or PIP 2 and press the knob to enter the corresponding settings screen.
Figure 5-10 Layer settings
Step 4 Select Status and press the knob to confirm. Rotate the knob again to select On and press the knob to confirm.
Step 5 Rotate the knob to select Input Source and select the desired input source for the layer.
Step 6 Rotate the knob to select other layer parameters and set them if needed. The layer parameter descriptions are shown in Table 5-2 and Figure 5-11.
Figure 5-11 Layer parameter descriptions
Step 7 Rotate the knob to select Priority and set the layer z-order.