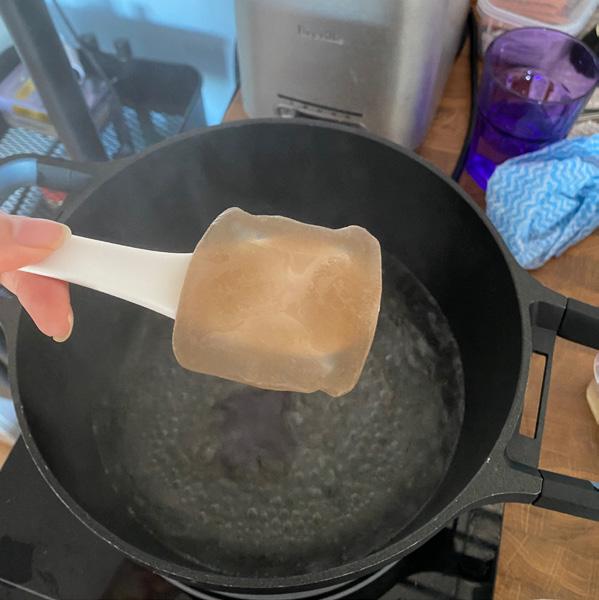
In the early hours of the morning before the Sun has risen, a pot of water gently simmers away on the stove. As tiny bubbles begin to form at the bottom of the pot, wisps of steam evaporate into the icy air of the kitchen. Out from the freezer a handful of withered avocado skins and pits emerge covered in frost. Suddenly they are dropped into the pot of steaming water, the frost instantly melting and the skins slowly opening. As the hours go by the water that was once clear transforms into a deep earthy rose hue. The heat is turned off and the tinted water is left to cool.
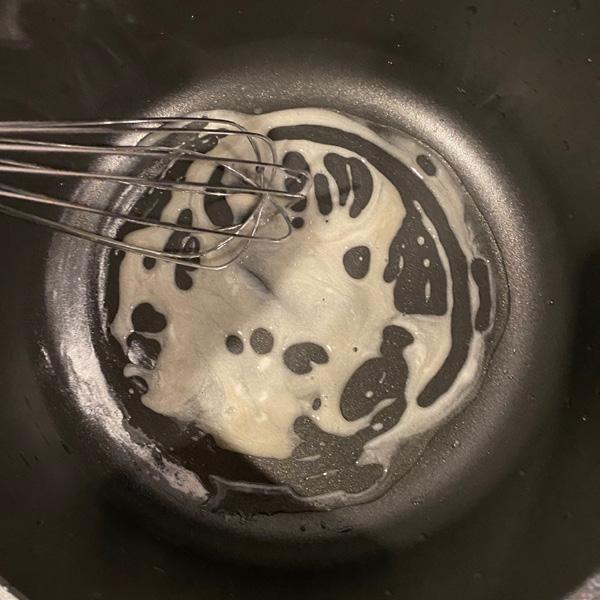
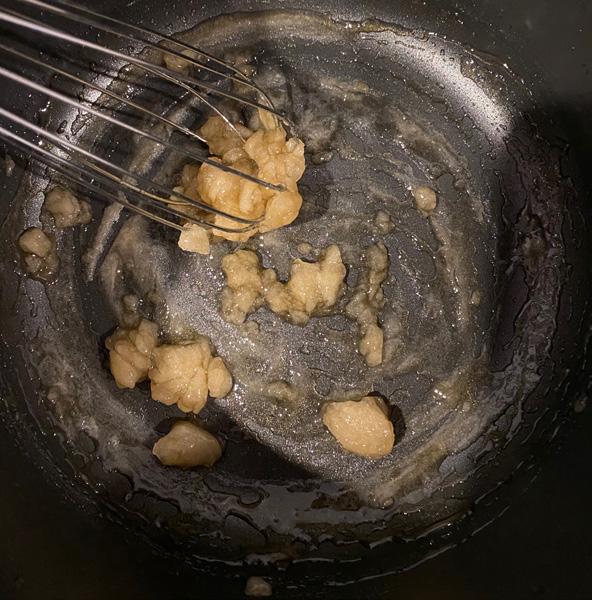
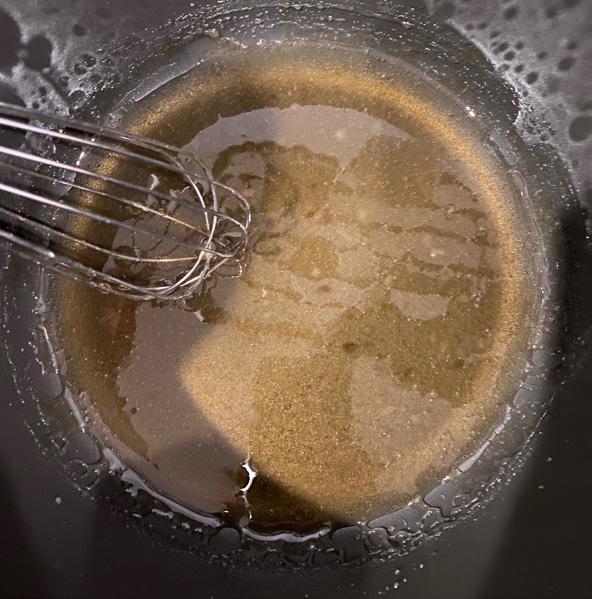
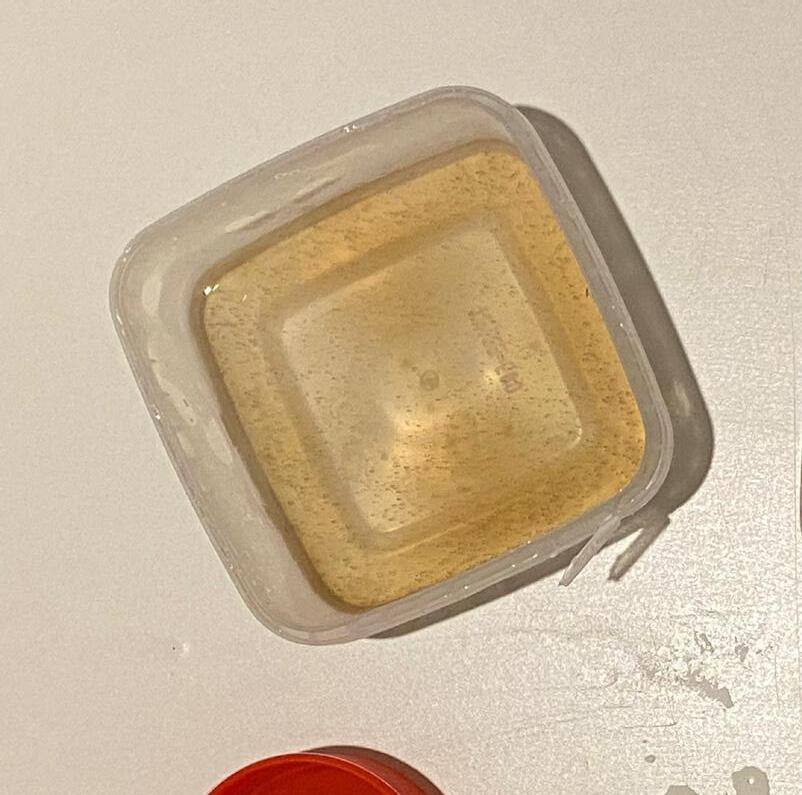
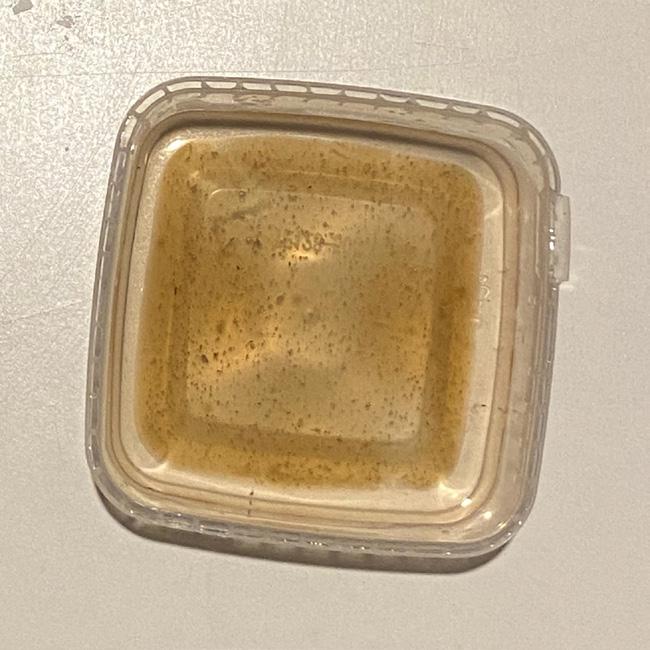
Across the stove, on the cool counter top a ceramic bowl clinks as it’s carefully placed down on the marble. A spoon hovers over the bowl and in falls a finely milled cream coloured powder. The powder falls and hit the bowl as fine dust billows into the air. But just as the dust begins to settle, a colorless honey is poured and drizzled on top. The wire loops of a whisk begin to stir, moving and blending the textures together. The powder and liquid soon turn into a smooth, sticky mess, reminiscent of condensed milk. Once the whisk has stopped a gentle stream of the rose tinted water trickles in, sliding on the surface of the creamy substance. Water continues to gently seep in and the wire loops start beating again.
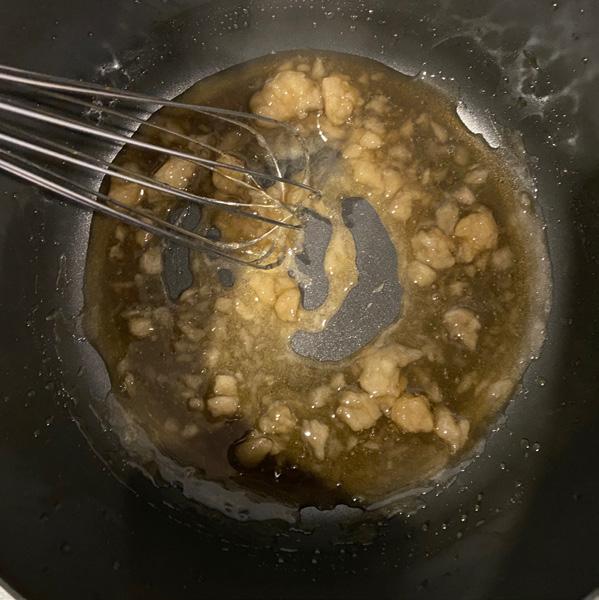
Then out of nowhere, small translucent gelatinous blobs begin to appear and the rosy water starts to thicken. When the whisk stops beating and is put aside, all that’s left is a runny watery gel scattered with jelly blobs and bubbles. Very slowly the jelly blobs begin to swell and eventually dissolve into each other. What once was a water blobby mess is now a seamless and viscous maroon coloured liquid.
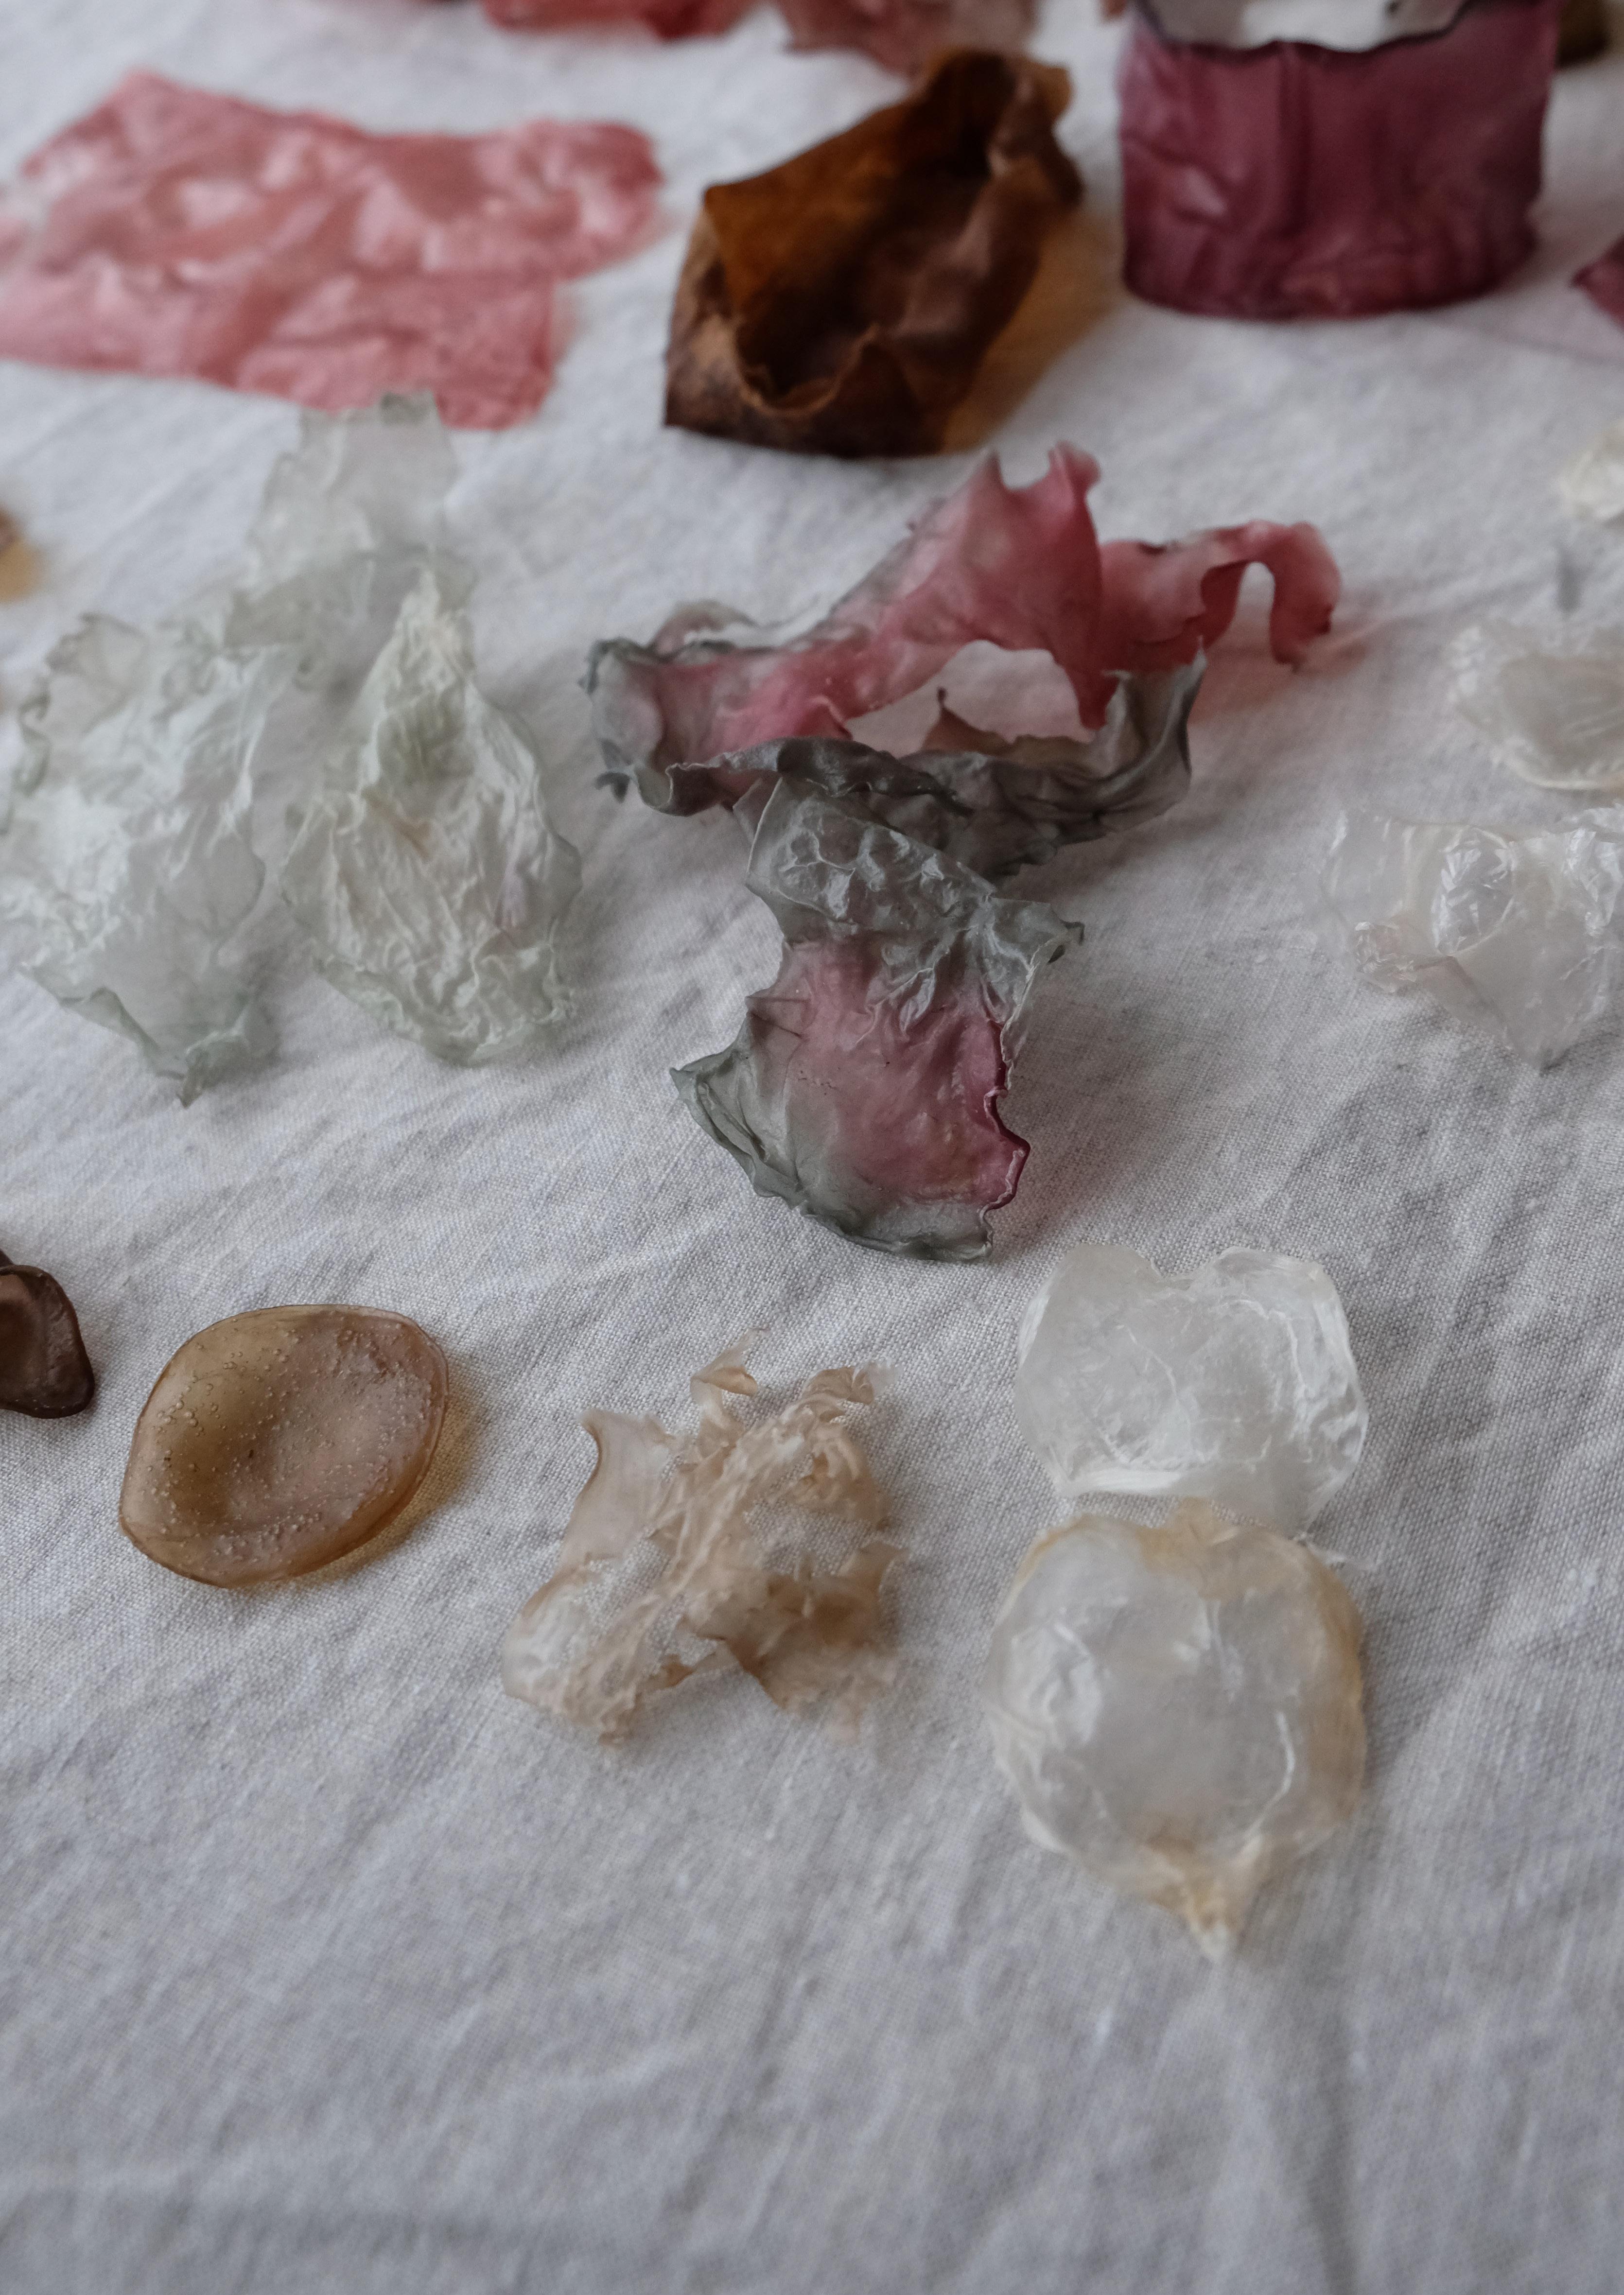
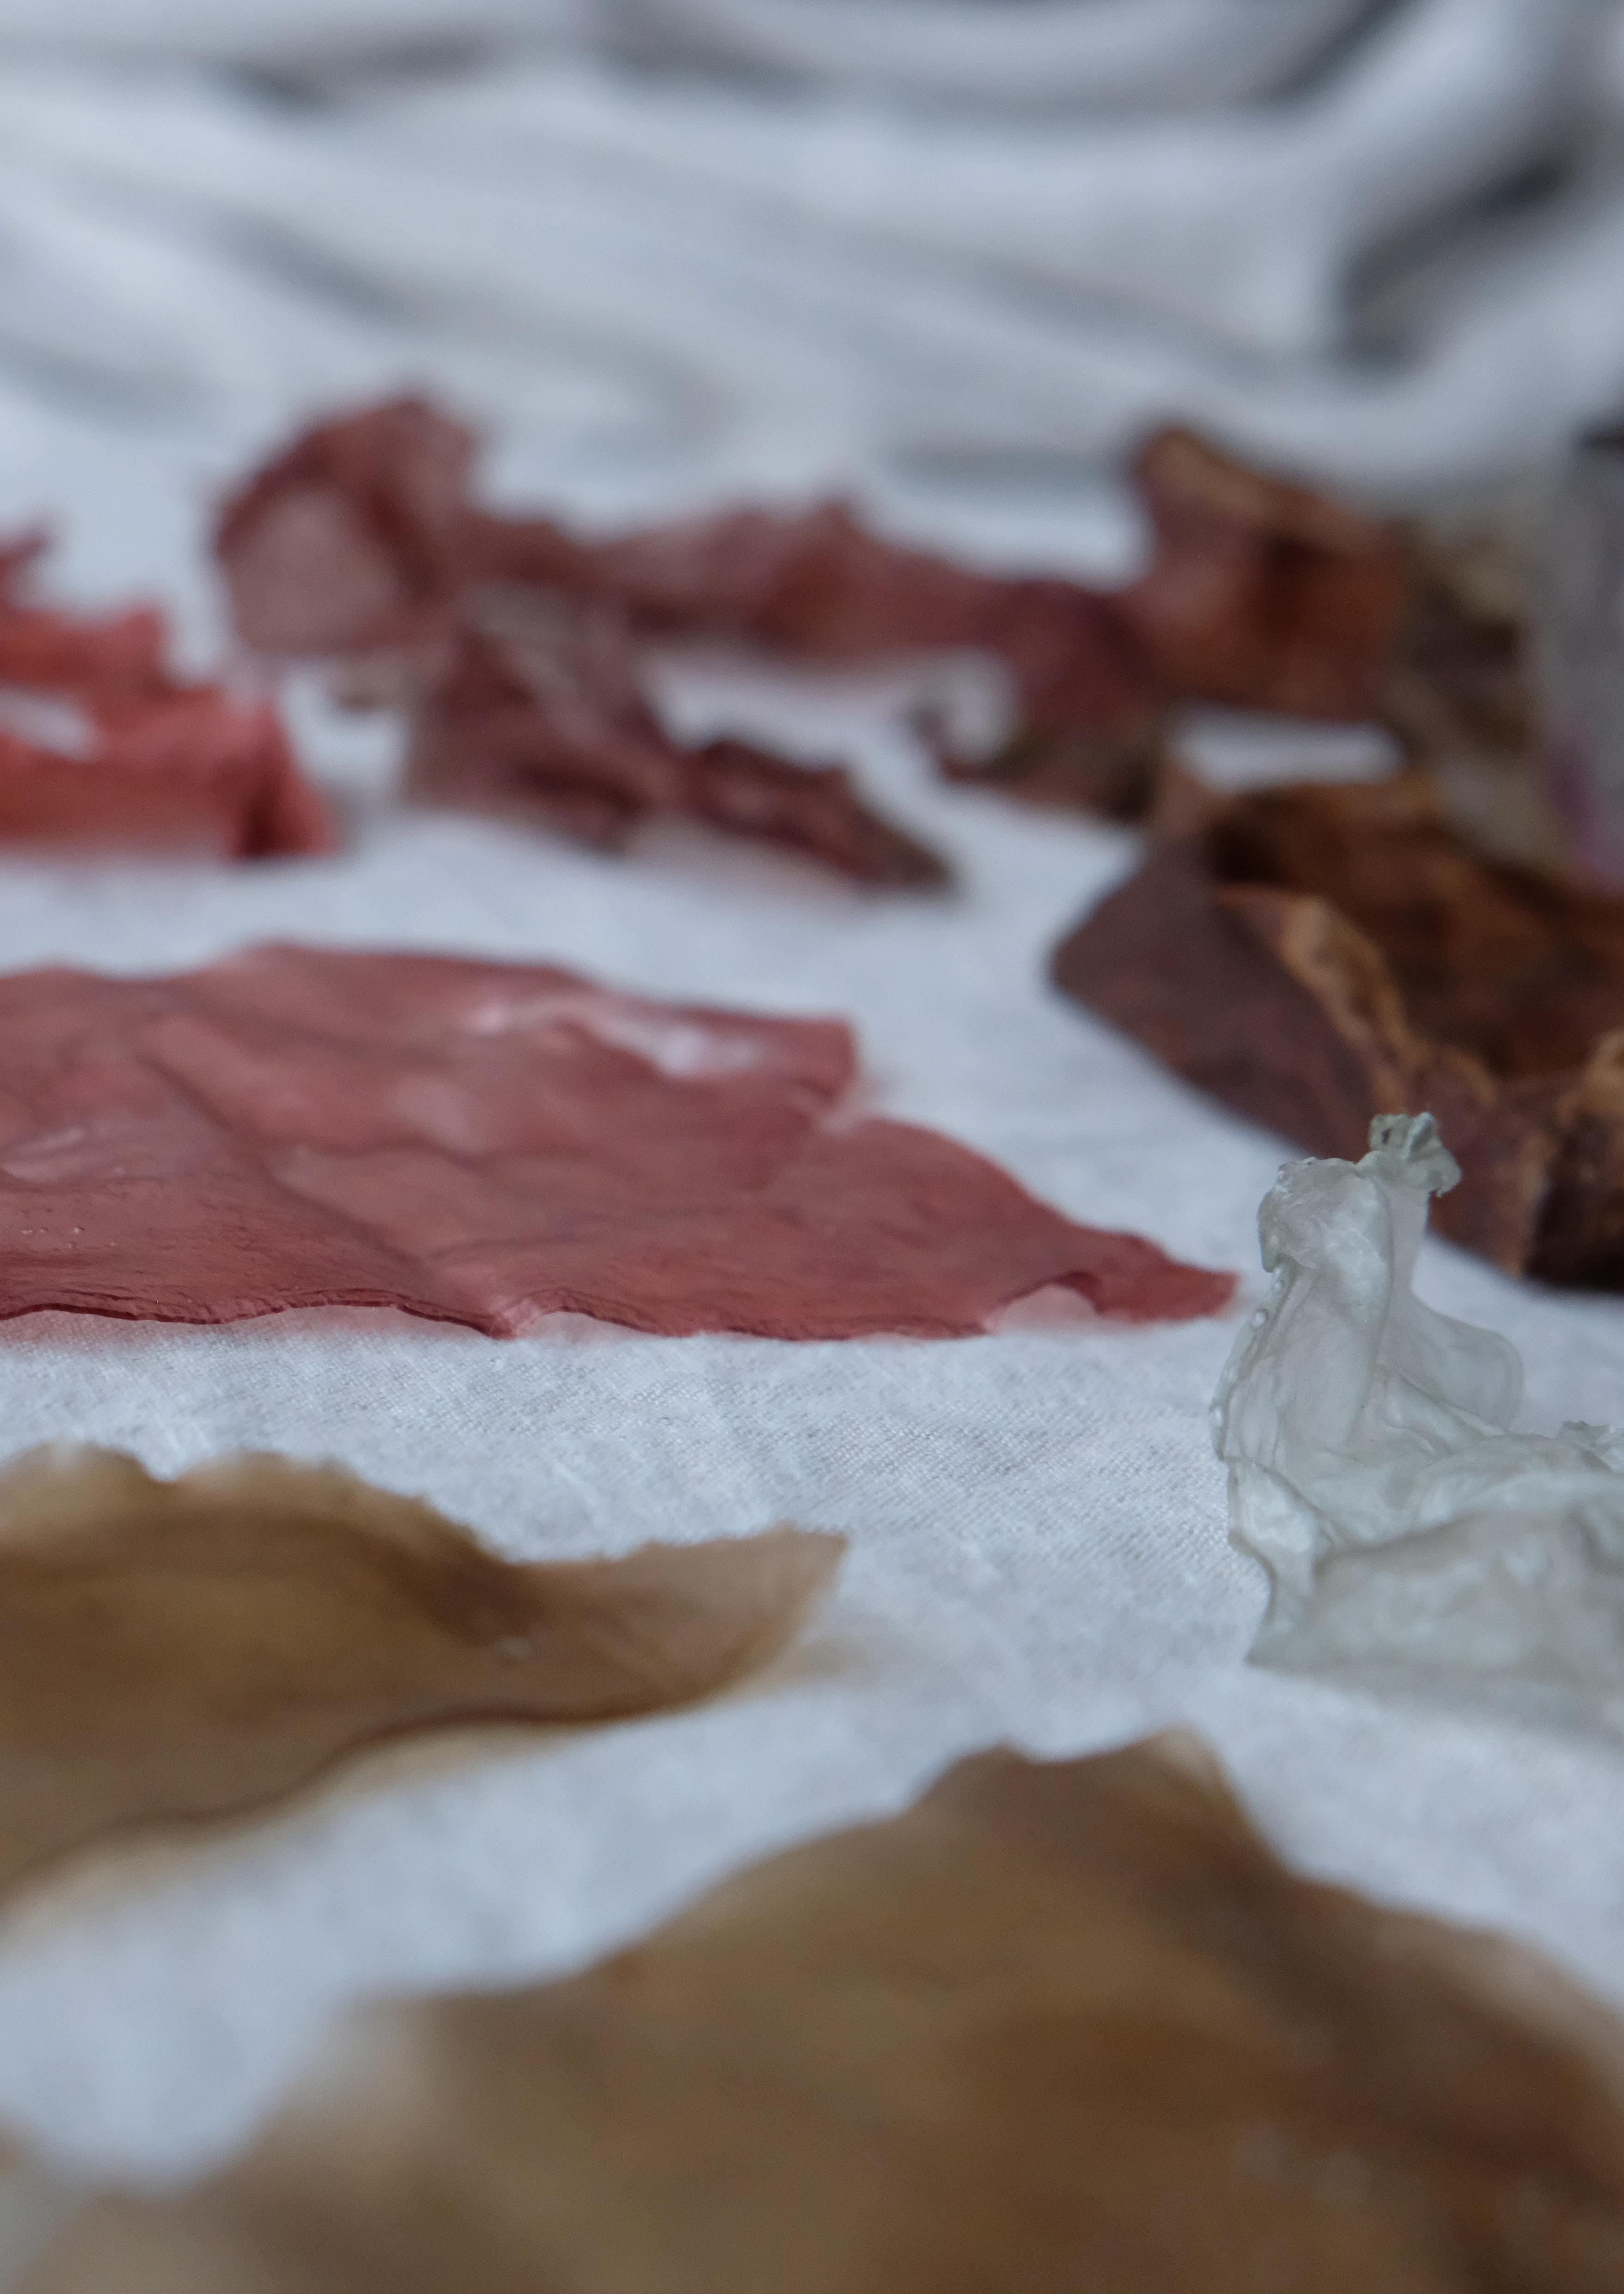
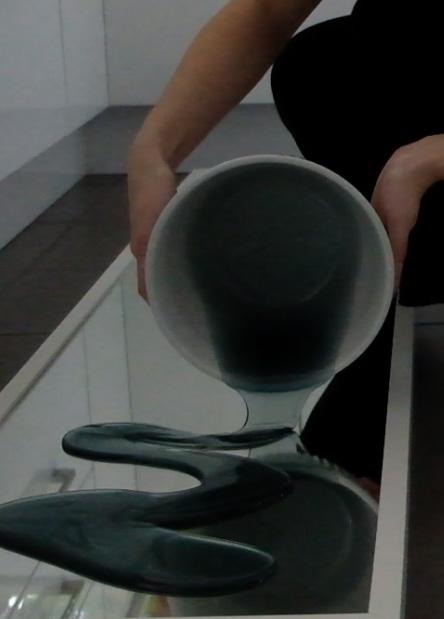
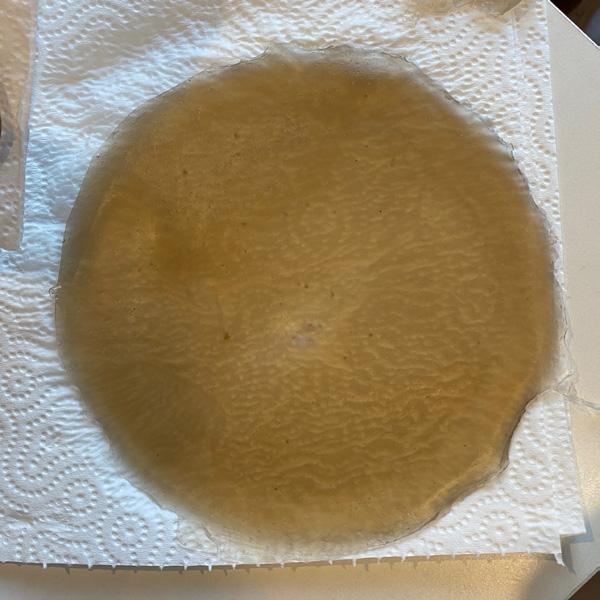
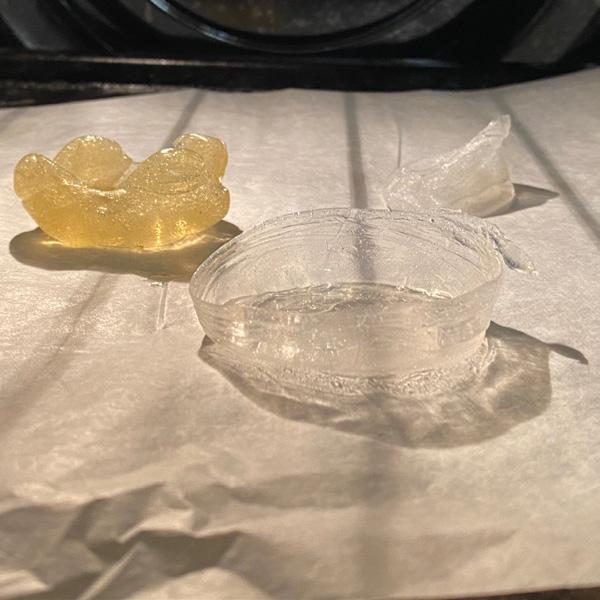
The thick viscous liquid is then poured into the middle of a small tray and slowly crawls to the edges of the tray as gravity works against it. With the liquid layer now evenly dispersed, the substance and tray are suddenly submerged in an icy, salty bath. Instantly, a gel membrane forms, encapsulating the liquid inside. The rectangular blob is gently nudged until it comes loose and is released from its tray, now floating freely in the salty cool water. As time passes on the membrane becomes thicker but the liquid instead is becoming less and less. Just before the liquid disappears the rectangular blob is lifted from the water a blade slices through and the remaining liquid is squeezed out. All that’s left is a glassy hollow pouch. The insides of the pouch are scooped, cleaned and rinsed, then left to dry on a bed of cloth.
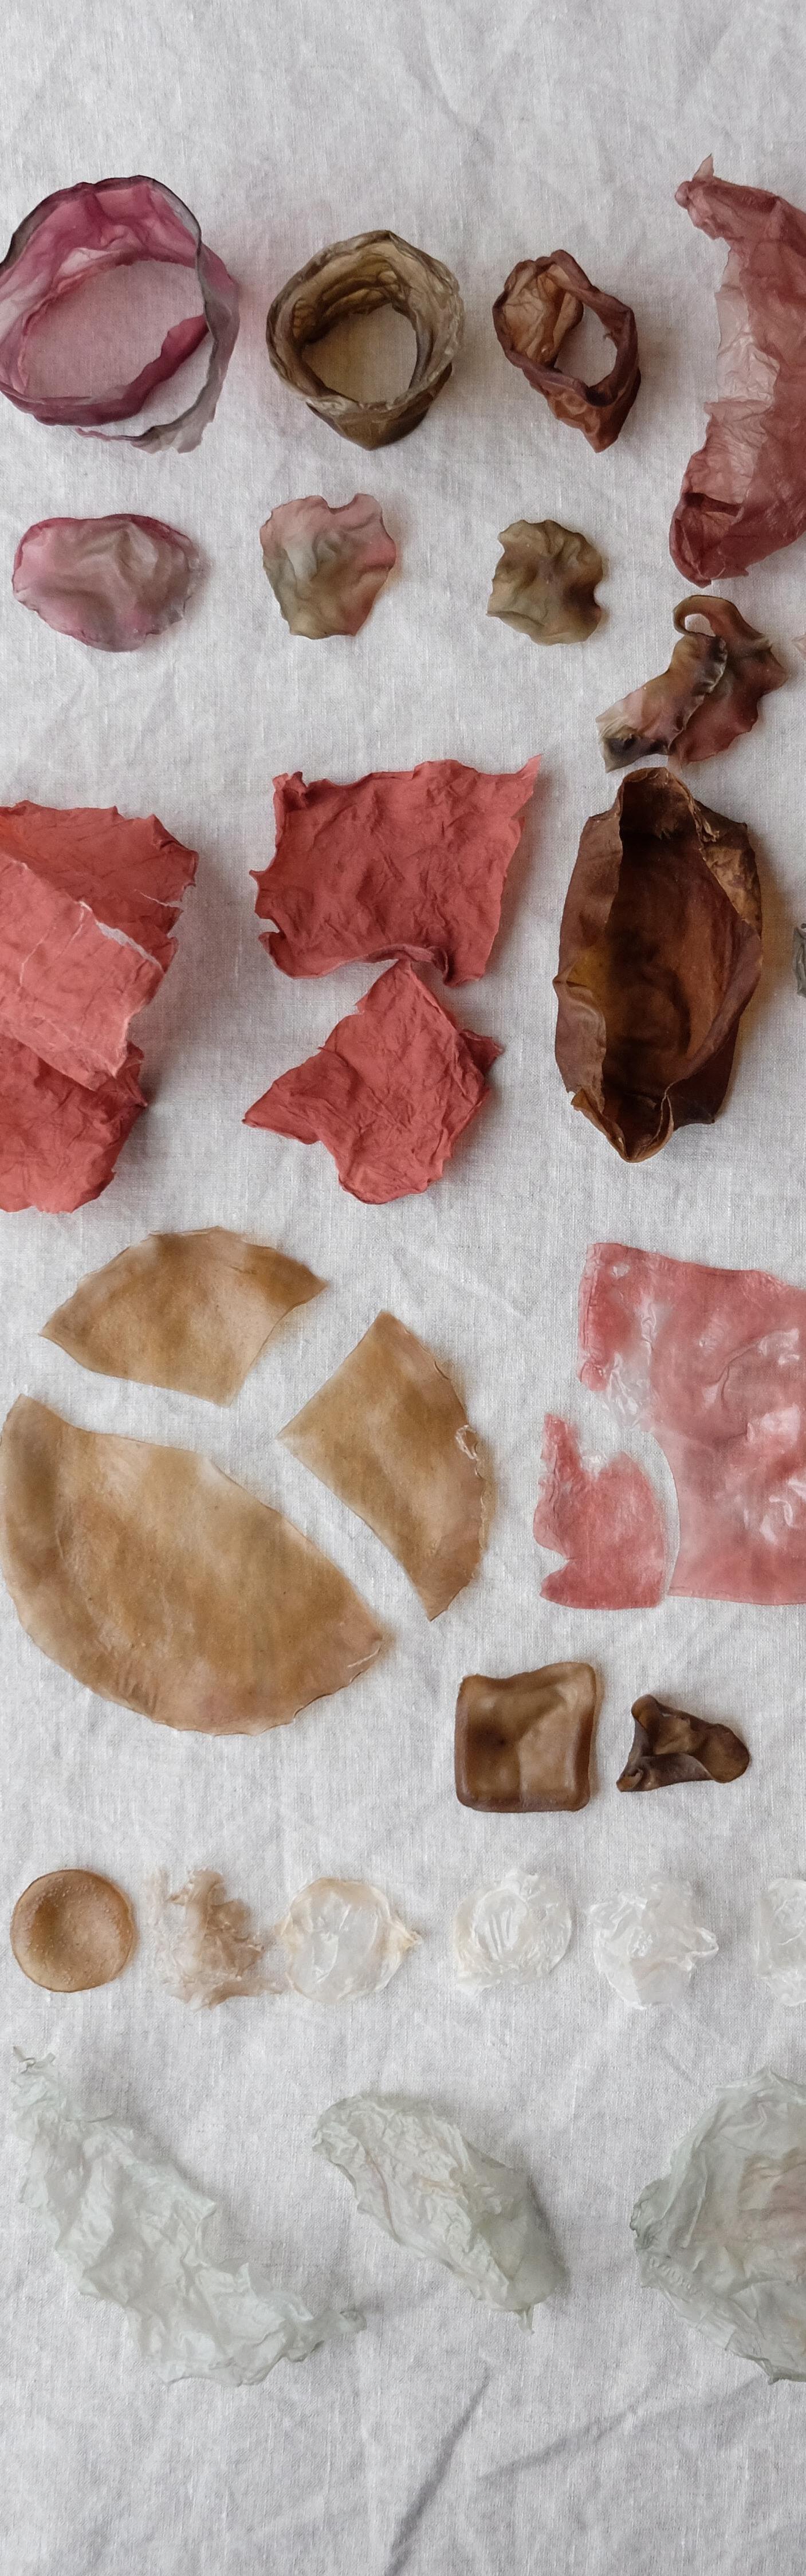
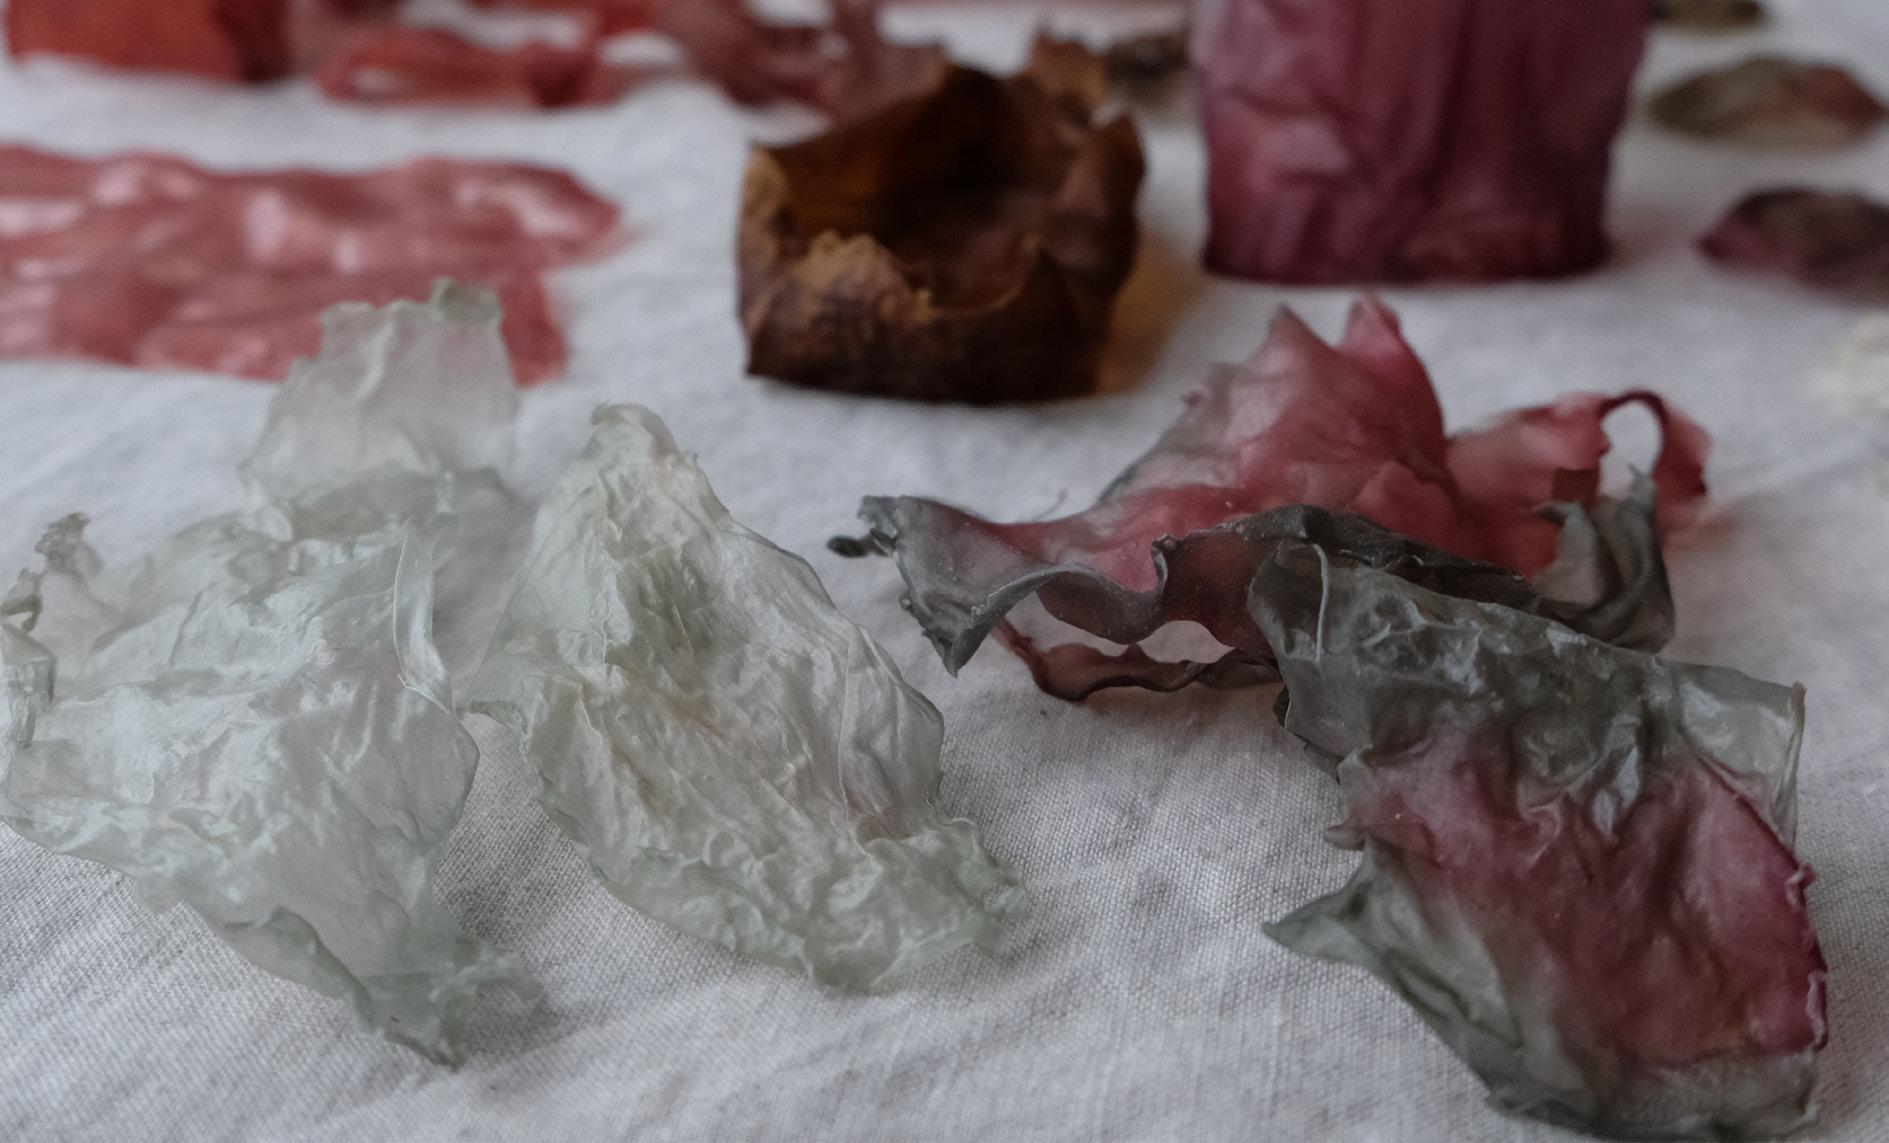
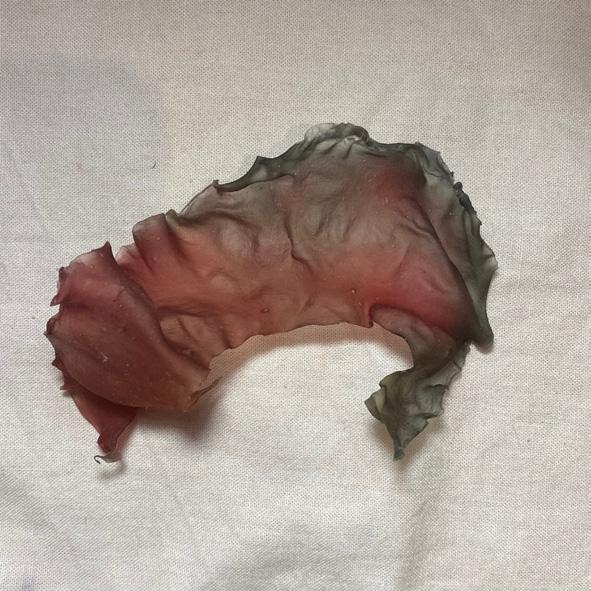
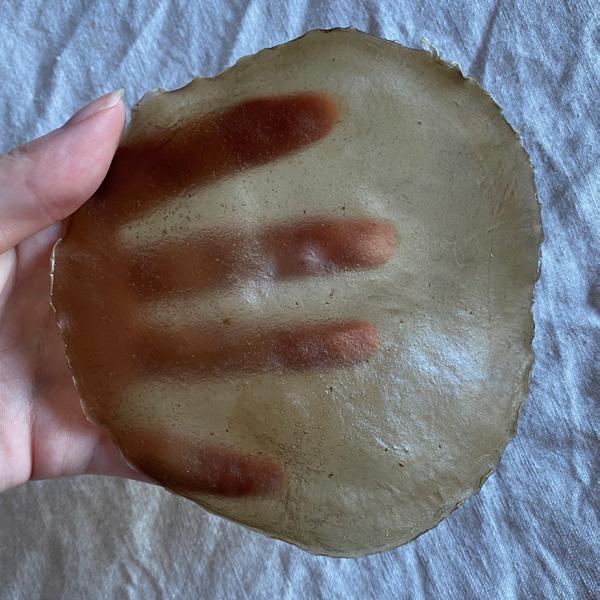
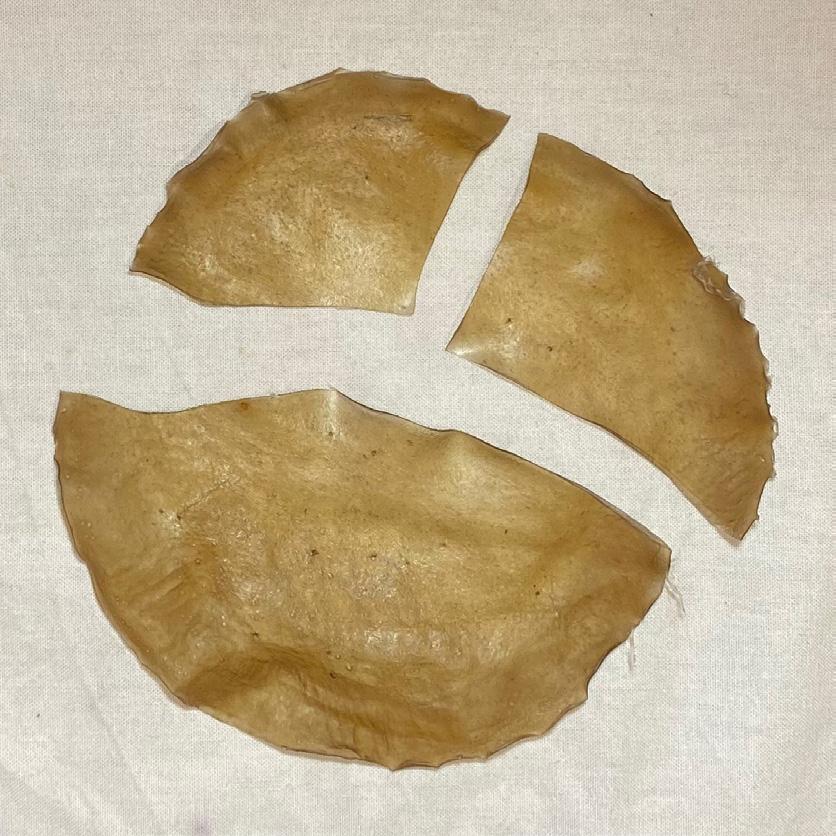
As the hours turn into days, water continues to leave the jelly pouch turning into a translucent flexible rubber. Then as the days turn into weeks, and all the water has gone, the material becomes brittle and remains as a delicate crisp shell.
Despite plastic being an incredibly versatile and durable material, its overuse, cheapness of production and abundance of the product have resulted in a throw away culture where it’s become the norm to discard plastic products after using it for as little as a few seconds. Because of this, disposable plastics have become one of the biggest contributors of plastic pollution and even when it’s discarded properly it eventually ends up in landfill or the ocean where it takes up to 1000 years to decompose. In that time discarded plastic can become choking hazards for marine life, it can leech harmful toxins into soil and microplastics are also finding its way back into food for human consumption.
Efforts have been made to address the issues of plastic and in recent years bioplastics have emerged as a solution. These bioplastics refer to plastics that are derived from renewable biomass sources like corn starch, vegetable fats and oils and even recycled food waste which are a significantly more sustainable source compared to the fossil fuels used to make traditional plastic. However, these bioplastics have been labeled as a form of ‘greenwashing’ where consumers have been misled to believe that these alternatives will effortlessly decompose in the environment. In most cases the end product made from biomass is molecularly the same as traditional plastic, and therefore are also non-biodegradable, creating the exact same plastic pollution problems. Additionally, in some instances the processes used to convert biomass to plastic can result in a higher carbon footprint than fossil fuel based plastics.
My intent for this project is to develop a material that will redefine the term ‘bioplastic’ into what consumers believe the product to be. An easily biodegradable material that offers the same versatile qualities as traditional plastic but without any of the harmful consequences. My material concept will be developed off my original alginate bioplastic working with its unique qualities that include resistance to high temperatures and insolubility in cold and boiling water.
With these characteristics in mind and because of my personal experience through consuming single use plastic when ordering beverages like bubble tea, my speculative design will be a bioplastic vessel that serves as a replacement for disposable plastic cups.
To develop this speculative design I will need to ensure the material can be durable enough to be held on the go and withstand different temperatures, hold liquid without leaking, be stored away for long periods of time without going bad until it is needed and be easily biodegradable.
Additionally, I would like to revise my alginate setting method for my speculative design. Although an advantage to the initial recipe was that I was able to make a vessel/pouch form without the need for adhesives or thread, I found that a significant amount of alginate was wasted in the process when squeezing out the insides. Therefore I would also like to revise my alginate setting method.
Ella Williams and Violaine Buet are two designers exploring the potential and possibilities of biomaterials. After listening to the two designers discuss their material experiences it was interesting to compare how they decided what they wanted to work with. For Ella she began by knowing that she wanted to work with shells as a biomaterial and as a result began researching the largest food waste streams for shells, the top three being walnut, macadamia and oyster. After this, she began experimenting with the three materials on a small scale and found an affinity for oyster shells due to their aesthetic qualities and also recognised it’s durable potential as a material. As for Violaine her choice of biomaterial was chosen intuitively, having grown up in Brittany, France, located on the coastline of the Atlantic ocean where she has a personal connection to seaweed.
Due to the unknown territory of working with these biomaterials both of the designers had similar experiences throughout their testing and experimentation. Both Ella and Violaine recognised that there were certain limitations or constraints that needed to be worked around and therefore employed and iterative process, constantly testing, making mistakes and trying new techniques or ingredients to see what worked and what didn’t. They also recognised these constraints to be a positive, where the unpredictable behaviours or the irregularity of the colours and textures of the natural materials were part of the organic aesthetic and beauty. For the two of them it revealed a need to reconsider the way designers work with materials and products, to re-frame our expectations of permanency. For Ella this meant evaluating the care and maintenance attitudes consumers have with products and for her speculative oyster shell air freshener this meant considering possible care rituals such as painting beeswax to maintain the product for longer. And for Violaine this meant working with and not against seaweed as a textile material and through this she learnt that different species of seaweed worked better for different textile applications. Additionally, Violaine stresses the importance for her as a textile designer to work with a multidisciplinary network in order to develop the research around her biomaterial.
The work from these two designers has inspired me to incorporate a different way of thinking in my design practice. From Ella’s interview I would like to experiment with different ingredients, fibres, thickeners or food waste to enhance the potential of my material. As for Violaine, I found myself relating to her dilemma when working with seaweed and how the material continues to act like how the tides change, constantly shifting between wet and dry. I found this to be the case when working with calcium alginate, where sometimes my material wouldn’t dry properly and develop mould, sometimes there would be a perfect sweet spot depending on the humidity in the air and sometimes, the weather would become sunny out of nowhere leaving my material dry, brittle and cracked. But with this characteristic of seaweed, Violaine shares how she sees this as the marine plant expressing emotion. Because of this I want to begin looking at how this unique characteristic could be a positive and design with the intent that the material will constantly interact with it’s environment.
Stanwix, A. (2021). [Photograph of bioplastic products by designer Jessie French]. The Design Files. https://thedesignfiles.net/2021/04/ studiovisit-jessie-french/
Throughout my material making phase I was constantly thinking about how I was going to construct my prototype. To better understand how to work with my algae based material and potential ways to visually communicate vessel forms I began researching designers and their material outcomes.
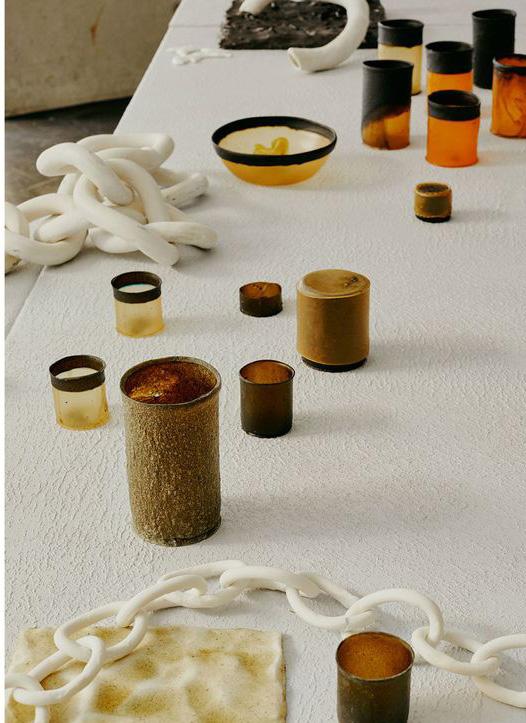
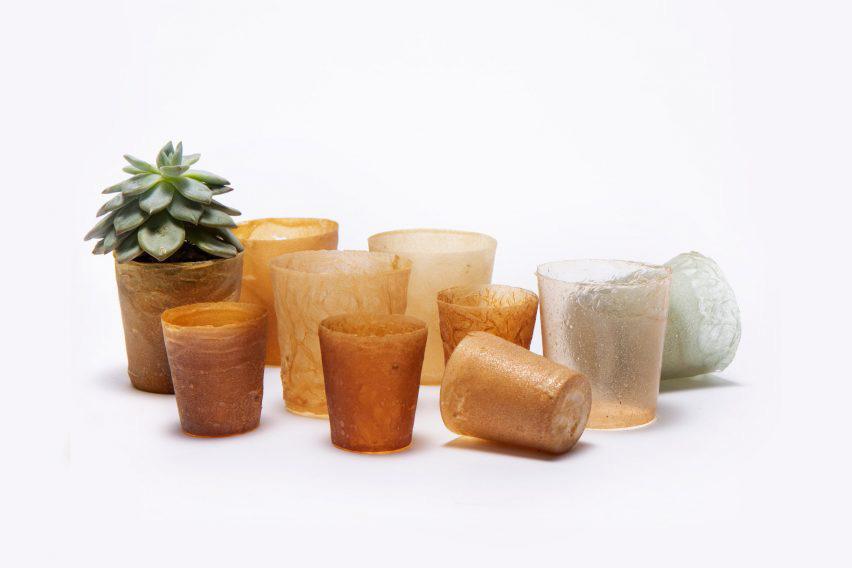
Jessie French
This Australian designer has done extensive research on developing algae based bioplastics but working with agar instead of alginate. It was really interesting to see how she leaned into showcasing the organic aesthetic of her biomaterial by making vessels of varying shapes, colours and textures, where every piece is unique. She also effectively communicates a narrative about the algae source of the material by my displaying her agar products next to an anchor chain painted in white. All these visuals also express the natural and impermanent qualities of these materials, where Jessie as a designer doesn’t aim to put forth a biomaterial that hopes to be durable and with a long life cycle.
This design group based in England and have also explored using biomaterials to replace single-use plastic. At the beginning of this project I set out to design a plastic replacement and envisioned potential consumers wanting a product that replicates the physical qualities and sensorial experience of traditional plastics. But this design group have produced alternative single-use products that translate natural qualities into their completed products. This makes the products visually appealing through the textural details and natural hues, and challenges the way I previously looked at single-use packaging. I think I’ve been conditioned to associate food packaging materials to be smooth and synthetic and without irregularities and inconsistency. I’m beginning to realise the significance of challenging how these food packaging items have been designed and that especially for items that are only intended for one use it makes complete sense that the form of the product doesn’t have to 100% perfect, just like how it’s natural to expect fruit to come in varying shapes and sizes and with some discolouration.
Shellworks. (2019). [Photograph of bioplastic cups made of discarded lobster shells]. Dezeen. https://www.dezeen.com/2019/02/22/shellworks-bioplasticlobster-shell-design/
Ingredients
Glycerine Test 1 (initial recipe)
10ml of sodium alginate
20ml of glycerine
200ml of water
Glycerine Test 2
10ml of sodium alginate
40ml of glycerine
200ml of water
Recipe
In a bowl combine sodium alginate and glycerine, then whisk in natural dye water. Leave in the fridge overnight to remove alginate lumps and bubbles.
In a large bowl prepare a calcium salt bath by whisking water and calcium chloride until the salt has completely dissolved. Then prepare your chosen mould by coating it in a thin layer of calcium chloride water and coconut oil.
Spoon alginate mixture into your mould and let it rest for a few minutes so that the surface is flat and evenly distributed. Next, cover the alginate entirely in salt water and leave to set overnight so that the entire mixture becomes solid.
Then remove the alginate from the mould rinse in plain water and move to a drying rack and air dry.
Glycerine Test 3
10ml of sodium alginate
30ml of glycerine
200ml of water
Notes
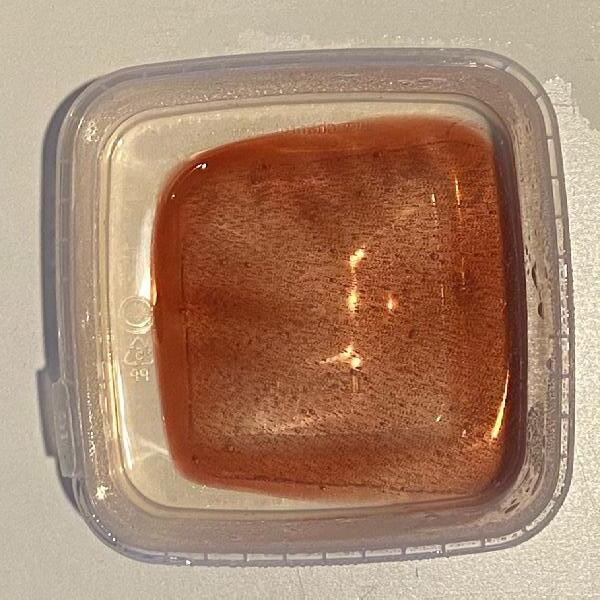
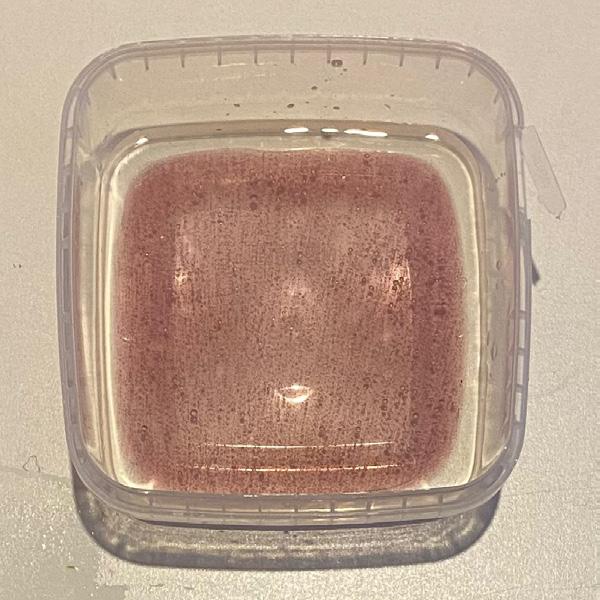
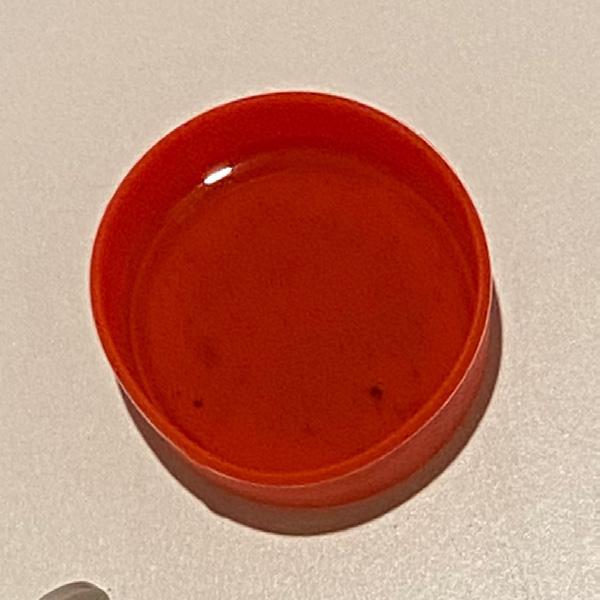
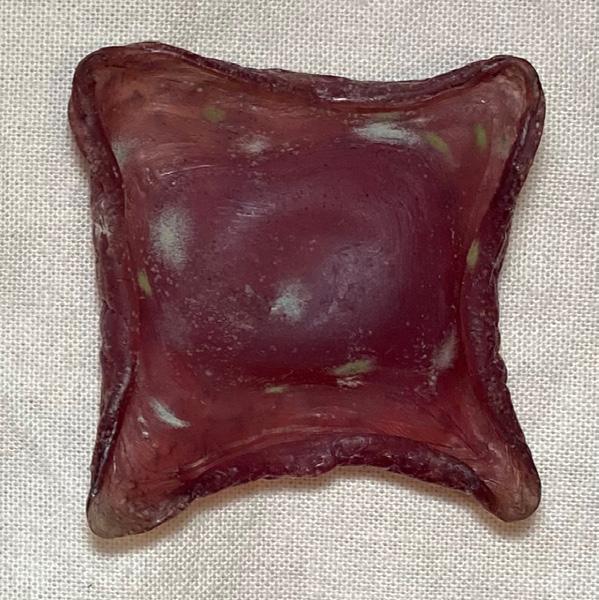
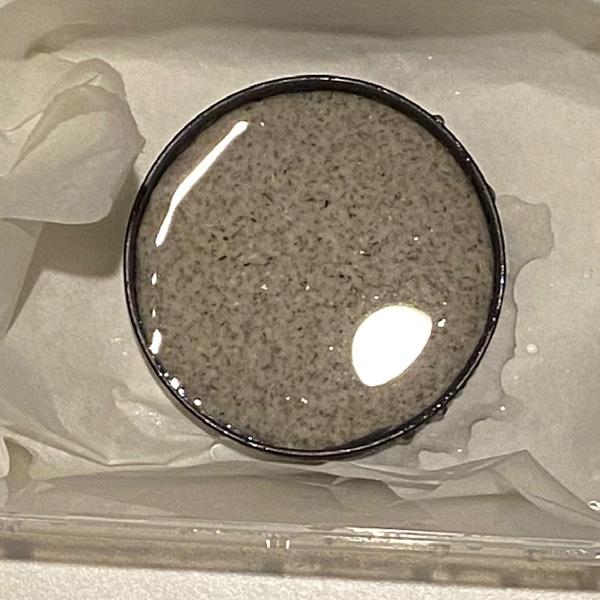
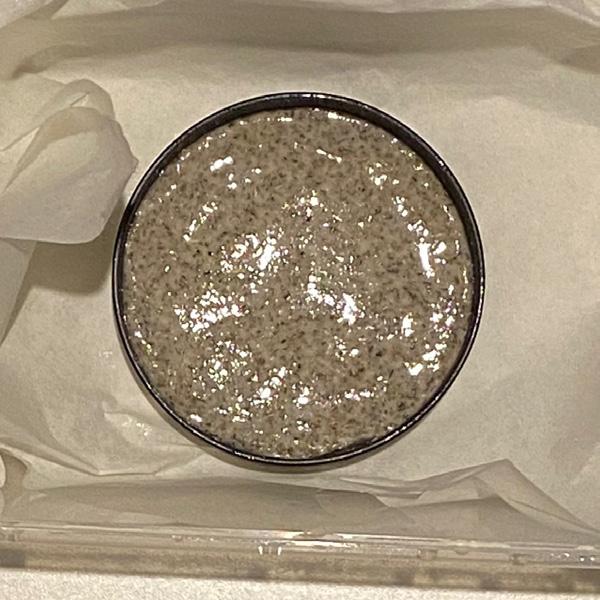
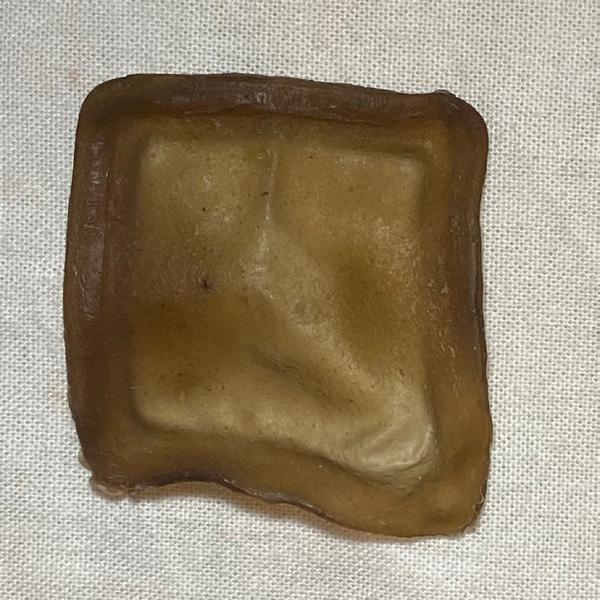
To begin the iterative testing of my material I started by experimenting with varying levels of glycerine due to my initial material becoming very brittle once all the water had evaporated.
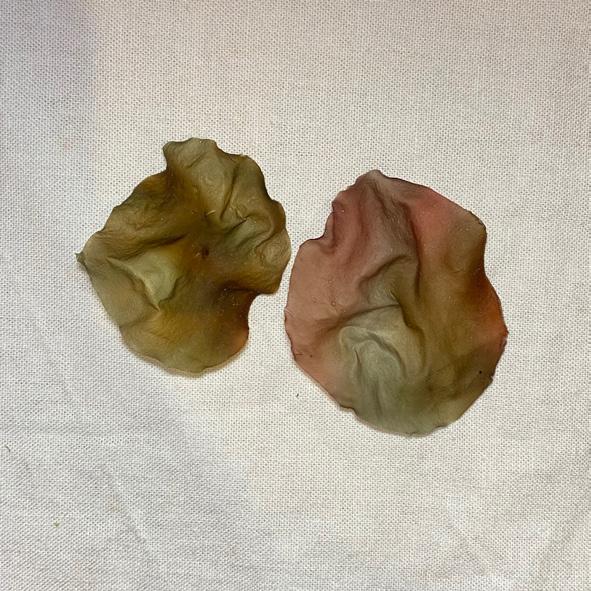
For these test samples I poured different amounts of calcium salt water to set the alginate not realising that this would alter the shape of the sample. There was more salt water placed in the 40ml of glycerine test so the middle had started to rise overnight while it was setting.
Mould formed on the 40ml test which may be due to the sample being too thick, but perhaps the glycerine also prevented it from drying quickly enough. The 30ml of glycerine was still flexible and durable once most of the water had evaporated.

Day 10
Ingredients
Water Test 1
10ml of sodium alginate
30ml of glycerine
200ml of water
Water Test 2
10ml of sodium alginate
30ml of glycerine
250ml of water
Recipe
In a bowl combine sodium alginate and glycerine, then whisk in natural dye water. Leave in the fridge overnight to remove alginate lumps and bubbles.
In a large bowl prepare a calcium salt bath by whisking water and calcium chloride until the salt has completely dissolved. Then prepare your chosen mould.
Pour a thin layer of alginate mixture into a tray and let it rest for a few minutes so that the surface is flat and evenly distributed. Next, spray the alginate entirely in salt water and leave to set for 15 mins, then carefully peel alginate from mould.
Transfer to salt bath to set for another 15 mins, rinse in plain water and move to a drying rack and air dry.
Water Test 3
10ml of sodium alginate
30ml of glycerine
450ml of water
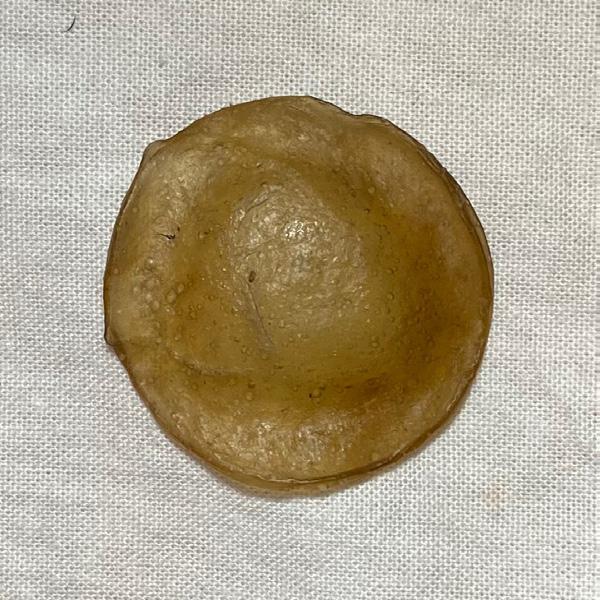
Notes
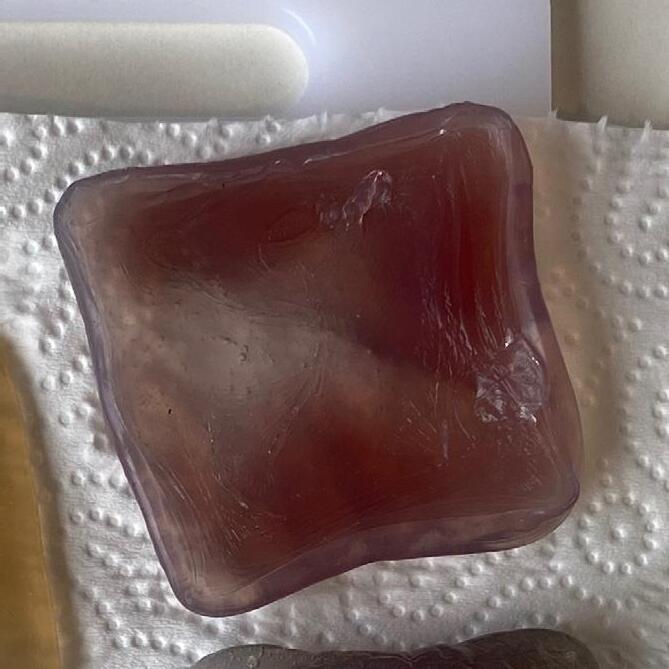
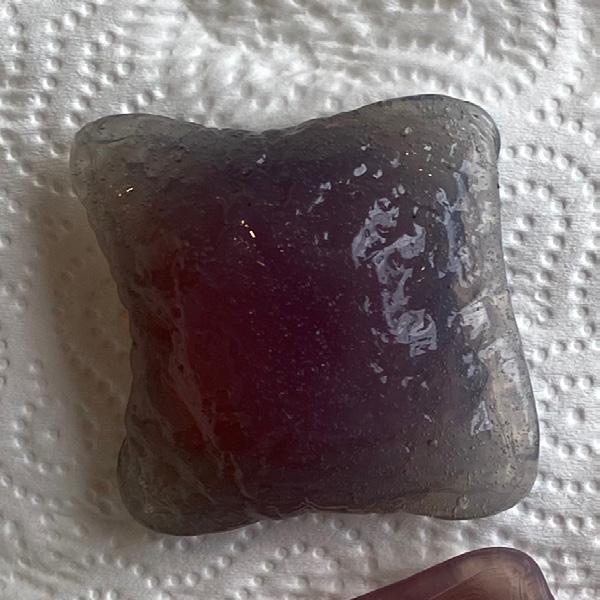
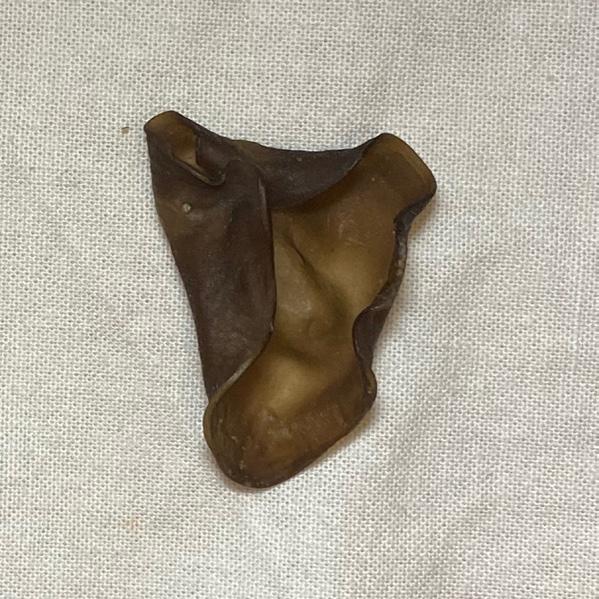
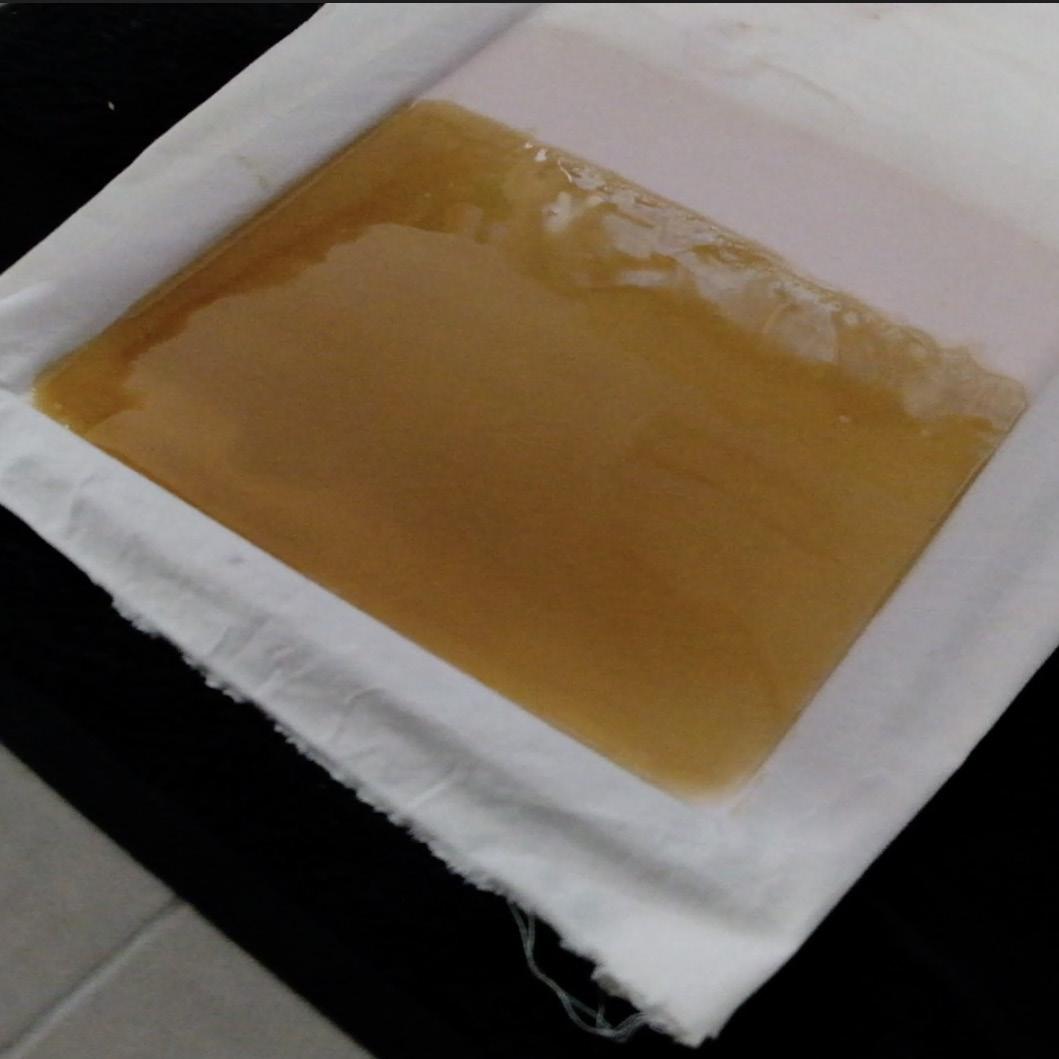
Using 30ml of glycerine determined from the first ingredient focus, I began testing to see if water ratios made a difference to the material. When all the materials had dried completely I found that there wasn’t much difference to the material qualities. However, increasing the water did change the viscosity of the solution making it runnier and therefore fill out the mould more evenly, but also made the material more fragile when lifting from the mould and I found the large water content caused the material to keep ripping when I was handling it.
Day 6

Ingredients
GRF Test 1
10ml of sodium alginate
5ml of glutinous rice flour
30ml of glycerine
200ml of water
GRF Test 2
10ml of sodium alginate
10ml of glutinous rice flour
30ml of glycerine
200ml of water
GRF Test 3 (for comparison - no GRF)
10ml of sodium alginate
30ml of glycerine
200ml of water
Notes
Recipe
In a bowl combine sodium alginate, glutinous rice flour and glycerine, then whisk in natural dye water. Leave in the fridge overnight to remove alginate lumps and bubbles.
In a large bowl prepare a calcium salt bath by whisking water and calcium chloride until the salt has completely dissolved. Then prepare your chosen mould.
Pour a thin layer of alginate mixture into a tray and let it rest for a few minutes so that the surface is flat and evenly distributed. Next, spray the alginate entirely in salt water and leave to set for 15 mins, then carefully peel alginate from mould.
Transfer to salt bath to set for another 15 mins, rinse in plain water and move to a drying rack and air dry.
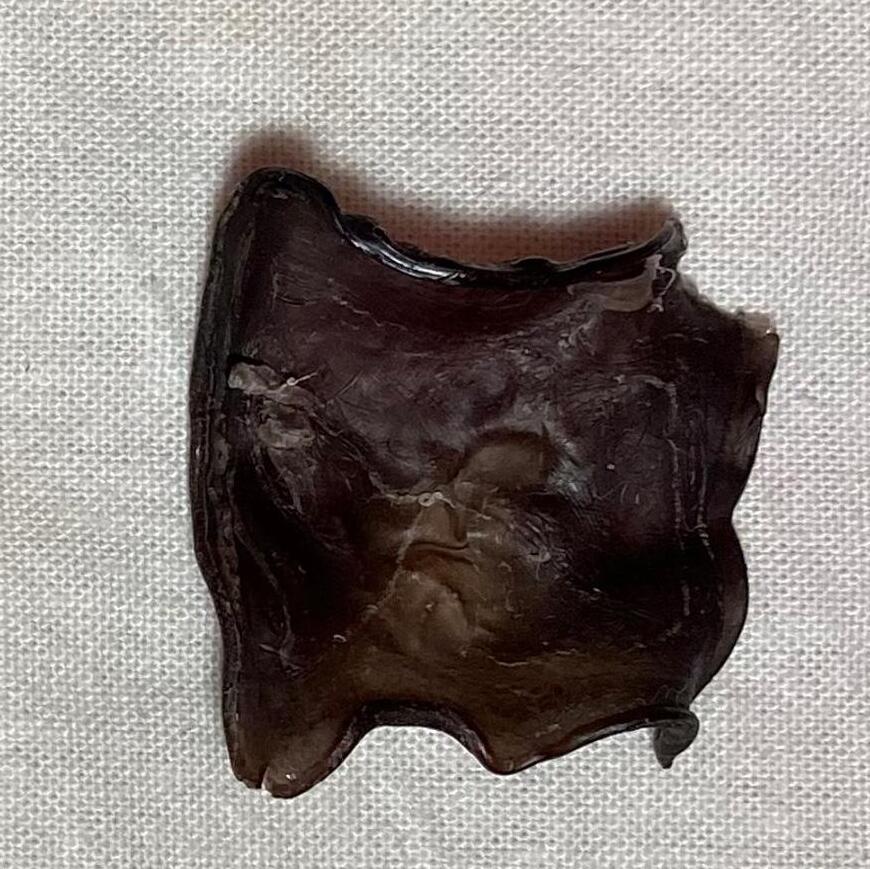
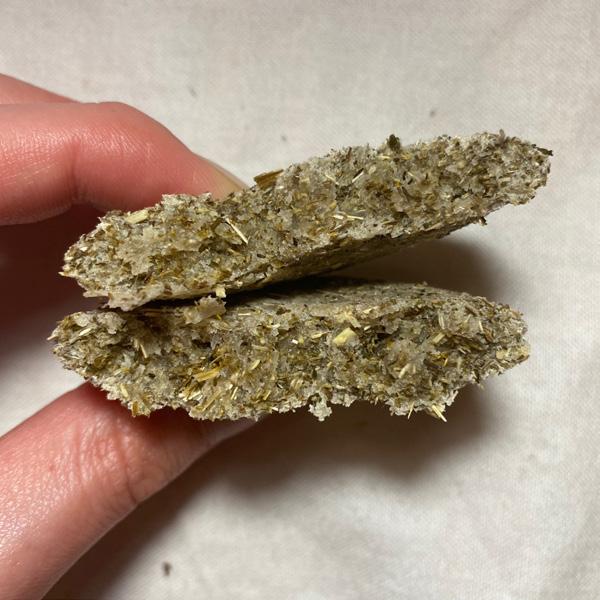
For this experiment I went back to my original recipe which included glutinous rice flour as an option. Initially I put this ingredient it in because it helped soak up the moisture that would form on the alginate material. Although this was before I realised that the alginate does eventually dry out completely depending on the humidity.
Texturally, I found the 5ml of GRF to feel nice and almost papery but unfortunately the material warped very badly while the water was evaporating. The 10ml of GRF had completely dried out the material and was very brittle and kept breaking. I compare these with the plain alginate recipe and found that the alginate on it’s own help up better.
Forgot to take photo
Day 5

Ingredients
Tea Leaves Test 1
5ml of sodium alginate
2.5ml of calcium chloride
20ml of dried chamomile tea leaves
25ml of glycerine
40ml of glutinous rice flour
20ml of water
Notes
Recipe
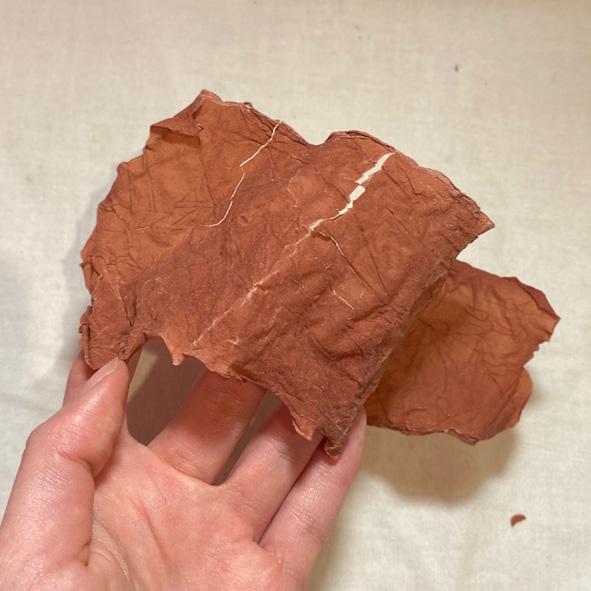
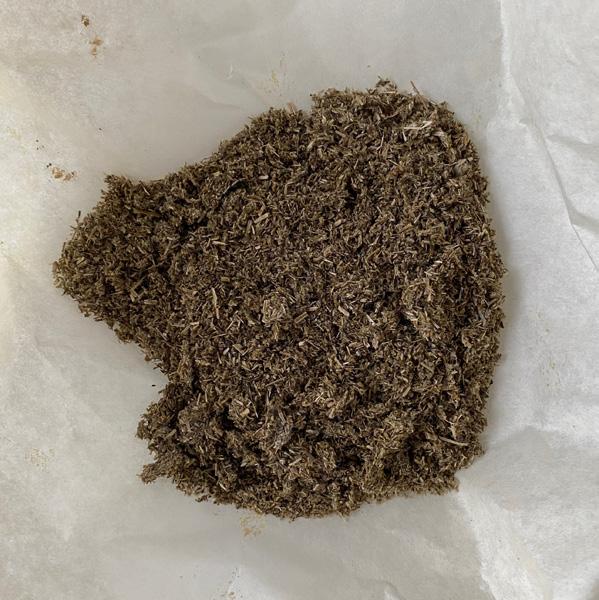
First, place used tea leaves in oven until completely dry, stirring every so often.
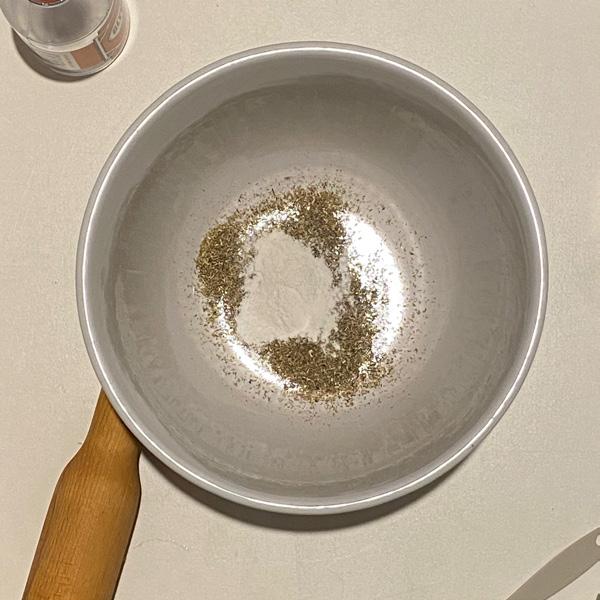
Combine tea leaves, sodium alginate, calcium chloride and glycerine into a mixing bowl. Then gradually add glutinous rice flour to adjust consistency.
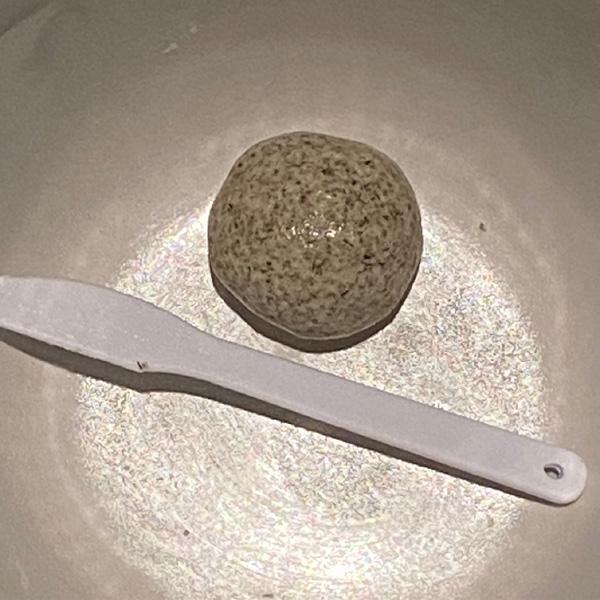
Roll the mixture into a ball using hands and line a tray with backing paper. Press tea leaf mixture into a mould on the baking paper and cover the mixture in water.
Because of the glutinous rice flour not producing composite material that I was after I tried revisiting a version that used food waste. This first recipe was inspired by the eggshell mortadella where I dried combining alginate and calcium chloride in powder form and the added water. However this test failed the ingredients never set. After covering it in water I checked back in a few hours and it was still a soupy wet paste.
Tea Leaves Test 2
5ml of sodium alginate
25ml of dried tea leaves
10ml of glycerine
15ml of glutinous rice flour
Calcium chloride salt bath
Combine tea leaves, sodium alginate powder and glycerine in a mixing bowl. Then gradually add glutinous rice flour to adjust consistency.
Roll the mixture into a ball using hands and place on tray lined with baking paper. Place another sheet of baking paper on top and roll out the mixture into a thin layer.
Saturate the rolled out layer in calcium chloride water, then flip and saturate the other side. Pat down excess water with cloth and leave out to air dry.
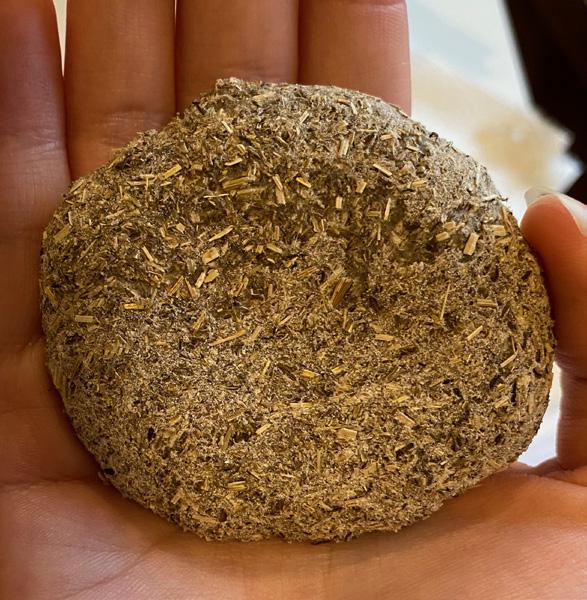
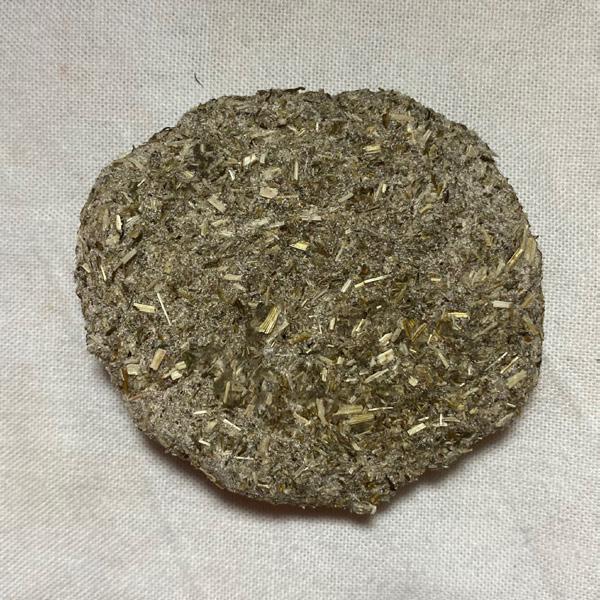
Notes
This composite material did work and set into quite a firm rubber like ball and took quite a bit of effort to break, so it was quite durable. However I wasn’t sure if this sort of material would be suitable for the speculative design and for a material concept for food and beverage packaging.
Tea Leaves Test 1
Tea Leaves Test 2
Day 2
Day 10
material never set
Day 10
Ingredients
5ml of sodium alginate
2.5ml of agar
2.5ml of carrageenan
20ml of glycerine
300ml of water
10ml of calcium chloride
1L of water
Recipe
In a pot combine sodium alginate, agar, carrageenan and glycerine. Slowly add water and whisk into mixture, breaking up large lumps that form.
On a medium heat continue stirring and lumps will eventually dissolve and mixture will become a uniform liquid. As the mixture cools it will slightly set into a jelly. Pour a generous amount of calcium chloride water and let is set over night.
The next day, rinse in plain water and move to a drying rack and air dry.
Notes
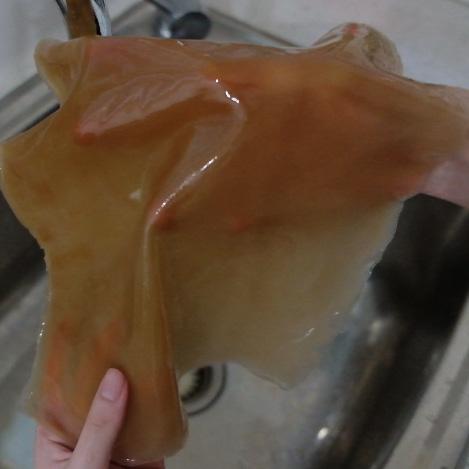
I was quite pleased with how the alginate, carrageenan and agar bioplastic turned out. Initially it felt like a soft jelly and I wasn’t sure if it was going to properly set. It did take a really long time to dry properly but the end result was like a tough rubber or flexible silicone.
Updates
Day 2 Day 8

Day 10
After testing various materials I decided to assess which ones had the most potential for food packaging. The top two that I was most interested in progressing with was my refined alginate material and my algae based composite material.
Criteria
There were three main qualities that the material needed to pass
• Ability to be stored away
• Durability
Insoluble in hot water
Ability to be stored away
Throughout the entire testing period neither had developed mould, but certain natural dyes did react with the air. Both materials were good for prolonged storage.
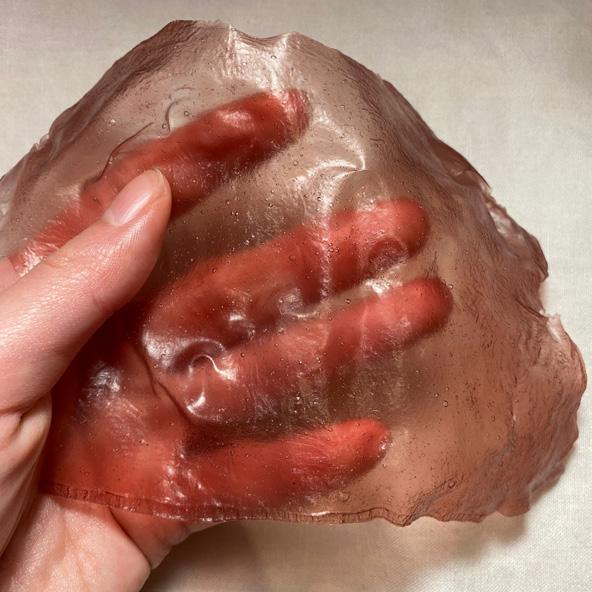
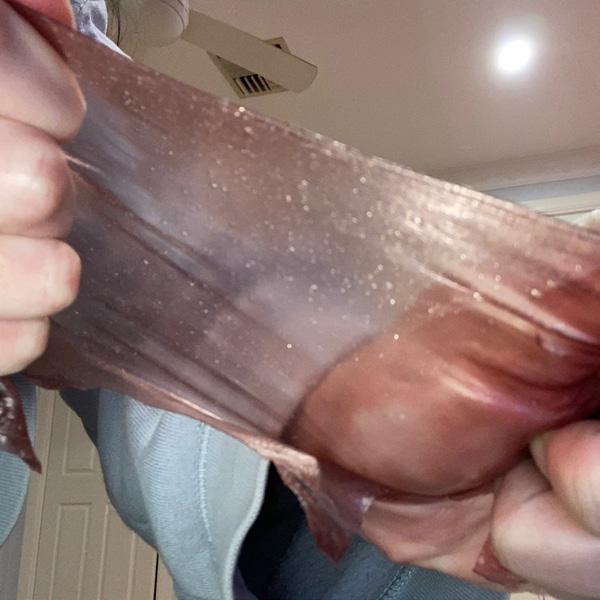
Durability
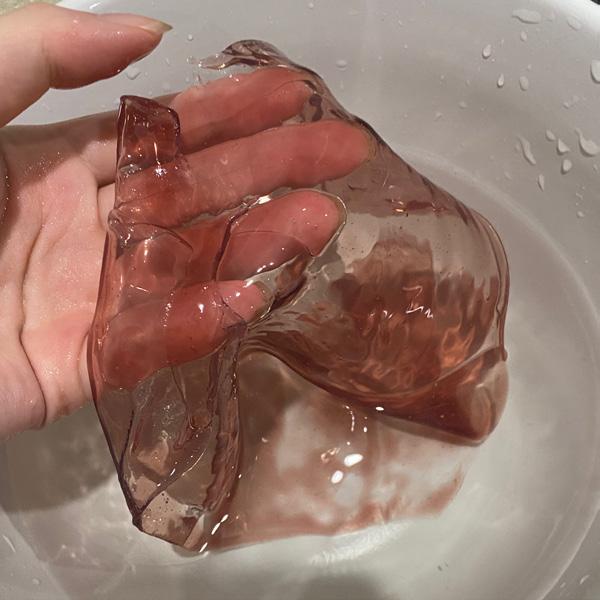
To test the durability of the materials I conducted a very unscientific experiment, I simply pulled apart the material to see what would happen. The alginate was surprisingly elastic but didn’t return back to it’s original shape. The algae composite was actually very tough but then out of no where it ripped into big pieces.
To Test the solubility in hot water I left the alginate and the algae composite material in boiling water for 5 mins. Interestingly they both didn’t dissolve, although the algae composite had reduced in size so maybe the carrageenan or agar did dissolve and it left the alginate behind.
Notes
After all of the testing that had been completed it seemed as though the purely alginate material was the most suitable for my material concept. Honestly I was a little underwhelmed to be returning back to my alginate material with the only adjustment having been the amount of glycerine.
Definitely for future speculations I would like to explore making composite materials that use alginate combined with food wastes as a substrate. Additionally, now that I’m looking back at my tea leaf experiments I don’t know why I didn’t put the tea leaves straight into the alginate like I did for my glutinous rice flour. But it’s something I’ll note down for future reference.
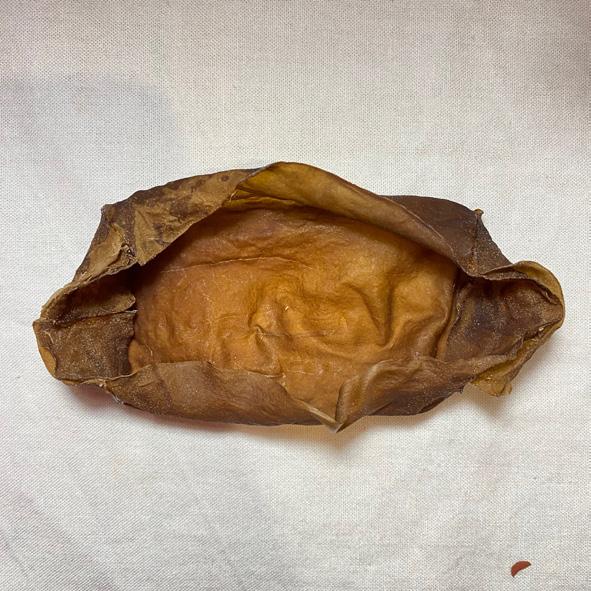
After finalising my material recipe I began trying to figure out the best way to achieve a vessel structure. In my recipe from task 1 I was able to make a vessel structure by emptying the liquid contents from an alginate gel membrane but felt this was a waste of material, so I wanted to find an alternate technique that wasn’t as wasteful.
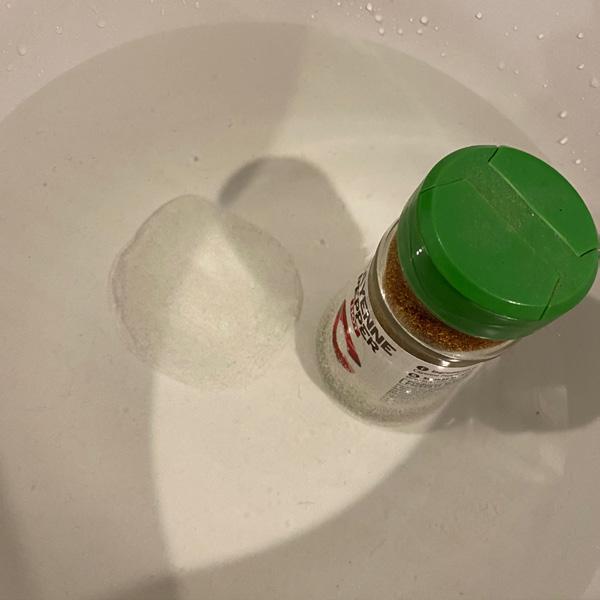
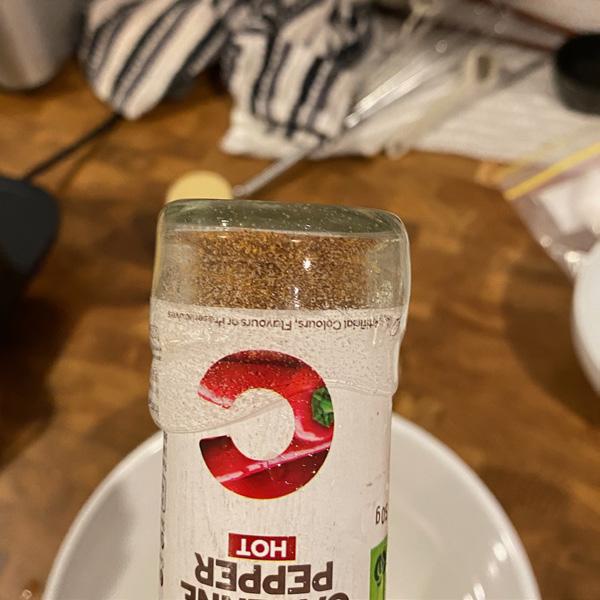
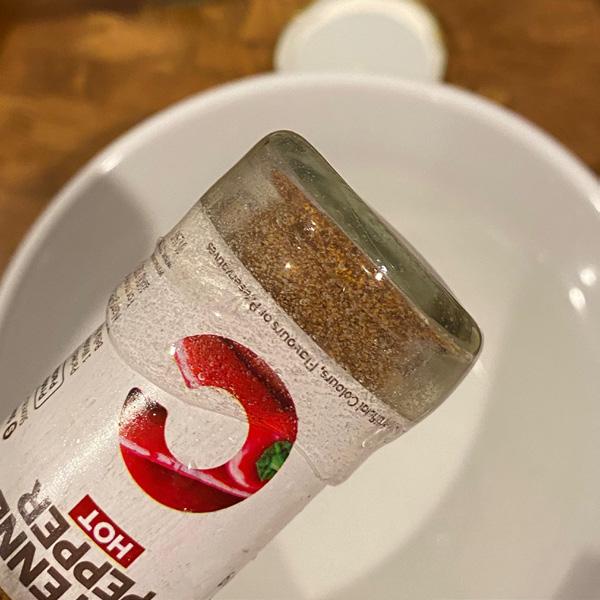
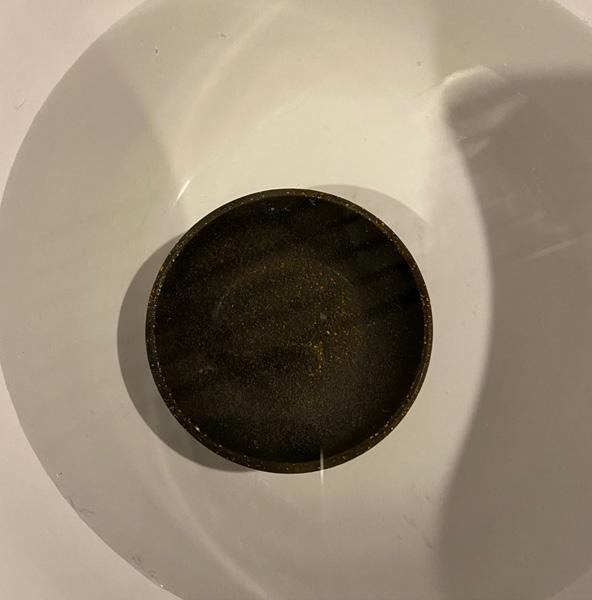
For my dipping method I started small using spice bottle to see if I could get the technique to work before progressing to a larger scale.
Tools
Drinking glass or bottle for mould
Baking paper
Oven proof tray
Rice grains
Method
Dip your chosen drinking glass or bottle directly into alginate mixture, then hold in salt bath for a minute to let a gel membrane form.
Then gently rest the mould on the bottom of the salt bath and leave until completely set.
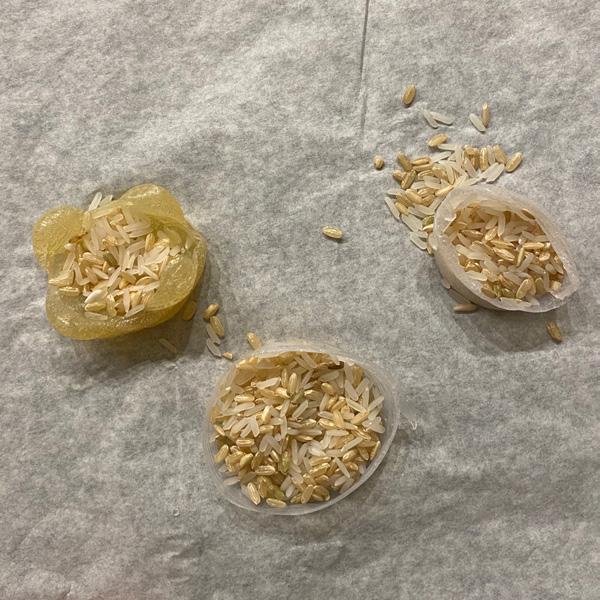
Carefully remove the set alginate off the mould and rinse with water. Pat dry and then place in oven on 100 degrees Celsius to remove excess water, place rice grains to prevent warping. Leave in oven for an hour then air dry for a few days.
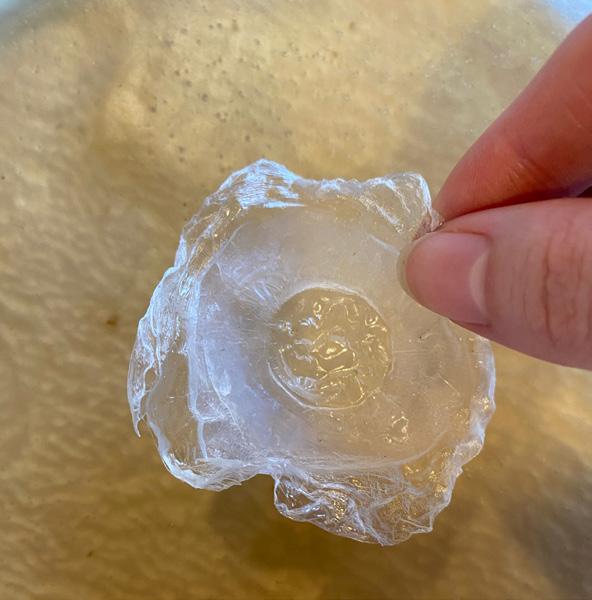
Notes
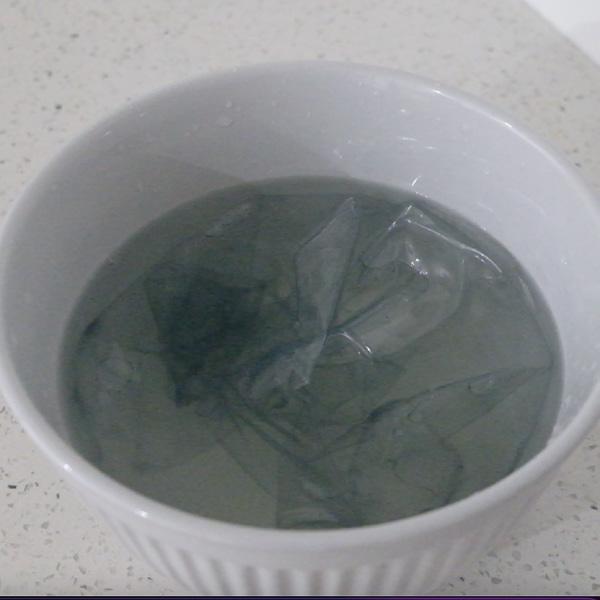
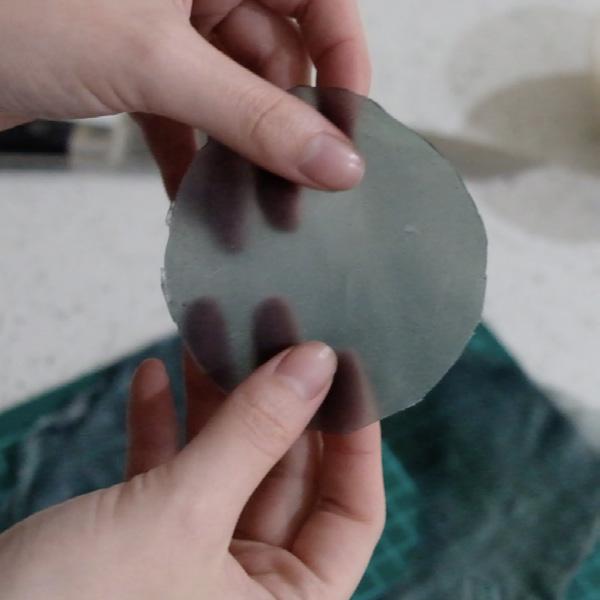
When the mould was first removed from the salt bath the alginate had set in a way that looked promising. However taking off the alginate was very difficult and ended up ruining the shape because the alginate touching the glass hadn’t set at all. It was also difficult to control the thickness of the material and this meant that when it dried the shape would warp.
Removing
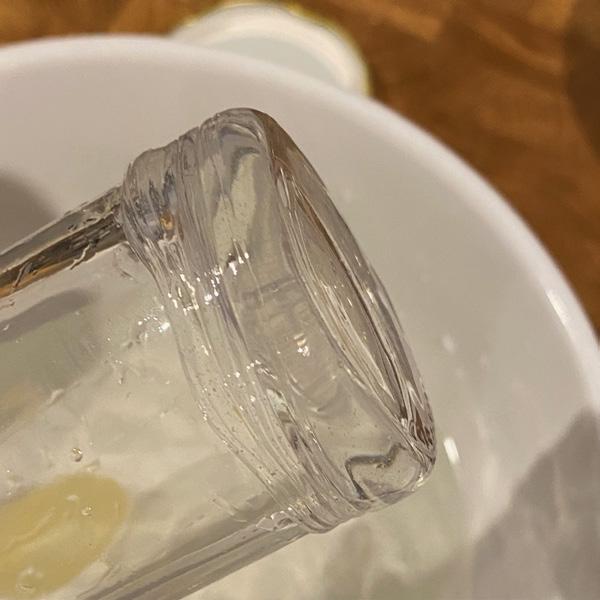

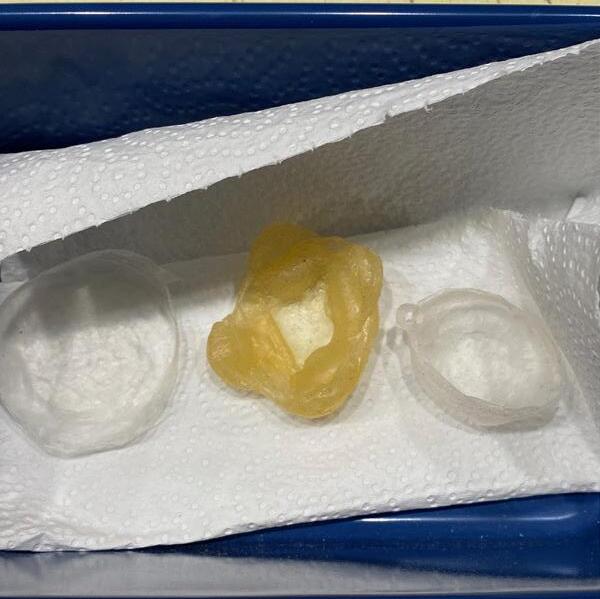
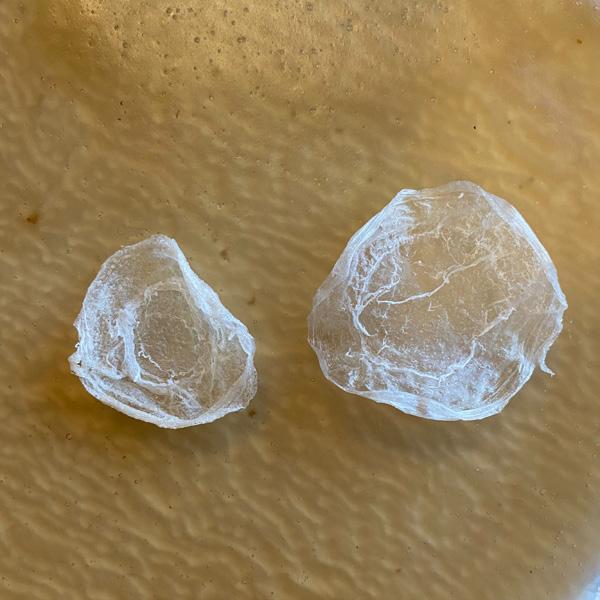
The next technique I tried was coating my mould in coconut oil to help the alginate lift off into the bath. I also tried putting the alginate inside the mould and tilted it around so that there was a thin layer. I had similar results as before and was left with a warped disc of alginate.
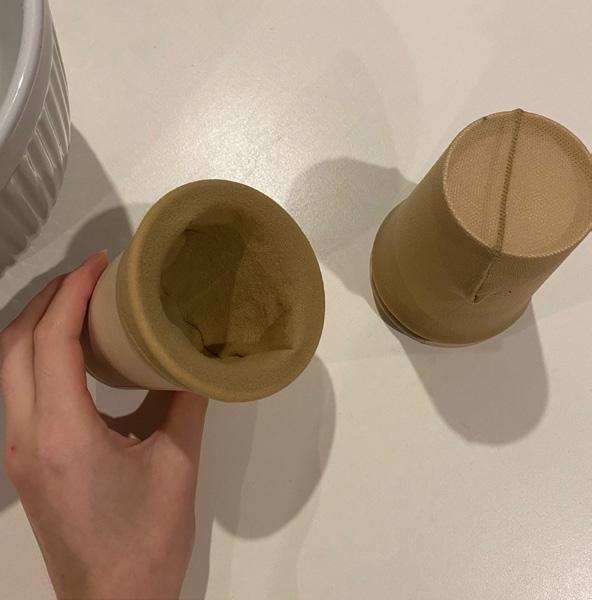
I also tried using stocking to cover two cups and then coating them in calcium chloride water, then filling one cup with alginate and pressing the other one down. This made a huge mess so I didn’t take any photos. This probably didn’t work because the stockings were nylon and didn’t absorb the salt water.


Notes
Since none of these casting techniques seemed to be working I began researching and having a think about other way I could construct a vessel. I was initially hesitant to use any adhesives or stitching but felt that was better than wasting lots of alginate through the original squeeze method.
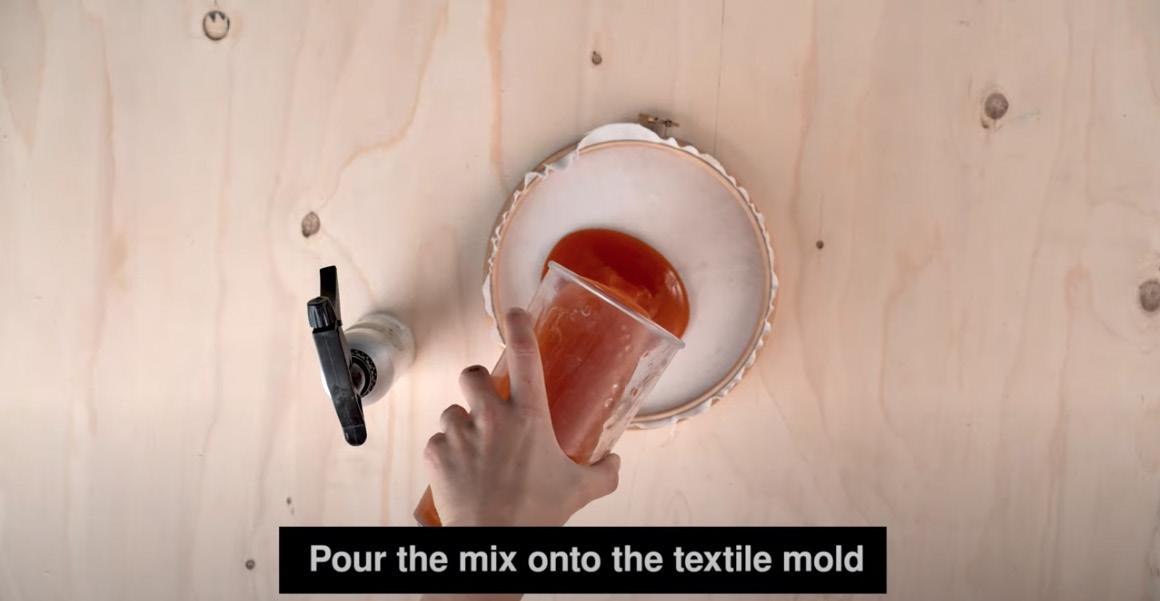
While researching on the Internet I came across the YouTube channel Fab Lab Barcelona and was excited to see that alginate could be set into a uniform flat sheet.
Fab Lab Barcelona (2021, March 19). Making Bioplastics from Avocado Dye and Alginate - REMIX EL BARRIO [Video]. YouTube. https://www.youtube. com/watch?v=iLLB7wJd9SM
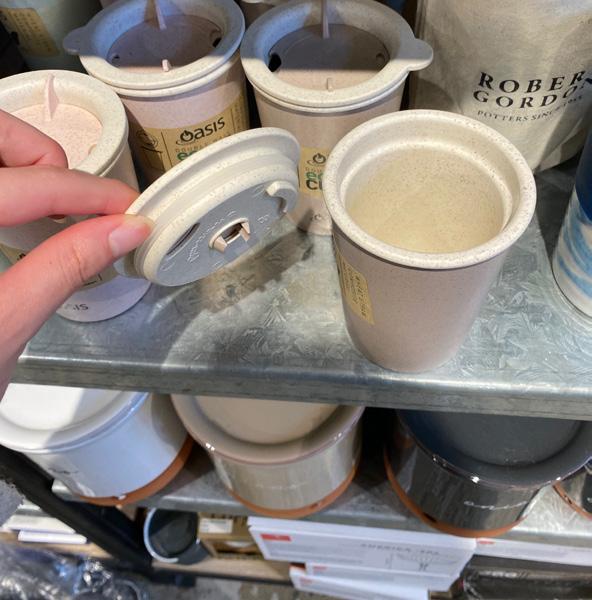
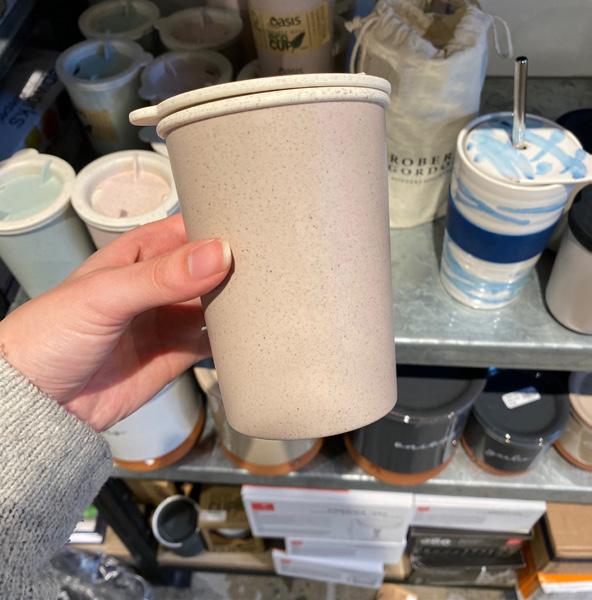
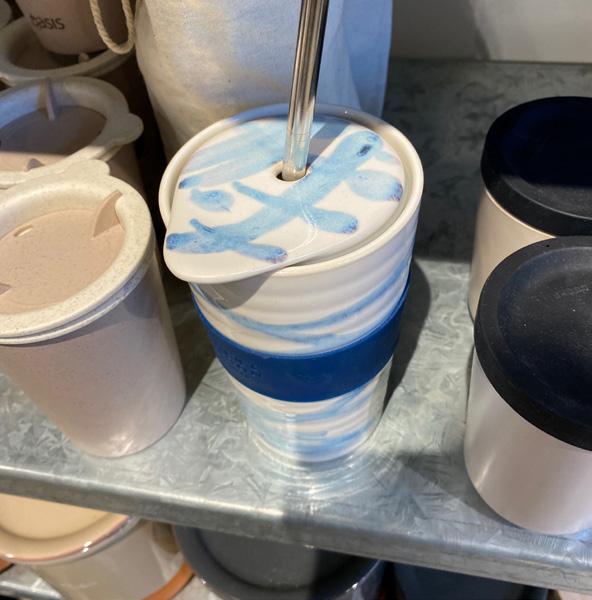
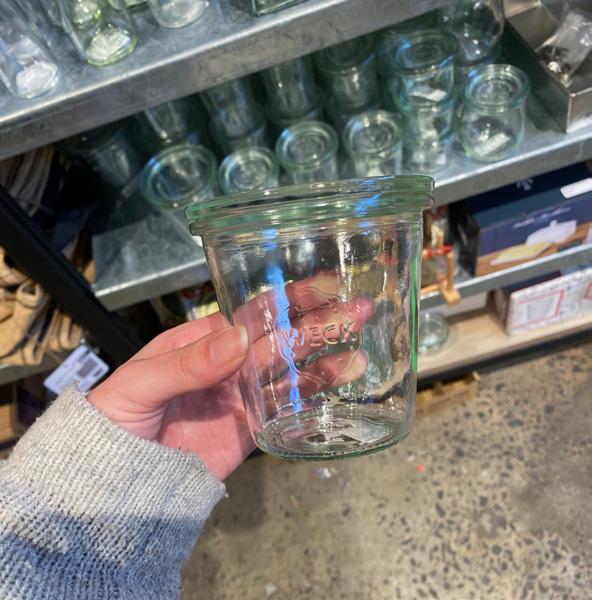
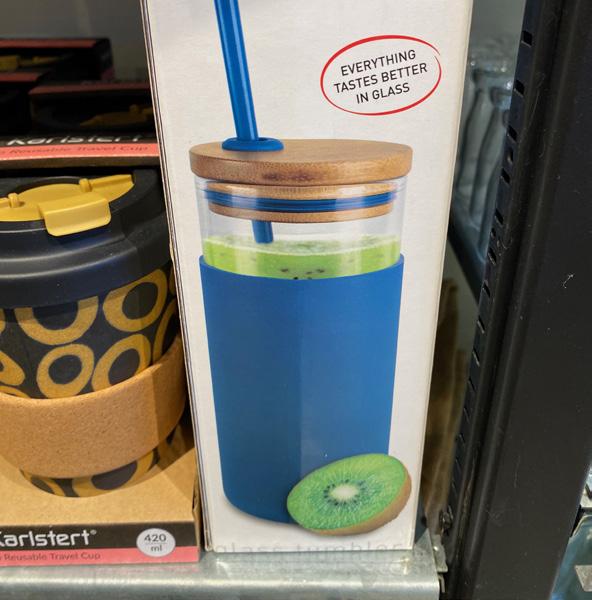
Went out and had a look at some cup designs for inspiration.
After doing some further research I began reconsidering my previous setting technique and wanted to experiment with creating thin sheets of alginate which might be easier to work with to create a vessel.
Tools
Mirror
Spray bottle
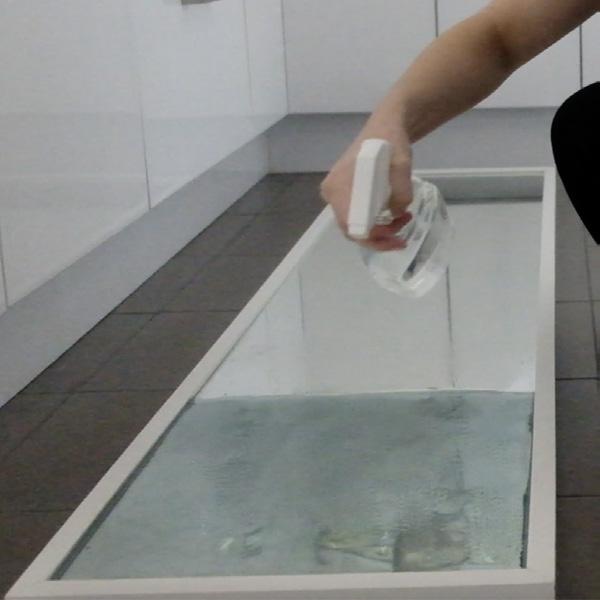
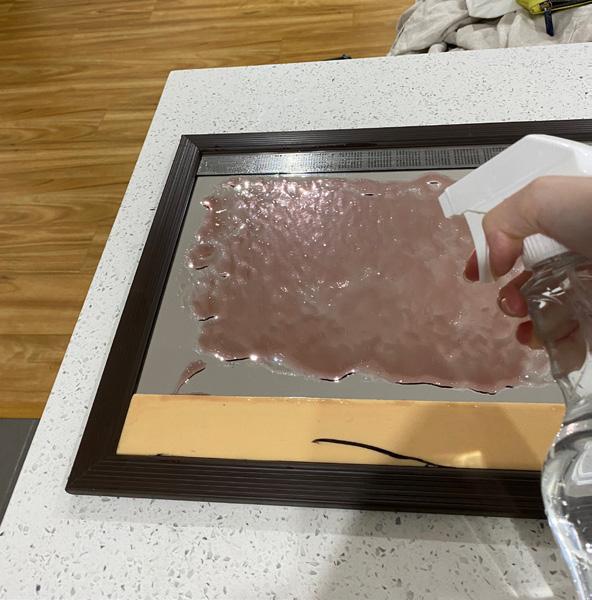
Method
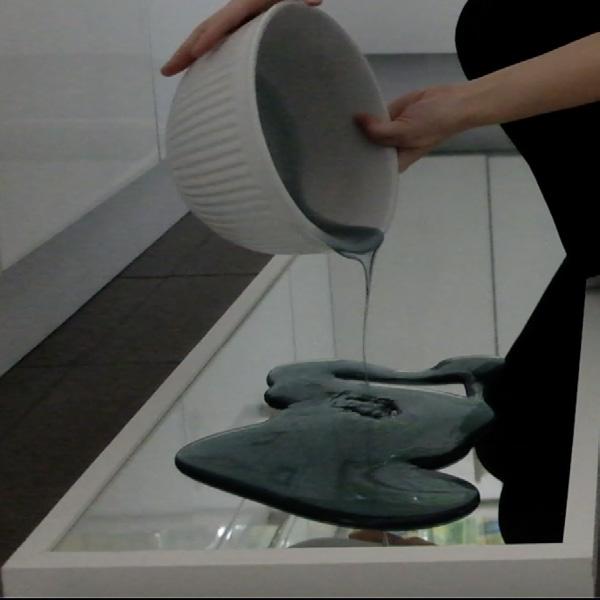
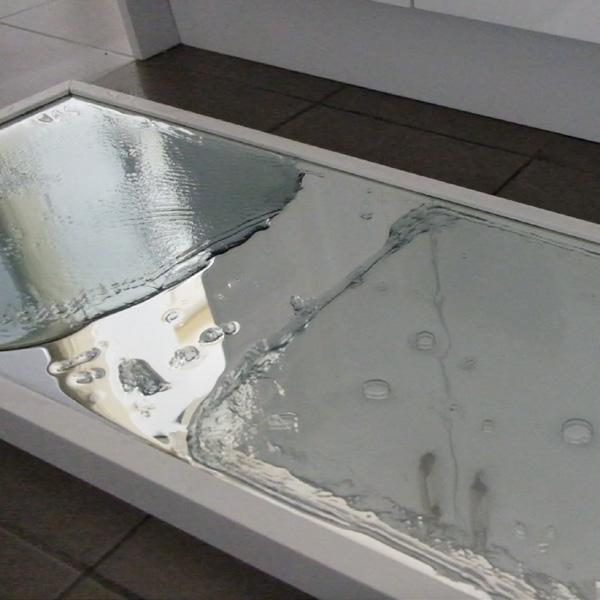
Pour alginate mixture onto mirror. Tilt mirror to spread alginate all across mould . Give it a few mins to rest and evenly disperse.
Generously spray the alginate in salt water to set and wait a couple of mins.
Carefully remove top layer of membrane and place it in salt bath to set completely then rinse with water and leave to dry.
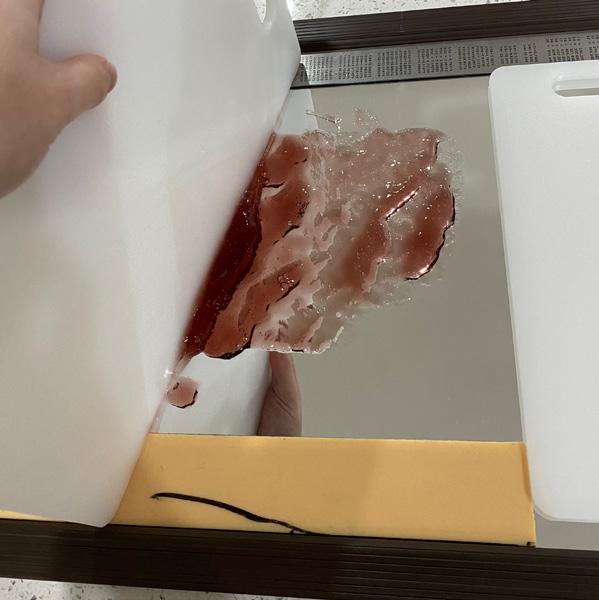
Notes
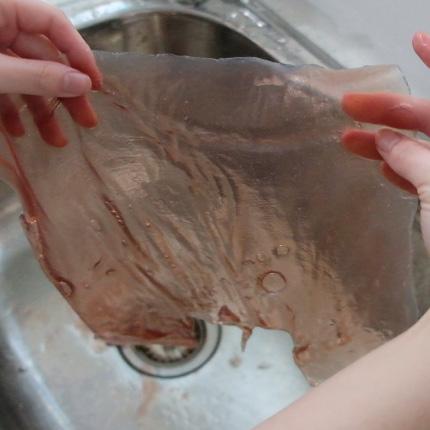
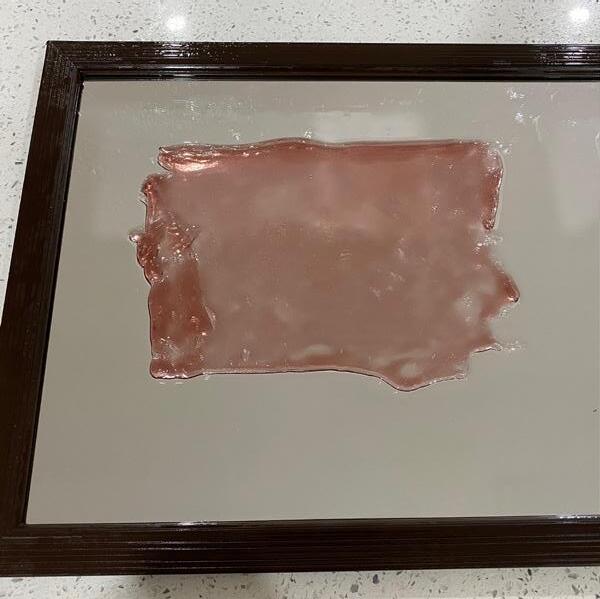
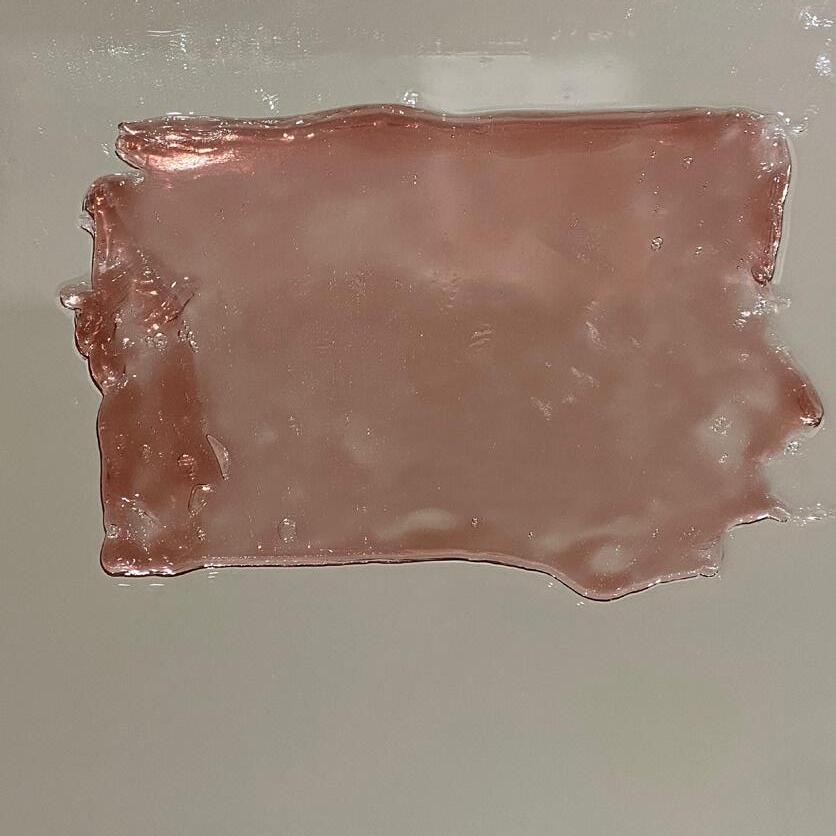
For the first time I was able to produce a flat uniform sheet, I had a lot more control compared to past tests. However my layer of alginate was too thick and just like my previous tests the alginate was unable to set in the areas where there was no contact with the salt water.
For my next test I need to spread the alginate to make it a thin as possible so the salt spray can set the whole way through and not just set a thin layer on top.
Results
Tools
Mirror
Chopping board
Spray bottle
2 rulers
Baking paper
Iron
Method
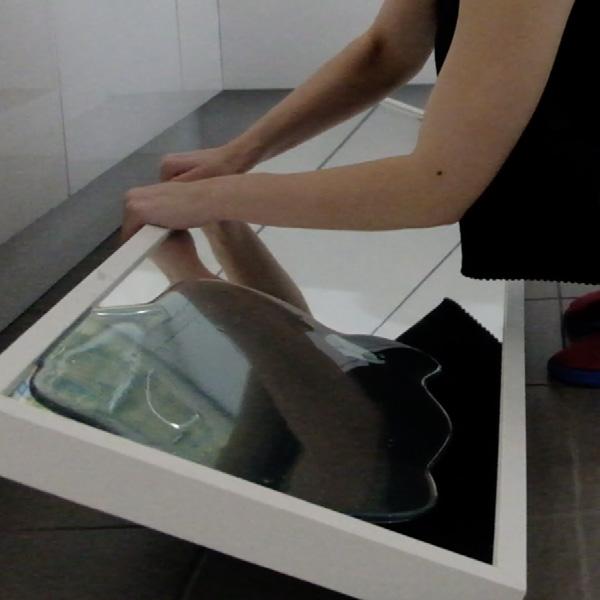
Place two rulers inside mirror to act as a leveler. Pour alginate mixture onto mirror and use a chopping board to spread alginate across surface. Give it a few mins to rest and evenly disperse.
Generously spray the alginate in salt water to set and wait a couple of mins.
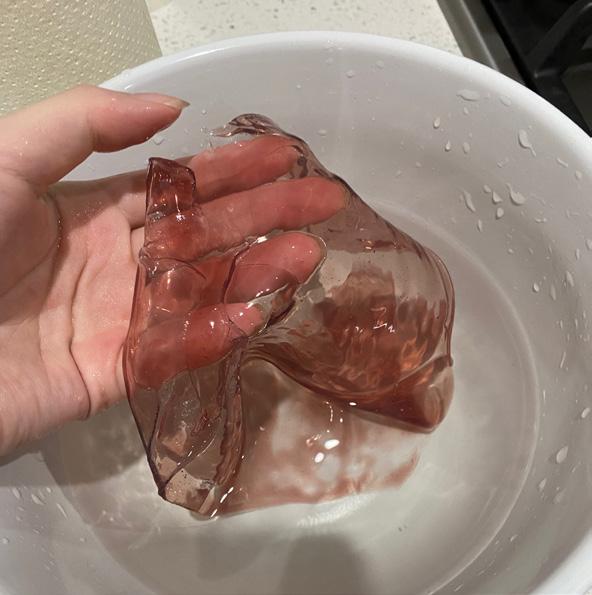
Carefully remove alginate and place it in salt bath to set completely then rinse with water and pat dry.
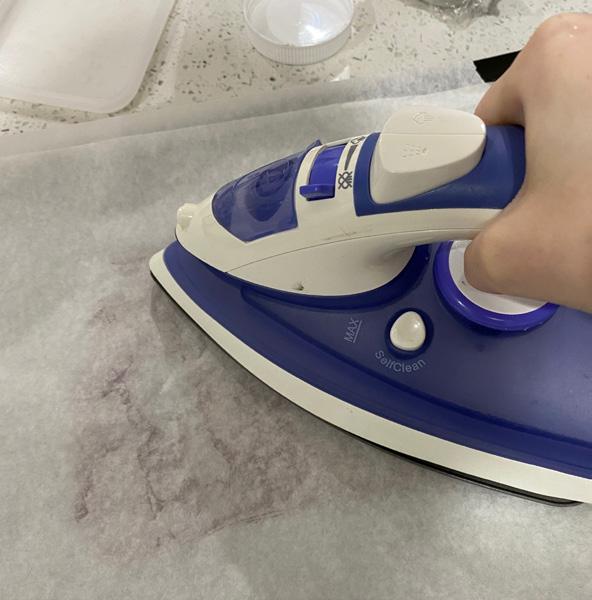
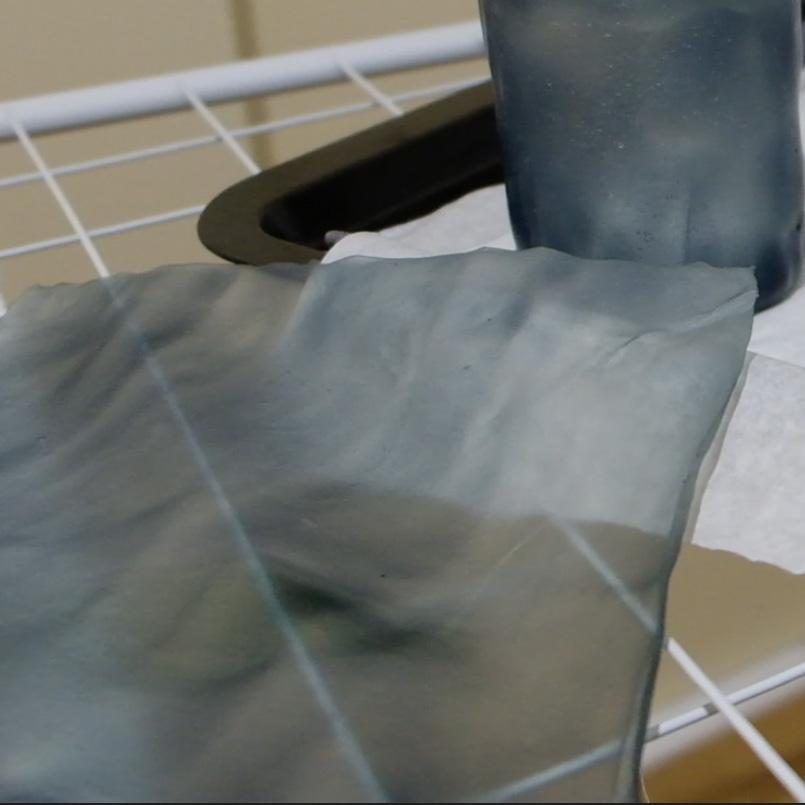
To speed up drying process place in between two sheet of baking paper and on the lowest heat setting iron the sheet of alginate the steam setting off.
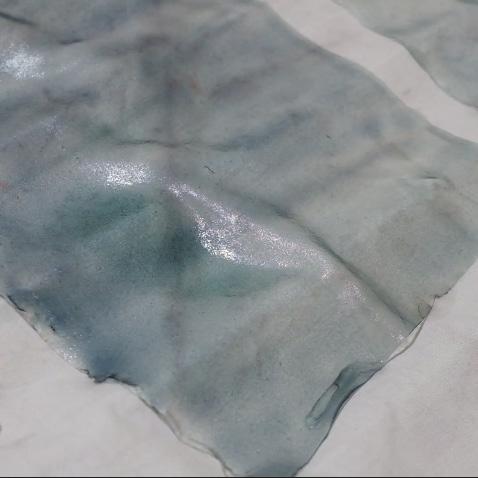
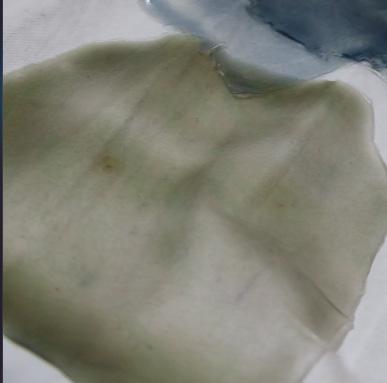
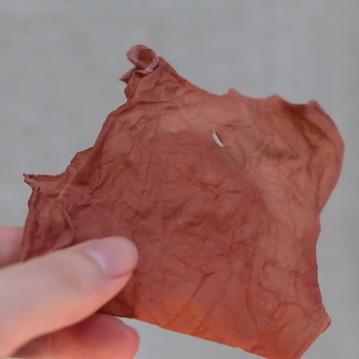
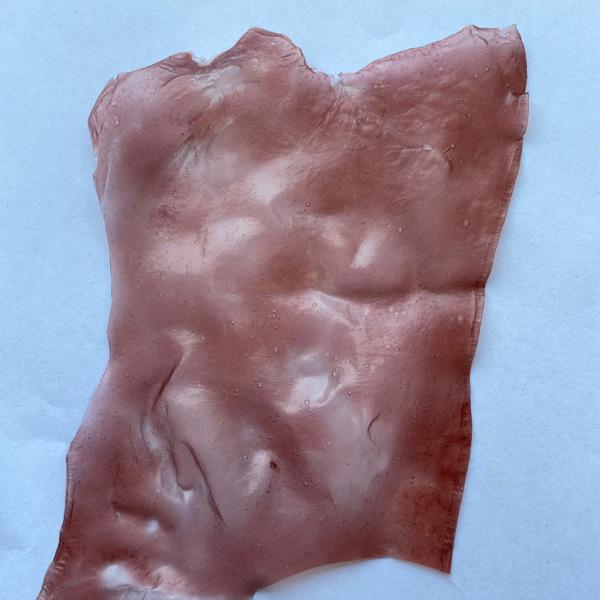
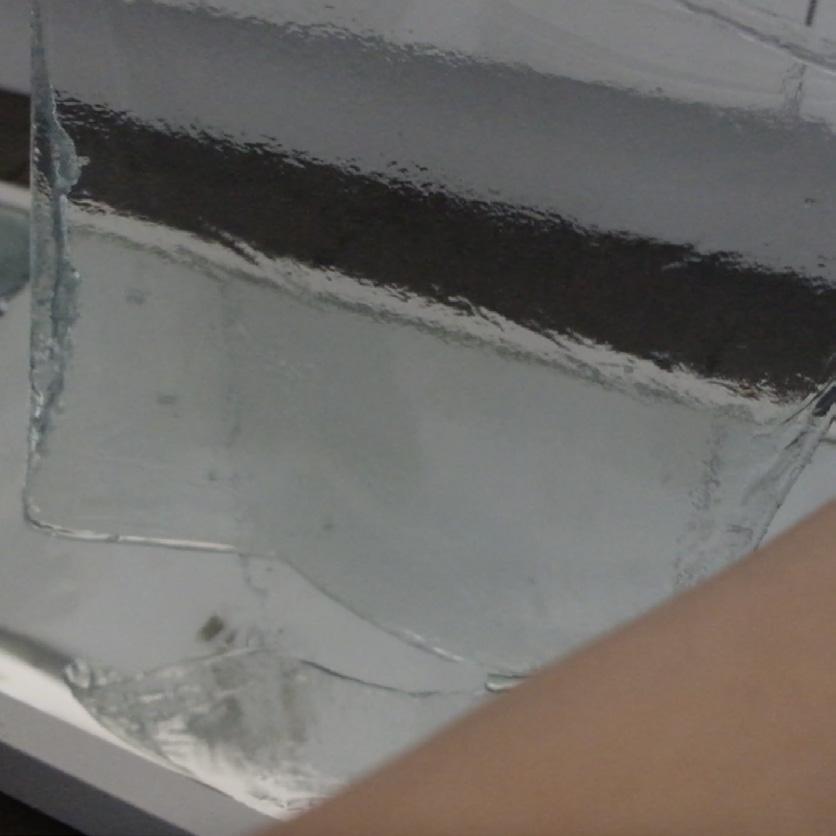
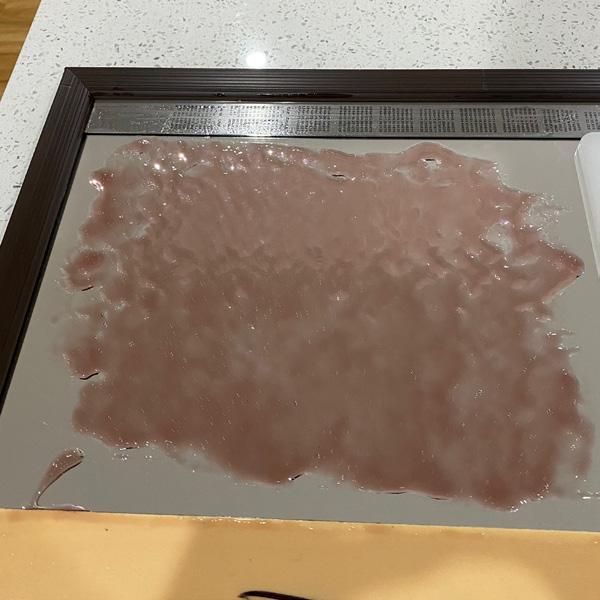
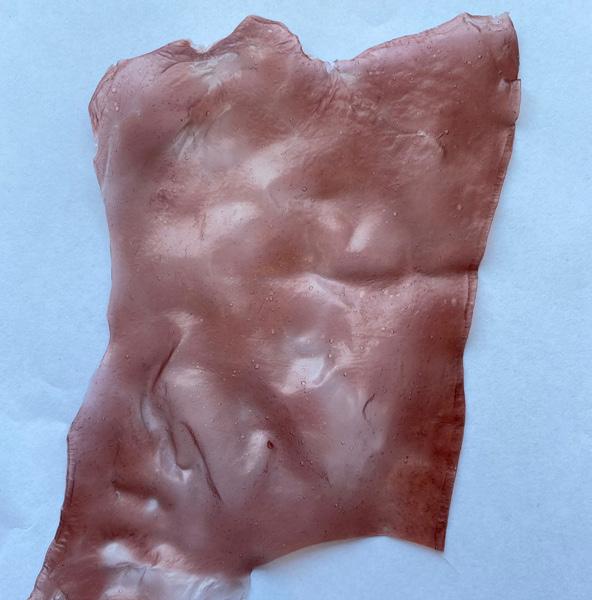
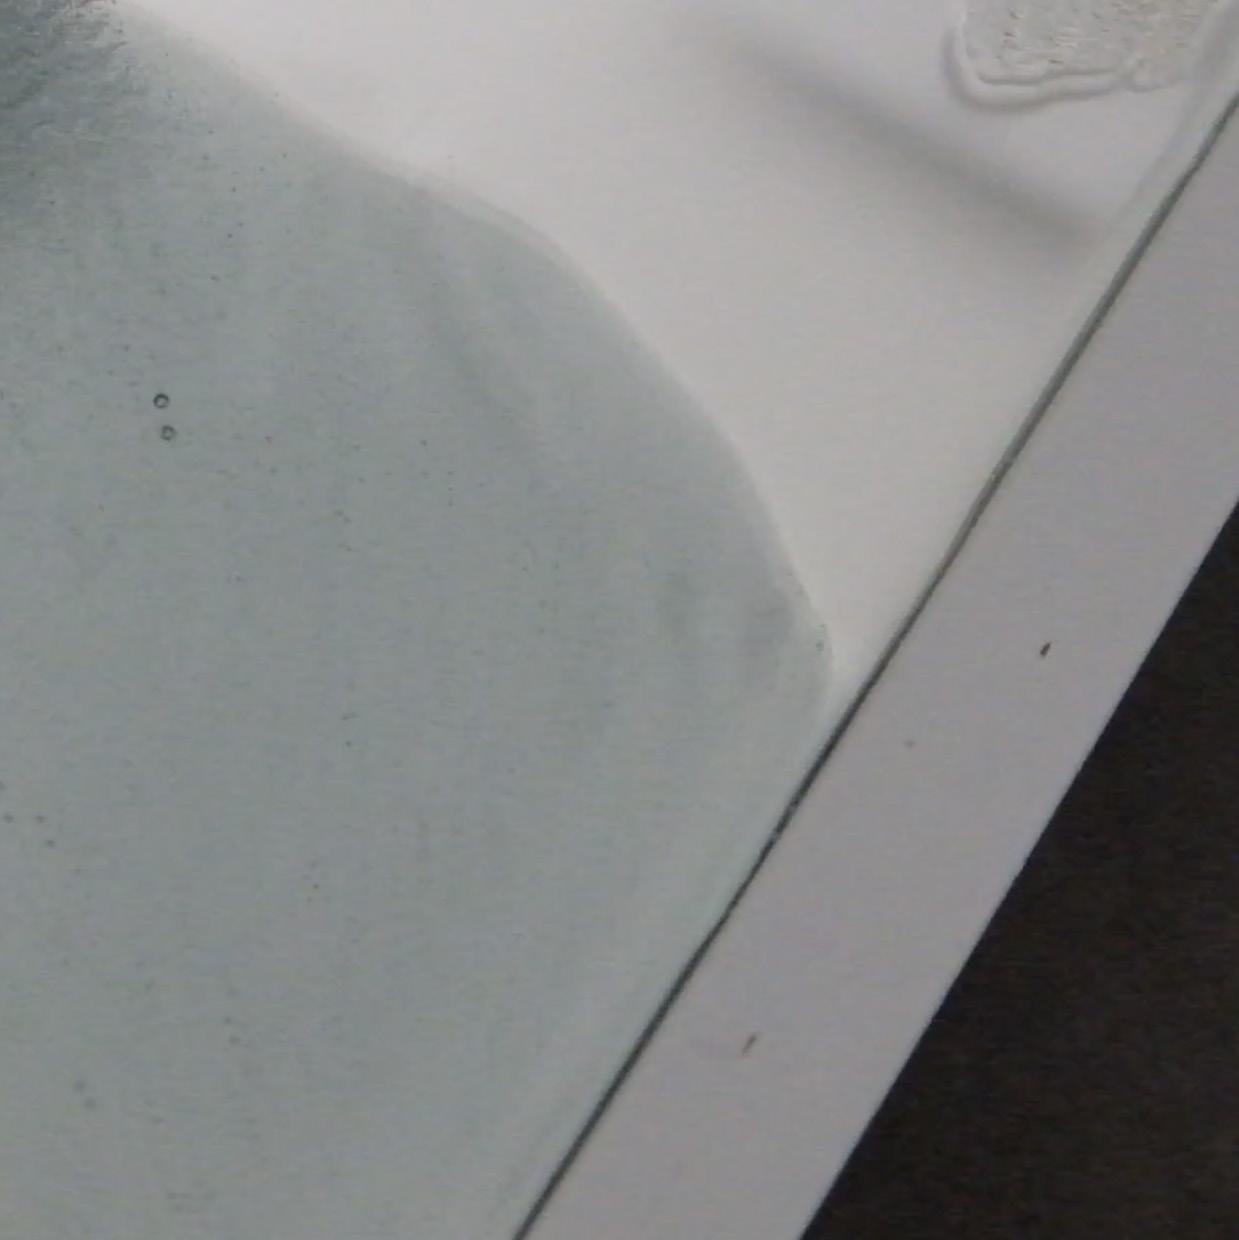
Notes
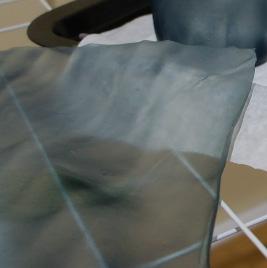
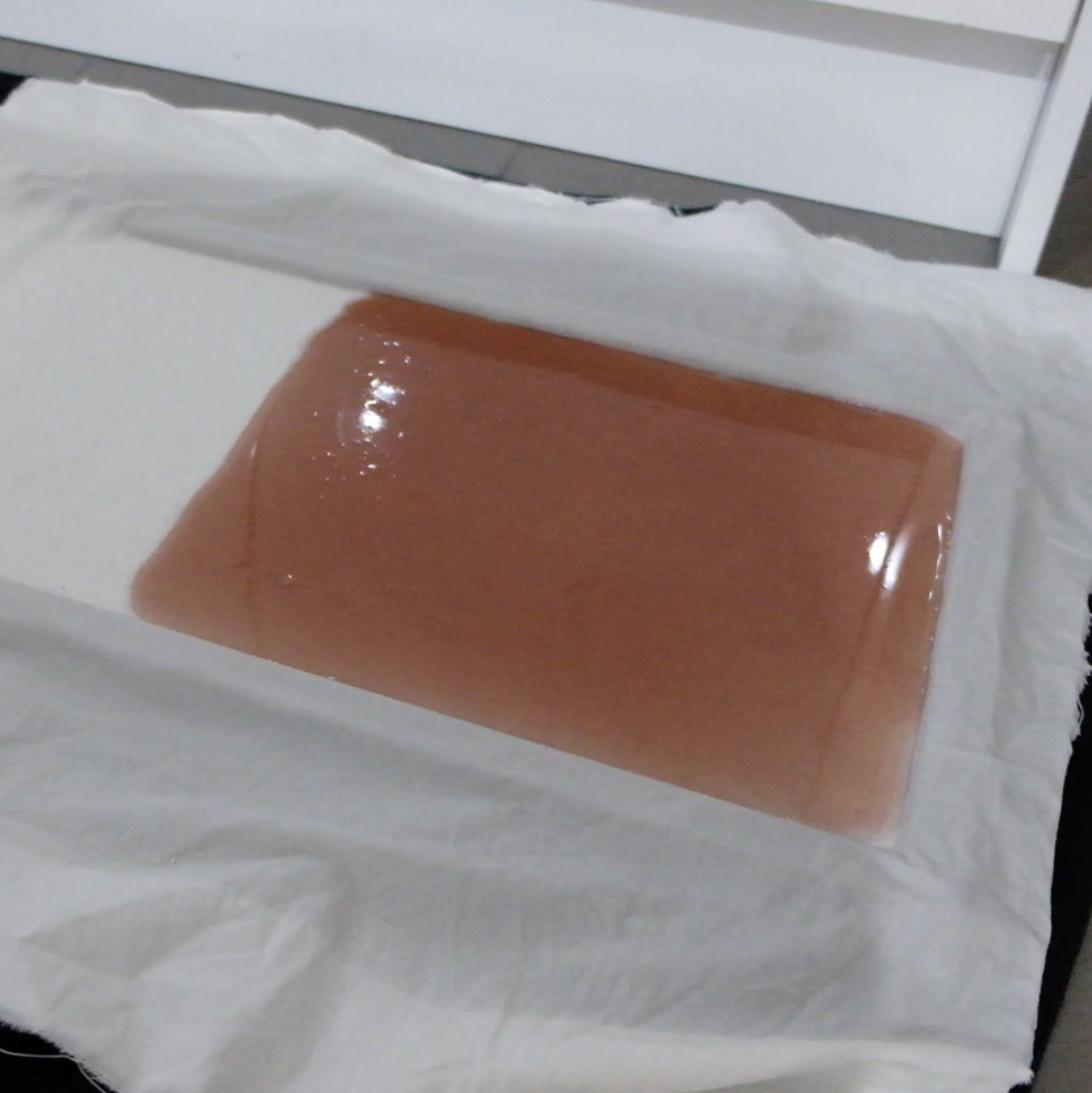
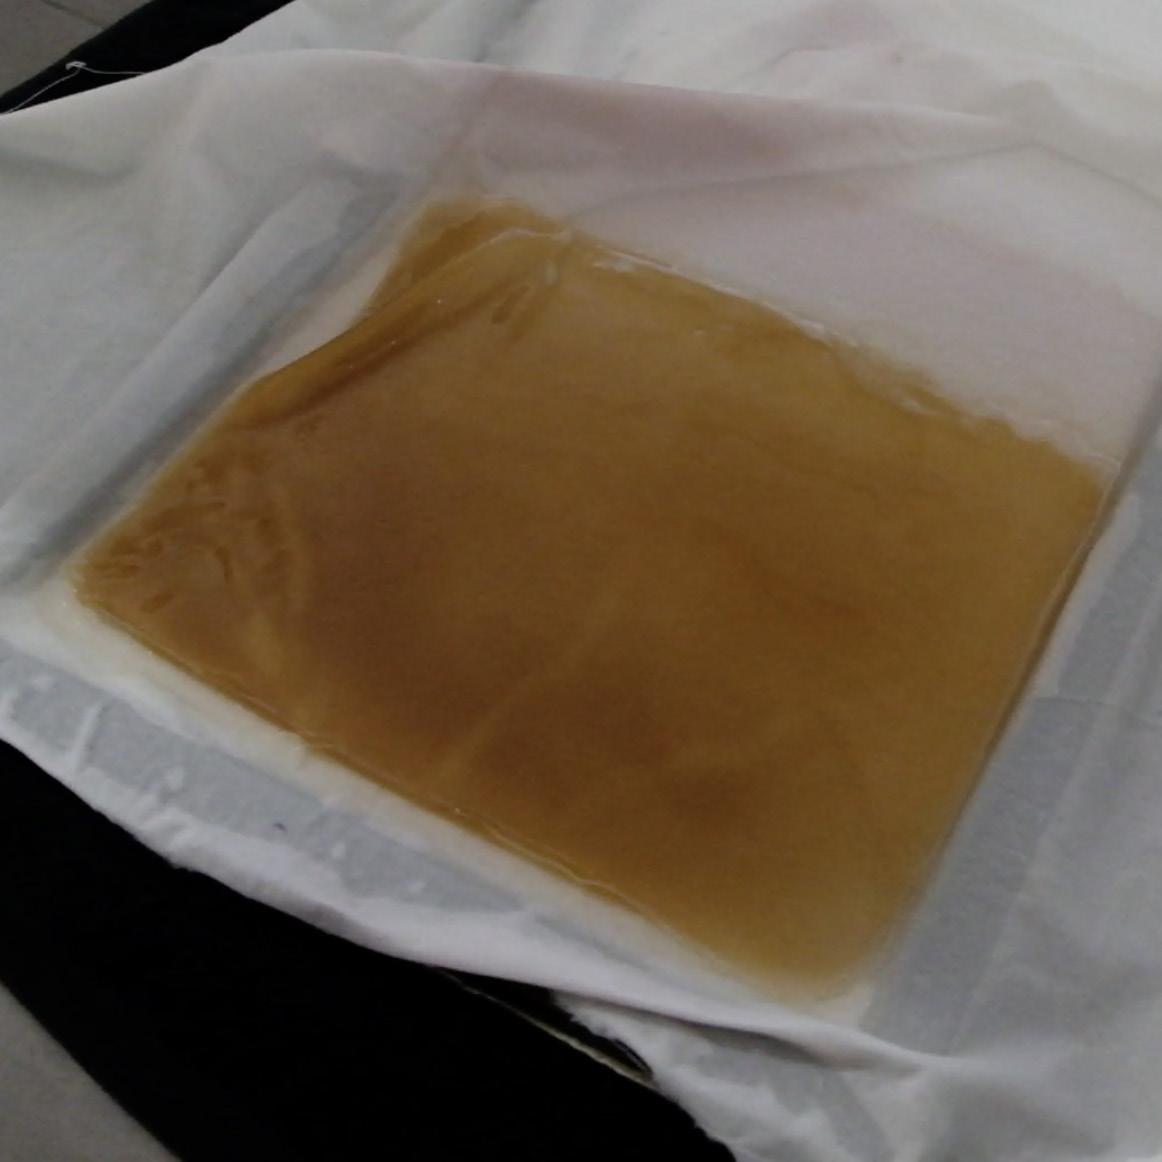
I was shocked how well this method worked and was surprised at how uniform it’s stayed. All the other sheets of alginate I had made up until this point end up turning brittle and form cracks and creases but for some reason when the water is removed through ironing no air drying it becomes elastic and uniform. This must be due to the way the water leaves at an even rate.
by side comparison of the exact same material recipe when ironed vs air dried.
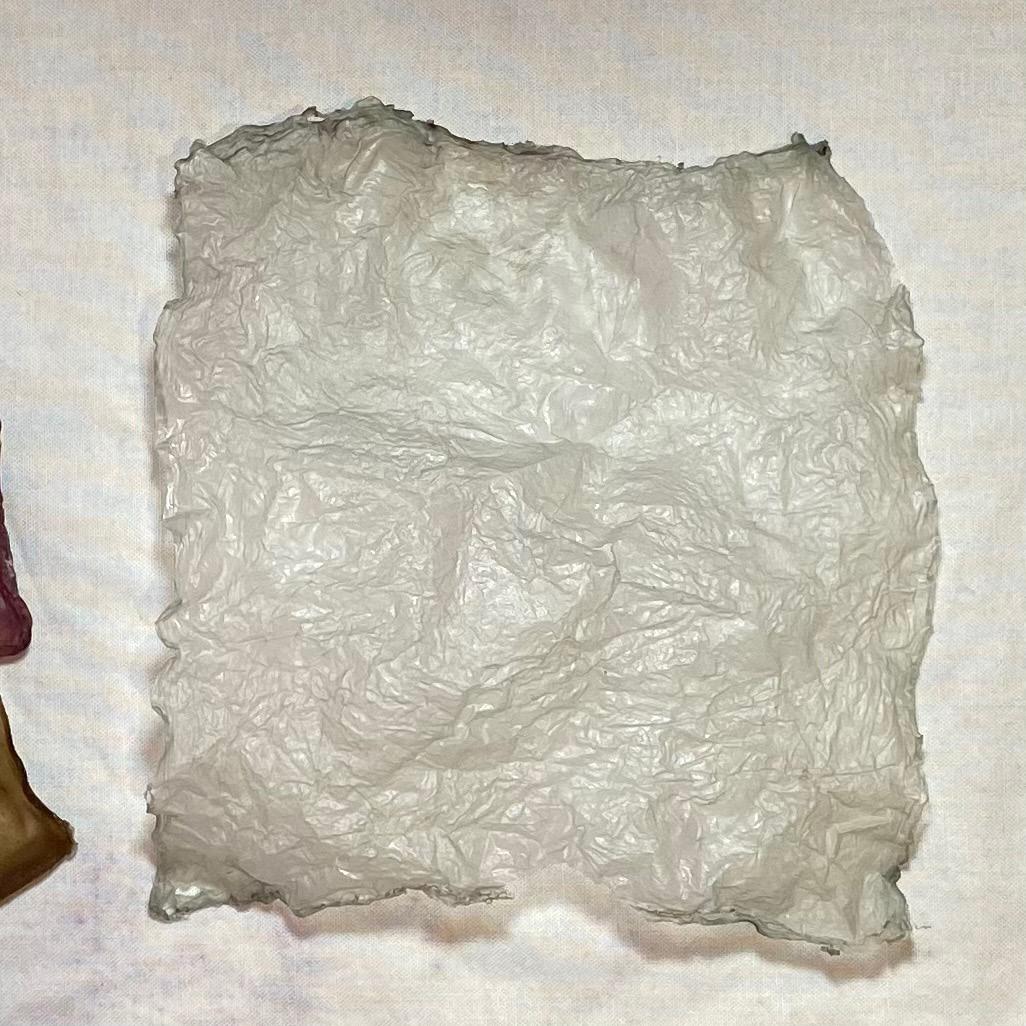
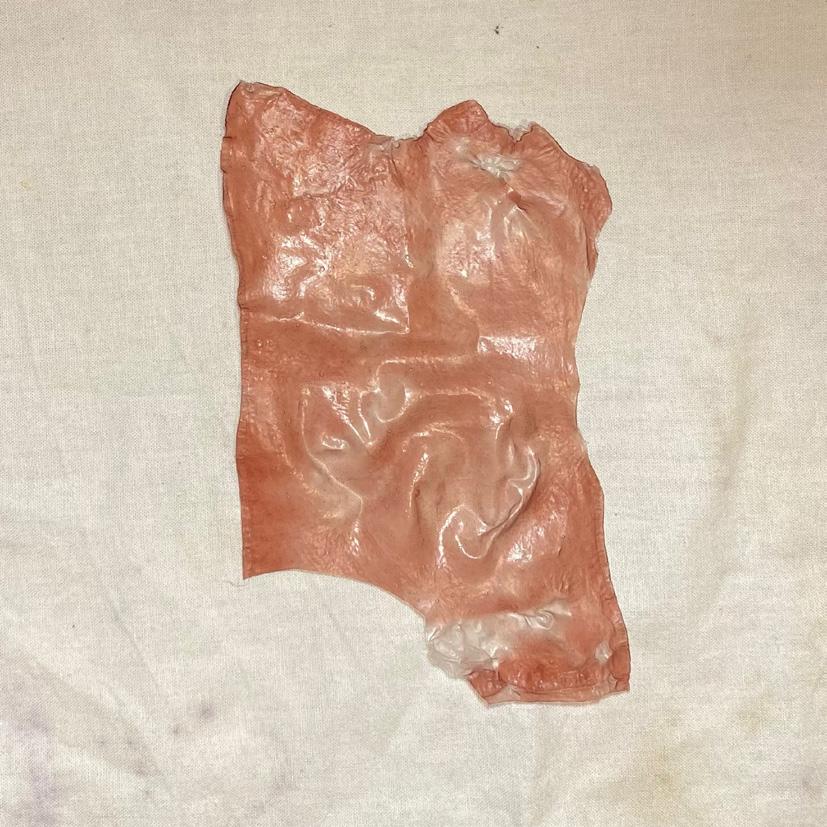
dried ironed (prior to pulling and stretching the material it was completely flat)
Results
Tools
Cotton scrap fabric
Mirror
Chopping board
Spray bottle
2 rulers
Baking paper
Iron
Method
Lay down a piece of fabric and spray with salt water. Flatten out any creases, respray and pat dry to soak up any excess moisture. Pour alginate mixture into mould and use a chopping board to spread alginate across surface. Give it a few mins to rest and evenly disperse.
Generously spray the alginate in salt water to set and wait a couple of mins.
Carefully remove alginate and place it in salt bath to set completely then rinse with water and pat dry.
Place in between two sheet of baking paper and on the lowest heat setting iron the sheet of alginate the steam setting off.
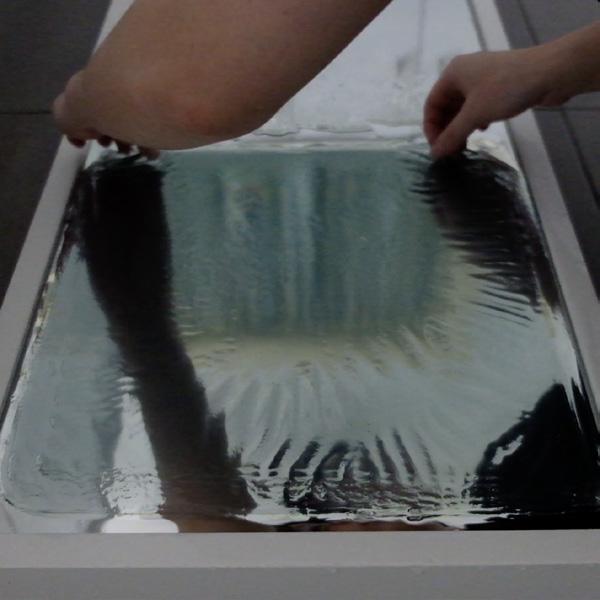
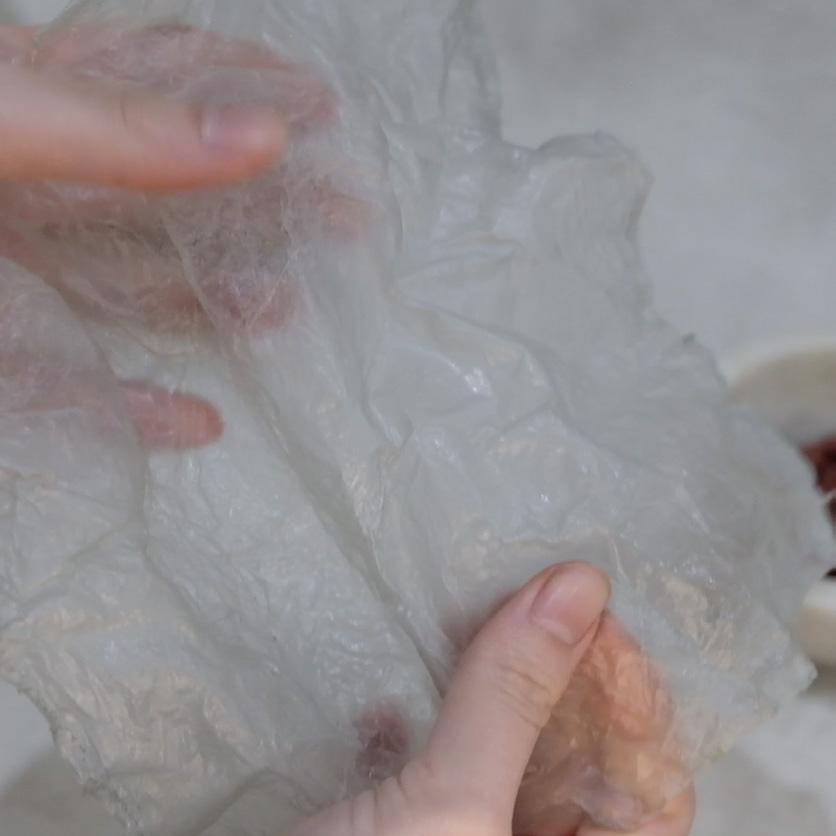
Notes
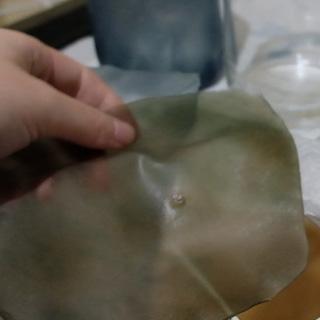
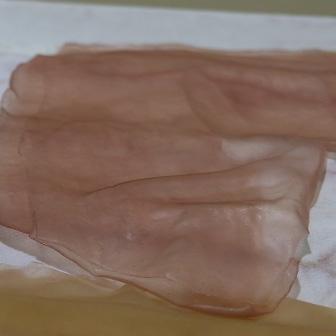
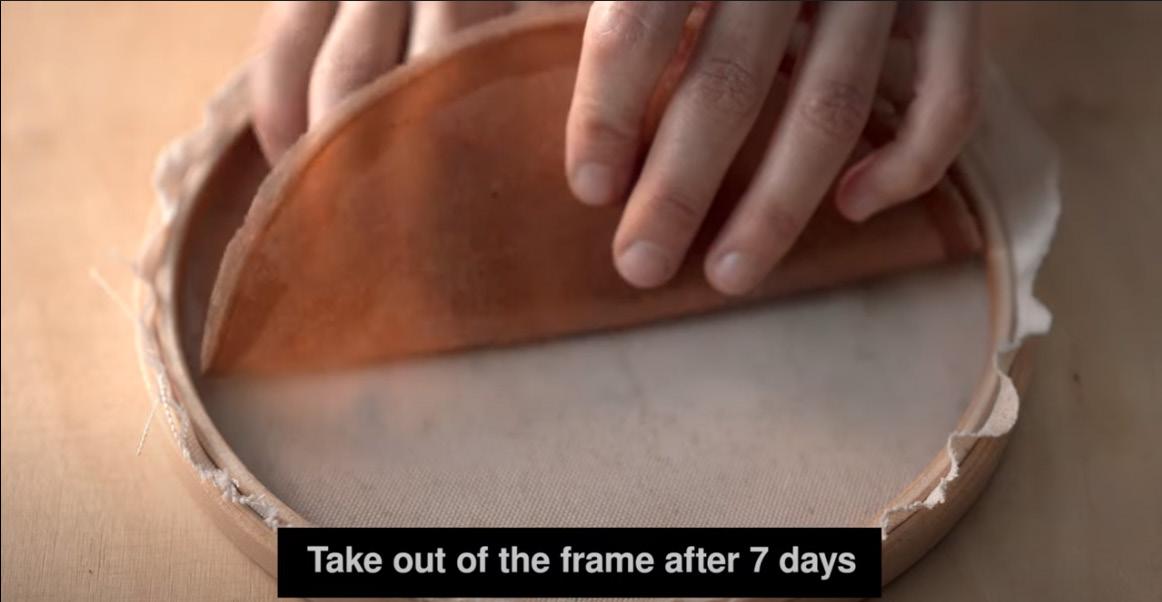
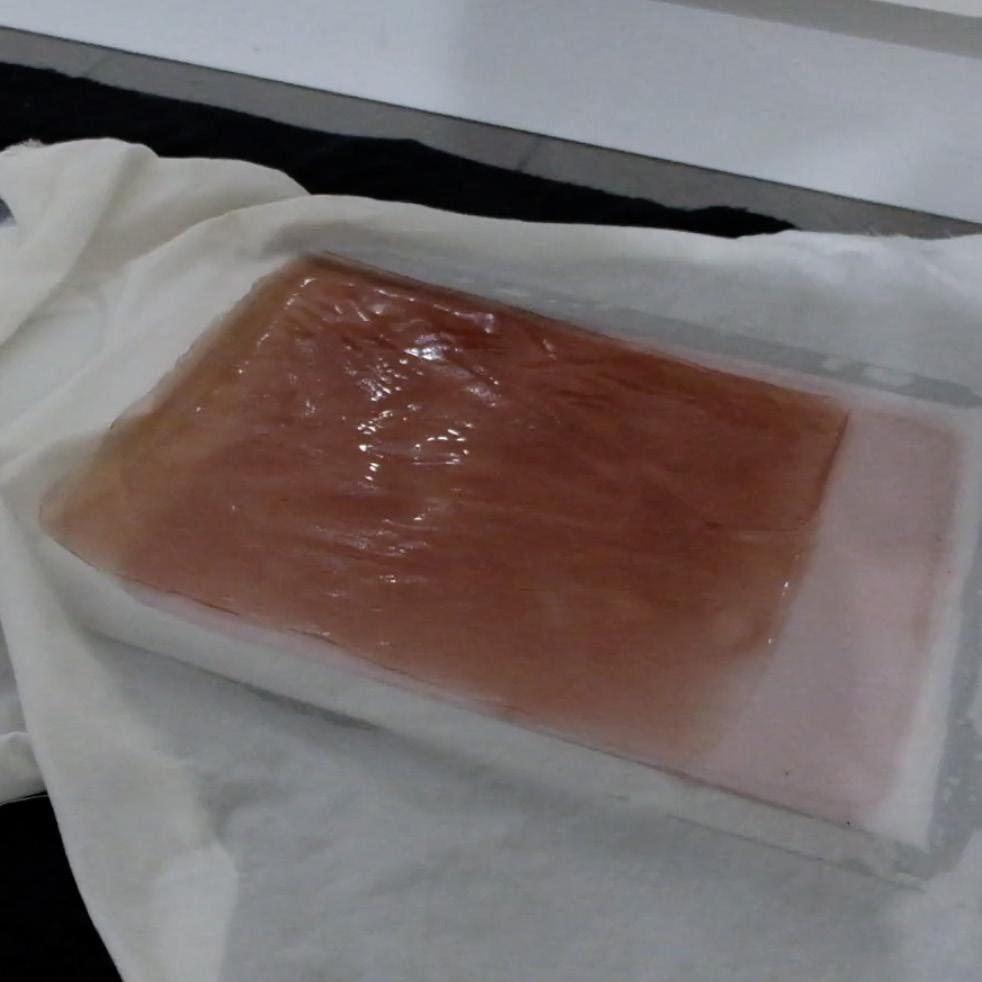
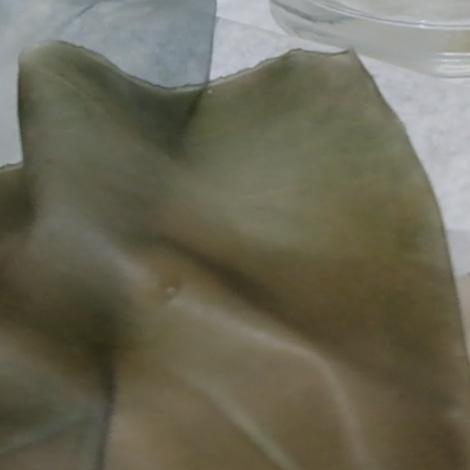
One issue I had with the new flat sheet method on the mirror is that as the material was setting the membrane forming would slowly travel inwards and the corners would curve. So I attempted using the fabric technique I had previously seen on YouTube and it worked great. The alginate now had something to grab onto and was able to maintain the shape of it’s edges.
Results with fabric (straight lines are maintained before and after setting)
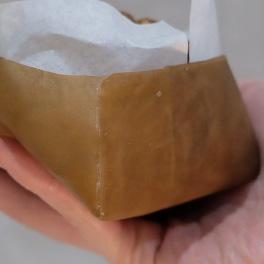
Going off the success of the new fabric setting method, I began prototyping my vessel and decided on making a traditional cup shape, which would consist of two pieces, a cylindrical sleeve for the walls of the cup and a flat circle for the base of the cup.
Method
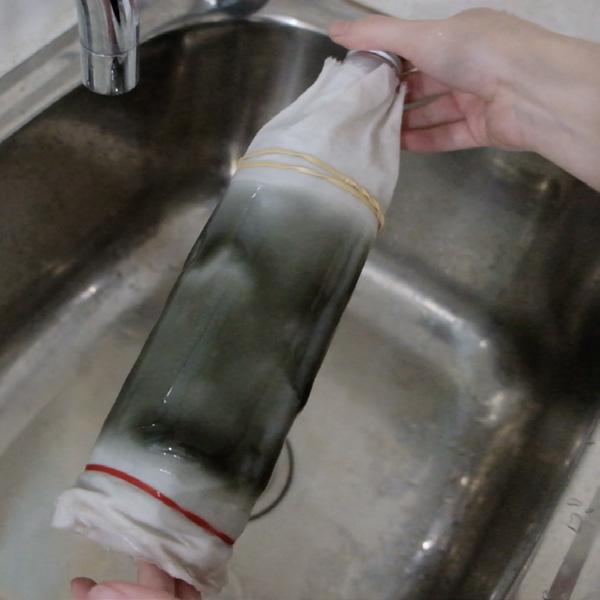
Soak a piece of cotton fabric in salt water bath and tightly wrap around wine bottle with no creases. Secure with rubber bands.
Drizzle alginate mixture onto mould making sure to evenly cover the entire surface. Hold in salt bath without touching the edges.
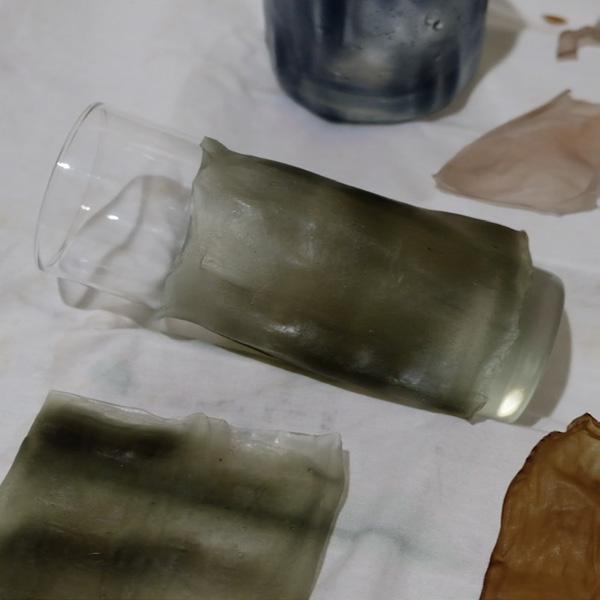
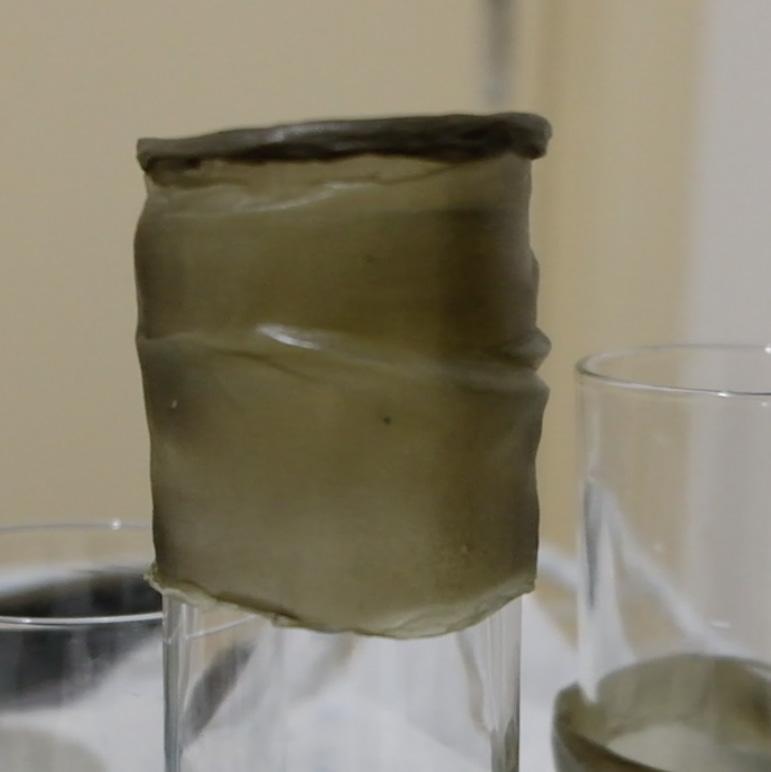
Remove from salt bath and pull off fabric from bottle and peel vessel sleeve from fabric. Rinse with water, leave to air dry in glass slightly smaller than sleeve to account for shrinkage.
When edges start to dry out roll down lip of cup.
With preprepared cup base attach by bending the bottom lip and gluing together.
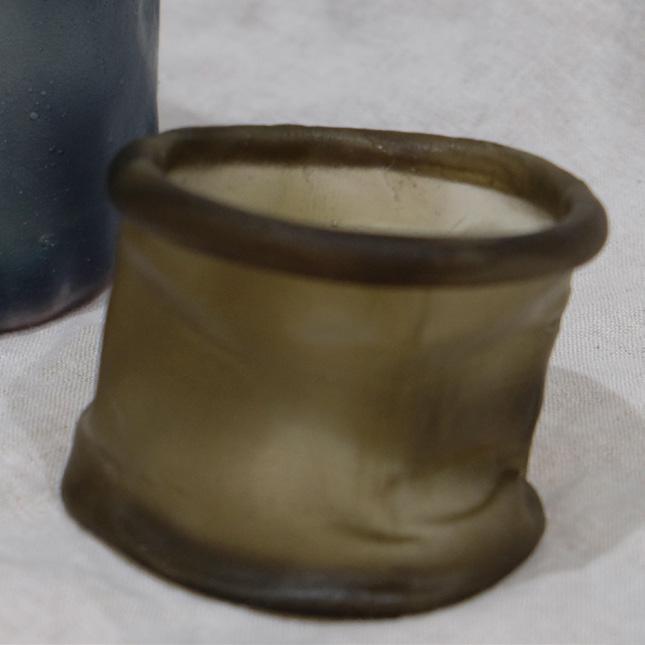
Notes
• Fabric wrapped around bottle worked great, inside of sleeve could set, easy to remove from fabric
A thicker layer of alginate needs to be spooned on otherwise will dry out too thin
• Edges dried out first, made it difficult to roll down top lip and fold down base
• The vessel was placed in a glass too small and couldn’t support it’s original shape
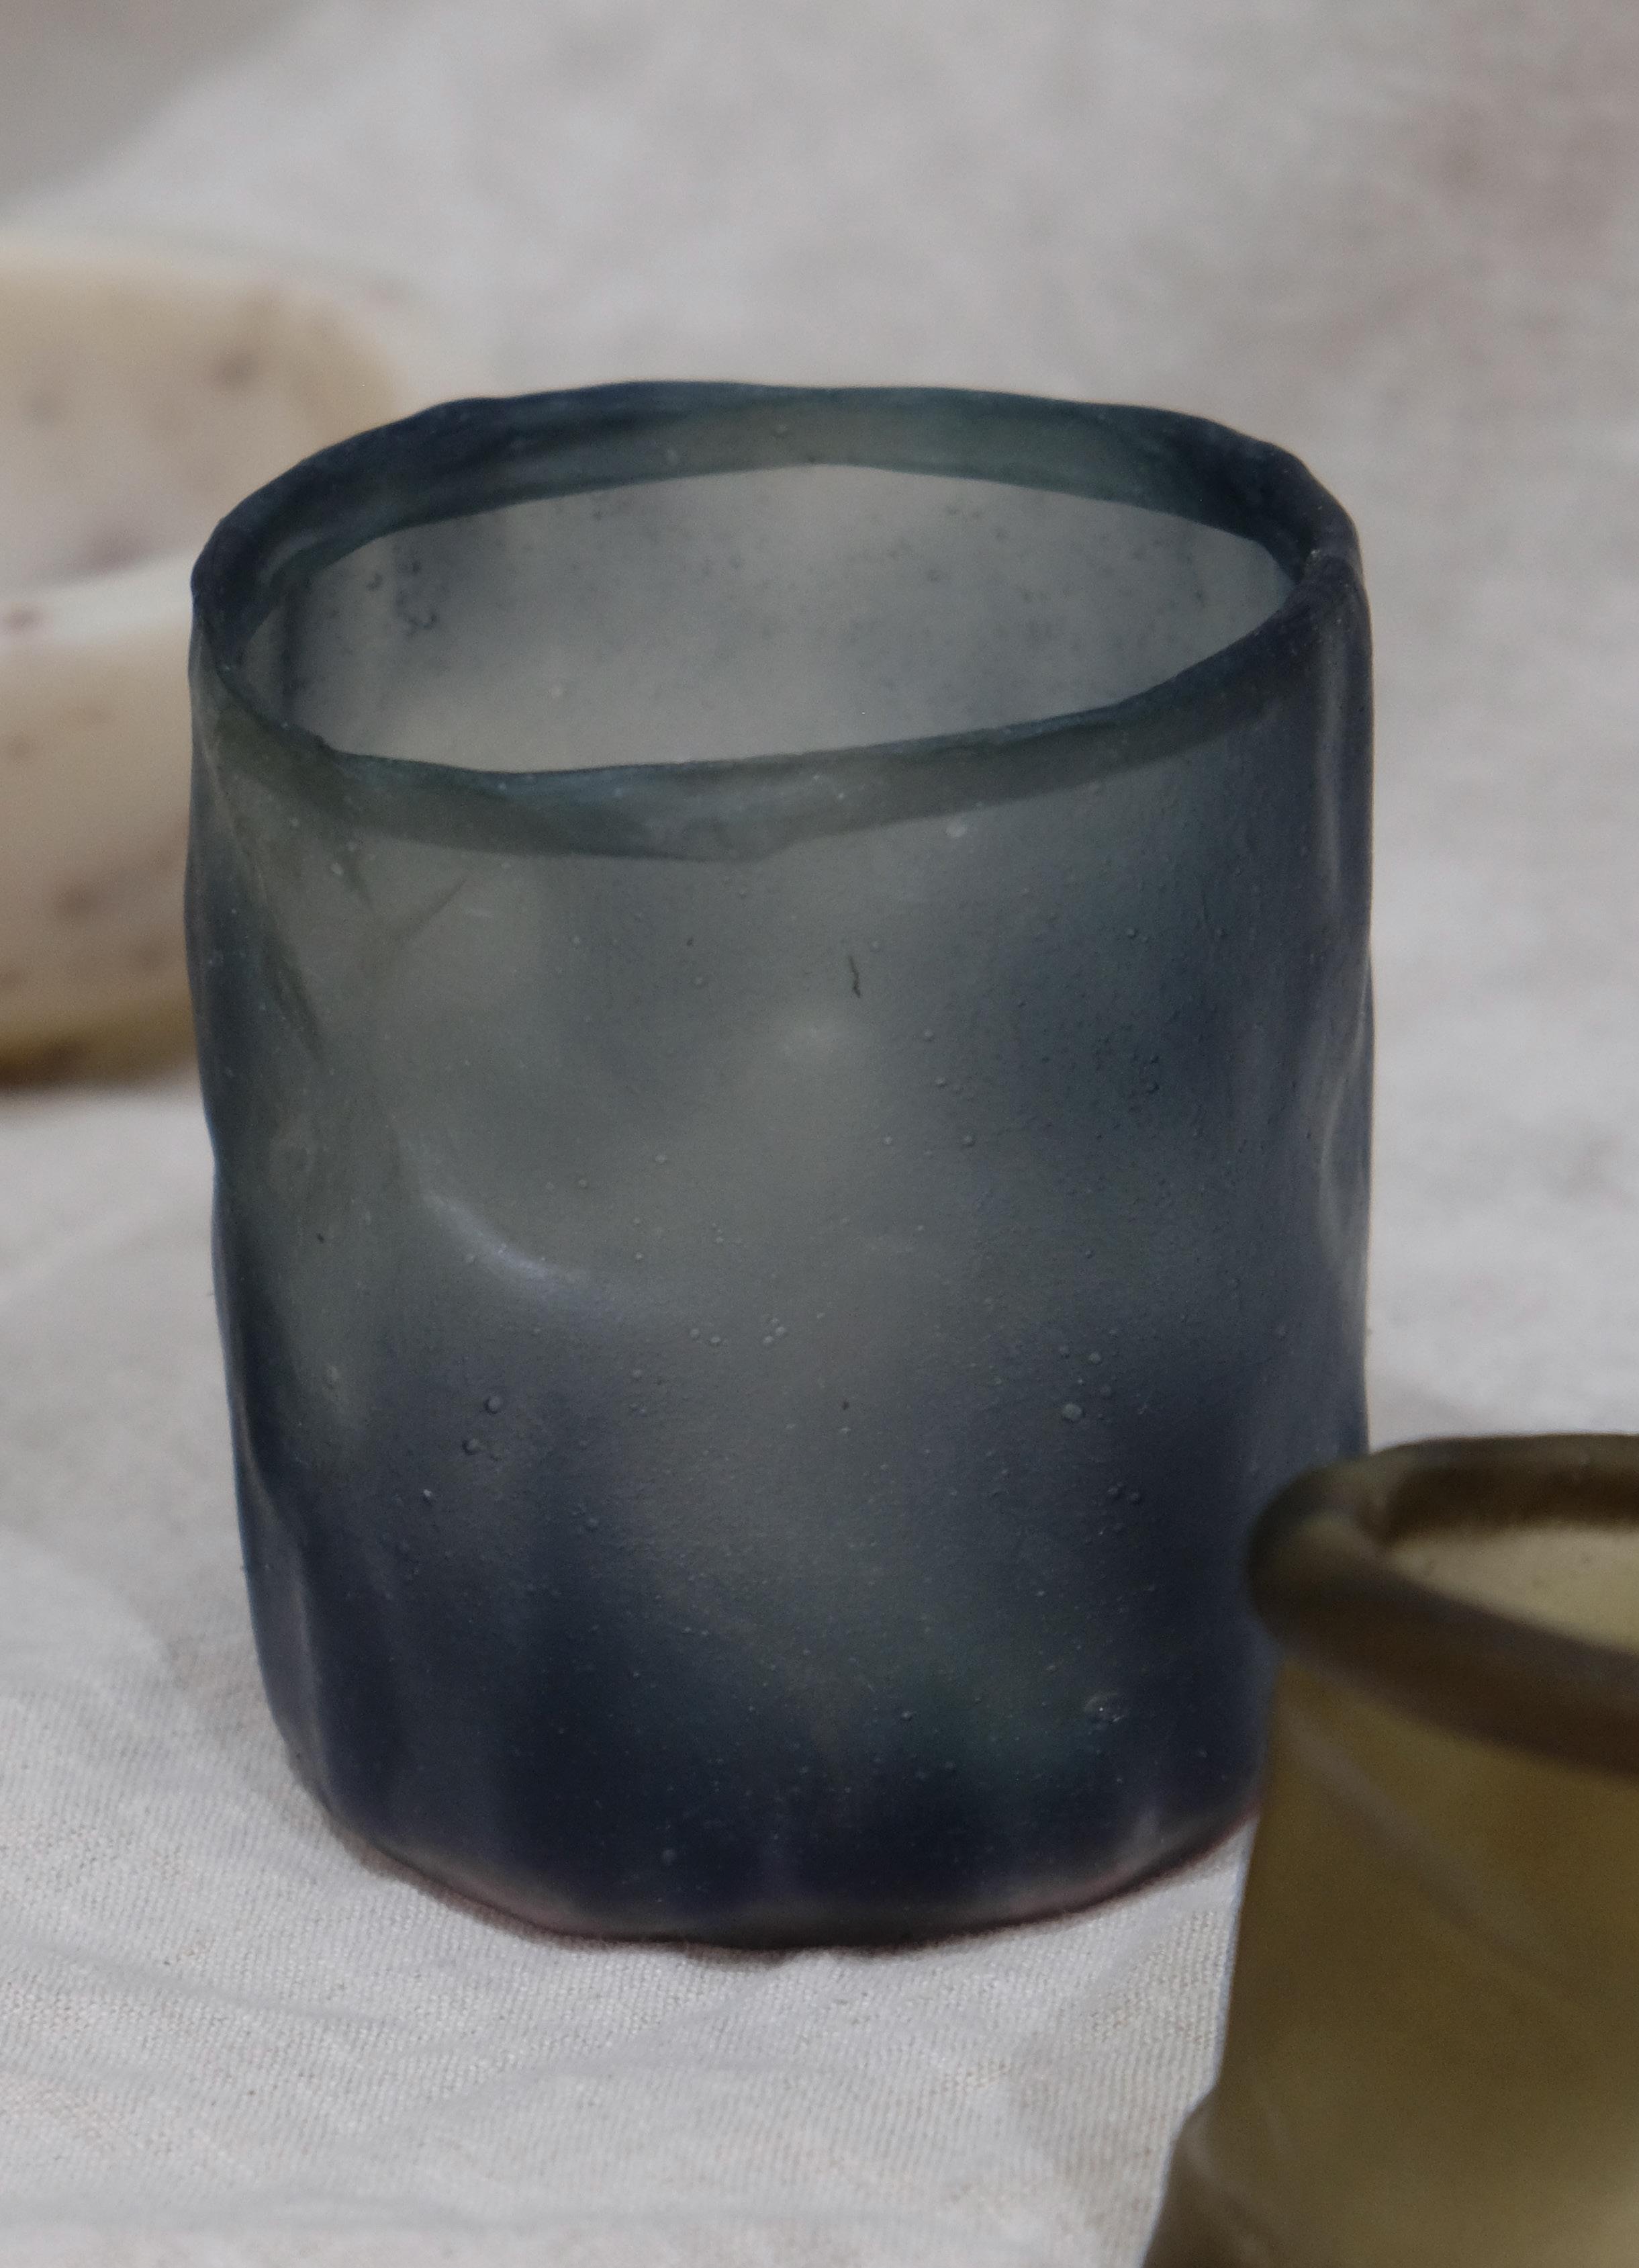
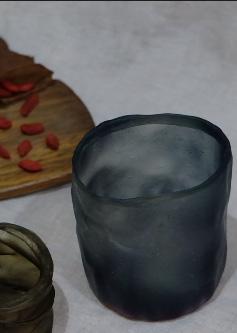
Became wrinkled but I don’t hate the texture, reminds me of seaweed
Method
Soak a piece of cotton fabric in salt water bath and tightly wrap around wine bottle with no creases. Secure with rubber bands.
Drizzle a thick layer of alginate mixture onto mould making sure to evenly cover the entire surface. Hold in salt bath without touching the edges.
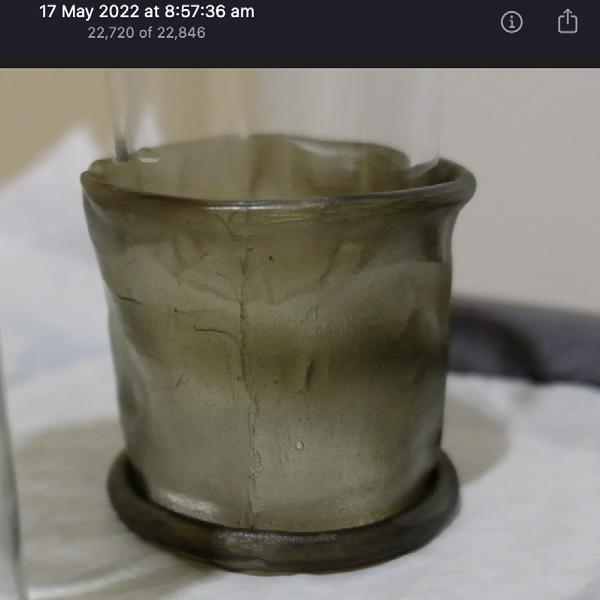
Remove from salt bath and pull off fabric from bottle and peel vessel sleeve from fabric. Rinse with water, leave to air dry in glass that fits comfortably and roll down top lip and fold base straight away.
With preprepared cup base attach by bending the bottom lip and gluing together.
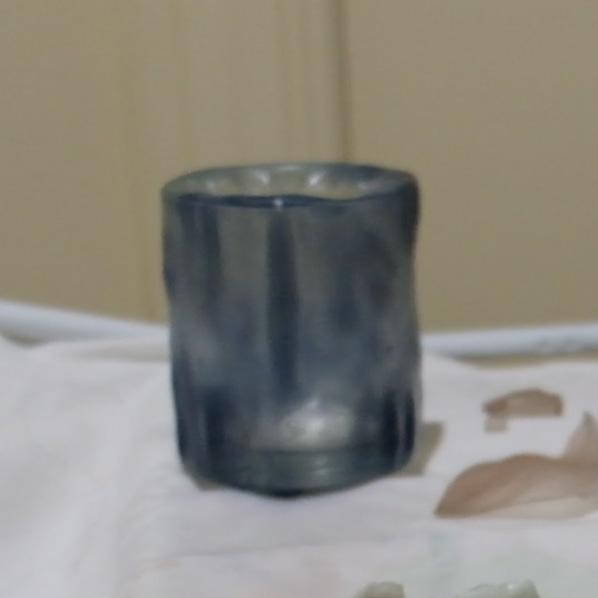
Notes
Improvement with the lip and base of the cup
• Needs to be spooned on even thicker
• Should probably go in a cup that’s very snug
A lot of the length from the sleeve disappears by rolling down the lip, try folding instead
Method
Soak a piece of cotton fabric in salt water bath and tightly wrap around wine bottle with no creases. Secure with rubber bands.
Drizzle a thick layer of alginate mixture onto mould making sure to evenly cover the entire surface. Hold in salt bath without touching the edges.
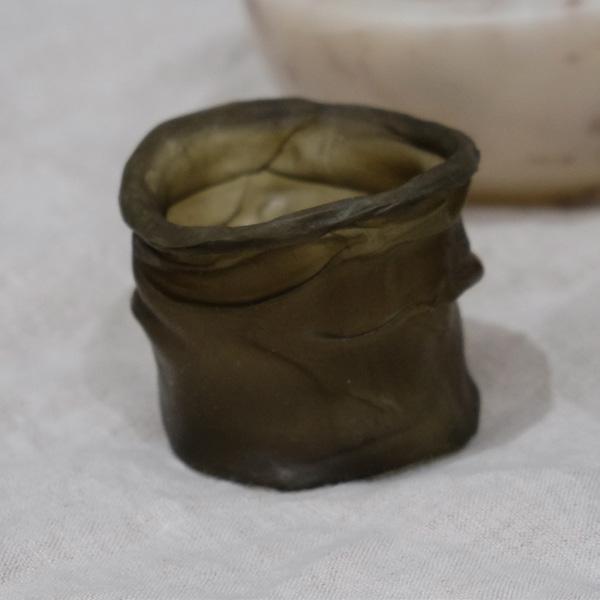
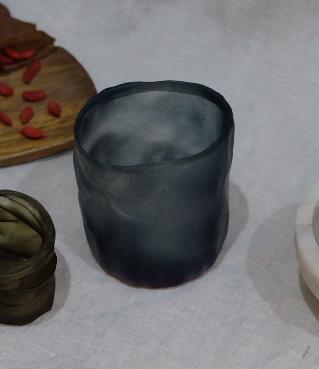
Remove from salt bath and pull off fabric from bottle and peel vessel sleeve from fabric. Rinse with water, leave to air dry in glass that fits very snugly and fold lip over mouth of glass and fold so that glass sits on top.
Leave to dry for 2 days and remove before it becomes stuck, then for another 3 days.
With preprepared cup base attach by bending the bottom lip and gluing together.
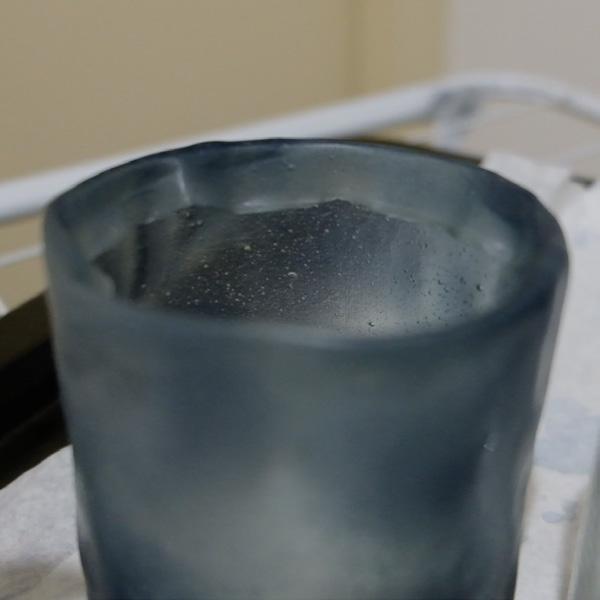
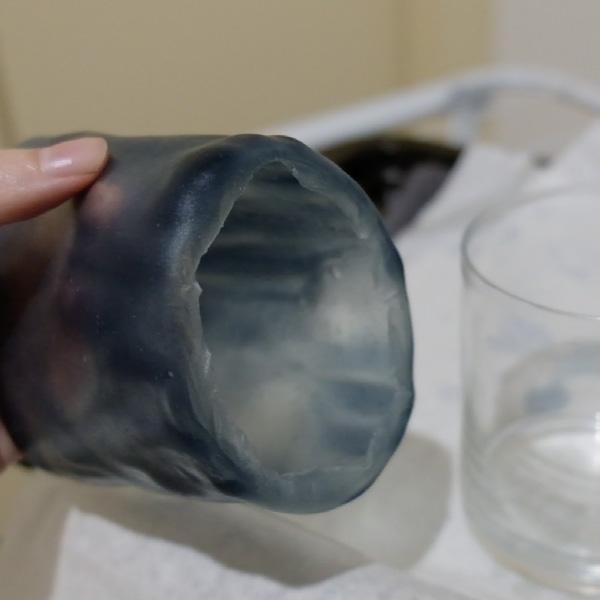
Notes
• I unfortunately ran out of time and the casein glue I had used hadn’t completely dried yet so when I placed water in the cup to test it was fine for a couple of mins but then water started seeping through some holes where the glue wasn’t dry.


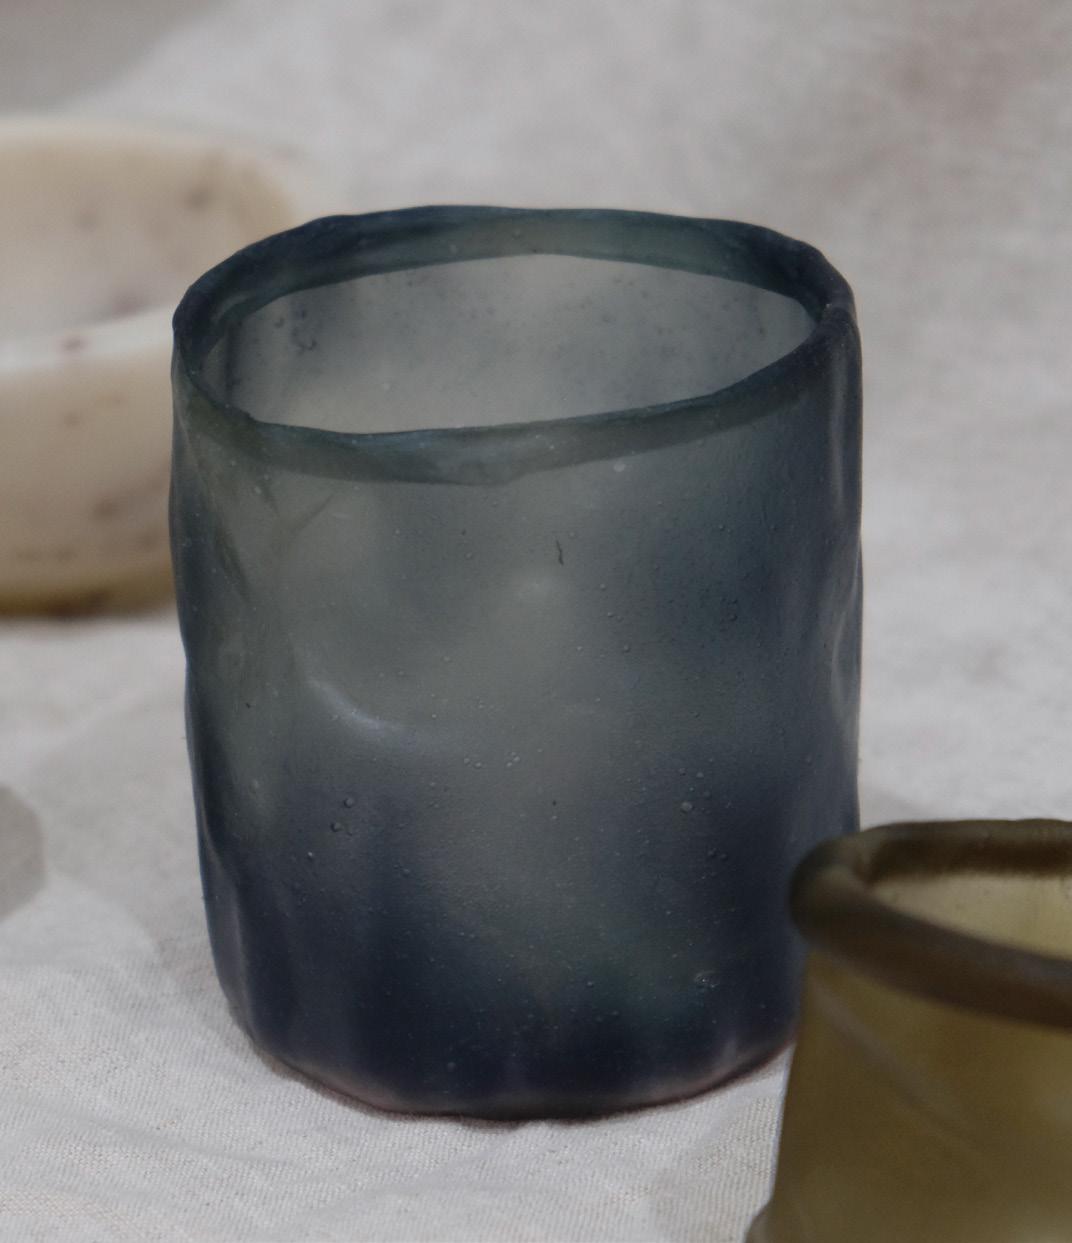
Microplastics and microfibres continue to pollute our oceans everyday and with no way to properly break down. The following recipe will show you how to make a sustainable bioplastic made using salt and algae extracts. This calcium alginate bioplastic can be turned into vessel and act as a replacement for single-use drinking cups or an alternative to plastic packaging to temporarily store foods, sauces and more. When the vessel can longer be used for drinking uses, repurpose it into a transient candle votive to warm the home. Once this vessel has reached the end of its life cycle simply place it in your compost bin or garden and let nature take care of the rest.
Ingredients
Alginate Mixture
200ml of water-based natural dye
10ml of sodium alginate
30ml of glycerine
Calcium Salt Spray/Bath
2L of cold water
20ml of calcium chloride/lactate
In a bowl combine sodium alginate powder and glycerine. Then slowly pour in the water-based natural dye whilst constantly whisking. Place the bowl in the fridge overnight to let the alginate lumps completely dissolve and to remove air bubbles.
In a large bowl prepare a calcium salt bath by whisking water and calcium chloride until the salt has completely dissolved. Then pour half into a spray bottle. To prepare the mould, place a piece of cotton or linen fabric over a large flat tray. Generously spray the fabric with the calcium salt spray to help the fabric stick to the tray, then smooth out any creases in the fabric. Apply a second coat of the salt spray to ensure the fabric is saturated then use a tea towel to soak up any excess liquid.
Tools
Household items
Large flat tray or unused mirror
2 Large pieces of cotton/linen fabric
Spray bottle
Iron
Assembling Vessel
Cutting mat
Craft knife
Casein glue
When the alginate mixture is smooth and viscous with no visible lumps or bubbles, slowly pour a third of the mixture into the mould and use a ruler to spread the alginate evenly across the fabric. Give it a few minutes to settle and evenly disperse. Then, liberally spray the alginate in calcium salt water and wait 15 minutes for the material to set. You will be able to feel that a gel membrane has formed over the alginate. Once the material has set, carefully peel sheet of calcium alginate form the mould and transfer to the salt bath and allow the inside of the material to set for another 15 mintues. Rinse with plain water to remove salt and pat dry. Then place in between two sheets of baking paper and iron on low heat with no steam to evaporate the water from the material. Then leave on a drying rack to air dry for a few days.
To prepare the vessel wall mould, soak the fabric in the salt bath and gently wring it out. Tightly wrap the damp fabric around a large bottle such as a wine or juice bottle and secure with rubber bands. Use a spoon to drizzle on a thick layer of the alginate mixture onto the bottle, making sure to evenly coat the entire surface. Use the rubber bands as a guideline. Then submerge in the salt bath, making sure not to hit the edges of the bowl. After 15 minutes remove from the salt bath and carefully remove the fabric from the wine bottle, then peel the calcium alginate sleeve from the fabric. Rinse with water then slip the sleeve over a drinking glass. Make sure the sleeve is snug. Then mould the lip of the vessel and the base to the drinking glass and leave to dry for a few days. In the mean time prepare a natural adhesive such as casein glue.
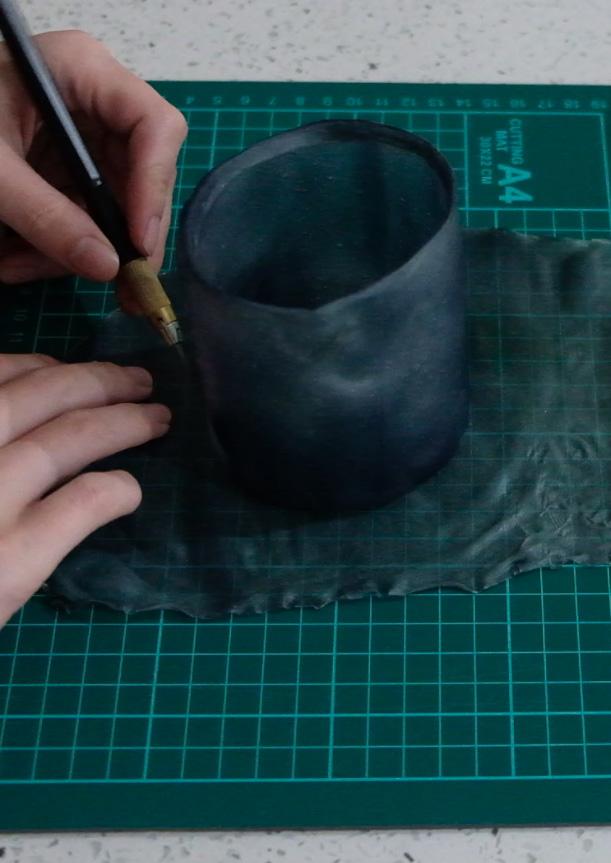
Once the base and wall pieces have completely dried begin by cutting out the base piece from the sheet. Use the vessel wall as a guideline. Then use a brush to neatly line the bottom of the vessel wall with casein glue and place the circle base inside. Slip a drinking glass inside the completed vessel to keep the pieces firmly together while the glue finishes drying.
There were a lot of creative responses that speculated the ways materials will be used in the future. There were bioplastic alternatives to replace traditional plastics, textile alternatives such as bioleathers, materials that repurposed food waste. The materials that stood out to me were Sophie Wood’s use of agar as a reversible fabric where the offcuts can also be reused. Sean Hatzinikolaou and Sarah Wang’s creative use of food waste as a material and Yuen Yee Chan’s bioplastic alternative to umbrella covers in Hong Kong.
Although all four of these students demonstrated the applications of their product they each had specific strengths that made their material more compelling. For Yuen Yee her documentation and narrative storytelling around the issue of umbrella bags effectively communicated the need for a plastic alternative. Sean’s video was engaging and humorous which made the material concept of food waste a cutlery memorable. Sarah and Sophie’s video demonstrated the practical applications of their material by showcasing it being used.
When looking back on my video I think the effort that I put into the production quality shows through. I enjoyed the visual components of shooting my material making process, setting up camera angles and showcasing the interesting textures of the ingredients and materials that I was working with. Although I think my video would’ve been better had I engaged with the camera and audience and included some personality.
When I was working with my ingredients I found textures and colours to be a big focus, often feeling inspired by organic glassware. Now that I’ve had time to reflect I can see that the students used the advantages of the material and applied that a niche or personal use. I think during my design process I was so focused on making an incredibly durable and heat resistant piece of beverage pacaking that I failed to see the other unique qualities my material provided and as a result didn’t generate a very persuasive design.
At one point during task 2 I couldn’t stop looking at my material and thinking how it would make a really unique lantern inspired lampshade. Next time I think I need to work with the material and not against it. Additionally I think I’d find working with homeware applications really interesting as I’m quite passionate about finding solutions to the growing ‘fast homeware’ problem that’s occured since the pandemic. In the future I want to aim to develop biomaterials that utilise waste and enourage people to create homewares in their own home instead of constantly repurchasing items only for it end up in land fill after a few months of use.
Stanwix, A. (2021). [Photograph of bioplastic products by designer Jessie French]. The Design Files. https://thedesignfiles.net/2021/04/studiovisit-jessie-french/
Shellworks. (2019). [Photograph of bioplastic cups made of discarded lobster shells]. Dezeen. https://www.dezeen.com/2019/02/22/shellworks-bioplastic-lobster-shell-design/
Fab Lab Barcelona (2021, March 19). Making Bioplastics from Avocado Dye and Alginate - REMIX EL BARRIO [Video]. YouTube. https://www.youtube.com/watch?v=iLLB7wJd9SM