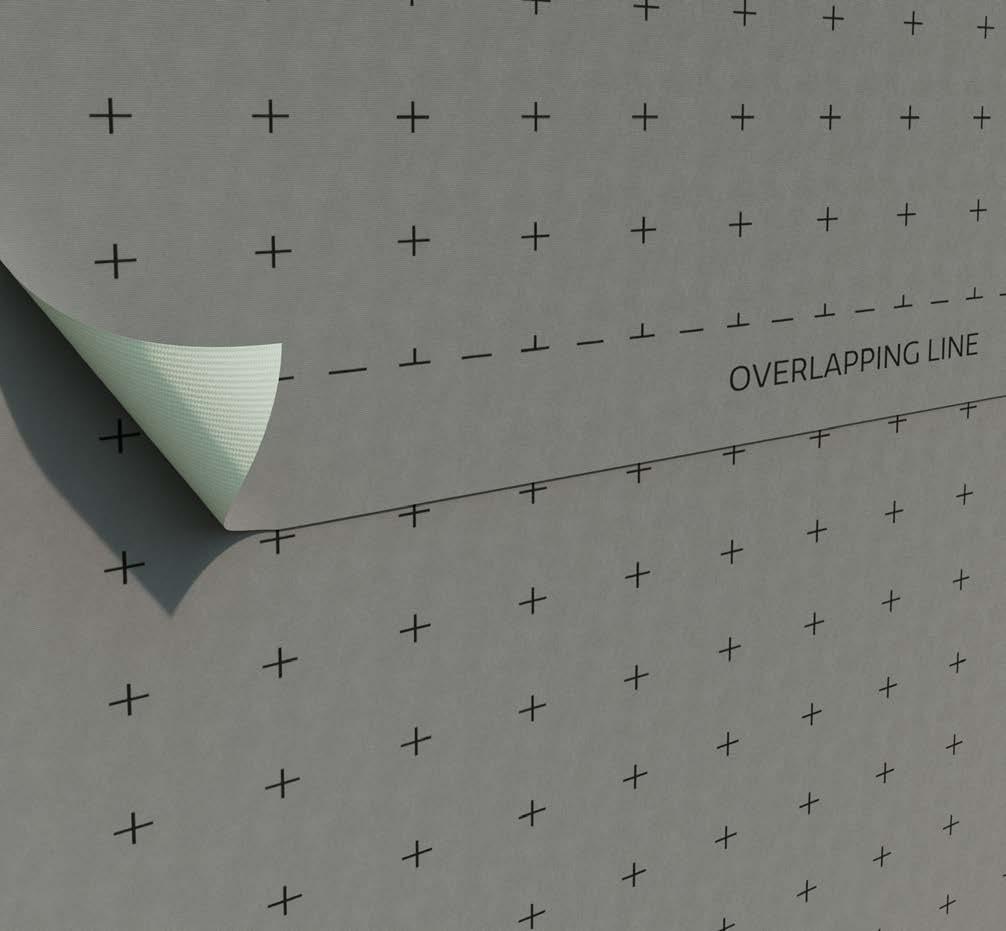
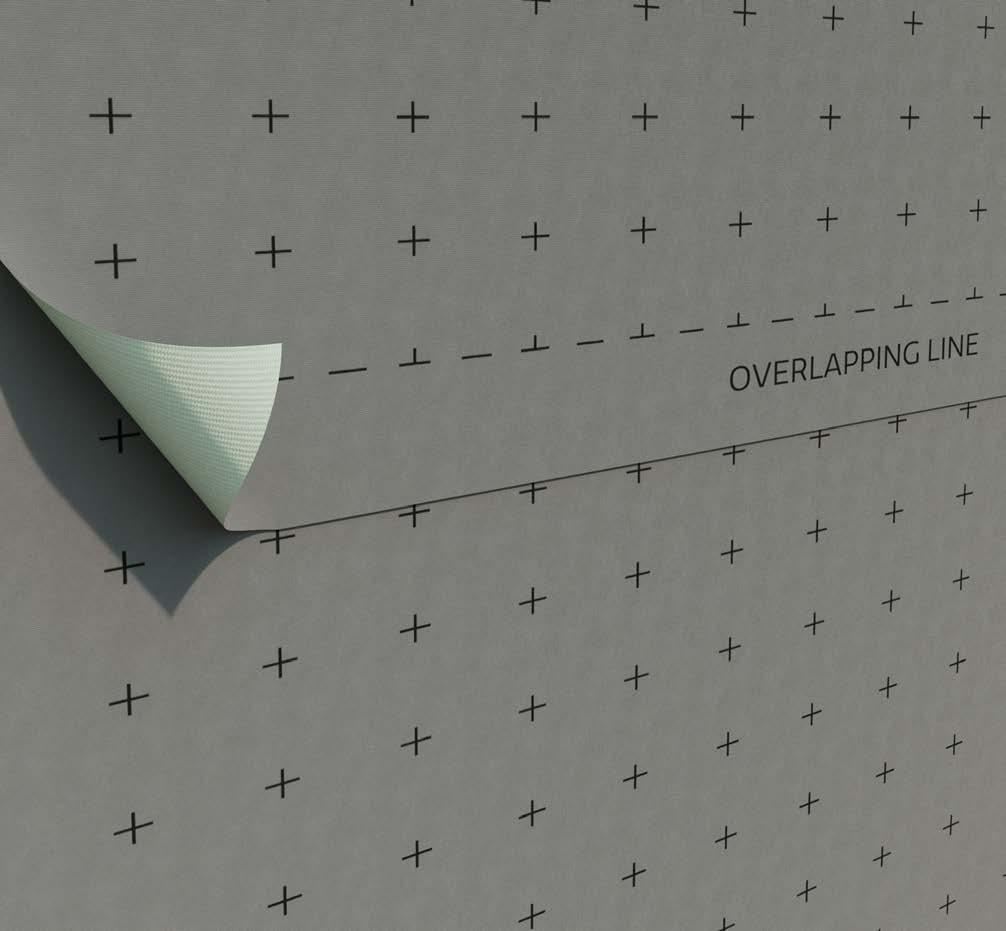
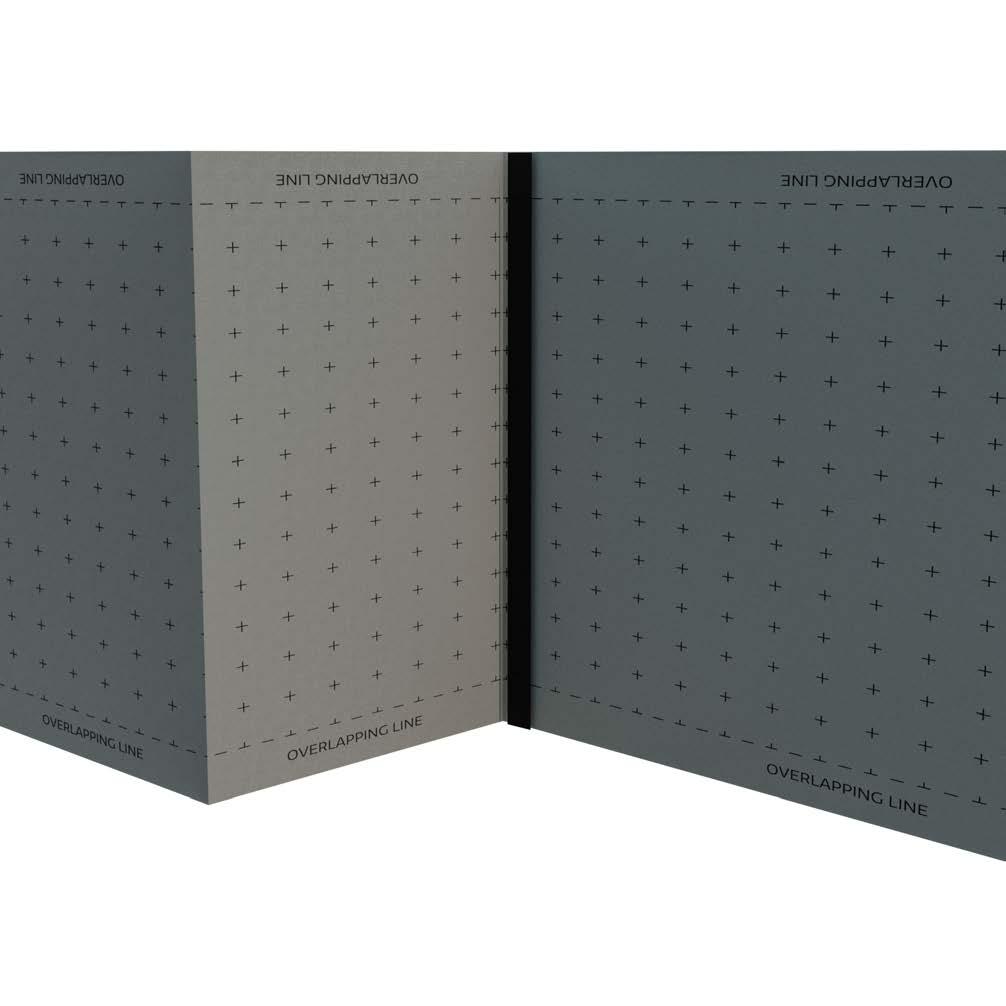
» Please ensure a minimum overlap of 150mm between sections of the ONE AAC Solutions 3-Layer Breathable Membrane.
» Ensure that all exposed edges of the ONE AAC Solutions 3-Layer Breathable Membrane are thoroughly sealed using UV façade tape for optimal protection and performance.
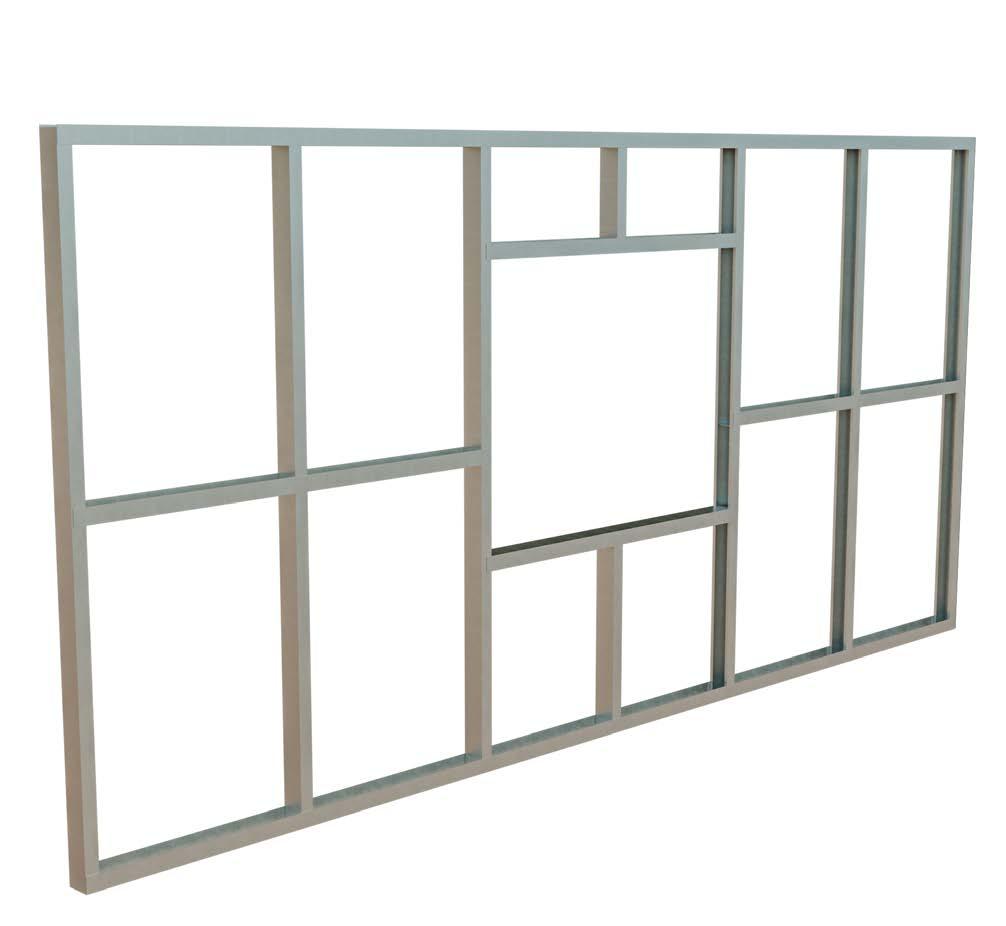
STEEL FRAME – MEMBRANE INSTALLATION
The guidelines below relate to installation using Double SidedTape, which is suited to cladding directly fixed to the stud work. Mechanical fixings with a broad-headed washer at 300mm centres are to be used for cavity walls, as per AS 4200.2:2017
1 Preparation of Steel Frame
Before installing the membrane, carefully remove any sharp edges or burrs to prevent potential damage to the membrane during installation. Ensure the frame surface is clean and free from contaminants that could affect the adhesion of the Double Sided Tape.
3
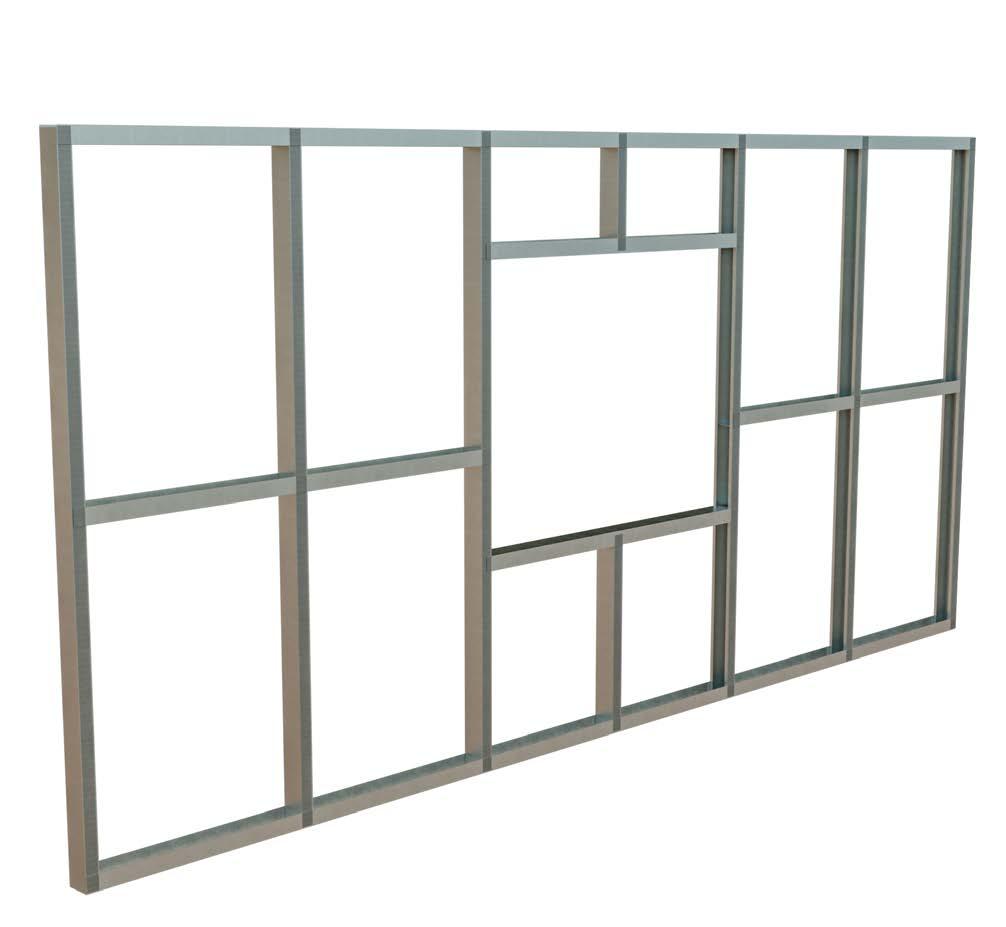
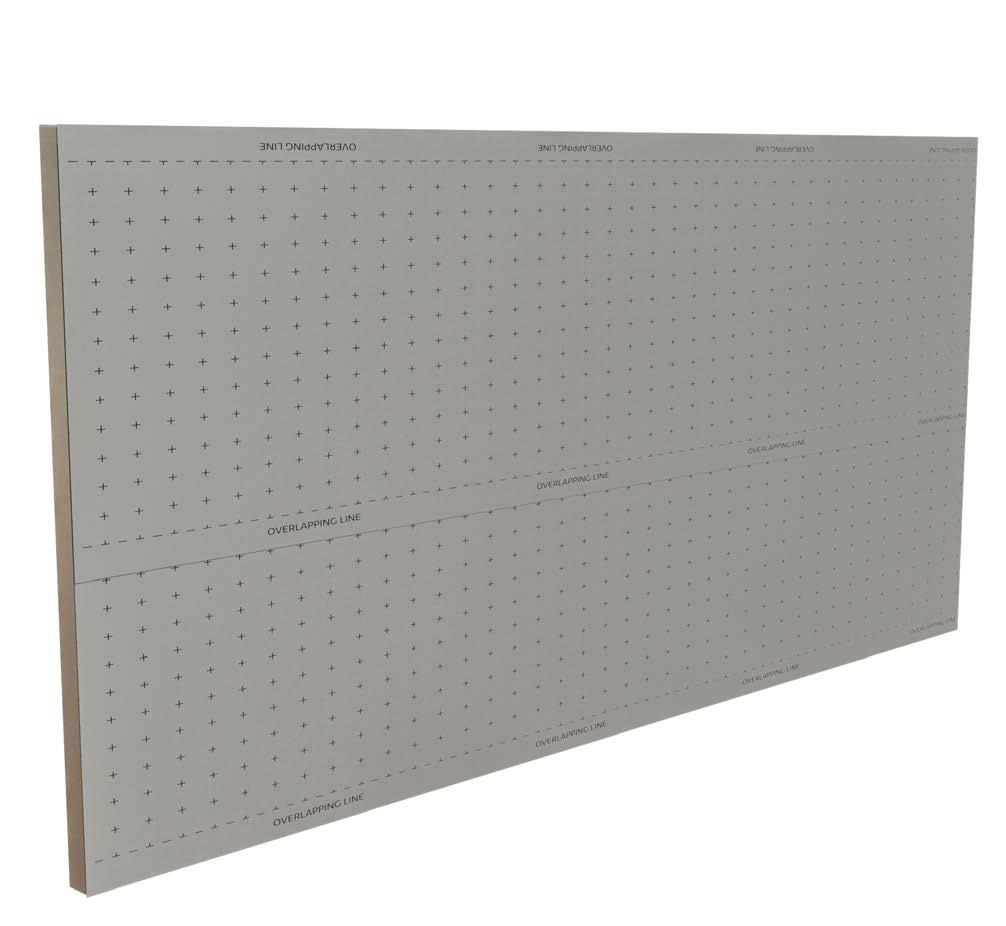
Setting Out Membrane Installation
From the bottom of the framing, measure and mark the exact height corresponding to the width of the membrane. This will indicate where the top of the first layer of the membrane should be installed.
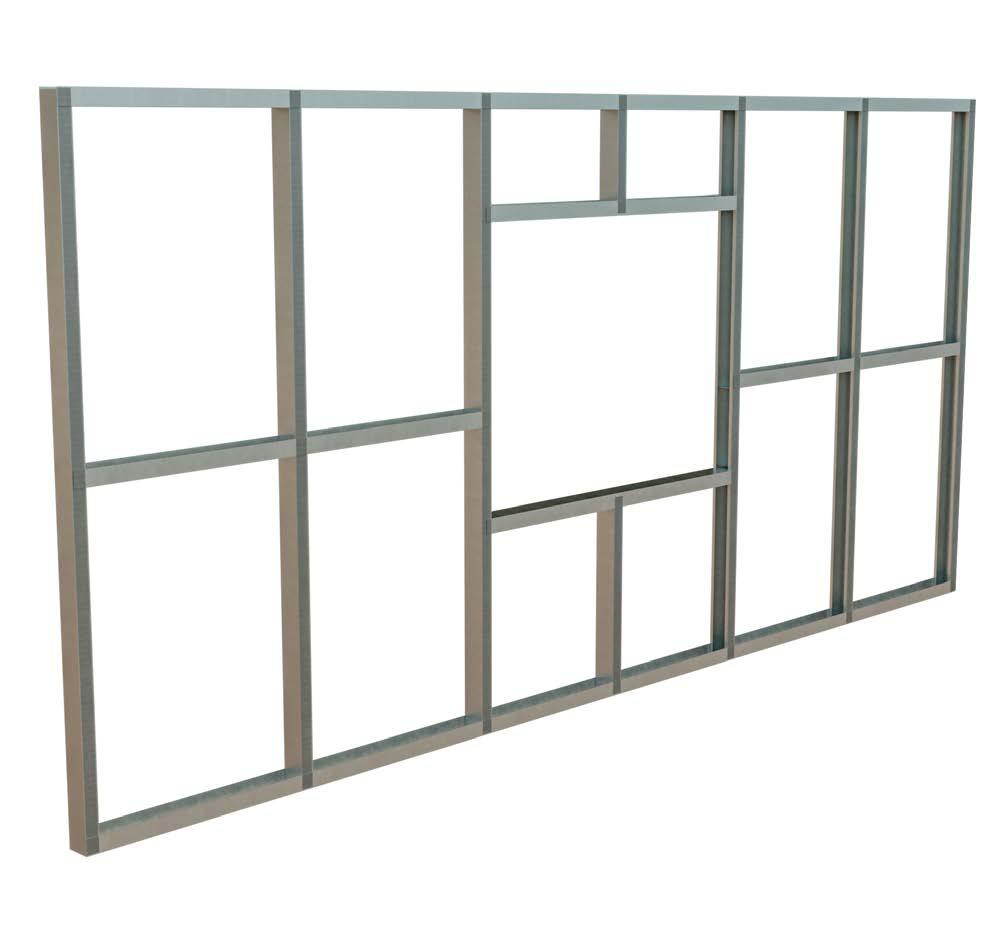
2 Apply Double Sided Tape
Apply the Double Sided Tape to all external faces of the metal framing. Press firmly onto the framing to ensure a good bond.
4
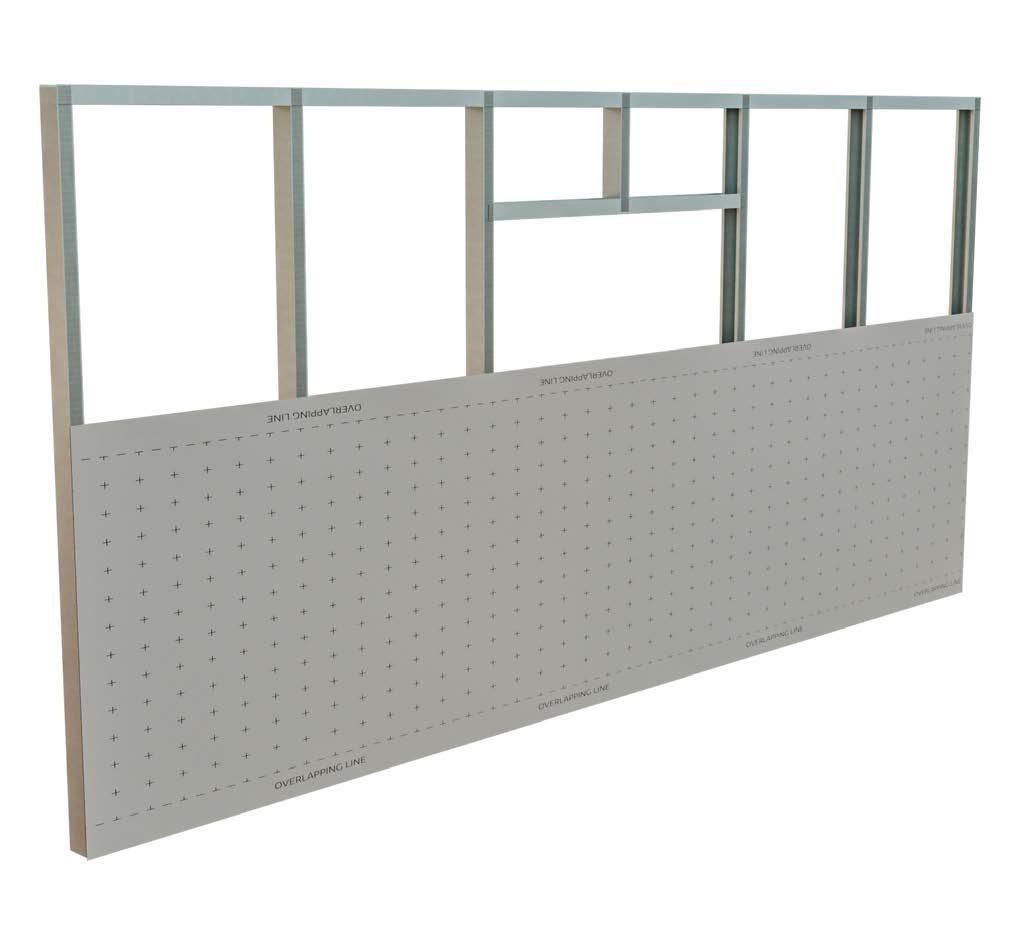
Securing and Aligning the Membrane
First, remove the release liner from the area designated for the initial membrane layer. Align with the marked line and pull taut and affix the top edge securely. Then, pull taut and fix the bottom centre edge.
5
Securing Bottom Corners
Next, pull the membrane taut and adhere the bottom corners. Finally, press down firmly across the entire membrane section to ensure firm adhesion to the Double Sided Tape.
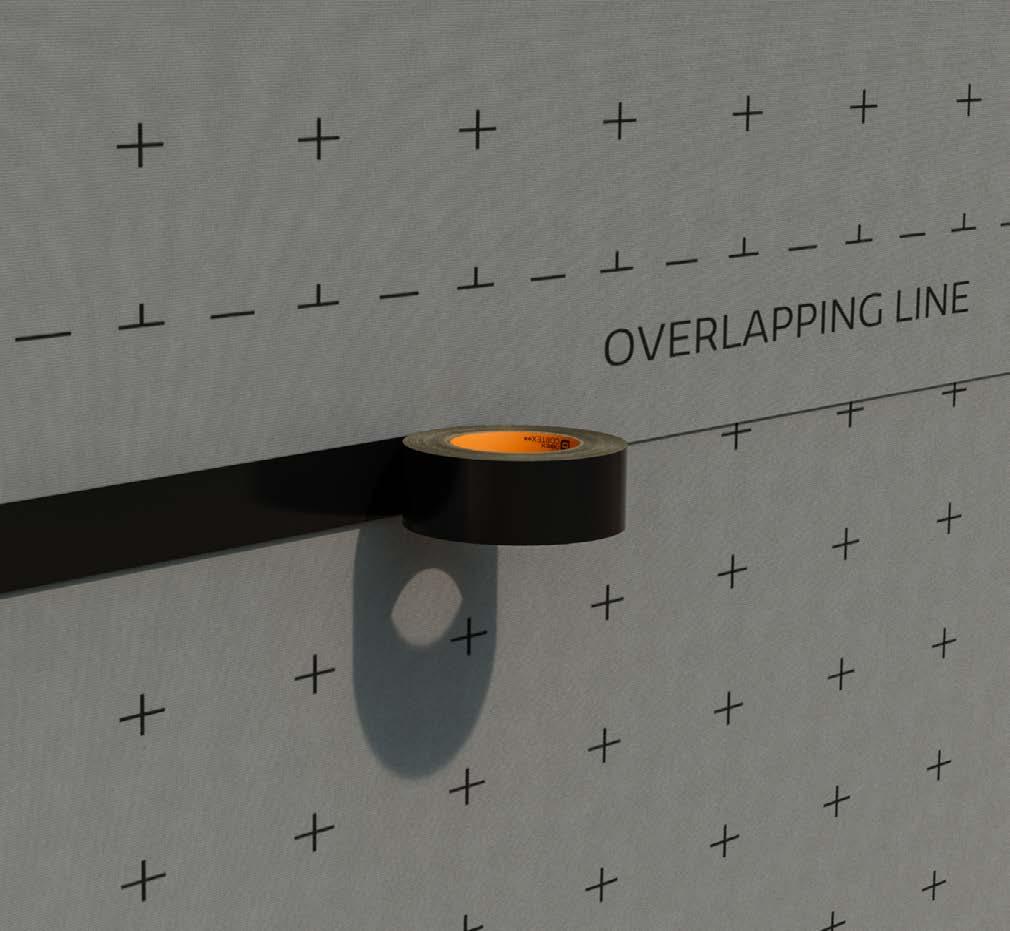
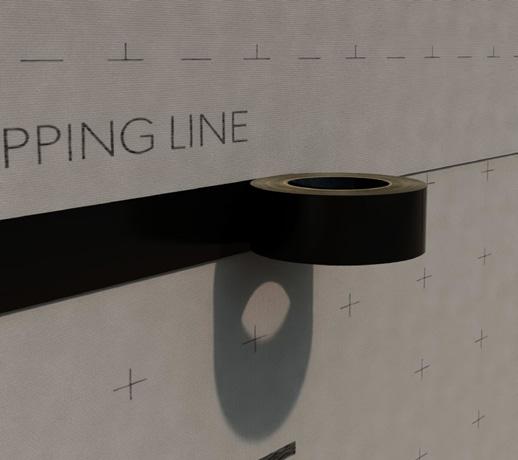
7 Membrane Edge Sealing
Once the membrane layers have been installed, seal all vertical and horizontal overlaps with Jointing Tape. Ensure that firm pressure is applied for secure and effective adhesion.
Overlaps of 50-150mm must be taped, as required by AS 4200.2:2017.
6
Installing Subsequent Membrane Layers
Continue installing the membrane layers above the first, using the same steps but in an upside down orientation. Ensure each new layer consistently overlaps the one beneath by at least 150mm. This overlap is critical for seamless coverage and optimal performance of the membrane system.
A minimum overlap of 50mm can be used in conjunction with taped joints.
All end laps must be fixed at a stud to form a continuous membrane.
Pull taut and fix
Pull taut and fix
150mm Overlap
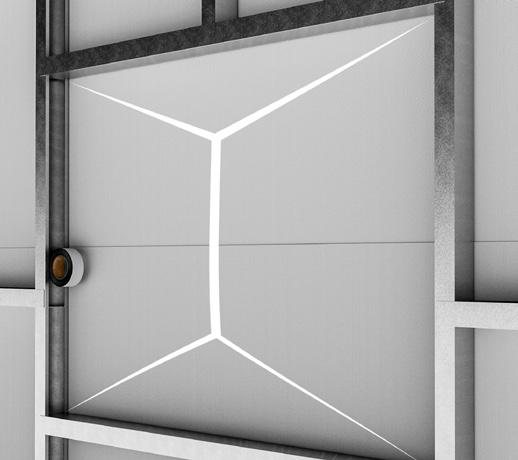
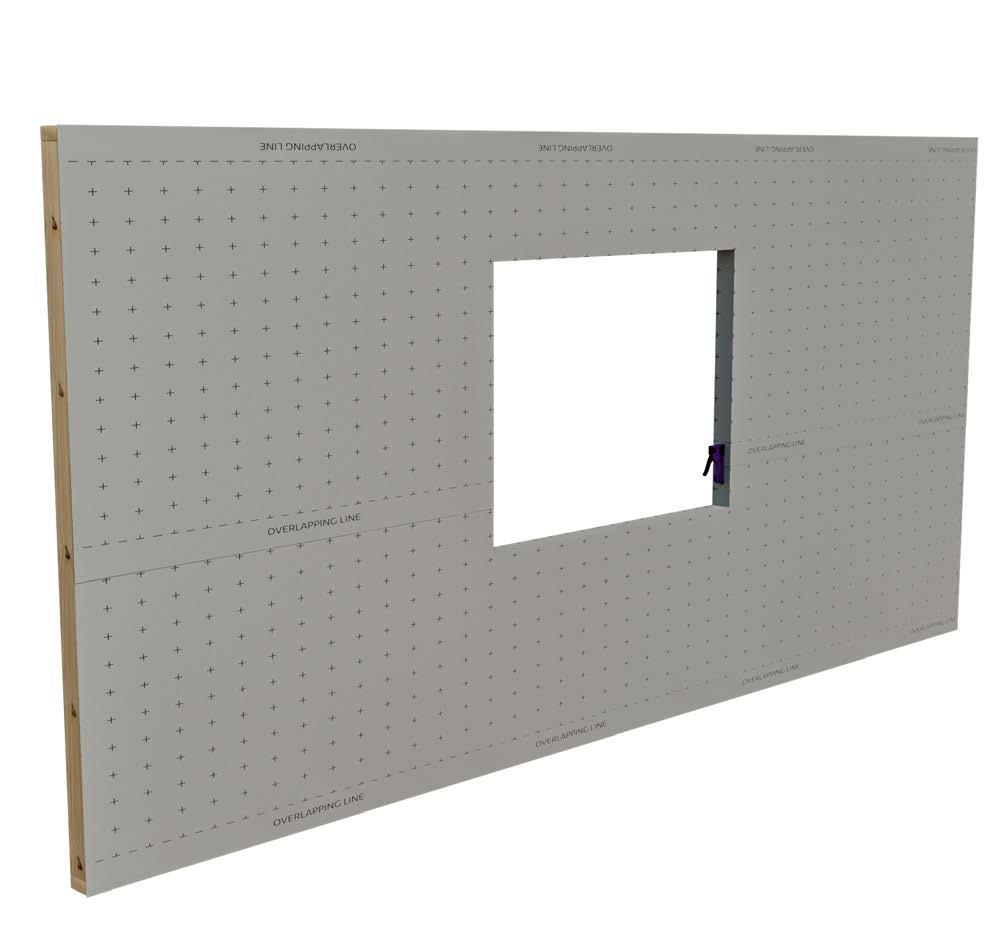
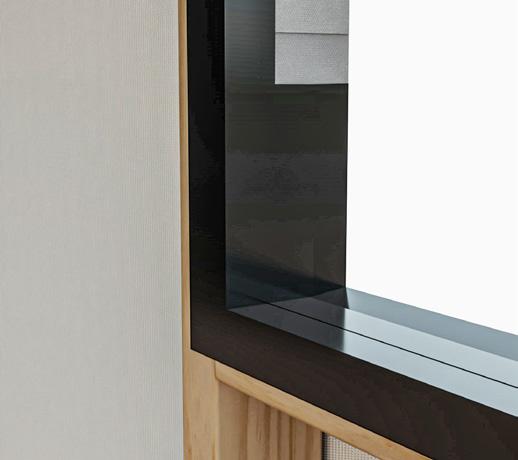
STEEL FRAME – WINDOW REVEAL DRESSING
The following steps are guidelines only. Window reveal dressing should always consider the flashing detailing specific to the project. Refer to the Australian Glass & Window Association (AGWA) - A Guide to Residential Installation for additional information.
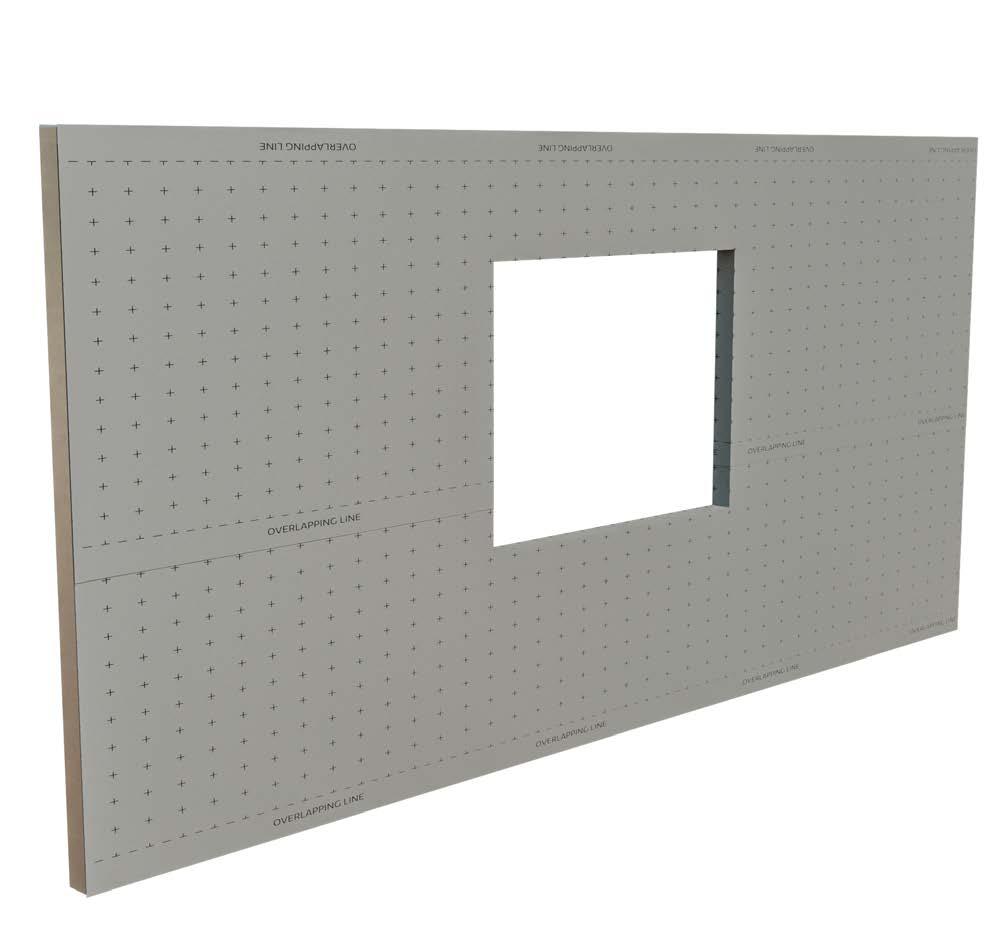
1 Window Reveal Dressing
Cut the membrane from the centre of the window area out towards each of the four corners, at 45° angles as shown. This will create four flaps that can then be folded neatly back into the window reveal.
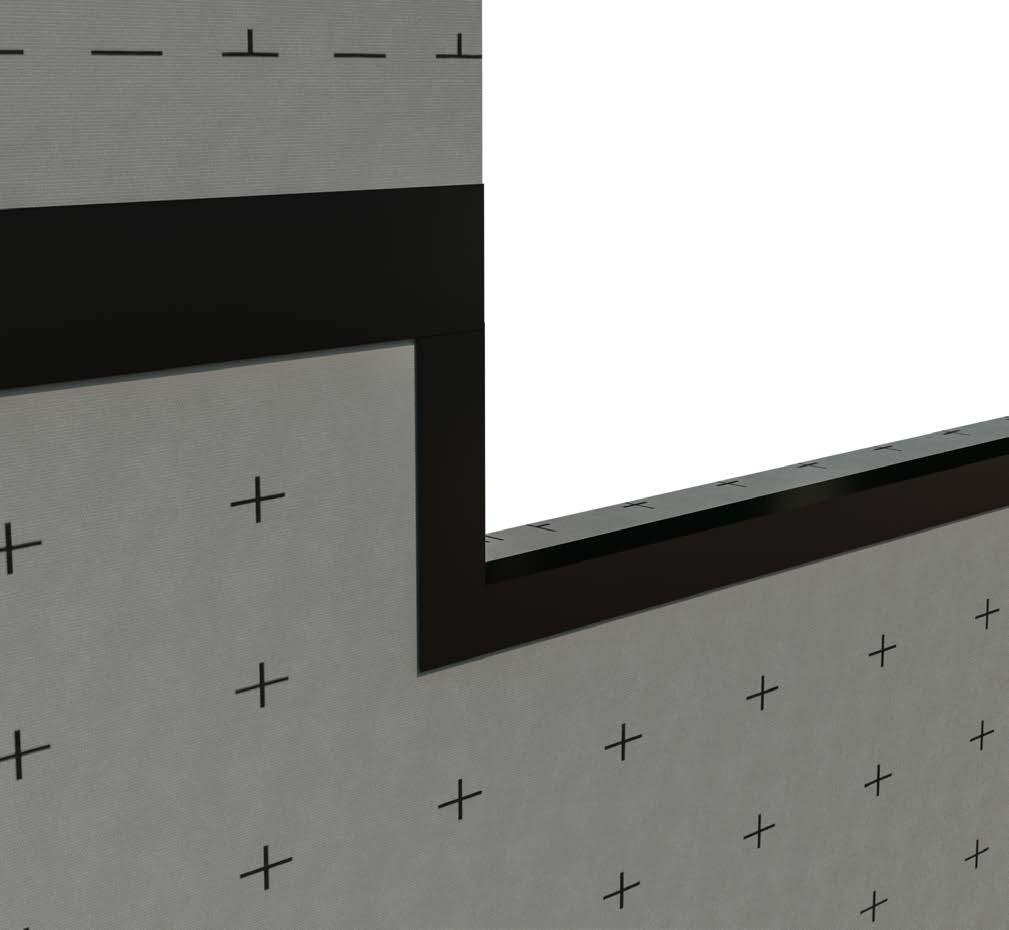
3
Lining the Reveal
Fold the membrane flaps into the reveal, firmly pressing them onto the Double Sided Tape. Trim any excess membrane to align with the back edge of the metal framing for a neat finish.
Tape applied to rear edge of reveal
2 Apply Double Sided Tape
Ensure surfaces are clean prior to tape application. Apply the Double Sided Tape along the rear edge of all four sides of the window reveal, then carefully remove the release liner.
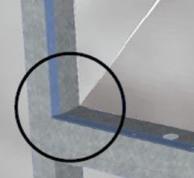
4 Sealing the Corners of the Reveal
All corners of the window reveal must be thoroughly sealed. Start by applying the Jointing Tape directly over the membrane in each corner Ensure that the tape is pressed firmly into place, covering the membrane completely in these areas.
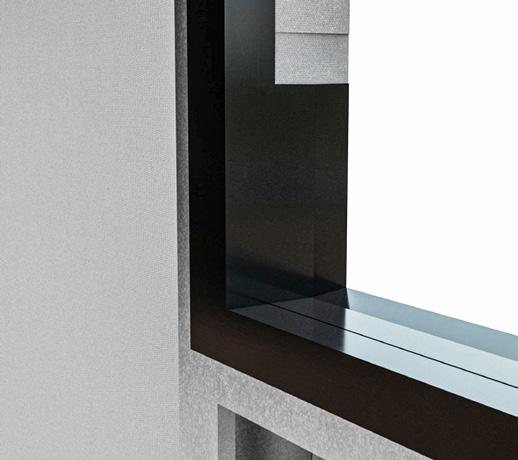
Applying the Tape to Sill (Best Practice)
To achieve optimal weatherproofing performance, repeat this process for the rear edge of the frame, then the right side followed by the left side. Finish off with the header. Ensure that any exposed framing at the corners of the sill is sealed with tape.
For internal corners, the membrane should be installed in two separate sections. This prevents curved corners and reduces the risk of accidental penetrations.
3
12 2 150mm Overlap 1
2
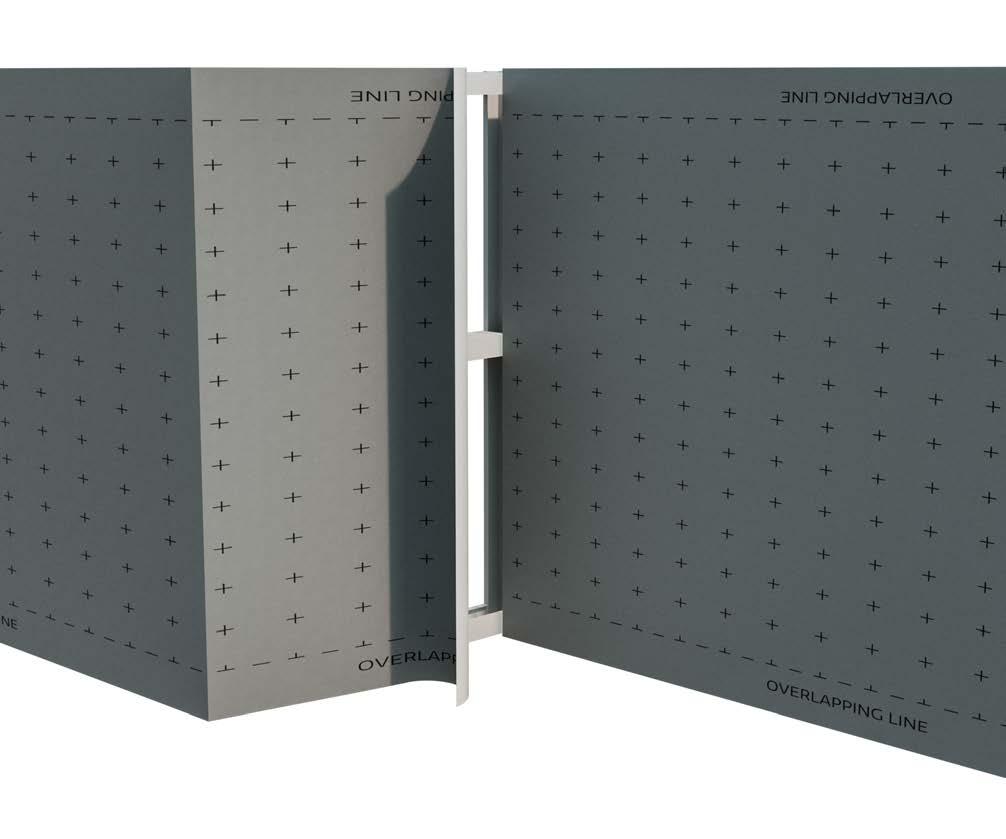
Applying the Membrane to each Face
First, align the membrane tightly into the corner and extend it outwards along the wall. Fix it back to the frame following the process described in previous sections.
1
Cutting and Applying the Membrane
Pull the second section of the membrane into the internal corner and trim it, ensuring a 150mm overlap. Fix the membrane securely back to the frame, following the previously described method.
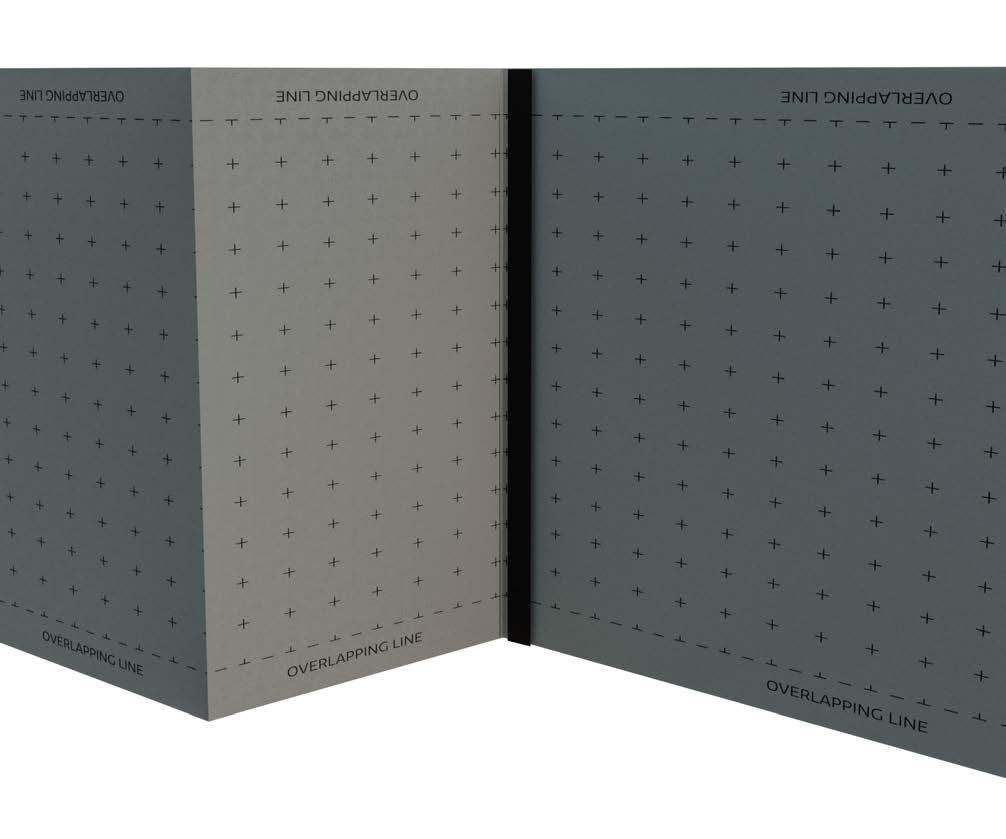
4
Sealing & Taping the Corner
Press the membrane firmly into the corner to prevent any curvature or radius forming. Bond it temporarily to the first piece of membrane using the Double-Sided Tape. Finally, seal the exposed edge with the Jointing Tape.
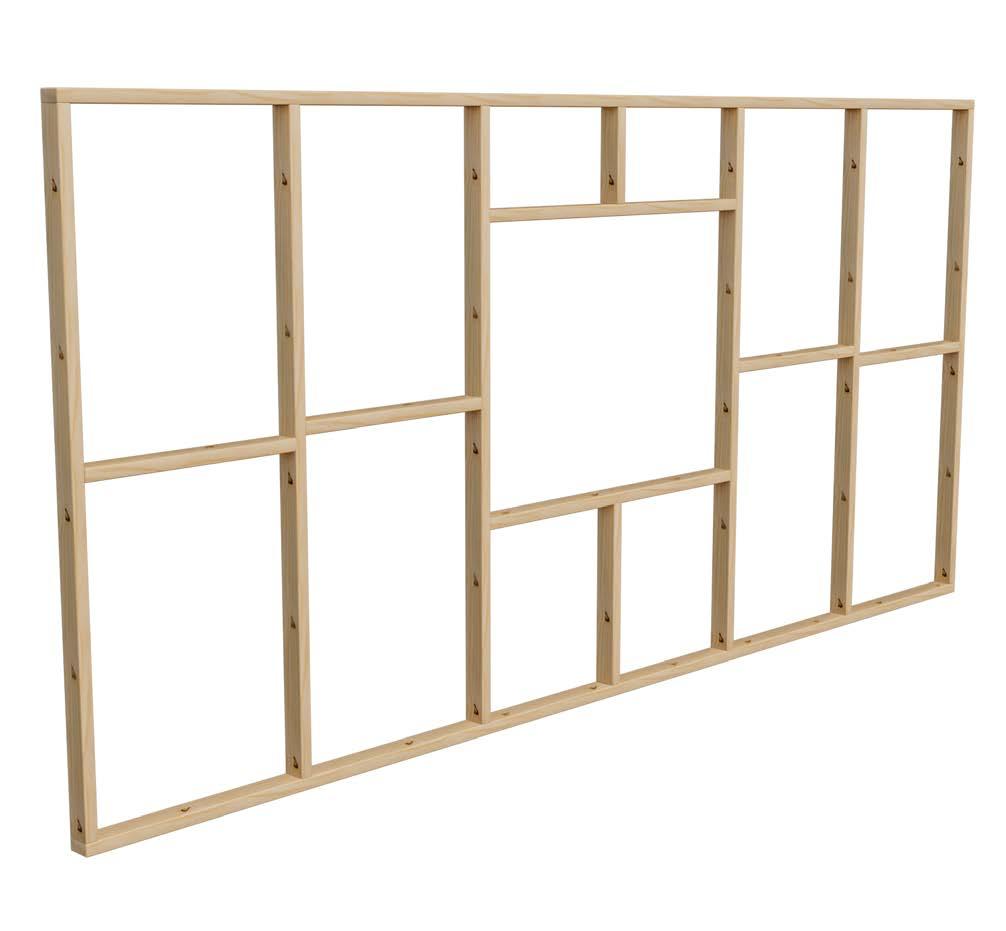
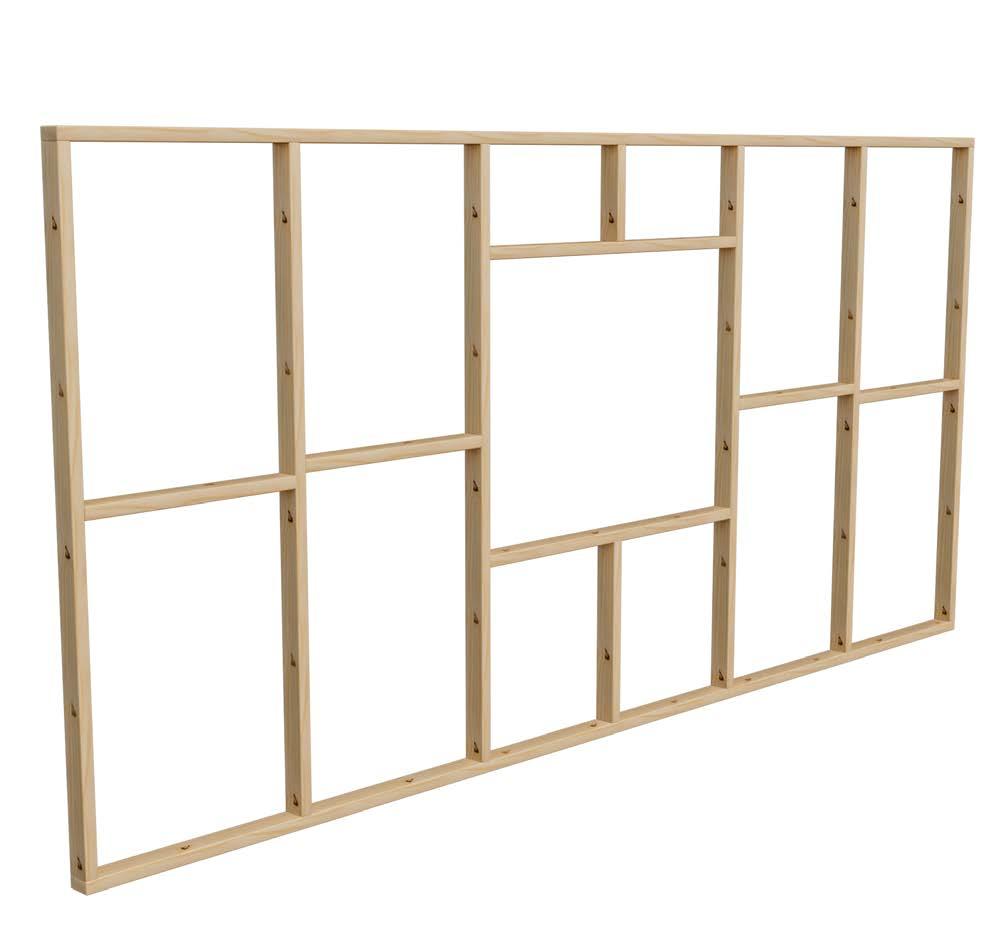
TIMBER FRAME – MEMBRANE INSTALLATION
1 Staples
Staples must be zinc-coated or stainless-steel, with a minimum 12mm width and at least 1.3mm thick.
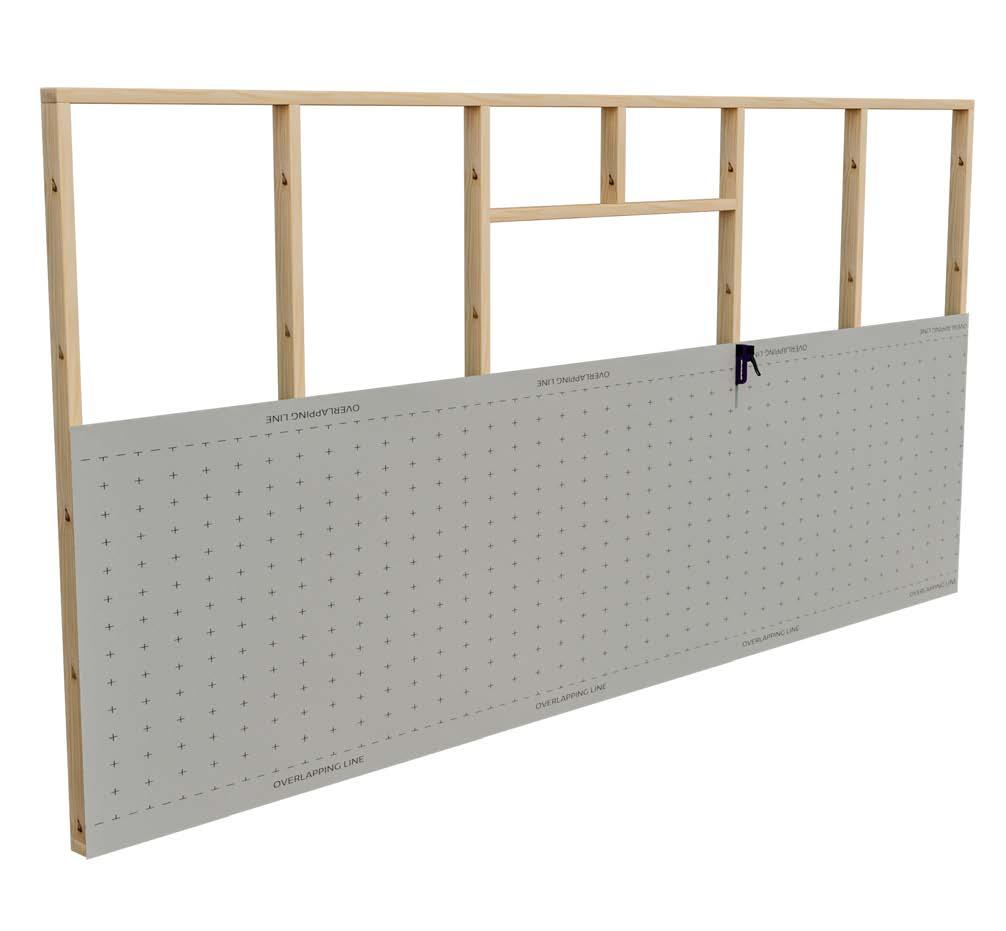
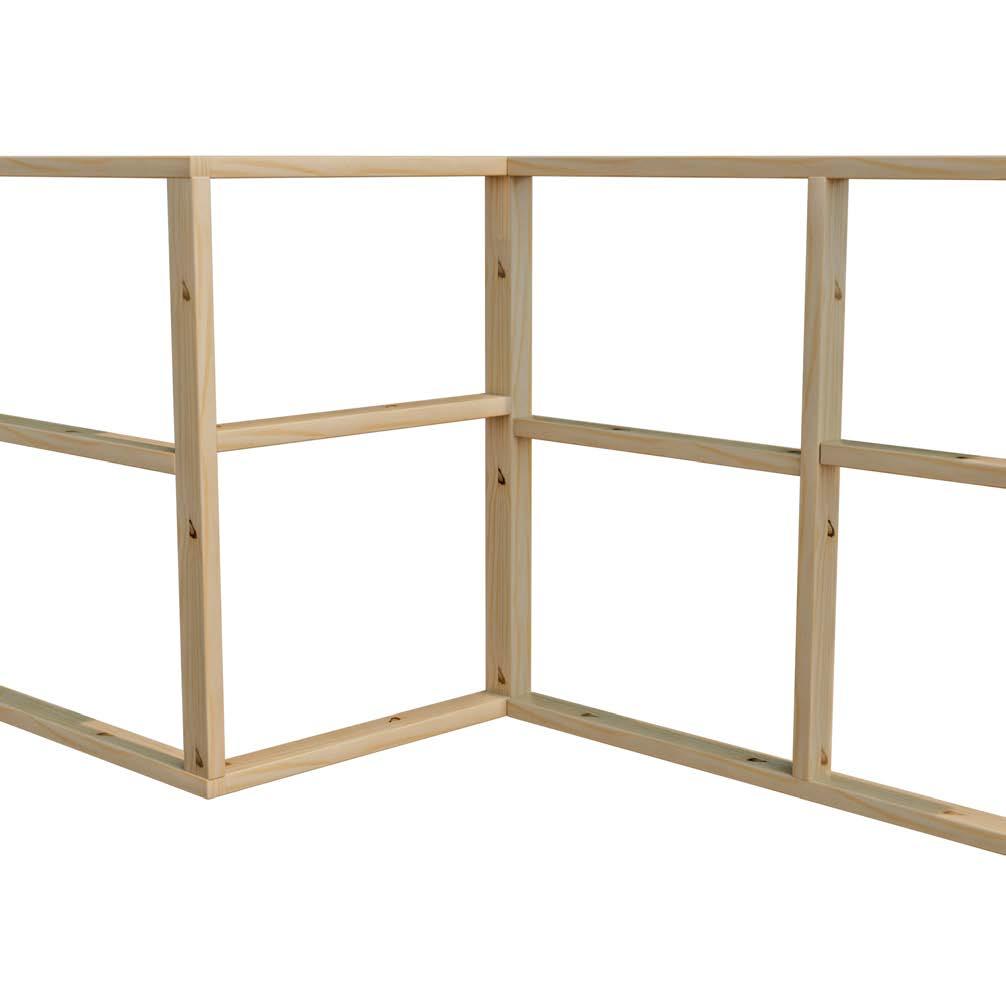
3
Setting Out Membrane Installation
Membrane installation starts from the bottom of the frame. Measure and mark out the exact height corresponding to the width of the membrane. This indicates where the top of the first layer of membrane should be positioned.
2 Preparation of Timber Frame
Carefully inspect the timber frame and address any sharp edges or protrusions that may tear or puncture the surface of the membrane.
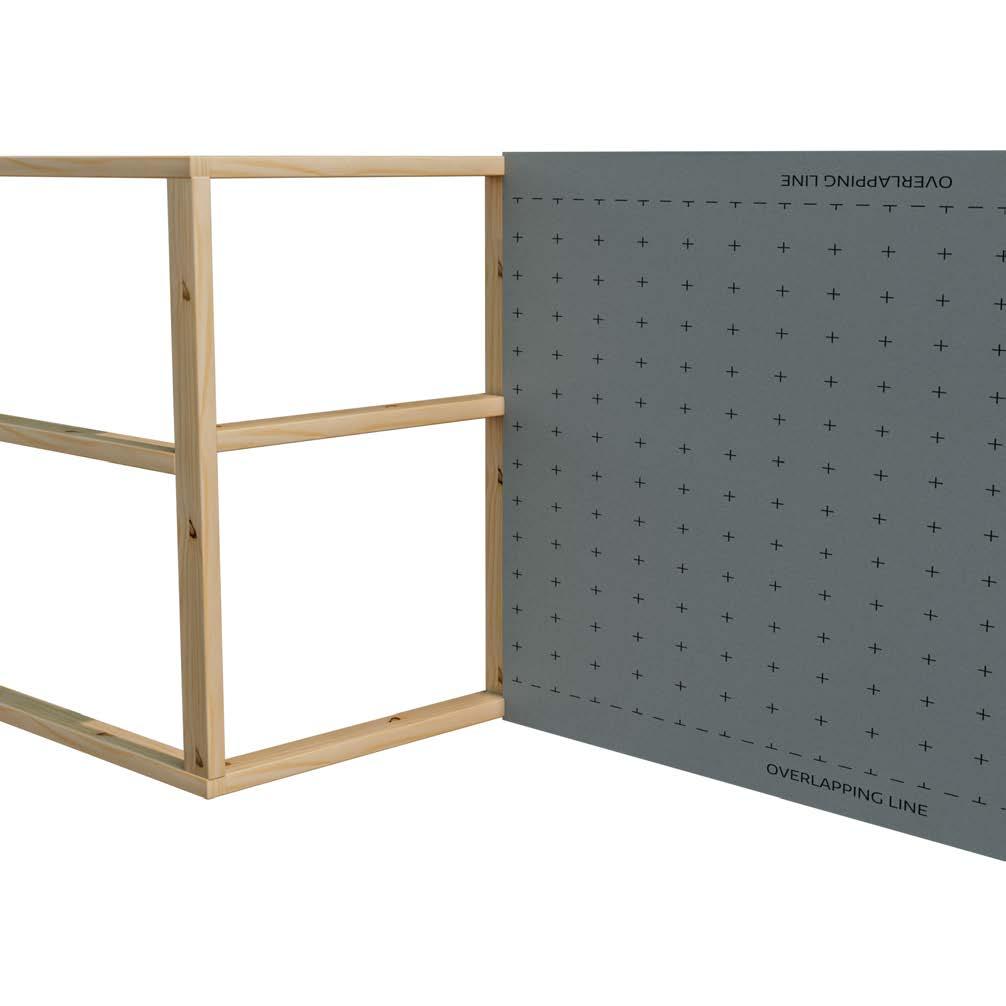
4
Initial Fixing of Membrane
Secure the top corner of the first layer of membrane with 4-6 staples, then roll out the membrane across the studs. If required, trim to length and pull the membrane taut before securing the opposite corner in the same way. Continue to secure the top edge of the membrane at each stud, ensuring the staples are within 150mm from the edge.
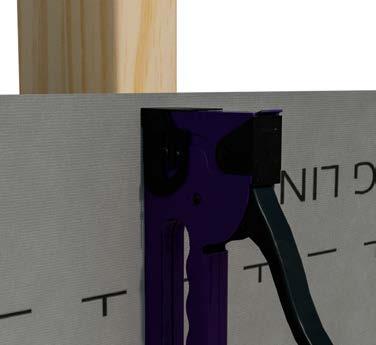
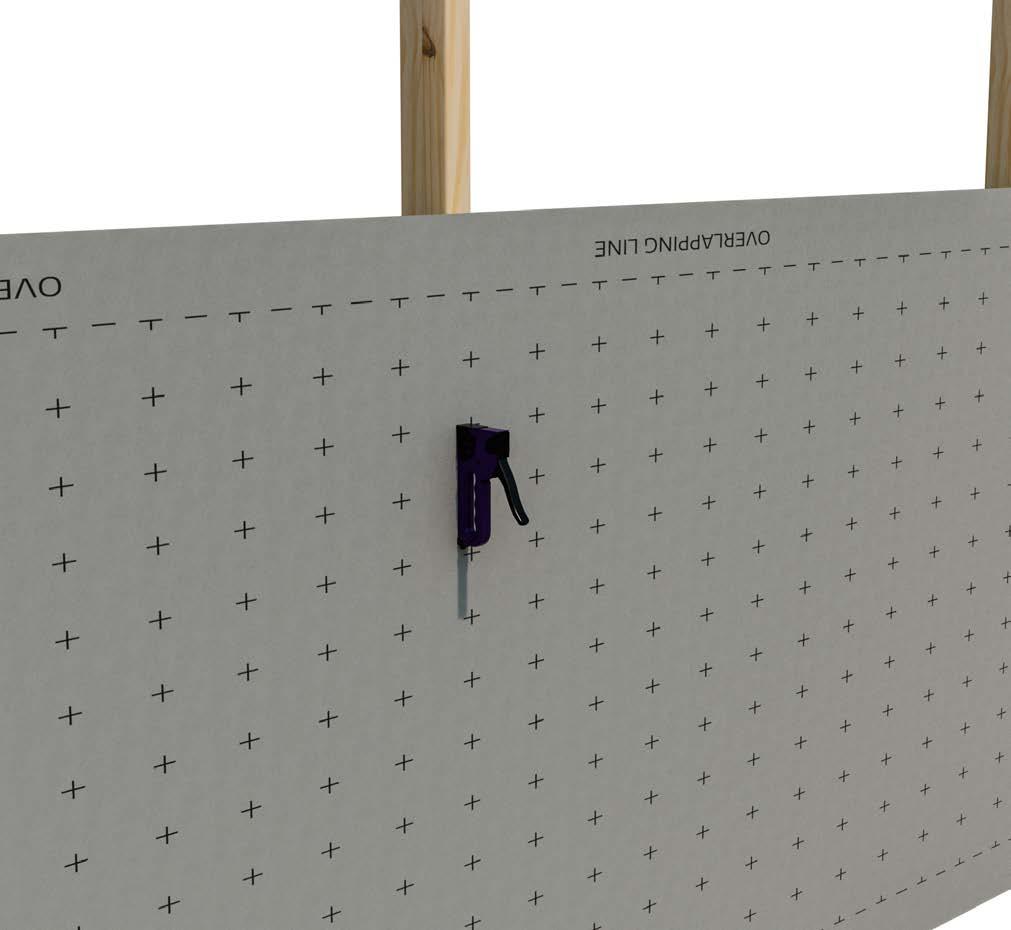
5 Positioning and Fixing Bottom Edge
Pull the membrane down from the centre until taut, and then secure with 2-4 staples at the bottom edge.
7
Securing the Membrane
Once the top and bottom edges of the membrane are secured, fix the membrane back at each vertical stud with staples.
6
Fixing Bottom Corners
Pull the bottom corners taut and fix with 2-4 staples.
8
150mm Overlap
Installing Successive Membrane Layers
Continue installing the membrane layers above the first, using the same steps but in an upsidedown orientation compared to the bottom layer.
Ensure that each new layer overlaps the one beneath by at least 150mm. This overlap is critical for seamless coverage and optimal performance of the membrane system. A minimum overlap of 50mm can be used in conjunction with taped joints.
Pull taut and fix
Pull taut and fix
Pull taut and fix
9
Membrane Edge Sealing
Once the membrane layers have been installed, seal all vertical and horizontal overlaps with Jointing Tape. Ensure that firm pressure is applied for secure and effective adhesion.
Overlaps of 50-150mm must be taped, as required by AS 4200.2:2017
10 Staple Head Sealing (Best Practice)
For maximum level of weather resistance, cut
squares of the Jointing Tape and place over each staple point.
TIMBER FRAME – WINDOW REVEAL DRESSING
The following steps are guidelines only. Window reveal dressing should always consider the flashing detailing specific to the project. Refer to the Australian Glass & Window Association (AGWA) - A Guide to Residential Installation for additional information.
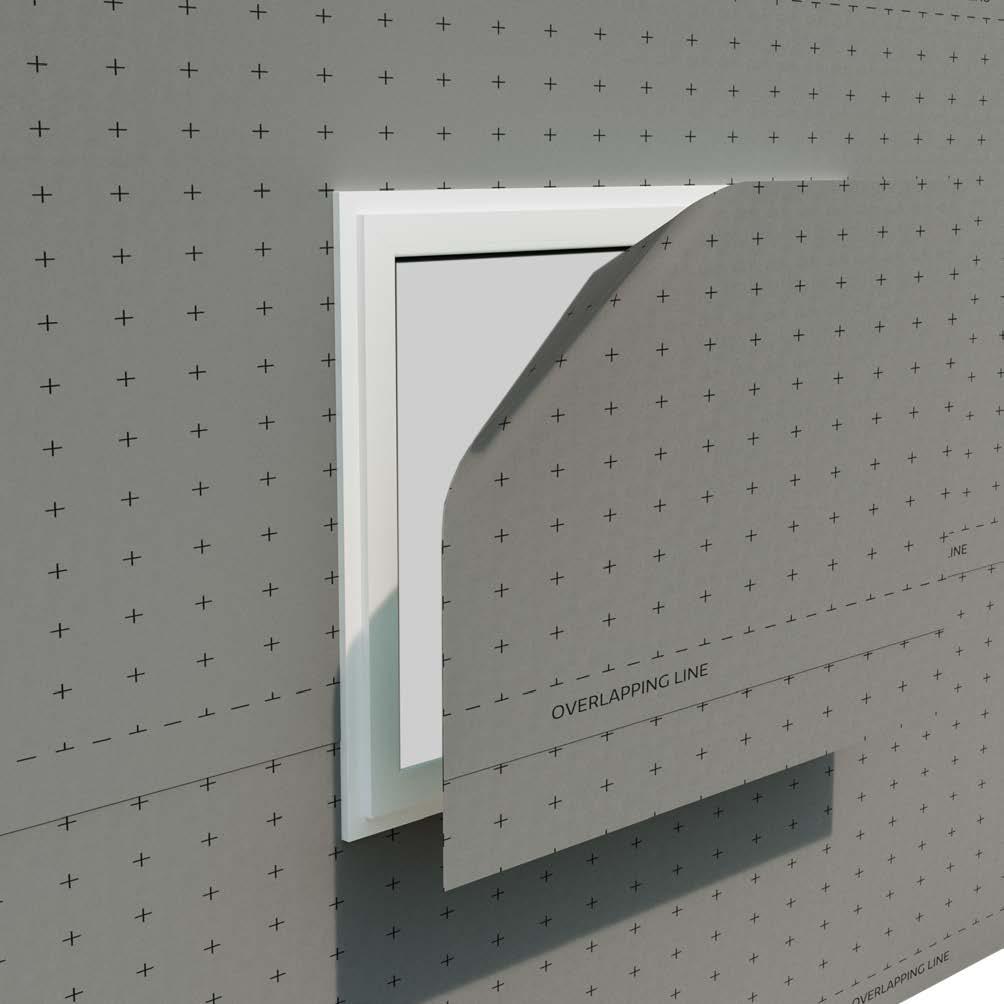
1 Window Reveal Dressing
Cut the membrane from the centre of the window area out towards each of the four corners, at 45° angles as shown. This will create four flaps that can then be folded neatly back into the window reveal.
3 Fixing the Reveals
Keeping the membrane taut, secure the flaps using staples at the rear edge of the window reveal at 150mm centres. Trim back any excess membrane to align with the back edge of the timber frame for a neat finish.
4
Sealing the Corners of the Reveal
All corners of the window reveal must be thoroughly sealed. Start by applying the Jointing Tape directly over the membrane in each corner, extending up the jambs. Ensure that the tape is pressed firmly into place, covering the membrane completely in these areas. Once the corners are secured, it is recommended to continue applying and stretching the tape around the front and back of the framing.
Applying Jointing Tape to Sill (Best Practice)
To achieve optimal weatherproofing performance, repeat this process for the rear edge of the frame, followed by the right and left hand side. Finish off with the header.
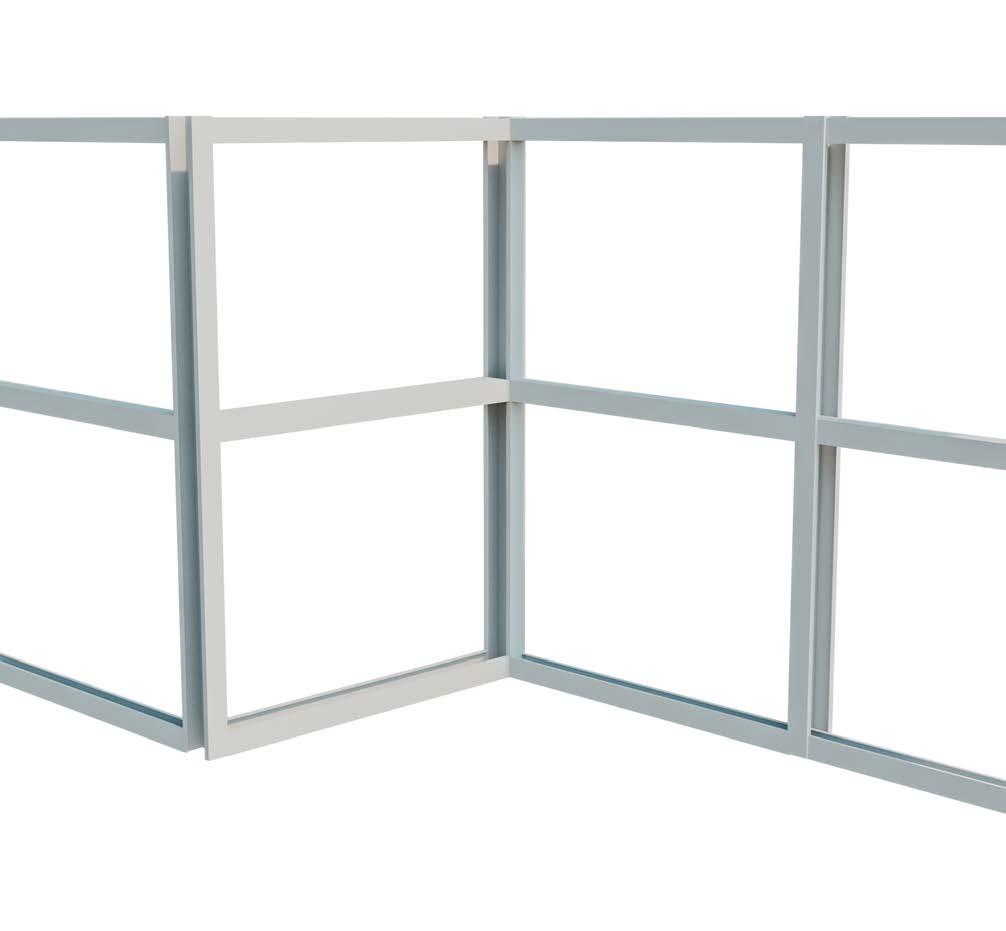
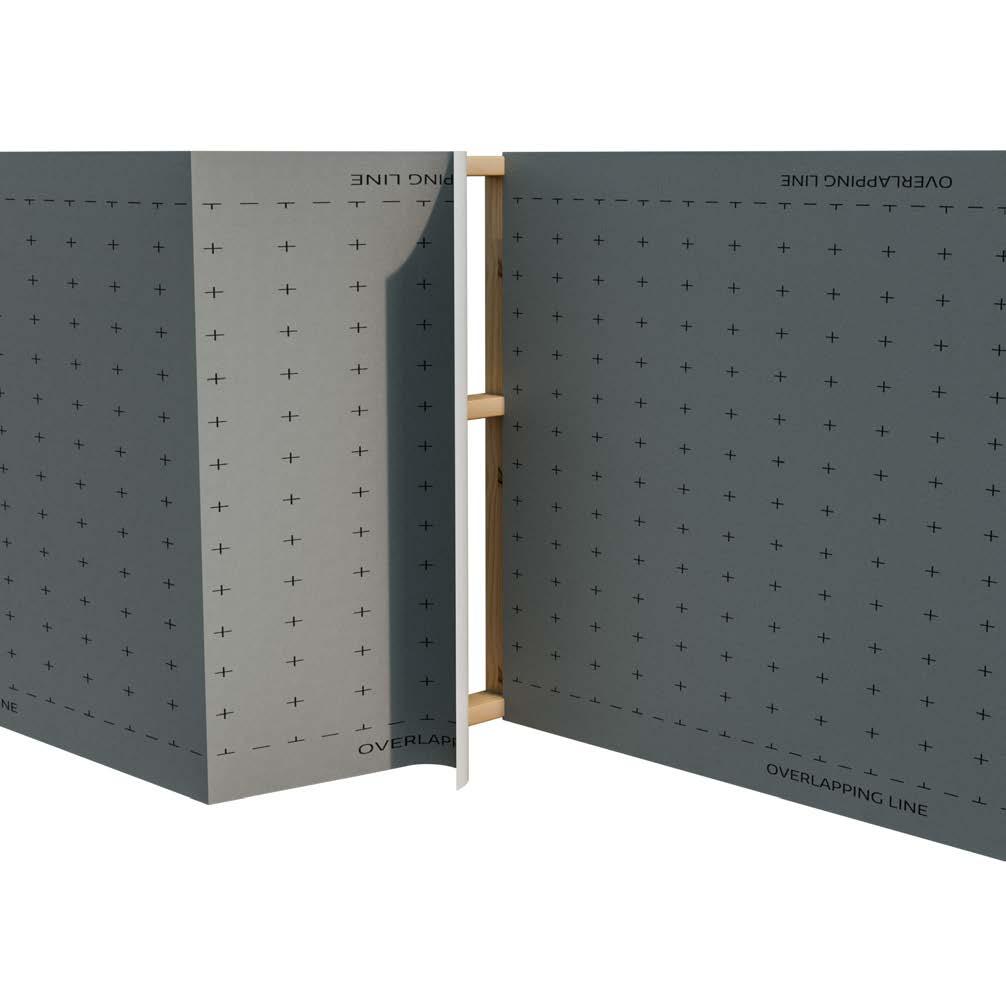
TIMBER FRAME – INTERNAL CORNER
1
Internal Corner Layout
For internal corners, the membrane should be installed in two separate sections. This prevents curved corners and reduces the risk of accidental penetrations.
150mm Overlap
3
2
Applying the Membrane to each Face
First, align the membrane tightly into the corner and extend it outwards along the wall. Fix it back to the timber frame following the process described in previous sections.
1 1 2 2
Cutting and Applying the Membrane
Pull the second section of the membrane into the internal corner and trim it, ensuring a 150mm overlap. Fix the membrane securely back to the frame, following the previously described method with staples and then seal with patches of the Jointing Tape.
4
Sealing & Taping the Corner
Press the membrane firmly into the corner to prevent any curvature or radius forming. Bond it temporarily to the first piece of membrane using the Double-Sided Tape. Finally, seal the exposed edge with the Jointing Tape. 1
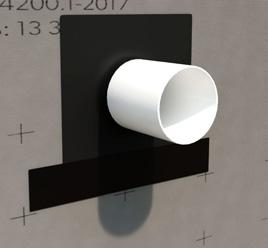
PENETRATION SEALING
1
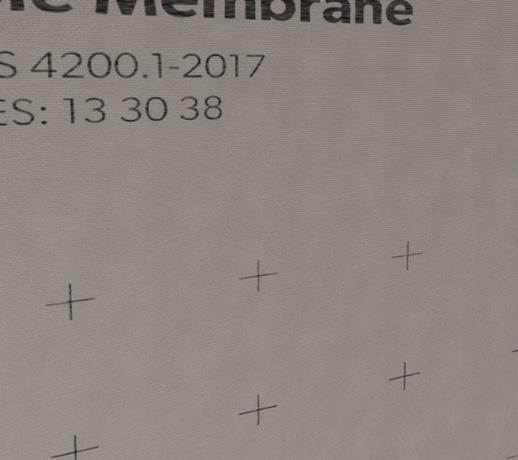
Cut for Penetrations
Make two 45-degree slits through the membrane, ensuring they are just large enough to fit the diameter of the pipe. Be careful not to extend the cuts too far.
3
Installing the EPDM Collar (Best Practice)
First, make sure the pipe is clean. Then, stretch the EPDM sealing collar over the pipe, ensuring a tight fit. Slide the sleeve up until it sits snugly against the face of the membrane.
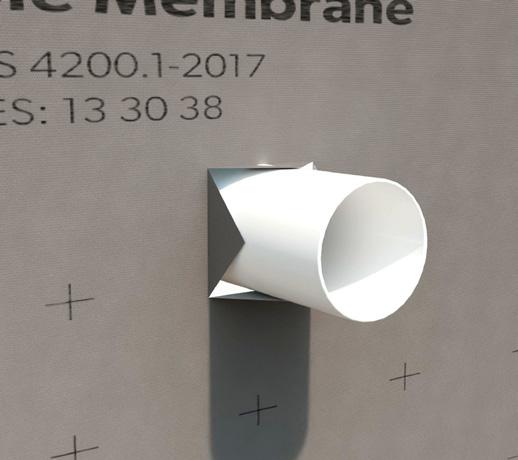
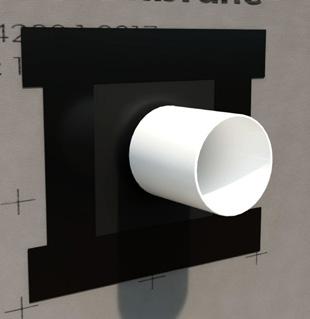
2 Push Pipe Through
Push the pipe through the cuts in the membrane, and then trim away any excess material to aid the installation of the EPDM sealing collar (Steps 3-4).
4
Sealing the Collar Edge (Best Practice)
First, apply the Jointing Tape along the bottom edge of the collar. Ensure that it forms a good bond onto both the collar and the membrane. Next, apply the Jointing Tape to the left and right edges of the collar. Finish by placing a final piece of tape across the top edge. It is critical that this sequence is followed to ensure a good seal.
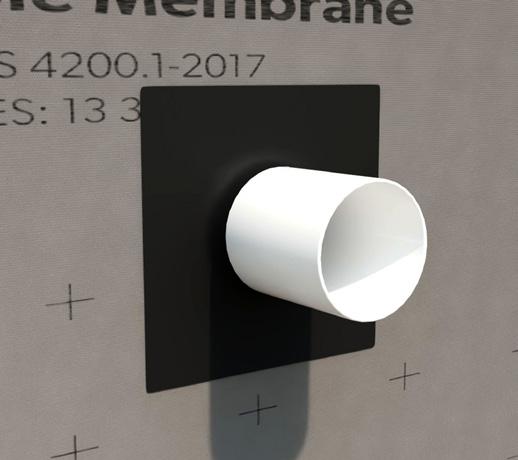
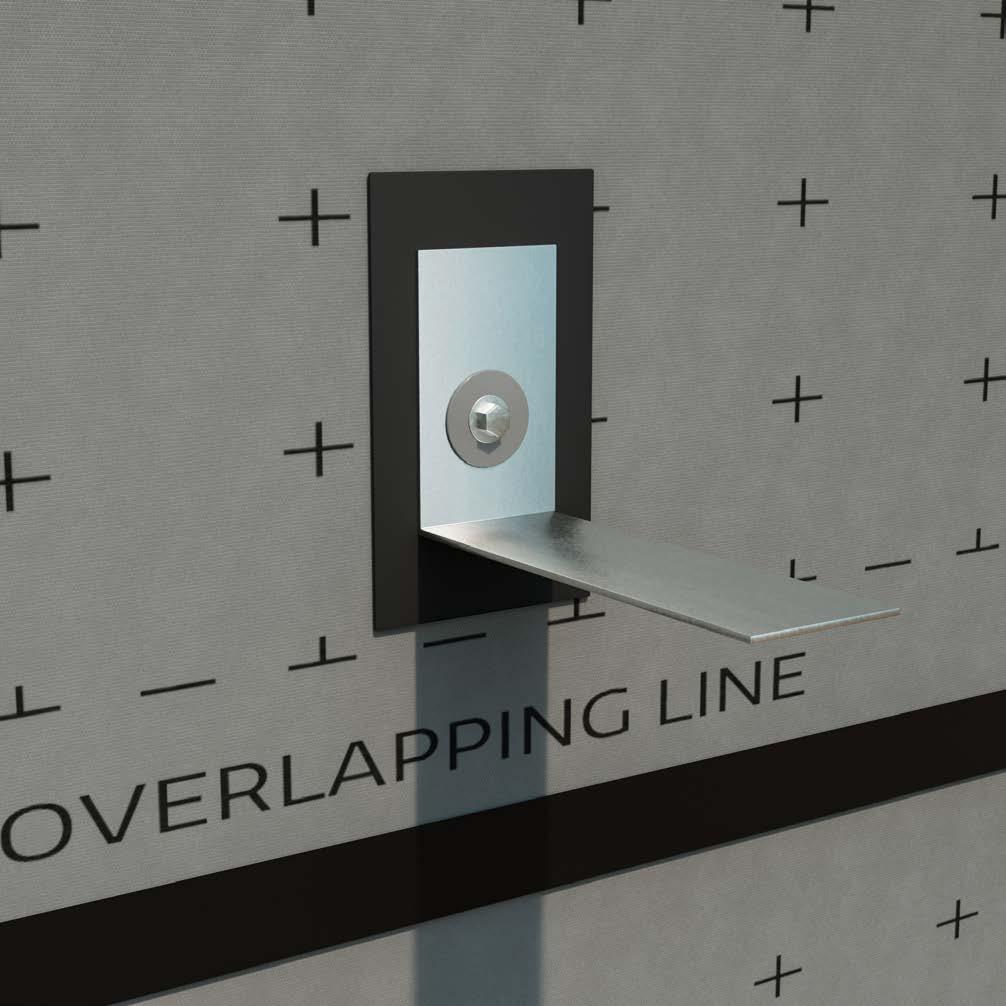
ATTACHMENT SEALING
1
Sealing Other Attachments (Best Practice)
For attachments fixed to the studs through the Membrane, it is recommended that all edges be sealed with Jointing Tape for optimal weatherproofing performance.
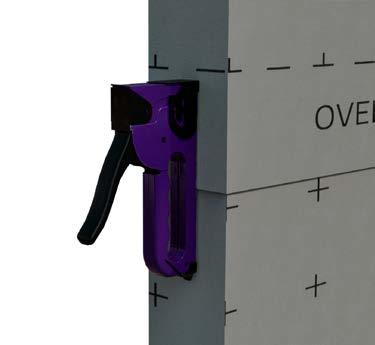
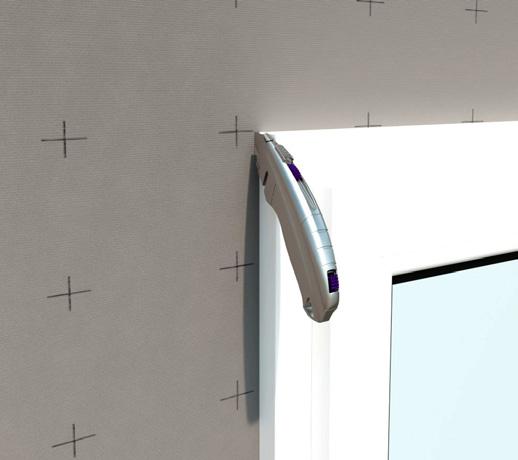
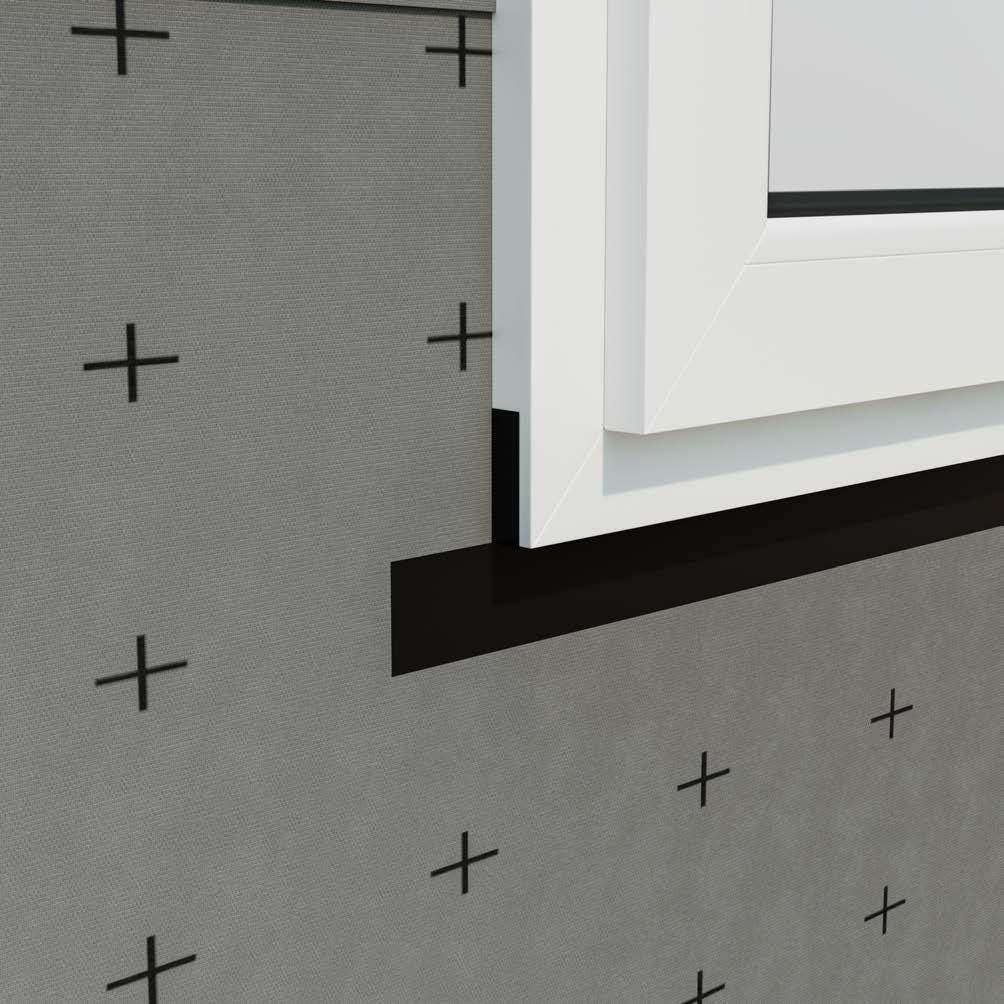
PRE-INSTALLED WINDOWS – SEAL TO WINDOW FRAME
Note: The following steps are guidelines only. This method is commonly used for membrane installation around pre-installed windows with shallow reveals.
1
Cut around Window Frame
Neatly cut the membrane around the edge of the window, as close to the frame as possible. Be careful not to cut any underlying EPDM membranes if installed. Take care not to cut past the intersection point of each corner.
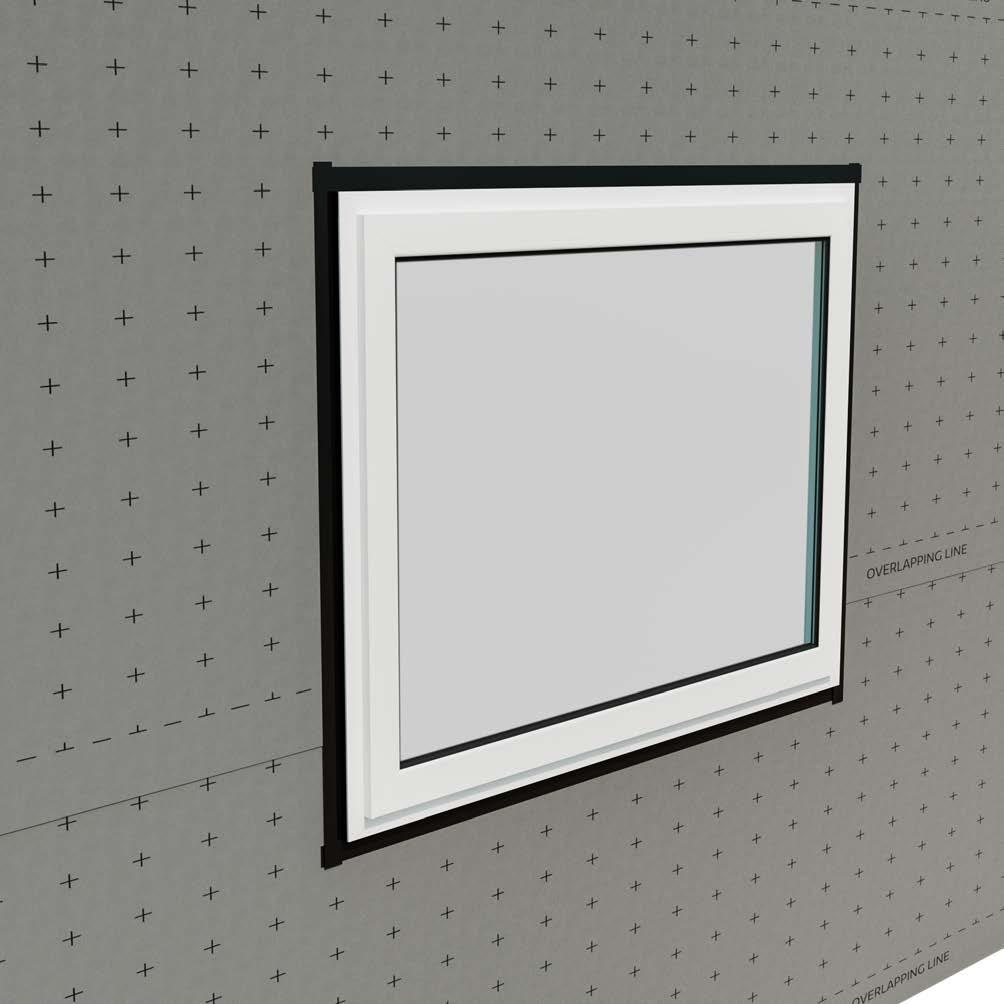
3 Seal to Window Frame
Apply the Jointing Tape around the edges of the Membrane, starting with the sill (or base). Ensure there is a minimum of 20mm bond to the window frame. Add a slit to the end as shown, so the tape can overlap the vertical joints.
2
Remove Excess Membrane
Remove the excess so the membrane fits flush around the window frame. Avoid creating any gaps between the membrane and the window frame, as these would need to be bridged with tape.
4 Repeat Sides, then Top
Repeat step 3 on both sides of the frame (jambs) and lastly the top (head), completing the seal around the window. Continue to seal any overlaps or penetrations in the membrane as previously shown in this guide.