Home Composting A Manual
1 TOGETHER WE MAKE TOMORROW MORE BEAUTIFUL OVAM
Ge ng more out of the organic cycle
ACKNOWLEDGEMENT
The manual has been developed by Vlaco npo.
Vlaco coordinates the policy on organic waste in Flanders (Northern-Belgium), and is in that sense the driving force behind the organic-biological materials cycle (that includes items as home composting, closed loop gardening ...).
This manual is published by the Flanders Public Waste Agency (OVAM).
Contacts: Anne Vandeputte (Public Waste Agency of Flanders, OVAM) and Kristof Van Stichelen (Vlaco npo). This manual can also be downloaded on www.vlaco.be/en/vlaco-vzw/info and on www.vlaco.be/publicaties
OTHER PUBLICATIONS
Vlaco npo and OVAM also developed the document ‘School Composting: A Manual’. That school composting manual explicitly has been written for school situations and focusses on the setting up of a school composting programme. The home composting manual is written for home situations and focusses on the production of homemade, high quality compost.
In addition to English-language publications, Vlaco obviously has a lot of Dutch/Flemish brochures, posters, leaflets and books available. You can download and order these documents easily on www.vlaco.be/publicaties
2
1. CONTENT OF THIS HOME COMPOSTING MANUAL
3 TOGETHER WE MAKE TOMORROW MORE BEAUTIFUL OVAM
2.
3.
4.
5.
6.
7.
8.
9.
1. Why composting? 4
What is composting? 5
Composting is mixing and turning 6
Wormeries, bins, boxes or heaps? 13
Composting in bins 14
Composting in boxes 19
Composting on a heap 23
Composting in a wormery 24
Problems during composting 27 10. The quality and use of your homemade compost 28
1. WHY COMPOSTING?
There are many reasons why you could decide not to compost your kitchen and garden waste yourself. Out of convenience, you could add it to your residual waste bin. Organic waste, which consists for three-quarters of water, will then be taken to e.g. an incinerator where, ironically, all this water will be ‘burned’.
Another option to get rid of your garden waste is to take it to a recycling yard. From here it will go to a professional composter.
In your district you might have (if not now, then probably in the future) a selective collection of vegetable, fruit and garden waste (VFG). In a VFG station, this organic waste is processed into first class compost. For this processing method, the citizens will have to pay, but nevertheless this is a good solution. The downside of this method is that your garden will not be able to benefit from the valuable organic matter and nutrients found in VFG waste.
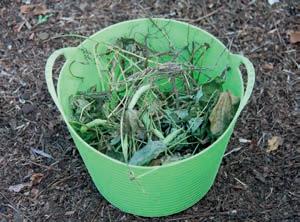
There are, however, other solutions for your VFG waste. If you raise chickens in your backyard, you can feed them your organic waste. Or you can use grass cuttings and other plant parts from your garden as mulch, covering the bare soil around bushes and trees. Maybe you cut up tree or hedge trimmings to small pieces, using them as cover for garden paths or you may have a lawnmower that cuts the grass into fine pieces and leaves them spread on the grass. All the above are excellent solutions for returning organic materials very quickly to the soil, where they belong.
Nevertheless, having a compost bin or compost box in your garden might be interesting. What do you do with banana peel or with the remnants of kiwis or leeks? And what do you do in a hot and wet summer when you have too much grass cuttings? If you feed this to the chickens, their run will become a smelly sea of mud. And if the mulch that you apply in your garden is too thick, plants will suffocate.
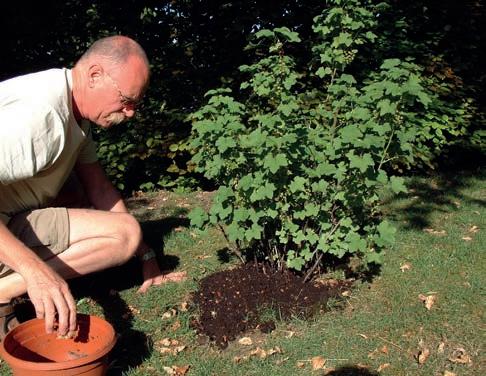
What you cannot use in your garden right away, the best thing to do is to compost it. For the final product, the compost, you can quickly find many useful applications. With this you can save on the cost of garbage collection and on the costs of running recycling parks. In addition to all this, composting is one of the most exciting aspects of gardening.
4
2. WHAT IS COMPOSTING?
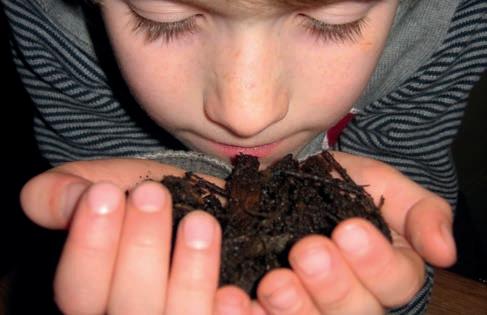
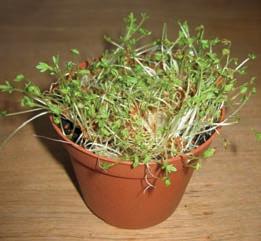
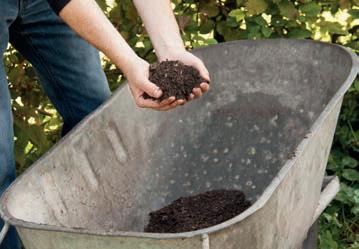
Composting is a natural transformation process. Micro-organisms and small soil-borne animals digest autumn leaves, apples, weeds, etc. For effective composting, different materials are simply put together and favourable conditions are created for the bacteria, moulds, worms, millipedes, and mites. Beside food – found in your kitchen or garden waste – these organisms only need water and air. If the conditions are optimal, life and activity in the compost heap can become so intense that the temperature will rise. Pathogenic bacteria and weed seeds cannot resist this temperature. The rapid pace at which this process takes place, is precisely one of the advantages of composting. Already after six to nine months, the compost can be used in a flower pot (diluted with soil) or in the garden.
Making your own compost requires some experience.
5 TOGETHER WE MAKE TOMORROW MORE BEAUTIFUL OVAM
3. COMPOSTING IS MIXING AND TURNING
WHEN TO START COMPOSTING
If you plan to compost your waste, then start as soon as possible. Each day of delay means you lose useful organic materials and nutrients for your garden. Before you start, you have to think carefully. Choose the system which fits best in your garden and select the best place for it. It has no real significance on which day of the year you start composting. The middle of the winter is not advisable because nature and decomposing organisms are resting in this season.
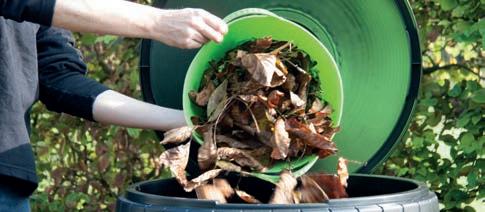
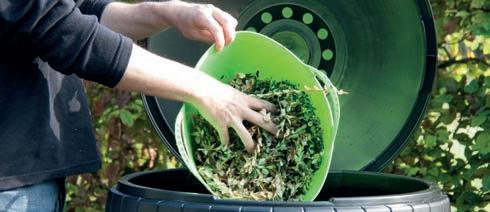
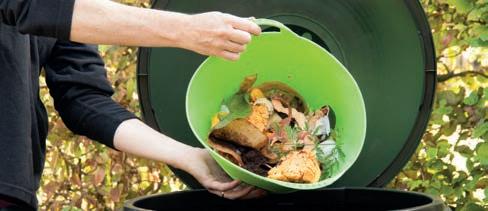
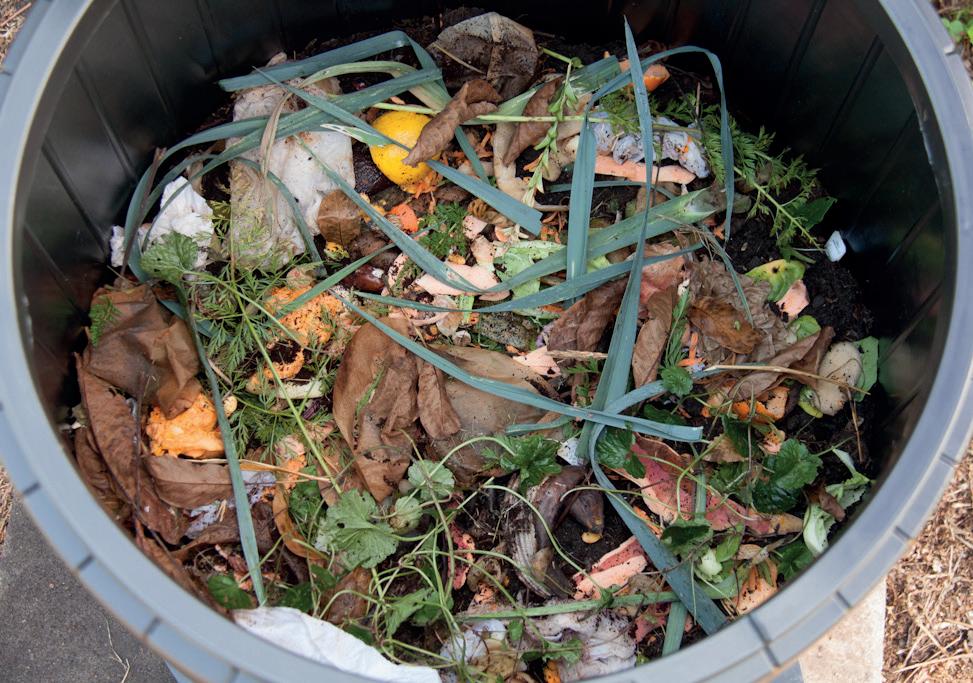
COMPOSTING WITH GREEN AND BROWN MATERIAL
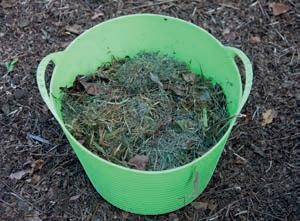
Materials that have little structure on their own, that contain many nutrients, and that usually also have high water content, are called “green” materials. Typical examples are grass cuttings, vegetable and fruit waste. If you try to compost only green materials you will find that the heap starts to smell bad pretty soon. Due to the clumping of the material, no oxygen can penetrate the composting material. These are anaerobic (i.e. without air) conditions, and the annoying smell is caused by this. This cannot be called ‘a composting process’ any longer.
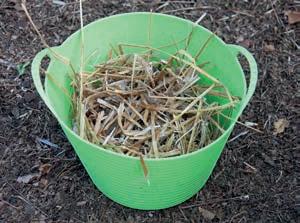
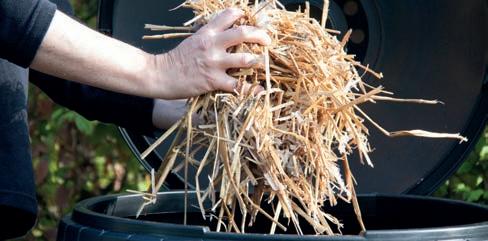
Loose, rigid materials like straw, wood cuttings and dry branches contain less nutrients and are often dry. These are the “brown” materials. If used alone, they compost slowly, but will not stink.
Optimal composting starts with the proper mixing of “green” and “brown” materials in order to obtain an optimal so called C / N ratio. When this ratio is optimal, it means that the decomposition organisms have enough nitrogen and enough carbon to grow well and to increase in number, so that composting can proceed smoothly.
6
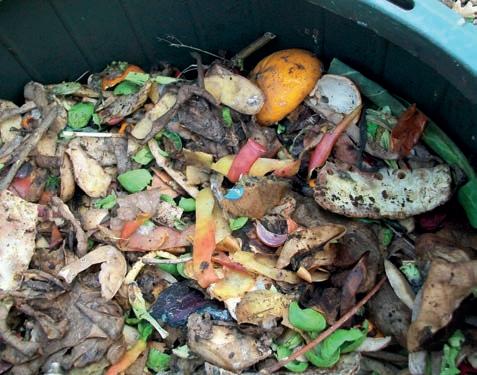
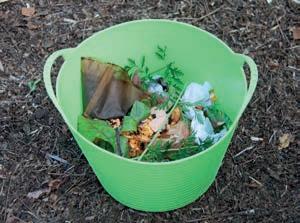
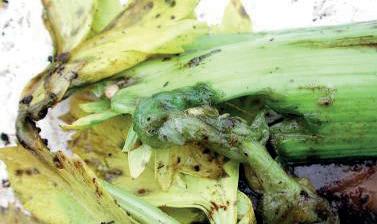
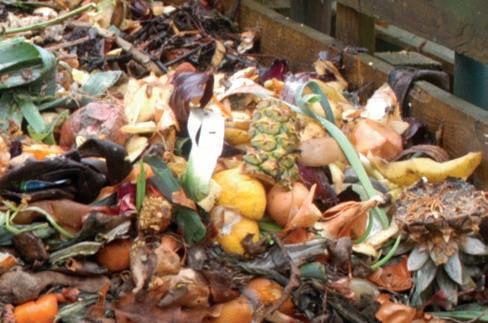
READILY COMPOSTABLE AT HOME
• Peel of citrus fruit and other fruits
• Vegetable waste (incl. potato skins)
• Tea-leaves and tea-bags
• Coffee grounds and (paper) filters
• Nutshells
• Kitchen paper towel
• Grass cuttings
• Small wood cuttings, hedge-cuttings
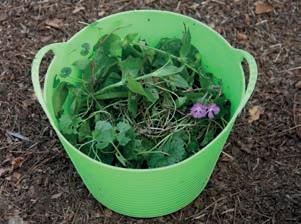
• Remnants from vegetable and ornamental gardens
• Withered cut flowers
• Weeds
• Straw and hay
• Pine needles
• Diseased plant parts
• Manure from plant-eating animals
• Paper and cardboard (small amounts)
• Potting soil and peat
NOT, OR NOT READILY COMPOSTABLE AT HOME
• Animal products (these are animal remains, bones, meat residues, charcuterie, hair and feathers, cat litter, mussel shells, egg shells ...)
• Cooked or prepared foods (e.g. bread, bread remains, biscuits, cakes, crisps, chocolate, cooked vegetables, oil and fatty materials ...)
• Divot
• Charcoal
• Inert materials such as earth, (wood) ash, soil, clay, sand, metal, stone, lime, and synthetic materials (e.g. brik, plastic insulation, plastic disposable diapers, cloths and conventions ...)
• Dust from the vacuum cleaner bag
• Lumber, wood shavings, wood fiber, cork
• Human faeces and excrement of carnivores
Composting is a process that wants to happen naturally. Everywhere in the air and in wastes there are micro-organisms and their spores. They are only waiting for the right moment to start the digestion of organic matter. Higher moisture content and sufficient oxygen are sufficient for them to start their work.
If you are composting for the first time and if you are impatient, you can turn to an experienced home composter for a bucket of half-digested compost. This compost should smell like forest soil and is guaranteed to contain everything that you need to get started. Mix it with your own compost only after the temperature has dropped, so the worms do not perish right away.
Other preparations, starters, accelerators … are not necessary. In the above list of non-compostable materials you can read that it is also not recommended to add soil (e.g. lime, sand…) into the compost.
7 TOGETHER WE MAKE TOMORROW MORE BEAUTIFUL OVAM
WHAT HAPPENS DURING THE COMPOSTING PROCESS?
Bacteria and fungi digest the garden and kitchen waste, under controlled conditions. They are helped by worms, springtails and other organisms.
Microorganisms: bacteria, fungi, protozoa...:
The main degradation organisms, both in the soil and in the compost, are the micro-organisms. They are so small that you can not see them with the naked eye. Micro-organisms are not able to digest food particles. They break down organic matter with the enzymes they secrete. Their job is to make the organic waste softer, and by doing so they ease nutrient absorption by the larger composting organisms. The mass of rapidly increasing bacteria and fungi is also a favourite food source for the worms, springtails and other small invertebrates. It benefits the micro-organisms that mites, millipedes and other nibblers with their strong mouthparts chop the waste into small pieces. Both bacteria and fungi need a lot of moisture in order to work optimally. They are very resistant to high temperatures. Due to the intense activity of bacteria and fungi the temperature in the composting material can increase quickly.
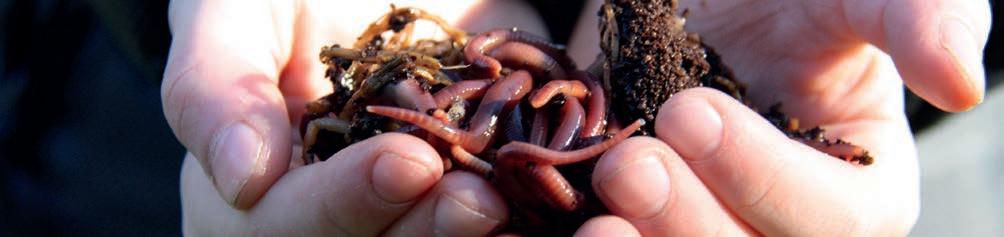
Compost Worms:
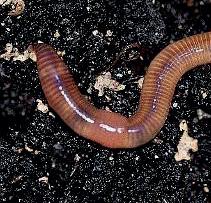
The small red - sometimes orange striped - compost worm (Eisenia fetida) occurs naturally in the humus layer of our woodlands, parks and gardens. But he has adapted well to life in the compost heap. This in contrast to the earthworm (Lumbricus terrestris), which as a deep digger seldom or never occurs in the compost heap. It therefore makes no sense to take earthworms out of the ground and put them into the composter. In good circumstances the compost worm makes egg cocoons. After three weeks new worms will appear. The worms reproduce quickly; they lay up to 900 eggs (cocoons) per worm per year. As lovers of moist and nutrient rich material, they live and reproduce fast in the composting material. Their droppings have exactly the structure that fits the image of well-digested compost; dark and crumbly.
8
Springtails:
These small, primitive insects are usually white and have six legs and short antennae. They eat dead plant and animal material. They play an important role in the degradation of the organic material and in the food chain through the “grazing” of fungi and their spores. Fungi are able to extract nutrients from readily degradable materials such as wood. By eating the fungi, springtails bring nutrients via their faeces in the compost.
Mites:
These arachnids have a length of 0.1 to 3 mm, and eight legs. Some types of mites crush leaves, rotten wood and other organic waste. Others eat fungi and bacteria, others are predatory, feeding on nematodes, eggs, insect larvae, other mites and springtails.
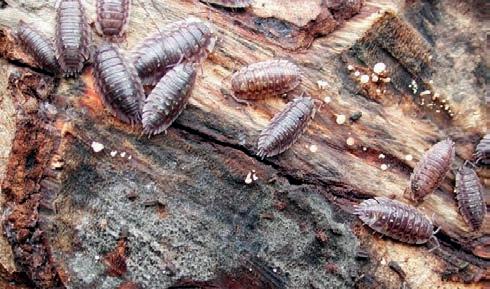
Woodlice:
These are the only terrestrial crustaceans. Their blue-gray or black-brown body is 1 to 2 cm long. They breath through highly branched breathing tubes between their legs. Gills and inhaled air must be constantly moist. Depending on the environment in which these animals live, they feed on decaying plants, remains of dead animals or other organic materials such as wood that they are able to digest by using a special enzyme which breaks down cellulose.
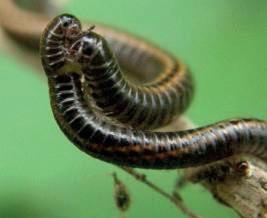
Millipedes:
These waste eaters have a segmented body. The segments are two by two fused and therefore contain two pairs of legs. The millipede can dig into the soil, just like a worm.
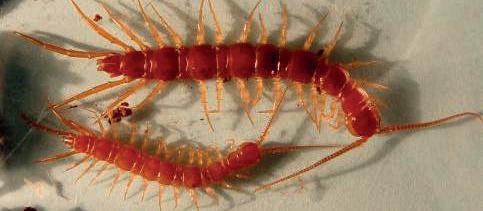
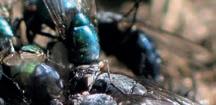
Centipedes:
These hunters move quickly and meander through the top few inches of the composting material. Their flattened bodies help them doing so. It allows them to curl up and go quickly after their prey.
9 TOGETHER WE MAKE TOMORROW MORE BEAUTIFUL OVAM
Besides all these organisms, you can find plenty of other species in the composting material. Think of ants, fruit flies, beetles, snails, spiders, grubs, etc.
Together, all these creatures manage to create a stable and high-quality end product (compost) out of kitchen and garden waste.
FOOD, MOISTURE, AIR AND HEAT. SOUNDS FAMILIAR, RIGHT?
As home composters, it is our job to create optimal working conditions for all those little hard-working organisms. Their basic needs include (very recognizable) food, air and moisture … and warmth.
Food:
The food for the compost organisms is usually not a problem. The remains of kitchen and garden contain all the elements that the compost organisms - and later our plants - need.
Moisture:
Both too little moisture and too much moisture are not good for the composting process. Too little fluid slows the activity of the micro-organisms down. Too much moisture displaces the oxygen in the composting material. Green materials, such as grass clippings and kitchen waste, easily contain more than 80% water. Brown materials like dry branches, shredded wood and autumn leaves are usually drier. A mixture of green and brown delivers an ideal moisture content of 50 to 60%. Especially in the beginning of the composting process there is a need for moisture. At this moment, the bacteria are very active and a great deal of the moisture in the composting material evaporates (e.g. by the temperature rise). As the compost matures, the process requires less moisture.
10
Air:
Without oxygen, composting is not possible. Composting at home is indeed an aerobic process. A third prerequisite for good compost is the air supply. A mixture of green and brown material is ideal to get enough air between the organic material. Processed in a bin, a box or on a pile grass clippings and remains of fruit and vegetables shrink quickly. The air circulation in the material stops and there can be no ingress of oxygen. The anaerobic organisms are introduced and the (surviving) organisms convert to other (incomplete) decomposition processes. The substances and odours they produce, are experienced as annoying. At this point aeration is needed. As long as there is oxygen in the composting material, there will not be an unpleasant smell.
Heat:
You will quickly notice when the compost organisms are enjoying themselves: the temperature within the compost rises. In “cold” compost the temperature is five to ten degrees higher than the outside temperature. But when the organic material is fresh, the outside temperature is not too low, the volume of compost is not too small and the aeration and moisture are OK, the temperature in the compost can rise with several tens of degrees. The optimal temperature for the composting process is 50 to 60 °C. Compost worms and other organisms do not naturally survive these high temperatures. They abscond at high temperatures and come back when the composting material has cooled sufficiently and when the organic material is softened and digested by micro-organisms.
FROM COLD TO HOT OR VICE VERSA …
With a little goodwill, we can divide the composting process in four phases.
The initial phase:
A good composting process starts with a so-called balance of green and brown materials (‘greens and browns’). Both types of material are best mixed as much as possible.
The heating phase:
When all conditions (food, water and air) are good, the composting organisms get down to work. When processing large volumes (more than a few wheelbarrows) organic matter at once, the temperature increases sharply. Temperatures of 50°C are common, and up to 60°C and 70°C are no exception. We call this the heating phase. During this phase only microorganisms (such as fungi and bacteria) are active. In this stage, they consume a lot of oxygen. Without brown material, the composting process will definitely go wrong. When, after a few weeks or months, the cooled and aerated compost is turned, the microorganisms can become very active again. A new, slighter rise in temperature can be the result of this activity. Besides speeding up the composting process, the main advantage of the rise in temperature is the killing of pathogens and weed seeds. Take into account that the composting material at the outsides of the bin or box will never reach these high temperatures. The air flow will diminish as the material digests. Regularly turning the compost…?
The cooling phase:
The foregoing heating phase is followed by a decomposition phase in which the larger breakdown organisms play a role: worms, mites, wood lice, beetles, centipedes, millipedes and springtails. Also in this stage the micro-organisms remain present. Their enzymes and the temperature rise broke down and softened the organic material so that worms and other small invertebrates can use it as food. These “larger” organisms reduce the organic waste into small particles. Those small crumbs have a surface area that is many times greater than the surface area of the original sheet or other material. The microorganisms may then break down further in an even higher speed.
11 TOGETHER WE MAKE TOMORROW MORE BEAUTIFUL OVAM
If the composting material never experienced a high temperature – because large amounts of material weren’t brought in at once – then its colonization by micro-organisms and worms and other small invertebrates takes place approximately the same time. The digestion process will be slower and the pathogens and weed seeds (if present) will only partly be deactivated or killed. However, your compost will therefore not be “worse”. The natural degradation process in the leaf litter of a forest also happens at ambient temperature.
The maturing phase:
The final phase of the composting process is a combination of mineralization and humification. The material is now transformed into a stable product, rich in humus and minerals.
12
4.
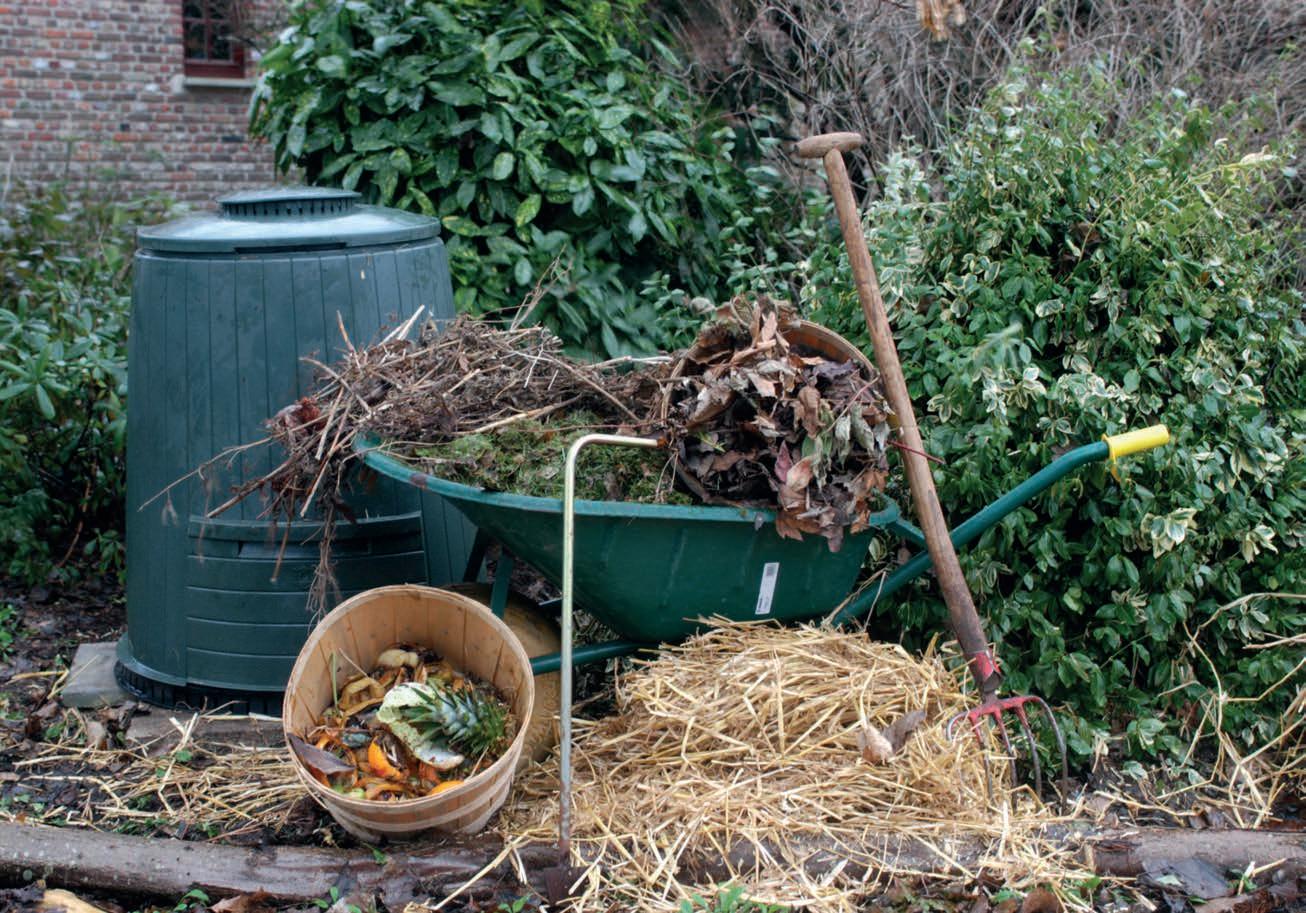
1. WORMERIES, BINS, BOXES OR HEAPS?
Select the right composting system for your garden.
Although below several other systems are described, you have to make a choice between compost bins, compost boxes and compost heaps depending on the size of your garden. If you have a garden, then wormeries should not be considered, as such bins are quite small and especially designed to process soft, uncooked kitchen waste.
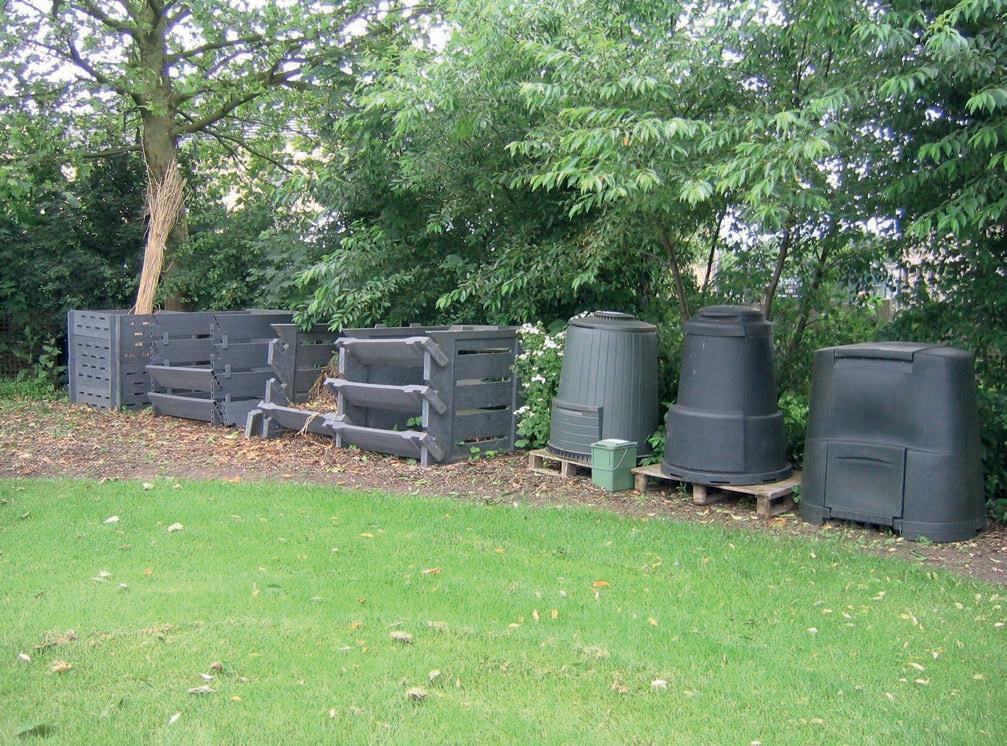
If you have a small garden (200 - 400 m²), the best thing to use is a compost bin. The small amount of available garden waste can be processed in the bin together with the kitchen waste. A few times per year you might have to bring a bag of cuttings from elsewhere to loosen up the content of the bin. Of course, much depends on how the garden is made up, on the size of grass area, the possibilities for utilisation of the autumn leaves and cuttings as mulch-material, etc.
If your garden is larger than a couple of hundred square meters, and it is cultivated in a way that much garden waste is produced, then it is better for you to switch over to a compost box. To make it crystal clear: if your garden waste consists only of cut grass, then any system, however big, cannot give any satisfaction.
If you have a large, densely planted garden and you need a lot of compost, then you can make a compost heap annually.
If you don’t have a garden you can consider a wormery or worm bin.
13 TOGETHER WE MAKE TOMORROW MORE BEAUTIFUL OVAM
5.
2. COMPOSTING IN BINS
As was mentioned above, the compost bin is the best system for a small garden. The small amount of garden waste available together with the daily vegetable and fruit remnants will find good composting conditions in the bin. At least if you take the rules of the game into account.
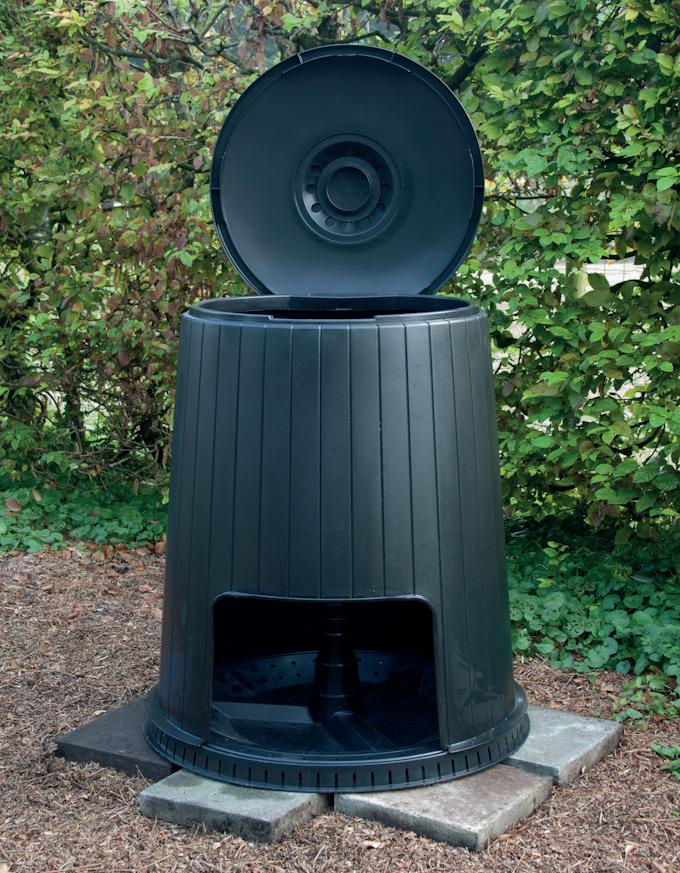
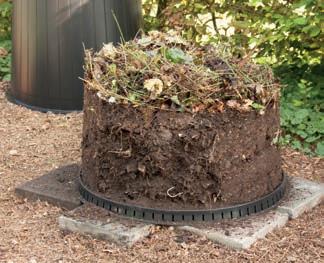
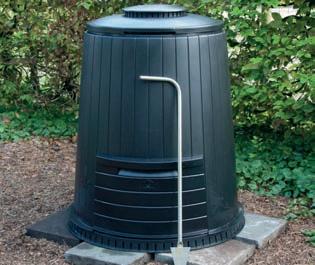
THE PARTS OF THE COMPOST BIN
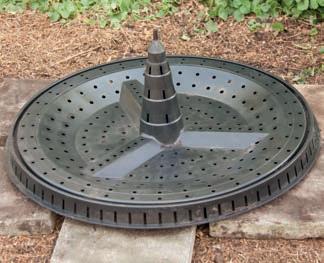
A compost bin consists of five parts, four of which (the bottom plate, the body, the control flap door and the lid) are made of plastic, and the fifth is the aerating stick, mostly made of metal.
The profiled and perforated bottom plate ensures entry for the soil micro-organisms, provides exit for the leakage of extra moisture, and ensures the inflow of air rich on oxygen.
The body is completely closed (except at the height of the control-opening) and prevents the drying out and cooling-off of the compost. When the sun shines on it, its dark (green or black) colour facilitates heat generation in the bin.
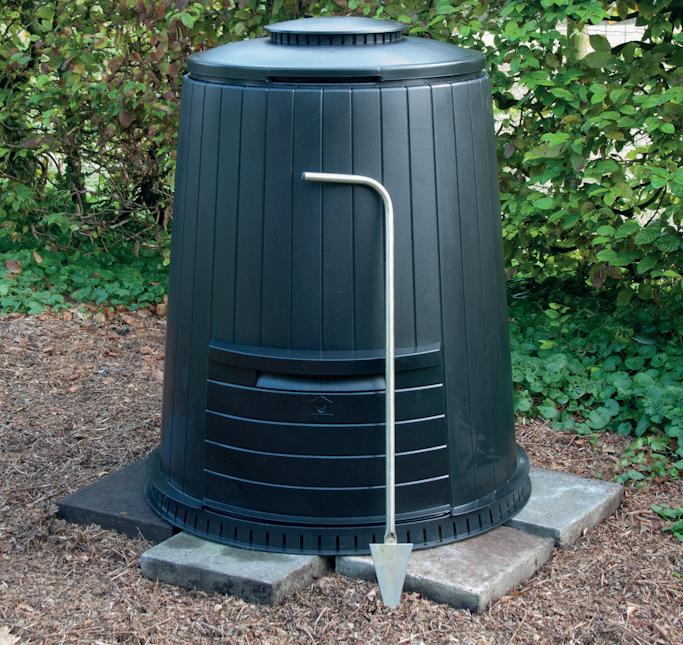
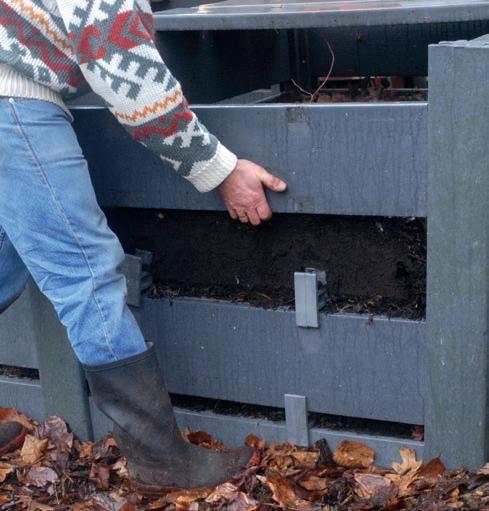
The inspection opening is closed by a control flap door or plate. You can take a small amount of compost out through this opening, but not much. As indicated by its name the flap-door serves the purpose to check at the bottom where the compost that is in the most digested state can be found, whether it is mature or not. Just imagine that you have to reach in through the top layer of the partially degraded waste to check what state your compost is in.
The lid provides very important protection for the compost. The lid is designed so that it keeps rain and wind out, but still allows the air rich in CO2 to exit the bin.
THE LOCATION OF THE COMPOST BIN IN THE GARDEN
For the proper operation of the compost bin there are some basic rules to be followed regarding its placement in the garden. Four things should be considered:
• Do not select a hardened surface (terrace), but one with loose soil.
• It is recommended that you select a place where the sun is shining for at least a few hours. It is recommended that you place the bin neither too close to the kitchen door, nor too far from it. Place it far enough to avoid odor and fruit flies entering your kitchen, but consider that you have to go to the compost bin once every day with the kitchen waste, in all weather conditions. Provide sufficient room for the bin. Or rather provide sufficient place for yourself for emptying or standing it upright. Above all make sure that it can be accessed easily.
14
THE START-UP
For starting up the compost bin a fixed scheme is followed where each step has its importance and helps to prevent future problems.


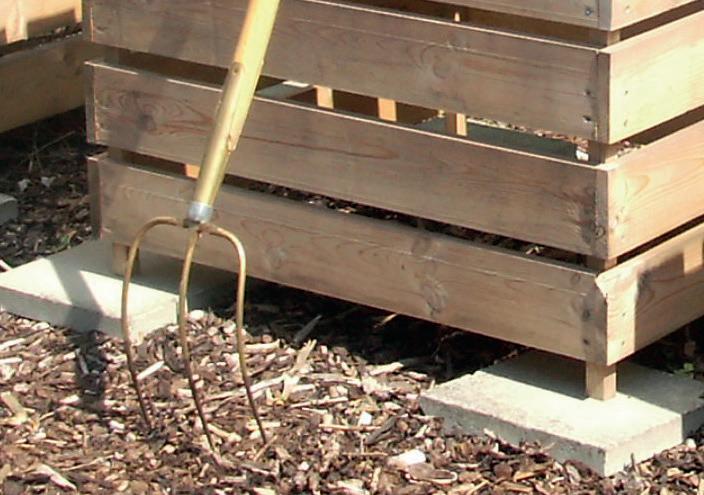
Do not place the bottom plate directly on the ground.
Under the weight of the content of the bin and due to the intensive soil activity around and under the bin, the bottom plate will sink into the ground. The perforation on the bottom plate will be clogged and no air will get into the bin. The composting process is then doomed to fail. To prevent this, put some flat stones under the bottom plate, for example concrete slabs (30 x 30 cm, 4 to 5 cm high). Put enough slabs underneath and especially do not forget to support the middle of the bottom plate. Leave some space between the stones. Air can then get into the bin through these gaps and through the holes on the plate. Along the edge of the stones the soil organisms can climb up without problems, and the excess moisture will slowly leach into the soil. Some solid timber beams or a pallet will also be excellent.
Place the body precisely into the groove on the bottom plate.
When filling the bin up, make sure that the body does not slip out, and especially during turning pay attention to completely clean the groove. Once you filled the bin, you cannot put it in its place.
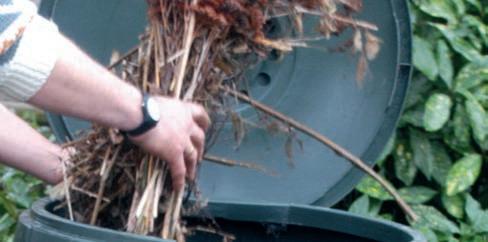
Place a layer of structural materials, at the bottom of the bin.
Structural material is the brown material which does not clog. The best type to use for this purpose are wooden shavings, small branches, dry stalks of weed or other solid materials which will ensure the inflow of air during the first few months. If you filled the bin directly with green materials such as grass or kitchen waste, then the holes on the bottom plate would be blocked off and good composting would become impossible. This bottom layer should be ± 10 cm thick.
15 TOGETHER WE MAKE TOMORROW MORE BEAUTIFUL OVAM
DAILY USE
Keep a set of brown material at hand.
One bag of wood chips or dry leaves, straw or pine needles. Whenever you put green material especially kitchen waste and (small amount of) grass into the bin, add same amount of brown material as well.
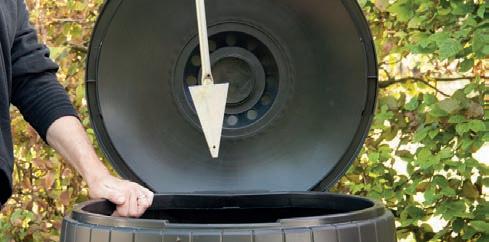

REGULAR AERATION
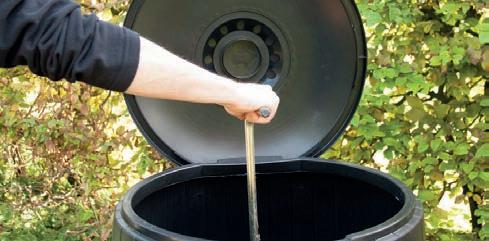
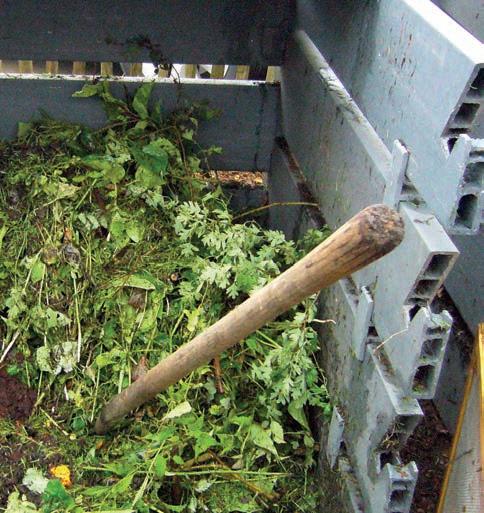
Use the aeration stick once or twice a week. Push it as deep as possible into the compost, turn it around a quarter of a turn, and then pull it out. Repeat it in various places. The aeration stick is not a mixing stick. Do not try to mix the material with it. With the aeration stick you make ducts in the material and improve air circulation within the material. Without brown material, aeration is meaningless. If the compost has become like a wet pudding, even daily aeration cannot make any change. If you pick up sticky, stinking material when using the aeration stick, then it is better to keep an eye on the process. If it stays smelly, even after adding brown material, then it is better to start all over again…
16
For those who throw weekly only kitchen waste and small amounts of garden waste into their compost bin, maintenance means nothing else than weekly aeration (= 20 seconds per week). Your bin will never be filled more than half full, and it seems bottomless. With such a small amount of garden waste you are probably not a fanatic gardener, and your need for compost is also limited. You will not get more than a couple of buckets of compost when you open the bin once a year. It is hard to imagine how you obtained only a few buckets of compost from the several dozens of buckets of waste.
HARVESTING THE COMPOST IN THE BIN
It may be that although your bin is small, it stands in a suitably dense garden where you are often active during the weekends, and the result is quite a few buckets of organic material for your bin. Bacteria, moulds and worms that are fed regularly and are isolated by a larger mass will change to a higher gear. But however hard they work on the processing of the weekend supply, after a few months a point is reached from where there is no way forward.
Do not yield to temptation to buy a second bin. The result would be that after a few weeks or months you would have two half-full bins. One would be decreasing continuously and the other would be more and more full. A half bin of course works only half as well as a full one!
17 TOGETHER WE MAKE TOMORROW MORE BEAUTIFUL OVAM
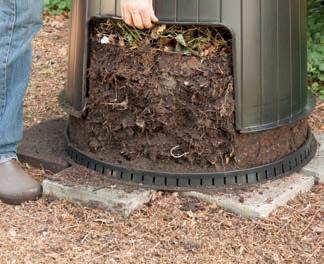
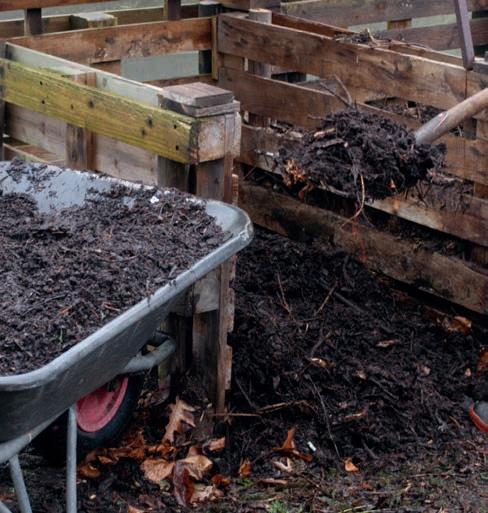
If your bin is full, get down to work and harvest. How you should proceed?
• Shake the body of the bin well, to separate it from its content.
• Pull down the conical bin lightly from the compost and put it aside. Do not be afraid that the heap falls apart. The whole will stay nicely together.
• Examine each layer to see whether the whole content stayed together, and find the half-fermented compost zone where most of the worms can be found.
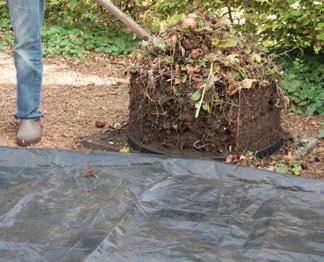
• Layer by layer, use a pitchfork to place first the fresh waste, then the half-fermented material, next to the bin. If your bin stands on the grass, cover it first with a plastic foil.
• If your bin has been working for some time, you will find compost at the bottom and in the lower part of the bin. Put it aside, protect it from the rain and wind and use it in the garden.
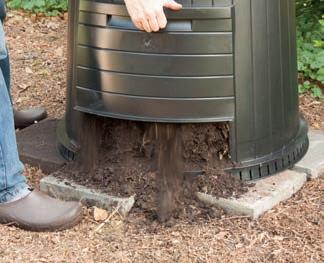
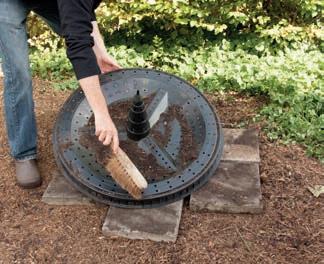
• Clean the bottom plate, the holes and the groove.
• If necessary rearrange the flat stones.
• Start the assembling of the bin: first the bottom plate, then the bin, then 10 cm cuttings.
• Mix thoroughly the fresh and the half-fermented material you just removed from the bin. You may add some more fresh waste to it also.
• Add some dry material if the content is too wet. If it is too dry, spray some water on it.
• Start filling the compost bin on a daily basis.
• After six to nine months – or longer – you can harvest the compost again. From a well-operated bin which is used and filled up intensively, with this method you can harvest compost maximum two times in one year.
18
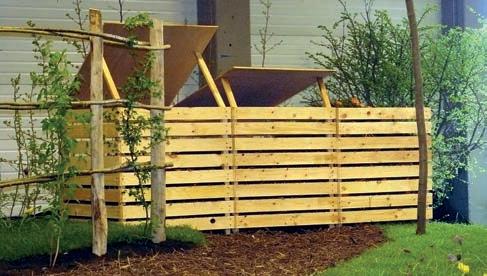
1. COMPOSTING IN BOXES
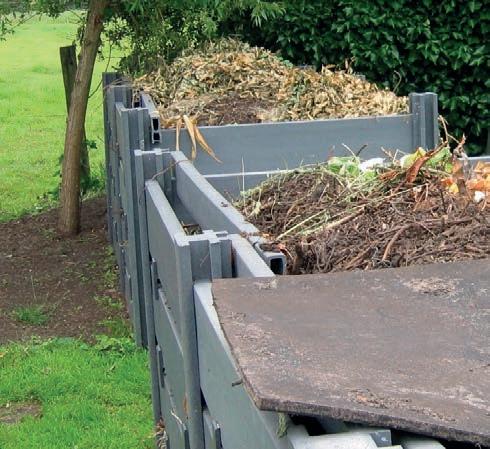
If your garden is larger than a couple of hundred square metres or the quantity accumulating on a regular basis in your garden is too much for a compost bin, then you should choose the compost box. Or even better: several compost boxes. In actual fact you will need at least two to be able to turn the compost once. Better still is to have a triple series. Double turning provides always a better quality compost.
HOW LARGE SHOULD THE BOXES BE AND FROM WHAT MATERIAL?
You should take into account that the quantity of compostable material decreases during the composting process.
Boxes with an area of 1 x 1 m are likely to be sufficient. Limit the height to 1 meter. The total volume is 1 m3 Larger boxes are not really practical because turning the compost becomes a very hard physical work.
Limit also the size of the boxes, but consider that the volume of a box of 0,8 x 0,8 x 0,8 m is barely half a cubic metre.
Whether the compost boxes are made of plastic elements, concrete slabs or wooden boards has little or no impact on the composting process. Mostly wooden boards are in use. Every handyman can manage it, it fits well in the garden, has good insulation and can be made cheaply if some recycled material is used. An important drawback of wood is that it rots. However this problem should not be exaggerated. A compost box from strong boards can last for five years.
At that time some of the planks and the bottom boards may have to be replaced. If you treat it with any (environment friendly) wood treatment solution, then it will last longer. Pallets are also used often. Although their quality can vary a lot, you can get them free of charge and regular replacement is not a problem.
19 TOGETHER WE MAKE TOMORROW MORE BEAUTIFUL OVAM
6.
In a lot of garden supermarkets you can find high qualitative compost boxes made from plastic. They last a lot longer.
During the construction you have to keep in mind three things:
• Ensure the box has a removable front. This allows you to turn the composting material comfortably. Turning is of fundamental importance in composting.
• Use wide boards, with narrow gaps. The (wooden) boards insulate the compost both from cooling down and from drying out. The gaps between them allow the inflow of oxygen rich air into the material. The gaps should not be wider than 2 cm. If the gaps are wider than 5 cm, the content of the bin dries out easily. If you use pallets, the large gaps between the boards can be reduced by nailing on an extra board between them.
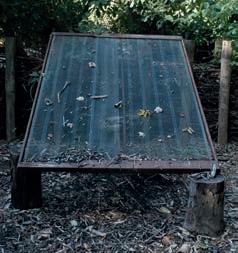
• Cover the box. The (half) mature compost takes up water easily and in large quantities. Therefore, the compost in the last box(es) should be protected with a roof. Under the roof the compost can evaporate the excess moisture by being protected from the rain.
20
Put the compost boxes in an airy, dry and (half) shaded place in the garden. A compost box with its legs in water will not operate properly.
Make room also for yourself so that you can work, screen, transport the material to and from the boxes with a wheelbarrow. Do not barricade the compost boxes in an inaccessible place.
COMPOST BOXES ARE MAINLY FOR GARDEN WASTE
If you have a big garden and you have chosen to use compost boxes, you will have to process much more garden waste than kitchen waste. For compost bins the opposite is true.
Garden waste consists mainly of loose, rigid materials. The only exception being cut grass. The quality of the end-product, the composting period and the number of turns will depend upon the proper mixing of the structure-rich garden waste with the softer cut grass and kitchen waste.
FROM BOX TO BOX
Box 1
Reserve the first box for fresh kitchen and garden waste supplies. Following each new addition, the volume will again decrease. This first box is a box where the organic waste is temporarily stored. Optimal mixing of this stored material in practice is not always possible. In the summer there is always an excess of grass, in the autumn there are always more leaves, and when you start cutting the hedge, the cuttings come after each hedge is cut.
In box 1 you cannot avoid generating such a structure of layers placed on top of one another, in which the living conditions for the decomposing organisms can be called anything but optimal. It might take a few months until the first box fills up to such a level that no more can fit into it. Do not yield to temptation to start filling up the second box!
21 TOGETHER WE MAKE TOMORROW MORE BEAUTIFUL OVAM
Box 2
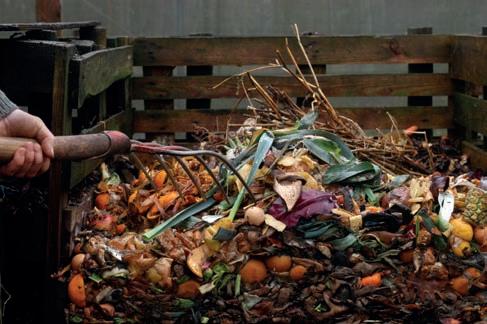
The second box is reserved for the result of the first turning.
With a fork take the material out from Box 1. This works best if you take out its front plate. Then you scrape everything out from it, mix it, aerate it, then throw it into Box 2.
If you did not delay the turning for too long and the digestion process was not in a very advanced stage, then in a short time you can expect that the composting process will be at its peak. This is shown by the warming up of the compost. An increase of temperature of 50 °C or more is not exceptional. Your compost may be so hot that you cannot keep your hand in it. Congratulations, you succeeded in making the decomposing organisms work hard!
It is recommended to make a small roof above the second box. This is especially important when the composting process has progressed a little, and when it rains regularly. Do not cover the compost directly with a plastic or wood board. It is important to allow air circulation between the compost and the roof.
Even if during the filling up of the compost box you paid attention to the right proportion of brown and green materials and to their proper mixing, there are some effects which make the material heterogeneous:
• The outsides dry out due to the wind.
• Inside, due to high temperatures, a dry core may develop.
• Certain materials do not mix too well and become sticky or form a dry core.
• The top layer is exposed to external effects, sometimes becoming moist from rain, sometimes drying out because of the wind.
Therefore the compost should be turned one more time at least one month before to use.
Box 3
You should decide whether or not a third turning, and therefore a third box, is necessary. If the compost in the second box still not meets your expectation after a few months, then live up the composting process once more with a second turning. While the first turning was about mixing, here the emphasis is primarily on aeration.
Make sure that you cover Box 3. In this last phase it is good if your compost becomes a little drier. Now it is mainly the moulds doing the processing, and they, in contrast to the bacteria which were working in the initial phase, work better under lower moisture conditions. Maturing and the accompanied nitrification (the transformation of ammonia to nitrate) are improved if the material is somewhat drier. The pH of the drier compost is also more neutral. Lastly, a somewhat drier compost is also more comfortable for you. Drier compost is lighter and it is easier to shovel, screen and spread on the ground.
The system of boxes and turnings means that you can only turn one box when the next box is empty.
22
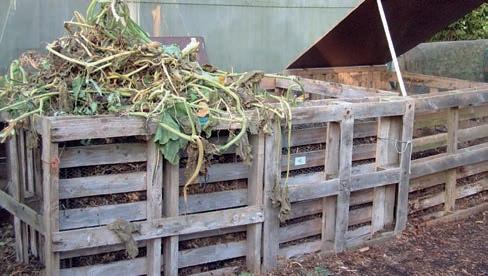
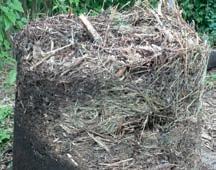
1. COMPOSTING ON A HEAP
Do not confuse the compost heap with a “garbage heap”.
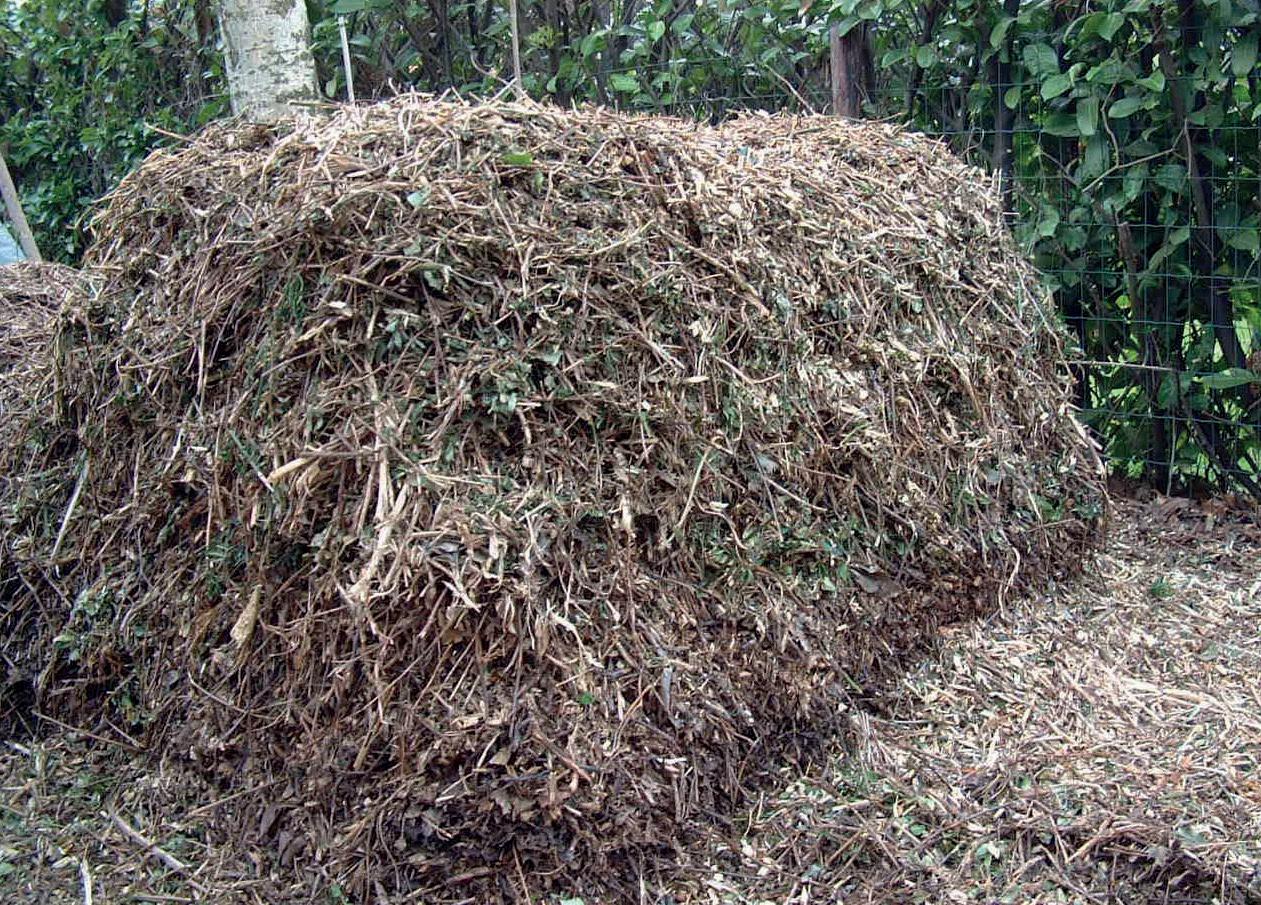
A compost heap is made only once. It is made large enough so that heat generation can take place and the various materials are mixed in such a way that proper moisture content and aeration should exist everywhere in the heap. A compost heap is chosen when several cubic meters of material are available for processing all at once, for example plenty of autumn leaves, a heap of pruned branches. Which are too much for the compost bin system. You can process the lot into a couple of cubic meters prime compost, which comes in handy if you have a large vegetable garden.
The best way to set up a compost heap is that it can accommodate maybe with the help of some temporary side walls the maximum volume on a minimum area. This way we obtain a trapezoid shaped section. The length and the width of the heap has no great importance, these are determined by the available space. Its height should not go beyond one and a half metres. If you use a lot of green material, make it a bit lower. If you process a lot of brown material, it can be a bit higher. Here experience will teach you what the proper dimensions and waiting times are in your case. In making the composting heaps, in addition to good mixing of the brown and green materials, turning is not so necessary for the start of the digestion process, but is more important for obtaining a homogeneous end-product. In the middle of the heap the temperature may rise so much that it becomes too dry, and in the event of lack of protection from the weather, the outside of the heap on the windblown side can dry out. At the very bottom of the heap the flow of air is hindered by the pressure, and the top 30 cm layer clumps together because of the rains in the previous weeks and months. Therefore turning becomes more worthwhile. Carry out turning at least one month before the planned use of the compost. Place the compost heap in a protected place so that it is not exposed to drying winds and violent rain-showers.
23 TOGETHER WE MAKE TOMORROW MORE BEAUTIFUL OVAM
7.
1. COMPOSTING IN A WORMERY
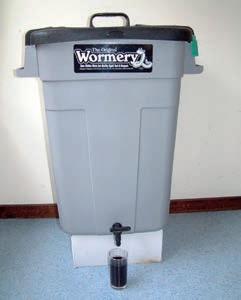
Composting in a wormery is not easy. The most common mistake is to overfeed the worms. In that case the wormery will stink and the worms will die. One must learn to live with the fact that there will be times that you have more kitchen waste then your worms will be able to process. A wormery needs a lot of care. Without supervision a wormery stops its activity.
A wormery can be placed in both indoor and outdoor locations. Outside you need a place sheltered from rain and sun. Inside, a place with a stable temperature of at least 18°C is preferred. There are good working wormeries in garages, basements, stairwells, sheds and even in kitchens.
We can distinguish two types of wormeries:
Mono-wormery:
In a high container with lid - make sure you can reach the bottom of the container with your hand - underneath a tap and double perforated bottom is placed. The organic material is added on top of the perforated plate. Similar containers are available in the market. In this type of wormeries worms can migrate unimpeded through all the layers of the system. To harvest the finished compost you need to remove the semi-mature compost and fresh material first, a leaking tap can cause discomfort, content and operation of the wormery are difficult to check, and this non-continuous system must be fully restarted after each harvest. A lot of things can go wrong in a mono-wormery ...
Stacking-wormery:
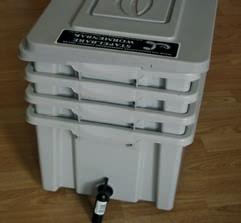
To avoid the mono-wormery-‘problems’ this type of Wormery was designed. It usually consists of three or four conical stacking and nesting boxes (eg. Curver boxes). In the lower non-perforated stacking box you can collect percolate and you can insert a tap. On top and spread over time, you can place (three) stackable boxes with a perforated bottom. With most models, you can also buy a cover.
WORKING WITH A STACKABLE WORMERY
In the undermost of the three perforated trays you start up the composting process. You first apply a thick bedding layer of 5 cm, consisting of straw, leaves, dry herbs or fine wood chips. Cover this bedding layer with a thick handful (about 5 l) starting material with a few hundred compost worms in it. Finally bring a layer of five centimeters of fresh kitchen waste. Cut the kitchen waste into pieces of max. 5 cm length. Give the new system some weeks to start.
24
8.
After several weeks, the worm population is ‘stabilized’, and you can start adding organic material on a regular basis. Bacteria and fungi begin to break down the newly installed kitchen waste. As soon as the waste is sufficiently soft, the worms will start eating it.
When this lower tray is full, after a few weeks or months, a second perforated tray can be placed on the first perforated tray. Put it so that the second can slide into the first as the organic material in the first one sinks. Each tray rests on the material in the underlying tray. The weight and the pressure each tray exert on the underlying material, is negligible. Worms and other organisms should be as free as possible to circulate between the different trays. The dozens of holes in the bottom of the trays may have a considerable diameter. More than a centimeter is no problem. It ensures a good flow of percolate and a smooth circulation of the worms.
When the compost in the lower tray is ready (that is when all the worms migrated to the upper trays), you can remove and empty that tray. With this type of stackable wormeries, you can check the operation and the compost easy and correct, and you can easily harvest by removing the lower tray. With this type of wormery the drainage is good, and the system can operate continuously.
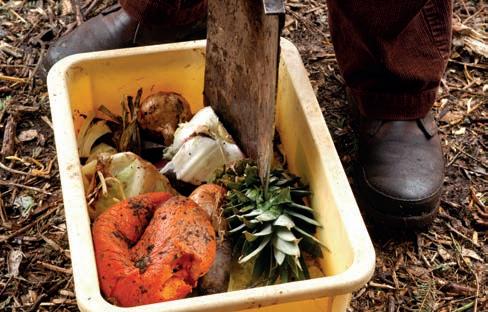
A wormery is particularly suitable for the processing of kitchen waste. You can occasionally add some structure material, but the throughput is too small to throw in garden waste. The following materials are suitable for the wormery:
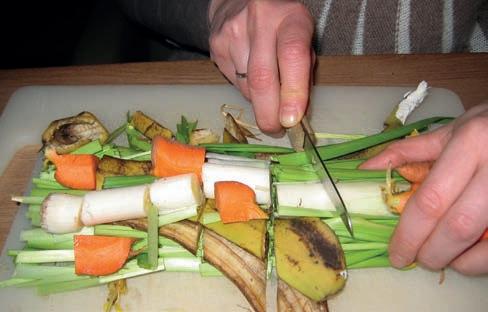
• Vegetable residues and fruit residues: not cooked or otherwise prepared and best cut in small pieces. Caution: don’t make a mush of it! Also potato and citrus peel can be safely processed.
• Used tea and coffee bags.
• Wilted flowers (cut the stems into pieces).
You can cover the composting material with paper from the shredder or cut cardboard egg cartons. This covering also helps avoiding fruit flies. No extra calcium or lime must be added to the wormery! The amount of food that your wormery can ‘swallow’ depends on:
• The proper functioning of your wormery.
• The nature of the waste. A peel of a banana digests faster than a cabbage leaf.
• The size of the kitchen waste.
• The volume ànd the surface area of the tray. Worms work mainly on the surface of the system.
• The room temperature. Ideally, ± 20 ° C. Worms freeze below 0°C and die above 30°C.
Check before adding kitchen waste - and at least once a month - the operation of your wormery. Ask yourself the following questions:
• Do the worms ‘follow’? In a properly functioning wormery you find most worms at a depth of 5 to 15 cm. Is the majority deeper, then you forage too much. Are the worms near the surface, then you should give a little more food. Please note: if the worms climb up the inner sides of the wormery, they try to escape from the acidity and wetness deeper in the mass.
25 TOGETHER WE MAKE TOMORROW MORE BEAUTIFUL OVAM
• What’s the smell? A properly functioning wormery emits no unpleasant odor. When the bin starts to stink, then there are problems.
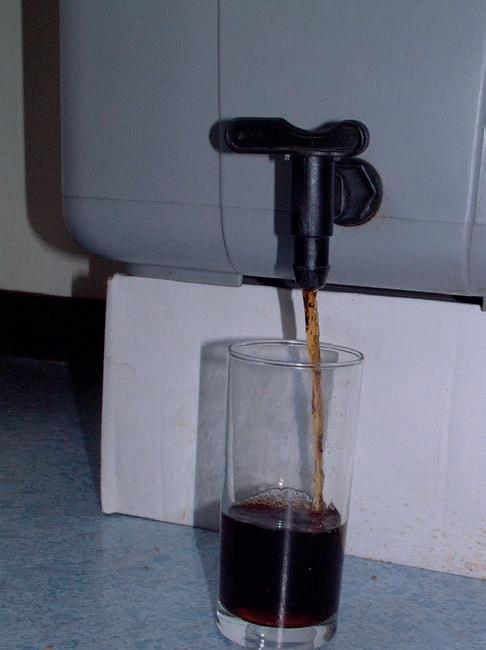
• Are odor and color of the percolate normal? Percolate does not really smell, it has a dark brown color and it is slightly alkaline.
If the worms work well, percolate drips into the non-perforated tray underneath. The amount of percolate can vary widely. Note that the level of percolate never rises as high as the bottom layer of compost. Percolate can be used as fertilizer for potted plants. Since it is naturally very rich in nutrients (especially potassium, magnesium and calcium) and salts, percolate must always be diluted (one part percolate to ten parts water). You do not have to use percolate immediately after harvesting; you can save the undiluted percolate for a few months in a bottle.
HARVESTING IN A STACKABLE WORMERY
Compost of a wormery is alkaline (pH ± 8) and rich in nutrients substances and nutrient salts. Since these concentrations are so high, you should never sow or plant in pure wormery compost.
Wormery compost is quite moist, when harvested. You’d better let this compost drain for several weeks and dry before you use it. This can be done for example by placing the lower perforated tray containing the most mature compost, a while on the top bin. The final percolate and the worms then disappear out of the tray with the harvestable compost.
26
9.
1. PROBLEMS DURING COMPOSTING
Even when you are an experienced composter, the composting process can go wrong.
Odor
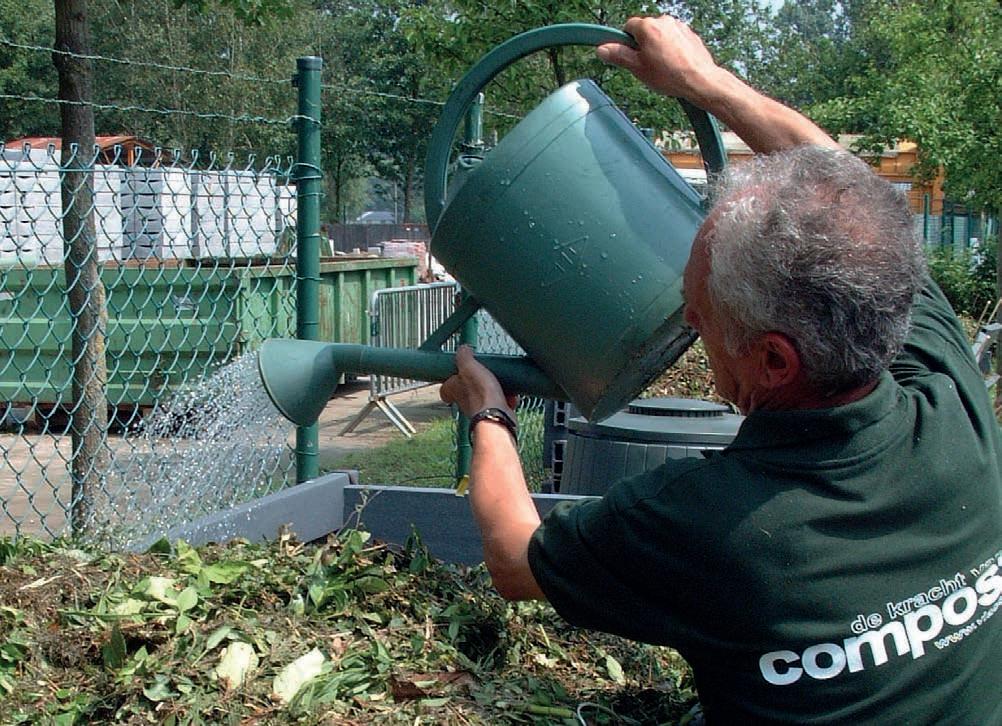
If your compost smells unpleasant, it has to do with poor ventilation. Converting or aerating with the aeration stick will often not be sufficient to resolve the problem. Take a few bags of wood chips, find dry leaves in the garden or grab some straw, and mix it intensely with the stinky material. Add from that moment on, along with kitchen waste or grass, a portion of this brown material.
Dried
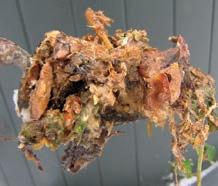
If you, after a few months of composting, find out that inside your box or bin not everywhere digestion or composting took place, then it is likely that the content is too dry or too ‘brown’. Turn the compost and do the squeeze test. Mix if necessary, a thick blanket of fresh grass clippings, kitchen waste or - if you have one –manure under it, and / or moisten.
Pests
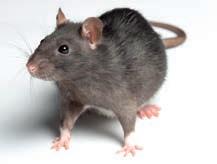
If you control the composting process regularly, you will not suffer from pests. You can use chicken wire on the sides of your box or bin to prevent problems with rats. In compost which is often converted, they will not nest. Do not panic if you detect an anthill in your compost. Also ants actively contribute to the composting process.
Flies
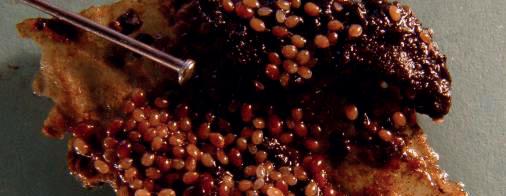
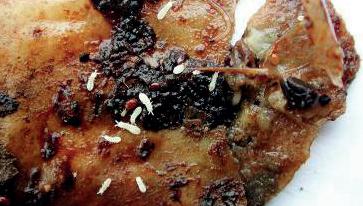
They are attracted by meat, animal products and fish. All the more reason not to compost these materials.
Fruit flies
For many composters fruit flies are quite a problem. They are not harmful, but their number can be exceptionally large; especially in summer. How can you limit the nuisance of these fruit flies to a minimum?

• Mix the green kitchen waste with plenty of brown material.
• Cover the composting material with mature compost, grass clippings, large (rhubarb) leaves ... so that the adult fruit flies do not again have access.

• Aerate regularly with the aeration stick.
• Keep the vessel a few days open. Although it is not a permanent solution, a large part of the flies will escape the bin.
• Do not apply pesticides, the remedy is worse than the disease. Looking for more natural remedies.
• Keep the (inside) wall of the wormery dry for several days. Use a bad dish cloth for it and rinse three or four times each day.
When you compost in a wormery and this tank begins to smell unpleasant, then you should quickly intervene by:
• Checking if there are worms. The worms flee from the places where conditions are the worst (usually at the bottom of the tray).
• Aerating the material and adding a handful of bedding material.
• Temporarily stop feeding.
27 TOGETHER WE MAKE TOMORROW MORE BEAUTIFUL OVAM
smells unpleasant
Wormery
1. THE QUALITY AND USE OF YOUR HOMEMADE COMPOST
QUALITY
Three things can help you to determine the quality of compost.
1. input materials
2. how you monitor the composting process
3. some simple observations
The end quality of the compost is determined by the materials that were processed. If you added mainly kitchen waste or manure and grass, then the nutrient content will be high. The salt concentration will also be higher and during use you have to make sure to dilute the compost. There is also the risk that your compost will be quite moist and give off a reminiscent scent of forest soil.
On the other hand if you compost a lot of hedge cuttings and pruned branches, your compost will be interesting mainly as a soil amelioration material and a humus source.
The composting process itself is at least as important as the input materials. Regular aeration, turning, the provision of moisture and covering guarantees a homogeneous end-product that is well matured, has a moisture content that is not too high, a stable nutrient content, a neutral pH, contains few seeds capable of germinating (weeds), has a salt content that is not too high and a balanced nutritional value.
There are some simple tests that you can easily carry out yourself that will provide a good picture of the quality of your compost. There is a precise relationship between the individual parameters that determine the quality of the home-made compost. If your compost shows good results in the following tests, you can rightly assume that more expensive chemical analysis would also show positive results.
Take the samples always from the inside of the compost. Don’t be misled by the outside appearance of the compost. This, in the majority of cases, is dried out or, due to violent rainfalls, is, on the contrary, soggy. Its temperature will also differ from the inside temperature.
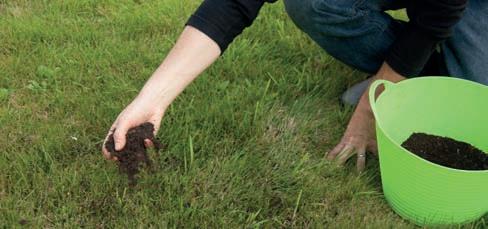
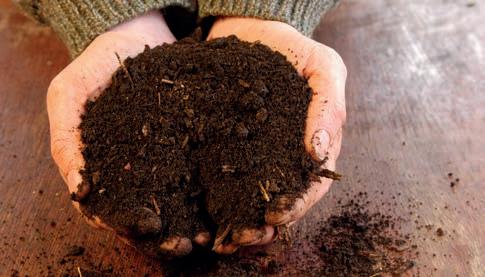
Watch it
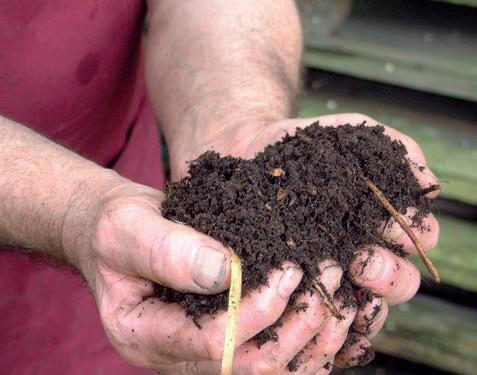
During and at the end of the composting process put some compost regularly in your hand and observe it. If you see a lot of life in the material, you made a good work. Worms, millipedes, mites, but also white mould strands of moulds all indicate a healthy decomposition process.
Smell it
Compost with an unpleasant smell does not contain sufficient oxygen needed for good composting. Kitchen or garden waste put in a few weeks or months ago has been only partially digested. In the course of good composting special fauna and flora will become active. The same organisms can be found in forest soil, and many of them generate odorous materials from which they can be identified. It is no accident that good and mature compost smells like forest soil.
28
10.
Check the homogeneity
If the end product (compost) contains a half-digested bundle of leaves, lumpy cut grass or cooked potato peels, it was not properly turned and aerated.

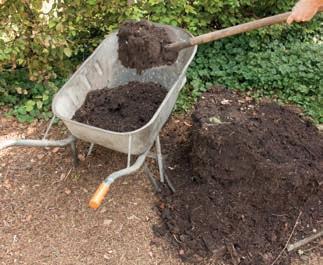
Crumble it
As the compost ages it becomes crumbly. Compost ready for use is a mixture of half-digested branches and leaves mixed with very fine crumbly clay and the faecal matter of worms and other compost-organisms.
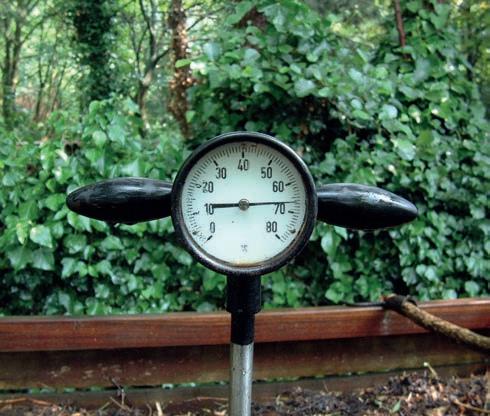
Temperature test
A higher temperature in the compost (after turning) than the outside temperature is a clear sign of (digestion) activity. Temperatures higher than 50°C give proof of the fact that weed seeds and pathogenic bacteria were destroyed (of course only in those places where the temperature was really that high). For good composting (for nitrification, for the development of worms and similar organisms, for the evaporation of the excess moisture, etc.) a temperature of 20 to 30°C is enough.
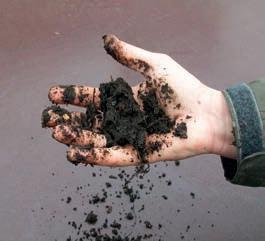
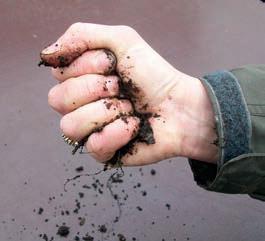
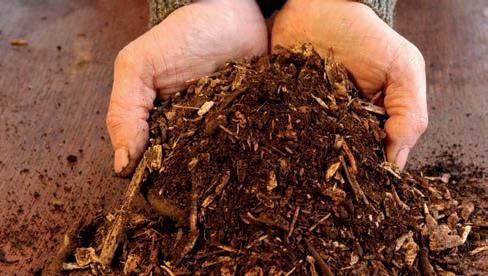
Squeeze test
The squeezing or fist test gives a good picture on the structure and moisture content of the material to be composted. During squeezing, you may notice no or only a few drops of water between your fingers. When you open your fist, the composting material stays on your hand in a compacted ball, but you can easily crumble it into several smaller pieces. In this case, the structure of the composting material is OK.
Sowing test
A final test to determine whether the end-product is suitable for sowing and planting into it is the planting and sowing test. It is obvious that first you should test it on some seedlings and with some seeds to see if any problem occurs. This way you can prevent any future disappointment. If you think that the salt content of your compost is quite high, make a test using diluted compost and mix one part of compost with one or two parts of (pot) soil and/or sand.
29 TOGETHER WE MAKE TOMORROW MORE BEAUTIFUL OVAM
COMPOST USE
Compost has many benefits. Whether it’s professional produced compost or home compost, the benefits are broadly the same:
• Compost enriches the soil with organic matter.
• Compost feeds the soil.
• Compost owns slow-acting fertilizers. The nutrients are only released when the plants need it: faster in hot and humid weather and slower when it is cold or dry.
• Compost improves soil structure which causes heat, water and nutrients are better retained.
• Compost makes clay soils airier and optimizes moisture retention capacity of sandy soils.
• Compost brings the acidity of the soil to an optimum value.
• Compost reduces the temperature differences between day and night.
• Compost keeps the soil particles together and prevents soil erosion by wind and water.
• Compost protects the plants against pests and diseases.
• Compost - many believe - improves the taste of vegetables.
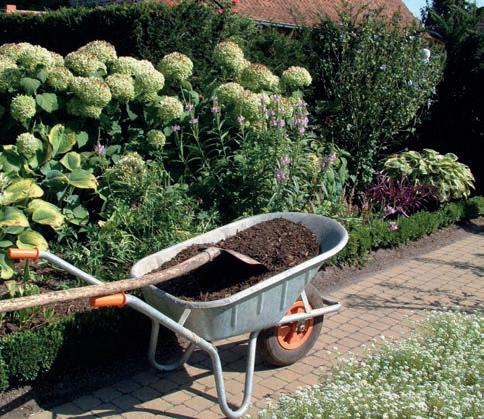
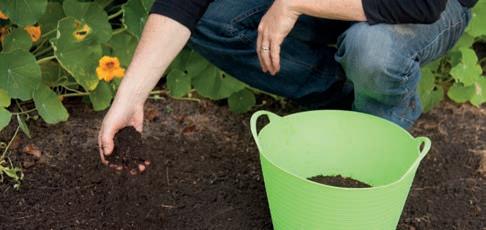
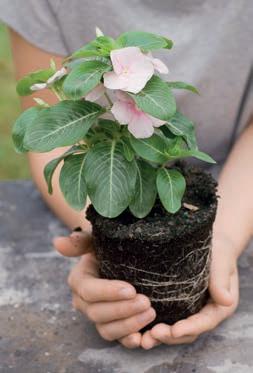
Compost improves the quality of soil in many different ways and you can use compost in many different ways. On your lawn, between your perennials, in the vegetable garden, in the fruit garden, as a mulch layer, in pots, in your selfmade potting soil …
Compost is the best food for the organisms living in the soil. They mix the organic material from the compost with soil particles and turn it into crumbly soil. The plant roots can grow well in this environment while searching for water, air and nutrients.
30
If you use young compost that still contains significant amounts of half-digested leaves, bark and branches, the soil organisms, including worms, will still find many good nutrients in it.
This will also improve the soil structure. The nutrients from the compost will slowly but surely be available for the roots during the coming months.The best use of such young compost is to spread it as soil cover (mulch layer) or mix it only with the top few centimetres of the soil.
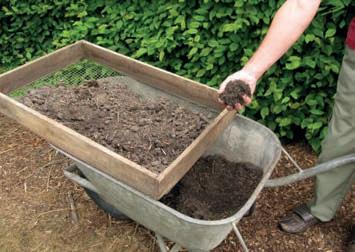
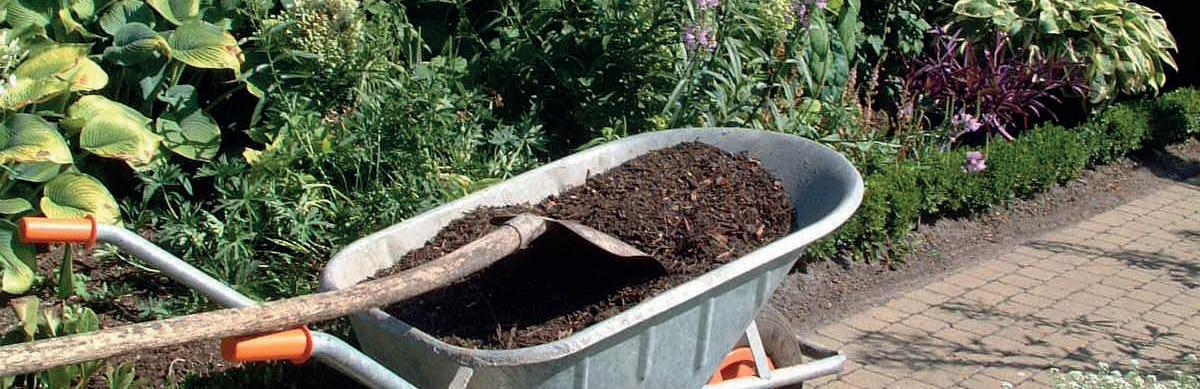
If you let your compost mature more into a very fine, crumbly end-product, then there will be less work for the soil organisms, but the nutrients will be released faster. The matured compost can be worked into the soil and you can use it as a base material for making potting soil. It’s up to you whether you will sieve it before use, or not. If you use the compost as a sort of mulch sieving is not required, if you use it in the vegetable garden sieving can be considered but it is not obliged, if you use it in pots, as a top layer on your lawn, or in potting soil, sieving is necessary.
Finally you have to find out how you can fit your own-made compost into your garden cultivation in the best way. Both quality and use differ considerably from garden to garden. Quality is determined by the input materials, the number of turnings, the handling of moisture content, the weather conditions, etc. And use depends on the type of garden you have, on the type of soil, on your own gardening experience, on the crops you want to grow etc.
31 TOGETHER WE MAKE TOMORROW MORE BEAUTIFUL OVAM

32 Vlaco npo Stationsstraat 110 | 2800 Mechelen | Belgium T: +32 015 451 370 | F: +32 015 218 335 www.vlaco.be Legal deposit: Rudy MeeusVLACOStati onsstraat 110, 2800 Mechelen, Belgium OVAM Stationsstraat 110 | 2800 Mechelen | Belgium T: +32 015 284 216 | F: +32 015 203 275 www.ovam.be Ge ng more out of the organic cycle
