PHILOSOPHY
The purpose of Southern Baptist Disaster Relief efforts can be summed up by looking at biblical accounts of Jesus’ teaching and healing, such as feeding the multitudes, the parable of the Good Samaritan, and urging followers to minister to others in a variety of ways (Matthew 25:3246).
Southern Baptist Disaster Relief is Christian love in action, responding to hurting persons and seeking to alleviate their needs whatever they may be. Disaster relief involves caring for people responding to hurting people in a timely way. James 2:14-18 is one of many scriptural foundations for Southern Baptist Disaster Relief.
PURPOSE
The purpose of this feeding manual is to provide guidance and information for disaster relief volunteers engaged in feeding operations to promote and ensure consistent procedures for the safe storage, handling, preparation, and distribution of food to disaster clients and workers. The manual is designed as a resource to support state conventions disaster relief and to supplement state conventions training endeavors. Nothing in the manual is to be construed as overriding state and local laws and regulations, nor are the guidelines designed to replace appropriate procedures currently being used in state convention disaster relief training.
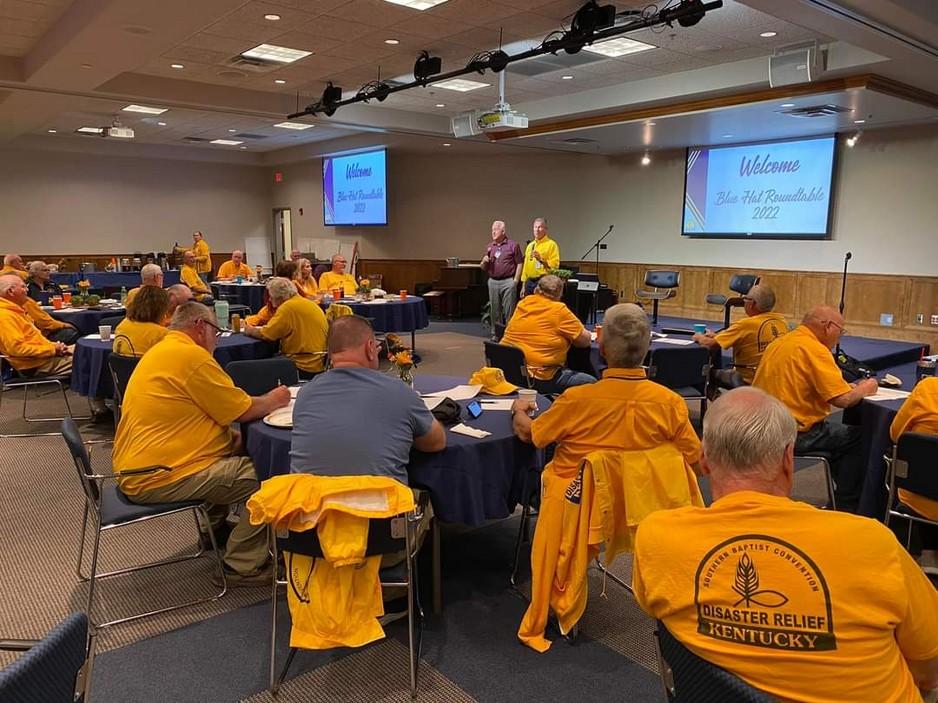
Each Baptist convention will train and maintain volunteers as described in this Feeding Manual.
SBDR leadership has chosen to use hats for recognition of leaders. These have been found to make key leaders easily identifiable at operational sites.
Specialized Training
Incident Commander (White Hat)
The incident commander is the leader of the ICS (Incident Command System) team. The incident commander should have FEMA training.
Feeding Operations Chief (FOC)
This position coordinates the field kitchens and is direct liaison to activating agencies (state/county EOC, American Red Cross, The Salvation Army, etc.). This person should have ServSafe Manager certification. This person is part of the Incident Management Team (IMT).
Blue Hat/Field Kitchen Manager
State conventions should work to ensure that all feeding Blue Hats have a ServSafe Manager certification.
Feeding Unit Disaster Relief Volunteer (Gold Hat)
A feeding unit disaster relief volunteer should be trained by the state convention in a comprehensive training program based on ServSafe principles and disaster relief field operations.
Individual states have various sized feeding units. These are classified in the following:
Type I (D) feeding unit
Capacity to prepare above 20,000 meals per day
Equipment will include at least six 30-gallon (or larger) pieces of cooking equipment including ovens or equivalent equipment (tilt skillet, steamer, kettle, or combination convection oven/steam oven)
Recommended minimum 50 volunteers
Type II (C) feeding unit
Capacity to prepare up to 20,000 meals per day
Equipment will include four 30-gallon (or larger) pieces of cooking equipment including convection ovens or equivalent equipment (tilt skillet, steamer, kettle, or combination convection oven/steam oven)
Recommended minimum 40 volunteers
Type III (B) feeding unit
Capacity to prepare up to 10,000 meals per day
Equipment will include two 30-gallon (or larger) pieces of cooking equipment including convection ovens or equivalent equipment (tilt skillet, steamer, kettle, or combination convection oven/steam oven)
Recommended minimum 30 volunteers
Type IV (A) feeding unit
Capacity to prepare up to 5,000 meals per day
Equipment will include stove burners, cookers, and double boilers and at least one convection oven or tilt skillet
Recommended minimum of 15 volunteers
Type V (QR) feeding unit (this is considered a Type IV by FEMA standards – Type V is for SBDR only)
Capacity to prepare <100 - 2,000 meals per day
Equipment can include roasters, six burner stoves, regular oven, tilt skillet, convection oven, griddle.
Recommended 6-10 volunteers.
Usually responds for a week or less before transferring to larger kitchen.
Type VI (Fixed/Church Kitchen) feeding unit (this is not on FEMA standards –Type VI is for SBDR only)
Capacity to prepare 75-200 meals per day
Typical home kitchen or commercial equipment may be available
Recommend 4-6 volunteers
Responds if crews are working.
All unit capacities are based on using canned, pre-cooked frozen or raw food. The unit should be able to sustain this type of production for two weeks based on a 12–15-hour day and preparation of two meals a day for disaster survivors, plus breakfast for the crew or three meals a day for crews.
Mega Feeding Sites
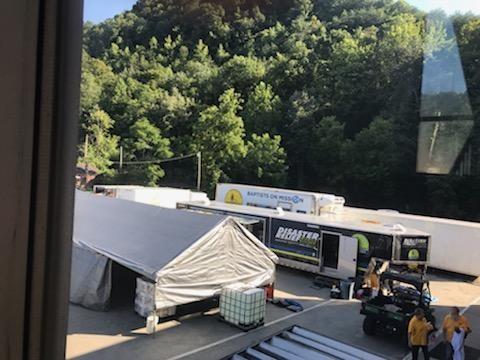
Mega feeding sites are set up at the request of the affected state convention in cooperation with our partners for the purpose of generating a higher daily meal count than a type I (D) unit (30,000 meals) can produce. The site location in the affected community could very possibly be something other than a Southern Baptist church facility, such as a fairground, school, community center, or shopping center, due to the large number of volunteers, support equipment, and materials needed for the operation.
In the cooperative spirit of SBDR volunteers, mega sites have been successful in meeting the needs of affected communities and our partners. Clear, concise communication up and down the chain of command is the foundation of our success. First, the affected state convention disaster relief director assigns the Site Coordinator (white hat), whether the mega feeding site is a one or multi-state operation. This person reports to the IMT. To maintain clear lines of authority and community the FOC reports to the Site Coordinator and the Blue Hat reports to the FOC.
The following points should be considered when operating a mega feeding site:
1. One experienced Site Coordinator or Incident Commander (IC, white hat) should be running operations.
a. It is recommended this person be familiar with mass feeding.
2. The Site Coordinator may appoint others to assist in managing the site, organized based on ICS principles. Clear lines of supervision and communication are critical to avoid compounding an already chaotic situation. For example:
a. An Inventory Coordinator who keeps up to date regarding food supplies and deliveries on site
b. A Trash Coordinator who facilitates the collection of trash and keeping the site clean
c. A Menu Planner who facilitates planning several days of menus with the Inventory Coordinator and our partner Kitchen Manager (i.e.: American Red Cross, The Salvation Army)
3. If multiple units are on site, each unit should be led by a Field Kitchen Manager (blue hat).
a. A coordination meeting should take place daily.
b. Cooperation is crucial.
4. A relationship with a partner kitchen coordinator is essential.
a. He/she is responsible for securing the food, distributing the food by ERVs, canteens, etc.
b. This person should be a part of the daily update meetings with SBDR.
5. Cooking large quantities of meals produces a lot of trash and strains the equipment.
a. This type of operation is larger than most volunteers have seen. It can be intimidating to SBDR volunteers if they are not prepared.
b. The key is trained, experienced leadership (Site Coordinator/White Hat and Blue Hat/Field Kitchen Managers) in food preparation and delivery.
c. Coordination and cooperation are crucial.
i. A mega feeding site is not the place or the time for on-the-job training of key leadership.
ii. Additionally, key leadership should remain stable; that is, the Site Coordinator should remain on site for a given period (at least one week and preferably two weeks).
iii. The same is true for the Blue Hat/Field Kitchen Managers—they should remain onsite for a minimum of one week. Leadership changes after only a few days will complicate the ministry.
Mass Feeding Sites

Much like a Mega feeding site set up, a Mass feeding site will service 5,000-30,000 meals per day.
This kitchen can be staffed with volunteers from one or more SBDR conventions.
As on any site, sufficient kitchen equipment and wrap-around equipment (i.e. forklift, dumpsters, port-a-pots, lights, etc.) is needed for the number of meals to be prepared.

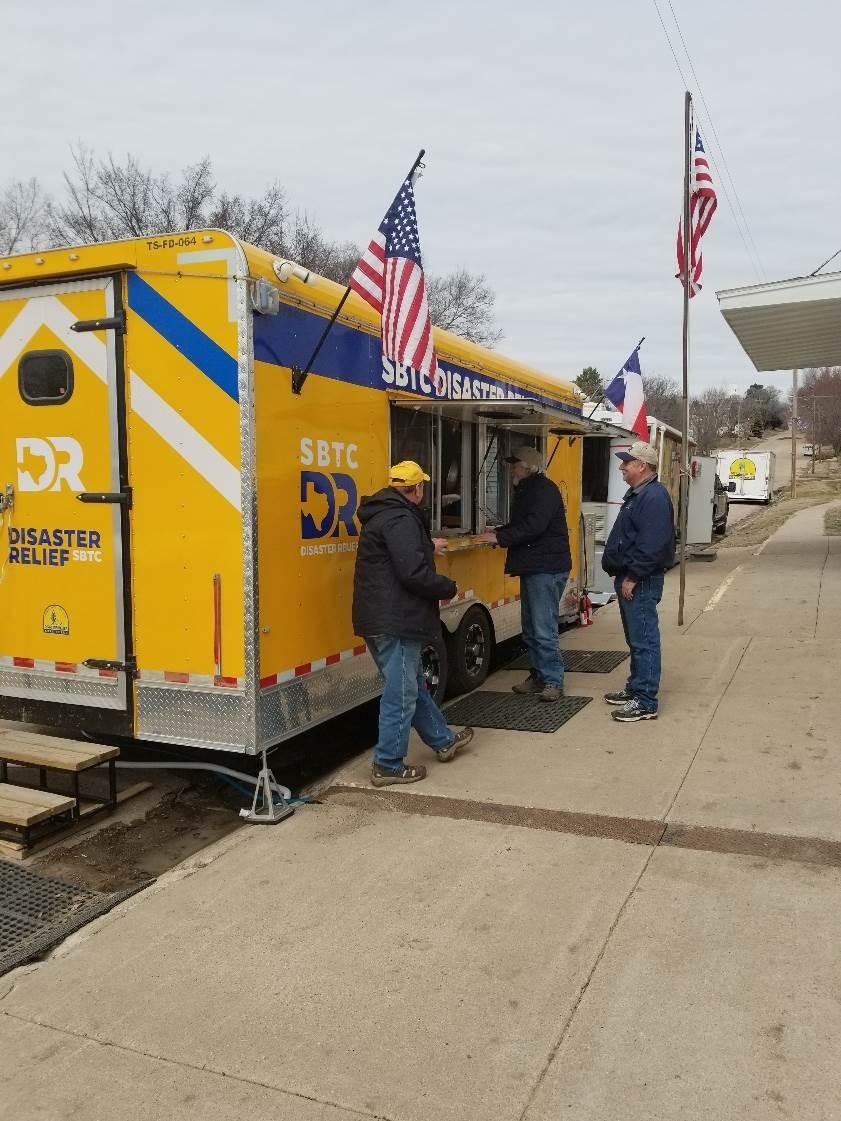
This kitchen is different from what most Disaster Relief volunteers are accustomed to. It is mobile, fully functional, and self-contained. QRUs are NOT designed for the purpose of mass feeding (though they can be
used in that context). They are designed to serve oneten people at a time as they walk up to the Unit.
In deploying a QRU with a crew of 3-5 volunteers, 2-3 will be serving inside the Unit and 1-2 will be outside the unit serving people and striking up conversations to share the Gospel.
The first word in the QRU acronym is “Quick.” The unit is designed to be quickly on site and can be moved to another site just as quickly. In deploying a QRU, think in terms of hours and not days. A successful QRU ministry remains ready to be deployed within 2 hours of being released to go. The idea is to be on-site in the Disaster Area and serving food the day of or the day after the disaster occurs. Normally, a QRU deployment usually lasts for 3-5 days.
The number of meals a QR is capable of depends on the equipment in unit. The total number of meals can range from less than 100 to 2,500 per day in a mass feeding context. But the emphasis in training needs to focus on feeding less than 200 meals a day. The volunteers needed depend on the specific equipment and the number of meals you plan to prepare. If you are preparing a small amount and serving out the window, 36 volunteers are sufficient. This allows the volunteers to travel with unit in one truck.
Each unit is unique: some with roasters, some with stove, oven, grill, deep fryers, and some with tilt skillets and convection ovens. Your convention needs to decide on which unit best serves your needs. If you are cooking inside the unit, you will need a vent hood and fire suppression (preferably built in).
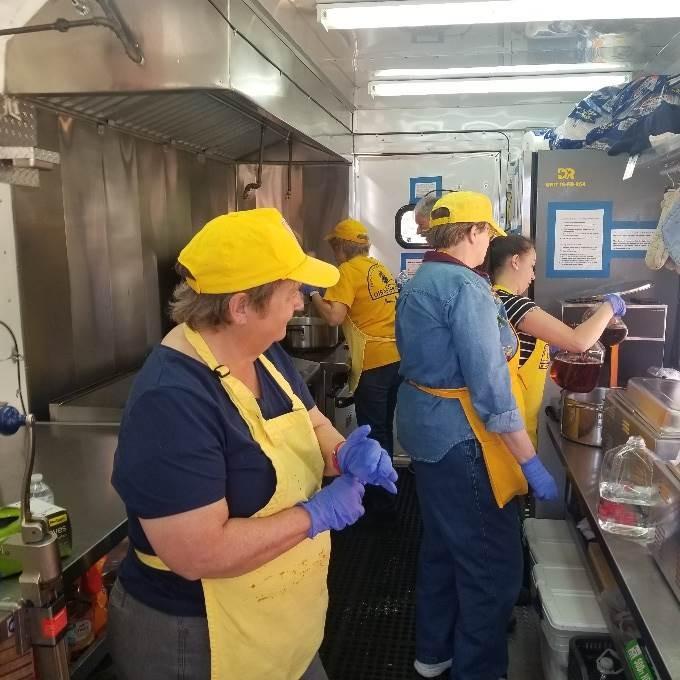
Other equipment to consider will be:
Proper storage, both dry and refrigerated Propane tanks
Generator
On demand water heater 9
Holding tank for both fresh water and gray (waste) water
Tables
Pop-up tents
Coffee maker and Ice chest for drinks
Each unit should have a copy of the operating manual. You need to determine what size vehicle is needed to tow the unit and transport volunteers, and gear to the site, depending on loaded weight of the unit.
Call-out follows typical standards (Go, where the team will be going, where you are staying, number of expected meals). It is always a good idea to know what locations will be available for you to obtain supplies or if they all must be shipped in. Usually, however, this information is not fully known before a QRU rolls out.
An example of a deployment conversation for a QRU often goes like this: “There was a storm last night in Small Town. Several homes were involved, and we are not sure of the extent of the damage. We need you to go there and find a place to serve survivors. Contact us when you get set up.”
In some instances, a QRU may discover that a larger kitchen is needed in the area. If determined that the QRU is not large enough for the event, a larger unit should be requested ASAP, but the QRU will give you time to call in bigger units and start mass feeding.
Fixed Kitchen
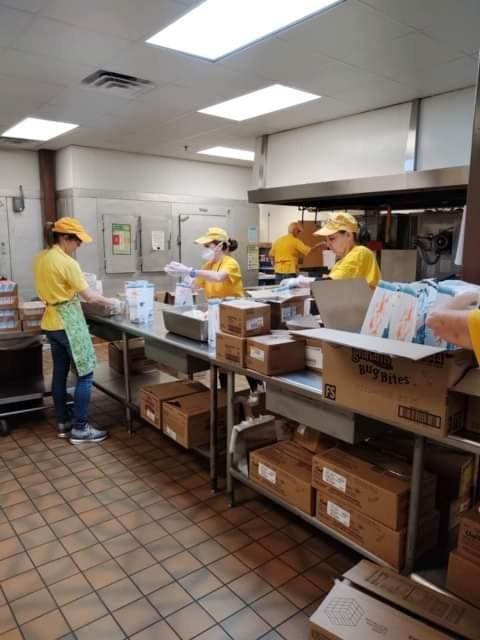
A fixed kitchen is any kitchen in a permanent building and may be in a school, church, or business. It is usually used to cook for small groups or teams.
• Introduce yourself and complete kitchen facility form person legally authorized to sign. It is helpful to have the kitchen person walk through with you later. They will be your best person for specific information.
• Develop a working relationship with host kitchen staff more than anyone else. used. Ask if there is need.
• Take pictures of the refrigerator, storage area, pictures of damage, clean.
• Do not re-arrange good pictures to return
• Post information. Name of facility, address, and number for IC office; emergency contact for building maintenance; and hospital and walk-in clinic numbers and addresses. Daily information should include today’s date and menu.
• Create a “Kitchen Folder” with initial pictures, contact information (for maintenance, emergency, church, facility agreement, trash info, where to shop with address, any other special information).
• Locate the fuse box, water and gas cut off. Make a map or note and place in Kitchen Folder. This may be done when you fill out the agreement or could be with maintenance or kitchen person.
• Can circuits handle several appliances? If not have a generator with long electric cords, if needed.
• Locate the extinguisher and fire alarms. Mark with tape. Place information in Kitchen Folder.
FOOD SUPPLIES AND STORAGE
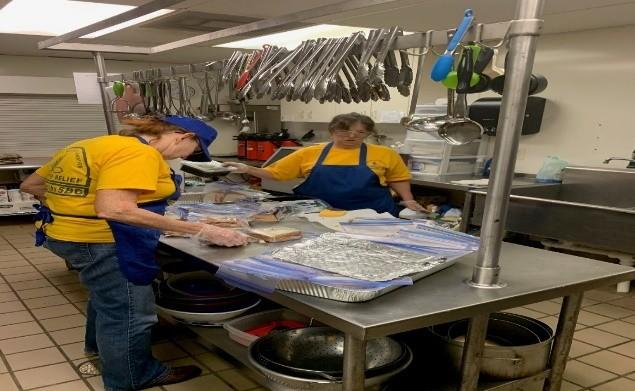
Locate trash dumpster and alternate dump sites. Find out days for dumping and how to handle extra dumps or increased service. Information should be placed in Kitchen Folder.
Know Recycle Procedures. Use them and train workers. Information should be placed in Kitchen Folder.
• Inventory food supplies and available equipment. Inventory the day you receive food and keep a running inventory. Pass it on to the incoming inventory person, either a paper copy, Google Drive or on a thumb drive. See inventory sheet in Appendix.
• Make sure equipment is clean and working orders It should be cleaned before use.
• Where to obtain food. Purchase from approved food sources and you can determine whether to use donated food for the team, but not for the public. Your local kitchen person will be a great information resource. Put information in Kitchen Folder.
• Menus are determined by availability of equipment, food, and time constraints. Plan and serve meals, with situational awareness, such as hot or
cold days, repurposing leftovers, number of volunteers, equipment, and supplies on hand, etc.
• Store items in areas relative to planned use and 6 inches off floor and 4 inches from wall. Ask if there is extra room you can store food. Have extra pallets to use for keeping food off floor.
• Be prepared for heavy cleaning. You may need special cleaning supplies. Clean before using, clean daily, and deep clean before final walk through before leaving. Check pictures to make sure everything is back to its original location.
Key Points to Remember
Equipment. Test as soon as possible before using and report any damage.
Label all DR Equipment. Use black marker to make X on bottom of pots and pans, make circle around upper handle on utensils; use tape if marker will not work. Renew as needed. Store in a separate area, if possible.
Label all leftover food. Label with date and the name of food if it is not obvious. Dispose of food not marked.
Basic Food Handling Procedures in Refrigerator.

Ready to eat food on top shelf
Leftovers in the middle
Poultry and raw meat on the bottom
Designate area for sandwich items.
Open wire, unlined shelves for proper circulation
If in doubt throw it out! No date DUMP it.
If church supplies cannot be moved out of refrigerator mark it and put in one area as much as possible.
Call an appliance store to see if you can borrow a refrigerator if needed.
FOOD ORDERING
The Kitchen Manager places order,
o Must obtain authorization at the activating organization’s operations center
o Orders are placed directly with approved vendors, USDA, Feeding America, or other local Food Bank.
A menu plan has been prepared to ensure the correct portions.
Utilize an approved food source. There may be food items available to order from USDA, Feeding America, or a local Food Bank. Be sure to contact the local school superintendent, if possible, regarding the availability of food available from closed schools.
Be practical when ordering, when available, but be prepared to safely prepare raw meats.
MENU PLANNING
The Kitchen Manager will plan the daily menus in coordination with head cook and inventory personnel.
Remember some food products take much longer to prepare than others so plan one easier and one harder meal per day.
Plan menus that will utilize all cooking equipment (convection ovens as well as tilt skillets).
Make time adjustments if preparing raw foods. Preparing raw foods requires:
o More time, equipment, and volunteers to prep items.
o More time to clean between items to prevent cross contamination
o More time to cook each part of the menu
o More time to clean up after
o More space to safely accommodate food waste
Take into consideration regional food preferences.
FOOD PREPARATION
To produce the number of meals needed during a major disaster, canned and/or frozen precooked food is preferred but raw food preparation may be necessary.
The following guidelines should be remembered.
Meats, vegetables, and fruits in #5 or # 10 cans are usually necessary during the first two to three days of food preparation.
Individual servings of fruit/pudding in 4 oz. cups are preferred to desserts when available.
Frozen, precooked, or raw food ingredients can be used if necessary.
All food used must come from approved food sources.
DISTRIBUTION
Feeding assessment should be done in conjunction with local churches, local Emergency Management, schools (if operational) and the public. This will determine the number of meals, location of fixed sites and possible distribution.
Prepared food distribution can be accomplished in several ways. Puerto Rico kitchens prepare the food, which is stored or transported in Cambro’s® to maintain the proper serving temperature.
Feeding lines are done at the site of the Feeding Unit.
Local churches or community resources may distribute the food from fixed feeding sites. Fixed feeding sites bring the food closer to the disaster survivors.
GUIDELINES FOR PREVENTION OF ACCIDENTS
To Prevent Injury
1. Do not touch electrical outlets or appliances with wet hands or while standing on a wet surface.
2. Contact the Unit Director or Maintenance team to replace worn or damaged electrical cords, plugs, etc.
3. Learn to operate mechanical and electrical equipment (coffee pots, slicers, etc.) before using them.
4. Always close drawers and cupboards.
5. Have sufficient light in work areas.
6. Never touch down lines of any kind.
To Prevent Fires
1. Make sure there are no gas leaks before lighting a gas stove or other appliance.
2. Keep type BC or ABC fire extinguishers in convenient places throughout the cooking area. Each extinguisher should be a minimum of 5 pounds.
3. Remember PASS to use the fire extinguisher correctly.
P = Pull the pin
A = Aim at the base of the fire
S = Squeeze the handle
S = Sweep the extinguisher back and forth, remembering to aim at the base of the fire
4. Follow safety requirements when refueling is taking place. Extinguish all fires, including pilot lights, before refueling starts. Check connections with liquid soap before re-lighting gas appliances. Avoid use of flammable cleaning fluids. Store all flammable fluids away from fires.
5. Extinguish grease fires by clamping a tight lid over the flame to starve it of oxygen. Be sure hands, arms, face, and body are protected. Never use water to put out a grease fire.
To Prevent Burns
1. Turn equipment handles away from the edges of stoves and tables to prevent tipping.
2. Wear gloves or use well-padded, dry potholders to handle pans and lids. Never use towels or aprons as potholders. Never use latex gloves around oven or open flame.
3. Wear oven mitts to remove pans from ovens. Protect arms.
4. Lift lids from hot pots slowly, the furthermost edge first. Let steam escape away from face and arms.
5. Keep matches in covered cans and provide metal containers for burned matches. Preferably use long-handle butane lighters.
6. Avoid use of flammable cleaning fluids. Store all flammable fluids away from fires.
7. Extinguish grease fires by clamping a tight lid over the flame to starve it of oxygen. Be sure hands, arms, face, and body are protected. Never use water to put out a grease fire.
To Prevent Cuts
1. Provide a holder and a safe storage place for knives. Do not store knives loosely in drawers with other utensils.
2. Wash knives by themselves; do not put in dishpan with other utensils.
3. Use broom and dustpan to pick up broken glass, wrap well, mark clearly, and place broken glass in special container for disposal.
4. Can lids should be stored in an empty can, never put loosely in a garbage container.
GUIDELINES FOR SAFE FOOD HANDLING
Personal
Do’s
1. Wear clean, washable outer garments.
2. Wash hands frequently with soap and water and dry with a clean paper towel.
3. Wash and dry hands carefully after using the toilet.
4. Wash and dry hands carefully after smoking or vaping.
5. Keep your fingernails trimmed and free of dirt.
6. Wear gloves made of proper material for the task.
7. Use forks, tongs, spoons, and ladles in handling and serving food.
8. Wear hair covering, uniform cap, or hair net at cooking and serving sites. No pins on hats, visors, or lanyards.
Do Not’s
1. Handle food if you have signs of disease or illness, cuts, infection, sores, diarrhea, sore throat, cold, or congestion.
2. Sneeze, cough, or blow nose or scratch scalp near food.
3. Moisten fingers by putting them in your mouth.
4. Use tobacco while working around food.
5. Touch sanitized eating utensils.
6. Take medicines in food prep or serving areas.
7. Wear aprons to the restroom.
Work Areas
1. Follow all guidelines for food handling and sanitation.
2. Keep walking and standing areas free of standing water.
3. Keep passageways, stairs, serving areas, and work areas clear of boxes, tools, or other obstructions.
4. Remove or cover spilled grease, fat, oil, water, or food immediately. Clean area and cover if still slippery.
5. Wear suitable shoes for the occasion: low heels, treaded sole, soft soles on hard surface, waterproof in damp area, heavy duty with heavy lifting, etc. Never wear opentoed shoes.
6. Provide sufficient light in work areas. Shine a flashlight before reaching into dark places.
7. Wear gloves and aprons while using sanitation supplies or other chemicals that may affect the skin.
a. Change gloves and aprons immediately after handling chemicals.
b. Avoid prolonged contact with or breathing fumes from cleaning chemicals.
8. Bandage cuts, scrapes, or burns immediately.
9. To reach high places, use a stepladder. Do not stand on chairs, stools, tables, pallets, or boxes. Follow guidelines for preventing falls.
10. Disconnect electrical equipment before cleaning. Do not touch outlets or equipment with wet hands or while standing on wet ground or a wet floor.
11. Avoid barehanded contact with ice or frozen food.
12. Know proper use of mechanical and electrical appliances before using.
13. Replace worn or damaged electrical cords, plugs, connections, and bases as soon as wear or damage is discovered.
14. Keep hands and clothing away from moving parts on mechanical and electrical equipment.
15. Watches, ties, jewelry, etc., can’t be worn in the food prep area. The only permissible ring is a plain band.
16. Get adequate rest, stay alert, and watch out for the welfare of others.
17. Make safety and hygiene a priority. Get plenty of fluids and nourishment so you can achieve your fullest effectiveness and that of your team.
18. Follow all safety requirements.
19. Tow motor/forklift operators must meet the certification standards of the state convention.
a. The use of a tow motor/forklift should be counted under heavy equipment hours (according to FEMA).
Safety Guidelines
All persons involved in food preparation, service, or delivery at mobile feeding units must be extremely concerned about prevention of food borne illnesses and control of sanitation and hygiene.
Food Handling
1. Use only clean, unspoiled foods obtained from an approved source.
2. Protect food and water supplies from contamination by airborne particles (dust, pollen, hair, and spores), splashing, cleaning solutions or sprays, flies, vermin, rodents, and drainage.
3. All dry bulk food needs to be covered by tents or tarps to protect from the weather.
4. Limit use of food that is known to be ideal media for bacteria growth: cream fillings or sauces, meat salads and dressings, stuffing or hashes, baked or broiled ham, and salads with mayonnaise (potato salad, etc.).
5. Avoid foods or preparation procedures that require much handling.
6. Refrigerate perishable foods at temperatures at or below 41° F.
7. Cook to recommended temperatures (160°-180°) using a thermometer and
8. Process all food in sanitary work areas.
9. Prepare food as near to serving time as possible and keep hot until served.
a. We can serve food from Cambros with no additional heat for 2 hours after opened and after it drops below 135 degrees or rises above 41 degrees, according to “Rules of 4.”
10. Use calibrated thermometers. (See appendix.)
11. Protect foods during delivery and when serving from unsafe cooling and contamination.
12. Cover food and drink containers whether empty, clean, or soiled.
Safety Guidelines
1. Use a safe water supply and sanitary water delivery (lines, pipes, hoses, and containers) obtained from an approved source.
2. Maintain clean preparation facilities, tables, equipment, and utensils.
3. Maintain clean, safe and protected serving supplies, equipment, utensils, eating areas.
4. Dispose of refuse and waste in a safe, sanitary manner and keep it away from preparation and serving areas.
5. Maintain clean and dry storage areas free from rodents, insects, and other animals or vermin.
6. Maintain clean, safe, controlled refrigeration storage to keep refrigerated foods at or below 41° F.
7. Use containers made of safe materials. Never use galvanized cans for cooking or storage, except for packages of dry staple foods.
8. Practice meticulous personal hygiene and sanitary food handling.
9. All food handlers must wear single use gloves.
a. To prevent contamination, change gloves after any possible contamination, use of restroom, handling food, touching any surface, eating, drinking, handling chemicals/garbage and when returning to kitchen area.
b. If in doubt Change Your Gloves.
c. Replace gloves if they become punctured or every four hours.
10. Wash hands often, with warm water of 100°F, before and after handling food, perishables, chemicals, and cleaning utensils. Use soap and dry hands thoroughly with a single use paper towel.
11. Completely clean and then sanitize workstations frequently, using a properly mixed sanitizing solution (bleach, quats, etc.) then air dry.
12. Deal with pests such as flies, bees, mosquitoes, etc., as safely as possible. Avoid spraying pesticides in food preparation and serving areas.
13. In case of vomiting or diarrhea different cleaning procedures are required. See appendix for Procedure.
SANITIZING FOOD SERVICE EQUIPMENT
Using Chlorine Bleach
1. Dilute mixtures of chlorine bleach and water are a common and cost-effective method for sanitizing equipment in food processing operations.
2. Equipment or articles sanitized with the solution must be allowed to drain adequately before contact with food.
3. Solutions used for sanitizing equipment shall not exceed 200 parts per million (ppm) available chlorine.
4. About one tablespoon (½ fluid ounce, 15 ml) of typical chlorine bleach per gallon of water is the maximum that should be used for sanitizing food contact surfaces, according to federal regulations. If higher concentrations are used, the surface must be rinsed with potable water after sanitizing. Make sure chlorine test strips are available.
5. Contact times of 30 seconds to one minute is usually sufficient to achieve a thorough kill, depending on the chlorine concentration and organic load.
6. The temperature of the water used to dilute and apply the chlorine as a sanitizer should be 110-120° F.
Three Sink/Stock Tanks Method of Cleaning
1. Scrape waste from pots and utensils into waste receptacle; dispose of waste.
2. Pre-rinse pots and utensils to prevent excess particles in wash water.
3. Wash in first compartment of sink.
Use soapy water, 110°-120° F.
Change water often and when refuse or temperature dictates.
Remember that detergent or soap is a cleaning agent, not a sanitizing agent.
4. Transfer to second compartment.
Rinse in water 110°-120° F.
Place small items in wire basket or pail.
Place container with small items in rinse water.
Rinse pots, pans, and utensils.
5. Transfer to third compartment.
Use water at least 180° F or sanitizing solution (see previous table).
Immerse for two minutes.
Remove and place on drain board; do not dry with a towel.
NOTE: Extreme care should be taken if using the hot water sanitizing method.
6. Store sanitized utensils, pots, and equipment appropriately making sure no food particles are left in containers, brushes, sponges, cloths, etc.
7. Clean floor surface of sanitation area with hot soapy water or chlorine solution. Leave no standing water.
PROPANE GAS AND DIESEL
Propane
1. Transport and store LP tanks in an upright position.
2. Inspect tanks for corrosion, damage, and wear.
3. Inspect lines and appliances for wear and damage.
4. Keep fire extinguishers and first aid kit within reach.
5. No Smoking signs need to be posted.
6. Propane tanks must be secured with a chain to a fixed object.
7. Secure valves with covers when possible.
8. Keep the following nearby for refueling or inspecting tanks and connections: wrench, screwdrivers, other related tools, copper wire, flashlight, liquid soap.
9. Have tanks filled by a professional dealer or capable representative. Refuel in an open area. Only essential people should be in the area.
10. Instruct volunteers prior to start of refueling:
a. Extinguish fires, flames, and pilots; remove potential spark sources (electric sources, motors, static electricity). Make sure generators are shut down.
b. Evacuate away from unit.
c. Do not offer to help, or help when asked.
d. No smoking or vaping anywhere in area by anyone.
e. Warn guests and insist upon strict compliance with all of the above.
11. Use a CALL-OUT WARNING SYSTEM prior to refueling or connecting/disconnecting tanks, lines, or appliances. That is,
a. Call loudly that refueling is about to take place.
b. See that the warning is repeated again so that no volunteer or anyone else fails to get the warning.
12. When connecting or disconnecting lines, close all valves.
a. When connecting fuel lines, begin at appliance and proceed to tank, with all valves closed.
b. When disconnecting appliance, turn off main valve at tank and check valves back to the appliance. Check and extinguish all flames within a safe distance. Then disconnect from tank to appliance.
13. Install check valves on lines as backup, where possible.
14. Check for open flames or other fire or spark sources.
15. After each refill, check connections for leaks with liquid soap. If leak is present, keep volunteers and others away until safe.
16. Light pilots with a small torch (flame that won’t blow out).
17. Turn appliances on; adjust pilot lights and flames.
18. Be acquainted with maintenance procedures on refueling.
Onsite Refueling – IF PERMITTED According to Local Vendor
Small LP tanks (4 lb. to 100 lb.) may be filled on site if they are equipped with an OPD (overfill prevention device) valve. The delivery truck or kitchen must have an adapter for these tanks. How to tell if you have an OPD valve:
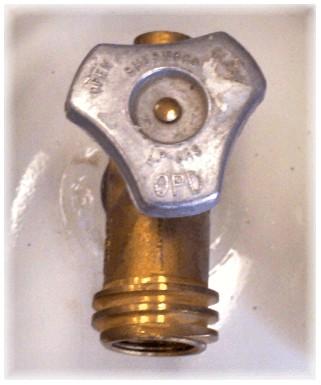
1. The valve must have a triangular handwheel.
2. The handwheel (if triangular) should have the letters OPD stamped into it.
3. Not all OPD valves have outside threads; however, most do.
Information
There are multi valves for 100 # cylinders which can be located at propane supply warehouses. These valves must be installed by a certified technician. The advantage to using this valve is most states will fill the tanks on site from propane tanker trucks without breaking connections.
Propane tanks are "date stamped. Date stamps are located on the collar of the tank. An example is 09-22 which is September 2022. The tank is good for 12 years and if a tank is out of date, it must be recertified before it can be filled. A recertification is good for 5 years and can receive the recertification 3 times total.
Gasoline/Diesel
No smoking or vaping
Have a secure refueling area
Shut off engine and make sure you have a cool-down period, NEVER fill a hot engine
Do not fuel if there is a source of ignition in the immediate area
Make sure equipment is grounded.
No Smoking signs need to be posted.
Fuel with proper fuel/equipment
DO NOT OVERFILL
Do not leave unattended while fueling
After filling check for any spillage
Return all equipment in the area back to operational status
It is important to have someone in maintenance to be responsible for tracking fuel and temperature in refrigerated units. Chart in Appendix.
** MSDS (material safety data sheet) by calling 800-689-3998. MSDS provides safety and first aid information in case of eye or skin contact, inhalation, or ingestion of fuel.
IS EVERYONE’S DUTY
For proper food use and handling, a good inventory plan is essential during the initial, on-going, and closing phases of a disaster response. A person who has the gift of organization should be given the task of inventory manager.
Initial Inventory Control
Prepare within 24-48 hours of arrival at the kitchen site an initial inventory of food and equipment brought to the disaster with the feeding unit.
Initial inventory with documentation will be presented to the Unit Director
On-going Inventory Control
Keep a copy and list of invoices and receipts related to food and supplies.
On-going Inventory and Bill of Lading must be submitted within 24-48 hours of arrival at designated kitchen site to the Unit Director.
Keep a daily inventory after initial processing of food and supplies that is available to the Unit Director.
The Unit Director will prepare a pull order daily for the Inventory team.
Keep pertinent information of all trailers (owner, vehicle number and license number).
Establish a warehouse or trailer grid identifying the location of products.
Store all food on pallets.
Closing
Prepare a complete closing inventory of food, paper goods, and all equipment.
WASTE DISPOSAL
Liquid Wastewater
Consult with local authorities on the disposal of liquid gray water.
If a large collection bladder is used, a professional hauler must be obtained to transport gray water.
Solid Waste (paper, cardboard, cans, food, etc.)
Garbage and refuse should be kept in durable, easy-to-clean, insect proof, rodent proof containers that do not leak, do not absorb liquids, and have covers that fit. Plastic bags may be used to line these containers.
There should be enough garbage containers to hold the garbage and refuse that accumulates.
Garbage and refuse should be disposed of frequently to prevent the development of odors and the attraction of insects and flies.
If recycling is available, and used by the host site, an additional recycle container is needed.
Outside garbage storage
Outside garbage storage containers are traditionally large construction dumpsters.
These containers should be located away from the food production area yet close enough for frequent trash dumps.
The areas around the containers must be kept as clean as possible.
All bulk food should be double plastic bagged before depositing in the dumpster.
The schedule for picking up or emptying of these dumpsters should be daily (or more often if necessary) to be free of pests and to keep the area clean.
Leakage around a dumpster should be pressure washed daily.
POTABLE WATER SAFETY
1. Drinking water should be obtained from one of the following approved sources:
a. Public water system
b. Non-public water system that is constructed, maintained, and operated according to law of state drinking water quality standards.
c. Water buffalo or tanker supplied by a local government agency.
2. Verify that the water systems being used are potable, by contacting local health department.
3. Bottled drinking water used or sold in a retail establishment should be obtained from approved sources in accordance with local and state health department regulations.


