


There’s something about summer that invites us to hit pause on the chaos and rewind to simpler times, sun-faded pool towels, cassette tapes in the car, ice cream trucks playing their tinny tune down the street. This special Throwback Summer Edition of Home By Geneva is your permission slip to unplug, reconnect, and let a little nostalgia lead the way.
Inside these pages, you’ll find retro-inspired recipes, DIYs with a vintage twist, and memory-fueled stories that transport us back to the golden days of backyard sleepovers, blockbuster rentals, and radio hits on repeat. This isn’t just a look back. It’s a reminder that joy doesn’t have to be complicated. Sometimes, all it takes is a popsicle, a patio, and a few good humans by your side.
As you read, we hope you rediscover what made those past summers so special, not just the aesthetics, but the feeling. The spontaneity. The togetherness. The way time seemed to stretch on forever. Bring that energy into your life today. Reclaim your summer, retro style. Let this edition be your invitation to slow down, laugh a little louder, and make memories worth rewinding for.
As always, we’re here to celebrate home, not just the place, but the feeling. And this summer, that feeling is one part sun-drenched nostalgia, one part presentmoment magic. Here’s to a season that’s timeless in all the best ways.

Cierra Dootson Geneva Financial Executive Director Of Marketing
Geneva Financial 180 S. Arizona Ave Ste 310 Chandler, AZ 85225 www.GenevaFi.com
EDITOR-IN-CHIEF
James Polinori
MANAGING EDITOR
Cierra Dootson
ART DIRECTOR
Jacque Huerta
Managing Editor Home By Geneva by
CONTRIBUTING WRITERS
Bryce Freshour
Chris Green
A modern day homecoming to presence, peace, and the summer magic we left behind.
We live in a world where scrolling is second nature. Wake up, scroll. Waiting in line? Scroll. One quiet moment to yourself? Scroll again. And yet, in a season built on sunshine, freedom, and togetherness, many of us are starting to feel it, that dull ache for something simpler. Something slower. Something real.

Call it nostalgia, call it burnout, or call it what it is: a yearning to remember who we were before the feed.
And this summer? We’re taking it back.
The Problem Isn’t Your Phone. It’s the Constant Noise
Social media isn’t the villain. It keeps us informed, entertained, connected. It’s where we find inspiration, support, and even joy. But when “just checking in” becomes hours of autopilot scrolling, we lose more than time—we lose presence.
We stop being in our own lives.
We stop noticing the breeze, the background music, the way the sky looked at 7:14 p.m.
We miss the moment.
What we’re craving isn’t disconnection.
It’s reconnection. With the world around us, the people we love, and the parts of ourselves that don’t require a screen to feel seen.
Taking a break from social media, even briefly, does more than clear your mind—it brings you home to your life. Studies show it reduces anxiety, improves focus, enhances sleep, and reignites creativity. But even beyond the research, here’s what you’ll likely feel.
You stop absorbing hundreds of voices a day and start hearing your own again.
Presence
You look up. You notice the golden light through the trees. You remember how good real laughter sounds.
Space
Mental, emotional, and physical space. Enough to daydream, reflect, or simply breathe.
Creativity
With no feed to scroll, your imagination kicks in. You draw. You write. You make. You remember how fulfilling it is to create without an audience.
How to Take a Social Media Break (Without Going Off the Grid)
You don’t need to delete every app and live in the woods. A reset can be soft, intentional, and beautifully personal. Here's how you can accomplish that.
Create Structure
• Set daily app time limits
• Turn off non-urgent notifications
• Schedule tech free hours (mornings, meals, or right before bed)
• Use “Do Not Disturb” when you want to be fully present
Designate No Phone Zones
• Bedrooms = sleep and sanctuary
• Kitchen tables = conversation and connection
• Front porches or patios = fresh air, not feed loops
Swap Habit for Ritual
• Scroll? Try journaling or reading instead
• Mindless TikToks? Put on a vinyl, light a candle, or pull out an old photo album
Tune Into Your Triggers
• Notice when and why you reach for your phone. Is it boredom? Stress? Discomfort?
• Once you name the feeling, you can respond to it—rather than scroll past it.
Set a Challenge
• Try a 7 day or weekend digital detox
• Leave your phone behind on a nature walk or date night
• Host a screen free Sunday with friends or family
You Won’t Miss It as Much as You Think. But You Will Miss This
You’ll miss the moment when your child says something hilarious and you're actually listening.
You’ll miss the way the light looks in your living room at golden hour.
You’ll miss the calm of drinking your coffee without checking the news.
Short, helpful ideas to rewire muscle memory:
• A book or magazine
• A deck of cards
• A journal or sketchpad
• An old recipe box
• A jigsaw puzzle
• A real map for your next road trip
• A garden trowel and your backyard
• A nap (yes, really)
• Replace background noise with a real moment—music, silence, or your own thoughts
You’ll miss your life, and all the small, sacred pieces of it that social media subtly steals.
But when you step away—just a little— you start to get it back.
We’re calling this the throwback summer. The one where we play more than we post. Where our conversations stretch longer than our captions. Where we trade in the pressure to perform for the freedom to just be.
Let this be your invitation to disconnect from the noise, and reconnect with the moments that matter. Because when you put down your phone, you don’t disconnect from the world—you reconnect with it.


In a world that rarely slows down, finding peace can start with something as simple as a breath of fresh air. Whether you're drawn to the simplicity of pitching a tent under the stars or the luxury of a cozy cabin with running water and plush bedding, nature has a getaway for every style. The rise of glamping—glamorous camping—offers a new spin on the classic outdoor experience. But which type of trip is the perfect match for your ideal escape?
Camping is all about unplugging and getting back to basics. From building your own fire to falling asleep to the sounds of the forest, it’s an experience that reconnects you with nature in the purest way. It’s budget friendly, DIY driven, and appeals to the adventurer who doesn’t mind a little dirt and unpredictability. For many, the rawness of camping is where the true magic lies.


Glamping brings the outdoors to you—without sacrificing comfort. Think king sized beds, air conditioning, bathrooms, and maybe even a glass of wine under the stars. It’s perfect for those who want the beauty of nature without the hassle of gear, setup, or sleeping on the ground. Glamping combines serenity with style, making it a dream escape for relaxation seekers.
Traditional camping is obviously more affordable and can be done with just a few essentials, especially if you're willing to go in with just the basics. However, it does require more prep work—packing gear, food, and knowing how to handle unexpected weather. Glamping, while more expensive, offers a turnkey experience with little to no setup involved. It’s the difference between bringing your world into the wild and stepping into one already made for you.
Camping often creates a deep sense of self-reliance and camaraderie—it’s bonding over campfire meals, sharing stories under the stars, and learning to embrace the unpredictable. Glamping fosters a different kind of connection—more time to unwind, rest, and enjoy the moment without worrying about logistics. Both offer meaningful experiences, but in very different ways. It really depends on what kind of memories you’re hoping to make.
Nature doesn’t play favorites—it welcomes both the rugged camper and the cozy glamper with open arms. Whether you’re craving dirt on your boots or a hot shower at the end of the day, the outdoors will always have something to offer you. The best escape is the one that fits your style, pace, and idea of peace. So pack your bags— tent or travel robe—and have a great time your way!


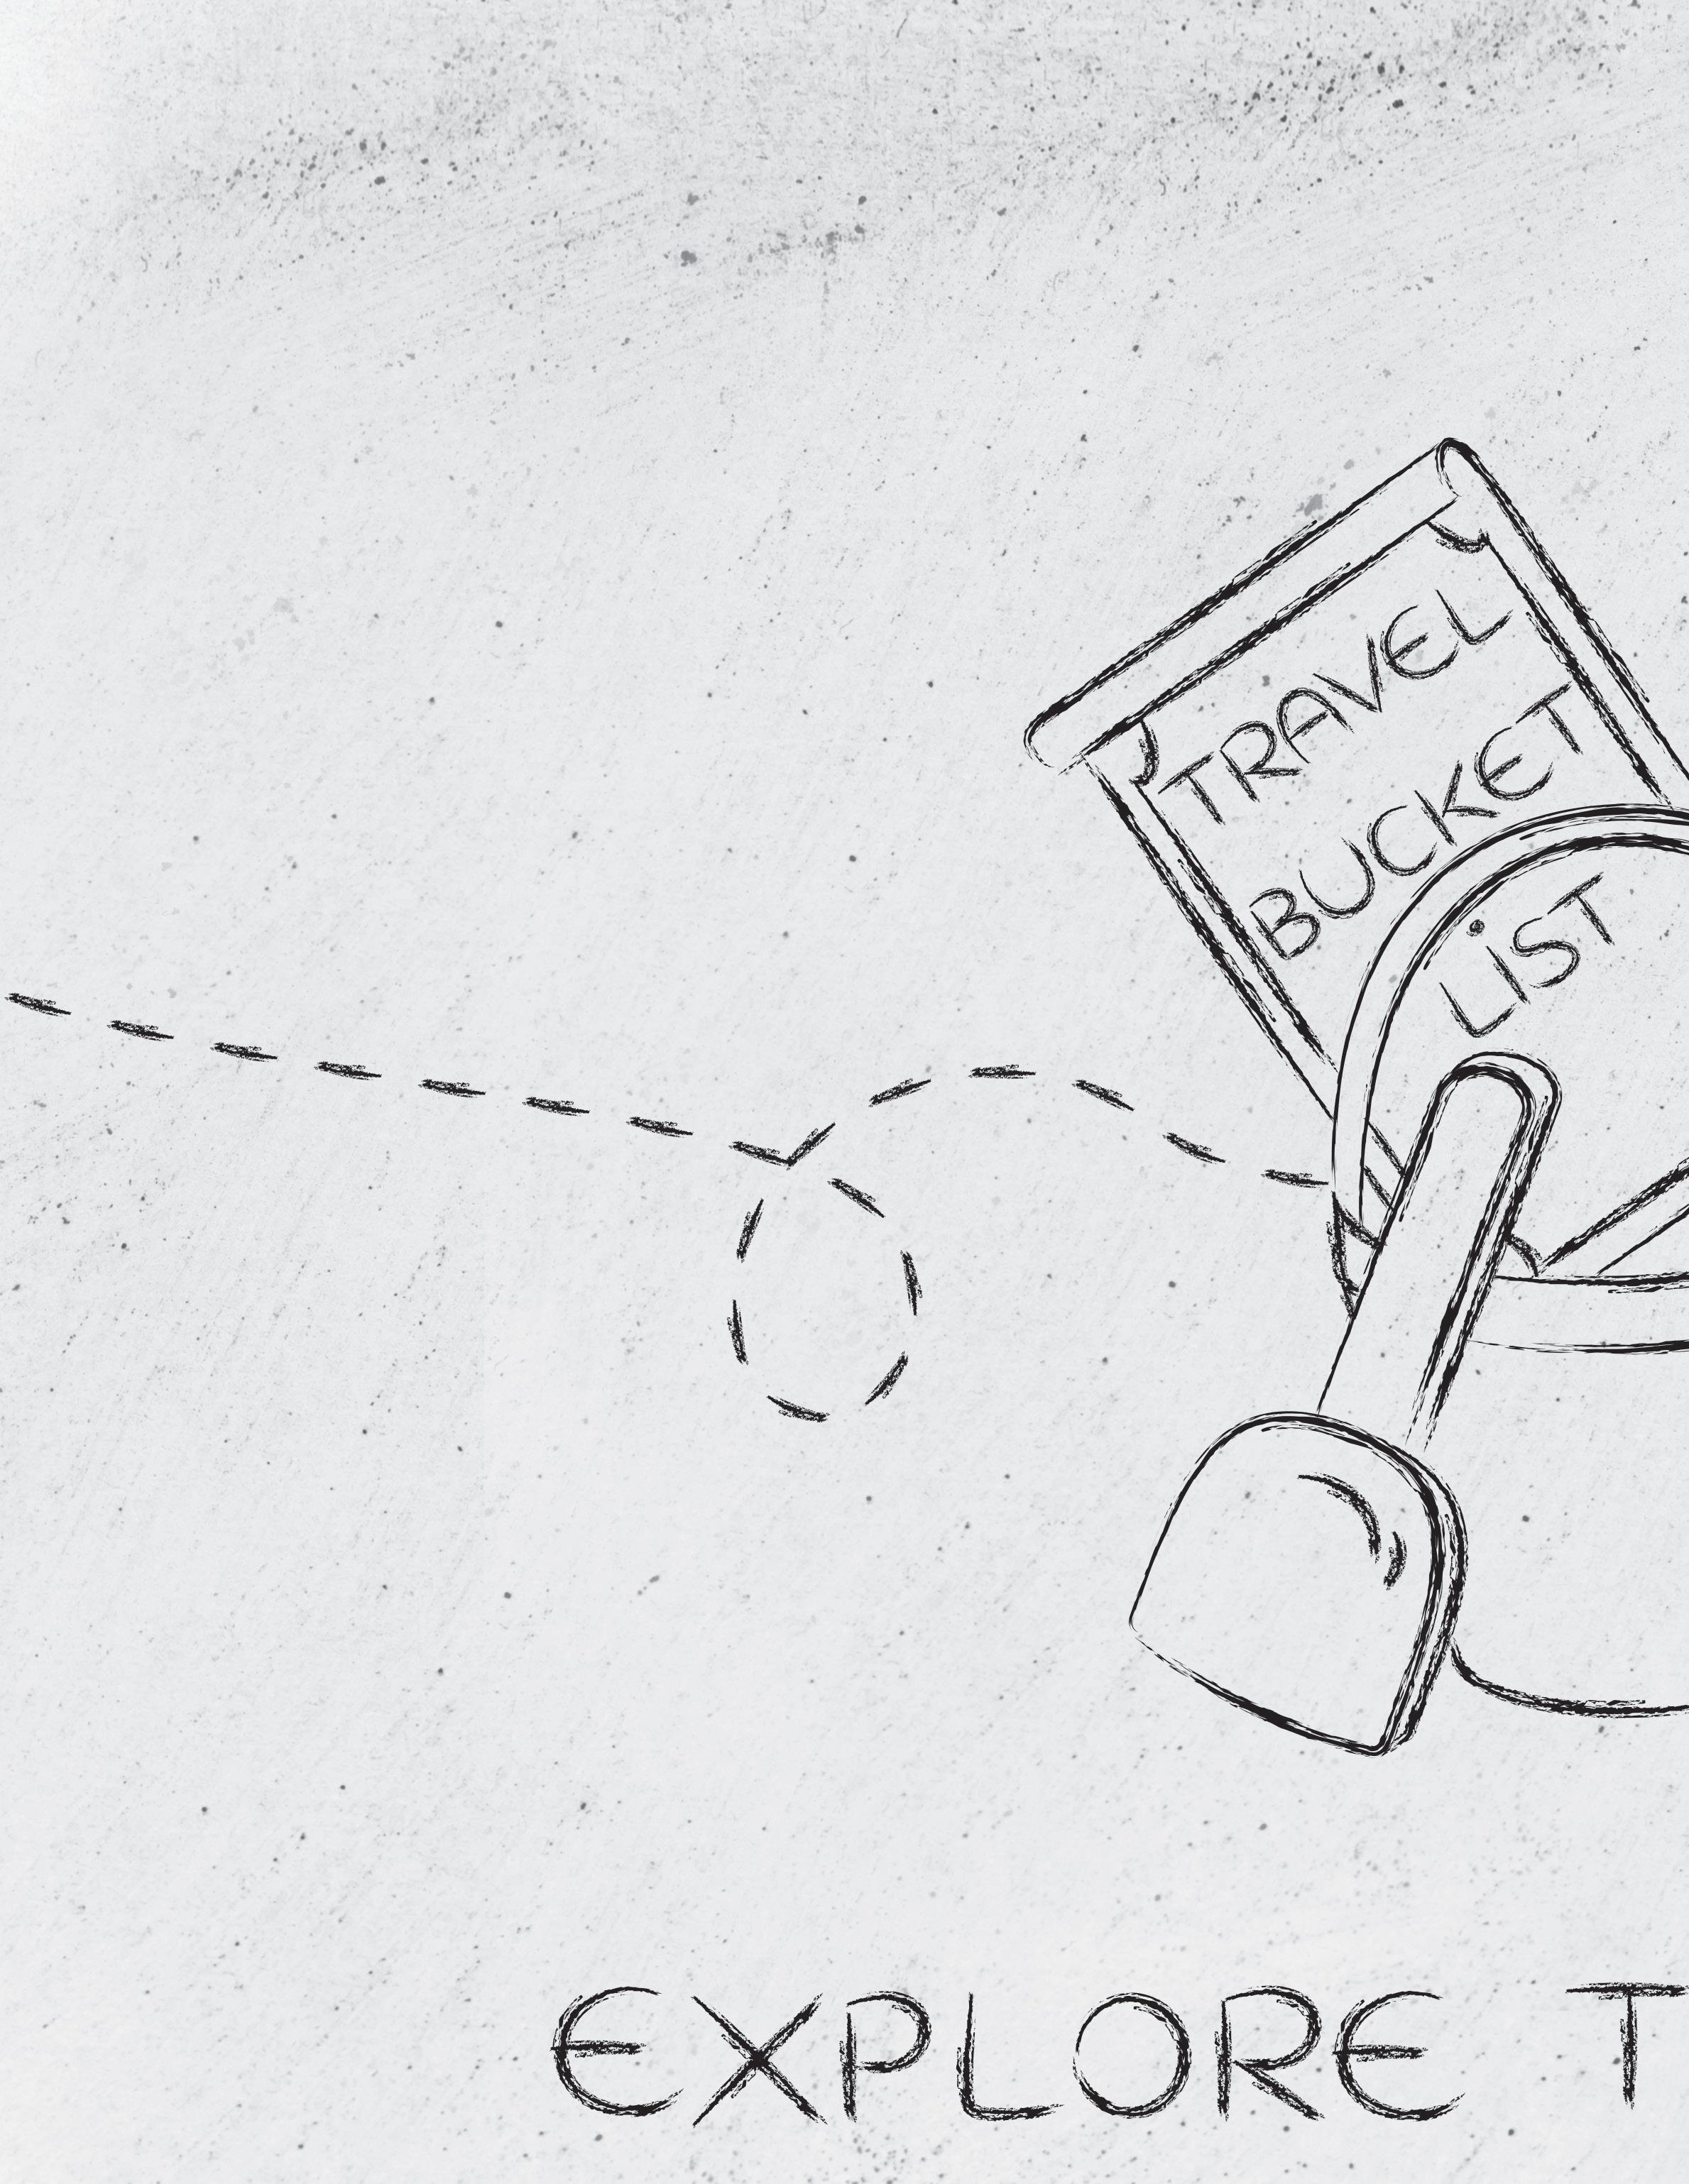
As the sun stretches longer into the evening and the scent of sunscreen fills the air, it’s time to answer summer’s call to adventure. Whether you’re a seasoned globetrotter, a weekend warrior, or someone craving a little thrill outside the daily routine, this bucket list is your go to guide for unforgettable experiences. From wild water escapades to soul soothing nature getaways, here are must try summer adventures for every kind of explorer.
There's something magical about stepping into the wild, especially when it's somewhere completely new. Whether it’s the towering granite cliffs of Yosemite, the glacier fed lakes of Banff, or the hidden waterfalls in the Smoky Mountains, make it a goal to hike a trail you’ve never been on. Bonus points if it ends with a view that takes your breath away.
No plans, no expectations—just a full tank of gas, a killer playlist, and an open road. Discover charming small towns, quirky roadside attractions, and scenic byways that Instagram hasn’t discovered yet. Whether it’s coastal drives or mountain passes, the beauty is in the journey.
Ditch the tent and sleep directly under the stars. Whether it’s in your backyard, at a desert lookout, or deep in a forest clearing, there’s something wildly freeing about falling asleep to the sound of nature with the night sky above you.

Jet skiing, whitewater rafting, paddleboarding at sunrise, whatever floats your boat (pun intended). Water based adventures are the heartbeat of summer fun, and there’s always something new to try. Not near an ocean or lake? Hit up a local river or even a cable wake park.
No phones. No Wi-Fi. No notifications. Just you, the outdoors, and maybe a book or journal. Disconnecting can reset your mind, reduce stress, and help you rediscover the beauty of being present. Try a cabin in the woods, a remote campground, or even a tech-free retreat.
Hot dogs are great, but how about campfire nachos, skillet seared trout, or even fire baked cinnamon apples? Learning to cook over a flame combines survival skills with culinary adventure. It’s rustic, rewarding, and oh-sodelicious.
Whether it's a food truck, fair, music festival, hot air balloon rally, or cultural celebrations. Summer festivals are a celebration of life, creativity, and community. Plus, it’s the perfect chance to dance barefoot, meet new people, and snack on something you’ve never tried before.
Start the day with sunrise from a mountaintop, and end it with a sunset by the beach, a lake, or a rooftop. It’s a poetic way to stretch your day and soak in nature’s most stunning light shows. It's also a gentle reminder of how incredible our world really is.
Summer isn’t just a season—it’s a state of mind. Whether your idea of adventure is scaling peaks, swimming in unknown waters, or simply chasing fireflies, make this the summer you say yes to more. Build your bucket list, grab your backpack (and a friend), and go explore. After all, the best stories are written under the sun.


Sunglasses aren’t just a summer essential—they’re a fashion statement, a confidence booster, and your first line of defense against UV rays. But not all sunglasses are created equal when it comes to flattering your face. The secret to looking effortlessly cool? Choosing the perfect pair that complements your unique face shape.
Before you dive into shopping, start by identifying your face shape. Pull your hair back, look straight into a mirror, and observe the overall contour of your face.
If your face has soft curves, full cheeks, and a rounded jawline, you likely have a round face. A square face features a strong jawline, broad forehead, and sharp angles. If your face has balanced proportions with a slightly narrower chin than forehead, it's probably oval. A heart shaped face is characterized by a broad forehead, high cheekbones, and a narrow chin. Finally, a diamond shaped face has a narrow forehead and chin with wider cheekbones.
Frame color can also make a big difference. Cool skin tones are complemented by shades like black, silver, blue, or gray. Warmer tones are better matched with tortoiseshell, brown, gold, or olive frames.
Proper fit is just as important as style. Make sure the lenses sit comfortably on your nose, the arms don’t press into your temples, and the size of the frame is in proportion to your face. Too big or too small can throw off the whole look.
Now that you know your shape, let’s find the styles that suit you best.
For round faces, angular styles such as rectangular, square, wayfarer, or cat eye sunglasses add definition and length. It’s best to avoid round frames, as they can emphasize the roundness.
If you have a square face, go for softer styles like round, oval, or aviator sunglasses. These help balance your strong features. Avoid boxy shapes that echo the angles of your face.
Those with oval faces can wear almost any style—aviators, oversized, wayfarers, round, and more all tend to work well. Just be careful not to choose frames that are too large, as they can overwhelm your features.
For heart shaped faces, styles like aviators, rimless glasses, and cat eyes with upturned corners are ideal. These styles help balance the wider forehead and narrow chin. Heavy top frames can make the forehead appear even broader, so it’s best to skip those.
Diamond shaped faces shine in oval, rimless, or cat eye sunglasses that accent the cheekbones while softening the angles. Avoid overly narrow frames, as they can exaggerate the width of the cheekbones.
While picking out a stylish frame is fun, don’t forget about protection and durability. Always opt for sunglasses that offer 100% UV protection to shield your eyes from harmful rays. Polarized lenses are a great choice if you spend a lot of time driving or near water, as they significantly reduce glare. And for everyday comfort, choose lightweight frames and durable lenses that can keep up with your lifestyle.


The right pair of sunglasses doesn’t just protect your eyes, it transforms your entire look. Once you know your face shape and understand how different frames work with your features, choosing becomes less of a guessing game and more about expressing your style. Try different shapes, experiment with colors, and most importantly, go for the pair that makes you feel confident. That’s when you’ll know you’ve found the perfect match.

Summer is all about living it up—long days, warm nights, and endless sunshine. The energy is contagious, and your fragrance should match that vibrant, feel good vibe. Whether you're soaking up the sun or chilling in the shade, the right scent can elevate your mood and make your summer moments even sweeter. A great fragrance doesn’t just smell good—it becomes part of your summer story. So let’s dive into some scents that’ll help you vibe with the season!
Summer is all about feeling free and easy, and your fragrance should make you feel like you’re wrapped in a warm, sunny hug. Look for light, bright scents with zesty citrus, fresh florals, and breezy notes that instantly lift your mood. Whether you’re strolling through the park or heading to a rooftop BBQ, these scents will have you feeling effortlessly fabulous all day long.
Not every day is a full throttle adventure—sometimes, you just want to chill. For those laid back summer moments, reach for scents that are green, herbal, or aquatic. Think mint, basil, and green tea—super fresh and calming. These fragrances are perfect for a lazy afternoon in the hammock, an iced tea by your side, or just relaxing after a long week. They’ll keep things cool, calm, and collected, just like summer should be.
On those super hot days when you wish you could dive into the ocean, aquatic scents come to the rescue. Fresh sea spray, cucumber, and hints of driftwood will cool you down instantly and leave you feeling refreshed. These scents are the perfect pick me up for those sweaty summer afternoons or when you need a burst of freshness to keep you going. It’s like a splash of water for your senses!

Want to feel like you’ve been dipped in sunshine? Reach for citrusy notes like lemon, grapefruit, and orange blossom. These fresh, fragrances are perfect for those moments when you want to feel alive and full of energy. Whether you’re hitting the beach, enjoying brunch with friends, or simply need a little pick me up, these scents will have you radiating good vibes.
When the sun sets and the cool evening air rolls in, you’ll want a scent that adds a little mystery and warmth to the night. Go for deeper notes like sandalwood, amber, or soft musk to create that warm, cozy vibe. These fragrances are perfect for late night dinners, sunset cocktails, or just enjoying the cool summer breeze. Think soft, sensual, and sophisticated—a scent that lingers long after the sun goes down.
Fragrance is the cherry on top of your summer style. Whether you're feeling fun, chill, confident, or fresh, there's a scent to match every mood. Light, fresh, and easygoing—that’s the summer fragrance vibe. So spritz, shine, and let your scent do the talking as you move through your sunny days and warm nights.
Scent is an easy way to capture the magic of summer and make every moment feel just a little bit more special. Whether you're after something fresh and vibrant or calm and grounded, there’s a perfect fragrance for every summer moment.
LIFESTYLE
A rhythmic journey through nostalgia, neuroscience, and the songs that shaped us.
Turn up the volume and close your eyes. You’re sitting in the backseat of your best friend’s car, windows down, hair wild in the wind. The speakers are pulsing with Van Halen, and someone up front is butchering the lyrics with full confidence. You’re laughing. You’re alive. You’re thirteen years old, and for a moment, everything is electric.
That’s the power of music. It doesn’t just soundtrack our lives—it stores them.
There’s real science behind why hearing a familiar song can instantly transport you. Music activates multiple areas of the brain at once—emotional centers, language networks, and even motor regions. This multisensory experience means music gets filed in the brain alongside everything you were feeling, seeing, and doing at that time.
Researchers have found that music can:
• Trigger autobiographical memories faster than words or photos
• Help people with memory loss reconnect to past events
• Regulate mood and reduce cortisol (the stress hormone)
• Strengthen neural pathways and emotional resilience

You’re not imagining that rush of energy when your favorite song comes on. Here’s what’s happening under the surface:
• Dopamine hit: Hearing a song you love releases dopamine, the brain’s “feel good” chemical
• Memory boost: The hippocampus (your memory center) lights up with familiar tunes
• Mood regulation: Music activates the limbic system, which governs emotion
• Focus enhancer: Certain tempos can improve concentration by syncing with brainwaves
Music doesn’t just feel powerful. It’s literally changing your brain chemistry.
Music has always been more than background noise—it’s been the heartbeat of my life. I credit so much of my early musical identity to the Gibsons, my best friend’s family, who filled their home with the sounds of Journey, Led Zeppelin, Van Halen, Styx, and REO Speedwagon. I can still recall the soundtracks that played during carpool on the way to and from school and being around them made me fall in love with rock in a way that stuck forever.
At home, my parents introduced me to a different kind of magic. Depeche Mode, Duran Duran, Psychedelic Furs, Fleetwood Mac, Queen, and The Cars. The bands that taught me emotion could live in a synth line and that a chorus could feel like a mood all its own.
I spent hours on Napster (RIP), crafting the perfect 15 track mixes to burn onto colorful blank CDs—accidentally downloading enough viruses to tank the family computer in the process. My hot pink Walkman went with me everywhere, and if it started to skip, a little smack usually did the trick. Music wasn’t just a part of my summer. It was summer. And honestly, it still is.
“Dancing With Myself” – Billy Idol
“Just Like Heaven” – The Cure
“Rio” – Duran Duran
“Modern Love” – David Bowie
“Take On Me” – a-ha
“Don’t Stop Believin’” – Journey
“Tainted Love” – Soft Cell
“Rock the Casbah” – The Clash
Vibe: Boombox on the curb, neon tank tops, ice cream melting down your arm.

“No Rain” – Blind Melon
“Waterfalls” – TLC
“Semi-Charmed Life” – Third Eye Blind
“Steal My Sunshine” – Len
“This Is How We Do It” – Montell Jordan
“You Get What You Give” – New Radicals
“Kiss Me” – Sixpence None the Richer
“Ironic” – Alanis Morissette
Vibe: Block parties, cassette tapes, trying to record the radio without the DJ talking over it.
Let’s time travel. Here’s a sampling of mood boosting throwback playlists to help you rediscover your rhythm.
The song that reminds you of your first summer crush
“Mr. Brightside” – The Killers
“Crazy in Love” – Beyoncé
“Float On” – Modest Mouse
“Ocean Avenue” – Yellowcard
“Hot in Herre” – Nelly
“Hey Ya!” – Outkast
“Since U Been Gone” – Kelly Clarkson
“Sugar, We’re Goin Down” – Fall Out Boy
Vibe: AIM away messages, first concerts, skinny jeans and side bangs
The one that makes you cry every time (in the best way)
The anthem you blasted in your car, windows down
The song your parents played every Saturday morning
The one you danced to with your best friend
Your middle school emo era favorite (you know the one)
The song that always puts you in a good mood
A track that still gives you butterflies
The one you played on repeat after your first heartbreak
The song that makes you feel like you
Title it something fun: "The Me Tapes," "Emotional Support Playlist," or "Songs That Raised Me."

Take a trip down memory lane with our ultimate guide to summer nostalgia! From backyard BBQs and retro road trips to popsicles on the porch and late night fireflies, this guide is packed with classic summer vibes, throwback fun, and feel good memories to relive—or recreate—all season long.

You wake up. The alarm stabs you out of a half dream. For the next eight hours— or thirtyt wo days straight—you’re a puppet to the click of keys, the shrinking meeting bubble, the silent buzz of Teams. You close your laptop at night and feel it already: the guilt of emails unanswered, the weight of tomorrow’s to-do list.
But pause. Look up.
We’re living in a world that’s run wild—chaos on the news, noise in the streets, the existential itch of “what am I even doing here?” Yet somewhere in the hum, you remember that feeling: salt on your skin, sun warm mug of coffee on the front porch, the electric buzz of possibility—the kind only summer brings.
Here’s the kicker: summer, that once effortless state of freedom, hasn’t left us. It’s waiting—patiently—behind our routines, nestled in that first dip at sunrise, that barefoot walk home from somewhere, anywhere. And this season, we aren’t just chasing it—we’re grabbing it.
This isn’t a gimmick. It’s a battle cry against the monotony of overnight routines and screen lit dinners. It’s a permission slip to feel alive, to laugh with salty sticky skin, to gather in porches and parks and backyards. To replace inbox anxiety with the soundtrack of cicadas, to swap dim office lights for golden hour glow, to trade app notifications for the real magic of face-toface moments. Summer isn’t just a date on the calendar—it’s a reclamation, a rebellion, a feeling we’ve always known but forgot how to seize.
And hey—I’m right there with you. In this issue, I’ll guide you through how to untangle from your desk, rediscover neighborhood adventures, whip up dinner under the stars, and find that summer soundtrack that gets your soul moving again.
We’ll start by crafting cozy DIY reading nooks—think blankets, fairy lights, and no screens—to help you unplug and fall into a good book. Then we’ll swing back to the 90s with backyard sleepovers; pull out the glow sticks, ghost stories, and neon sheets like kids again. And when the morning sun spills in, indulge in retro treats and childhood candies, some cleverly reimagined into grown up snacks; nostalgia never tasted so good.
It’s not all play, though—we’ve also packed in lifesaving tips. You'll build your own heat-emergency kit and learn how to keep your dog cool and happy, no matter how hot it gets. When the sun is high, lean into curated playlists designed to lift your mood, stir memories and sling you straight back to carefree afternoons.
Need ideas to fill your days? Check off moments from the ultimate summer bucket list—think midnight swims, porch jam-sessions, spontaneous bike rides. And when the digital world starts tugging at you again, try a social-media detox. Reconnect with people, with neighborhoods, with laughter that happens without Likes.
So take a breath, close the laptop, and grab this issue. Together, we’ll pull summer back into our hands. Let it be loud, messy, nostalgic, practical—and, above all, magic.
Summer reignited, reclaimed, and ours for the taking.

In today's economy, creating that magazine worthy outdoor oasis might seem like a distant dream reserved for those with unlimited budgets and professional landscapers on speed dial. But here's the truth I've discovered after years of outdoor space transformations: the most inviting spaces aren't necessarily the most expensive. When I finally invested time (not a fortune) into my backyard, something magical happened—I actually wanted to spend time out there. And isn't that the whole point?
Whether you're working with a postage stamp balcony, a concrete apartment patio, or a suburban backyard that's seen better days, this guide will help you transform your outdoor space into a relaxing retreat without breaking the bank. Consider it your permission slip to slow down, step outside, and rediscover the simple joy of lounging in the fresh air—just like we used to before screens dominated our every waking moment.
The most budget friendly approach starts with taking inventory of what you already own. That old bookshelf gathering dust in the garage? Weather seal it with a coat of exterior paint (Rust Oleum Painter's Touch 2X 12 oz. Gloss White Spray Paint at Home Depot, $6.48) and repurpose it as an outdoor plant stand or bar cart. Those mismatched dining chairs? Group them together with a unified paint job (BEHR PREMIUM PLUS 8 oz. Interior/Exterior Paint Sample at Home Depot, $5.98 for sample pots) for an eclectic seating arrangement that looks intentionally curated rather than randomly assembled.
Small spaces require strategic thinking but can deliver big impact. Start with a weather resistant outdoor rug (Mainstays Outdoor Patio Rug 5' x 7' Gray Stripe at Walmart, $20-30 from discount home stores) to define the space and add immediate color. Instead of traditional seating, try floor cushions (Outdoor Floor Pillows, Worldmarket $15-25 each) that can be stacked away when not in use.
Vertical space is your friend! Install adjustable tension rods (Mainstays 28"-48" Tension Rod in Black at Walmart, $8-15) between walls for hanging plants or string lights without drilling holes (perfect for renters). A folding wall mounted table (BJURSTA wall mounted drop-leaf table at IKEA, $25-40) provides a surface for drinks or meals without permanently sacrificing precious floor space.
Apartment patios often suffer from concrete overload and privacy issues. Combat both by creating zones: a lounging area, perhaps a tiny dining space, and a green corner. Use large planters strategically placed to create natural dividers and bring life to sterile surroundings.
For seating on a budget, pallets are still a viable (and free) option when cushioned properly. Two pallets together create a platform for an outdoor daybed—just add foam cut to size (Foam by Mail, $30-40) and cover with weather resistant fabric (Outdoor Fabric at Joann, $15-25). For maximum throwback vibes, consider hunting down an authentic 90s era lawn chair with woven plastic webbing— check thrift stores or Facebook Marketplace for deals typically under $20.
Larger spaces present their own challenges—namely, how to make them feel cozy without spending a fortune filling them. The solution? Create intimate "rooms" within the larger area using strategic furniture placement and budget friendly dividers.
Define a lounge zone with two weather resistant outdoor rugs (Target Threshold Outdoor Rug, $25-35 each) placed perpendicular to create an L-shape. Add several large floor pillows (IKEA Floor Cushion,) around a repurposed wooden cable spool (often free from construction sites or for minimal cost from hardware stores) as a coffee table.
For evening ambiance without expensive lighting, combine solar stake lights (Solar Garden Lights at Target ) with mason jars and tea lights (IKEA Tealights, $5-10). Hang string lights for special occasions, but rely on these lowercost options for everyday illumination.
Some ideas transcend space limitations and work beautifully whether you're dealing with 30 or 300 square feet:
Textiles Are Transformative: Outdoor pillows (make your own covers from drop cloths or repurposed shower curtains for $5-15), throws (look for clearance indoor throws and store in weatherproof containers when not in use), and rugs instantly make any space feel intentional and welcoming.
Container Gardens Do Double Duty: Plants provide privacy, clean the air, and add vibrant color. Start with easy growing
varieties like pothos, snake plants, or herbs. Check local buy nothing groups or plant exchange events for free starters.
Upcycled Side Tables: Vintage suitcases stacked and sealed for weather resistance, large ceramic planters turned upside down, or wooden crates sanded and stained all make characterful side tables for under $20.
As you can tell, we love retro throwbacks. There's something especially appropriate about incorporating retro elements into your outdoor space. Not only does vintage shopping save money, but it also brings character that new items often lack.
Thrift stores, yard sales, and online marketplaces are gold mines for sturdy outdoor furniture from decades past. Look for wrought iron pieces (easily refreshed with spray paint), wicker (check for structural integrity), and solid wood items that can be restored with minimal effort.
A truly inviting outdoor space engages all the senses. Add these finishing touches without stretching your budget.
Sound: In addition to music, consider wind chimes made from repurposed materials ($0-10) or an affordable bamboo set (Wind Chimes at Amazon, $12-18).
Scent: Plant fragrant herbs like rosemary, lavender, or mint in repurposed containers (Live Herb Plants at Home Depot, $5-10 total). As a bonus, you can snip them for summer cocktails or cooking.
Touch: Varying textures make a space feel rich and considered. Mix smooth surfaces (glass, metal) with rough ones (jute, unfinished wood) and soft elements (textiles).
Taste: Keep a simple drink station with a repurposed bar cart or shelf, stocked with basics for outdoor refreshments.
I've found that the most important factor isn't how much you spend, but simply making the commitment to create an outdoor space you'll actually use. Start with one corner, maybe just two chairs and a tiny table and you'll be amazed how often you'll find yourself stepping outside for morning coffee or an evening wind down.
In a world where we're constantly tethered to screens and schedules, creating an outdoor retreat, even a modest one, offers something increasingly precious: a place to disconnect, breathe deeply, and remember what summer felt like when we were kids with nothing but time and imagination.
And that feeling? You absolutely can't put a price tag on it.
There’s something special about capturing summer memories—not just on your phone, but in a way you can actually hold, flip through, and relive. Enter the DIY summer scrapbook: part creative project, part time capsule, and all kinds of fun. Even better? You don’t need fancy materials to get started. With a little imagination and some thrifted supplies, you can create a nostalgic, one-of-a-kind scrapbook that tells your sunny season story in style.


Your scrapbook doesn’t have to be brand new. Check thrift shops or secondhand stores for old journals, photo albums, or even hardcover books with blank pages. A little character goes a long way—worn edges, aged paper, and unique textures add instant charm.
Vintage postcards, old greeting cards, sheet music, maps, and even packaging from local shops make great decorative pieces. Look for fabric scraps, buttons, stamps, and ribbon you can repurpose. Keep an eye out for items in sunny colors, florals, or patterns that scream summer.
Pick your favorite photos—beach days, farmers market strolls, ice cream runs, road trips—and print them in different sizes for a playful layout. Mix in ticket stubs, Polaroids, or pressed flowers from your adventures for extra texture and personality.
No rules here—just have fun. Use washi tape to frame photos, layer papers like a collage, or write short notes next to your pictures. Use your thrifted finds to decorate the edges, borders, and corners. Add hand drawn doodles or scribbled thoughts for that personal touch.
Set the mood while you create—play your summer playlist, sip something iced, and let your creativity take over. Scrapbooking is just as much about the process as it is the result. It's your chance to slow down and reflect on what made your summer unforgettable.
By the end, you’ll have more than just a scrapbook— you’ll have a handmade, memory filled piece of summer you can revisit anytime. It’s a reminder of golden hours, big laughs, quiet moments, and all the little things in between.
Grab your scissors, start thrifting, and let your summer story come to life—page by page.

There’s something timelessly comforting about curling up with a good book—and creating a cozy, retro-inspired reading nook takes that feeling to the next level. Whether you're transforming a quiet corner, revamping an empty window seat, or carving out a tiny hideaway just for you, adding vintage flair turns any space into a nostalgic retreat. Think warm lighting, soft textures, and those small, personal touches that make you want to stay awhile. Ready to turn the page on your next home project? Let’s dive in.
You don’t need a whole room—just a spot that feels a little tucked away. A corner of your bedroom, a stretch of hallway, or even a spot by the window can work wonders. The key? Comfort and quiet. Once you’ve found your zone, it’s time to layer on the charm.
Look for a plush armchair, an old school rocker, or even a cushioned bench with character. Thrift stores and flea markets are goldmines for mid-century or boho
finds. Drape a chunky knit throw or quilt over the back, toss on a few patterned pillows, and you’ve got a cozy setup that’s made for long reading sessions (and spontaneous naps).
Soft, warm lighting is a must. Try a retro-style floor lamp, a vintage desk light, or a string of Edison bulbs to bring a little glow. Bonus points if your light has a dimmer switch—perfect for winding down with a mystery novel or setting the mood for a cozy evening read.
This is where your nook comes to life. Stack your favorite books or display them on floating shelves with quirky bookends. Add in a few framed prints, a retro clock, or a vase with dried flowers to bring a little old-school charm. A record player or a small
Bluetooth speaker can complete the vibe with soft jazz, lo-fi, or a moody instrumental playlist.
Make It Functional and Fabulous
Keep a small side table or crate nearby for your tea, coffee, or latenight snacks. A soft rug underfoot makes things extra inviting. And don’t forget a cozy footstool—you’ll thank yourself after a few chapters.
Once your nook is set, all that’s left to do is grab your current read, sink in, and let the outside world fade away. With the right mix of retro charm and modern comfort, you’ve created more than just a space— you’ve built your own little escape.
Ready to get cozy? Whether you’re into dreamy novels, page turning thrillers, or old classics, your DIY reading nook is about to become your favorite new destination.
Remember those summer nights when time seemed to stretch endlessly before you? When the only notification that mattered was Mom calling you in for dinner? This summer I'm inviting you to unplug, step outside, and recreate that magical 90s sleepover experience right in your own backyard.
The beauty of a 90s backyard sleepover lies in its simplicity. Start with the essentials: a few tents or one large one if you're feeling ambitious. String lights weren't as ubiquitous back then as they are now, but they add that perfect ambient glow that makes any outdoor space feel magical. For authentic 90s vibes, dig out those old holiday lights from your parents' attic.
Layer the ground with all the blankets and pillows you can find. The more mismatched, the better! The 90s weren't about perfectly curated Instagram aesthetics; they were about comfort and making do with what you had. Remember those flannel sleeping bags with neon geometric patterns? Dust those off if you've still got them stashed away.
No 90s sleepover was complete without making something with your hands. For a grown up twist on classic crafts:
Friendship Bracelets 2.0: Upgrade those embroidery thread bracelets with some metallic threads and tiny charms. They make perfect nostalgic party favors that your friends might actually wear beyond the driveway.
DIY Tie Dye: But make it sophisticated with monochromatic schemes or subtle ombré effects on pillowcases or bandanas. (Pro tip: Pack these in your guests' goodie bags with wash instructions)
Memory Jars: Provide small jars, decorative paper, and pens for guests to write down their favorite 90s memories or sleepover moments. These can be shared around the campfire later or kept as mementos.
Transform your backyard into an open air cinema with just a white sheet and a projector for the perfect setting to enjoy nostalgic 90s films under the stars. And what's


a movie night without the perfect snacks? For a complete guide to creating the ultimate cinematic experience, check out our feature "Throwback Treats: Classic Candies & Snacks for the Ultimate Retro Movie Night" on page 67 You'll find everything from the perfect movie lineup to recipes for recreating those iconic concession stand favorites that fueled our late night gossip sessions and weekend sleepovers.
As dusk settles in and the cicadas begin their nightly symphony, gather your friends around in a circle. This is when the real magic happens. Take turns sharing spooky stories—the ones about the hook handed man work just as well at 35 as they did at 13, trust me.
Bring a portable speaker for 90s playlists but keep the volume just low enough that you can still hear the rustle of leaves and night creatures stirring. There's something about that natural soundtrack that no Spotify playlist can replicate.
Stargazing was an essential part of any backyard sleepover, and thankfully, the stars haven't changed much since the 90s. Lie back on your blankets and try to find the constellations without using an app just like we did back then, pointing vaguely at clusters and claiming "that's definitely the little dipper."
The most important element of your 90s throwback isn't the crafts or the movies or even the snacks but it is the purposeful disconnection from our current digital tethers. Consider setting up a "phone check" station where everyone surrenders their devices for the night. It might feel uncomfortable at first (what if there's an emergency? what if someone needs us?), but that slight discomfort quickly gives way to liberation.
Without the constant ping of notifications, you'll be amazed at how conversations deepen, how games become more engaging, and how present you feel in your own skin. It's that ability to be fully immersed in a moment that we're really trying to recapture from our 90s childhoods.
I still remember lying on my childhood's best friend’s trampoline, staring up at constellations as we whispered secrets into the night, completely unaware of anything happening beyond our little universe. My favorite summer memories were created outside. I can still recall those unstructured, technology free moments where imagination and friendship were the only entertainment we needed. That feeling is still available to us; we just need to create the right conditions for it to emerge.
So, this summer, as fireflies blink their secret codes and evening breezes carry the scent of sunscreen and barbecue, give yourself permission to step back in time. Your inner 90s kid is still there, ready for one more magical night under the stars.

MORGAN SMITH Director of Portfolio Lending, Geneva Financial

Our portfolio lending model was born from the idea that there are still great deals out there—borrowers with equity and motivation,” Morgan explains. “We lend to imperfect borrowers in great situations and perfect borrowers in imperfect situations. If the equity’s there, the deal makes sense.
When Morgan Smith talks about mortgage lending, it’s more than business—it’s personal. With over three decades of experience and an unmatched passion for innovation, Morgan brings a rare blend of vision, grit, and entrepreneurial spirit to his role as Director of Portfolio Lending at Geneva Financial.
Legacy of Innovation: The Genesis of Geneva’s Portfolio Division
The Portfolio Division at Geneva Financial is not just another product offering—it’s the embodiment of Morgan’s career long mission to help originators close more loans and generate greater income by thinking beyond traditional lending models.
“I’ve always believed that if you can teach someone to originate a unique product, they’ll come running,” Morgan shares. That philosophy fueled his early success in subprime and Alt-A lending, as well as his foray into non-traditional loans during the early 2000s. While some of those products eventually pushed the market too far, they also proved one key concept: equity is power.
In an industry dominated by rigid underwriting guidelines, the Portfolio Division provides a refreshing alternative. “This is make sense lending,” Morgan emphasizes. “We care about credit, income, and character—but what matters most is the value of the collateral.”
That flexibility allows Geneva to serve a variety of clients and scenarios, such as:
• Transition Bridge Loans for homeowners looking to buy a new home before selling their current one.
• Renovation Loans for investors looking to purchase, renovate, and flip or refinance.
• Investor Bridge Loans with no income requirements, seasoning, or red tape.
• Creative, Equity Driven Solutions for unique real estate situations that defy conventional lending.
“If the loan-to-value is 65% or less, odds are we can find a way to make it work,” Morgan states confidently.

Morgan sees the Portfolio Division as one of Geneva’s greatest competitive advantages. “Not many mortgage companies have their own in-house private money lending arm,” he says. “It’s part of our secret sauce.”
His vision over the next 3–5 years is simple but powerful: ensure every Geneva Loan Officer is equipped with knowledge of portfolio products. “Every Geneva LO should be talking to agents about our bridge and renovation loan solutions. These products close deals that wouldn’t otherwise get done—and they often lead to future transactions.”
Morgan’s journey into the mortgage world started in 1993 with a pre-internet data service for realtors and lenders. Realizing his clients were making more money from his information than he was, Morgan and his partners pivoted, becoming mortgage brokers and forming Morgan Financial in 1995.
By 2006, Morgan Financial had grown into Oregon’s largest independently owned mortgage firm, with over 4,200 employees and $2.5 billion in annual funding before being sold to W.J. Bradley. “Launching and growing that company at 25 was a gratifying experience,” Morgan reflects. “Selling before the crash? That was luck—but good luck.”
The financial crisis of 2008 was a turning point. “It was brutal,” he admits. “I was laying off 150 people a week. But that pain forged my leadership style and reminded me how fragile the market can be.”
Out of that chaos came something extraordinary: a renewed partnership with Aaron VanTrojen.
The Power of Partnership: Aaron and Telle
Morgan and Aaron’s story is one of mutual respect, hard earned success, and a deep friendship. “Aaron’s the best hire I’ve ever made,” Morgan says. “He showed up, he worked harder than anyone, and he never looked back.”
Morgan recalls Aaron putting flyers on houses at 5 a.m., rallying a team, and outworking everyone. “He told me he wanted to build the next Countrywide. I smiled then. I’m not smiling now—because he did it with Geneva.”
That success, Morgan insists, is also thanks to Aaron’s business partner and Geneva’s co-founder, Telle VanTrojen. “Hiring Aaron and Telle—those are my two biggest career wins.”
The Evolution of a Leader
Morgan has watched Aaron evolve from a driven originator into an industry titan. “The day Aaron committed to becoming a banker, focusing on service over price—that changed everything. It elevated Geneva to a whole new level.”
Aaron’s defining trait? “He leads by doing,” Morgan says. “He never asks someone to do something he hasn’t already done himself.”
As for Morgan, his motivation hasn’t wavered. “I love deals. I love helping our loan officers win,” he says with a smile. “Thirty years in, and I still love what I do.”
Geneva’s Portfolio Division may have been born from past lessons, but its future is anything but dated. With Morgan Smith at the helm, it’s poised to continue disrupting the industry—one smart, equity driven loan at a time.


Craving something cozy and nostalgic? Classic comfort food recipes bring back the flavors of home with timeless favorites like hearty casseroles, classic meatloaf, and baked from scratch desserts. These dishes are all about warmth, tradition, and simple ingredients that never go out of style.

DIRECTIONS:
Preheat oven to 350°.

6 - 8
INGREDIENTS: 1 HR 30 MIN
3 tbsp. unsalted butter
1 medium yellow onion, finely chopped
1 stalk celery, finely chopped
3 cloves garlic, finely chopped
1 tsp. dried thyme
1 tbsp. Dijon mustard
1 tbsp. reduced sodium soy sauce
1 tbsp. tomato paste
1 tbsp. Worcestershire sauce
2 large eggs
1/2 c. whole milk
1/2 tsp. unflavored powdered gelatin
1 1/2 lb. (80% lean) ground beef
1/2 lb. ground pork
1/2 c. ground Saltines (from about 3/4 sleeve)
Kosher salt
Freshly ground black pepper
1 c. ketchup
2 tbsp. brown sugar
Chopped fresh thyme, for serving (optional)


In a medium skillet over medium high heat, melt butter. Cook onions and celery, stirring occasionally, until softened and translucent, 10 to 15 minutes. Add garlic and thyme and cook, stirring occasionally, until fragrant, about 1 minute more. Remove from heat. Mix in mustard, soy sauce, tomato paste, and Worcestershire. Transfer to a medium bowl and let cool slightly.
In a large bowl, lightly beat eggs to combine, then stir in milk. Sprinkle gelatin over and let sit 5 minutes.
Add beef, pork, Saltines, and onion mixture; season with salt and pepper. Using your hands or a rubber spatula, mix until meat starts to feel tacky.
In a small bowl, stir ketchup and brown sugar until combined.
Spoon half of the meat mixture into a 9" x 5" loaf pan, making sure there are no air pockets. Spread half of ketchup mixture on top. Cover with remaining meat mixture. Spread top with remaining ketchup mixture.
Bake meatloaf until browned and an instant read thermometer inserted into the center registers 160°, 40 to 50 minutes.
Turn on broiler, if desired. Broil, watching closely, until top browns in spots, 2 to 3 minutes.
Let sit 15 minutes. Carefully drain excess fat and remove loaf from pan with a spatula. Top with thyme (if using).


8 oz. extra wide egg noodles
4 Tbsp. unsalted butter, divided 1 lb. skirt steak
2 tsp. kosher salt, plus more
4 Tbsp. all purpose flour, divided
3 Tbsp. neutral oil
8 oz. baby bella mushrooms, sliced
2 large shallots, thinly sliced
3 cloves garlic, finely chopped
1 tbsp. Dijon mustard
1 tbsp. tomato paste
1 tbsp. Worcestershire sauce
2 c. low sodium beef stock
1/2 c. full bodied red wine
1/2 c. sour cream
Chopped fresh parsley, for serving
DIRECTIONS:
In a large pot of boiling water, cook noodles, stirring occasionally, until al dente according to package instructions. Drain and transfer to a large bowl. Add 2 Tbsp. butter and toss to combine.
Meanwhile, slice steak with the grain into 2" thick pieces. In a small bowl, mix salt and 3 Tbsp. flour. In a large, shallow pan over medium high heat, heat oil until shimmering. Test an edge of a piece of steak; if the sizzle is aggressive, it's ready to go. Dredge steaks in flour mixture, shaking off excess. Cook, turning once, until deep golden brown, about 1 minute per side. Transfer to a cutting board.
In same pan over medium high heat, combine mushrooms, 1 Tbsp. butter, and 1/4 c. water. Cook, stirring occasionally and scraping bottom of pan, until mushrooms are golden brown, 8 to 10 minutes; season with salt and stir to combine. Using a slotted spoon, transfer mushrooms to a plate.
Reduce heat to low. Cook shallots, 3 Tbsp. water, and remaining 2 Tbsp. butter, stirring occasionally, until shallots are caramelized and taste sweet, 10 to 15 minutes.
Add garlic and cook, stirring, until fragrant, about 1 minute. Increase heat to medium high. Add mustard, tomato paste, and Worcestershire and cook, stirring, until paste is brick red, about 1 minute. Sprinkle with remaining 1 Tbsp. flour and cook, stirring, until flour is toasted, about 1 minute. Pour in stock and wine and bring to a boil. Cook, stirring occasionally, until slightly reduced, about 5 minutes. Transfer 1/2 c. sauce to a small bowl; stir in sour cream.
Thinly slice meat against the grain into 1/2" strips. Return steak and mushrooms to pan and toss to combine. Add sour cream mixture and noodles to pan and cook, tossing constantly, until sauce thickens and coats noodles, about 3 minutes; season with salt.
Divide beef stroganoff among bowls or plates. Top with parsley.

https://gardeninthekitchen.com
DIRECTIONS:
Start by seasoning the beef well, on all sides with salt and pepper.
6
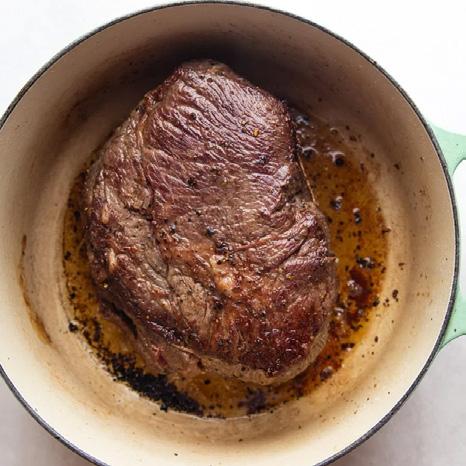
INGREDIENTS: 3 HR 25 MIN
3 lb. chuck roast, shoulder cut
Table salt and black pepper, to taste
2 tbsp olive oil
1 onion, chopped
3 cloves garlic, minced or pressed
1 tbsp tomato paste
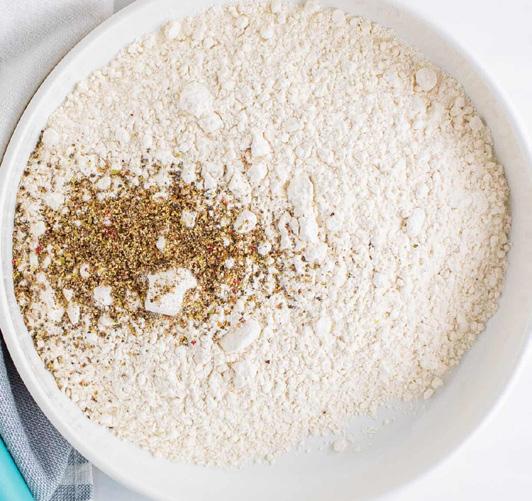
2 tbsp all purpose flour, GF flour, cassava flour
1 c. red wine
32 oz. beef broth
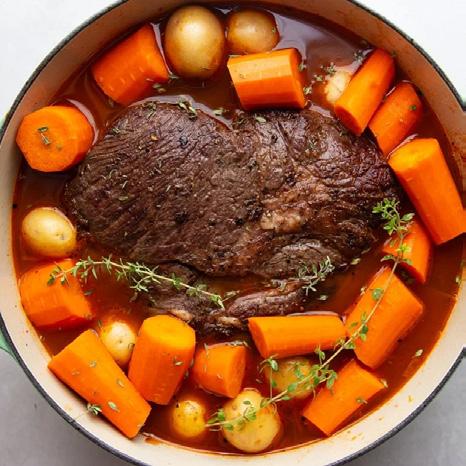
2 lb. small yellow potatoes
1 lb. carrots, chunks
2 bay leaves
Fresh parsley or cilantro
Fresh thyme

In a dutch oven or heavy pot, heat oil. Brown roast on all sides to lock in moisture and flavor (about 15-min). Transfer to a plate.
To the grease left in the pot, add in onions and garlic and sauté until onions are translucent (about 2-3 minutes). The onions can be tender at this point, as they will soften to perfection while the recipe is cooking in the oven.
Then stir in the tomato paste, then flour. Stir well. This is a quick moving process, At this point the flour will absorb all the oil/ moisture. Add the wine, stir and allow the wine to reduce (1-2 minutes). Add beef broth, a few sprigs of fresh thyme and bay leaves. Transfer the beef back to the pot.
Add carrots and potatoes around the beef in the pot. Cover and cook in the oven at 350° degrees for 2 1/2 to 3 hours.
When done, garnish with fresh thyme, parsley or cilantro and serve.


1 whole chicken, cut up (or 8 pieces of your favorite cuts of chicken)
2 tsp. kosher salt
2 tsp. garlic powder
2 tsp. onion powder
2 c. buttermilk
2 tbsp. hot sauce
2 c. all purpose flour
1 cup cornstarch
2 tsp. kosher salt
2 tsp. paprika
2 tsp. black pepper
Peanut oil (for frying)
Flaked salt (for serving, optional)
https://www.thecountrycook.net
DIRECTIONS:
Place 1 whole chicken, cut up in a large bowl.
Sprinkle on top of the chicken: 2 teaspoons kosher salt, 2 teaspoons garlic powder and 2 teaspoons onion powder then toss to coat the chicken in the spices.
Add 2 cups buttermilk and 2 Tablespoons hot sauce, stir until everything is combined. Cover with plastic wrap and let marinate in the fridge for at least 2 hours, but it’s best if you can let it sit overnight.
In a medium sized bowl, whisk together 2 cup all purpose flour, 1 cup cornstarch, 2 teaspoons kosher salt, 2 teaspoons paprika and 2 teaspoons black pepper. Set aside.
Fill up a deep fryer with peanut oil (or neutral frying oil of your choice) and preheat to 325°F – you may need to turn down the heat to 300°F if you notice the skin is getting dark too quickly.
Also, if using a cast iron skillet, please remember it holds heat very well so it is easy for it to get too hot so please monitor closely.
Taking the chicken pieces one at a time, let the excess buttermilk drip off. Coat in the flour mixture, make sure the chicken is well coated. Shake off any excess. Set the chicken aside and let it sit for a few minutes until the coating starts to look a little pasty.
Carefully add the piece of chicken to the deep fryer and continue with the next piece. Don't add more than three or four pieces at at time. You will need to fry in batches so you do not overcrowd the fryer. Fry until golden brown, turning every few minutes.
Chicken is done when golden brown and the internal temperature reaches 165°F. Depending on the size of the chicken, dark meat can take about 12-14 minutes and white meat takes 8-10 minutes (these are estimates – use a meat thermometer for accurate doneness)
When the chicken is done frying, place it on a paper towel lined sheet tray and immediately sprinkle a little flaked salt on top. Continue with the rest of the chicken pieces.

https://thecozycook.com
DIRECTIONS:
For the Biscuits:

4
INGREDIENTS: 55 MIN
Chicken Pot Pie
2 small boneless skinless chicken breasts, see notes
Salt/pepper, to taste
3 c. chicken broth
4 tbsp. butter
1/2 c. onions, finely diced
1/2 c. celery, finely diced
1/2 c. carrots, finely diced
2 cloves garlic, minced
1/2 tsp. EACH: Onion Powder, Dry Thyme, Dry Rosemary
1/4 tsp. ground sage
1/3 c. flour
1/2 c. half and half
1 chicken bouillon cube
1 tsp. low sodium soy sauce
1 c. frozen peas
For the Biscuits:
Use your biscuit recipe of your choice or refrigerated ones and then follow directions below.


Prepare buttermilk biscuits but do not bake. Store formed biscuits on a plate in the fridge while you prepare the pot pie, then add the formed biscuits to the top when ready to bake.
Bake at 425° for 15-18 minutes. (Optional: Brush with butter and bake at 450° for up to 5 more minutes to brown the top more.)
Refrigerated biscuits may also be used. If making Bisquick biscuits or using a Biscuit mix: Prepare them JUST before baking. Refer to package for baking time/ temperature.
For the Chicken Pot Pie:
Season each side of the chicken with salt and pepper. Add it to a medium saucepan along with the chicken broth and bring it to a very gentle bubble with the lid cracked for 15 minutes, until cooked through. Don’t boil rapidly or the chicken will be tough. Remove the chicken and use forks to shred. Set aside and reserve the broth that the chicken cooked in.
Meanwhile, melt butter in a wide (12 inch) pan over medium heat and sauté onions, celery, and carrots for 5-6 minutes. Add garlic and seasonings. Toss to coat and cook for 1 more minute.
Add flour and toss to coat. Cook for 2 minutes or until you can no longer smell raw flour.
Add 2/3 of the chicken broth in small splashes, stirring to incorporate. Add the half and half in the same manner.
Add chicken bouillon and soy sauce. Then add the shredded chicken and stir to combine.
If the liquid was added slowly, the gravy should be pretty thick. If you would like it to be thicker, bring to a gentle boil and reduce to a simmer.
Optional: Add any of the remaining 1/3 chicken broth if desired. The bottom of the biscuits will absorb some of it during baking.
Add the frozen peas and stir to combine and heat through. Remove from heat.
Transfer filling to a lightly greased 8 x 8 inch baking dish if your skillet isn’t oven safe.
Add the biscuits to the top and bake per biscuit recipe instructions, or until biscuits are golden and set in the middle. Note: you can also bake the biscuits separately on a baking sheet and place them on the filling after, resulting in a crispier bottom biscuit.
Optional: Brush butter on top of the biscuits at the end and bake at 450° for 3-5 more minutes if additional browning is desired.
Stove Top


2 tbsp. extra virgin olive oil
1 medium yellow onion, chopped
2 cloves garlic, finely chopped
1 lb. ground beef
Kosher salt
Freshly ground black pepper
1 tbsp. tomato paste
1 (15 oz.) can diced tomatoes
1 (15 oz.) can tomato sauce
1 1/4 c. low sodium beef broth
1 tsp. Italian seasoning
1 tsp. paprika
1 1/2 c. elbow macaroni
1 c. shredded cheddar
Chopped fresh parsley, for serving
DIRECTIONS:
In a large skillet over medium heat, heat oil. Add onion and cook, stirring occasionally, until softened, about 7 minutes. Add garlic and cook, stirring, until fragrant, about 1 minute more.
Add ground beef, season with salt and pepper, and cook, breaking up with a spoon, until no longer pink, about 6 minutes. Drain fat.
Add tomato paste and stir to coat, then pour in diced tomatoes, tomato sauce, and broth. Add Italian seasoning and paprika, then stir in macaroni.
Bring to a simmer and cook, stirring occasionally, until pasta is tender, 10-15 minutes.
Stir in cheese until melted; season with salt and pepper, if needed. Remove from heat. Top with parsley.

https://www.delish.com

INGREDIENTS: 50 MIN
1 tbsp. extra virgin olive oil
1 medium yellow onion, chopped
1 red bell pepper, seeds and ribs removed, chopped 1/2 c. ketchup
2 garlic cloves, finely chopped
1 tbsp. chili powder
2 tbsp. apple cider vinegar
2 tbsp. yellow mustard
1 tbsp. brown sugar
1 tbsp. Worcestershire sauce
Kosher salt
Freshly ground black pepper
1 lb. ground beef
1 c. canned tomato sauce
6 hamburger buns, toasted


DIRECTIONS:
In a large skillet over medium high heat, heat oil. Cook onion and bell pepper, stirring occasionally, until softened and slightly golden, 10 to 15 minutes
Add ketchup and cook, stirring occasionally, until color has darkened and ketchup is reduced to a thick paste, 7 to 10 minutes.
Add garlic and chili powder and cook, stirring, until fragrant, about 1 minute. Add vinegar, mustard, brown sugar, and Worcestershire sauce; season with salt and pepper. Cook, stirring frequently, until incorporated, about 1 minute more.
Increase heat to high and add ground beef. Using a fork, break apart beef until separated and no big lumps remain. Cook, stirring frequently, until browned, about 5 minutes.
Add tomato sauce and bring to a boil, stirring to combine. Let cool slightly; season with salt, if needed.
Divide beef mixture among buns and serve.


Preheat oven to 400°.
2 lb. russet potatoes, peeled, sliced
Kosher salt
2/3 c. half and half
4 tbsp. unsalted butter
2 tbsp. chopped fresh parsley, divided
Freshly ground black pepper
1 tbsp. canola oil
2 lb. lean ground beef
1 medium yellow onion, chopped
2 medium carrots, peeled, chopped
3 cloves garlic, chopped
2 tsp. chopped fresh rosemary
2 tsp. chopped fresh thyme
3 tbsp. tomato paste
1/2 c. dry red wine
1 c. low sodium beef broth
3 tbsp. Worcestershire sauce
Cooking spray
3 tbsp. all purpose flour
1 c. frozen corn
1 c. frozen peas
3 tbsp. grated Parmesan
In a medium saucepan, cover potatoes with water by 1/2"; season with 1 tablespoon salt. Bring to a boil over high heat. Cook until potatoes are fork tender, 12 to 15 minutes. Drain potatoes; set aside in colander.
In same pot over medium low heat, cook half and half and butter, stirring until butter is melted. Return potatoes to pot. Mash potatoes with a potato masher or a fork. Stir in 1 tablespoon parsley; season with salt and pepper. Remove from heat.
Meanwhile, in a large skillet over medium high heat, heat oil. Add beef; season with 2 teaspoons salt and 1/2 teaspoon pepper. Break up beef with a wooden spoon and cook until crumbled and no longer pink, 6 to 8 minutes. Using a slotted spoon, transfer beef to a plate. Pour off all but 2 tablespoons beef drippings.
In same skillet over medium heat, cook onion and carrots, stirring, until onions begin to soften, 5 to 6 minutes. Add garlic, rosemary, and thyme and cook, stirring, until fragrant, about 2 minutes more. Return beef and accumulated juices to skillet; stir in tomato paste. Cook, stirring, until tomato paste turns dark red, 3 to 4 minutes. Add wine and cook, stirring, until almost completely evaporated, 2 to 3 minutes. Stir in broth and Worcestershire and bring to a simmer. Sprinkle with flour and cook, stirring occasionally, until sauce is thickened, about 5 minutes. Stir in corn and peas.
Pour beef mixture into a 13" x 9" pan and dollop mashed potatoes on top. Lightly spray a rubber spatula with cooking spray and spread potatoes over beef mixture. Sprinkle with Parmesan; season with a pinch of pepper.
Bake shepherd’s pie until beef mixture is bubbling, about 25 minutes. Remove from oven. Place a rack in upper third of oven and turn broiler to high. Broil until top begins to brown, 1 to 2 minutes. Sprinkle with remaining 1 tablespoon parsley. Let cool 10 minutes before serving.

DIRECTIONS:
Steak:
INGREDIENTS:
Steak:
1 large egg
1/3 c. plain dried bread crumbs
2 tbsp. Worcestershire sauce
1 tsp. garlic powder
1 tsp. onion powder
1 tsp. (or more) kosher salt
1/4 tsp. freshly ground black pepper
1 lb. ground beef
1 tbsp. plus 1 tsp. neutral oil
Gravy:
6 oz. crimini mushrooms, scrubbed, thinly sliced
1 1/2 tsp. kosher salt, divided
4 tbsp. unsalted butter
1 yellow onion, chopped
2 sprigs fresh thyme
2 tbsp. all purpose flour
1 tbsp. tomato paste
1/3 c. red wine (such as Cabernet Sauvignon)
1 1/2 c. low sodium chicken stock
1 tbsp. Worchestershire sauce


In a large bowl, mix egg, bread crumbs, Worcestershire sauce, garlic powder, onion powder, salt, and pepper. Add beef and mix with clean hands until mixture becomes tacky.
In a large skillet over medium high heat, heat 1 tsp. oil. Pinch off a small piece of beef mixture and add to pan. Cook until browned on both sides, about 1 minute total. Transfer to a small plate. Let cool slightly, then taste. Season remaining beef mixture with more salt, if needed. Form beef mixture into 4 (3" wide, 4" long, 3/4" thick) oval patties and arrange on a parchment lined sheet. Using a clean finger, press 8 to 10 dimples into each patty.
In a large skillet over medium high heat, heat remaining 1 tbsp. oil. Place patties in skillet, reduce heat to medium, and cook, undisturbed, until deeply browned on the bottom, 2 to 3 minutes. Turn and cook until other side is browned, 2 to 3 minutes more. Transfer to a large plate.
Gravy:
Drain all but 3 Tbsp. fat from skillet. Reduce heat to medium and add mushrooms and 1/4 c. water. Cook, stirring occasionally, until deeply golden brown, 6 to 8 minutes; season with 1/2 tsp. salt. Transfer to a small bowl; set aside. In same skillet over medium heat, melt butter. Add onion, thyme, and 1/2 tsp. salt. Cook, stirring occasionally, until onions are slightly softened and translucent, about 7 minutes. Add flour and tomato paste and cook, stirring frequently, until tomato paste is darkened and beginning to stick to skillet, about 2 minutes. Add wine and cook, stirring, until slightly reduced and a thick, jammy paste forms, about 2 minutes. Slowly whisk in stock and Worcestershire sauce. Bring to a boil over high heat, then reduce heat to medium low and simmer, stirring occasionally, until thickened, 4 to 5 minutes.
Remove thyme sprigs and stir in reserved mushrooms. Return steaks to skillet, spooning sauce over. Simmer until an instant read thermometer inserted into thickest part of steak registers 165°, 4 to 5 minutes more; season with remaining 1/2 tsp. salt, if needed.


INGREDIENTS:
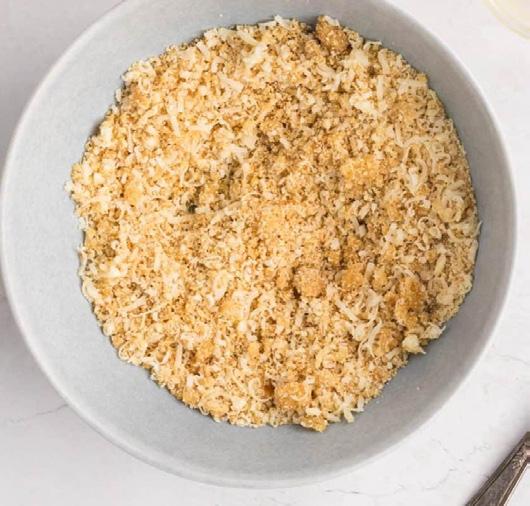
1/2 c. (1 stick) unsalted butter, plus more for baking dish
Kosher salt
1 lb. elbow macaroni
1/2 c. all purpose flour
5 cups whole milk
1 tsp. mustard powder
Freshly ground black pepper
12 oz. shredded cheddar
8 oz. shredded Gruyère
3 oz. finely grated Parmesan, divided
1 c. panko bread crumbs
3 tbsp. extra virgin olive oil
DIRECTIONS:
Preheat oven to 375°.
Grease a 13"x9" baking dish with butter. In a large pot of boiling salted water, cook macaroni, stirring occasionally, until al dente, 5 to 6 minutes. Drain.
In a large saucepan over medium heat, melt 1 stick butter. Sprinkle flour over and cook, stirring, until slightly golden, 2 to 3 minutes. Pour in milk and whisk until combined. Add mustard powder; season with salt and pepper.
Bring to a simmer over medium high heat and cook, stirring, until sauce starts to thicken, about 2 minutes.
Remove pan from heat and whisk in cheddar, Gruyère, and 1 cup Parmesan until melted and smooth. Stir in macaroni and transfer to prepared dish.
In a small bowl, combine panko, oil, and remaining 1/2 cup Parmesan. Sprinkle over macaroni; season with more pepper.
Bake mac and cheese until bubbly and golden, 25 to 30 minutes. Let cool 10 minutes.

INGREDIENTS:
4 (6 to 8 oz.) boneless pork chops
1 tsp. smoked paprika
Kosher salt
Freshly ground black pepper
2 Tbsp. extra virgin olive oil
1 apple, cored, thinly sliced
1 small yellow onion, halved, thinly sliced
2 garlic cloves, minced
2 tsp. finely chopped fresh rosemary
2 tsp. fresh thyme leaves
1 cup apple cider
DIRECTIONS:


Season pork chops all over with paprika, salt, and pepper.
In a large skillet, heat oil over medium heat. Add pork chops and cook, turning halfway through, until golden, about 3 minutes per side. Transfer to a plate.
To the same skillet, add apple, onion, and garlic and cook until apples and onion are browned and slightly softened, about 8 minutes. Add rosemary, thyme, and apple cider and bring to a simmer.
Return pork chops to skillet and simmer until cider is almost completely reduced and a thermometer inserted in the thickest part of the chops registers 145°, 6 to 8 more minutes.


1/3 c. breadcrumbs (can use regular or panko)
1/3 c. grated parmesan cheese
1 tbsp. melted salted butter
12 oz. bag egg noodles
1/2 c. milk
10.5 oz. can cream of mushroom soup
10.5 oz. can cream of chicken soup
2 (5 oz) cans of tuna
1 c. frozen peas
1 c. shredded cheddar cheese
1/2 c. sour cream (or mayonnaise)
1/2 tsp. dried parsley (optional, plus more for topping)
1/4 tsp. onion powder
1/4 tsp. garlic powder
1/4 tsp. black pepper
1/4 tsp. kosher salt
https://www.thecountrycook.net
DIRECTIONS:
Preheat the oven to 400° F.
Spray a 9×13 inch baking dish with nonstick cooking spray.
To a bowl add 1/3 cup breadcrumbs, 1/3 cup grated parmesan cheese and 1 Tablespoon melted salted butter. Mix until combined. Set aside.
Cook 12 ounce bag egg noodles according to the package directions. This will take approximately 5-7 minutes. You want to cook this to al dente. Drain the noodles well and add to the baking dish.
To the baking dish add 1 1/2 cups milk, 10.5 ounce can cream of mushroom soup, 10.5 ounce can cream of chicken soup, 2 (5 ounce) cans of tuna, 1 cup frozen peas, 1 cup shredded cheddar cheese, 1/2 cup sour cream (or mayonnaise), 1/2 teaspoon dried parsley, 1/4 teaspoon onion powder, 1/4 teaspoon garlic powder, 1/4 teaspoon black pepper and 1/8 teaspoon kosher salt. Mix until combined.
Top with the breadcrumb mixture that you set aside earlier. Bake for about 15 minutes (you should see the edges bubbling).
Turn the oven to broil on high and brown the top for about 1 minute. Don’t walk away from the oven. You just want the top to be a golden brown so keep a close eye on it.
Remove from the oven and top with some more dried parsley flakes (optional).


INGREDIENTS: 1 HR 30 MIN
2 tbsp. extra virgin olive oil, plus more for drizzling
1 medium yellow onion, chopped
3 cloves garlic, finely chopped
2 tbsp. tomato paste
1 lb. ground beef
1 1/2 c. cooked white or brown rice
1 (14.5 oz.) can diced tomatoes
1 1/2 tsp. dried oregano
Kosher salt
Freshly ground black pepper
6 bell peppers, tops and cores removed
1 c. shredded Monterey jack
Chopped fresh parsley, for serving


DIRECTIONS:
Arrange a rack in center of oven; preheat to 400°.
In a large skillet over medium heat, heat oil. Cook onion, stirring occasionally, until softened, about 7 minutes. Stir in garlic and tomato paste and cook, stirring, until fragrant, about 1 minute more. Add ground beef and cook, breaking up meat with a wooden spoon, until no longer pink, about 6 minutes.
Stir in rice and diced tomatoes; season with oregano, salt, and pepper. Let simmer, stirring occasionally, until liquid has reduced slightly, about 5 minutes.
Arrange peppers cut side up in a 13" x 9" baking dish and drizzle with oil. Spoon beef mixture into each pepper. Cover baking dish with foil. Bake peppers until tender, about 35 minutes. Uncover, sprinkle with cheese, and continue to bake until cheese is bubbly, about 10 minutes more.
Top with parsley before serving.


Bolognese Sauce:
1 tsp. extra virgin olive oil
1 lb. (90% lean) ground beef
1 lb. ground pork
3 tbsp. tomato paste
2 (32 oz.) jars marinara sauce
2 tsp. kosher salt
Béchamel Sauce:
4 c. whole milk
1/2 c. (1 stick) unsalted butter
1/2 c. all purpose flour
1/4 tsp. ground nutmeg
2 tsp. kosher salt
1/2 tsp. ground black pepper
Assembly:
15 no boil lasagna noodles
1 lb. whole milk mozzarella, shredded
3 c. finely grated Parmesan
Cooking spray
Chopped fresh parsley, for serving
In a large pot over medium high heat, heat oil. Cook beef and pork, breaking up with a wooden spoon, until no longer pink, about 6 minutes. Drain excess fat.
Add tomato paste to pot and cook, stirring, until incorporated, about 1 minute. Add marinara sauce and stir to combine. Bring to a boil, then stir in 1 teaspoon salt. Reduce heat to medium low and simmer, stirring occasionally, until flavors have melded, about 20 minutes; season with remaining 1 teaspoon salt, if needed.
Béchamel Sauce:
In a medium pot over medium heat, heat milk until warm to the touch but not boiling.
In a large pot over medium heat, melt butter. Add flour and cook, whisking frequently, until light tan in color and texture resembles wet sand, about 2 minutes. Whisking constantly, very slowly add milk until combined. Increase heat to medium high and continue to cook, whisking constantly, until sauce is thickened and smooth, 3 to 5 minutes.
Pass spoon through edges of pot to collect any butter flour mixture that wasn’t fully incorporated and mix to combine. Stir in nutmeg; season with salt and pepper.
Assembly:
Preheat oven to 350°. In a deep 13" x 9" ceramic, glass, or metal baking dish, spread 1 1/2 cups Bolognese, followed by 3 pasta sheets and 3/4 cup béchamel. Sprinkle with about one fifth of mozzarella and Parmesan. Repeat to make 5 layers, finishing with cheese. Spray a sheet of foil with cooking spray. Cover dish greased side down. Bake lasagna 20 minutes, then increase oven temperature to 400°. Uncover and continue to bake until sides are bubbling and darkened and cheese starts to turn golden brown, 25 to 30 minutes. Turn broiler to medium. Broil lasagna, watching closely, until top is browned in spots, about 1 minute.
Let cool 15 minutes. Top with parsley.


DIRECTIONS:
Preheat oven to 350°.
INGREDIENTS:
Cooking spray
2 cups (240 g.) all purpose flour
1 1/2 tsp. baking powder
1 tsp. kosher salt
1 cup (2 sticks) unsalted butter, softened
1 cup (200 g.) granulated sugar
3 large eggs, room temperature
1 tsp. pure vanilla extract
1/2 tsp. almond extract
3/4 cup (170 g.) sour cream, room temperature


Grease a 9" x 5" loaf pan with cooking spray. In a medium bowl, whisk flour, baking powder, and salt until combined.
In a large bowl, using a handheld mixer on medium speed (or in the large bowl of a stand mixer fitted with the paddle attachment), beat butter and sugar until light and fluffy, about 2 minutes. Add eggs, one at a time, beating to blend after each addition. Beat in vanilla and almond extracts.
Add dry ingredients and beat on low speed until just a few dry streaks remain. Beat in sour cream until just combined. Pour batter into prepared pan; smooth top.
Bake cake until a tester inserted into the center comes out clean, 55 to 60 minutes. Transfer pan to a wire rack and let cool completely.


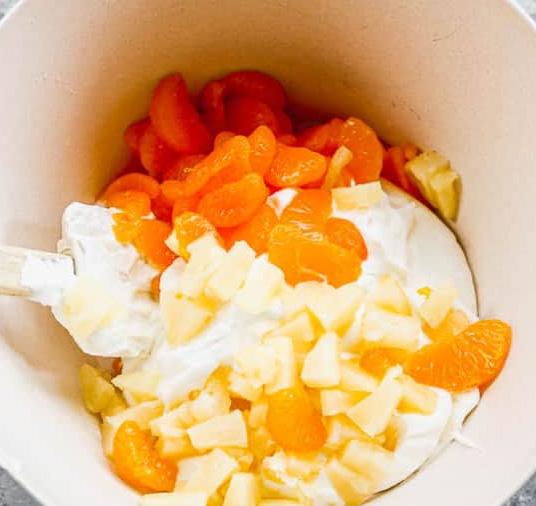
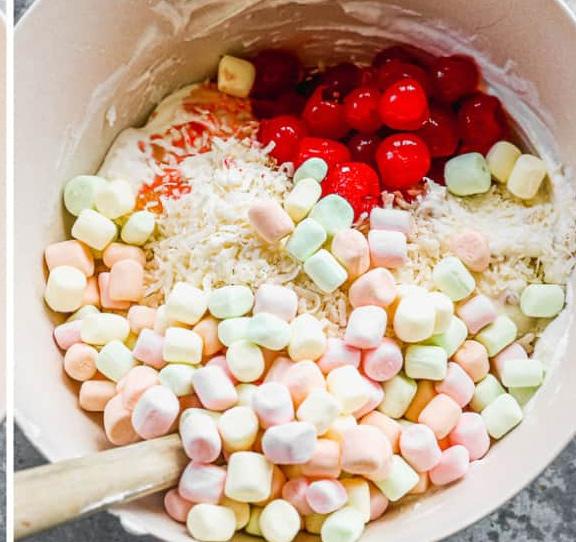
1 c. heavy whipping cream
1/4 c. powdered sugar
1/2 c. plain Greek yogurt, or vanilla
1 c. shredded sweetened coconut
11 oz can mandarin oranges, drained
8 oz can pineapple tidbits , drained
1 c. maraschino cherries, drained
1 1/2 c. mini fruit flavored marshmallows
Optional fruit salad add ins: chopped pecans, sliced bananas, chopped apples
https://tastesbetterfromscratch.com
DIRECTIONS:
Add whipping cream to a large bowl or stand mixer and beat with electric beaters for 1-2 minutes. Slowly add powdered sugar and continue beating until stiff peaks form. Fold in yogurt.
Drain canned fruits very well, then add remaining ingredients to a large serving bowl.
Fold in whipped cream mixture. Chill for at least 30 minutes before serving.
Ambrosia Salad can be made several hours or up to 1 day ahead of time, but for best results, leave the marshmallows out and stir them in just before serving.

https://www.delish.com
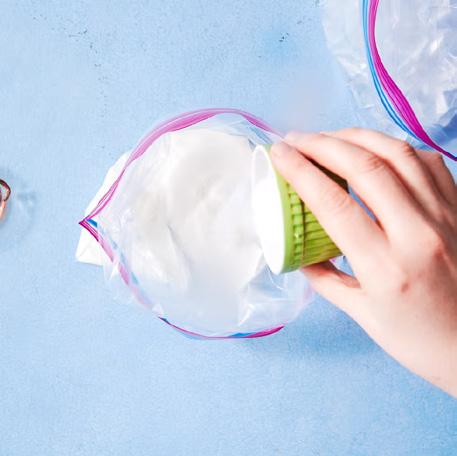
INGREDIENTS: 15 MIN
1 cup half and half
2 Tbsp. granulated sugar
1/2 tsp. pure vanilla extract
3 cups ice
1/3 cup kosher salt
Toppings of your choice


DIRECTIONS:
In a small resealable plastic bag, combine half and half, sugar, and vanilla. Push out excess air and seal.
Into a large resealable plastic bag, combine ice and salt. Place small bag inside the bigger bag and shake vigorously, 7 to 10 minutes, until ice cream has hardened.
Remove from bag and enjoy with your favorite ice cream toppings.


3/4 c. sugar
1/4 c. all purpose flour
1/4 tsp. salt
3 c. 2% milk
3 large eggs
1 1/2 tsp. vanilla extract
8 ounces vanilla wafers (about 60 cookies), divided
4 large ripe bananas, cut into 1/4 inch slices
DIRECTIONS:
In a large saucepan, mix sugar, flour and salt. Whisk in milk. Cook and stir over medium heat until thickened and bubbly. Reduce heat to low; cook and stir 2 minutes longer. Remove from heat.
In a small bowl, whisk eggs. Whisk a small amount of hot mixture into eggs; return all to pan, whisking constantly. Bring to a gentle boil; cook and stir 2 minutes. Remove from heat. Stir in vanilla. Cool 15 minutes, stirring occasionally.
In an ungreased 8 in. square baking dish, layer 25 vanilla wafers, half the banana slices and half the pudding. Repeat layers.
Press plastic wrap onto surface of pudding. Refrigerate 4 hours or overnight. Just before serving, remove wrap; crush remaining wafers and sprinkle over top.


INGREDIENTS: 20 MIN
Strawberries:
2 pints strawberries, hulled, sliced
Juice of 1/2 lemon
1 tbsp. granulated sugar
Biscuits:
2 1/2 c. all purpose flour
2 tbsp. baking powder
1 tbsp. granulated sugar
1 tsp. kosher salt
1/2 c. cold unsalted butter, cut into 1/2" cubes
1 c. buttermilk, plus more for brushing
Turbinado sugar, for sprinkling
Whipped Cream & Assembly
1 1/2 c. heavy cream
2 tbsp. confectioners' sugar


DIRECTIONS:
Strawberries:
In a medium bowl, toss strawberries, lemon juice, and sugar until combined. Let sit at room temperature until ready to use, or cover and refrigerate up to 1 day.
Biscuits:
In a large bowl, whisk flour, baking powder, granulated sugar, and salt. Add butter and, using your hands, work butter into flour until pea size pieces form. Add buttermilk and stir with a rubber spatula until dough comes together.
On a clean surface, form dough into a rectangle about 1" thick. Starting on a long side, fold dough into thirds, like folding a letter. Rotate dough 90°. Using a rolling pin, gently pat back to a 1" thick rectangle. Repeat folding process, working fast so butter doesn't melt. Pat dough to a 1" thick rectangle. Using a 3 1/2" round biscuit or cookie cutter, quickly press down (don’t twist!) to cut out rounds. Transfer to a parchment lined baking sheet, spacing about 1/2" apart. Bring together dough scraps and cut out more rounds (you should have about 6).
Brush tops of biscuits with buttermilk and sprinkle with turbinado sugar. Freeze until cold, about 10 minutes.
Preheat oven to 425°. Bake biscuits until tops are golden brown, about 20 minutes.
Whipped Cream & Assembly
In the large bowl of a stand mixer fitted with the whisk attachment, beat cream and confectioners' sugar on medium high speed until soft peaks form.
Split biscuits in half. Top bottom half with whipped cream and strawberries, spooning over any juices from strawberries. Close with second half. Top with a little more strawberries and cream.


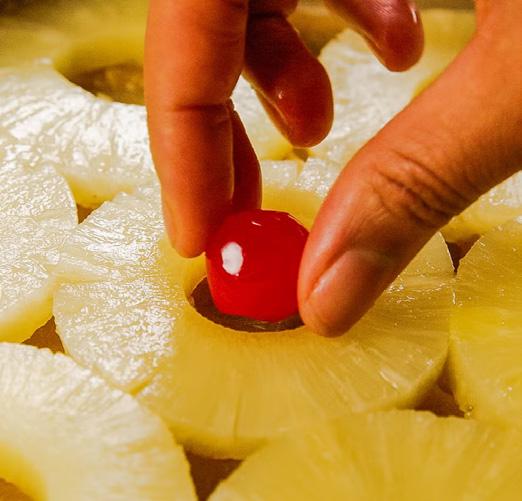

DIRECTIONS:
Preheat oven to 350° and grease a round 9” cake pan.
INGREDIENTS:
For the Topping:
1/4 c. butter, melted
1/2 c. packed brown sugar
1 (20 oz.) can pineapple rings in juice
Stemless maraschino cherries
For the Cake Batter:
1 1/3 c.s all purpose flour
1 tsp. baking powder
1/2 tsp. kosher salt
1/4 c. butter, softened
1/2 c. granulated sugar
1/4 c. packed brown sugar
1 large egg
1 tsp. pure vanilla extract
1/4 c. sour cream
1/4 c. pineapple juice (from can used for topping)
Make topping: Mix butter with brown sugar and add to prepared cake pan. Let mixture spread to the edges, then add 7 pineapple rings. Place cherries inside and in between pineapple slices.
Make batter: In a small bowl, whisk together flour, baking powder, and salt. Set aside. In a large bowl using a hand mixer, cream butter with sugars. Beat in egg, vanilla, and sour cream, then slowly beat in flour mixture and pineapple juice until just combined.
Spoon the batter over the pineapple, gently spreading out in an even layer.
Bake until cake is golden and a toothpick comes out clean, about 35 minutes.
Remove from oven, wait 5 minutes and flip cake upside down onto serving platter. Wait 30 seconds more, then carefully lift pan off. Let cool completely before slicing and serving.

There’s just something about sunshine. It lifts our spirits, invites us to slow down, and reminds us to step outside and breathe. Whether it’s a peaceful morning walk or an afternoon by the pool, time in the sun just feels right. But beyond the glow and feel good vibes, the sun offers real health benefits—when enjoyed mindfully.
Sunshine is your body’s best natural source of Vitamin D, a nutrient that supports bone health, immune strength, and overall vitality. Just 10 to 30 minutes of exposure to midday sun, several times a week, can help keep your levels in check. It’s a simple, effective way to boost your wellness—no pills required. Even a short walk outdoors can make a meaningful difference.
Sunlight helps regulate your circadian rhythm, the internal clock that controls your sleep cycle. Morning exposure can signal your body to feel more awake during the day—and ready to rest at night. Getting outside early can actually help you fall asleep faster and sleep more soundly. More natural light during the day often means deeper, more restful sleep.
Spending time in the sun triggers your brain to release serotonin, the “feel good” hormone. This can reduce anxiety, improve focus, and help fight off symptoms of depression. Natural light has a powerful effect on mental well-being, especially for those prone to seasonal mood shifts. It’s like nature’s mood lifting therapy, available right outside your door!
Aim to get your sun time during early mornings or late afternoons when UV rays are less intense. Always wear a broad spectrum SPF 30 or higher, and reapply every two hours if you’re swimming or sweating. Don’t forget to wear sunglasses, a wide-brim hat, and stay hydrated throughout the day. A little planning goes a long way in keeping your skin healthy and protected.
The sun is a beautiful, energizing part of our everyday lives—and with a few easy precautions, it can also be a powerful tool for better health. Let it warm your skin, lift your mood, and support your body from the inside out. There’s no need to overdo it; a little sunshine goes a long way. So go ahead—step into the light, and let the sunshine work its magic.
The season of summer is perfect for enjoying the sunshine, long walks, and outdoor play with your dog—but rising temperatures can pose serious risks for your furry friend. Dogs don’t handle heat the same way we do, and they can overheat quickly, especially in hot or humid conditions. As pet parents, it’s our responsibility to make sure our companions stay cool, hydrated, and happy during the warmer months. With a little planning and awareness, you and your pup can enjoy everything summer has to offer—safely.
Keeping your dog well hydrated is one of the most important things you can do during hot weather. Always ensure they have access to fresh, cool water, whether you’re at home, in the yard, or out exploring. Look out for signs of dehydration like dry gums, excessive panting, or sluggish behavior. Tossing a few ice cubes in their bowl or bringing along a portable pet water bottle can make a big difference.
Sidewalks, sand, and pavement can heat up fast under the sun and easily burn your dog’s sensitive paw pads. A good rule of thumb: if it’s too hot for your bare hand, it’s too hot for their feet. Try to schedule walks for early mornings or later in the evenings when the ground has cooled off. If daytime walks are a must, dog booties can offer added protection.
It’s crucial to recognize the early signs of heat exhaustion in dogs, which include heavy panting, drooling, rapid pulse, vomiting, or weakness. If your dog shows any of these symptoms, move them to a cooler area right away and contact your vet. Offer small amounts of water and try to lower their temperature gradually. Heatstroke in pets is serious—but with quick action, it’s often preventable.

Summer should be a season of joy, adventure, and bonding with your four legged best friend. With just a few thoughtful precautions, you can keep your pup safe and smiling all season long. From shady naps to splashy playdates, there are plenty of ways to beat the heat together. Keep water close, stay aware of the temps, and let your dog set the pace—because their comfort, health, and happiness always come first.
This one’s a biggie—never, ever leave your dog in a parked car during summer, even for a quick errand. On a warm day, the temperature inside a vehicle can rise to dangerous levels in just minutes, even with the windows cracked. It can quickly become a life threatening situation. If your pup can’t come inside with you, it’s best to leave them at home in a cool, comfortable space.
Dogs need a break from the heat just like we do. Make sure your pup has access to shady spots outdoors or air conditioned spaces indoors where they can relax and cool down. Cooling mats, fans, frozen treats, or even a damp towel can help lower their body temperature. On especially hot days, encourage downtime and limit high energy activities during peak sun hours.
A little effort. A lot of peace. The season of slowing down starts right at home.
Summer should feel like exhaling, like the moment the sun hits your skin after being inside all day, like the clink of ice in a glass, like knowing you have nowhere to be. But sometimes, even in the slowest season, our homes feel anything but calm.
Between pool towels multiplying like rabbits and dishes stacking faster than we can blink, the chaos creeps in quickly. That’s where the five minute reset comes in—a simple daily rhythm that keeps the clutter (and your stress) in check. No deep cleaning, no perfectionism, just small, doable shifts that help your home (and your mind) feel a little lighter.
Let’s bring the peace back to your placefive minutes at a time.

1.
Morning Light & Movement
Before the emails. Before the to do list. Take five minutes to wake up your space and your body. Open the curtains wide. Let in the golden light. Do a quick stretch or slow walk through your home with a mug in hand, music on, maybe barefoot. Let it be your summer sunrise ritual.
Bonus tip: open a window. Let the breeze do a quick energy cleanse.

3.
Speed Swipe for the Win
Choose one high traffic surface a day for example, the kitchen counter, bathroom vanity, or coffee table, and give it a quick wipe down. You’ll be shocked at how five minutes keeps grime at bay and your home feeling fresh, not frazzled.
Keep a small caddy of wipes or natural cleaner in reach to make this mindless.

2.
The Drop Zone Detox
We all have that one surface that collects keys, mail, water bottles, and… somehow, a sock? Take five to tackle it. Clear it. Wipe it. Reset it. A clutter free catchall sets the tone for everything else.
Make it a habit by setting a daily reminder or tying it to your morning coffee.
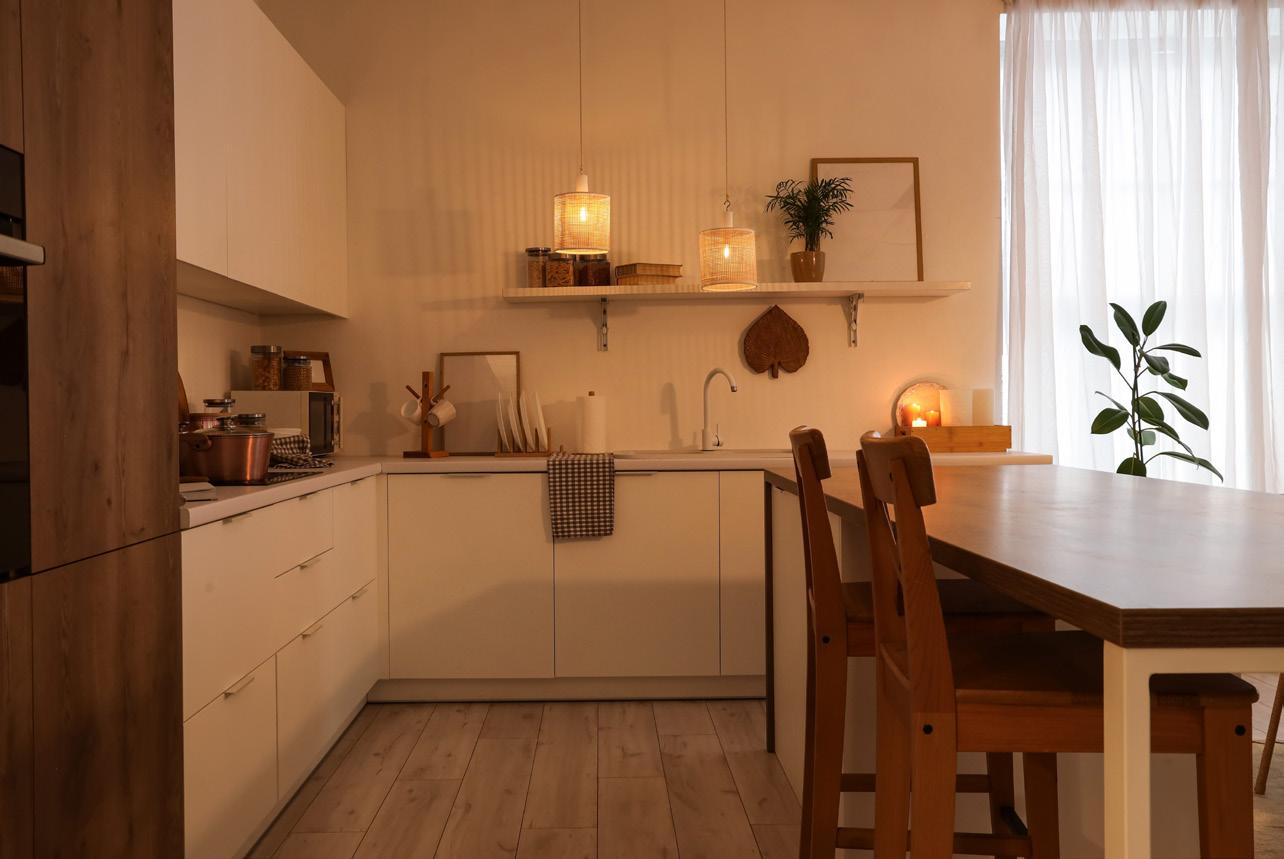
4.
Sink Reset Before Bed
Nothing says “adult peace” like waking up to a clean sink. Before bed, take a moment to load the dishwasher, wipe down the faucet, and light a candle or dim the kitchen lights. It sets a calming tone to close the day.
Want to level up? Put out a fresh dish towel and a lemon in your diffuser overnight.
Scent is a secret weapon. Try diffusing a summery blend like eucalyptus + lemon or spritzing a homemade linen spray before guests arrive (or just because you deserve it). In five minutes, your space will smell like vacation.
For a nostalgic twist, burn a candle that smells like sunscreen, coconut, or fresh linen.
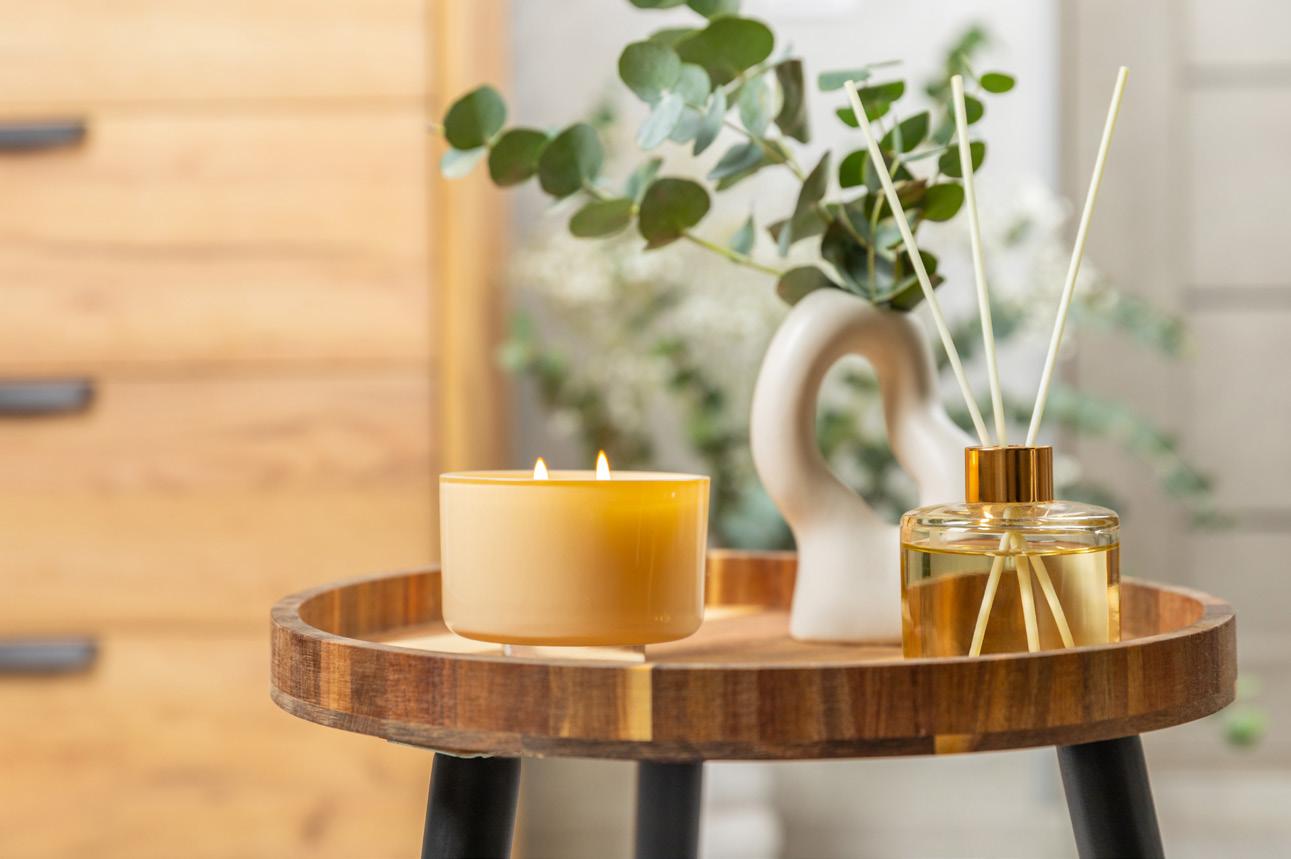
7.
The Evening Prep Pause
Before you crash for the night, do a five minute prep for tomorrow. Lay out clothes. Fill a water bottle. Tidy the entryway. It’s not about doing it all, it’s about giving your future self a softer landing in the morning.
Add a journal or gratitude list to seal the wind down with intention.
6.
Touch Grass. Literally.
Your home doesn’t stop at the front door. Step outside for five minutes every day. Water your plants. Sit on the porch. Watch the sky change. Connecting with nature— even briefly—lowers stress and boosts serotonin. Science says so.
Ditch your phone for this part. Just be.

9.
Hydrate Your Home (and Yourself)
Fill your water bottle. Refill your pet’s bowl. Give your plants a quick drink. In five minutes, you’ve nurtured the living things in your space—yourself included. Hydration is a ritual. Treat it like one.
Add mint or cucumber to your water for a spa level upgrade.

8.
Basket Method = Sanity Saver
Place a pretty basket in a busy zone and do a five minute sweep: sunglasses, lip balm, mail, loose toys—all go in. Sort it later. You’re not ignoring the clutter, you’re containing it until you have the time or energy to deal with it.
Pro tip: make it a family activity and assign a “basket boss” of the day.

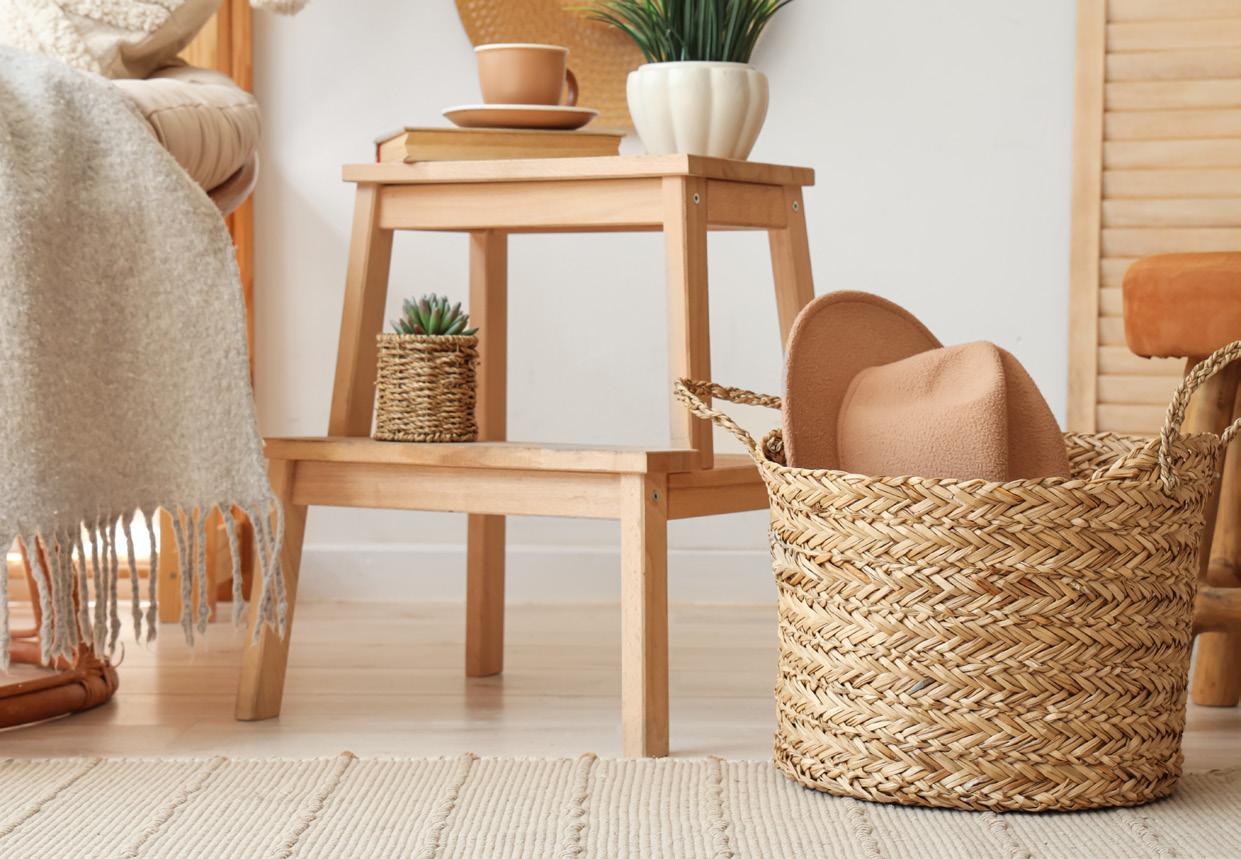
10.
Midday Reset: No Tech, Just Breath
Pick one moment each afternoon to not scroll. No phone, no inbox, no pressure. Just five minutes to breathe, sip a tea, flip through a book, or stare out the window. Let your brain stretch. Let your soul settle.
The world won’t end if you check Instagram later.

These aren’t life overhauls. They’re tiny shifts—five minute wins that add up to something beautiful: a home that feels lived in, not overwhelmed. A summer that feels present, not packed. A rhythm that works with your life, not against it.
Because peace doesn’t come from having a perfect home. It comes from choosing to care for your space with intention, a little each day. From choosing you.
So here’s to your summer reset. Five minutes at a time.

When the temperatures soar and the sun is blazing, staying cool and safe becomes more than just a comfort—it's a necessity. Extreme heat can hit unexpectedly, especially during power outages or outdoor adventures. That’s why having a Summer Emergency Kit on hand is a smart, potentially life saving move. Whether you're prepping for a heatwave, heading to a festival, or planning a road trip, here’s everything you need to beat the heat.
Unlike winter storms or hurricanes, extreme heat often sneaks up without much warning. Heat related illnesses like heat exhaustion and heat stroke can happen quickly, especially in young kids, older adults, or pets. Having the right supplies ready can help you stay safe, hydrated, and cool—no matter where you are.
Water is your number one defense against heat. Pack several bottles of water or a large refillable jug. Electrolyte powders or sports drinks are great for replacing salt lost through sweat. Collapsible water bottles are a great space saver if you're on the go.
2. Cooling Tools
Include portable items to help lower your body temperature. Think of instant cold packs, cooling towels, battery powered or USB fans, and a spray bottle for misting. A foldable umbrella or compact sunshade can also provide instant relief.
3. Sun Protection
Don’t forget the basics: a high SPF sunscreen (at least SPF 30), lip balm with SPF, sunglasses with UV protection, and a wide brimmed hat. Light, breathable clothing in light colors can make a huge difference, too.
4. First Aid Supplies
Heat related issues often show up as dizziness, nausea, or headaches. Include a basic first aid kit with adhesive bandages, antiseptic wipes, pain relievers, aloe vera for sunburns, and electrolyte tablets. Add a thermometer so you can monitor for signs of heat exhaustion or fever.
5. Emergency Snacks
Dehydration can sap your energy. Keep non-perishable, low-sodium snacks like granola bars, trail mix, or dried fruit in your kit. Avoid salty foods that can make dehydration worse.
6. Power Backups
A charged power bank or solar powered charger ensures you can call for help, check weather alerts, or run small fans. Flashlights or headlamps with extra batteries are also useful during power outages.
7. Multipurpose Tools & Extras
Pack a small multi-tool or utility knife, duct tape, and resealable plastic bags. Add a few large towels or an emergency foil blanket (can double as a heat reflector). If you’re preparing a car kit, include jumper cables and extra coolant.
8. Pet Safety Supplies
If you have pets, make sure they’re covered too. Include a collapsible bowl, bottled water, a cooling mat or towel, and an umbrella or cover for shade.
• Stay indoors during peak sun hours (usually 10 AM–4 PM).
• Never leave kids or pets in parked cars, even for a few minutes.


• Check on elderly neighbors or relatives.
• Know the signs of heat stroke: red skin, confusion, no sweating, rapid pulse—if in doubt, call emergency services.
A well stocked Summer Emergency Kit isn’t just about staying comfortable—it’s about being prepared for whatever the season throws your way. With just a little planning, you can enjoy summer’s best moments while keeping cool.
In today’s fast paced, hyper connected world, finding peace can feel like chasing a mirage. For many, the answer lies not in fancy studios or expensive retreats, but in the simplest, most ancient setting of all: nature. Imagine this — the rustle of leaves in the breeze, the scent of pine or ocean salt, the golden hues of sunrise warming your skin. Now pair that with slow, intentional movement or deep, mindful stillness. This is the powerful union of Zen, yoga, and the natural world.

Yoga and meditation both center on awareness — of breath, body, and the present moment. Practicing outdoors brings an extra dimension to this awareness. Unlike indoor environments, nature is never static. You might hear birds calling in the distance, feel the ground shift beneath your feet, or notice how the light changes as clouds drift by. These subtle changes train the mind to stay alert yet calm — a perfect balance of focus and flow.
In other words, nature doesn't distract you. It grounds you.
It's not just a romantic notion — there’s science behind it. Studies have shown that spending time in nature reduces cortisol (the stress hormone), lowers blood pressure, and increases feelings of well being. When combined with yoga or meditation, these effects multiply.
One study from the International Journal of Environmental Research and Public Health found that “forest bathing” (a Japanese practice of mindful time spent in forests) can significantly improve mental clarity and reduce anxiety. Add deep breathing or gentle movement to that mix, and it becomes a full on nervous system reset.
Nature immerses you in the elements yoga philosophy so often refers to:
Earth: Sitting or standing on grass, sand, or rock helps you feel rooted and supported.
Water: Practicing near a river, ocean, or even a small creek can soothe the senses and promote emotional flow.
Fire: The sun’s warmth energizes the body, stokes internal motivation, and symbolizes transformation.
Air: Crisp, fresh air naturally deepens your breath, enhancing pranayama (breathwork) practices.
Space (Ether): The wide, open sky reminds us of the vastness within and around us — perfect for meditation.
Pack light, go often – A mat or towel, water bottle, and maybe a journal is all you need.
Pick a spot that feels safe and inviting – A quiet park, forest glade, beach, or even your backyard can work wonders.
Adapt your practice – Let the environment guide your session. Feeling the wind? Try a pose that offers more grounding. Warm sunlight? Flow through some sun salutations.
Stay open to the unexpected – A curious squirrel, passing hiker, or unexpected breeze is not a distraction, but part of the moment.
Tune in, not out – Rather than using headphones, embrace the natural soundscape as your meditative soundtrack.


There’s something deeply healing about practicing where we evolved to be — under the sky, feet on the earth, in tune with the rhythms of the planet. As modern life pulls us further indoors and into screens, stepping outside becomes a radical act of reconnection.
Nature doesn’t ask us to be perfect. It welcomes us as we are — windblown, barefoot, distracted or deeply focused. Whether you're holding Warrior II with the mountains as your backdrop or simply sitting in stillness beneath a tree, the great outdoors has a way of bringing us back to ourselves.
So next time you roll out your mat, consider rolling it out under the open sky.
Your body — and your soul — will thank you.
Take a nostalgic stroll through summers past with some our employee submitted throwback photos. These photos are paired with the songs that defined those carefree days. From beach trips to backyard barbecues, each memory comes with its own perfect soundtrack.


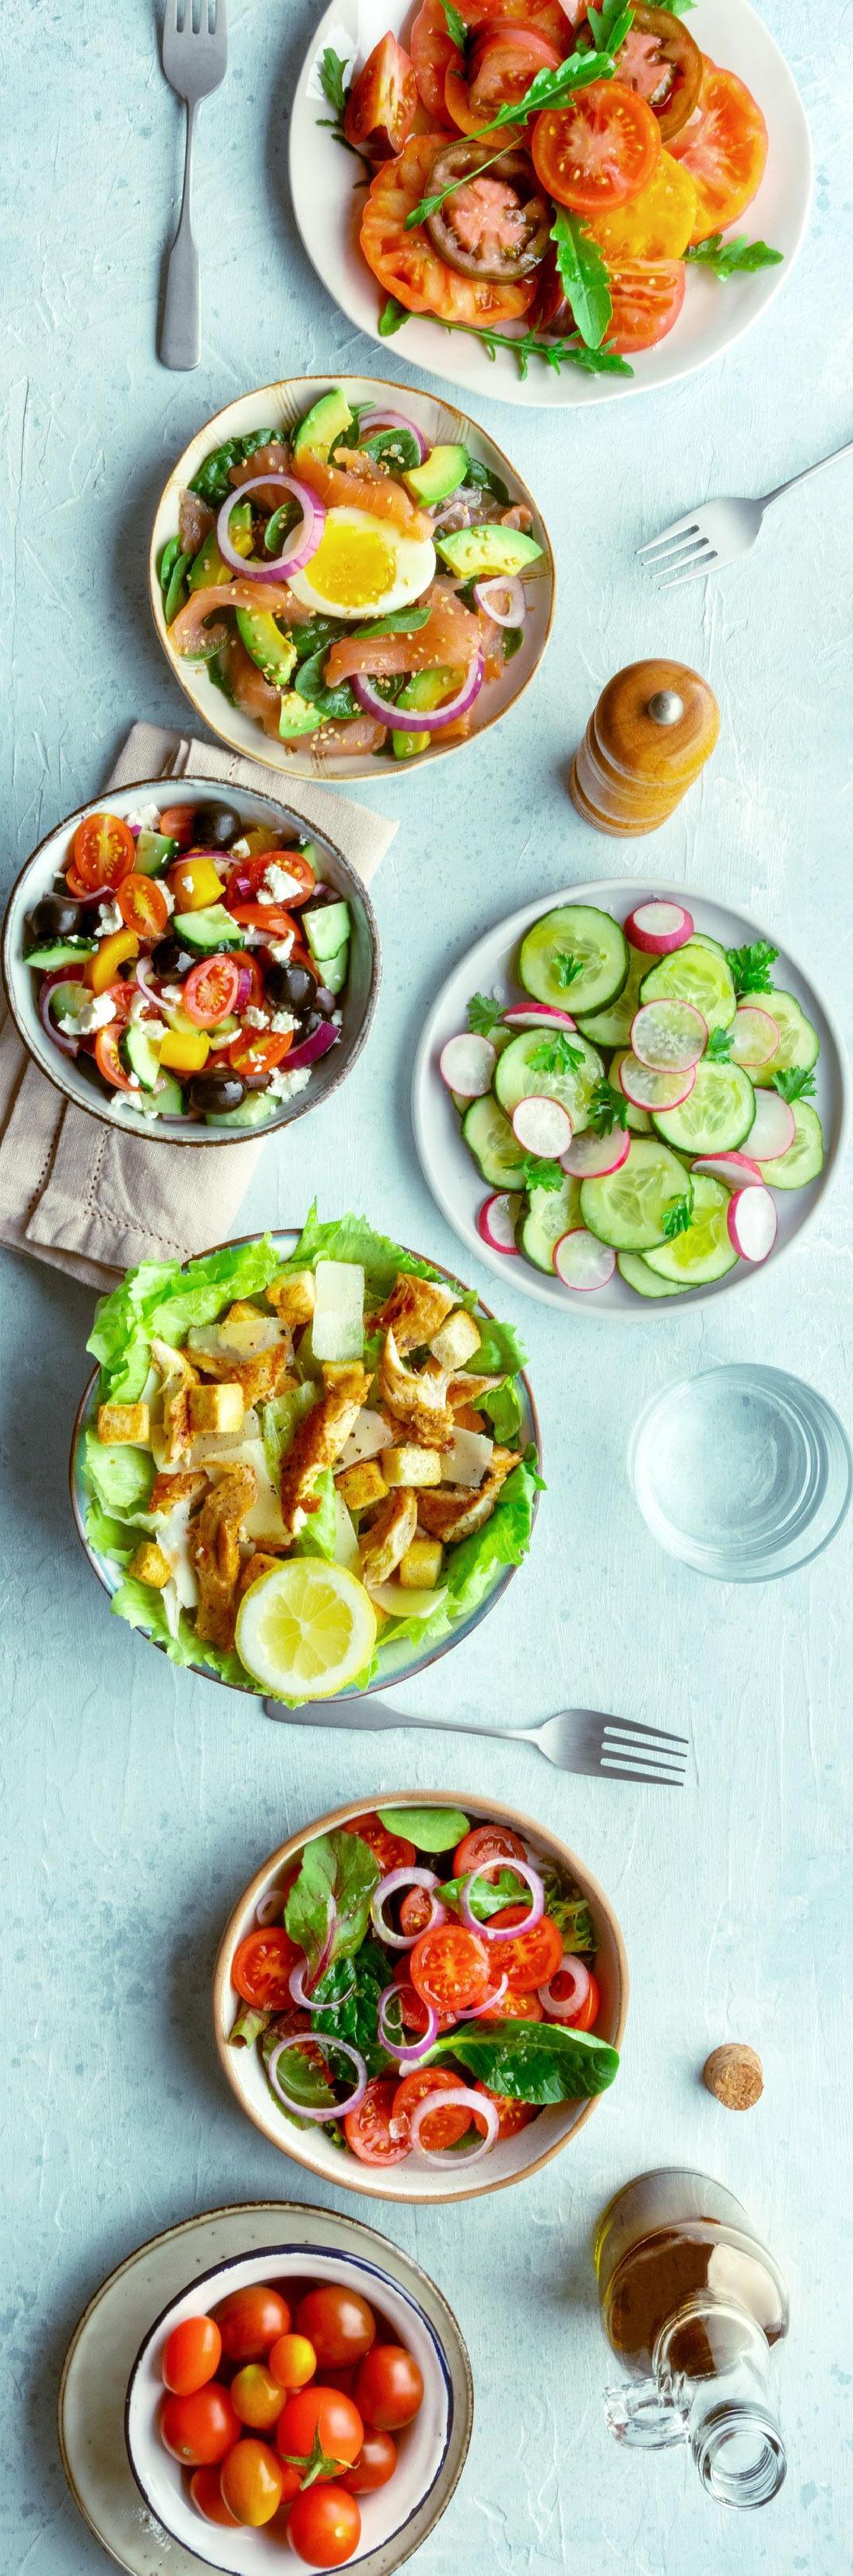
Summer is the season of light bites, bold flavors, and meals that keep things cool—especially when the temps start climbing. Enter the summer salad: crisp, colorful, and endlessly creative. Whether you’re feeding a crowd at a cookout or just need a quick lunch that won’t weigh you down, a good salad is your ultimate warm weather go to. It's fresh, it’s fast, and when done right, it's anything but boring. Ready to toss things up? Here's how to build the perfect summer salad and keep your taste buds happy all season long.
Greens are your canvas. Think beyond romaine—try peppery arugula, crunchy cabbage, or hearty kale (massaged, of course). Not a fan of leafy greens? No problem. Grains like quinoa, farro, or couscous make great hearty alternatives, while chopped veggies like cucumber, bell pepper, or shredded carrots offer crisp texture and plenty of color.
Here’s where the flavor kicks in. Load up on seasonal fruits like strawberries, peaches, or watermelon for a sweet touch, or go savory with grilled corn, cherry tomatoes, and avocado. Cheese? Yes, please. Crumbled feta, shaved parmesan, or creamy goat cheese bring big flavor without much effort. Want more crunch? Toasted nuts, seeds, or crispy chickpeas are your new best friends.
BRING THE PROTEIN
Turn your salad into a meal with a punch of protein. Grilled chicken, shrimp, or steak are easy wins, but don’t overlook plant based picks like chickpeas, lentils, or tofu. Hard boiled eggs, smoked salmon, or even leftover rotisserie chicken can upgrade your salad with almost zero prep.
A good dressing brings it all together. Classic vinaigrettes made with olive oil and citrus keep things light, while creamy dressings (hello, avocado lime or tahini) add richness without being heavy. Skip store bought when you can—homemade dressings are super easy, and a quick shake in a mason jar is all it takes.
MIX IT UP & MAKE IT YOURS
There are no rules here. Your salad should match your mood. Feeling tropical? Toss in mango, coconut, and a lime honey drizzle. Going Mediterranean? Think olives, cucumber, tomato, and a splash of red wine vinegar. Want something hearty? Add roasted sweet potatoes, grains, and a smoky paprika dressing. The possibilities are endless—and delicious.
CHILL & SERVE
The best summer salads are served cold, crisp, and full of flavor. Prep ahead if you like, but save the dressing for the last minute to keep everything fresh. Serve it up for lunch, pack it for a picnic, or bring it to the barbecue. However you dish it, a summer salad always hits the spot.
Ready to crunch your way through summer? With just a little creativity (and a lot of fresh ingredients), your salad game is about to be anything but basic.
Summer is practically made for grilling—warm evenings, the smell of great food, and the satisfaction of a meal that tastes better because you cooked it. Whether you're brand new to the BBQ or just looking to step up your game, grilling is easier (and more fun) than it seems. It’s not just about cooking—it’s about creating a vibe, bringing people together, and enjoying that perfect sizzle. Ready to fire things up? Here’s what you need to know to get started.
First things first—what are you cooking on? Charcoal grills bring that smoky, classic flavor and give you full control over heat, while gas grills offer convenience and quick startup. Pellet grills combine ease with serious flavor and are perfect for slow and low cooking. Choose the grill that fits your style, space, and flavor goals. No matter which you pick, you're one step closer to backyard greatness.
You don’t need a ton of gear, but a few essentials make a big difference. Tongs (long ones!), a good spatula, a meat thermometer, and a grill brush should be in every beginner’s lineup. Want to level up? Try a chimney starter for charcoal or a cast iron skillet for side dishes right on the grill. The right tools make grilling safer, easier, and way more fun.
Grilling isn’t just throwing food on flames—it's all about heat zones. Direct heat (right over the flame) is great for quick cooking items like burgers and veggies. Indirect heat (off to the side) is best for thicker cuts like chicken or ribs. Managing your heat is the secret to avoiding burnt outsides and raw insides. Practice makes perfect, and hey—there are worse things than having to eat more grilled food.
Keep it simple to start. Burgers, hot dogs, chicken thighs, and skewers are beginner friendly and hard to mess up. Toss some corn or peppers on there, and you’ve got a full meal with almost zero fuss. As your confidence grows, you can experiment with marinades, rubs, and more adventurous proteins like a delicious brisket!
Salt, pepper, olive oil—that’s your foundation. From there, try dry rubs for meats, glazes for veggies, or fresh herbs to finish everything off. Don’t forget the buns, sauces, and sides that complete the vibe. Grilling is part cooking, part creativity, and part celebration—so don’t be afraid to make it your own.
Grilling is as much about the experience as the food. It’s the laughter while flipping burgers, the clink of a cold drink, and that first bite of something hot off the grates. Once you get the hang of it, you’ll find yourself reaching for the tongs all season long. So fire it up, keep it simple, and enjoy every delicious moment.
Ready to become a grill master in the making? Your backyard (and your taste buds) will thank you.


Summer calls for cool treats and nostalgic bites that take you straight back to chasing down the ice cream truck—but this time, you're the one making the magic. Whether you're throwing a backyard bash or just looking to beat the heat with something sweet, homemade frozen desserts like Choco Tacos, Push Pops, and Drumsticks are the ultimate DIY upgrade. They're fun to make, easy to customize, and way more delicious than anything wrapped in plastic. Ready to chill out and level up your dessert game? Let’s scoop into it.
You don’t need fancy equipment—just some creativity and a freezer that’s ready to work overtime. Grab your favorite ice cream (store bought or homemade), some waffle cones or shells, chocolate for dipping, and all the toppings your heart desires. From sprinkles and crushed cookies to chopped nuts and caramel drizzle, this is your chance to play.


Waffle taco shells are easier than you think— press some waffle cone batter into a hot pan or waffle iron, then shape them while warm. Fill with layers of ice cream, fudge, or crunchy bits, then dip the top in melted chocolate and freeze until set. It’s the ultimate handheld treat, with all the crunch and creaminess of the original—but better because you made it.
All you need are some pop molds (or even small paper cups and popsicle sticks). Layer in colorful combos like strawberry and vanilla, cookies and cream, or mango and coconut milk for dairy free fun. Freeze between layers to keep things neat, and once they’re solid, push up and enjoy! These are perfect for kids, parties, or just treating yourself after a long day in the sun.
Think ice cream cones filled with creamy goodness, dipped in chocolate, and finished with crunchy toppings. Start with a cone, spoon in a little chocolate at the bottom (for that classic "chocolate plug"), then fill with ice cream. Dip the top in magic shell, roll in chopped nuts or crushed candy, and pop them in the freezer until set. They're fun to make, even more fun to eat, and sure to be a hit at any summer hangout.
There’s no wrong way to do DIY frozen treats. Switch up your flavors—think mint chip, dulce de leche, or fruity sorbets. Go wild with toppings like pretzel bits, crushed cereal, or edible glitter. Want to make them a little fancy? Add a swirl of whipped cream or a drizzle of honey before serving. You’re the ice cream truck now—make it count.
Once your creations are frozen and ready, store them in airtight containers or wrap them individually for easy grab-and-go treats. They’re perfect for pool days, backyard movie nights, or just keeping the summer vibes going strong. Ready to turn your freezer into the hottest spot of the season? With a few simple steps and a little imagination, you’ll have a stash of frozen treats that’ll make this summer the sweetest one yet.
1. CAPRI SUN
The Vibe: The ultimate lunchbox status symbol, with its shiny pouch and elusive straw hole.

Flavor Flashback: Classic flavors like Pacific Cooler and Wild Cherry.
Modern Remix: Create a Capri Spritz by mixing natural fruit juices with sparkling water and a splash of citrus. Serve over ice in a reusable pouch for that authentic feel.
The Vibe: A Ghostbusters tie in that turned our tongues green.
Flavor Flashback: A citrusy, neon green punch.
Modern Remix: Blend orange juice, tangerine juice, and a hint of lime with natural green food coloring. Sweeten with agave syrup and serve chilled.
3. TANG
The Vibe: The astronaut's choice, straight from NASA to our kitchens.
Flavor Flashback: A tangy orange powder mix.
Modern Remix: Combine fresh orange juice with a touch of lemon zest and honey. Add a pinch of turmeric for that signature color and a health boost.

From lunchbox legends to summer staples, these drinks defined our youth. Now, they're back— with a grown up glow up.
1. SQUEEZIT
The Vibe: Twist top bottles with vibrant colors and quirky characters.

Flavor Flashback: Bold fruit flavors like Chucklin' Cherry and Grumpy Grape.
Modern Remix: Use natural fruit purees (like cherry or grape) mixed with coconut water. Serve in reusable squeeze bottles for that nostalgic twist.
2. ORBITZ
The Vibe: A drink with floating edible balls, more fun to look at than to taste.
Flavor Flashback: Fruity flavors with suspended gelatin spheres.
Modern Remix: Create a fruit infused drink with chia seeds or tapioca pearls. Think of it as a healthier, more palatable version of the original.
3. CRYSTAL PEPSI
The Vibe: Clear cola that challenged our perceptions.
Flavor Flashback: Cola taste without the caramel color.
Modern Remix: Craft a homemade cola using natural ingredients like kola nut extract, vanilla, and citrus zest. Strain to keep it clear and serve over ice.


The Vibe: Brightly colored drinks in kid friendly bottles.
Flavor Flashback: Sweet, fruity flavors with a fun name.
Modern Remix: Mix natural fruit juices like strawberry and kiwi with a splash of sparkling water. Serve in mini bottles with playful labels.
The Vibe: Herbal infusions and exotic flavors in sleek bottles.
Flavor Flashback: Flavors like Green Tea and Lizard Fuel.
Modern Remix: Brew green tea and infuse with fruits like mango or lychee. Sweeten lightly with honey and chill.
The Vibe: A tangy orange drink that wasn't quite juice or soda.
Flavor Flashback: Bold orange flavor with a unique zing.
Modern Remix: Blend fresh orange juice with a hint of lime and a splash of sparkling water. Sweeten to taste and serve cold.
HOMEMADE TANG INSPIRED DRINK
Ingredients:
• 1 cup fresh orange juice
• 1 tbsp lemon juice
• 1 tsp honey
• Pinch of turmeric
• Ice cubes
Instructions:
1. Combine orange juice, lemon juice, honey, and turmeric in a shaker.
2. Shake well and pour over ice.
3. Garnish with an orange slice.
Ingredients:
• 1 cup orange juice
• 1/2 cup tangerine juice
• 1 tbsp lime juice
• 1 tsp agave syrup
• Natural green food coloring
• Ice cubes
Instructions:
1. Mix all juices and agave syrup in a pitcher.
2. Add a few drops of green food coloring until desired hue is achieved.
3. Serve over ice with a lime wedge.
FINAL SIP: CHEERS TO THE PAST AND PRESENT
SQUEEZIT INSPIRED FRUIT DRINK
Ingredients:
• 1 cup cherry puree
• 1/2 cup coconut water
• 1 tsp lemon juice
• Ice cubes
Instructions:
1. Blend cherry puree, coconut water, and lemon juice until smooth.
2. Pour into squeeze bottles and chill.
3. Enjoy the burst of natural flavors!
Recreating these classic drinks offers a delightful trip down memory lane, blending the joy of our childhood favorites with the sophistication of adult tastes. Whether you're hosting a retro themed party or simply indulging in nostalgia, these reimagined beverages are sure to refresh and reminisce.

Because nothing pairs better with a nostalgic flick than the snacks that defined our childhoods.
The Magic of Movie Nights Past
It’s a Friday night in the middle of summer. Your hair’s still damp from a day in the pool, the windows are open, and your only concern is whether Blockbuster still has a copy of The Goonies. You just tore open a pack of Gushers, stained your fingers neon blue, and someone’s heating up Pizza Rolls while calling dibs on the couch.
The living room lights are off. The TV is glowing. You’ve got your favorite blanket, a friend by your side, and nothing else to do but press play.
This is movie night—retro style.
These were more than treats—they were our childhood currency. Swapped in lunchrooms, hoarded in backpacks, and sometimes forgotten in the pocket of your favorite hoodie.
Pop Rocks – Exploding candy magic that felt like a science experiment.
Ring Pops – Wearable, sticky, and a playground status symbol.
Fun Dip – Powdered chaos with a sugar stick as your spoon.
Warheads – One word: pain. But like, the fun kind.
Bubble Tape – Six feet of gum, none of which lasted longer than 90 seconds.
Gushers – Fruit snacks with a gooey, “what is this?” center that made them feel rebellious.
The Goonies (1985) – Treasure maps, booby traps, and Baby Ruths.
Clueless (1995) – A sugary, stylish daydream with the energy of a Pixy Stick.

You never measured portions. You grabbed handfuls straight from the bag, probably while sitting cross legged on the carpet in front of the TV.
Chex Mix – The bagel chips were gold. The cereal pieces were the tax.
Muddy Buddies (a.k.a. Puppy Chow) –Chocolate, peanut butter, powdered sugar, and zero self-control.
Pizza Rolls – A rite of passage. Always too hot. Always worth it.

Combos – Road trip royalty. Pretzels with weird cheese? Elite.
Popcorn + M&Ms – Sweet and salty perfection, especially when the M&Ms melted just slightly.
The Sandlot (1993) – Backyard baseball, bikes, and snack breaks.
Empire Records (1995) – Angsty, chaotic, and best consumed with finger food.
Napoleon Dynamite (2004) – So weird. So salty. So good.
Sticky fingers, brain freezes, and the race to grab the last Otter Pop from the box.
Choco Tacos – A chocolate dipped ice cream taco. Enough said.
Otter Pops – “I want Louie-Bloo Raspberry!” – every kid, every time.
Drumsticks – That last bite of chocolate at the bottom of the cone? Bliss.
Hi-C Ecto Cooler – Glowing green, Ghostbuster branded, and probably illegal today.

Squeeze-Its – Sugary mystery juice you squeezed like your life depended on it.
Matilda (1996) – Magical kids, chocolate cake justice, and frozen treats for rebels.
Honey, I Shrunk the Kids (1989) – Backyard adventures with popsicle sized drama.
Bring It On (2000) – A Cherry Coke colored cheer flick with serious bite.
Mix 9 cups Chex cereal with melted chocolate chips, peanut butter, and butter. Add powdered sugar and shake it like your childhood depended on it.
Use wonton wrappers filled with mozzarella, pepperoni, and pizza sauce. Fry until golden and fight over who gets the first bite.
Shape softened waffle cones into shells, fill with vanilla ice cream, dip in melted chocolate, and top with chopped nuts. Freeze and cry happy tears.

Match your favorite throwback treat with a film that defined the decade
Summer Adventure & Friendship
• The Goonies (1985)
• Stand by Me (1986)
• The Sandlot (1993)
• Now and Then (1995)
Teen Comedy & High School Antics
• Fast Times at Ridgemont High (1982)
• Clueless (1995)
• Romy and Michele’s High School Reunion (1997)
• Mean Girls (2004)
Spooky, Strange & Supernatural
• The Lost Boys (1987)
• Beetlejuice (1988)
• The Craft (1996)
• Donnie Darko (2001)
Quirky Comedy & Feel Good Flicks
• Pee-wee’s Big Adventure (1985)
• Empire Records (1995)
• Napoleon Dynamite (2004)
• Drop Dead Gorgeous (1999)
Retro movie nights aren’t just about what’s on the screen. They’re about the sugar highs, the friends on the couch, the popcorn crumbs in the blanket, and the glow of the TV that made everything feel a little more magical.
So grab your snacks, dim the lights, and hit play. You’re not just watching a movie—you’re pressing rewind on the best parts of growing up.


You can practically hear the sizzle of summer calling—lounging under string lights, cannonballs into the pool, grill smoke curling into a sunset sky. But if your current backyard setup feels more “wish list” than “oasis,” you’re not alone. The good news? You don’t have to wait years (or drain your savings) to create the ultimate outdoor escape.
Whether you're dreaming of a resort style pool, a shady pergola covered patio, an outdoor kitchen, or a firepit for late night s’mores, your home might already be holding the key. Let’s dive into the smartest ways to finance your summer upgrades—starting with the equity you’ve been building without even thinking about it.
Use Your Equity to Upgrade Your Escape
As of this summer, the average U.S. homeowner has over $212,000 in home equity—untapped value just sitting in the walls of your home. That equity can be used to fund big ticket renovations without racking up high-interest credit card debt.

Refinancing your mortgage for a higher loan amount than you currently owe, and pocketing the difference.
Best for: Homeowners with substantial equity who want one monthly payment and possibly a lower rate (depending on market conditions).
Summer tip: Use the funds for that dream pool or a complete backyard transformation.
A revolving line of credit based on your home’s equity, similar to a credit card.
Best for: Flexible budgets or phased projects (think: pool this summer, patio next year).
Summer tip: Only pay interest on what you use—great for budgeting your upgrades.
A lump sum loan secured by your home equity with a fixed interest rate.
Best for: Homeowners who know exactly how much their project will cost.
Summer tip: Predictable payments make it easier to plan around vacations or back to school expenses.
Don’t have a ton of equity built up yet? You may still be able to fund your upgrades with a renovation loan. These loan types let you roll renovation costs into the mortgage—ideal for those buying or refinancing.
Best for: Buyers or refinancers looking to roll renovation costs into one mortgage.
Summer tip: This loan can be used for exterior upgrades like decks, patios, and landscaping.
Best for: Conventional borrowers wanting to finance nearly any improvement—luxury upgrades included.
Summer tip: Yes, you can use it to finance a pool.
Your Backyard. Your Terms.
Don’t let high-interest credit cards or personal loans put a damper on your summer plans. If you’ve got home equity, you’ve got options. And if you’re not sure where to start—we’ve got people for that.
Talk to a licensed Geneva Financial Loan Officer today to explore your options and turn that backyard daydream into a sun-drenched reality.

If you're drowning in high-interest debt—credit cards, personal loans, or medical bills—your home equity could be your lifeline. Here's how Geneva Financial and sound financial practices can help you swap debt stress for smarter payments and peace of mind.

Home equity—the portion of your home you truly own—is often your biggest asset Tapping into it makes sense because:
Mortgage rates beat high-interest debt:
It’s far cheaper to move 18% credit card debt into your mortgage or HELOC at a lower rate.
Simplified repayment:
Instead of juggling multiple payments, you manage one manageable monthly payment.
Build equity steadily:
You’re not just paying off interest—you’re growing ownership in your home. And over time, homeowners build substantially more net worth than renters.
Cash-out refinance:
Replace your current mortgage with a larger one, then use the extra cash to pay off higher-rate debts.
Home Equity Line of Credit (HELOC):
Works like a credit card backed by your home—borrow what you need, when you need it.
Home equity loan:
A fixed-rate second mortgage giving you a lump sum to eliminate debts.
BENEFITS:
• Lower overall interest and monthly payments
• Cleaner, simpler financial life
• Potential to build equity faster
• Carrying high-interest revolving debt
• With 15–20%+ home equity
• Comfortable managing a secured, longer term debt
Turning your home into a financial tool isn’t about magic—it’s about strategic restructuring. By consolidating high-rate debts into a lower-cost mortgage or HELOC, you simplify your payments and save money. But discipline is essential—your home is on the line. With Geneva’s expert guidance, this could be the smarter path to financial relief.
Ready to take control of your high-interest debt and turn your home equity into a powerful financial tool? It all starts with a conversation—and Geneva Financial makes it easy.
Reach out to a licensed Geneva Financial Loan Officer near you for a totally personalized approach. You'll work with one dedicated licensed professional who guides you through every step—from evaluating your equity options to finding the strategy that fits your goals