7 minute read
Internal applied finishes


Plaster Mixes
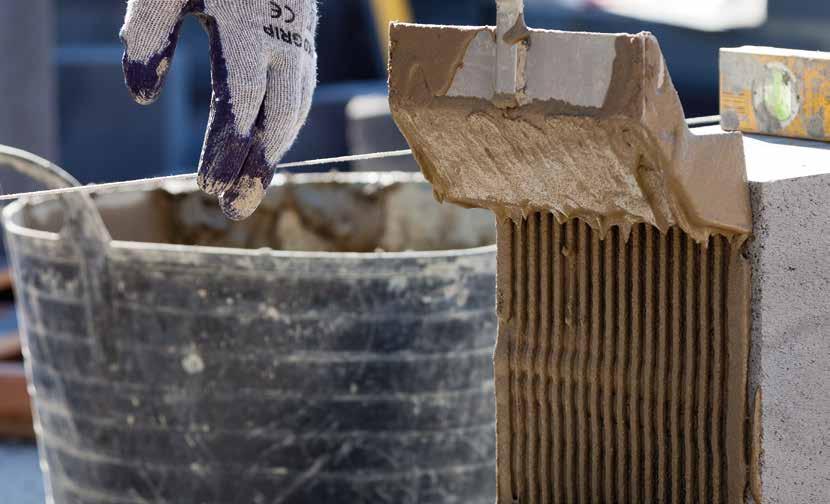
Most types of plaster, can be applied to H+H aircrete. Choice of plaster type and application should be made with regard to guidance given in BS EN13914 ‘Design, preparation and application of external rendering and internal plastering’ Part 2: Internal plastering and PD6697 (see also FPDC Advisory Note No 1 ‘The application of plaster to aircrete block walls’). Traditional sand:cement (dense) plasters should not be stronger than the backgrounds onto which they are applied. An M4 or equivalent, is the strongest mix recommended for use for direct application on to aircrete walls. Recommended mix proportions (by volume) for M4 are given in Table 13. Gypsum (lightweight) plasters The manufacturer’s recommendations should be followed as to the appropriateness of their plasters for application onto aircrete. Portland cement and gypsum plasters should never be used in the same mix nor allowed to contaminate each other at any stage of the mixing or gauging of materials.
Advertisement
The total thickness of plaster is normally 13mm when applied to blockwork. This excludes any dubbing out which may be necessary when walls have been built out of plumb or alignment, or where architectural features require localised thickening of the plaster finish.
Table 13
Recommended prescribed M4 mortar types
Type of Mortar
Cement:lime:plastering sand
Cement:plastering sand with plasticiser
Masonry cement:plastering sand Surface Preparation The following guidance covers the application of traditional dense plaster when applied direct to the aircrete walls. Proprietary and pre-mixed plasters should be applied in accordance with the manufacturer’s recommendations.
As recommended in PD6697, we would suggest that mortar joints should be raked by 15mm as work proceeds on all masonry to be plastered or rendered in order to provide a good key. For walls built with thin layer mortar joints (which cannot be raked), we would suggest the use of a PVA bonding coat, as detailed below, to improve the bond for plastering. Walls should be cleaned of any dust, loose particles and contamination, which may have occurred during construction. In extreme cases of bad site storage or wet conditions where fungi or algae may have formed on the wall, the surface must first be treated with a fungicide, applied in accordance with the manufacturer’s instructions.
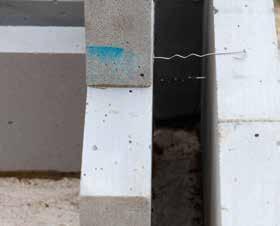
Any movement joints present in the wall should be continued through the plaster finish. Proprietary types of movement beads incorporating a cover strip are available for this purpose. Alternatively, stop beads abutting adjoining work can be used to provide a break in the plaster.
Proportion by volume
1:1:6
1:6
1:5
H+H aircrete, under normal conditions, has moderate to high suction. In very dry conditions, it may be necessary to control high suction by dampening the wall using a stock brush or fine spray immediately before plastering to balance the blocks’ initial suction. This must be carried out in a controlled fashion and on relatively small areas at a time. Excessive wetting must be avoided. Alternatively, a PVA bonding coat can be applied in accordance with the manufacturer’s recommendations. These are typically applied diluted in two coats, with the first acting as a primer (which is allowed to dry) and the plaster is applied to the second coat whilst it is still tacky. Dry Lining Both standard plasterboard and laminated thermal boards can be fixed by bonding directly to the blockwork using proprietary dabs or adhesive, or attached to proprietary metal furring systems. Direct Bonding Plasterboard can be directly bonded to the background using plaster dabs in accordance with the instructions of the board manufacturer; those boards which have a layer of bonded insulation should be fixed by means of a suitable adhesive. Selection of a suitable adhesive, and the most appropriate method of application should be made in accordance with the board manufacturer’s instructions.
Secondary nailing using proprietary nails and plugs is also necessary to ensure that laminated linings remain attached to the blockwork in the event of fire. Battening Plasterboard can also be fixed by means of a timber or a proprietary metal furring system, which should be spaced in accordance with manufacturer’s instructions. The method of fixing the framing to aircrete is covered under ‘Fixing’, (see drawings 25 and 26 on page 35) (see also plasterboard manufacturer’s data). Internal Tiling Traditionally, internal ceramic tiling is applied to blockwork which has previously received a rendered or plastered finish. A period of six weeks must be allowed between the completion of the blockwork and the start of the rendering or plastering, and a further two weeks must be allowed before the tiling commences. For further information, see BS 5385-1.
Proprietary adhesives are available which permit tiling to be carried out sooner on blockwork which is sufficiently plumb and accurate. However, this method is not appropriate for every situation and advice should be sought from the manufacturers of the tiles and the adhesive.
Generally, tiles should comply with BS EN 14411.
Technical specifications (materials and methods) for ceramic wall tiling can be obtained from The Tile Association: www.tiles.org.uk BRE Defect Action Sheet 137 gives general advice to avoid problems in internal tiling. Tiling Rendered and Plastered Walls An undercoat of cement:sand (dense) plaster provides a stronger background for tiling than lightweight plaster and should be used wherever possible. See the Tile Association guidance. Preparation: cement and sand render is the preferred background for large areas of blockwork which are intended to receive a tiled finish, but the blockwork should be allowed to dry out for at least six weeks before rendering. On Solar Grade blockwork the render should be reinforced, with welded wire mesh secured to the blockwork. For further guidance see BS 5385-1. The most suitable mix for H+H Standard Grade and Higher Strength Grade block walls is 1:4 cement:sand (by volume); Solar Grade block walls, appropriate mixes include 1:5 masonry cement:sand, or 1:6 cement:sand plus a plasticiser. Application: rendering should be left with a wood float finish (see BS 5385-1) and should be completed at least 14 days before the tiling begins; the surface should be dry to receive the tiling. When conditions of service are damp or wet, a flexible, water-resistant adhesive should be used with a solid-bed technique (see BS 5385-4). Large areas of tiling should be divided into bays of 3-4.5m2. Movement joints will be required at edges of tiled areas and at junctions of walls, floors and ceilings. Movement joints in the wall should extend completely through the tiling, bedding and rendering.
Internal applied finishes
Continued...
Decorative Finishes
Aircrete can be left unfinished or finished with one of many surface treatments, other than conventional render, plaster and tiling. Tiling Unrendered Walls (internal) Provided the walls have been well built to the required standards for plumb and accuracy for the recommended thickness of the bedding material, tiles can be fixed direct to block walls. The wall surface should be free from dust, oil and other forms of contamination, and should be dry or almost dry; the blockwork should be completed at least one month before the tiling begins. The tiles should be fixed with a proprietary adhesive, using the solid-bed technique. A thin-bed or a thick-bed adhesive may be used depending on the flatness of the wall. For general guidance on internal tiling see BRE Defect Action Sheet 137.
The selection of a suitable adhesive will depend on the background to which the tiles are to be fixed, and it is important to follow the particular adhesive manufacturer’s instructions. BS 5385-1 gives advice on the choice of adhesives available.
Natural or Painted Finishes
Where blockwork is protected from regular contact or is out of reach, the most economical finish is for it to be left exposed or painted. A painted wall will often be perfectly satisfactory in areas with limited access, for example in plant rooms.
It should be noted that although all H+H blocks are suitable to receive a paint finish, we do not sell any of our products as being ‘Paint Grade’ or ‘Fair Face’. Where it is intended to have a painted finish we suggest the following is considered. Due to the manufacturing process it is possible that occasional ‘pock’ marks may be visible on the face of the blocks (as the result of a wire cutting through one of the larger air bubbles). It is also possible that edges may become chipped whilst the blocks are moved around site – although not an issue with traditional applied finishes, this may be an issue with fair face work.
Given the aforementioned, we would suggest that where our blocks are intended to be finished with paint only or left unfinished, that a sample panel is built to determine the acceptability of the surface of the blockwork panel for the project in hand. Paints of most types can be applied direct to the surface of the blocks. After normal preparatory work, the paint should be applied following the manufacturer’s specific recommendations. A mist coat (or sealer) plus two full coats of trade emulsion is generally adequate to provide an economical finish.
Textured Finishes
There are also many proprietary surface treatments which can be used on aircrete blockwork, either directly or on a rendered background. These should always be applied in accordance with the relevant manufacturer’s recommendations.
Spray Finishes Proprietary plasters with a total thickness of 3-4mm can be applied directly to blockwork that has been constructed to a suitable standard of plumbness and accuracy. These plasters are particularly suitable with, and compliment, the inherent accuracy which can be achieved using the Thin-Joint System.