11 minute read
Acer Empowering Technology


Acer’s innovative Empowering Technology makes it easy to have access to the frequently used functions and manage the notebook. It features the following handy utilities: Acer eDataSecurity Management protects data with passwords and advanced encryption algorithms. Acer eLock Management limits access to external storage media. Acer ePerformance Management improves system performance by optimizing disk space, memory and registry setting. Acer eRecovery Management backs up and recovers data flexibly, reliably and completely. Acer eSettings Management accesses system information and adjusts settings easily. Acer eNet Management hooks up to location-based networks intelligently. Acer ePower Management extends battery power via versatile usage profiles. Acer ePresentation Management connects to a projector and adjusts dispaly settings conveniently.
For more information, press the key to launch the Empowering Technology menu, then click on the appropriate utility and select the Help function.
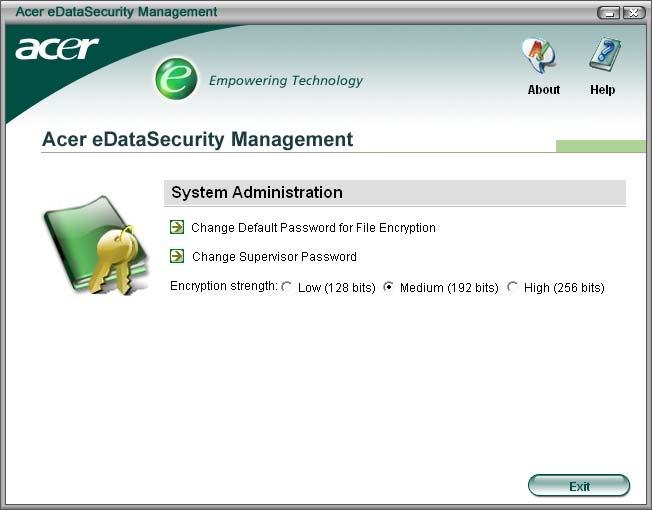
Acer eDataSecurity Management is a handy file encryption utility that protects the files from being accessed by unauthorized persons. It is conveniently integrated with Windows Explorer as a shell extension for quick and easy data encryption and decryption and also supports on-the-fly file encryption for MSN Messenger and Microsoft Outlook. There are two passwords that can be used to encrypt and decrypt a file: the supervisor password and the file-specific password. The supervisor password is a “master” password that can decrypt any file on the system. The file-specific password is assigned when you encrypt each individual file. Acer eDataSecurity Management setup wizard will prompt for a supervisor password and default file-specific password. This file-specific password will be used to encrypt files by default, or you can choose to enter your own file-specific password when encrypting a file.
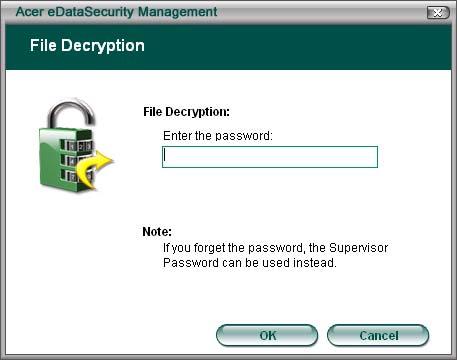
NOTE: The password used to encrypt a file is the unique key that the system needs to decrypt it. If you lose the password, the supervisor password is the only other key capable of decrypting the file. If you lose both passwords, there will be no way to decrypt the encrypted files! Be sure to safeguard all related password.

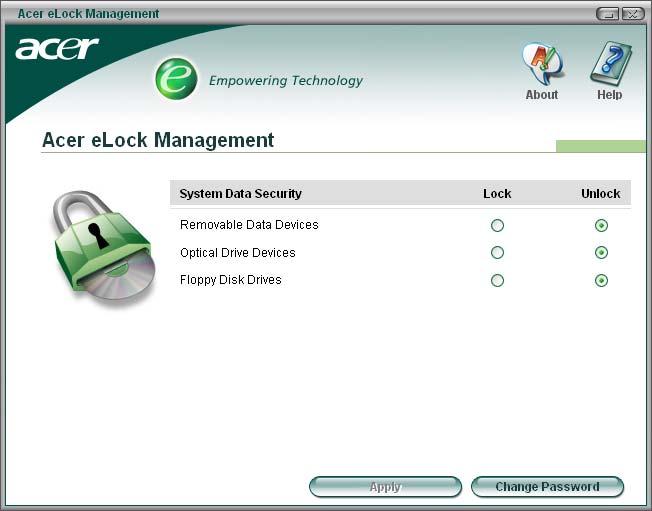
Acer eLock Management is a security utility that allow you to lock up your removable data, optical and floppy drives to ensure that data can not be stolen while your notebook is unattended. Removable data devices: includes USB disk drives, USB pen drives, USB flash drives, USB
MP3 drives, USB memory card readers, IEEE 1394 disk drives and any other removable disk drives that can be mounted as a file system when plugged into the system. Optical drive devices: includes any kind of CD-ROM or DVD-ROM drives. Floppy disk drives: 3.5-inch disks only. To activate Acer eLock Management, a password must be set at first. Once set, you may apply locks to any of the three kinds of devices. The lock(s) will be set without any reboot necessary, and will remain locked after rebooting, until unlocked. If you do not set a password, Acer eLock Management will reset back to the initial status with all locks cancelled.
NOTE: If you lose the password, there is no method to reset it except by reformatting the notebook or taking the notebook to an Acer Customer Service Center. Be sure to remember or write down the password.
Acer ePerformance Management is a system optimization tool that boosts the performance of the Acer notebook. It provides you with the following options to enhance overall system performance: Memory optimization: releases unused memory and checks memory usage. Disk optimization: removes unneeded items and files. Speed optimization: improves the usability and performance of the Windows XP system.

Acer eRecovery Management is a powerful utility with the need for recovery disks provided by the manufacturer. The Acer eRecovery Management utility occupies space in a hidden partition on the system’s HDD. User-created backups are stored on D:\ drive. Acer eRecovery Management provides: Password protection Recovery of applications and drives Image or data backup: • Backup to HDD (set recovery point) • Backup to CD or DVD Image or data recovery tools: • Recovery from a hidden partition (factory defaults) • Recovery from the HDD (most recent user-defined recovery point) • Recovery from CD or DVD
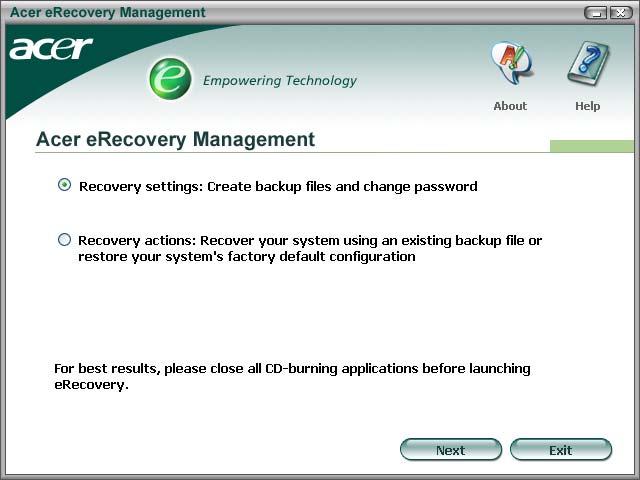
NOTE: If the computer did not come with a Recovery CD or System CD, please use Acer eRecovery Management’s “System backup to optical disk” feature to burn a backup image to CD or DVD. To ensure the best results when recovering the system using a CD or Acer eRecovery Management, detach all peripherals (except external Acer ODD, if equipped), including the Acer ezDock.
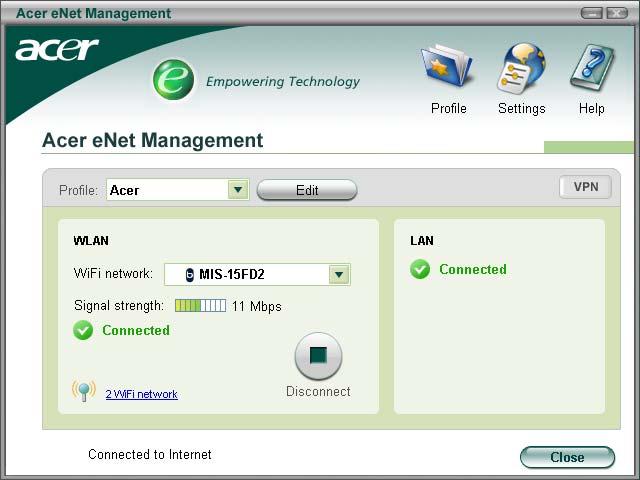
Acer eNet Management helps you to quickly and easily connect to both wired and wireless networks in a variety of locations. To access this utility, either click on the “Acer eNet Management” icon on the notebook, or start the program from the Start menu. You also have the option to set Acer eNet Management to start automatically when you boot up the PC. Acer eNet Management automatically detects the best settings for a new location, while offering you the freedom to manually adjust the settings to match your needs, simply by right clicking on the icon in the task bar.
Acer eNet Management can save network settings for a location to a profile, and automatically apply the appropriate profile when you move from one location to another. The settings stored include network connection settings (IP and DNS settings, wireless AP details, etc.), as well as default printer settings. The security and safety concerns mean that Acer eNet Management does not store username and password information.

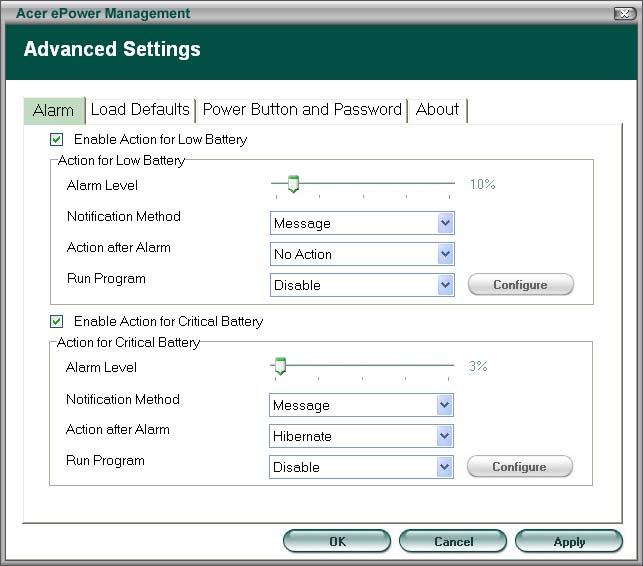
Acer ePower Management features a straightforward user interface. To launch it, select Acer ePower Management from the Empowering Technology interface, or double click the Acer ePower Management icon in the task tray.
AC mode
The default setting is “Maximum Performance.” You can adjust CPU speed, LCD brightness and other settings, or click on buttons to turn the following functions on or off: Wireless LAN, Bluetooth, CardBus, Memory Card, Audio, and Wired LAN.
DC mode
To suit your usage, there are four pre-defined profiles: Entertainment, Presentation, Word Processing, and Maximum Battery. Or, you can define up to three of your own profiles.
Battery status
For real-time battery life estimates based on current usage, refer to the panel on the lower left side of the window.
You can also click “Advanced settings” to: • Set alarms. • Reload factory defaults. • Select what actions will be taken when the cover is closed, and set passwords for accessing to the system after Hibernation or Stand-by.

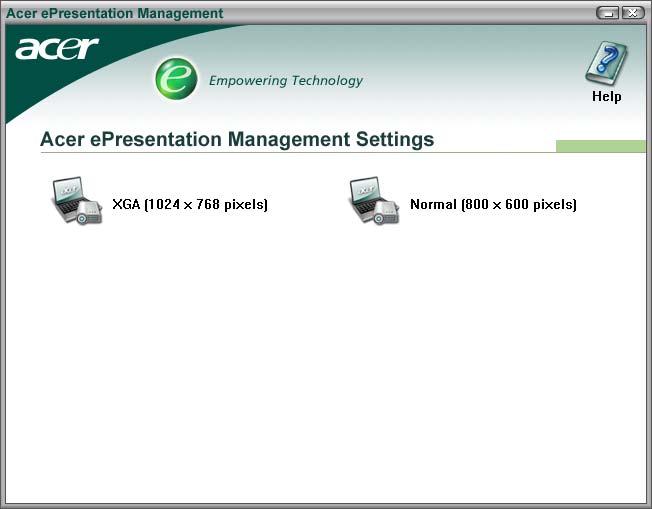
Acer ePresentation Management lets you select from two of the most common projector resolution: XGA and SVGA.
The Acer OrbiCam is a 1.3 megapixel CMOS camera appropriately mounted on the top of the LCD panel. The camera’s 225-degree ergonomic rotation allows you to capture high-resolution photos or videos up front or at the back of the LCD panel. The Acer OrbiCam fully supports the Acer Video Conference technology so that you can transmit the best video quality over an instant messenger service.
Rotating the Acer Orbicam
The Acer OrbiCam rotates 225 degrees counterclockwise to achieve the desired angle. Refer to the illustrations below:
For your convenience, the camera snaps 45 degrees to match the position of your face in front in back of the LCD panel.
1 23
# Item
No. Item
1 Lens 2 Power indicator 3 Rubber grip (selected models only)# Item
NOTE: Do not rotate the camera clockwise to prevent it from the damage.
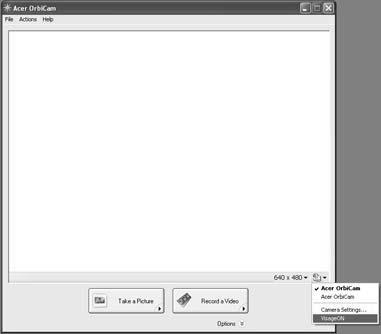
Launching the Acer OrbiCam
To launch the Acer OrbiCam, double click on the Acer OrbiCam icon on the screen. or Click Start > All programs > Acer > Acer OrbiCam. The Acer OrbiCam capture windows window appears as below:

Changing the Acer OrbiCam settings Resolution
To change the capture resolution, click the displayed resolution at the bottom right corner of the capture window, then select the desired resolution. Setting the camera resolution to 640 x 480 or larger does not change the capture window size.
Options
Click Options to display the Window, Preview, and Folder tabs. Use the options to change the capture window size, preview settings, and the folder for captured photos or videos.Options Window, Preview Folder

Camera Settings
• Basic settings: Click the Camera Settings icon on the bottom right corner of the capture display, then select Camera Settings from the pop-up menu. You can adjust the Video, Audio, and Zoom/Face tracking options from this window. Camera Settings Video, Audio Zoom/Face tracking • Capture settings: From the Camera Settings window, click the Driver Settings button. The Properties window will appear. • Device Settings allows you to change the camera brightness, contrast, hue, saturation, sharpness, etc. • Advanced Settings allows you to achieve gain control, implement image mirror, select image enhancements and anti-flicker settings, and turn on/off the camera indicator. • Zoom/Face Track Settings allows you to adjust the zoom level and turn the face tracking feature on or off.
Capturing photos or videos
To capture a photo or a video clip, rotate the Acer OrbiCam to get the desired angle, then click the Take a Picture or Record a Video button. The Windows Picture and Fax Viewer or the Windows Media Player automatically launches to display or play a preview of the photo/video clip.
Camera Settings Video, Audio Zoom/Face tracking
Driver Settings Properties
Driver Settings
Properties
Device Settings
Device Settings Advanced Settings Advanced Settings Zoom/Face Track Settings Zoom/Face Track Settings
NOTE: By default, all photos and videos are saved in the My Pictures and My Videos folder.
Using the Acer OrbiCam as webcam
The Acer OrbiCam is automatically selected as the capture device of any instant messenger (IM) application. To use the Acer OrbiCam as a webcam, open the IM service, then select the video/ webcam feature. You can now broadcast from your location to an IM partner anywhere in the world.
Enabling the Acer VisageON
The Acer VisageON technology comes with two features: Face tracking and Video effects (selected models only). The Face Tracking feature tracks your head movement and automatically centers your face in the capture window. The video effects feature allows you to select and apply an effect to your video transmissions.
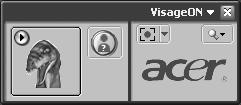
NOTE: The face tracking feature is not capable of centering your face beyond the capture window frame. Minimal head movements are tracked more efficiently. To enable the Acer VisageON: 1. Right click on this icon, then select VisageON from the pop-up menu.
The VisageON window appears as below:
2. Select and apply a video effect in the left section of the VisageON window. Change the face tracking settings and options in the right section.
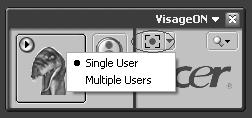
Using the face tracking feature
To use the face tracking feature: 1. Click the left icon down arrow button, then select Single User or Multiple Users from the pop-up menu. For multiple users, the face tracking feature automatically centers all the users’ face in the capture window, otherwise the utility centers the face of the user closest to the camera.
VisageON
VisageON
VisageON
Single User Multiple
Users Single User Multiple
Users Single User Multiple
Users
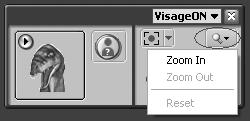
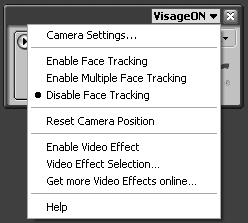
3. Click VisageON to display a menu that allows to change the configuration of the camera, face tracking and video effects settings.
VisageON
VisageON
VisageON
Using video effects
Video Settings
Using video effects (selected models only)
The Video Settings section allows you to select an avatar or accessory video effect from the list. To select an effect:
Using video effects Video
Effect Selection Video Settings Using video effects Video
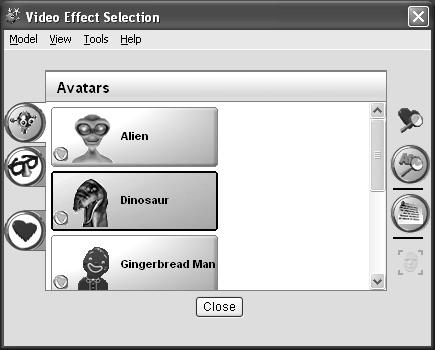
Effect Selection Video Settings 1. Click the encircled icon to display the available video effects. The Video Effect Selection window appears as below: Video
Effect Selection

2. Click on a video effect to use. The selected effect appears in the video effects section of the
VisageON window.
NOTE: When using avatars, you may have to calibrate the face points to achieve better tracking. Follow screen instructions in the VisageON to continue. NOTE: You may use video effects when using the camera for IM chat/video sessions or call conferences.