2 minute read
Model 5200 High-Level Orderpicker
from Raymond 5200 High-Level Orderpicker Lift Truck Maintenance Manual SN 1000 and up - PDF DOWNLOAD
Shimming Procedure
1.Elevate the mast to gain access to the bearings.
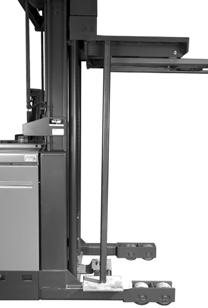
2.Place a block between the outer telescopic crosstie and the main frame.
3.Fully lower the carriage.
4.Turn the key switch OFF and disconnect the battery connector.
NOTE: When removing the upper bearings, use caution not to let the bearing fall down into the mast assembly. If the bearings are worn or damaged, replace them.
5.Remove the bolt and roller stud sleeve securing the roller bearing to the respective mast or telescopic.
6.Remove the bearing.
NOTE: It may be necessary to drive a wedge between the respective telescopics to provide clearance for removal and installation.
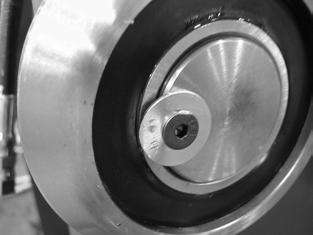
7.Remove the socket head cap screw and washer retaining the bearing on the stud.
NOTE: Shim the main frame top bearing and the outer telescopic lower bearing set to a 0.000 ±0.010 in. overall interference.
8.Shim the outer telescopic upper bearing set to 0.000 ±0.010 in. overall interference with the inner telescopic after the top main frame bearings have been correctly shimmed.
9.Shim the inner telescopic lower bearing set to 0.000 ±0.010 in. overall interference with the outer telescopic after the outer telescopic lower bearings have been set.
10.Install or remove the required amount of shims.
11.Install the bearing on the shaft.
12.Apply thread-locking compound (P/N990-536) to the socket head cap screw and fasten the screw and washer in place.
13.If the inner race of the bearing does not protrude past the end of the bearing stud when the bearing is fully seated, bend the flat washer to contact the bearing to

Section
prevent the bearing from walking on the stud shaft.
14.Install the bearing assembly into its respective mast or telescopic. Make sure that the flat spot of the bearing stud aligns with the welded stop on the mast or telescopic.
15.Install the roller stud sleeve.
16.Apply thread-locking compound (P/N1013829) to the threads of the mounting bolt and torque to 260 ft. lb. (352.5 Nm).
17.Reconnect the battery connector and turn the key switch ON.
18.Remove the block from between the outer telescopic and the main frame.
19.Test the operatio n of the elevating assembly.
Publication Number: 1043922A, Revised: 2 Sept 2015
Section 7.Component Procedures
Model 5200 High-Level Orderpicker

Upper Mast Bearing Replacement
Upper Mast Bearing Replacement
Use extreme care when blocking the mast for any reason. Never remove the block when it is supporting the mast.
1.Slightly elevate the carriage to gain access to the bearings.
2.Block the carriage be fore you attempt to remove the roller bearing. See Figure7-209
Do not damage the telescopic when prying with the screwdriver.
NOTE: For the upper mast bearings, wedge a screwdriver between the roller bearing and the mast to prevent the bearing from falling.
NOTE: When removing the roller bearing, use caution not to let the bearing fall down into the mast assembly.
4.Remove the bolt securing the roller bearing to the respective mast or telescopic.
NOTE: If the bearings are worn or damaged, replace them.
5.Install the same number of shims under the bearing that were removed.
6.Make sure the roller bearing mounting bolts are clean before you install them.
7.Apply thread-locking compound (P/N1013829) on the threads. Torque the bolts per Table7-6.
8.Reconnect the battery connector and turn the key switch ON.
9.Lift the carriage and mast and unblock the mast.
10.Test the operation of the telescopics.
11.Return the lift truck to service.
Table
You may also use a lift hoist to pull the carriage upward to gain access to the roller bearing. Put a strap suitable to handle the weight of the carriage around the uppermost crosstie. When the carriage is raised in place, block it into place.
3.Turn the key switch OFF and disconnect the battery connector.
Main Frame300 ft. lb. (406.7 Nm) Outer Tele Upper250 ft. lb. (339 Nm)
*After torquing, back bolt off 1/4 to 1/2 turn.
Publication Number: 1043922A, Revised: 2 Sept 2015
Mast Section 7-110


