1 minute read
Model 4700 Maintenance Manual
Hydraulic
5.Reconnect the battery connector and turn the key switch ON.
6.Place the maximum rated load on the forks.
7.Elevate the carriage past free lift (when the telescopics begin to lift). Record the pressure required to lift the load.
8.Lower the carriage and remove the load.
9.Elevate the carriage in a safe area until the upper limit is reached (lift bypass).
NOTE : Loosen the locking nut and turn the lift pressure adjustment screw clockwise to increase pressure, counterclockwise to decrease the pressure.
10.Continue trying to lift. Turn the lift pressure adjusting screw (see Figure7-73 ) to obtain a pressure reading 200 psi (1379kPa) greater than the pressure required to lift the maximum rated load (the value recorded in step 7).
11.Check the pressure again. Repeat this procedure until the correct pressure reading is obtained. Tighten the locking nut.
12.Turn the key switch OFF and disconnect the battery connector.
13.Remove pressure gauge and adapter from the pump pressure port and replace protective cap.
14.Reinstall covers.
Section 7.Component Procedures
Auxiliary Function Pressure Adjustment
1.Lower the carriage completely.
2.Turn the key switch OFF and disconnect the battery connector.
3.Remove the cover to gain access to the pump pressure port and the hydraulic control valve cover.
4.Using Metric Pressure Fitting Adapter P/N1620-04CE, install a pressure gauge at the pump pressure port.
5.Reconnect the battery connector and turn the key switch ON.
6.Activate an auxiliary function to bypass. NOTE : Loosen the locking nut for the function requiring adjustment and turn the pressure adjustment screw clockwise to increase pressure, counterclockwise to decrease the pressure.
7.Check the pressure. Adjust the corresponding pressure adjustment screw to 2300 psi (16000 kPa) max (see Figure7-73).
8.Tighten the locking nut.
9.Turn the key switch OFF and disconnect the battery connector.
10.Remove pressure gauge from the pump pressure port and replace cap.
11.Reinstall covers.
Section 7.Component Procedures
Model 4700 Maintenance Manual
Hydraulic Pump and Motor
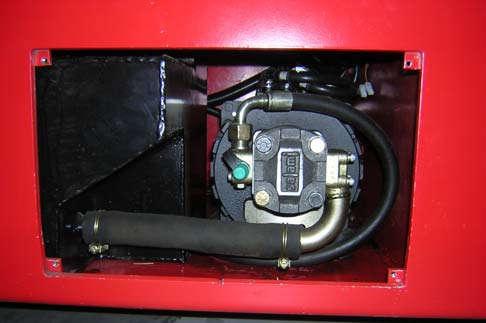
If the pump is to be removed, disconnect hoses. If motor only is to be removed, leave the hoses attached to the pump.

Parts link: C30
C40, C50, C50HM, C50HP, C50L, C60
Separating Pump and Motor
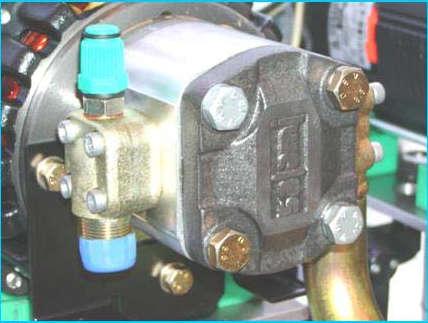
There are four bolts on the end of the pump. Two bolts are shorter and hold the pump together. The other two bolts are longer and thread into the end bell of the motor. See Figure7-77.
Pump Mounting Bolts
Apply molybdenum anti-seize compound (P/N990-638) to the pump shaft splines before reassembly.
After reassembly, torque the pump mounting bolts to 33 ±4 ft. lb. (45 ±5 Nm).
Publication 1160093, Issued: 20 May 2013
Hydraulic Pump and Motor Hydraulic Components 7-64


