2 minute read
Model 4700 Maintenance Manual
Section 7.Component Procedures
Drive and Brake Drive Unit/Motor Assemblies
Refer to Figure7-18 for bracketed numbers referenced in this procedure.
Place the drive unit in a holding device or on the wheel bolts to perform the following steps.
1.Use an impact wrench to loosen the countersunk bolts in the cover [1].
Do not damage mating surfaces during disassembly.
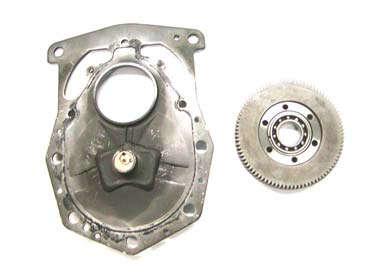
2.Carefully pry the cover [1] off the drive unit.
NOTE : When the housing cover is removed, the spur gear [2] remains connected to the internal disk carrier [3] as a single unit.
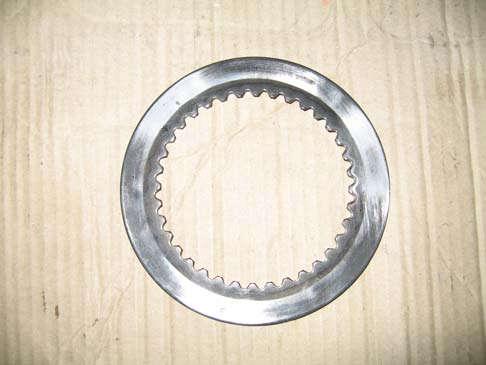
3.Remove the disk set (four external tooth [4] and three internal tooth disks [5]) and thrust washer [6] from the ring gear [7].
4.Lightly rub the new internal tooth disks with a flat sanding block to visually establish “high spots”. These “high spots” must be in alignment when installed to ensure correct braking. See Figure7-19.
•internal tooth disk [5]
•external tooth disk [4]
•internal tooth disk [5]
•external tooth disk [4]
NOTE : Align the “high spots” on the internal tooth disks for maximum “spring” action.
6.Insert the disk set into the ring gear [7].
7.Put the internal disk carrier [3] into the correct fitting position. Slide the disks into their correct position by slightly turning or moving the internal disk carrier.
8.Carefully remove the internal disk carrier from the fitting position. Make sure that the position of the disk is not changed.
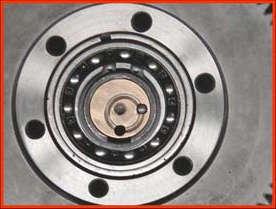
NOTE : If the wearable brass brake activation pad [8] is replaced, make sure it is positioned correctly. See Figure7-20.
Assembly
5.Assemble the new disk set in the following order:
•thrust washer [6]
•external tooth disk [4]
•internal tooth disk [5]
•external tooth disk [4]
Publication 1160093, Issued: 20 May 2013
1.Thoroughly clean all the parts and remove all residual thread-locking compound.
2.Check brake disks for wear and damage. Replace if necessary.


NOTE : Replace brakes in sets only.
3.Smooth the sealing surface with an oilstone or a double-smooth file.
Section 7.Component Procedures
Model 4700 Maintenance Manual
Drive Unit/Motor Assemblies Drive and Brake
4.Replace all sealing elements using mastic sealants (such as Loctite ®).
5.Assemble the cover to the drive unit.
6.Check that silicone has been spread on the sealing surface of the cover.
7.Align the two 8 mm holes in the cover with the two straight pins in the drive unit.
8.Drive the cover onto the drive unit. Move the cover lightly and tap on it with a plastic hammer.
9.Use blue thread-locking compound (P/N1013829) to secure the countersunk bolts that fasten the cover. Torque the bolts to 6.6 ft. lb. (9Nm).
Mounting Brake Actuator Lever to Drive Unit
1.Insert the brake lever into the cover mount. Make sure the brake lever is correctly positioned. See Figure7-21.
2.Drive a straight pin through both the cover mount and the brake lever.
3.Secure the straight pin with two snap rings.
4.Check the setting clearance (A).
Setting clearance (A) for the brake lever should measure between 0.016 and 0.039in. (0.4 and 1.0 mm).
Storage
•If no motor is attached, seal the drive unit to prevent contamination.
•Fill the drive unit with oil. Turn the drive shaft several times, then drain the oil. Pack the drive unit in a closed plastic container.
Snap Ring
Straight Pin
Publication 1160093, Issued: 20 May 2013


