8 minute read
10 - GEAR BOX RE-ASSEMBLY


General Re-assembly Notes : • All nylon patch bolts may be re-used 5 to 6 times provided a prevailing thread torque of 15 to 18 Nm. is recorded. • All shafts and bearings should be lubricated with transmission fluid prior to assembly. • To prevent possible contamination of hydraulic parts lint or cotton rags should not be used.
10-1

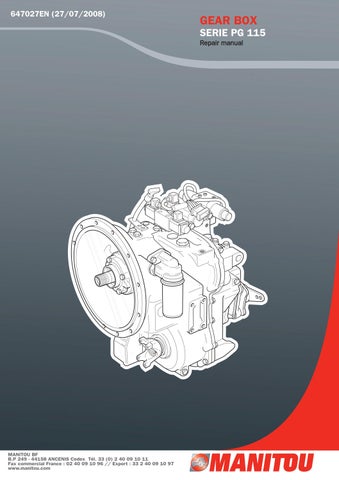
Fit two new O rings to the internal hydraulic pipe.
10-3 10-2
Invert the front case and fit the internal pipe using 4 new sealing washers, one either side of each banjo connection. Tighten the 2 banjo bolts to 20 -27 Nm. and the two capscrews to 10 - 18 Nm.
10-4
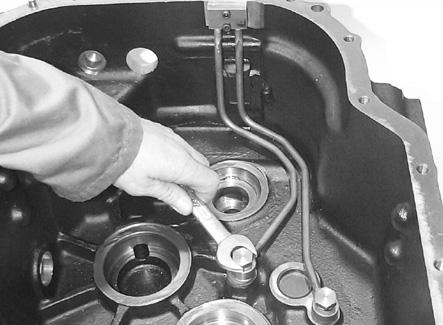
Re-fit the bearing shells to the front case.
10-5 Re-fit the reverse shaft assembly.
10-6
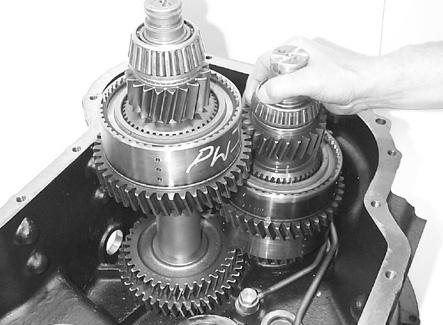
Re-fit the input shaft assembly. Lift the input shaft approximately 30mm and refit the countershaft assembly.

10-7

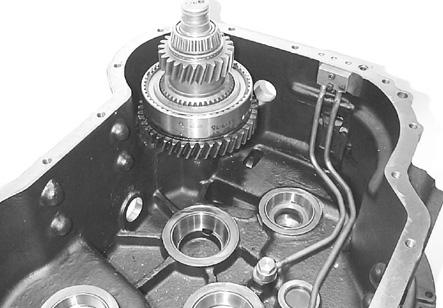
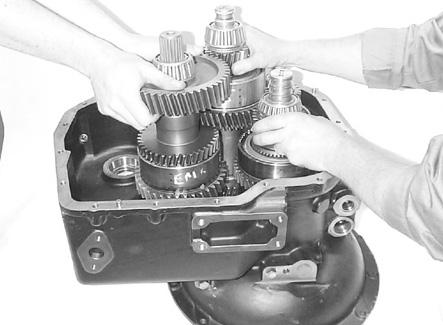
Lift the input and countershaft assemblies together approximately 30mm and get an assistant to simultaneously fit the output shaft assembly. Take care not to damage the shaft sealing rings.
10-9 10-8
Re-fit the 4wd shaft assembly (Not used on 2wd models).
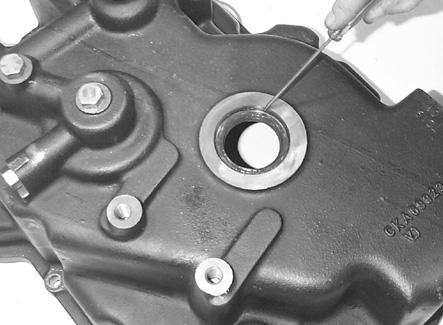
Using a suitably sized tube fit new rear output and 4wd oil seals into the front and rear cases. The rear output seal should be fitted to a depth of 6mm. Fill the seal lips with light grease.
Re-fit the internal pipe using 4 new sealing washers, one either side of each banjo connection. Tighten the 2 banjo bolts to 40 - 46 Nm.
10-10
Fit a new O ring to the transmission case.

10-11 10-12

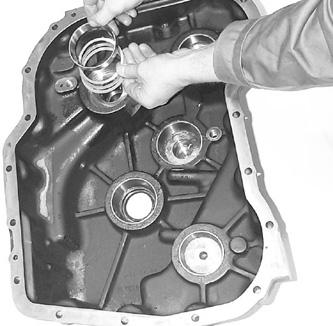
Invert the rear case and replace the shim packs and bearing cups. The 2mm thick spacer shim should be fitted into the case first , then fit the remaining shims followed by the bearing cup. A light grease may be used to help hold the cups in the case.
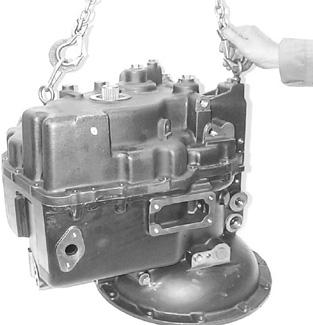
Using suitable lifting equipment re-fit the rear case, (without sealant at this stage), and secure with at least 6 equally spaced bolts. When fitting the rear case be careful to avoid damaging any of the shaft sealing rings.
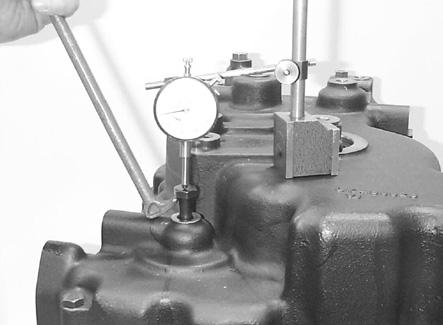
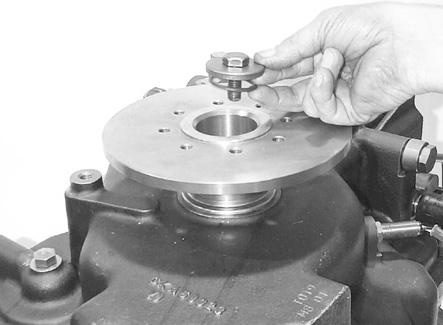
10-15 Refit the flange retaining bolt and washer into the end of the output shaft. Then position a D.T.I. as shown, and using a pry bar lift the shaft, then measure and note the end float. NOTE : All shaft assemblies should be rotated several times to seat the bearings prior to measuring the end float.
10-16

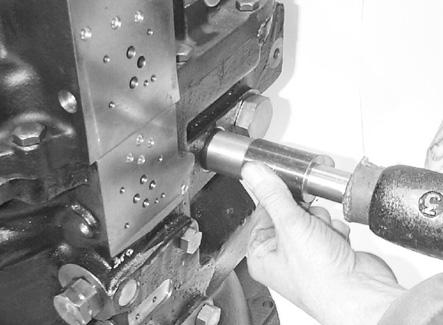
Attach a suitable shimming tool, (with a 12mm thread), to the end of the 4 wheel drive shaft. Position a D.T.I. as shown. Use a pry bar lift the shaft, then measure and note the end float. (Tool No. 563395) (Not fitted on 2 wheel drive models).
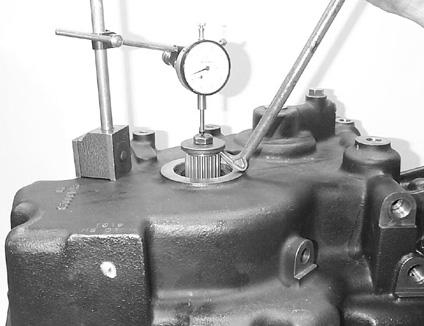
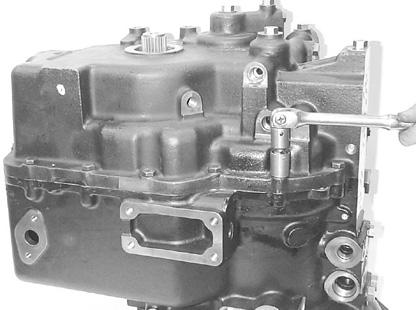
10-17 Fit tool (600747) into the countershaft shimming hole and position a D.T.I. on the end of the tool as shown. Then using a suitable pry bar through the side access hole, measure and note the shaft end float.
Fit tool (600747) into the reverse shaft shimming hole and position a D.T.I. on the end of the tool as shown. Then using a suitable pry bar through the upper access hole, measure and note the shaft end float.
10-18

Fit tool (600747) into the input shaft shimming hole and position a D.T.I. on the end of the tool as shown. Then using a suitable pry bar through the upper access hole , measure and note the shaft end float.
Remove the rear case and add or remove shims as necessary to give .0,025mm to .0,076mm inches end float on all shafts Repeat steps 10:13 to 10:18 until all shaft end floats are correct. Then fit new sealing rings to the shafts. 62
10-19 10-20
Refit the rear case, using an approved liquid gasket (Loctite 5203), taking care not to damage the shaft sealing rings. Tighten the 17 bolts to a torque of 55 to 75 Nm. Then replace the shaft end plug and O ring assemblies.
10-21 10-22
Lubricate the seals with transmission fluid then re-fit the pressure regulator valve and tighten to a torque of 45 to 64 Nm.

Re-fit the cold start housing, spring and ball. Then tighten to a torque of 45 to 64 Nm. Fit new expansion plugs to the shimming access holes using an approved sealant (Loctite 649).
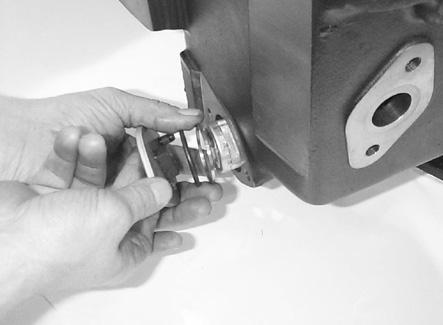
Lubricate the seals with transmission fluid then re-fit the converter regulator valve and tighten to a torque of 23 to 30 Nm.

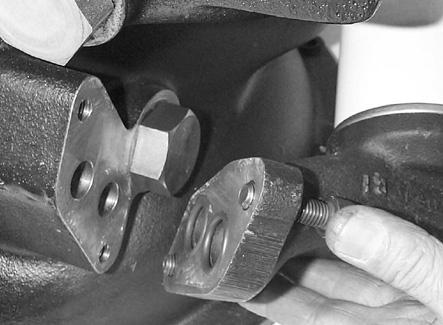
Refit the filter housing using 2 new O rings. Tighten the two bolts to a torque of 45 to 64 Nm.
10-23 10-24
10-25
Lubricate the seal with a light grease and screw on a new oil filter. Tighten to a torque of 7 to 10 Nm.

10-27 10-26
10-28
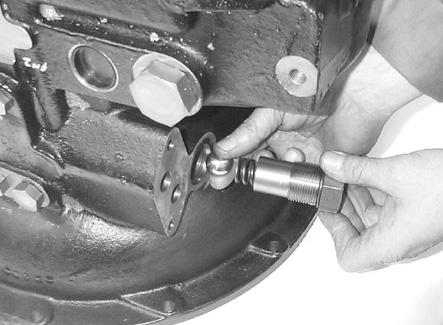
Refit the speed probe, sealing washer and locknut. Adjust. then tighten the locknut to a torque of 25,5 Nm and seal with Loctite 542 (see notes for correct adjustment).

Lubricate the seals with a light grease and re-fit the Speed Clutch 1 solenoid spool. Tighten to a torque of 26 to 39 Nm. Then refit the solenoid coil and nut. Tighten to a torque of 2,7 to 5,4 Nm. Refit the strainer, spacer, O ring and cover plate. Then tighten the two screws to a torque of 18 to 31 Nm.
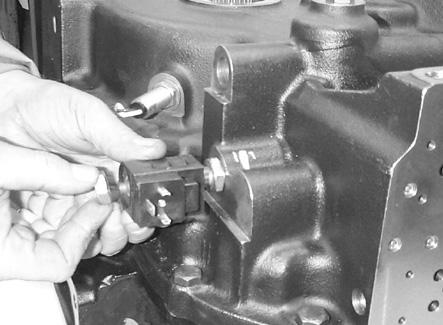
Re-fit the temperature sender. Then tighten to a torque of 20 to 27 Nm.

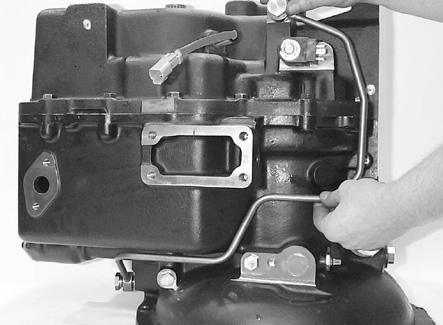
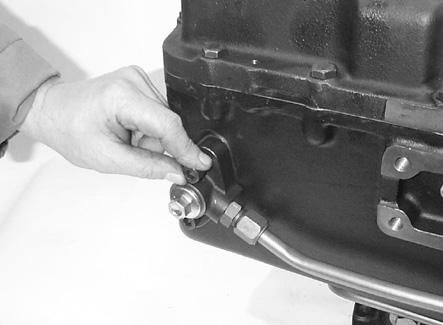
Refit the external transfer pipe using 4 new copper washers . Then tighten the 2 banjo bolts to a torque of 40 to 46 Nm.
10-29 10-30
10-31 10-32
Refit the dipstick tube bracket and tighten the 2 capscrews to a torque of 7 to 9 Nm.

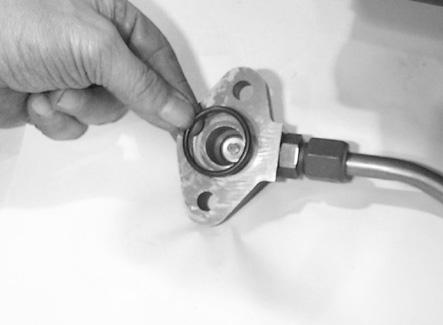
10-33 Fit a new O ring to the dipstick tube assembly.
10-34

Insert the dipstick tube assembly through the bracket and fit to the case. Tighten the 2 capscrews to a torque of 45 to 64 Nm.
10-35 Re-fit the 4wd spacer and Yoke.
10-36
Replace the 4wd O ring , washer and bolt. Then tighten to a torque of 68 to 88 Nm. Replace the output flange, O ring , washer and bolt. Then tighten to a torque of 68 to 88 Nm.


10-37
Ensure the 4 O rings are in place then re-fit the Speed Clutch 2 and 3 control valve assembly and tighten the 4 cap screws to a torque of 7 to 9 Nm. Then re-fit the 4 plastic caps to the capscrew holes. NOTE : The valve can only be fitted one way round as it is located by a small dowel pin.
Ensure the 4 O rings are in place then re-fit the Forward control valve assembly using 4 capscrews, and spacers if fitted. Then tighten the 4 cap screws to a torque of 7 to 9 Nm. Then re-fit the 4 plastic caps to the capscrew holes. NOTE : The valve can only be fitted one way round as it is located by a small dowel pin.
10-39 10-38

Ensure the 4 O rings are in place then re-fit the Reverse control valve assembly and tighten the 4 cap screws to a torque of 7 to 9 Nm. Then refit the 4 plastic caps to the capscrew holes. NOTE : The valve can only be fitted one way round as it is located by a small dowel pin.
67