
1 minute read
Engine Valve Clearance


Trashguard
The trashguard is a one piece construction and mounted in front of radiator. This can be easily removed for cleaning as follows :
1.Open the hood.
2.Remove the RH side panel.
3.Loosen bolt (A) of stopper plate (B) and rotate plate by 900 .
4.Gently take out trashguard (C) from the mounting. Reverse the procedure of removal for assembly.
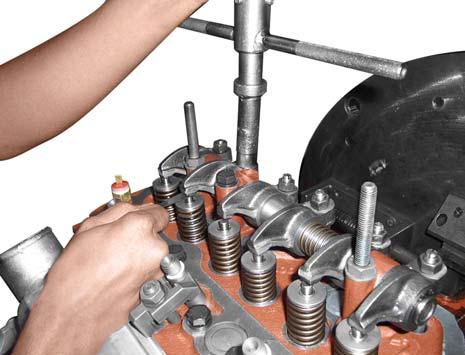
Adjusting The Valve Clearance
After the first 1000 hrs. the cylinder head bolts should be re-tightened to a torque as recommended. The bolt in the center should be tightened first and then work outwards. Check the valve clearance as given in specifications. Following this a further check should be made after every 1000 hrs.
1.Remove the valve housing.
2.Turn the engine until the No. 1 cylinder is at the top dead center of the compression stroke.

3.Loosen the locknut and adjust the screw in each valve lever so that the feeler gauge slips snugly between the ends of the valve lever and the valve stem.
4.Tighten the locknut and re-check the clearance.
5.Crank the engine for 2/3 revolutions in case of 3 cylinder engine in order to bring the TDC position of subsequent cylinder number as per the respective firing orders. Now adjust the valve clearance as explained earlier.
Repeat the process until clearance for each set of valves is adjusted.
Reassemble the valve housing and ensure that the valve housing gasket makes an oil tight seal with the cylinder head. Use a new gasket, if necessary.
Be accurate - use a feeler gauge for checking the valve clearance.