1 minute read
ELECTRICAL SYSTEM
from Komatsu HD785-7 Dump Truck Drowsiness Detection System (DDS) Shop Manual SEN06857-04 - PDF DOWNLOAD
Remove And Install Driver Status Monitor
Standard tool list
The listed tools are for reference, and other tools that are not on the list can also be used if the function is the same. No. Part name
1Hexagonal wrench Commercially available 4mm 1
2Torque wrench (hexagonal) Commercially available 0 to 20Nm 1
Precautions before and during work k Stop the machine on a level ground, set the parking brake switch to the PARKING (P) position, and stop the engine. k Chock the tires to prevent unexpected movement of the machine. k Set the battery disconnect switch to the OFF position. (For details, see the shop manual for the standard machine, STRUCTURE AND FUNCTION, MAINTENANCE STANDARD, “BATTERY DISCONNECT SWITCH”.) k When you disconnect the wirings and hoses, be careful not to deform or damage them with the clips and clamps. k If the wirings and hoses can be deformed or damaged, remove the clips and clamps before the work.
Notice
Check the connector numbers and installation positions before you disconnect the wirings and hoses, and write them down.
Remove Driver Status Monitor
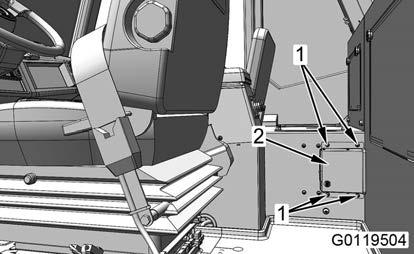
1. Remove the hexagonal socket head screws (1) (4 pieces), and remove the bracket (2).

REMARK
• Be careful not to lose the washer
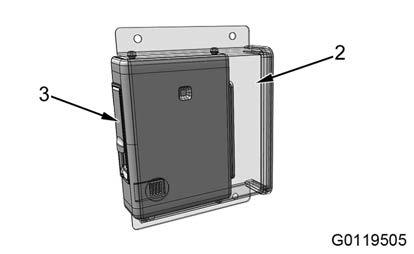
•The driver status monitor (3) and wiring harness are attached to the bracket (2) at this time.
Tool: Hexagonal wrench
Hexagonal socket head screw (1): Width across flats 4mm, M6


