1 minute read
Connecting Auxiliary Hydraulic Couplings

from Gehl RT165 RT165 (EU) RT165 X-Series Compact Track Loader Operator’s Manual 50950264 - PDF DOWNLOAD

Important: Connect hydraulically-powered attachment hoses to the auxiliary circuits after the attachment is secured to the hitch.
Disconnect hydraulically-powered attachment hoses from the auxiliary circuits before removing the attachment from the hitch.
1. Empty the attachment and lower it to the ground.
2. Shut off the engine. With the ignition on, but the engine off, move the auxiliary hydraulics control rocker switch (F, Figure 65) on the right T-bar, joystick or hand control back and forth to relieve pressure in the auxiliary hydraulics circuit.
3. Turn off the ignition. Remove the ignition key and take it with you.
4. Raise the safety bars/arm rests and exit the machine using the hand holds.
5. Clean the hydraulic connections on the hoses and the connections.
6. Relieve any residual pressure remaining in the auxiliary hydraulics circuit by pushing the attachment coupler firmly into the auxiliary coupler (Figure 66). Route the hydraulic hoses so they do not get pinched when the attachment is tilted forward and back. Damaged or burst hydraulic hoses could result.
Caution

7. Continue to push the hose connections firmly onto the auxiliary hydraulic connections until they snap into place.
Note: Pressure build-up caused by heat in hydraulic attachments left in direct sunlight can make it difficult to connect the quickcouplers to the fittings on the attachment.
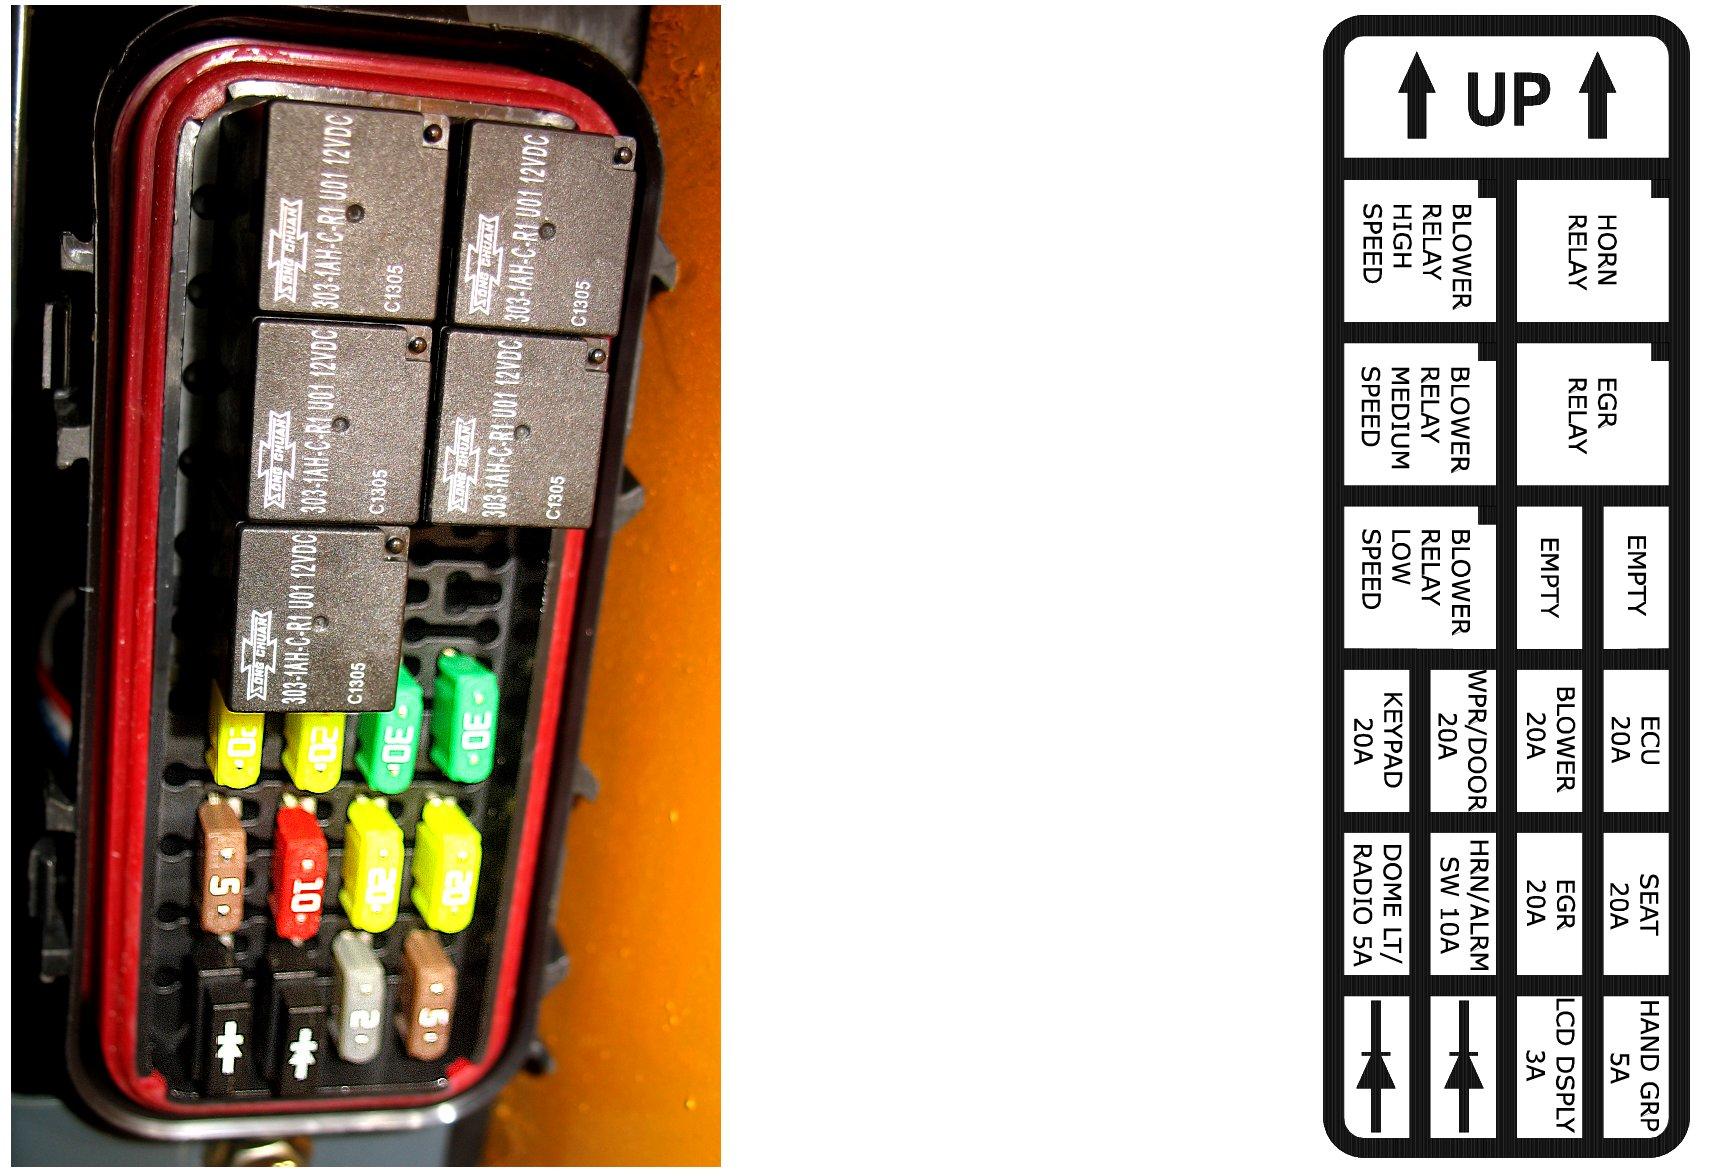
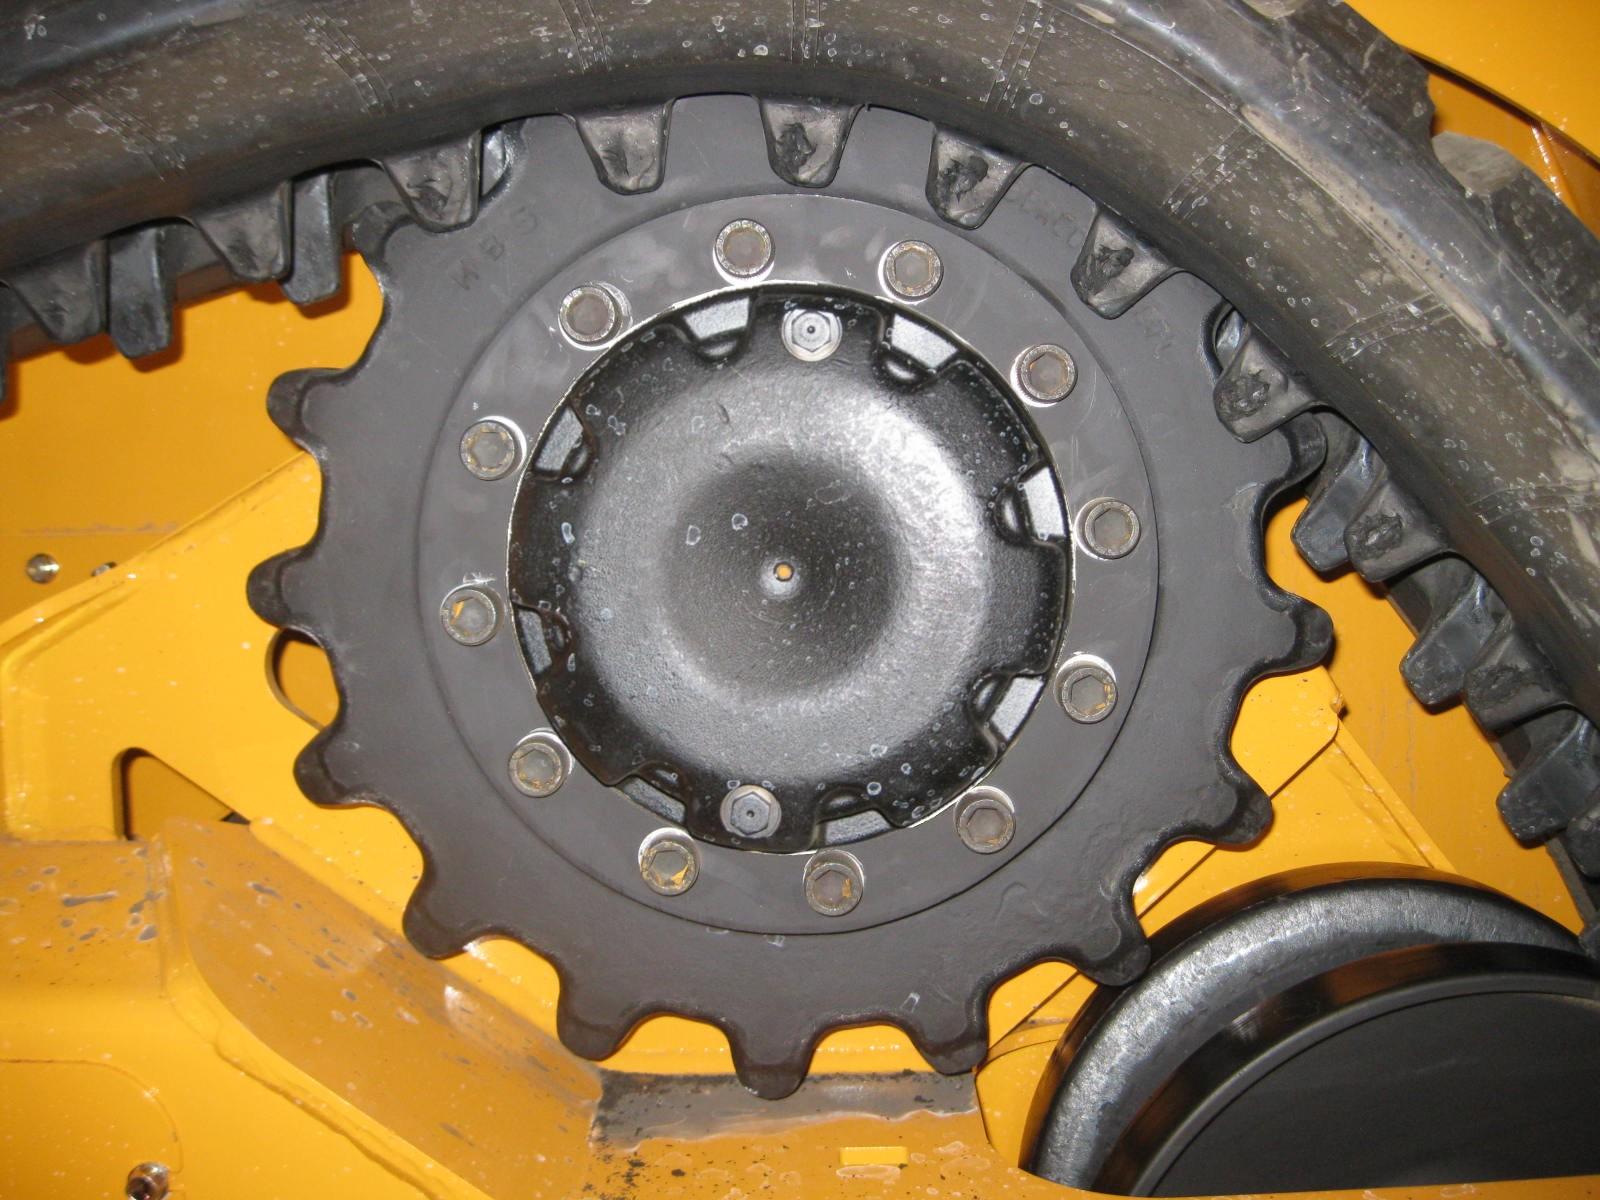
Note: The auxiliary hydraulic couplers are located on the left lift arm. When the auxiliary control switch is activated in either direction, the inside and outside couplers can be “pressure” or “return”, depending on which direction the switch is activated. The smaller center coupler is for the case drain.
Important: Always check hydraulic function of the attachment before use, to make sure the hydraulic hoses have not been installed in reverse.