5 minute read
Operating ‐Seeder


CAUTION: Avoid injury! Keep hands and feet away from all moving parts. Never carry riders.
1. Seed application rates can be affected by humidity and the amount of moisture in the material. Poor spreading results can occur if the material has been allowed to become wet or packed in the hopper.
2. Avoid stopping unit with seed box motor running, as material will continue to flow through seed box openings.
CAUTION: Avoid injury! Do not make adjustments unless the machine is installed on a tractor or utility vehicle.
Keep hands and feet away from discs and points when lowering to the ground.
1. Park tractor or utility vehicle safely. (See SAFETY RULES section.)
2. Install Food Plot Seeder to tractor or utility vehicle (See Installation & Removal section.)
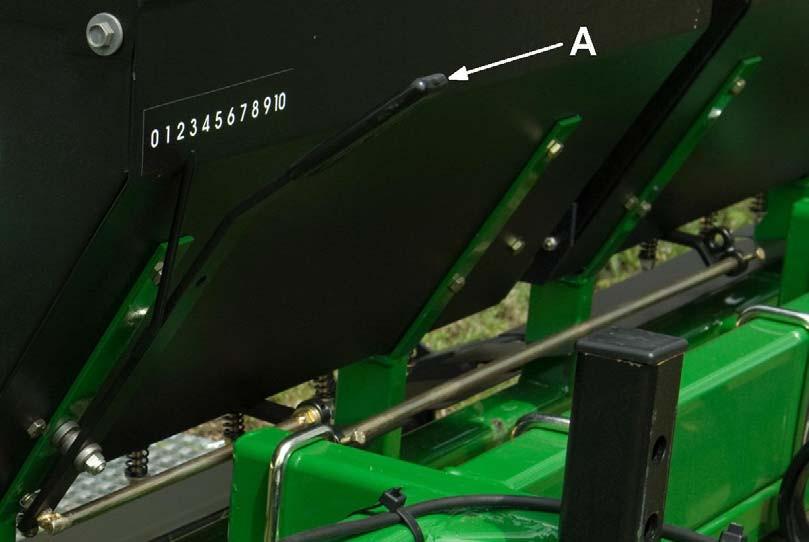
Flow Control Lever
3. Move flow control lever (A) to the left (as shown) to shut off material flow. Move flow control lever to the right (as shown) to open seed box and allow material flow.
4. Engage the Food Plot Seeder in the ground and turn on seed motor as you start down the row to be planted.
5. Pull the Food Plot Seeder 3 to 5 mph (5 to 8 km/hr) for safe and effective operation.
Adjusting the Flow Rate
1. Set the flow control to 0 and add seeds not to exceed the weight capacity of the seed box.
2. Determine the correct flow rate setting for your spreading application using the chart below.
NOTE: Seed application rates as provided are affected by humidity and moisture content of the material. Minor setti ng adjustments may be necessary to compensate for these conditions.
Application Rate Chart
How to Calibrate the Food Plot Seeder
To determine the seeding rate for any type seed when using the Food Plot Seeder, you need to know two things: a) seed coverage area and b) the amount of seed used to cover this area.
To determine the seeding rate, you must do the following:
1) Weigh a small amount of the seed, in pounds (kg) you wish to plant.
2) Place the small amount of seed that you weighed into seeder hopper.
3) Open the seed gate until the first seed falls out (open until the first largest seed falls out if it is a seed blend). Note this seed setting for future reference.
4) Turn on seeder motor.
5) Plant seed at the desired depth using a constant speed, usually between 4‐ 8 mph (6.4‐12.9 km/hr).
6) Once all the seed has been dispensed out of your seeder, you must now determine the distance, in feet (m), that you covered (planted) with that amount of seed.
7) You must also measure the planting width, in feet (m), of the seeder.
Use the following formulas to determine the seeding rate:
Se eding Rate = Amount of Seed, lbs (kg)
Coverage Area, acres (hectare)
Coverage Area = Distance Covered, feet (m) x Planting Width, feet (m)
43,560 square feet in one acre (10,000 sq m in one hectare)
Example: Say you are using the FP2206, which has a 5‐ft (1.5 m) planting width. You weigh 3 lbs (1.4 kg) of seed and place it in the seeder. You open the seed gate until first seed comes out (ex. setting #5 on the seeder). You travel at the constant speed of 4 mph (6.4 km/hr) for a distance of 700 ft (213 m) before the 3 lbs (1.4 kg) of seed is completely dispensed. What is your seeding rate?
Coverage Area = Distance Covered, feet (m) x Planting Width, feet (m) = 700 feet x 5 feet (213 m x 1.5 m) = 3500 sq ft (319.5 sq m)
Divide by 43,560 square feet in one acre (10,000 sq m in one hectare)
Covera ge Area = .08 acres (.03 hectare)
Seeding Rate = Amount of Seed (lbs) = 3 lbs = 37.5 lbs per acre
Coverage Area (acres) .08 acres
Seeding Rate = Amount of Seed (kg) = 1.4 kg = 46.7 kg per hectare
Coverage Area (hectare) .03 hectare
Note: You can increase your seeding rate by increasing the opening or seed setting on your seeder (ex. going from setting #5 to setting #6) or by decreasing your speed of travel, i.e. going from 4 to 3 mph (6.4 to 4.8 km/hr).
You can decrease your seeding rate by decreasing the opening or seed setting on your seeder (ex. going from setting #5 to setting #4) or by increasing your speed of travel, i.e. going from 4 to 5 mph (6.4 to 8 km/hr).
Each time you change the type of seed used, seeder settings and/or your speed of travel, you will change your seeding rate. Therefore, you must recalculate your seeding rate each time you change seed types, seeder settings and/or speed of travel.
Determining the Flow Control Setting (Alternative Method)
1. Determine from material bag, the amount of material to be spread over a designated area. Example: The contents of this bag, 25 lb (11.3 kg), will cover 5000 sq ft (465 sq m).
2. Determine the amount of material required to cover 100 sq ft (9.3 sq m) as follows:
Divide the contents, lbs (kg) by the coverage area, sq ft (sq m), then multiply by 100 sq ft (9.3 sq m). Example: 25 lb divided by 5000 sq ft, then multiplied by 100 sq ft = 0.5 lb of material for 100 sq ft (11.3 kg divided by 465 sq m, then multiplied by 9.3 sq m = .23 kg of material for 9.3 sq m). To convert this weight to ounces, multiply by 16 (16 oz/lb) or 35 (35 oz/kg).
Example: 0.5 lb x 16 = 8 oz (.23 kg x 35 = 8 oz).
3. Determine approximate Flow Control Setting by using the APPLICATION RATE CHART shown on page 27 for your type of seed.
4. Measure off a distance of 26.5 ft (8.1 m) in your yard for the FP2204, 17 ft (5.2 m) for the FP2206, or 12.5 ft (3.8 m) for the FP2208. This is the distance your seeder must travel in order to cover 100 sq ft (9.3 sq m).
5. Set the flow control lever at the approximate flow control setting.
6. Place 5 lb of material in hopper. Weigh the material before and after spreading 100 sq ft (9.3 sq m) to determine amount of material used.
7. Move unit to measured area, turn on seed box motor, and open the flow control lever. Drive the 30 ft (9.1 m) course, stop unit, and close the flow control lever.
8. Remove and weigh remaining material. Subtract this weight from 5 lb (2.3 kg) to determine material used. If too much material is used, set Flow Control ONE number LOWER and try again. If too little material is used, set Flow Control ONE number HIGHER and try again.
9. After determining proper setting always record the type of material and the setting for future use.
3. Set the flow control lever to the desired setting.
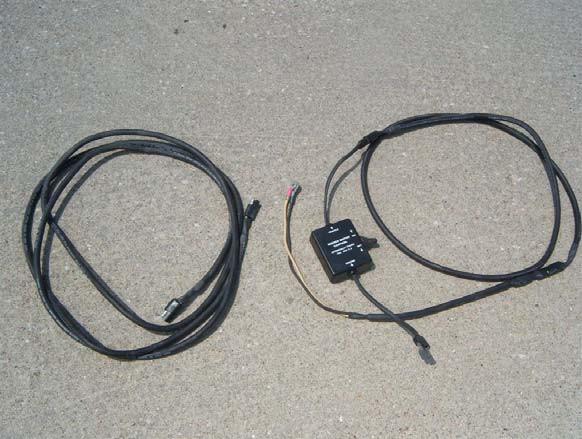
Using the control box for seed dispensing or raising wheels
The control box illustrated above is used with all tractor models. To engage the seeder motor(s), turn the switch on. This box can be connected directly to the tractor battery with the provided connectors. Wiring extensions also come with each machine and can be placed between the implement and control box or between the battery and control box.
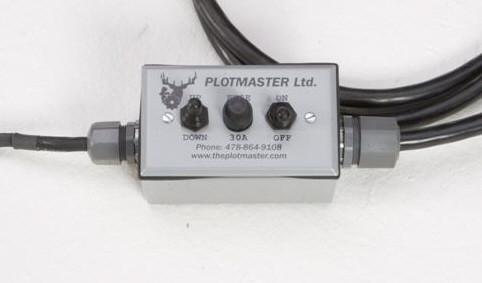
The control box illustrated above is for the pull ‐type model and contains two switches, one to engage the seeder motor and the other to raise and lower the wheels for transport or to control the depth of tillage. This box can be connected directly to the utility vehicle battery with the provided connectors. Wiring extensions also come with each machine and can be placed between the implement and control box or between the battery and control box.