1 minute read
Installation & Removal


Installing Pull‐Type Machine on Utility Vehicle
1. Park ATV or Gator. (See SAFETY RULES section.)
2. Place the machine behind the vehicle.
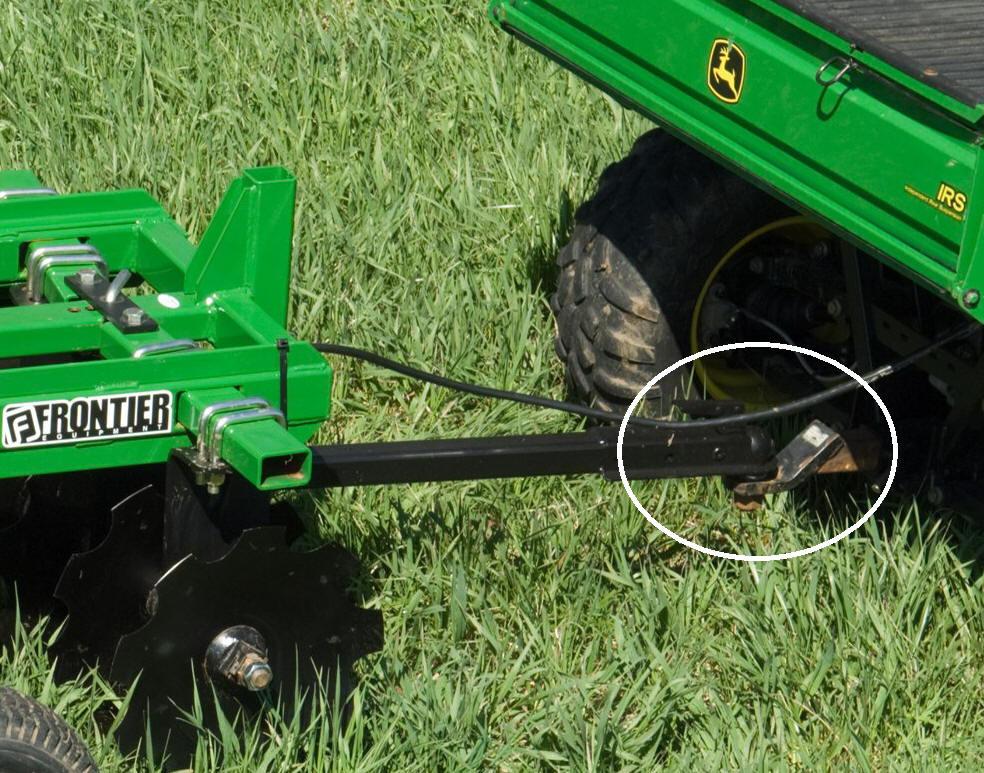
3. Place drawbar hitch onto vehicle 2 in. (5 cm) hitch ball. Close coupler and align the hitch pin holes. NOTE: For optimum performance, keep drawbar as level as possible during operation and transport (See Operating section).
4. Install hitch pin through holes in coupler.
5. Secure spring locking pin through hole in hitch pin.
6. Attach wiring clips to vehicle battery.
Installing 3‐Point Machine on Tractor
1. Park tractor safely. (See SAFETY RULES section.)
2. Place the machine behind the tractor.
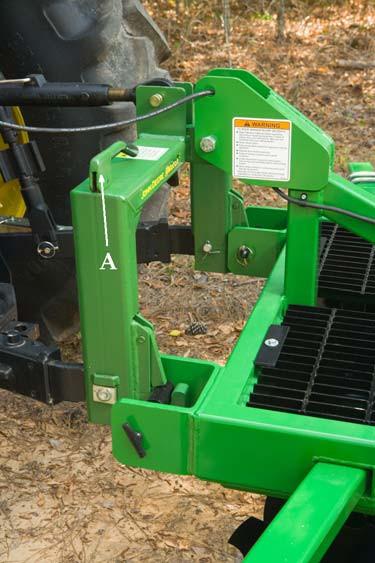
iMatch Hitch
(Shown with optional grating kit.)
3. Engage three point pins onto tractor iMatch hitch or Quick‐Coupler. Make sure proper bushings are in place. Close locking latches (A).
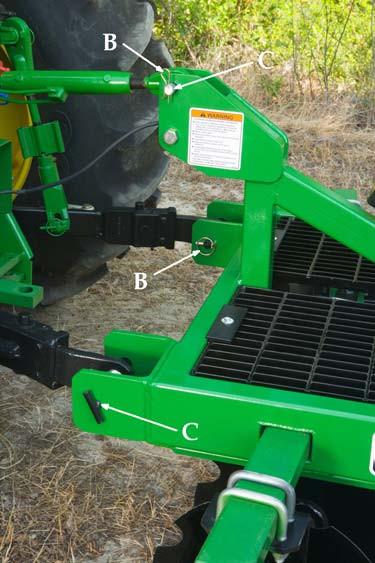
4. If tractor does not have an iMatch or Quick ‐Coupler, Install lower hitch pins (C) through holes in link arms and secure with spring locking pins (B). Then install top hitch pin (C) in tractor turnbuckle and secure with locking clip (B). Make sure proper bushings are in place.
5. Attach wiring clips to tractor battery.
Determining Correct Tractor Ballast
CAUTION: Front ‐end ballast may not always maintain the required stability if the tractor is driven too fast over rough ground with machine in raised position. Be safe and drive slowly under these conditions.
Install the proper amount of weight to the front of the tractor as recommended in the tractor operator’s manual. For proper front end weighting, see the following implement code table.
NOTE: The implement code number represents the weight of the machine and how far rearward the weight is from the tractor.
Removing Pull‐Type Machine from Utility Vehicle
1. Park unit safely. (See SAFETY RULES section.)
CAUTION: Avoid injury! Do not attempt to disconnect machine from vehicle with material remaining in the unit. Machine could become unstable.
2. Remove all material from seed box.
3. Remove spring locking pin from hitch coupler.
4. Remove hitch pin. Open coupler.
5. Move machine off vehicle hitch ball.
6. Install hitch pin and spring locking pin on hitch coupler for storage.
Removing 3‐Point Machine from Tractor iMatch Hitch
1. Park tractor safely. (See SAFETY RULES section.)
CAUTION: Avoid injury! Do not attempt to disconnect machine from tractor with material remaining in the unit. Machine could become unstable.
2. Remove all material from seed box .
3. Disconnect locking mechanisms (A) on iMatch or Quick Hitch and lower tractor 3‐point hitch to disengage.
4. If attached directly to tractor 3‐point hitch, remove spring locking pins (B) and hitch pins (C) from link arms and locking clip (B) and hitch pin (C) from turnbuckle.
5. Install hitch pins and locking pins and clips on hitch for storage.
6. Un‐hook wiring clips from tractor battery and store wires on machine.