1 minute read
PREP ARING FOR ASSEMBL Y Preparation

from CNH KG1BP514-00 - Multi-Purpose Circuit Proportional Control Kit CX300D Installation Instructions

An “*” this document indicates that the part mounted the actual Items prepare:
• W renches ( , , , , , )
• Hexagon wrenches ( 8 , )
• Phillips screwdriver
• scissors
• Rag
Position the main
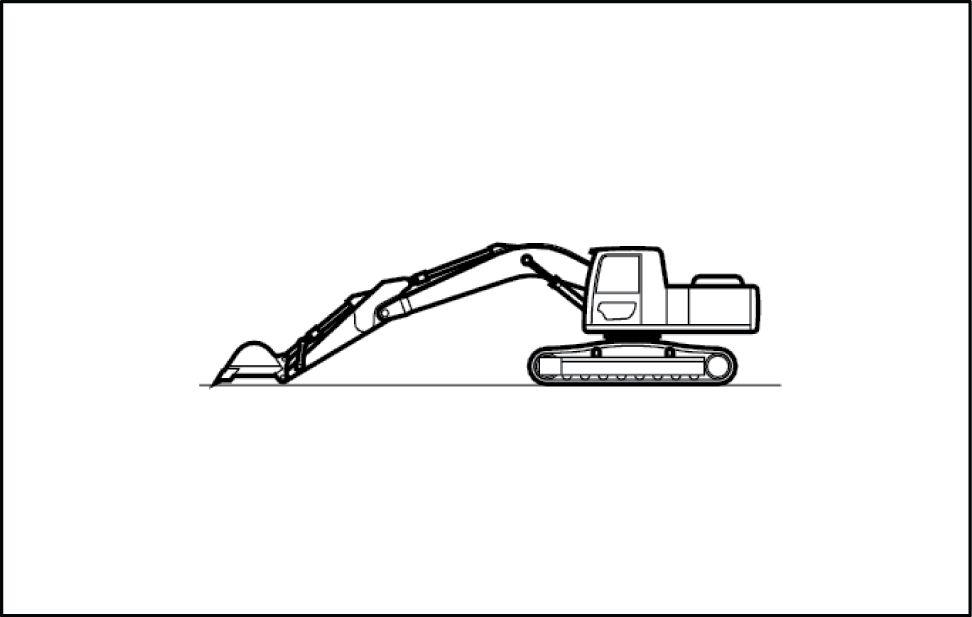
• Put the main unit level put the bucket cylinder its open stroke the arm der its open stroke end, lower the boom, and touch the arm top the SMIL13II00106AA
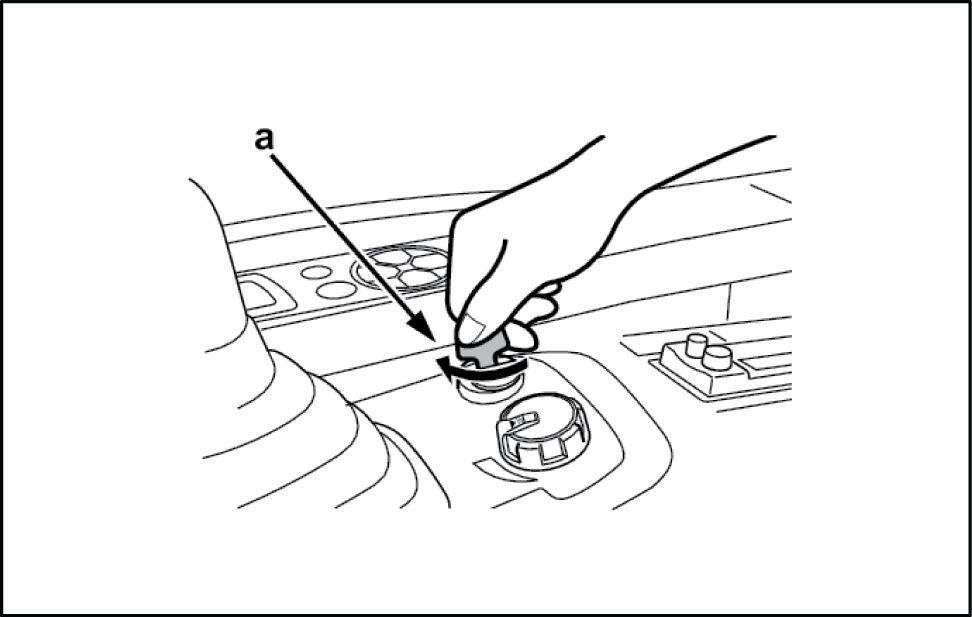
Switch the ignition key (a) “OFF”, check that the engine has stopped, and then switch the ignition key “ON” (Do not start the
Bleed out the pressure inside the
• Flip the lever (c) and then turn the upper operation lever (b) about times bleed out the
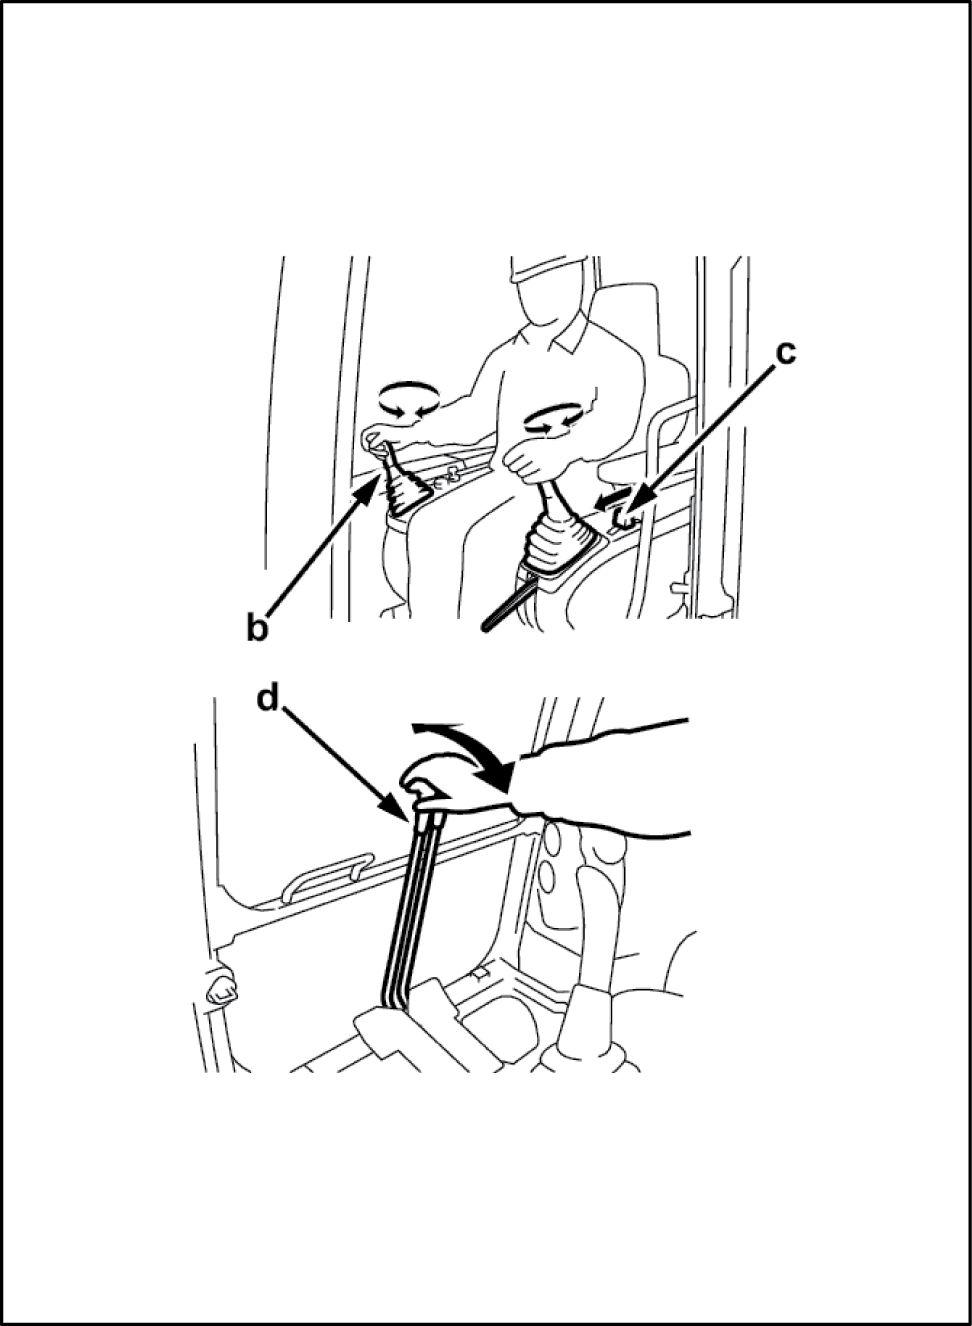
• Move the travel lever (d) back and forth about 5 times bleed out the SMIL13II00108BA
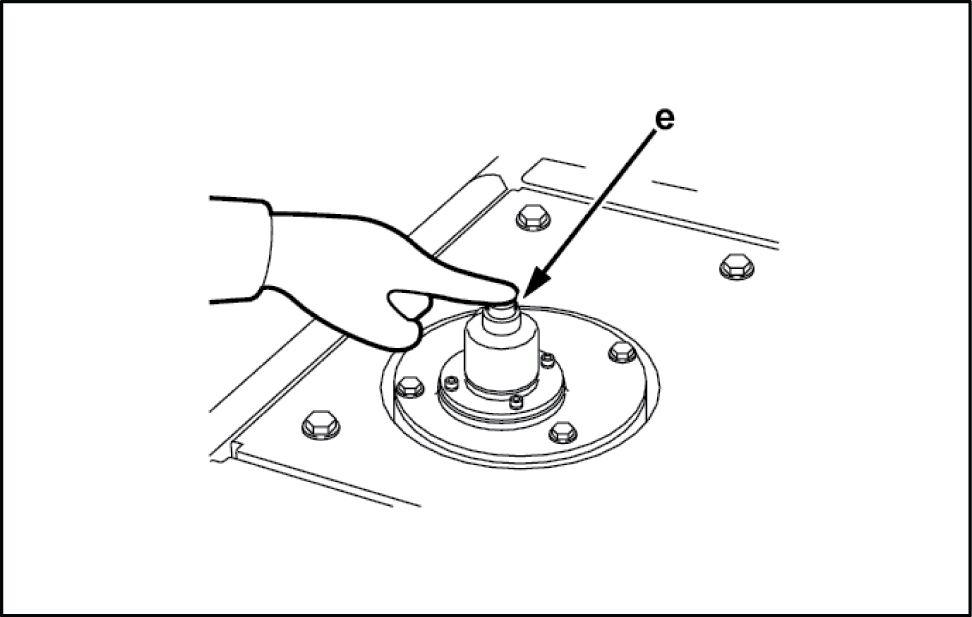
Bleed out the pressure from inside the hydraulic
• Press the air breather button (e) top the draulic tank release the pressure inside the
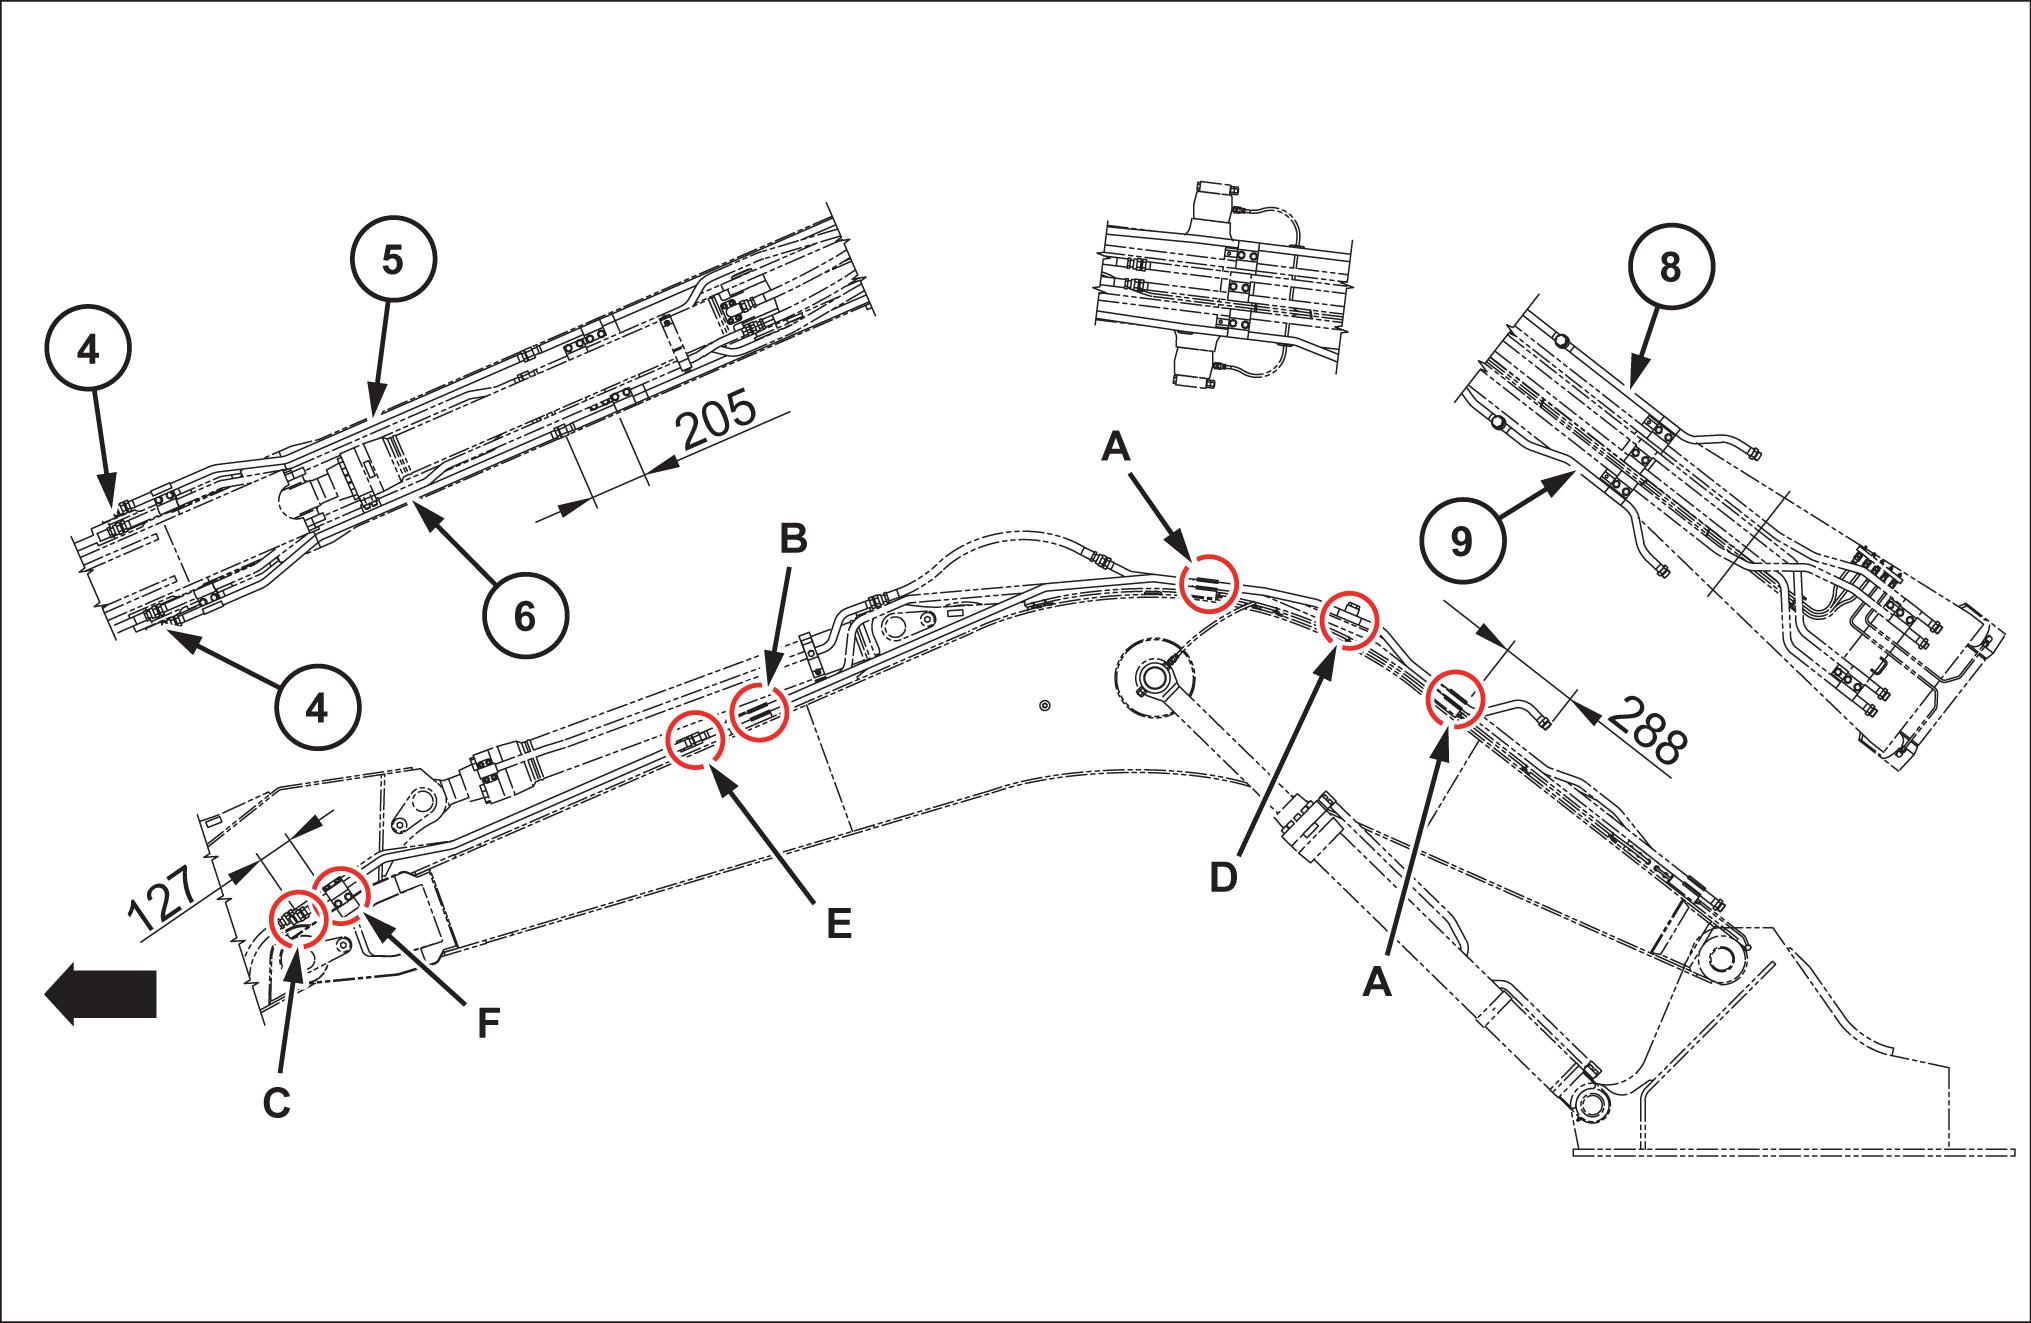
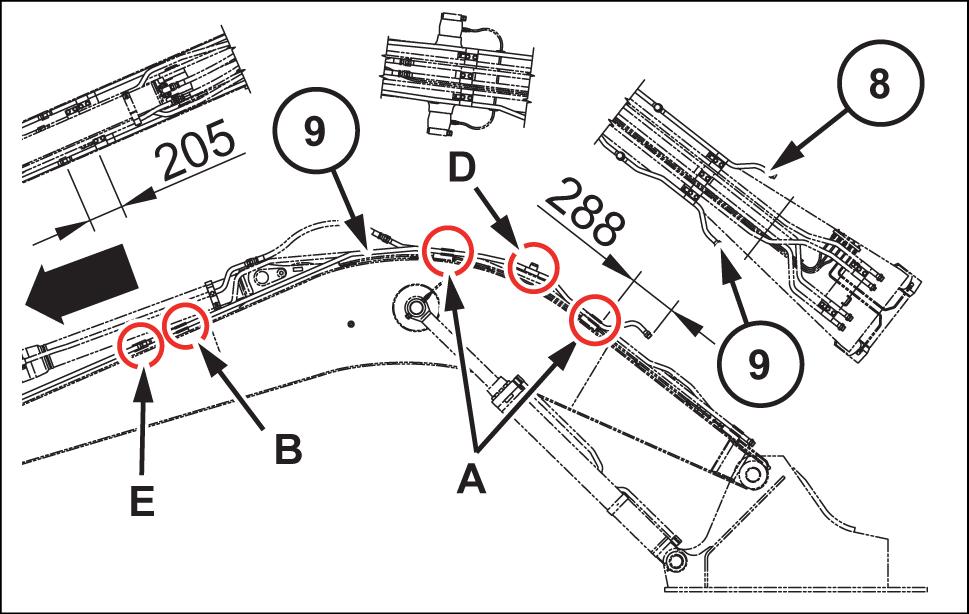
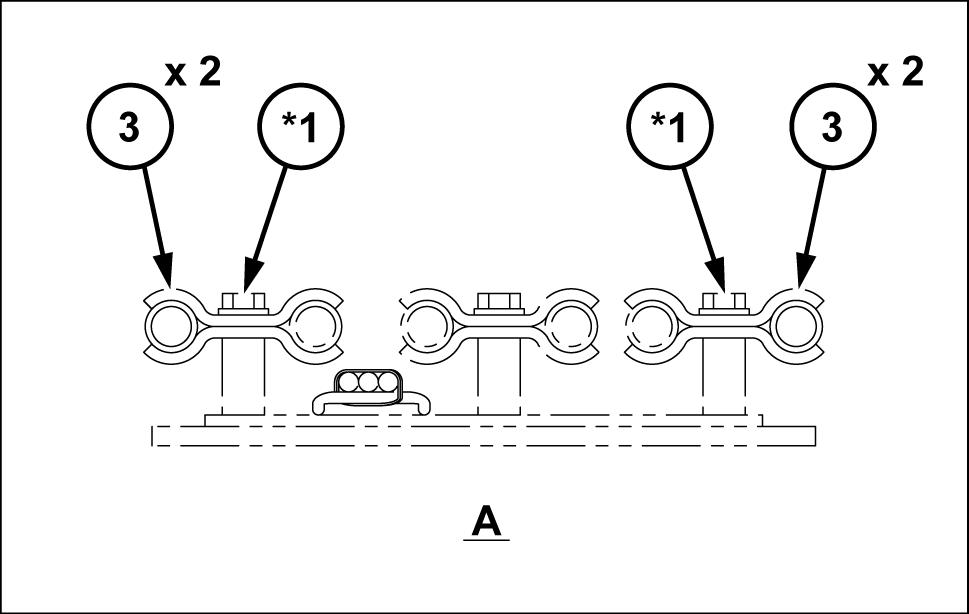
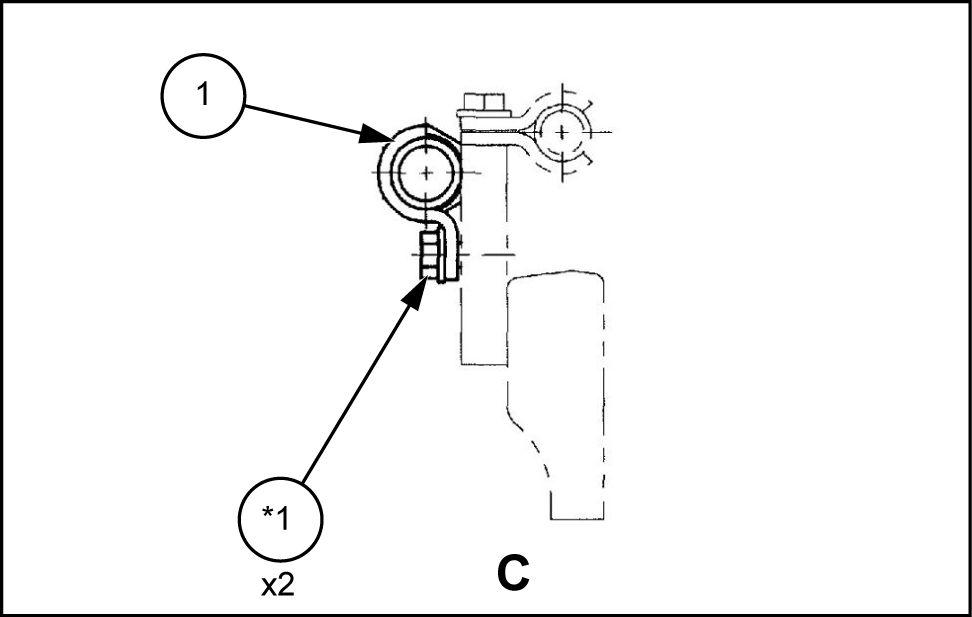
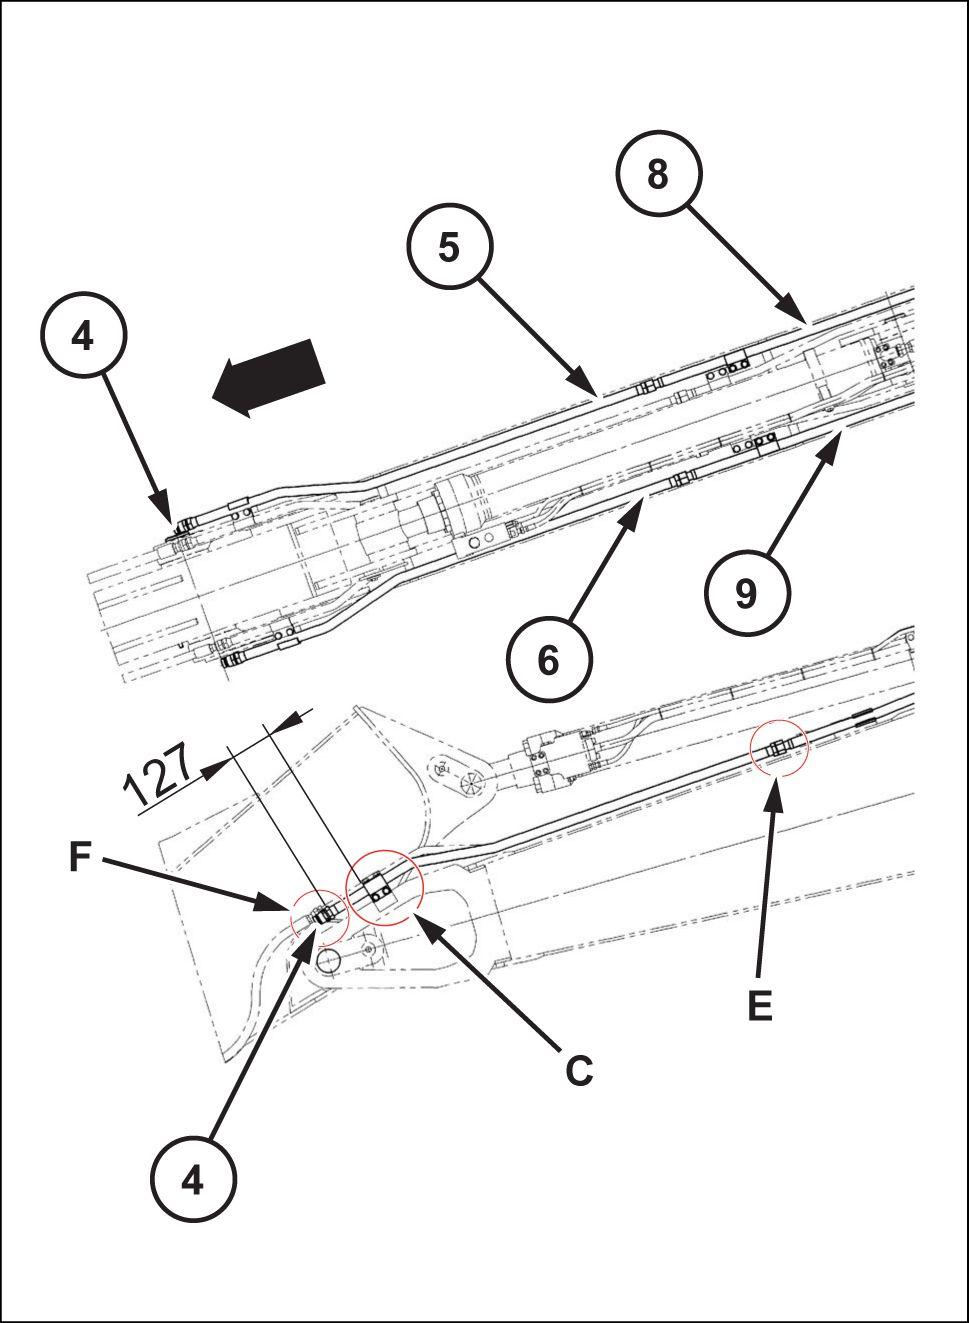
Sandwich the line assembly (left) (9) two locations with two pipe clamps (3) and then fasten with two sems bolts (*1)
• Fasten one the pipe clamps (3) a position 208 ( 8.189 ) from the rear end the line assembly (left) (9) . SMIL15CEX8078AB
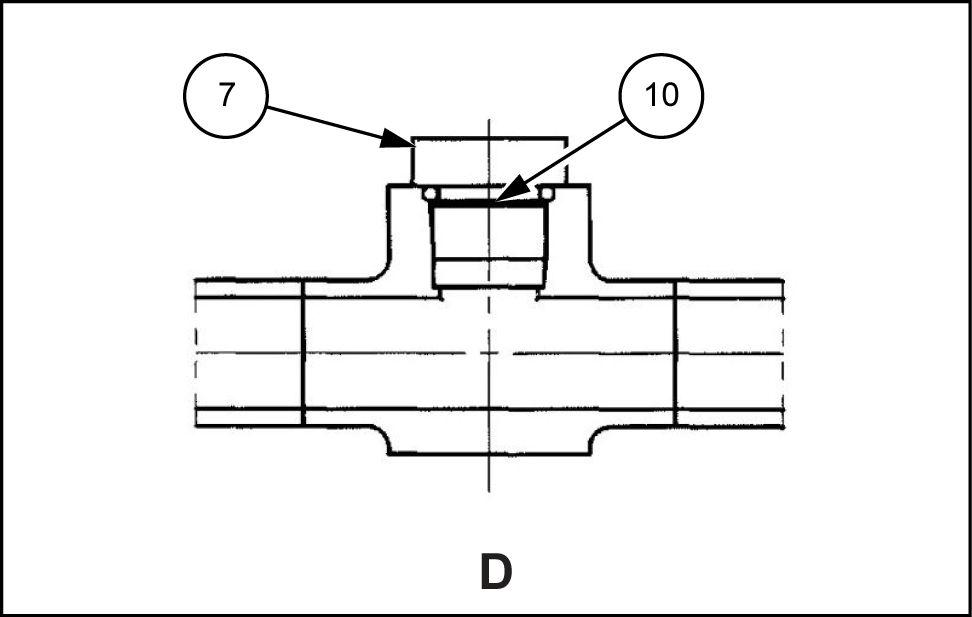
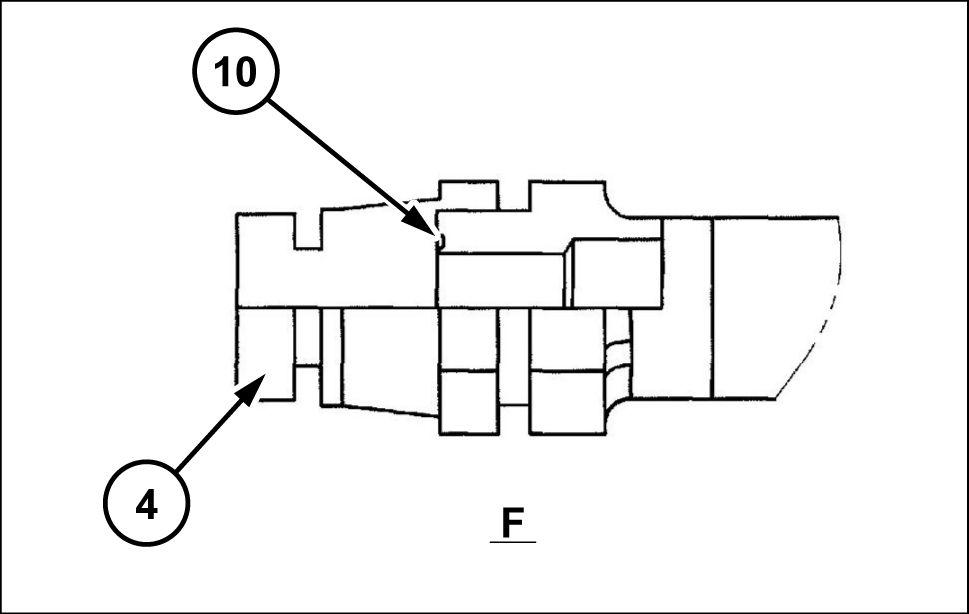
Set the O - ring (10) the line assembly (left) (9) , and then install the plug (7) SMIL15CEX7677AB
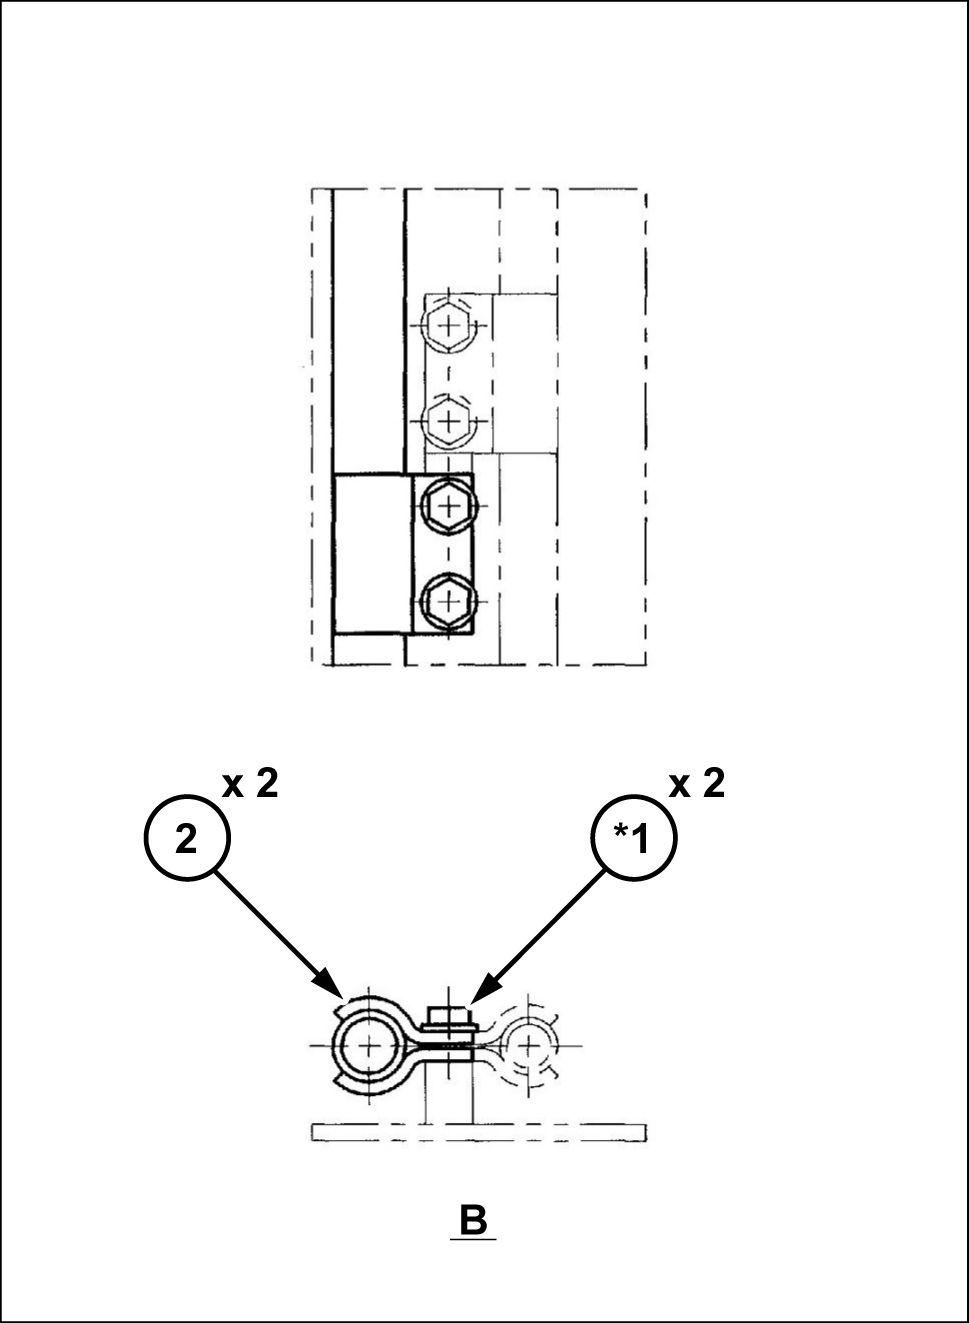
Sandwich the line assembly (left) (9) with two pipe clamps (2) , and then fasten with two sems bolts (*1) .
• Fasten the pipe clamps (2) a position 205 ( 8.071 ) from the front end the line assembly (left) (9)
Install the line assembly (right) (8) the same way the line assembly (left) (9)
Line Assemblies (5) (6)
Set the line assembly (left) (6)
SMIL15CEX8081BB
Fasten the line assembly (left) (6) with one pipe clamp (1) and two sems bolts (*1)
• Fasten the pipe clamp (1) a position 127 ( ) from the front end the line assembly (left) (6)
SMIL15CEX7680AB
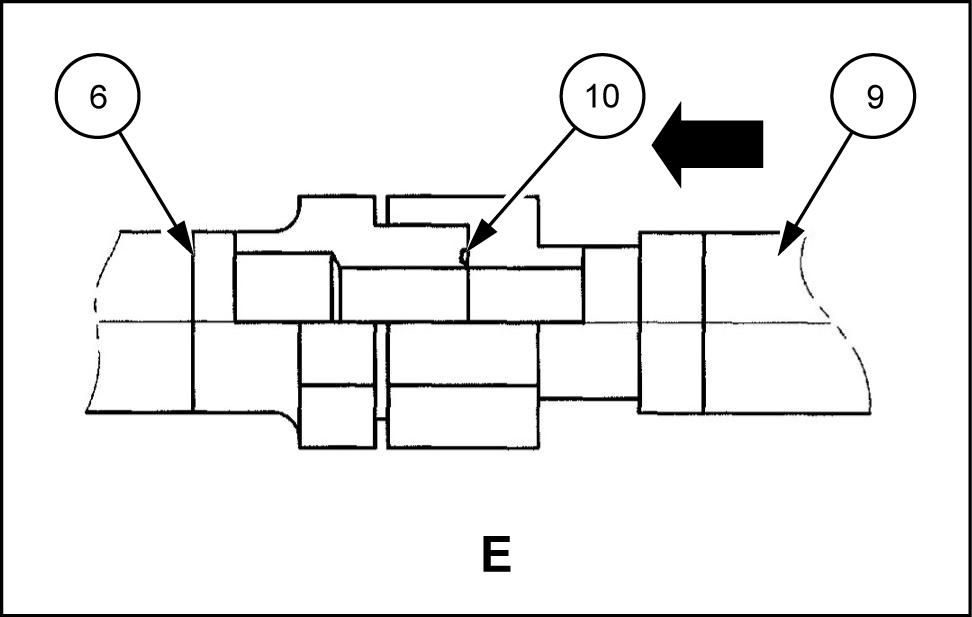
Set the O - ring (10) the rear end the line assembly (left) (6) , then connect the line assembly (left) (9)
Set the O - ring (10) the front end the line assembly (left) (6) , then install the plug (4)
Install the line assembly (right) (5) the same way the line assembly (left) (6)