8 minute read
Every 250 Hours or Once in 3 Months


3.6.12. How to replace oil in the engine
• Prepare an appropriate vessel of ca 20 l. • Remove drain plug and let oil to run out.
• Clean the surface round the oil filter head. Dismantle the filter.
• Clean the contact surface designed for filter gasket.
• Take a new filter, fill it with pure motor oil - 11,2 l (2,96 gal US).


• Apply oil on the gasket.
• Install the filter and hand-tighten securely. • Check the drain plug gasket – replace if damaged. • Check the thread of crankcase sump and clean contact surface designed for the gasket. • Reinstall the plug again. Use 80 Nm (59 ft-lb) torque.
• Refill the engine via filler neck
• Replenish the oil up to the dipstick upper line (H). Oil refilling makes 11,2 l (2,95 gal US).


NOTE
• With the oil replaced start the engine for 2 - 3 minutes.
Check the tightness of drain plug and filter. • Stop the engine and wait 3 minutes until oil descents into the crankcase sump. Then check the oil level using dipstick.
! CAUTION ! Replace oil every 3 months at the latest even though 250 hours of operation have not been reached. Replace oil in an interval that comes first. Use recommended filters only. Refer to Specification Manual or Spare Parts Catalogue. Use recommended oil only. Refer to Section 3.2.1. Do NOT over tighten the filter. Its thread or gasket may get spoiled. Observe fire precautions!
Drain oil when it is hot, following the operation end, or heat the running engine until the cooling liquid temperature reaches 60 °C (140 °F). Beware of possible scalding when draining hot oil.
Collect drain oil and do not leave it to soak in the ground.
Used oil and filters are environmentally hazardous waste – hand it over for disposal.
3.6.13. Check the fixing of the engine
• Confirm the condition of metal rubbers (cracks, fissures), coherence of metal with rubber, tightness of bolts and nuts.
Engine front metal rubbers
Engine rear metal rubbers


3.6.14. How to inspect the batteries
When handling the accumulator you must use proper clothing, rubber gloves, eye protection. EYE CONTACT with electrolyte: Immediately flush hit eye with large amounts of water for at least a couple of minutes. Call for prompt medical attention. SKIN CONTACT with electrolyte: Remove contaminated clothing, including shoes. Immediately flush with soap water or water & soda solution. Get prompt medical attention. INGESTION: Drink max. amount of milk or water or solution of calcined magnesia or soda in water to dilute stomach contents. Do NOT each, drink or smoke while at work! Upon work completion washes your hands and face thoroughly with water and soap!
• Disconnect the batteries using a disconnector. • Wipe the surface of accumulators. • Check the condition of poles & terminals 1. Wipe the poles and terminals. Apply thin layer of grease on the terminals. • Open cell plugs 2 and confirm the electrolyte level in all the cells reaches 5 ÷ 15 mm (0.2÷0.6 in) over the plates, or the lower edge of built-in dipstick inside the cells. Replenish with distilled water those cells where electrolyte level is less than 5 mm (0.2 in) above the plates.

NOTE
• Use glass tube to check the level.
• Use refractometer to measure the electrolyte inside individual cells.
1
2 1 1 2 1

Or use charge indicator.
Compare measured figures with those in the Table. When checking is completed, please close the accumulators.
NOTE:
During winter shutdown of the Machine you must dismount the accumulators and store them in dry dust-free area protected against frost. Do NOT store them together with alkaline cells. During their storage life, please check 1x every month their charging condition and recharge if required.

eD sn ti
y i m c/gn 3 i ) emueB(eB°n 02 86 C° F° rT o cpi 02 86 C° °F rT op ci
degahcylrepo rr P 8 2, 1 3 2, 1 ° 2 3 ° 72 degrahC-fla H 2 ,1 , 1 2 1 °4 2 ° 61
egrahce R 2 1, 1 8 0, 1 ° 6 1 ° 11
! CAUTION! Always follow the Manual of accumulator manufacturer when handling the accumulator! Disconnect the accumulator when making its repair, or handling the conductors and electric equipment within the wiring circuit, so as to avoid short circuit. Disconnect (–) pole cable first when disconnecting the accumulator. Connect as first the (+) pole when connecting again. NEVER attempt to disconnect accumulator with the engine running. Short circuit occurs with hazard of accumulator explosion in case of making direct conductive connection between both of the accumulator poles. Do NOT contact the Machine frame to confirm existence of voltage in the conductor. Replenish the accumulator with distilled water only – NEVER with acid! Refill with distilled water immediately before work on the Machine or prior to charging the accumulator. Recharge the accumulator insufficiently charged. Recharge the accumulator outside the Machine.
Open the accumulator plugs before recharging. Do NOT any open fire near the accumulator. Danger of explosion! Spark made upon disconnecting the terminals when recharging may cause explosion.
Do NOT turn the accumulators upside down. Danger of electrolyte flowing out from degassing accumulators.
Flush with water and neutralize with lime a place hit with spilled electrolyte.
Hand over for disposal any nonfunctional worn accumulators.
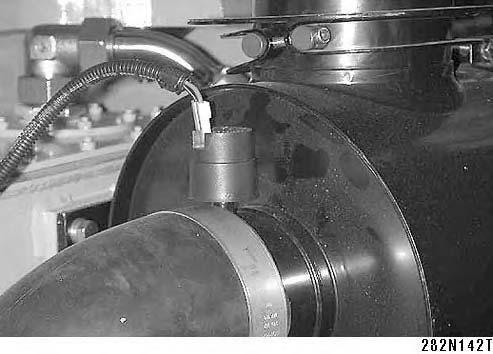
3.6.15. Check the function of Air Filter Vacuum Switch
• Remove the engine air intake cover, or the pre-filter (optional)
• Set up the engine speed increased to about 2000 1/ min (RPM). • Cover shortly Air Filter Suction Hole on the engine bonnet.
• Indicator lamp 17 for Air Filter fouling should light.
• Check the following unless it lights up :
Vacuum switch 1 • Bulb inside the indicator lamp 17. Confirm the contact, supply cable.
1


3.6.16. Machine Lubrication
• Remove greasing nipple caps. • Put on gradually the greasing nipple of high pressure press and grease till the old grease begins to flow out. • Reinstall the greasing nipple caps again.
3 1
Steering Joint
Upper bearing 1 Lower bearing 2 Bearing 3 4x

Linear Hydraulic Motors for Steering
King pins 2 x
Rear pins 2x
Linear Hydraulic Motors for Tilting the Bonnet
Upper pivots 2 x
2


Lower pivots 2 x
Linear Hydraulic Motor for Tilting Driver’s Control Stand
Door Hinges
Bonnet Hinges


Cabin’s Front Pivots
Pivots 2 x
Options
Cabin door hinges
! CAUTION! Use ONLY recommended lube greases. Refer to Section 3.2.6.


3.6.17. How to check oil inside vibrator
• Stop in such a way that the free axle plugs on the left side are in the position as per fig.
• Clean the spot round of the inspection plug 1. Unscrew the plug 1 and check the oil level. The level must reach up to the inspection hole or flow out slightly. • Replenish oil with the filler cap 2 unscrewed. • Wipe the plugs and reinstall.
! CAUTION! Check the oil only after it cools down. Refill with identical type of oil. Observe fire precautions! 2

1
3.6.18. How to check oil in gearboxes
Axle Gearbox
• Stop the Machine in such a way the plugs of gearboxes of both of the wheels are in position as per fig. • Wipe the spot round the check plug, unscrew the plug and check the oil level. The level must be as high as the inspection hole or flow out slightly. • Refill oil if necessary. • Wipe the plugs and reinstall.
Free Axle Gearbox
• Clean the spot round the inspection plug 1. Unscrew the plug and check the oil level. The level must reach up to the hole or flow out slightly. • Refill with oil via filler plug 2, if required. • Wipe the plugs and reinstall. • Confirm the tightness of gearboxes.


1 2
NOTE:
Plugs are located on the static section of the gearbox –they do not turn while driving.