3 minute read
OPERATING PROCEDURE (CONT’D)


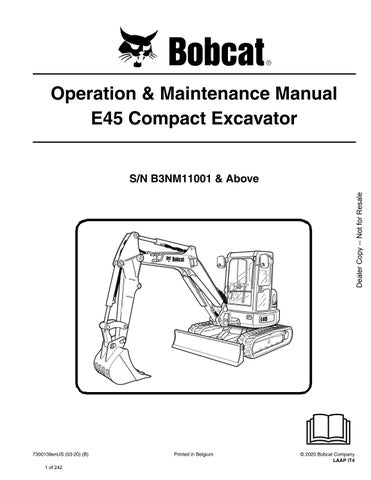
Using The Clamp
Figure 176
The optional lifting clamp attachment gives the excavator a wider range of use and mobility for debris removal [Figure 176]
The lifting clamp cylinder must be fully retracted when the machine is being used for excavating.
The lift capacities are reduced by 122 kg (270 lb) if the excavator is equipped with the optional lifting clamp.
NOTE:Use care when operating the bucket and clamp functions on machines equipped with an X-Change and without a bucket or attachment installed. Cylinder damage can occur due to contact between the X-Change and the clamp when both cylinders are fully extended.
When Using Primary Auxiliary Hydraulics To Activate Clamp
Engage the auxiliary hydraulics and toggle to the Aux2 setting. (See Auxiliary Hydraulics - Standard Instrument Panel on Page 55.)
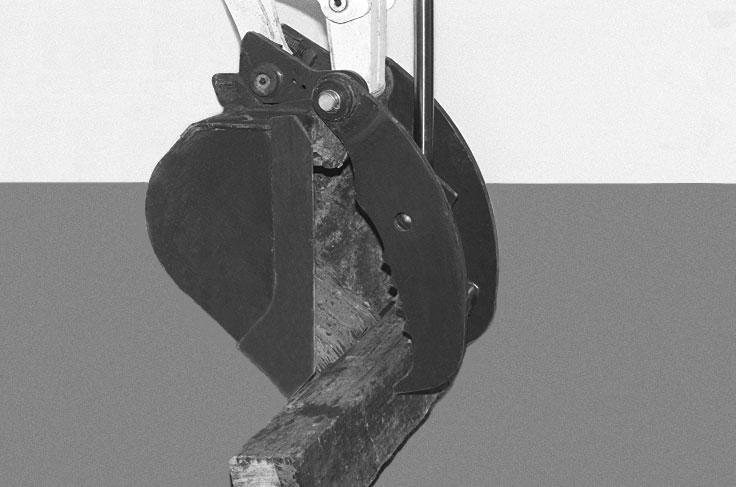
Figure 177
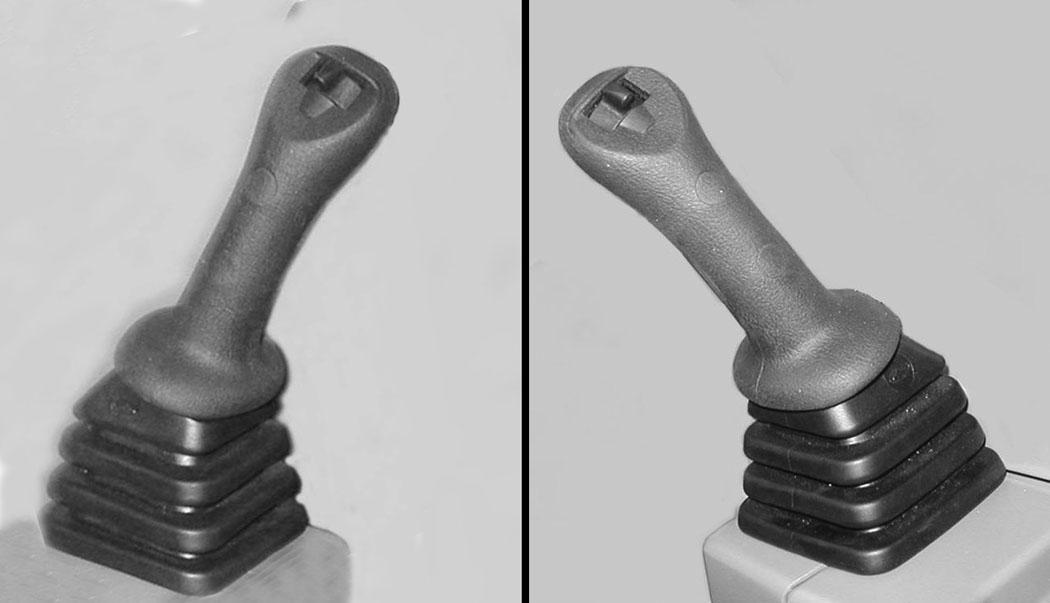
Move the switch (Item 1) [Figure 177] on the right control lever to the right to open the clamp. Move the switch to the left to close the clamp.
When Using Secondary Auxiliary Hydraulics To Activate Clamp
Move the switch (Item 2) [Figure 177] on the left control lever to the left open the clamp. Move the switch to the right to close the clamp.
NOTE:The lifting clamp will be connected to the secondary auxiliary hydraulic quick couplers when equipped with the optional extendable arm.
OPERATING PROCEDURE (CONT’D)
Using The Pro Clamp™ System
The lift capacities of the excavator will be reduced by 144 kg (317 lb) with the Pro Clamp™ System installed. (See Lift Capacity on Page 107.)
Engage the auxiliary hydraulics and toggle to the Aux2 setting. (See Auxiliary Hydraulics - Standard Instrument Panel on Page 55.) or (See Auxiliary Hydraulics - Deluxe Instrument Panel on Page 56.)
LEFT HAND CONTROL LEVER (JOYSTICK)
SECONDARY AUXILIARY HYDRAULICS
RIGHT HAND CONTROL LEVER (JOYSTICK) PRIMARY AUXILIARY HYDRAULICS
Operating With The Grading Tool IMPORTANT
When using the Pro Clamp System with the Grading Tool, the Grading Tool must not be used with the cylinder fully extended and unsupported. It is necessary to support the Grading Tool with the bucket to avoid damaging the clamp cylinder.
Move the switch (Item 1) [Figure 178] on the right control lever to the right to open the clamp. Move the switch to the left to close the clamp.
Using Secondary Auxiliary Hydraulics To Activate Clamp
Move the switch (Item 2) [Figure 178] on the left control lever to the left open the clamp. Move the switch to the right to close the clamp.
Before connecting and disconnecting auxiliary hydraulic quick couplers, relieve hydraulic pressure. (See Relieve Hydraulic Pressure With Standard Instrument Panel (Excavator And Attachment) on Page 57.), (See Relieve Hydraulic Pressure With Deluxe Instrument Panel (Excavator And Attachment) on Page 57.) or (See Relieve Secondary Auxiliary Hydraulic Pressure (Excavator And Attachment) on Page 58.)
For installing and removing the Pro Clamp™ system tools, (See Installing And Removing The Pro Clamp™ System Tool on Page 96.)
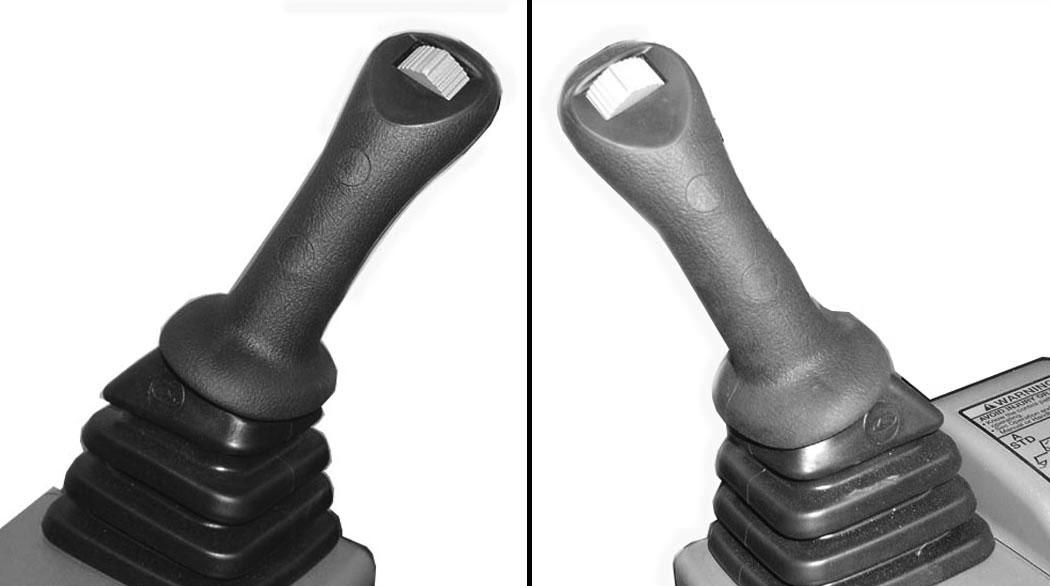
When using the Pro Clamp™ System with the Grading Tool, the Grading Tool must not be used with the cylinder fully extended and unsupported. It is necessary to support the Grading Tool with the bucket to avoid damaging the clamp cylinder. Position the bucket to the clamp grading tool as shown [Figure 179]
NOTE:The clamp grading tool plate (Item 1) [Figure 179] must be in contact with the bucket or bucket teeth when using the tool for grading.
OPERATING PROCEDURE (CONT’D)
Excavating
Lower the blade to increase digging performance.
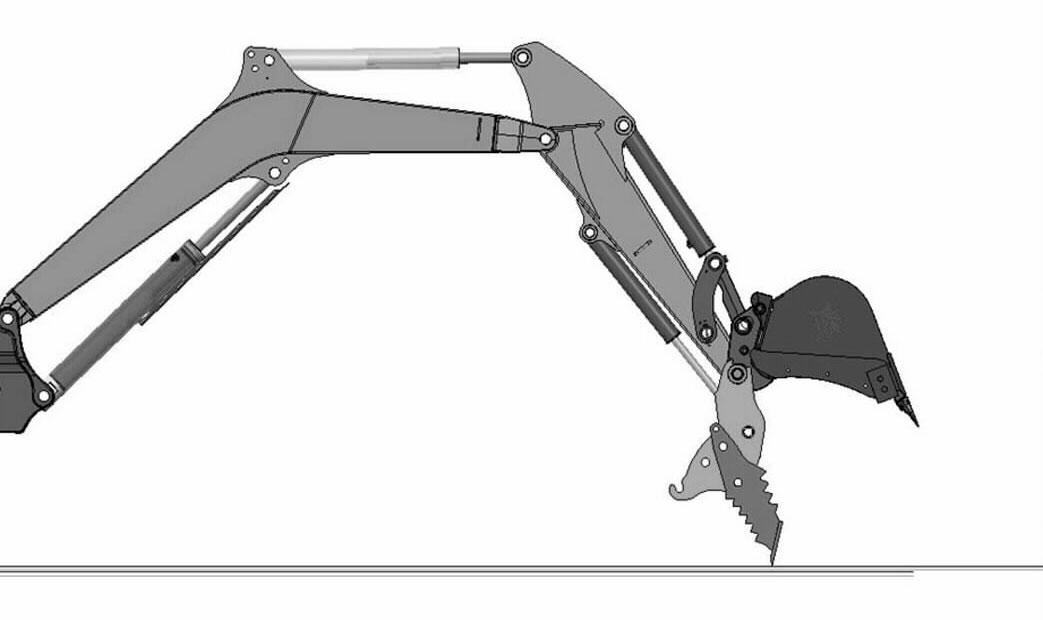
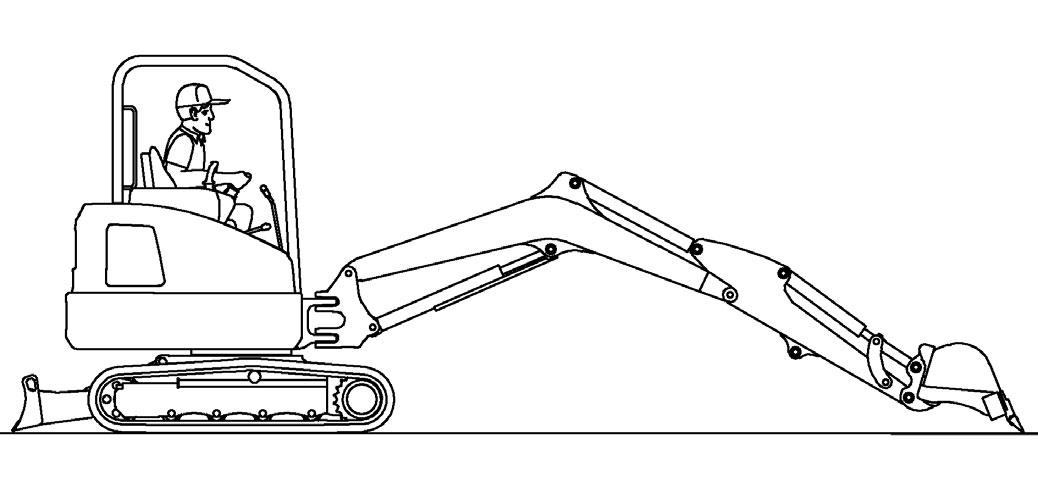
Figure 180
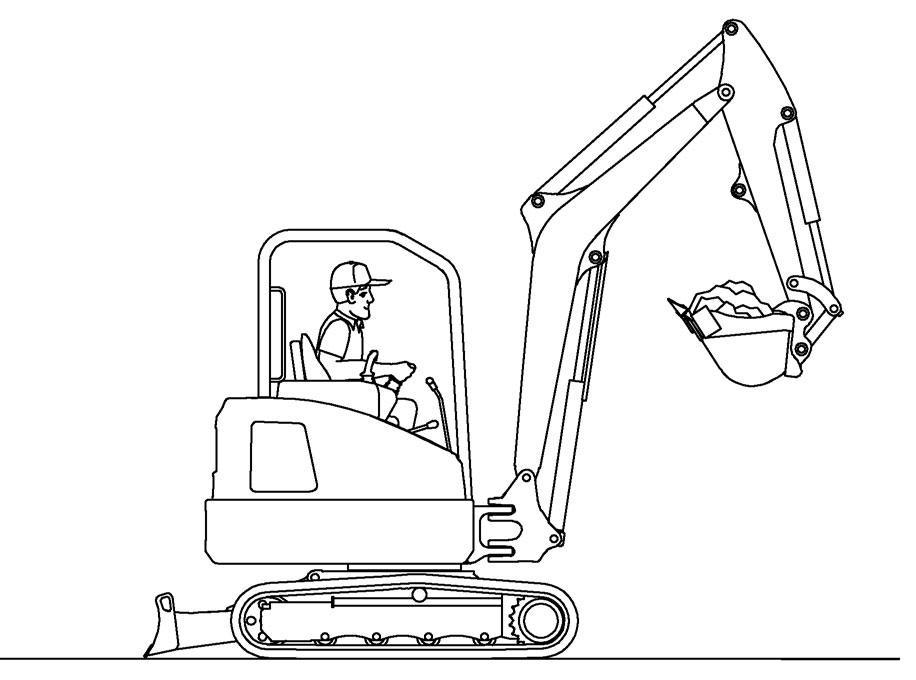
Extend the arm, lower the boom, and open the bucket [Figure 180]
181
Retract the arm, while lowering boom and curling the bucket [Figure 181]
Raise the boom, retract the arm and curl the bucket [Figure 182]
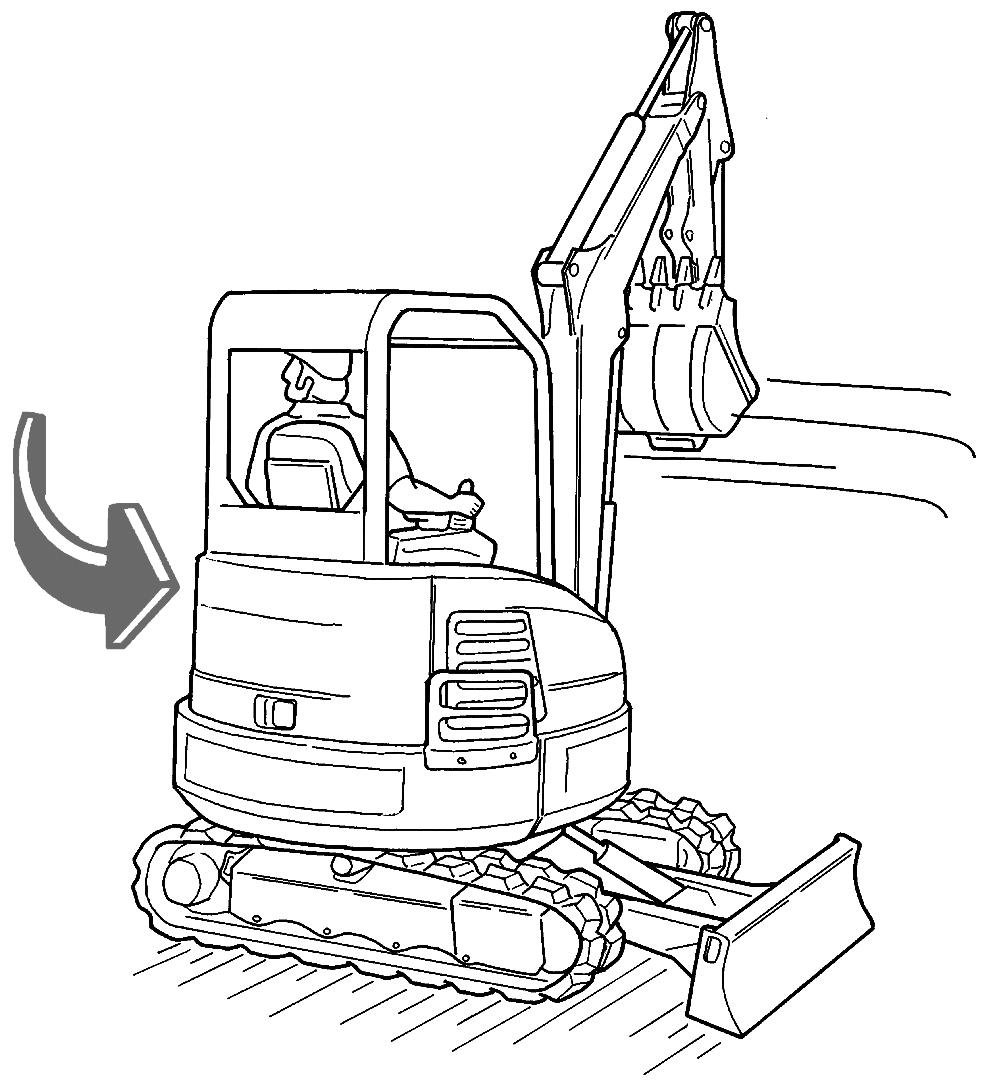
Rotate the upperstructure.
NOTE:Do not allow the bucket teeth to contact the ground when swinging the upperstructure.
Warning
Keep all bystanders 6 m (20 ft) away from equipment when operating. Contact with moving parts, a trench cave-in or flying objects can cause injury or death.
W-2119-0910
Warning
Avoid Injury Or Death
Check area to be excavated for overhead or underground electrical power lines. Keep a safe distance from electrical power lines.
W-2757-0910
OPERATING PROCEDURE (CONT’D)
Excavating (Cont’d)
Figure 183
Figure 185
Look in the direction of rotation and make sure there are no bystanders in the work area before rotating the upperstructure [Figure 183].
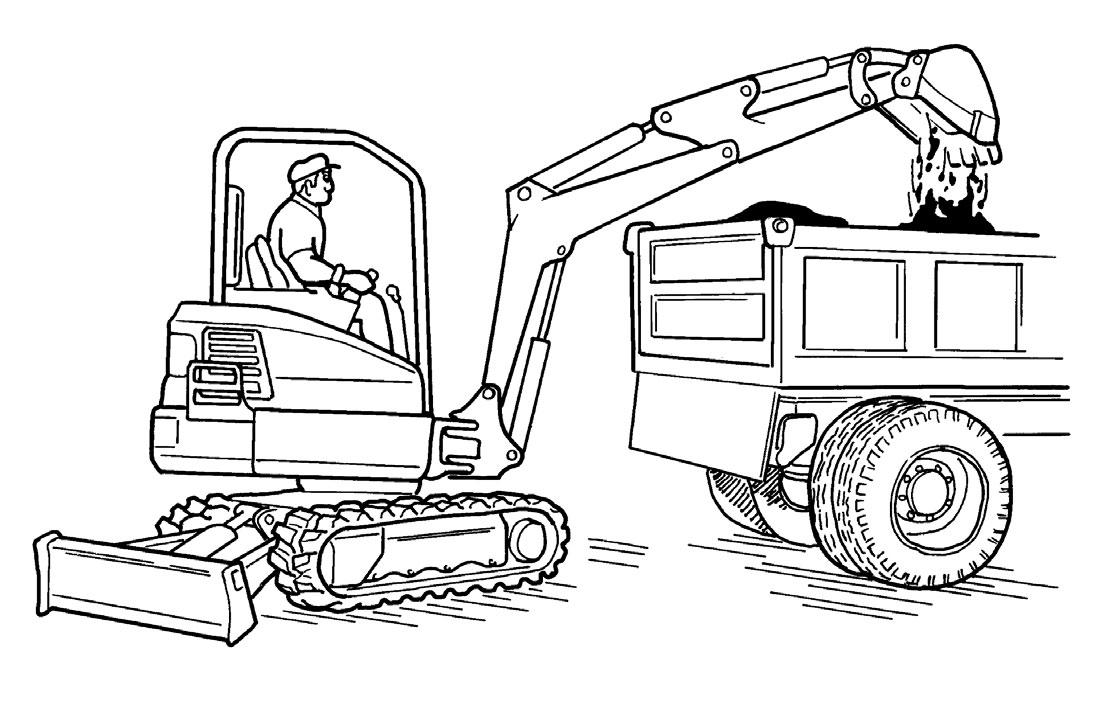
Figure 184
Extend the arm and uncurl the bucket to dump the material into a pile or truck [Figure 184]
Important
Avoid operating hydraulics over relief pressure. Failure to do so will overheat hydraulic components. I-2220-0503
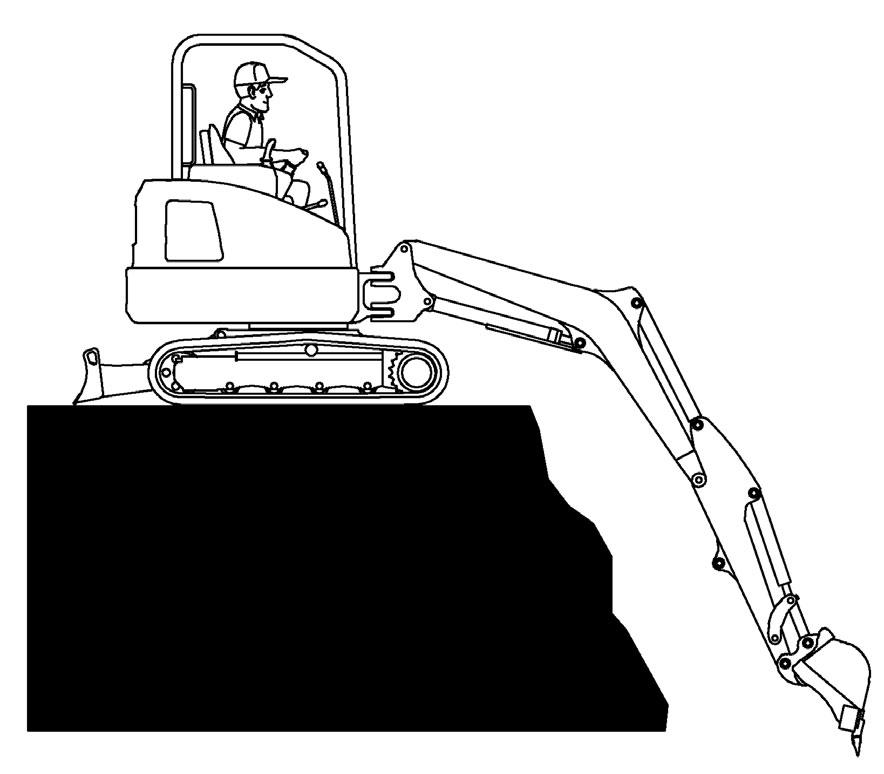
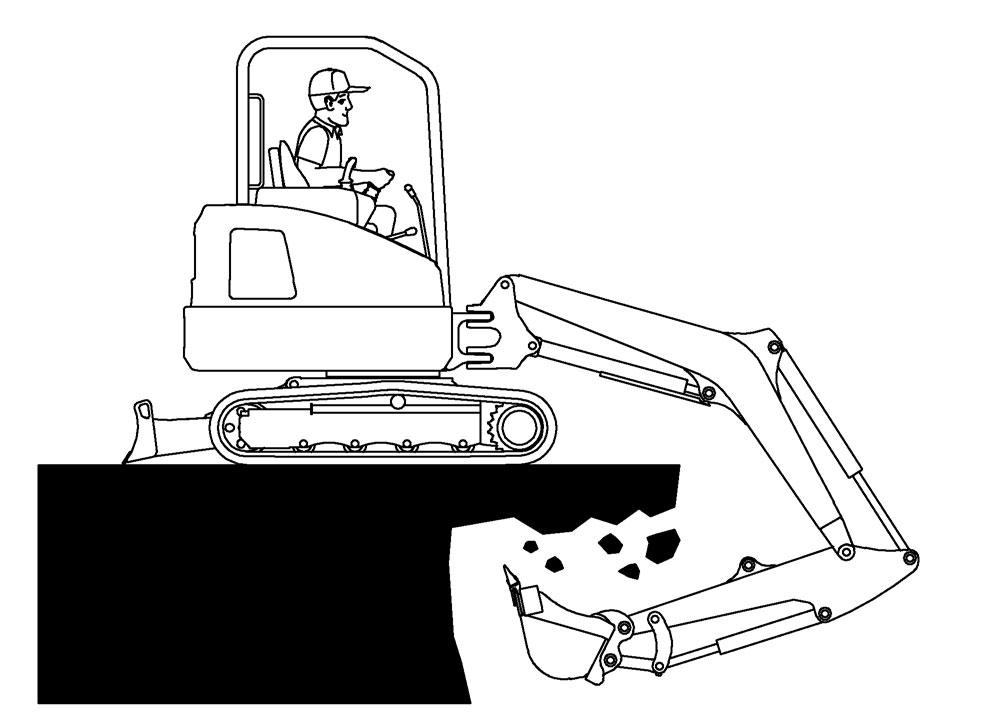
Do not dig under the excavator [Figure 185]
Do not use the bucket as a breaker or pile driver. It is better to excavate hard or rocky ground after breaking it with other equipment. This will reduce damage to the excavator.
Do not move the excavator while the bucket is in the ground.
Dig only by moving the boom and arm toward the excavator.
Do not back dig (digging by moving the boom and arm away from the excavator). Damage to the X-Change and attachments may occur.