4 minute read
INSTRUMENTS AND CONTROLS (CONT’D)


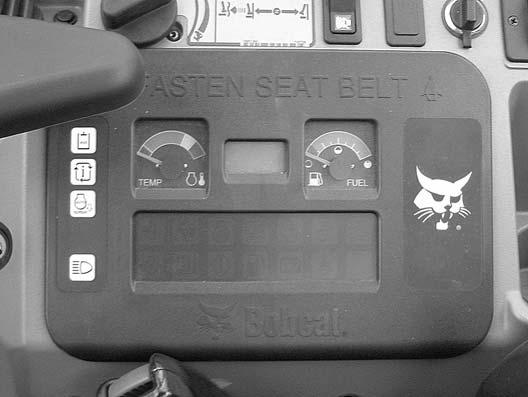
Auto Idle Feature
Figure14
The auto idle feature (when engaged) will reduce the engine speed to low idle when the control levers (joystick, blade, travel, etc.) are in neutral and not used for approximately 4 seconds. The engine rpm will return to the set position as soon as any control lever is activated.
The automatic idle switch (Item 1) [Figure14] is used to engage or disengage the automatic idle feature.
Press the switch (Item 1) once to engage automatic idle and the icon (Item 2) will illuminate. Press the switch (Item 1) a second time to disengage automatic idle, the icon (Item 2) [Figure14] will be OFF.
NOTE:Always disengage the auto idle feature when loading or unloading the excavator onto a transport vehicle.
OPERATOR CANOPY (ROPS / TOPS)
Description
The Bobcat excavator has an operator canopy (ROPS / TOPS) as standard equipment to protect the operator if the excavator is tipped over. The seat belt must be worn for ROPS / TOPS protection.
Check the ROPS / TOPS canopy, mounting, and hardware for damage. Never modify the ROPS / TOPS canopy. Replace the canopy and hardware if damaged. See your Bobcat dealer for parts.
ROPS / TOPS - Roll Over Protective Structure and Tip Over Protective Structure per ISO 12117.
Warning
Never modify operator cab by welding, grinding, drilling holes or adding attachments unless instructed to do so by Bobcat Company. Changes to the cab can cause loss of operator protection from rollover and falling objects, and result in injury or death.
W-2069-0200
OPERATOR CAB (ROPS / TOPS)
Description
The Bobcat excavator has an optional operator cab (ROPS / TOPS) as standard equipment to protect the operator if the excavator is tipped over. The seat belt must be worn for ROPS / TOPS protection.
Check the ROPS / TOPS cab, mounting, and hardware for damage. Never modify the ROPS / TOPS cab. Replace the cab and hardware if damaged. See your Bobcat dealer for parts.
ROPS / TOPS - Roll Over Protective Structure and Tip Over Protective Structure per ISO 12117.
Warning
Never modify operator cab by welding, grinding, drilling holes or adding attachments unless instructed to do so by Bobcat Company. Changes to the cab can cause loss of operator protection from rollover and falling objects, and result in injury or death.
W-2069-0200
OPERATOR CAB (ROPS / TOPS) (CONT’D)
Cab Door


Push the door all the way open until the latch post (Item 1) engages in the latch (Item 2) [Figure16] to hold the door in the open position.
When the door is in the open position, push down on the latch (Item 1) [Figure17] and close the door.
From inside the cab, open the door using the handle (Item 1) [Figure18]


OPERATOR CAB (ROPS / TOPS) (CONT’D)

Front Window
Opening The Front Window (Early Models)
Figure19
When the window is fully raised, the latch (Item 1) [Figure21] (both sides) will close on the bracket in the latched position.

Pull down slightly on the window to make sure it is fully latched.
Press the top window latch (Item 1) [Figure19] (both sides).
Figure20
Use both window grab handles (Item 1) [Figure20] to pull the top of the window in.
Continue moving the window in and up over the operator’s head until the window is fully raised.
Closing The Front Window (Early Models)
Support the window while releasing the window latch (Item 1) [Figure21] (both sides).
Use both window grab handles (Item 1) [Figure20] to pull the window down fully.
Press the top of the window in until the latch (Item 1) [Figure19] locks into the latched position (both sides).
Pull inward slightly on the window to make sure it is fully latched in the closed position.

Operator
CAB (ROPS / TOPS) (CONT’D)
Front Window
Opening The Front Window (Later Models)
Figure22
Press the window latch button (Item 1) [Figure22] (both sides).
When the window is fully raised, the latch (Item 1) [Figure24] (both sides) will close on the bracket in the latched position.
Pull forward slightly on the window to make sure it is fully latched.
Closing The Front Window (Later Models)
Use both window grab handles to support the window while pressing the window latch button (Item 2) [Figure24] (both sides).

Use both window grab handles (Item 1) [Figure23] to pull the window down fully.
Press the top of the window in until the latch locks into the latched position (both sides) [Figure22]
Pull upward slightly on the window to make sure it is fully latched in the closed position.

Use both window grab handles (Item 1) [Figure23] to pull the top of the window in.
Continue moving the window in and up over the operator’s head until the window is fully raised.
OPERATOR CAB (ROPS / TOPS) (CONT’D)

Front Wiper
Figure25
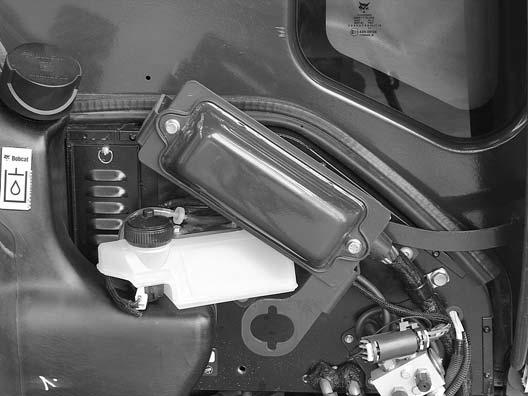
Window Washer Reservoir
Figure26
OPERATOR CAB (ROPS / TOPS) (CONT’D)

Right Side Window
Opening The Right Rear Window
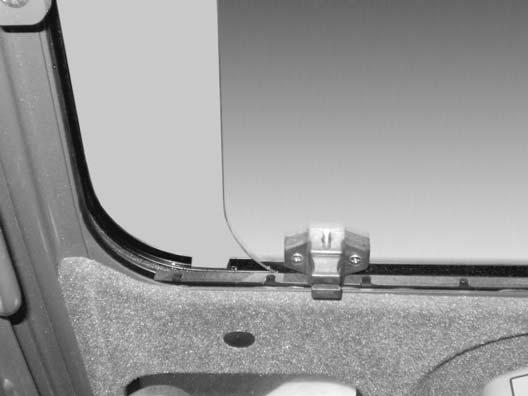

Figure27
Pull up on the bottom latch (Item 1) [Figure27]
Opening The Right Front Window
Figure29
Pull the latch (Item 1) [Figure28] forward to open the window until the desired stop. Release the bottom latch and snap the lock in place.
Closing The Right Rear Window
Pull up on the bottom latch (Item 1) [Figure27] and push the latch back to close the window.
Pull up on the bottom latch (Item 1) [Figure29] located at the front of the front window.

Pull the latch (Item 1) [Figure30] back to open the window until the desired stop. Release the bottom latch and snap the lock in place.
Closing The Right Front Window
Pull up on the bottom latch (Item 1) [Figure29] and push the latch forward to close the window.
OPERATOR CAB (ROPS / TOPS) (CONT’D)
Heating And Ventilation Ducting
Figure31
The louvers (Item 1) [Figure31] can be positioned as needed to direct the air flow to various areas in the cab.
Operating Tip: To increase heating efficiency, move the Recirculation / Fresh Air Control knob (Item 2) [Figure31] to the recirculation position. This will allow the air to recirculate through the heating system and improve temperature control. If left in the fresh air position, the heating system will also need to heat the ambient air that is drawn in from the outside, slowing and / or reducing the temperature change inside the cab.

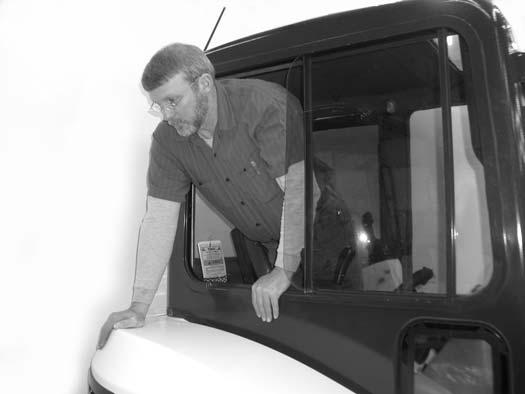
Emergency Exit
The door, the right side rear window and the front window provide exits.
Right Side Rear Window
Figure32
Exit through the window [Figure32].
Front Window
Figure33
Open the front window and exit [Figure33]
NOTE:If the excavator has a Special Applications Kit installed, the front window is NOT an emergency exit.