1 minute read
Removing the Hard Disk Drive Module


DISCLAIMER: The notebook sample in the following images shows an FFC. The actual model includes an FPC as pictured in the image on the right. 1. See “Removing the Battery Pack” on page 45. 2. Loosen the two captive screws.
3. Lift the HDD cover up and away by the corner.
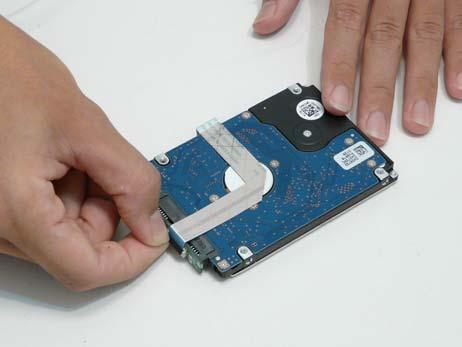
4. Grasp the FPC cable and lift to remove. NOTE: The cable pictured in the following images may differ from the actual sample.


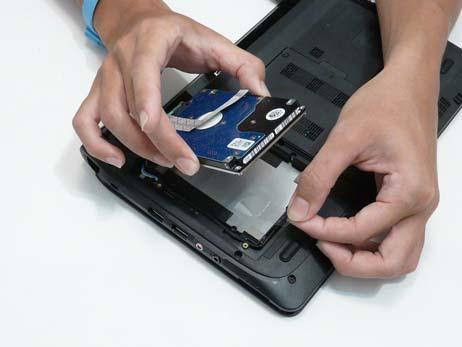
5. Grasp the transparent tab at the top of the HDD and lift up to eject the HDD from the bay. IMPORTANT:The transparent tab is attached to the bottom cover. Do not pull the transparent tab out of the chassis.

6. Pull the tab upwards to free the HDD from the bay. 7. At the same time, hold the HDD with the other hand and lift to remove from the chassis.
8. Unlock the HDD FPC and pull the FPC away.