1 minute read
Removing the Hard Disk Drive Module


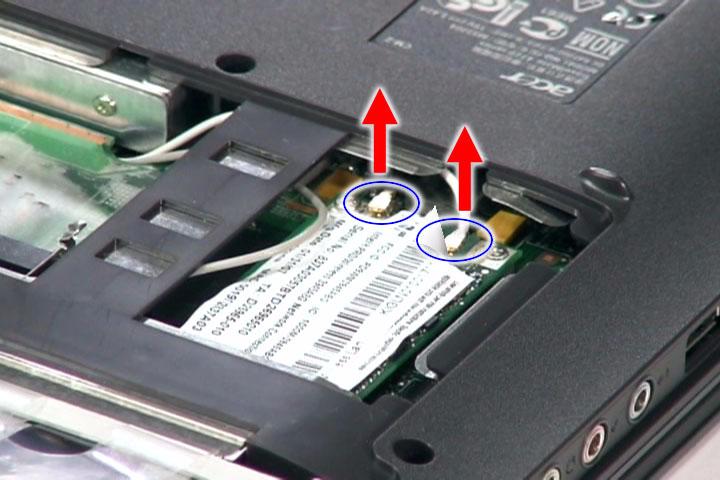
7. Remove the two screws (C) on the WLAN board to release the WLAN board.

Step Size (Quantity) Color Torque 1~2 M2 x L3 (2) Silver 1.6 kgf-cm
8. Detach the WLAN board from the WLAN socket.
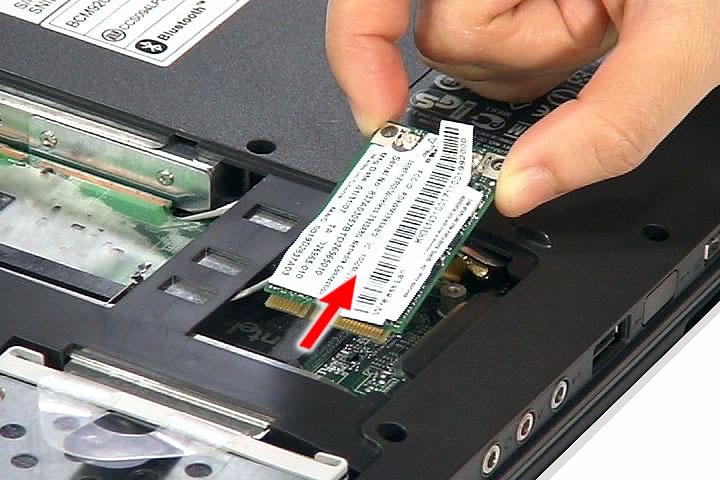
NOTE: When attaching the antennas back to the WLAN board, make sure the cable are routed properly.
1. See “Removing the Battery Pack” on page 51. 2. See “Removing the SD Dummy Card” on page 51. 3. See “Removing the Express Dummy Card” on page 52. 4. See “Removing the Lower Cover” on page 53.
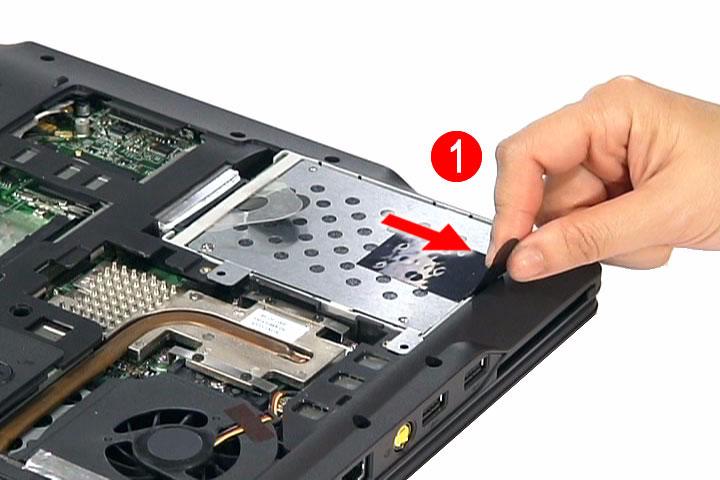
5. Pull the HDD module out by pulling on the mylar attached to it, gently slide-out the HDD module from its bay.
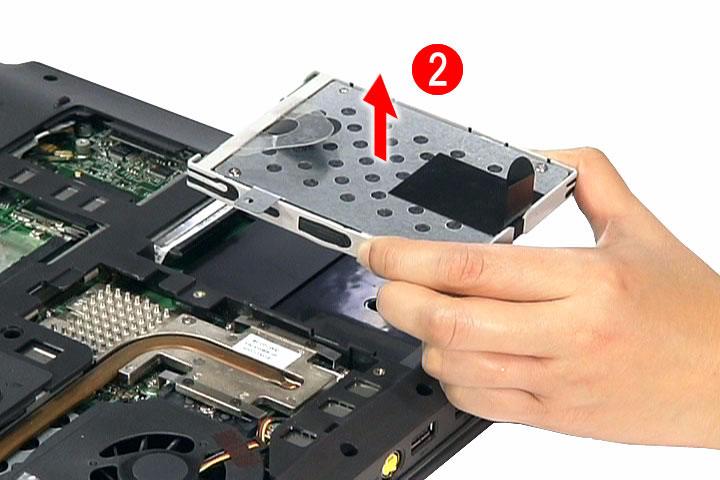
NOTE: To prevent damage to device, avoid pressing down on it or placing heavy objects on top of it. 6. Remove the HDD rubber enclosure by gently prying open the enclosure, starting on either side (3) and proceeding down the bottom (4) and towards the top of the disk (5), then pull it up to detach from the HDD module (6).


