1 minute read
Changing the Acer OrbiCam Settings


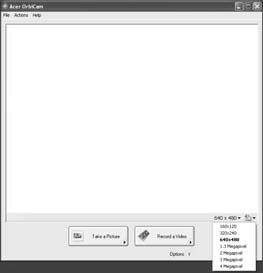
Resolution
To change the capture resolution, click the displayed resolution at the bottom right corner of the capture window, then select the desired resolution. Setting the camera resolution to 640 x 480 or larger does not change the capture window size. Note:
Options
Click Options to display the Window, Preview, and Folder tabs. Use the options to change the capture window size, preview settings, and the folder for captured photos or videos.
Options Window, Preview Folder

• Basic Settings: Click the Camera Settings icon on the bottom right corner of the capture display, then select Camera Settings from the pop-up menu. You can adjust the Video, Audio, and Zoom/Face tracking options from this window.Camera Settings Camera Settings Video, Audio Zoom/Face tracking Video, Audio Zoom/Face tracking
• Capture settings: From the Camera Settings window, click the Driver Settings button. The
Properties window will appear. Driver Settings Properties Driver Settings Properties
• Device Settings Device Settings Device Settings allows you to change the camera brightness, contrast, hue, saturation, sharpness, etc. Advanced Settings Advanced Settings • Advanced Settings allows you to achieve gain control, implement image mirror, select image enhancements and anti-flicker settings, and turn on/off the camera indicator.Zoom/Face Track Settings Zoom/Face Track Settings • Zoom/Face Track Settings allows you to adjust the zoom level and turn the face tracking feature on or off.
Capturing Photos or Videos
To capture a photo or a video clip, rotate the Acer OrbiCam to get the desired angle, then click the Take a Picture or Record a Video button. The Windows Picture and Fax Viewer or the Windows Media Player automatically launches to display or play a preview of the photo or video clip. NOTE: By default, all photos and videos are saved in the My Pictures and My Videos folder.