12 minute read
System Utilities


Phoenix TrustedCore Setup Utility
Phoenix TrustedCore Setup Utility is a hardware configuration program built into your system's Basic Input/ Output System (BIOS). Since most systems are already properly configured and optimized, there is normally no need to run this utility. You will need to run this utility under the following conditions: When changing the system configuration including:
Setting the system time and date Configuring the hard drives Specifying the boot device sequence Configuring the power management modes Setting up system passwords or making other changes to the security setup When a configuration error is detected by the system and you are prompted (“Run Setup” message) to make changes to the BIOS settings. IMPORTANT: If you repeatedly receive “Run Setup” messages, the RTC battery located on the system board (RTC1) may be defective. In this case, the system cannot retain configuration values in CMOS. Replace the RTC battery with a new one.
NOTE: For ease of reading, Phoenix TrustedCore Setup Utility will be simply referred to as “Setup” or “Setup Utility” in this Service Guide.
The screenshots used in this guide display default system values. These values may not be the same as those in your computer.
In the descriptive tables following each of the menu screen illustrations, settings in boldface are the default and suggested parameter settings. The Setup Utility loads the configuration values in a battery-backed nonvolatile memory called CMOS RAM. This memory area is not part of the system RAM, which allows configuration data to be retained when power is turned off. The values take effect when the system is booted. Power-On Self Test (POST) uses these values to configure the hardware. If the values and the actual hardware do not agree, POST generates an error message. You must run this utility to change the BIOS settings from the default or current configuration.
1. Turn on the computer.
If the computer is already turned on, save your data and close all open applications, then restart the computer. 2. During POST, press F2.
If you fail to press F2 before POST is completed, you will need to restart the computer. The first page to be displayed will be the Information menu. Use the left ( ) and right ( ) arrow keys to move between selections on the menu bar.
Menu bar
Legend bar
Use the keys listed in the legend bar on the bottom of the Setup screen to work your way through the various menu and submenu screens of the Setup Utility. The table below lists these legend keys and their respective functions.
Additional help information is available on the General Help window. Just press F1 on any screen.
Key
Function
and To move between selections on the menu bar.
and To move the cursor to the field you want.The currently selected field will be highlighted. The right side of each menu screen displays a field help panel—Item Specific Help panel. This panel displays the help text for the currently selected field. It updates as you move the cursor to each field. You can also use these keys to navigate through the multipage General Help window.
F5 or (-) F6, (+), or Space
To select a value for the currently selected field (only if it is user-configurable). Press F5 or (-) to select the next lower value; F6, (+), or Space to select the next higher value. A parameter that is enclosed in square brackets [ ] is user-configurable. Parameters are not user-configurable for one of the following reasons: The field value is auto-configured or auto-detected.· The field value is informational only. The field is password-protected. Enter To select a field value. Esc or Alt-X If you press this key: On one of the menu screens, the Exit menu displays. On a General Help window, closes the window. F1 or Alt-H To bring up the General Help window. This window lists other Setup navigation keys that are not displayed on the legend bar. F9 Press to load default system values. F10 Press to save changes and close the Setup Utility.

The PhoenixBIOS Setup Utility has five menus for configuring the various system functions. These include: • Information • Main • Security • Boot • Exit
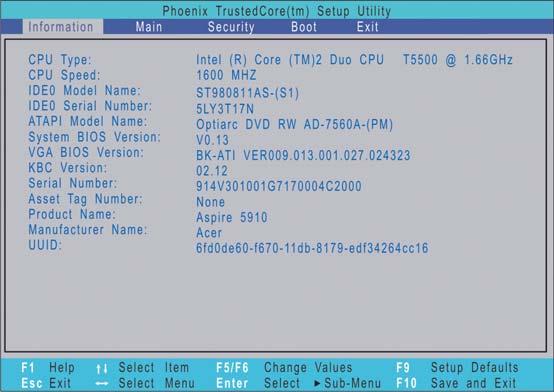
Information
The Information menu screen displays a summary of your computer hardware information. These information are necessary for troubleshooting and may be required when asking for technical support.
Field
Description
CPU Type Displays the processor name, sequence number, and clock speed. CPU Speed Displays the CPU speed. IDEO Model Name Displays the hard disk drive model. IDEO Serial Number Displays the hard disk drive serial number. ATAPI Model Name Displays the optical disc drive model. System BIOS Version Displays the current system BIOS version. VGA BIOS Version Displays the current VGA firmware version. KBC Version Displays the current keyboard controller version. Serial Number Displays the system serial number. Asset Tag Number Displays the system asset tag number Product Name Displays the official model name of the product. Manufacturer Name Displays the manufacturer of the computer. UUID Displays the universally unique identifier of your computer. This will only be visible when an internal LAN device is presenting.
The Main menu screen allows you to configure the basic system settings and view the memory allocations.

Field Description
Value
System Time Set the system time. HH:MM:SS (hour:minute:second) System Date Set the system date. MM/DD/YYYY (month/day/year) System Memory Displays the size of system memory detected during boot-up. Memory size is fixed at 640 MB. Extended Memory Displays the size of extended memory detected during boot-up. Extended memory size is equal to total memory size less 1 MB. Video Memory Displays the size of video memory detected during boot-up.
128 MB
256 MB Quiet Boot When enabled, the Acer logo screen appears during boot-up Disabled
Enabled
Network Boot When enabled, remote host with appropriate boot image can boot this computer. (Only works with an Ethernet device.) Disabled
Enabled
F12 Boot Menu When enabled, the “Press F12 to enter Multi-Boot Menu” message is displayed during POST.
Disabled
Enabled D2D Recovery When enabled, pressing Alt-F10 during POST will activate the Acer disc-to-disc recovery function. The function allows the user to create a hidden partition on the hard drive to store a copy of the OS and restore the system to its default factory settings. Disabled
Enabled
The Security menu screen displays system passwords options to help safeguard and protect your computer from unauthorized use.

Field Description
Value
Supervisor Password Is Indicates whether a supervisor password is in use (Set) or not (Clear). User Password Is Indicates whether a user password is in use (Set) or not (Clear). HDD Password Is Indicates whether an HDD password is in use (HDD Password Set) or not (Clear).
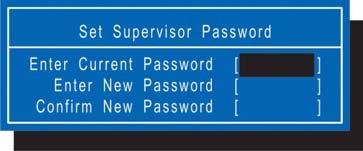
Set Supervisor Password
When set, this password will allow the user to access and change all settings in the Setup Utility. Press Enter to configure. Set User Password When set, this password will restrict a user’s access to the Setup menus. Only the following menus will be accessible: System Time System Date Boot menu options All Exit menu options excluding Load Setup Defaults A supervisor password must first be set before creating a user password. Set HDD Password When set, this password will restrict a user’s access to the internal hard disk drive. It will be required during boot-up or when resuming from S4 mode (hibernation). Note: If this password is the same as the power-on password, it will not be required anymore at boot-up. Password on Boot Referred to as power-on password. When set, the user or supervisor password will be required to boot up the system or when resuming from S4 mode. A supervisor password must first be set before creating this password.
Disabled
Enabled
Note the following before you define a system password: • The maximum length of password contains eight alphanumeric characters—A - Z, 0 - 9, and ‘;’ (for a French keyboard). • System passwords are case-insensitive. • Password re-try is limited to three times. If user failed to enter the correct password, the system will hang up.
To set a system password:
1. Press or to highlight a set password field, then press Enter.
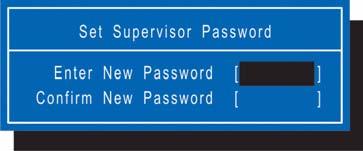
The password box appears.
2. Type a password then press Enter. IMPORTANT: Be very careful when typing your password because the characters do not appear on the screen. Only shaded blocks representing each typed character are visible. 3. Retype the password to verify the first entry, then press Enter.
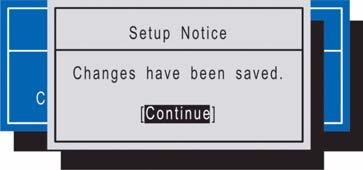
You will be prompted to save the new password.
4. Press Enter.
The corresponding password status field displays Set to indicate that a password has been enabled.
5. Press F10 to save the password and close the Setup Utility.

To change a system password:
1. Press or to highlight an enabled password field, then press Enter.
The password box appears.
2. Type the original password, then press Enter. 3. Type a new password, then press Enter. 4. Retype the new password to verify the first entry, then press Enter.
You will be prompted to save the new password. 5. Press Enter. 6. Press F10 to save the password and close the Setup Utility.
To remove a system password:
1. Press or to highlight a password parameter, then press Enter.
The password box appears. 2. Type the original password, then press Enter. 3. Press Enter twice without entering anything in the new and confirm password fields.
You will be prompted to confirm the password removal. 4. Press Enter.
The corresponding password status field displays Clear to indicate that the password has been disabled. 5. Press F10 to save the changes you made and close the Setup Utility.
To clear a lost password:
If you have forgotten the user password, the computer will continue to function normally but you will have limited access to the Setup Utility. If you have enabled the Password on Boot field and you forget the supervisor password, you will not be able to boot up the computer. The same thing applies if you forget an HDD password. You will need to clear the lost password by shorting the SW1 dip switch located near the DIMM slot (DM1). Perform the following procedure to clear all the system passwords (user, supervisor, and HDD). 1. Turn off the computer and unplug all the peripherals connected to it. 2. Unplug the power cord from the computer. 3. Remove the lower case cover according to the instructions described on page 28. 4. Remove the memory modules according to the instructions described on page 29.
5. Peel off the black tape near the DIMM slot to expose the SW1 dip switch. 6. Locate the SW1 dip switch (G55).
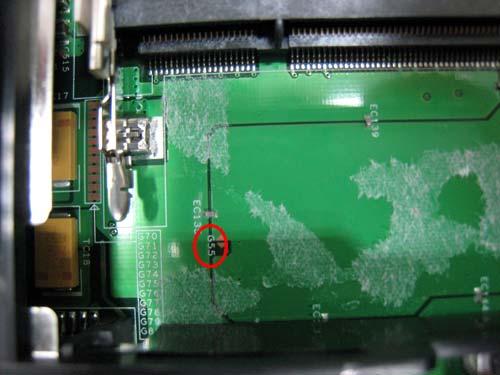
7. Position the SWI dip switch to ON to clear all system passwords. 8. Reinstall the memory modules and the lower case cover. 9. Turn on the computer and press F2 during bootup to access the Setup Utility. 10. Press F9 to load the system defaults. 11. Press F10 to save the changes you made and close the Setup Utility.
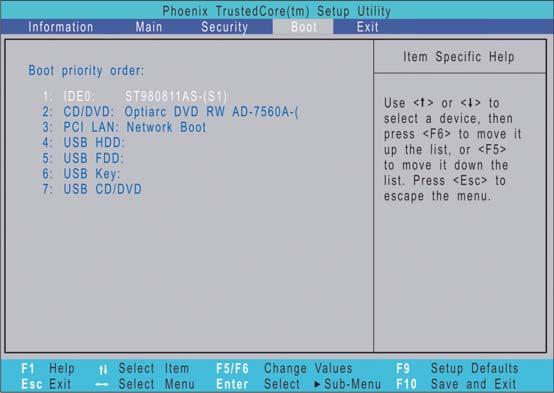
Boot
The Boot menu screen allows users to set the drive sequence in which Setup attempts to boot the operating system. By default, Setup searches for boot devices in the order shown in the screen below.
To set the boot drive sequence:
1. Press or to select a bootable device. 2. Press F6 to move the device up the list, or F5 to move it down the list. 3. Press F10 to save the changes you made and close the Setup Utility.
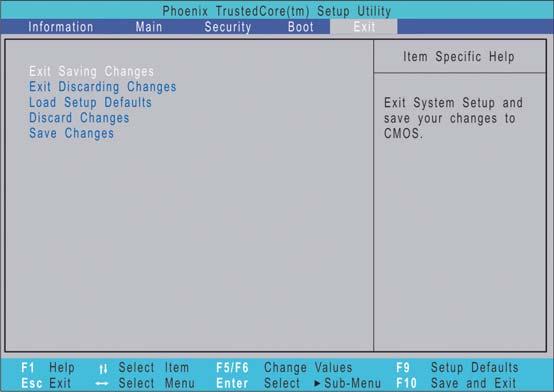
The Exit menu displays the several options on how to quit from the Setup Utility. Select any of the exit options then press Enter.
Option
Description
Exit Saving Changes Saves changes made and closes the Setup Utility. Keyboard shortcut: F10· Exit Discarding Changes Discards changes made and closes the Setup Utility. Load Setup Defaults Loads the factory-default settings for all Setup fields. Keyboard shortcut: F9 Discard Changes Discards all changes made to the Setup Utility and loads the previous configuration settings. Save Changes Saves all changes made to the Setup Utility.
The BIOS flash memory update is required under the following conditions: When there are new versions of system programs When new hardware options are installed When the BIOS has been corrupted and you need to restore it
BIOS Flash Precautions
If you do not have a crisis recovery diskette at hand, create a Crisis Recovery Diskette in Windows XP of Vista before you use the flash utility. Do not install memory-related drivers (XMS, EMS, DPMI) when you use the flash utility. Place the computer in AC mode during the BIOS flash procedure. If the battery pack does not contain enough power to finish the BIOS flash, you may not able to boot the system because the BIOS is not completely loaded.
To flash the BIOS:
1. Prepare a bootable diskette. 2. Copy the flash utilities to the bootable diskette. 3. Boot the system from the bootable diskette.
The flash utility will automatically be executed. 4. Follow the on-screen instructions to finish the flashing of the BIOS.
BIOS Recovery
If a BIOS flash procedure fails to complete, perform a BIOS recovery procedure by using the Crisis Recovery Diskette. During this procedure, the system will force the BIOS to enter a special BIOS block, called boot block, to boot up the system with minimum BIOS initialization.
To perform BIOS recovery:
1. Make sure the power cord is connected to the computer. 1. Attached a USB floppy drive to the computer. 2. Insert the Crisis Recovery Diskette into the floppy drive. 3. Press and hold the Fn+Esc keys, then press the power button .
This initialize the BIOS recovery process. The boot block BIOS will start to restore the failed BIOS code.
Short beeps should be heard during this process. Once the process is completed, a long beep should be heard. 4. Turn off the computer once the process is complete. 5. Turn on the computer again and flash the BIOS. Refer to the previous instructions.
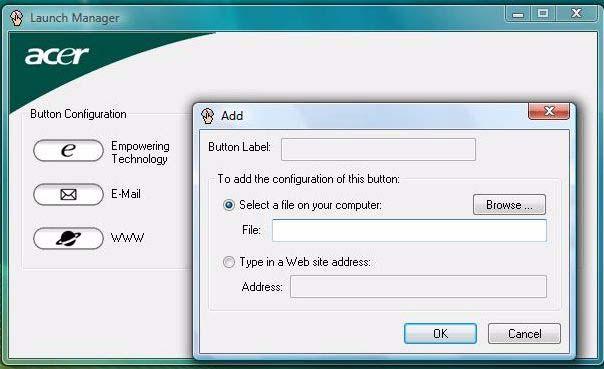
Launch Manager allows users to configure three of the easy-launch keys—Acer Empowering, Web browser, and Mail.
To configure an easy-launch key:
1. Select Start | All Programs | Launch Manager.
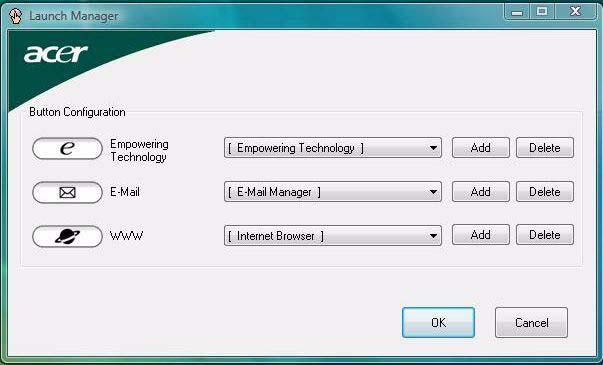
2. Select which key to configure, then click the Add button opposite it.
3. You can set the key to open a particular file or program, or display a Web site address. Select the corresponding radio button, then type or browse for your selection. 4. If you’ve entered a Web site address, key in a descriptive label for the new easy-launch key function. 5. Click OK. 6. Click OK to save the new settings.