1 minute read
CHAPTER 9 DECAL LOCATIONS
General Information
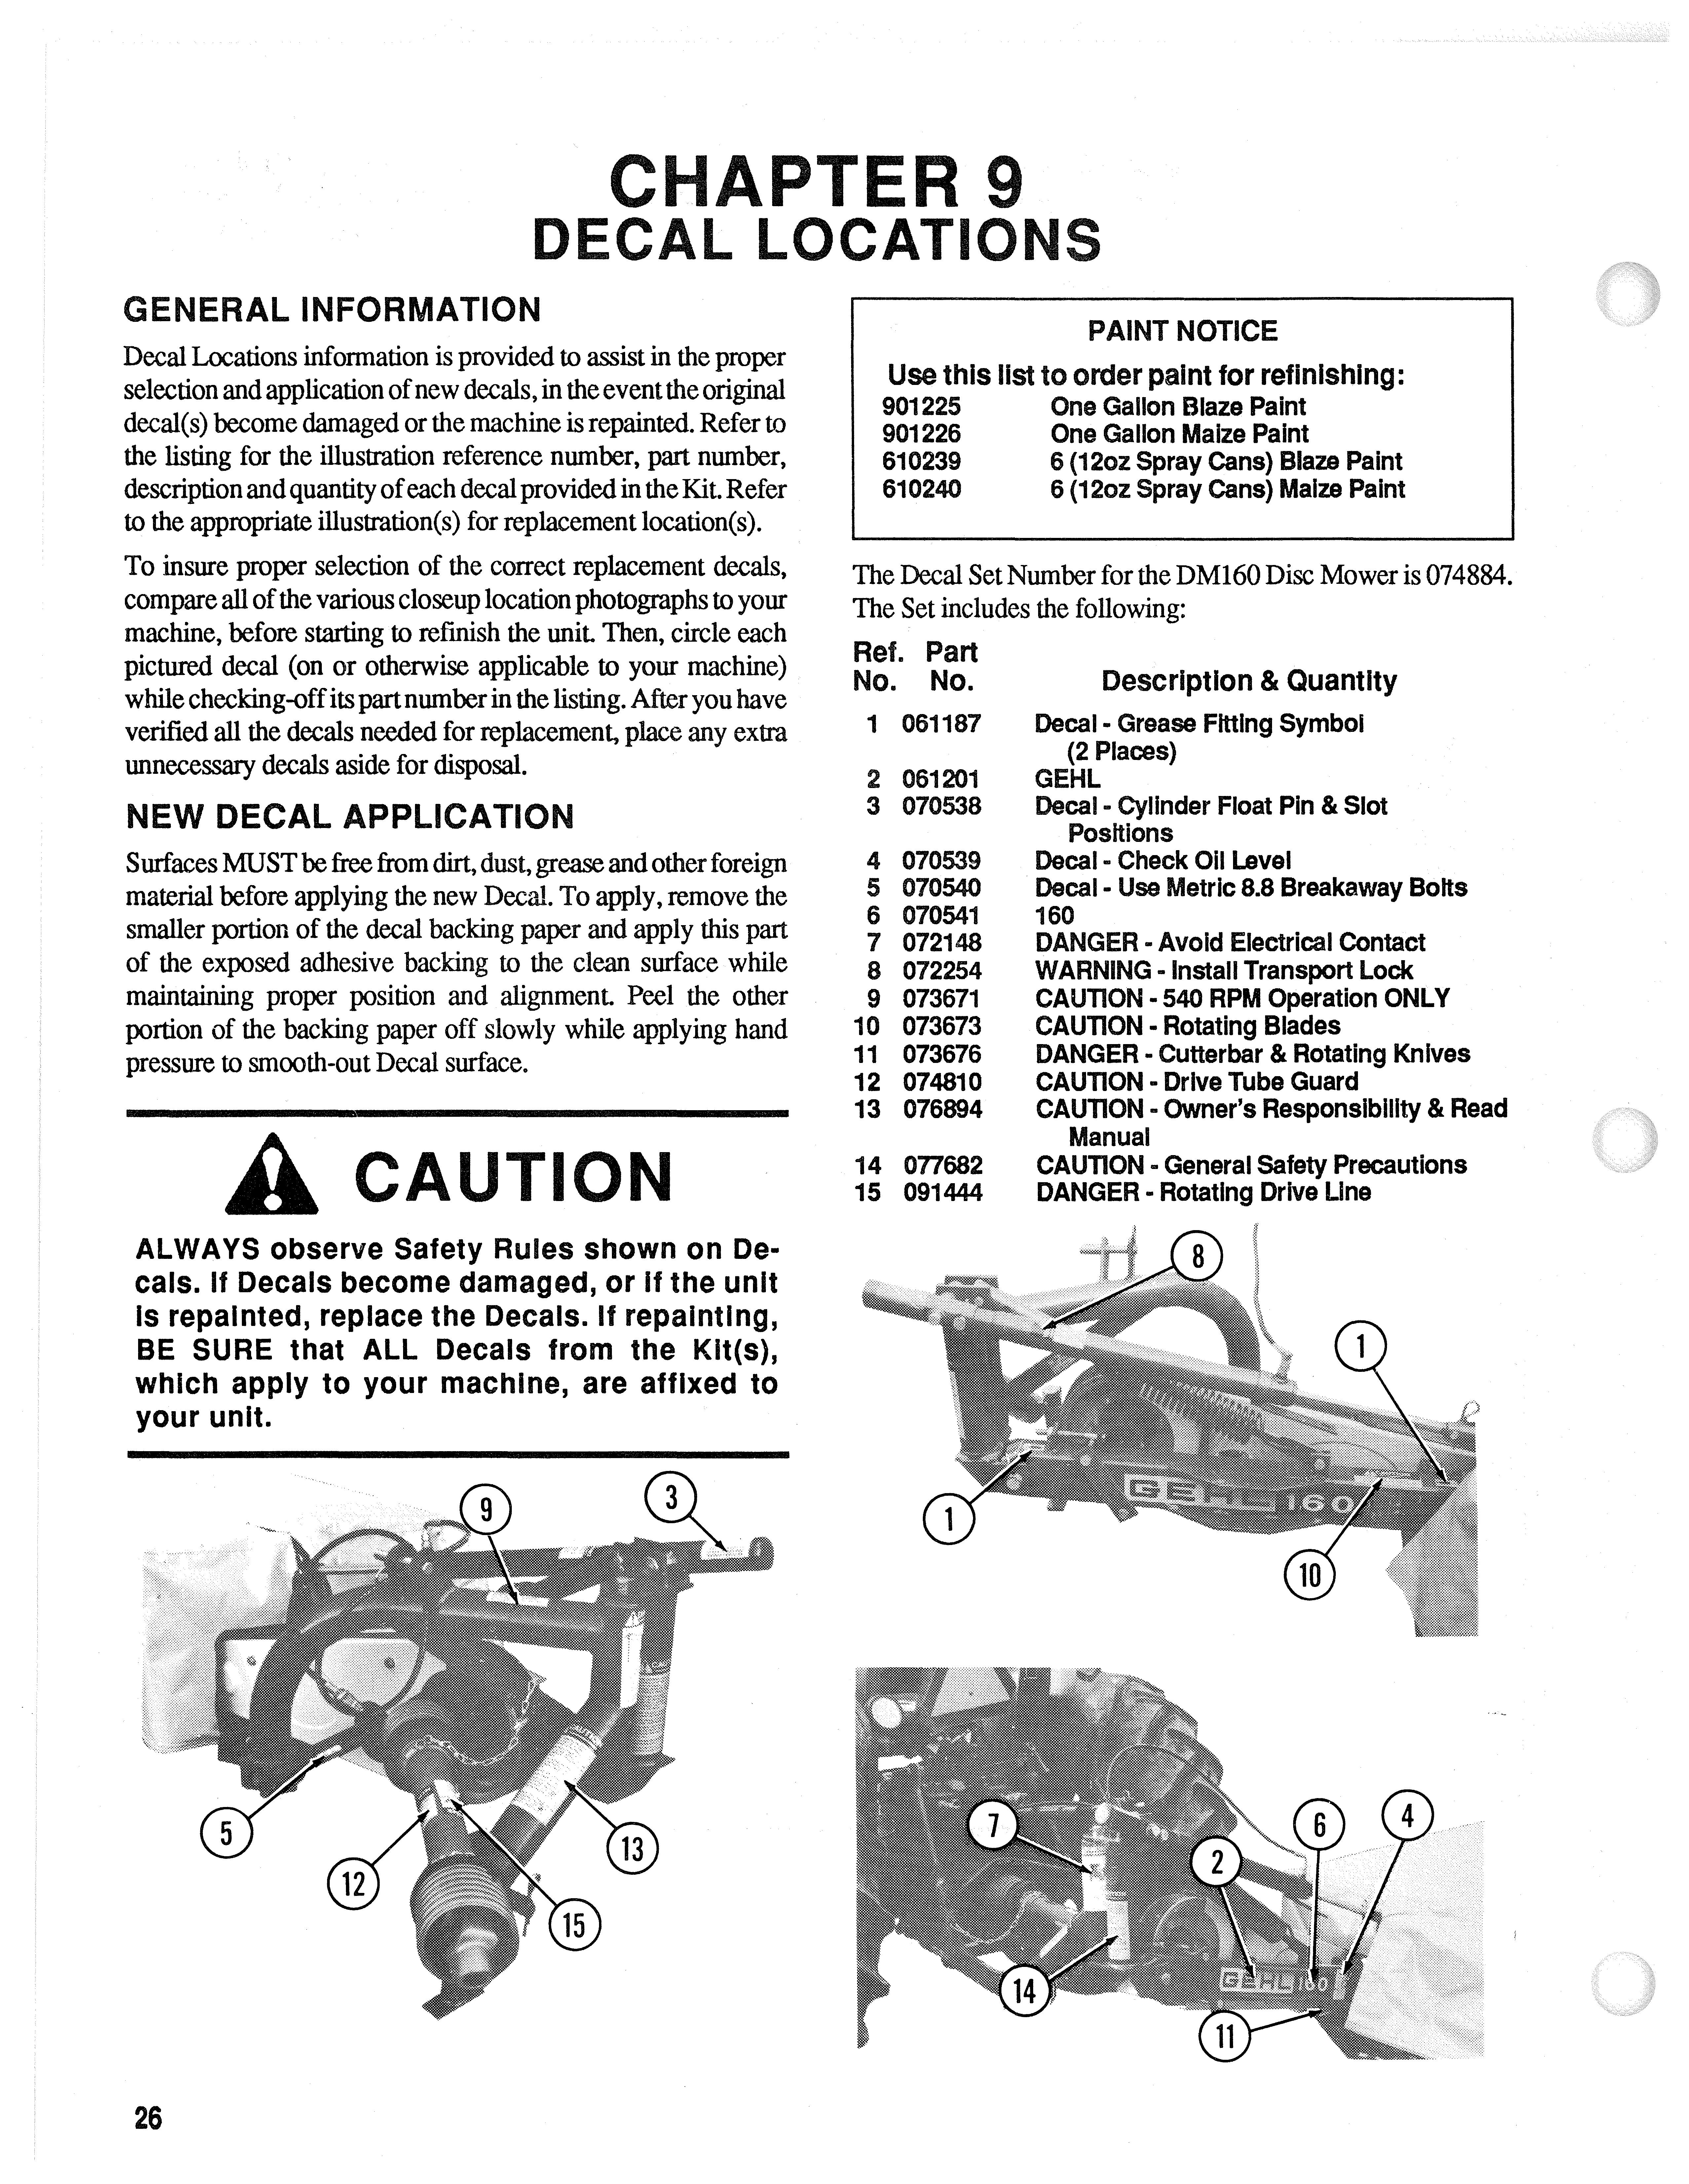
Decal Locations infonnation is provided to assist in the proper selection and application of new decals, in the event the original decal(s) become damaged or the machine is repainted. Refer to the listing for the illustration reference number, part number, description and quantity of each decal provided in the Kit Refer to the appropriate illustration(s) for replacement location(s). To insure proper selection of the correct replacement decals, compare all of the various closeup location photographs to your machine, before starting to refinish the unit Then, circle each pictured decal (on or otherwise applicable to your machine) while checking-off its part number in the listing. After you have verified all the decals needed for replacement, place any extra unnecessary decals aside for disposal.
New Decal Application
Surfaces MUST be free from dirt, dust, grease and other foreign material before applying the new Decal. To apply, remove the smaller portion of the decal backing paper and apply this part of the exposed adhesive backing to the clean surface while maintaining proper position and alignment Peel the other portion of the backing paper off slowly while applying hand pressure to smooth-out Decal surface.
Acaution
ALWAYS observe Safety Rules shown on Decals. If Decals become damaged, or If the unit Is repainted, replace the Decals. If repainting, BE SURE that ALL Decals from the Klt(s), which apply to your machine, are affixed to your unit.
Paint Notice
Use this list to order paint for refinishing:
The Decal Set Number for the DM160 Disc Mower is
The Set includes the following:


