3 minute read
Renew the engine/transmission oil and filter Section Check the condition of the front brake shoes and/or


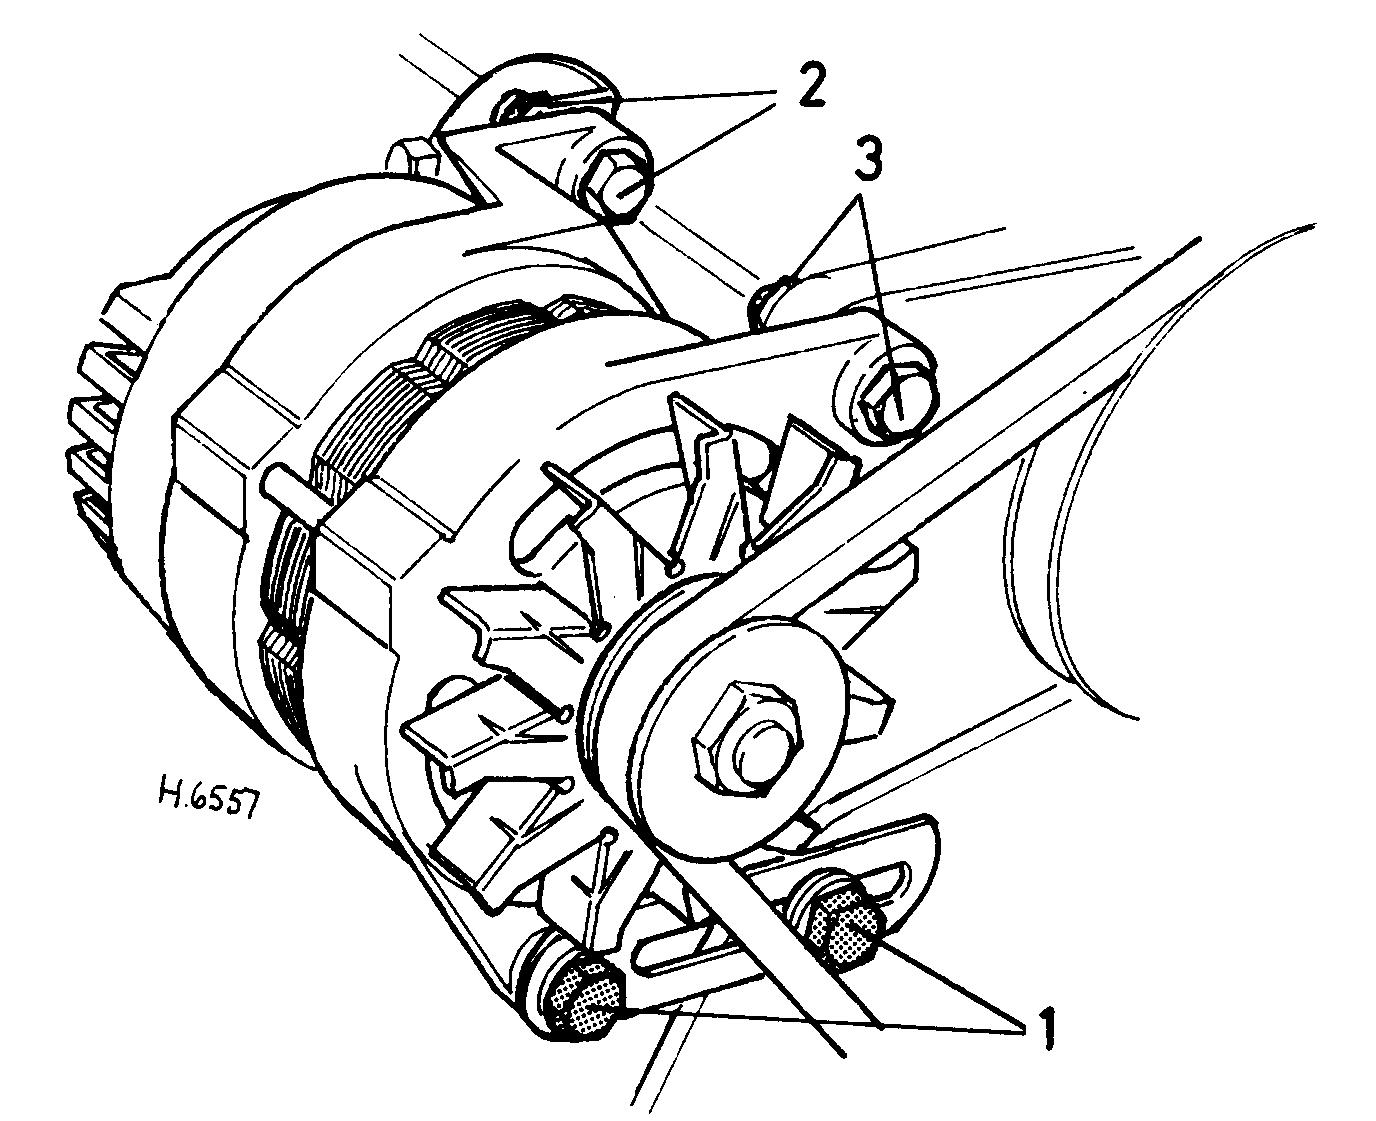
8.8b Alternator mounting and adjustment points 1 Adjustment arm fixings 2 Securing nut and bolt (rear) 3 Securing nut and bolt (front) 8.9 The gap in the radiator shroud of early models (arrowed) to allow removal and refitting of the fan belt

9 Push the dynamo or alternator toward the engine and lift the old belt off the three pulleys. Feed the belt over each fan blade in turn and withdraw it from behind the fan cowling at the special gap just below the top hose (see illustration). 10 Fit the new belt over the fan blades in the same way and then place it in position on the three pulleys. 11 Adjust the fan belt tension as described previously then refit the air pump drivebelt, where applicable, as described in the following Section. Note: After fitting a new fan belt, check and if necessary readjust the tension after 250 miles (400 km).
9 Air pump drivebelt check and renewal 2
Check and adjustment
1 The checks and adjustment procedure for the air pump drivebelt are basically the same as described in Section 9 for the fan belt. Adjust the tension of the drivebelt so that there is 13 mm deflection of the belt, using thumb pressure, at a point midway between the two pulleys. Renewal
2 Release the three retaining lugs and remove the engine ignition shield, if fitted. 3 Undo and remove the two bolts securing the radiator upper mounting bracket to the radiator. 4 Unscrew the radiator filler cap and slacken the top hose securing clips. Carefully ease the radiator as far as possible toward the wing valance. Place a container beneath the engine to catch the small quantity of coolant that will be lost as the top hose is released. Warning: If the engine is hot, take precautions against scalding.
5 Slacken the air pump pivot and adjusting link bolts, push the pump in toward the engine, and slip the drivebelt off the two pulleys. 6 Feed the belt between the fan blades and the radiator cowling at the top as the blades are rotated. Now pull the belt out from between the fan and radiator. 7 Refitting the drivebelt is the reverse sequence to removal, adjusting the tension as described previously. Top up the cooling system as described in “Weekly Checks” on completion.
10 Clutch hydraulic check 1
1 Check that the clutch pedal moves smoothly and easily through its full travel, and that the clutch itself functions correctly, with no trace of slip or drag. 2 Apply a few drops of light oil to the clutch pedal pivot. 3 From within the engine compartment check the condition of the fluid lines and hoses. Check for signs of fluid leaks around the slave cylinder rubber boot or from the feed pipe and hose. Apply a few drops of oil to the clutch operating lever clevis pin and the pivot on the flywheel housing.
11 Seats and seat belt check 1
1 Check that the seats are securely attached to the floor crossmember and that there is no sign of corrosion anywhere near the mountings. Check that the seats release and then lock in place when the release mechanism is operated. 2 Check the seat belts for satisfactory operation and condition. Inspect the webbing for fraying and cuts. Check that they retract smoothly and without binding into their reels. 3 Check the seat belt mountings, ensuring that all the bolts are securely tightened.
12 Headlight beam alignment check 5
Accurate adjustment of the headlight beam is only possible using optical beam-setting equipment, and this work should therefore be carried out by a Rover dealer or service station with the necessary facilities.
Basic adjustments can be carried out in an emergency, and further details are given in Chapter 12.