3 minute read
Check the headlight beam alignment (Section


7.2a Exhaust front mounting block . . . 7.2b . . . and rear mounting block on rear subframe 8.6 Dynamo adjusting arm nut located below the water pump
2 Check the pipes and connections for evidence of leaks, severe corrosion, or damage. Make sure that all brackets and rubber mountings are in good condition, and tight; if any of the mountings are to be renewed, ensure that the replacements are of the correct type. Failure of the rear mounting rubber blocks on the rear subframe is a common problem - check these carefully (see illustrations). Leakage at any of the joints or in other parts of the system will usually show up as a black sooty stain in the vicinity of the leak. 3 At the same time, inspect the underside of the body for holes, corrosion, open seams, etc. which may allow exhaust gases to enter the passenger compartment. Seal all body openings with silicone or body putty. 4 Rattles and other noises can often be traced to the exhaust system, especially the rubber mountings. Try to move the system, silencer(s) and catalytic converter. If any components can touch the body or suspension parts, secure the exhaust system with new mountings.
When checking the exhaust, pay particular attention to the mounting on the transmission. Movement of the engine causes this mounting to work loose, causing an annoying squeak or rattle when accelerating and decelerating. Turning the engine will be easier if the spark plugs are removed first - see Section 33.
8 Fan belt check and renewal 2
Note: If the car is fitted with exhaust emission control equipment it will first be necessary to remove the air pump drivebelt as described in Section 9 to allow access to the fan belt. Check and adjustment
1 Release the three retaining lugs and remove the engine ignition shield, if fitted. Rotate the crankshaft so that the entire length of the fan belt can be examined. On manual transmission models, the engine can be rotated quite easily by engaging top gear and moving the car backwards or forwards to allow the belt to be inspected. This should only be done on level ground; and make sure that the car cannot run away! An alternative method, and the method that should be used on automatic transmission models, is to press the fan belt midway between the water pump pulley and dynamo or alternator pulley and then turn the fan blades.
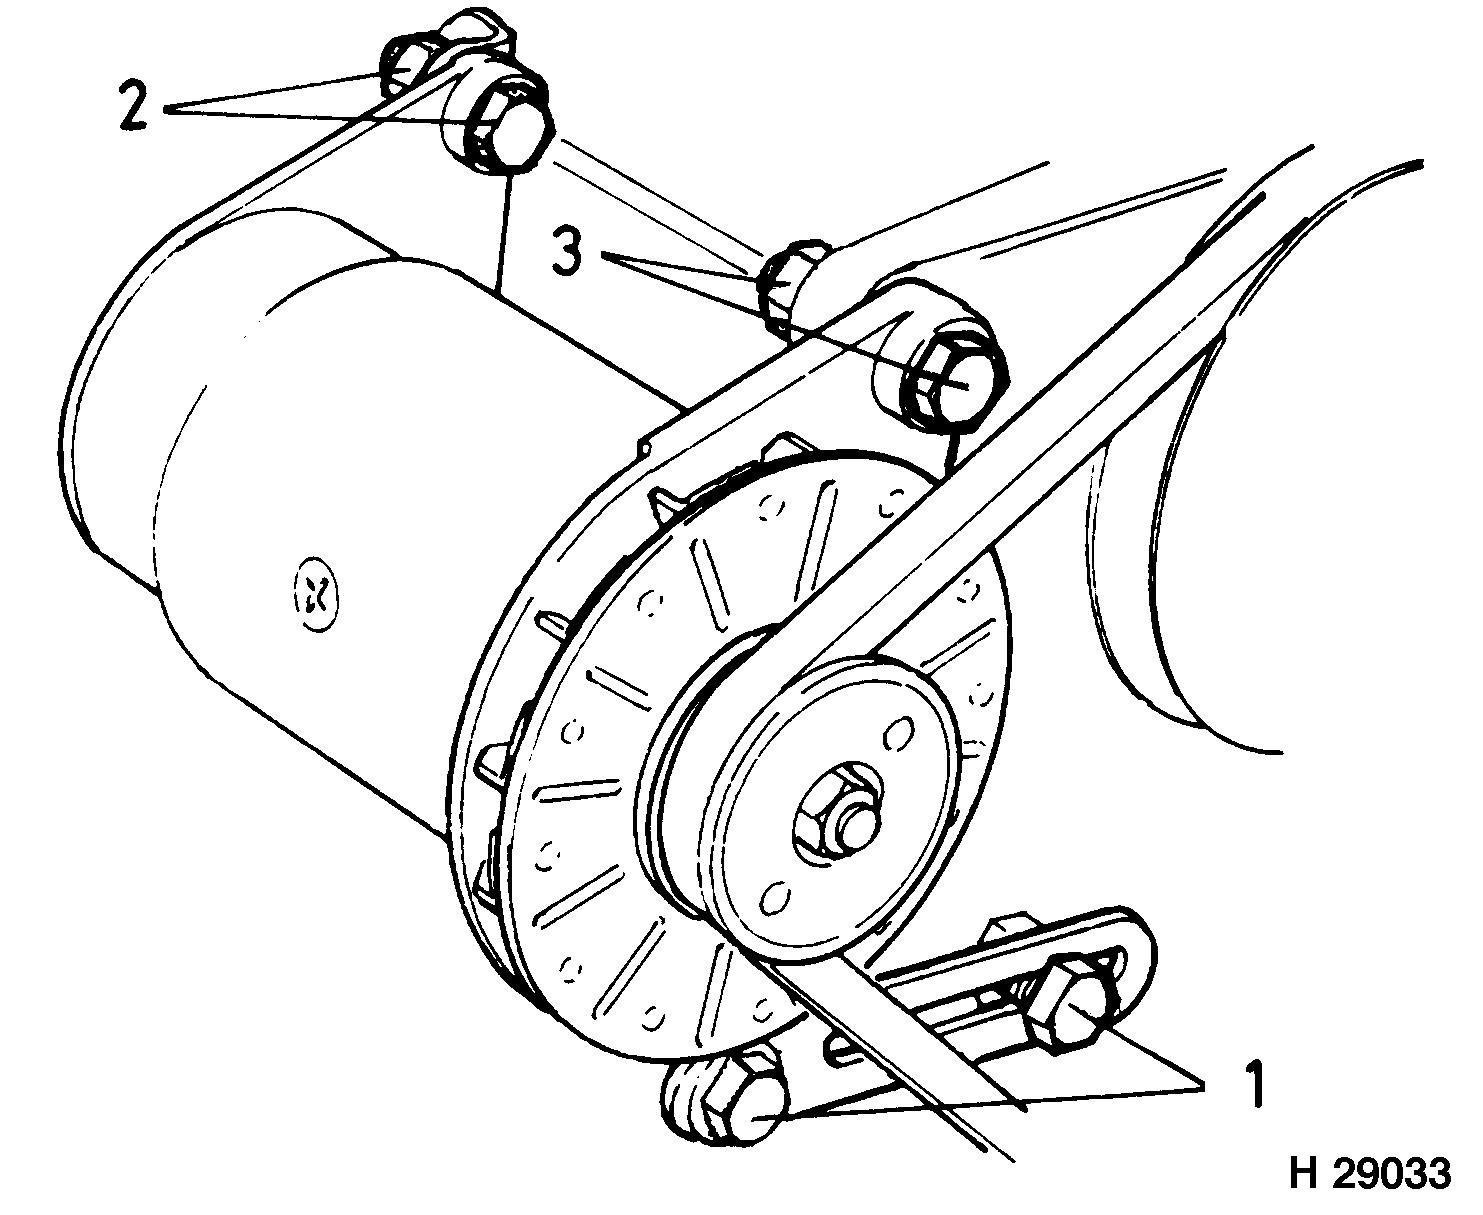
2 Examine the belt for cracks, splitting, fraying or damage. Check also for signs of glazing (shiny patches) and for separation of the belt plies. Renew the fan belt if worn or damaged. 3 If the condition of the belt is satisfactory, check the adjustment as follows. 4 It is most important to keep the fan belt correctly adjusted; If the belt is too loose it will slip and wear rapidly, resulting in inefficient operation of the water pump and dynamo or alternator. If it is too tight, it will impose excessive strain on the bearings of the water pump, dynamo or alternator causing premature failure of these components. 5 The fan belt tension is correct when there is 13 mm of fan belt deflection, using light finger pressure, at a point midway between the crankshaft and dynamo or alternator pulleys. 6 To adjust the fan belt, slacken the mounting bolts of the dynamo or alternator, and also the nut on the adjusting arm located below the water pump (see illustration). Now move the unit either in or out until the correct tension is obtained. It is easier if the adjusting arm nut is only slackened a little so it requires some force to move the dynamo or alternator. In this way the tension of the belt can be arrived at more quickly than by making frequent adjustments. If difficulty is experienced in moving the dynamo or alternator away from the engine, a long spanner or bar placed behind the unit and resting against the block serves as a very good lever and can be held in position while the adjusting and mounting bolts are fully tightened. When levering on an alternator, only lever on the drive end or damage may occur. 7 When the tension is correct, tighten the adjusting arm nut first, followed by the mounting bolts. Renewal
8 To remove the fan belt, slacken the two dynamo or alternator upper mountings and the nut on the adjusting arm below the water pump (see illustrations).
8.8a Dynamo mountings and adjustment points 1 Adjustment arm retaining nuts 2 Securing nut and bolt (rear) 3 Securing nut and bolt (front)