How to Install PostgreSQL on Ubuntu 24.04: A Comprehensive Tutorial

greenwebpage.com/community/how-to-install-postgresql-on-ubuntu-24-04/
Tutorials by Karim
Buzdar
December 4, 2024
December 4, 2024

PostgreSQL is an open-source, effective database system known for its flexibility and reliability. PostgreSQL is essential for managing and storing data reliably and efficiently. Installing it on Ubuntu 24.04 provides a solid foundation for various applications.
This guide will explain users to install and configure PostgreSQL on their Ubuntu 24.04 system.
Installing PostgreSQL on Ubuntu 24.04
Configuring PostgreSQL on Ubuntu 24.04
Removing PostgreSQL on Ubuntu 24.04
Let’s start with the installation.
Installing PostgreSQL on Ubuntu 24.04
Ubuntu includes PostgreSQL as a pre-installed option. You can easily add it to your system using the apt package manager. Let’s get started.
Step 1: Updating Packages List
Start by refreshing your system’s package lists to ensure you have the most recent software available:
sudo apt update
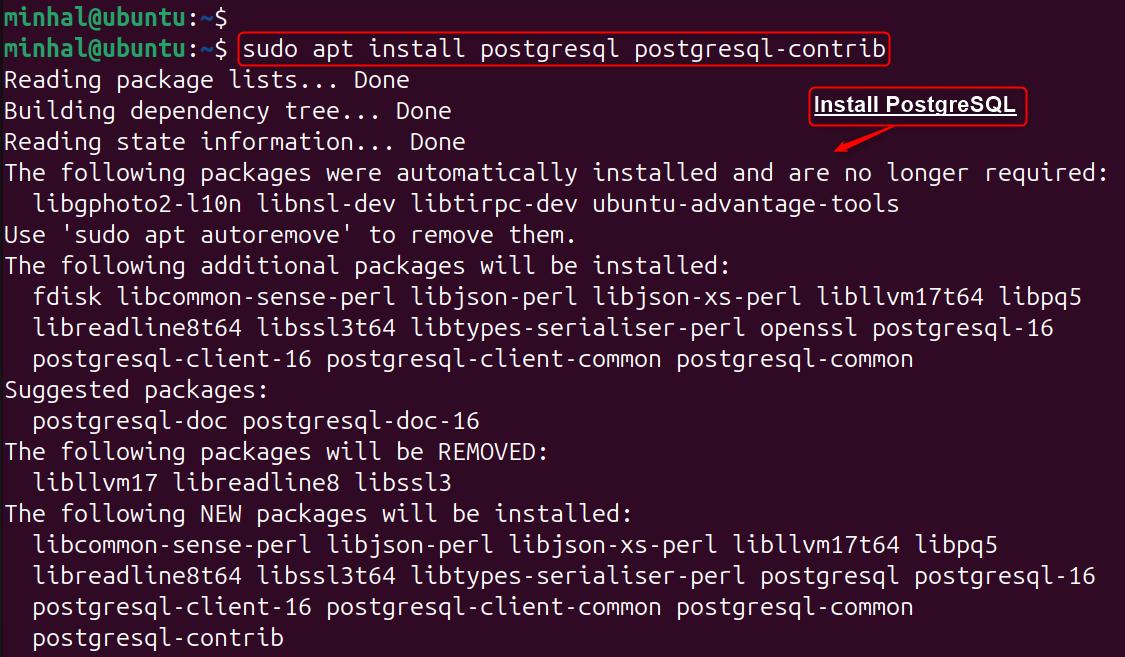
Step 2: Installing PostgreSQL and Additional Tools
Next, install the PostgreSQL package and the “postgresql-contrib” package. It offers several extra utilities and tools for PostgreSQL.
sudo apt install postgresql postgresql-contrib
Note: Users need to authenticate the installation and accept the defaults settings for restarting any services.
Step 3: Starting the PostgreSQL Service
For starting the PostgreSQL service after installation, execute the following command:
sudo systemctl start postgresql service
Step 4: Accessing PostgreSQL
PostgreSQL uses roles to control who can access the database and what they can do. To connect to the database, you have two main options:
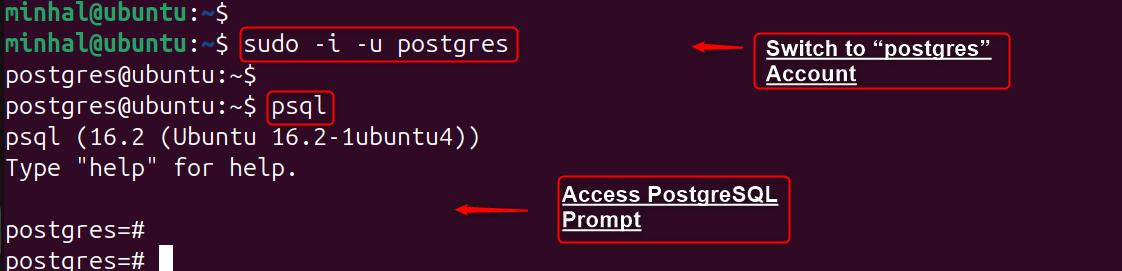
Become the postgres superuser
Switch to the postgres user account using sudo -i -u postgres and then access the PostgreSQL prompt with psql:
sudo -i -u postgres psql
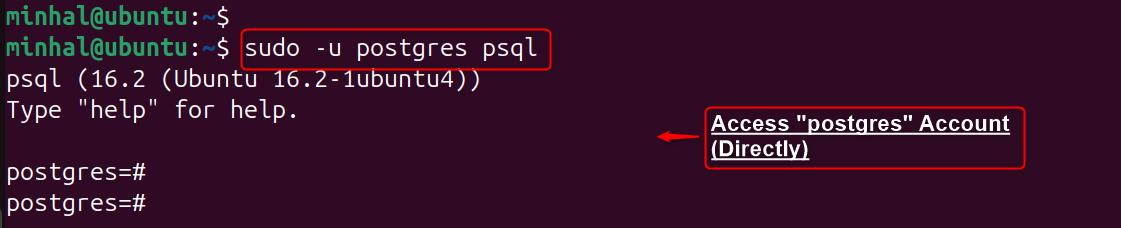
Create
and use a specific user
Create a new user with appropriate permissions and connect to the database using that user’s credentials:
sudo -u postgres psql
Step 5: Creating Users and Databases
Once logged in, users can create a new user as well as database. For creating the “linuxrole” as a new user, users can utilize the following script:
CREATE ROLE linuxrole WITH LOGIN PASSWORD '1212';
For creating the “linuxdatabase” as new database, execute the “CREATE” command as below:
CREATE DATABASE linuxdatabase;
After that, users need to get required permission to the new role on the created database:
GRANT ALL PRIVILEGES ON DATABASE linuxdatabase TO linuxrole;
Your PostgreSQL installation is complete. You now have a fully functional PostgreSQL database on your Ubuntu 24.04 server.
Basic PostgreSQL Commands
For managing the PostgreSQL database on Ubuntu, users can also follow below commands:
Managing a PostgreSQL Database Statements
Listing all Databases \l
Viewing all Tables within the Database \dt
Describing a Table’s Structure \d table_name
Connect to a PostgreSQL Database psql -d database -U user -W
Switching Databases \c dbname username
That is all from the installation.
Enabling Remote Access to Your PostgreSQL Database
Granting remote access to your PostgreSQL database significantly enhances its usability. Let’s guide you through the steps to configure this on your Ubuntu server
Step 1: Install PostgreSQL
To configure remote access, PostgreSQL must be installed on your Ubuntu server first. Let’s install it:
sudo apt update
sudo apt install postgresql postgresql-contrib
Step 2: Switch to the PostgreSQL User
For managing the default database of PostgreSQL, switch to the postgres user:
Step 3: Create a Database User (Optional)
Establish a new user account with specific permissions for remote database access. It optimizes security by giving permission to only required privileges:
createuser --interactive --pwprompt
Step 4: Edit the Configuration File
To allow remote connections to your PostgreSQL database, you’ll need to adjust two key configuration files: postgresql.conf and pg_hba.conf. These files determine which computers can connect to your database.
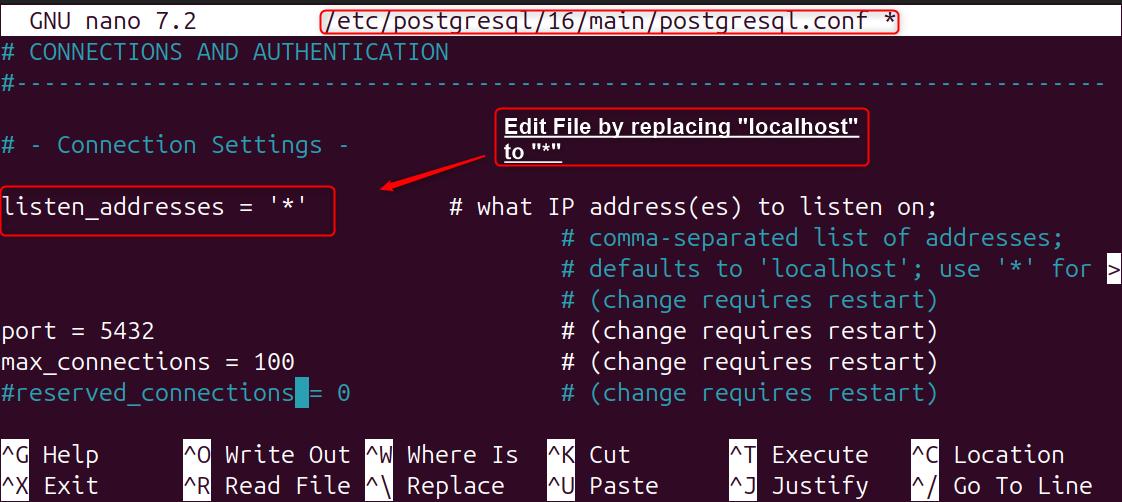
First, modify the postgresql.conf file to specify which network interfaces PostgreSQL should listen on. This file is typically located at /etc/postgresql/{version}/main/postgresql.conf. Replace {version} with the actual version of PostgreSQL installed on your system:
sudo nano /etc/postgresql/{version}/main/postgresql.conf
Find the line that says listen_addresses = ‘localhost’. Uncomment this line (remove the leading #) and change it to listen_addresses = ‘*’ to allow connections from all network interfaces:
listen addresses = '*'
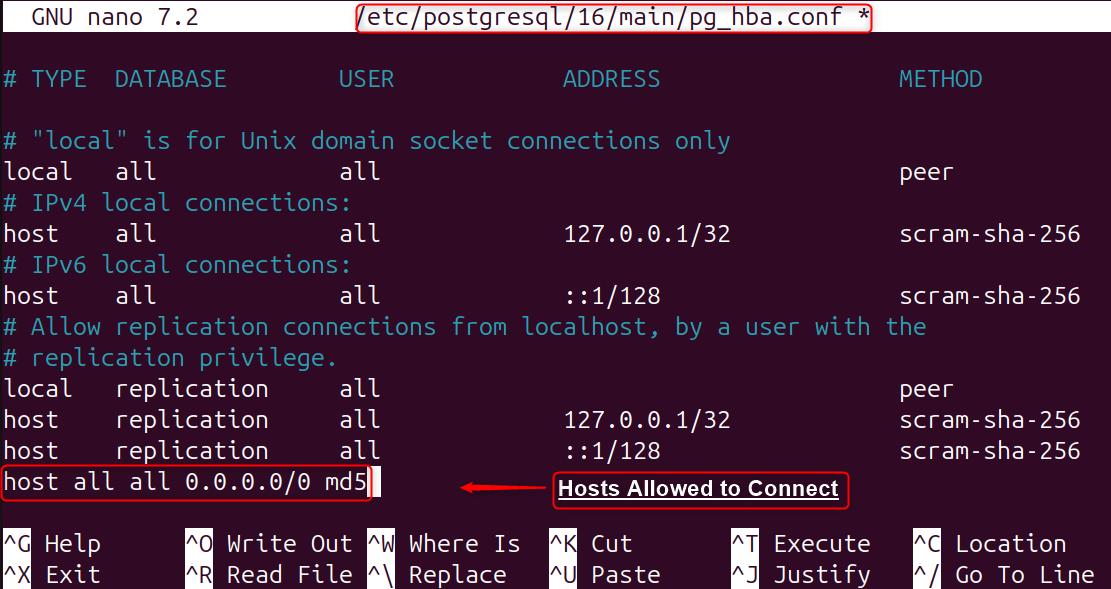
Edit the pg_hba.conf file
Next, edit the pg_hba.conf file, also found in /etc/postgresql/{version}/main/pg_hba.conf. This file controls access to the database: sudo nano /etc/postgresql/{version}/main/pg hba conf
Now, users need to add a line for permiting connections from any IP address via the below authentication prcedure:
host all all 0.0.0.0/0 md5
After done configuration, save as well as exit the file.
Step 5: Restart PostgreSQL
Finally, users require for applying the modifications by restarting the service via the below “systemctl” command:
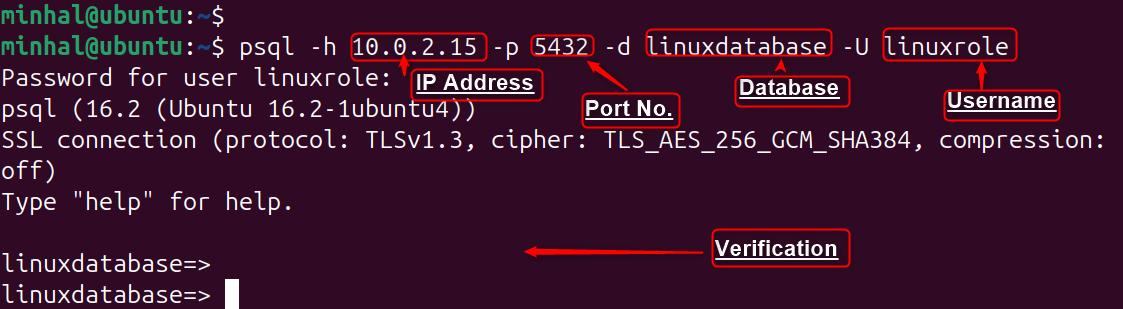
Step 6: Test the Connection
Now, users need to replace <server_ip> with the actual IP address of your Ubuntu server. If you’ve modified the PostgreSQL port or database name, adjust the corresponding options accordingly
psql -h 10 0 2 15 -p 5432 -d linuxdatabase -U linuxrole
By following these steps, users can set up remote access to the PostgreSQL database on an Ubuntu server
Managing PostgreSQL Services
Users can also manage the PostgreSQL services on the Ubuntu system, utiize the below commands:
Enable PostgreSQL Service to Start at Boot
Starting the PostgreSQL Service
Stopping PostgreSQL
Reloading PostgreSQL Service (without stopping it)
Disable PostgreSQL Service
Installing a Specific Version of PostgreSQL
Removing PostgreSQL from Ubuntu 24.04
sudo systemctl enable postgresql
sudo systemctl start postgresql
sudo systemctl stop postgresql
sudo systemctl reload postgresql
sudo systemctl disable postgresql
sudo apt install postgresql<version>
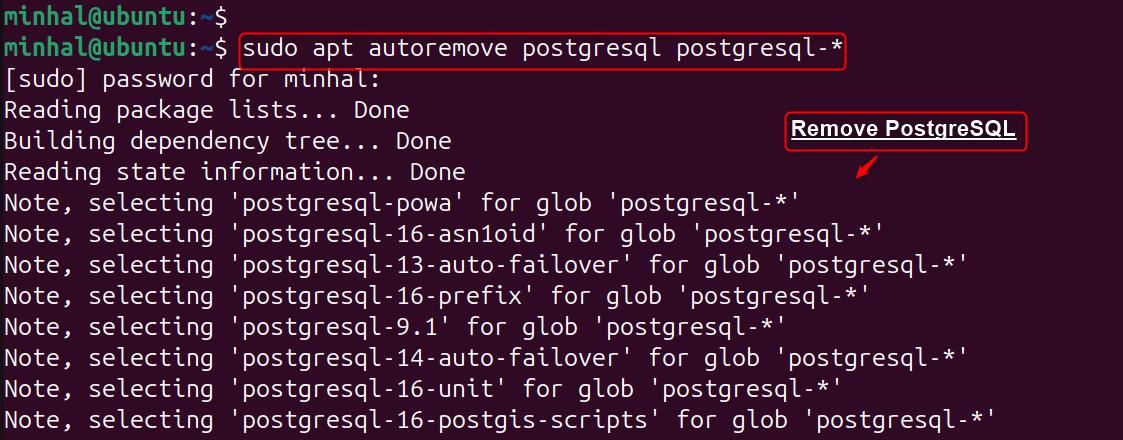
For completely removing PostgreSQL from the system, execute the following command. This command removes the PostgreSQL packages and any unused dependencies:
sudo apt autoremove postgresql postgresql-*
Alternatively, you can execute the “rm” command for removing the PostgreSQL directory as well:
sudo rm -rf /etc/postgresql/
Conclusion
Unleash the full potential of your Ubuntu 24.04 system by installing PostgreSQL, a powerful and versatile database management system. To get started, update your system’s package lists using sudo apt update, then install PostgreSQL and essential tools with sudo apt install postgresql postgresql-contrib.
Once installed, switch to the postgres user account using sudo -i -u postgres and access the PostgreSQL command line with psql. For enhanced accessibility, consider setting up remote access to your database, allowing you to manage it conveniently from any location.
Frequently Asked Questions
How do I verify that PostgreSQL is installed correctly?
After installation, you can verify PostgreSQL by running: psql --version You can also check the PostgreSQL service status: sudo systemctl status postgresql
How do I switch to the PostgreSQL default user (postgres)?
PostgreSQL creates a default user called postgres. To switch to this user, run: sudo -iu postgres You will now be logged in as the postgres user, which allows you to interact with the database.
How do I create a new PostgreSQL user?
After switching to the postgres user, you can create a new PostgreSQL role by running: createuser --interactive --pwprompt Follow the prompts to define the username and set a password.
How do I create a database in PostgreSQL?
Once logged in as the postgres user or any superuser, create a new database: createdb mydatabase You can also create a database as a specific user by using: createdb -O myuser mydatabase
How do I connect to the PostgreSQL database?
To connect to a PostgreSQL database, use the following command (while logged in as postgres or the user that has access to the database): psql -d mydatabase