Gladstone Regional Council would like to acknowledge the traditional custodians of this land, the Bailai, the Gurang, the Gooreng Gooreng and the Taribelang Bunda people. We pay respect to their Elders past, present and emerging. Gladstone Regional Council is committed to cultivating a culture of inclusion and connectedness, acknowledging that our communities are richer when diversity is embraced.
A Taste of the Gladstone Region cookbook is a collaborative effort between Gladstone Regional Council and Gladstone Region Neighbourhood Centre, proudly presented as part of Welcoming Week celebrations. This heartwarming collection of recipes showcases the diverse flavours of our community, brought to you by the generous contributions of local residents. Let’s celebrate our shared heritage and build stronger connections, one delicious dish at a time.
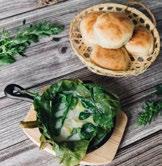
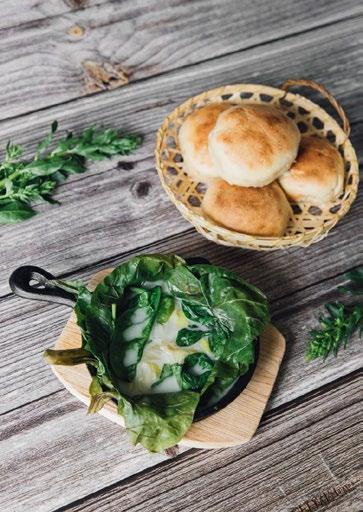
LOLO BUNS WITH PALUSAMI
Recipe Submitted by: Bibiana
These fluffy coconut bread rolls are traditionally served for breakfast in Fiji and utilise one of Fiji’s basic staples, the coconut. “Lolo” (coconut milk) is poured over the buns and then baked until golden brown. Also a perfect accompaniment to Palusami, a creamed spinach dish, common across Polynesian countries such as Samoa. The origins of Palusami are as rich as the dish itself, believed to have been created by early Polynesian settlers who brought with them taro plants from Southeast Asia. These hardy plants thrived in Samoa’s tropical climate and became a staple food source for the islanders.
Ingredients:
Coconut Buns (Lolo) makes 6
• 2 cups all-purpose flour
• 1 tbsp vital wheat gluten
• ½ tbsp instant yeast
• 3 tbsp sugar
• 1 tsp salt
• 4 tbsp butter (melted)
• 1 cup milk (lukewarm)
• 1 cup coconut milk
Method (Coconut Buns - Lolo):
1. Combine the flour, vital wheat gluten, instant yeast, sugar, and salt in the bowl, this can be hand kneaded or in a stand mixer.
2. Melt the butter and add it to the flour mixture and slowly add the warm milk to the flour mixture and knead to make a very soft dough.
3. Make a ball out of the dough and place it in an oiled bowl. Cover the dough with plastic wrap and then a kitchen towel and place it in a warm place to rise. It takes about an hour and a half for the dough to rise and double in volume.
4. Once the dough has risen for the first time, gently punch it down and divide it into 6 equal pieces.
5. Roll each piece into a ball and place it in a greased baking dish. A rectangular pan to bake the buns is best.
6. Cover the dough again and let it rise for the second time. It takes less than an hour for the rolls to double in size.
7. Preheat the oven to 180 Degrees.
8. Once the dough rises, add the coconut milk on top of the buns. One cup of coconut milk is enough. Do not add more as it will start to splatter in the oven when baking.
9. Bake the rolls for about 25 to 30 minutes or until the buns are golden brown on top and sound hollow when tapped.
The base of the buns will be moist as it is also steaming in coconut milk. By the end of the baking time, you will also notice that the coconut milk has almost been absorbed.
Best served warm and delicious with a cup of tea!
Ingredients:
Palusami
• 14 Taro leaves or substitute option is Swiss chard (14 leaves, probably 2 bunches)
• 420g coconut cream (1 can)
• 340g corned beef (1 can)
• 1 brown onion diced
• 1 tomato (optional)
• 2 garlic cloves minced
• salt
• pepper
Method (Palusami):
1. Dice the onion and mince the garlic. Put them in a large mixing bowl.
2. Add the corned beef to the mixing bowl. Add salt and pepper. Stir thoroughly to combine.
3. Cut the stems off the Taro leaves/Swiss chard. You only want the leaves. If you wash the leaves, pat them dry before the next step.
4. Lay down a sheet of aluminium foil. Put 2 Taro leaves/Swiss chard leaves on it, one on top of the other.
5. Scoop about 3 tablespoons (or however much you can fit) into the centre of the leaf. Drizzle coconut cream on top of the filling, as well as the leaf itself.
6. Fold the leaf like a present, keeping the opening on top. Drizzle some coconut cream in between the 2 leaves. Fold the second leaf closed as well.
7. Keep the palusami closed while folding the aluminium foil closed.
8. Repeat until you are out of leaves or filling, whichever comes first.
9. Bake in the oven at 180 Degrees for 30 minutes.
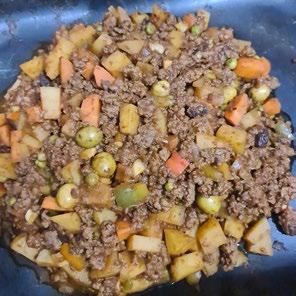
BEEF PICADILLO
Recipe Submitted by: Maria
Beef Picadillo is a staple in Filipino households and is often served during special occasions and family gatherings. Picadillo’s origins can be traced back to the Spanish colonisation of the Philippines in the 16th century, its name derived from the Spanish word “picar” which means ‘to mince”. Over time, Filipino cooks adapted the recipe to incorporate local ingredients and flavours such as patis (fish sauce), suka (vinegar), and siling labuyo (Filipino chilli peppers). They also added their own twist by using a variety of ground meats, including beef, pork, and even fish.
This flavourful savoury dish is often served with steamed rice, vegetables, pickled papaya, fried egg and traditional Filipino bread rolls. Today, Picadillo remains a beloved dish in Filipino cuisine, and its rich history and cultural significance are a testament to the country’s diverse culinary heritage.
Ingredients:
• 1 tbsp olive oil
• 1 onion, peeled and chopped
• 2 cloves garlic, peeled and minced
• 700g ground beef
• 1 tbsp fish sauce
• 1 cup tomato sauce
• ½ cup crushed tomatoes
• ½ cup water or beef broth
• 2 medium potatoes, peeled and cubed
• 2 medium carrots, peeled and cubed
• 2 tbsp raisins
• ½ bell pepper diced
• ½ cup frozen green peas, thawed
• ¼ cup green olives, pitted
• salt and pepper to taste
Method:
1. In a pan over medium heat, heat olive oil. Add onions and garlic and cook until softened.
2. Add ground beef and cook, breaking to pieces with the back of a spoon, until lightly browned. Drain off any excess fat/grease.
3. Add fish sauce and cook for about 1 to 2 minutes.
4. Add tomato sauce and crushed tomatoes.
5. Add water or beef broth and bring to a boil. Lower heat, cover and cook for about 10 to 15 minutes or until beef is cooked through.
6. Add potatoes, carrots, raisins. Cover and continue to simmer for about 3 to 5 minutes or until tender.
7. Add bell pepper, green peas and olives.
8. Continue to cook until sauce is reduced and thickened. Season with salt and pepper to taste.
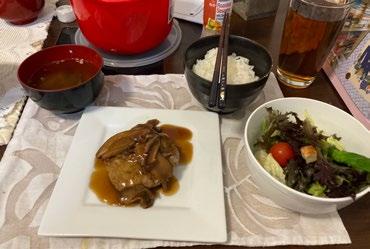
HAMBURG WITH SHIITAKE MUSHROOM ANKAKE SAUCE
Recipe Submitted by: Masato
Not to be confused with hamburgers, hamburg is a Japanese meat dish served with sauce and various side dishes. It is a common household food and is also a popular addition to bento lunches. Adding tofu to the hamburg makes it lighter and lower in calories, but it can also be made with just beef mince, or a mix of beef and pork. The most common sauce served with hamburg is demi glazed sauce, but in Masato’s house, they love mushroom ankake sauce. Hamburg is also nice with Japanese curry.
Did you know that the Gladstone Region has a Japanese Sister City called Saiki. The relationship began in 1996 and is centred around exchanges of knowledge, culture and education with both regions benefiting from the long-standing friendship. Japanese cuisine is very popular in Australia, and globally, encompassing seasonal foods and immaculate presentation. In fact, Tokyo has the most Michelin-starred restaurants in the world!
Ingredients:
For the Hamburg:
• 500g beef mince
• 1 pack firm tofu
• 1 cup panko breadcrumbs
• 1 onion finely diced
• 2 eggs
For the Sauce:
• 20g dried shiitake mushrooms sliced (adjust amount to taste)
• 2 cups water
• 2 tbsp mirin
• 3 tbsp soy sauce
• 2 tbsp sake
• 1 tbsp cornflour dissolved in 2 tbsp water
Method:
For the Hamburg
1. Remove excess liquid from tofu by patting dry with a paper towel. Break into small pieces.
2. Mix tofu, mince, diced onion, panko, and eggs.
3. Roll into balls (similar to rissoles or a thick hamburger pattie)
4. Cook in fry pan until cooked through.
For the Sauce
1. Rehydrate shiitake mushrooms by soaking in warm water for approximately 20 mins. Drain when complete
2. In a small pot, add all ingredients except cornflour mix. Cook on low heat for 5-10 mins.
3. Turn off heat. Add in cornflour mix and stir through. Add back to low heat and stir until sauce thickens.
Serve with rice, miso soup, and a side salad.
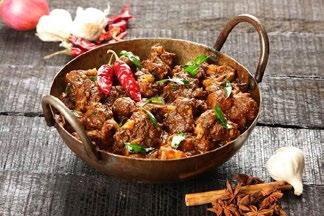
LUTO SA PASO
Recipe Submitted by: Arthur
Arthur learnt this delicious recipe from his late brother-in-law, originally from Bulacan in northern Metro Manila. He later modified the recipe to serve at a café run by himself and his wife in Sydney. It was a hit! Now living in the Gladstone Region, Arthur and his family regularly enjoy this comforting casserole dish. The term Luto sa Paso means ‘cooked in a pot’ and can be cooked in a good casserole pot or slow cooker.
Ingredients:
• 2kg gravy beef (cut the meat into chunks)
• 1 tin crushed tomato
• 2 onions medium size diced
• 4 gloves garlic chopped
• 1 medium size red capsicum chopped
• 1 tsp smoked paprika
• Pinch salt
• 1 tbsp soy sauce
• 1 tbsp fish sauce (salt / soy sauce and fish sauce can be added more during cooking procedure)
• 1 tbsp olive oil
Method:
1. Cut the meat into chunk pieces
2. Finely dice the onion, capsicum and garlic
3. Mix all of the beef, vegetables, tin tomatoes, spices and olive oil in a bowl. Ensure all ingredients are coating the meat then set aside for half an hour
4. Cook over a slow flame (if you’re using slow cooker, a medium setting will be perfect)
5. Add more fish sauce or soy sauce once it’s boiling to taste.
6. Let it cook until the meat is super tender. Around 2 hours.
Note: any excess juice while cooking can be removed if you prefer more of a casserole style.
Serve with steamed rice.
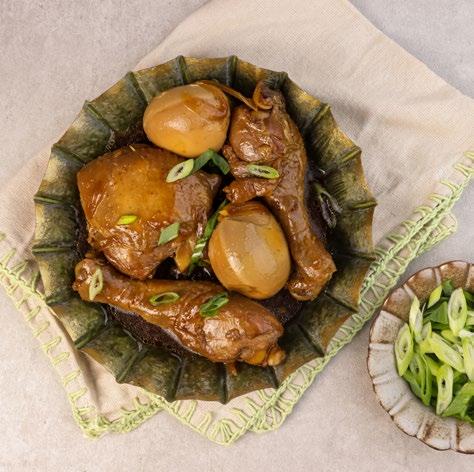
CHICKEN ADOBO
Recipe Submitted by: Geraldine
Filipino adobo traces its origins to pre-colonial times when indigenous Filipinos used vinegar and salt to preserve meat. With the arrival of the Spanish in the 16th century, adobo evolved as they introduced ingredients like vinegar, soy sauce, garlic, and bay leaves. The term “adobo” stems from the Spanish word “adobar,” meaning to marinate or pickle. Today, adobo remains a quintessential dish in Filipino cuisine, celebrated for its tangy-savoury flavour profile and regional variations across the Philippines. It reflects the blending of indigenous cooking methods with Spanish culinary influences, showcasing the country’s diverse culinary heritage.
Ingredients:
• 900g chicken thighs, cut into serving pieces
• 5 hard boiled eggs
• 480 ml chicken broth (approximately 2 cups)
• 75 ml dark soy sauce (approximately 5 tablespoons)
• 45 ml vinegar (approximately 3 tablespoons)
• 6 to 8 cloves garlic, crushed
• 1 tbsp whole peppercorn
• 4 dried bay leaves
• Salt to taste (optional)
• 45 ml cooking oil (approximately 3 tablespoons)
Method:
1. In a large bowl, combine chicken pieces, soy sauce, whole peppercorns, and half of the crushed garlic. Mix thoroughly to coat the chicken. Cover and marinate for at least 1 hour (longer for better flavour).
2. Heat oil in a large pot over medium heat. Add the remaining crushed garlic and cook until golden brown.
3. Add the marinated chicken along with the marinade. Stir and cook for 3 minutes.
4. Pour in the chicken broth and bring to a boil.
5. Add the bay leaves and pour the vinegar into the pot. Stir and let it boil again. Cover and simmer until the chicken is tender and the sauce has reduced to your liking.
6. Taste and add salt only if needed. Add the hard-boiled eggs and simmer for an additional 2 minutes (optional)
7. Transfer to a serving plate and serve hot.
Enjoy your delicious chicken adobo!
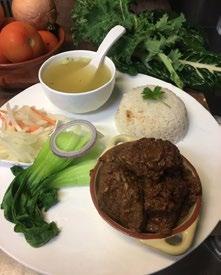
CHICKEN SALMI
Recipe Submitted by: Evan
This Mauritian recipe is history on a plate, reflecting more than three centuries of colonisation. Mauritius was first colonised by the Dutch, then the French and then the British, who abolished slavery in 1835, resulting in a wave of indentured labour from India, China, the Comoros, Madagascar, Mozambique, South-east Asia and Yemen. The result is a melting pot of cultures and diverse cuisines, with well-kept secret recipes of grandmothers and dishes made to the feeling and inspiration of the moment.
Chicken Salmi, also known as “Salmi poulet” is a delightful Mauritian-style chicken stew, inspired by the French classic “Coq au vin” combining rich flavours with tender chicken.
Ingredients:
• 800g chicken, cut into pieces
• 300ml red wine
• 4 tomatoes, cut into pieces
• 1 onion, chopped
• 4 cloves garlic, chopped
• 1 piece of ginger, chopped
• 2 cinnamon sticks
• 6 cloves
• 4 dry red chilies
• 4 sprigs of parsley
• 2 sprigs of thyme
• 4 strands of chopped coriander
• Salt and pepper
Method:
1. In a large pot, sauté the onion, garlic and ginger over medium heat in a little oil until the garlic begins to colour.
2. Add the chicken pieces and fry them, then add the tomatoes. Cook for 2 minutes.
3. Add the cinnamon, cloves, thyme, parsley, dry chili, pepper and red wine. Mix well and simmer covered for 20 minutes.
4. Add half a glass of water and salt. Simmer for an additional 25 minutes over low heat.
5. Taste and adjust seasoning if needed.
6. Remove from heat, sprinkle with chopped coriander, and let it stand for 10 minutes.
7. Serve with white rice and a lettuce salad.
CRISPY CHICKEN BAKE
Recipe Submitted by: Helen
Filipino cuisine is a rich tapestry woven from cultural influences and local traditions. Each dish tells a story, connecting people to their heritage and flavours of their beloved land. Crispy Chicken Bake is a comforting and hearty dish enjoyed by Filipino families during gatherings, celebrations and everyday meals. There are several variations to the recipe, some including additional ingredients such as potatoes, carrots and bell peppers to create a one-pan meal.
Helen shares her favourite version of Crispy Chicken Bake that she prepares for her children in Australia, adapting to their tastes and infusing her Filipino culture.
Ingredients:
• 1 barbecued or steamed chicken (meat removed from bones and chopped roughly)
• 3 sticks of sliced celery
• ¾ cup slivered almonds
• 1 ½ cups mayonnaise
• ½ cup cream
• 1 small onion (finely chopped)
• 1 tbsp lemon juice
• 1 cup grated tasty cheese
• 2 x 25 g packets of potato crisps (lightly crushed)
Method:
1. Combine the chopped chicken, sliced celery, silvered almonds, mayonnaise, cream, finely chopped onion, and lemon juice in a bowl.
2. Pour this mixture into a shallow ovenproof dish.
3. Combine the grated tasty cheese with the lightly crushed potato crisps and sprinkle mixture over the top of the chicken mixture in the dish.
4. Once baked, serve your Chicken Crispy Bake hot and enjoy the delightful combination of flavours and textures!
Remember to adjust the cooking time based on your oven’s temperature and the desired level of crispiness. Why not experiment with additional seasonings or herbs to make it your own!
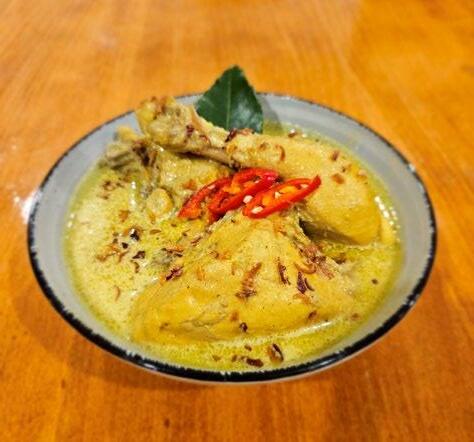
OPOR AYAM
Recipe Submitted by: Atik
Opor Ayam is an aromatic Indonesian chicken dish cooked in coconut milk, spices and herbs. It tastes delicately rich with fragrant herbs. Originally from Central Java, Opor Ayam is traditionally served at special occasions or celebratory events such as religious festivities like Eid al-Fitr and Christmas. It is usually served with rice cakes or steamed rice and is a great introduction to some of the classic Indonesian flavours.
Ingredients:
• 1 whole chicken cut into 8 pieces
• 1 stalk fresh lemongrass
• 4 kaffir lime leaves
• 2 bay leaves
• 500 ml water or chicken broth
• 300 ml coconut milk
• 1½ tsp salt (less if chicken broth is used)
• 20g palm sugar
For the Spice Paste:
• 3 cm fresh turmeric
• 3 cm fresh ginger
• 2 cm fresh galangal
• 1 tbsp coriander
• ½ tsp pepper
• ½ tsp cumin
• 6 cloves of garlic
• ½ onion
• ¼ tsp ground nutmeg
• 3 roasted candlenuts
Method:
For the Spice Paste
1. Blend all ingredients together in high speed blender for about 20 second so it’s well blended
For the Opor Ayam
1. Heat 2 tablespoons of oil in a pot and stir fry the spice paste until fragrant, about 2-3 minutes.
2. Add lemongrass, bay leaf, kaffir lime leaf and cook for another 2 minutes.
3. Add the chicken pieces and cook until chicken is no longer pink.
4. Add water or chicken broth and bring to boil
5. Add palm sugar and salt
6. Reduce the heat and simmer until liquid is reduced and chicken is cooked, about 25 minutes
7. Add coconut milk and continue heat for 10 minutes or until it boils
Transfer to a serving bowl and garnish with fried shallot.
CROCODILE BURGER
Recipe Submitted by:
Rameera
Crocodile meat is high in protein and low in fat and cholesterol. In fact, is has more protein than chicken breast and is chocka-block full of good fat Omega-3s. Often described as a cross between chicken and crab, it is a succulent white meat with a delicious and unique flavour.
Crocodile is growing in popularity and is part of a developing cuisine. The tail portion is often considered the best cut of crocodile meat and is best cooked in the same manner as lean pork or chicken. Aussies definitely know how to cook this kind of exotic food! So, for those people looking for something new to taste, here is an exciting burger recipe to try from Australian native cuisine!
Ingredients:
• 250g crocodile tail meat
• 1 tbsp garlic
• 100g barbecue sauce
• 100g tomato sauce
• 2 tbsp honey
• 1 tbsp light soy sauce
To Serve:
• 2 Hamburger buns
• Avocado
• Lettuce
• Tomato
• Beetroot
Serves 2
Method:
1. Combine the first five ingredients in a small bowl to create a seasoning.
2. Coat the crocodile tail meat in the seasoning and set in an oven tray, covering with aluminium foil.
3. Slow cook in preheated oven 160 degrees Celsius for 45 minutes.
4. To serve, spread the hamburger buns with mashed avocado. Top with the lettuce, tomato, beetroot and crocodile meat.
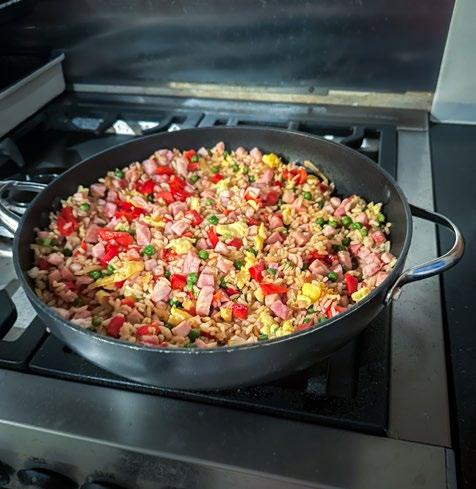
NANA’S FAVOURITE FRIED RICE
Recipe Submitted by: Jessi
Nana Jennifer’s fried rice is a Burnett family favourite, enjoyed by generations! It is the meal they eat together as a family, and they crave when they are feeling unwell. Perfect dished up on a cold Winter’s night.
Ingredients:
• 1 cup white rice
• 1 brown onion, diced
• ½ cup dehydrated peas
• ½ of a red capsicum, diced
• 1 tbsp soy sauce
• 500g bacon, diced
• 2 eggs, beaten
• Olive oil
Serves 4
Method:
1. Boil water in a saucepan
2. Add 1 cup of white rice, cook for 20 minutes Tip: Best if you can leave the cooked rice in the fridge overnight. That way it isn’t tacky.
3. Into a frypan cook 500 grams of diced bacon, add 1 diced onion and cook until translucent. Then add dehydrated peas and diced capsicum.
4. Once cooked put into a container and cool down in the fridge.
5. On the side beat the eggs, then fry in a small separate fry pan. Once cooked take from the fry pan and dice the egg. Place aside in the refrigerator.
6. Stir soy sauce into rice thoroughly. Tip: until the rice turns a light brown colour or to taste.
7. Gradually add the extras to the rice which has cooled down in fridge. Extras can be added or taken away for your taste.
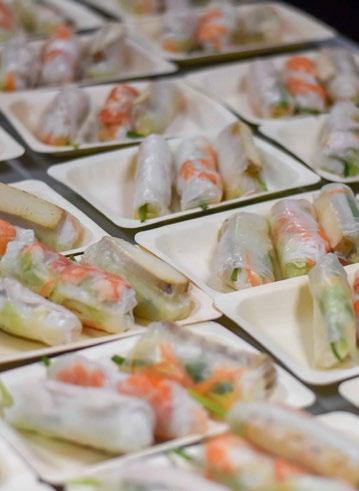
VIETNAMESE FRESH SPRING ROLLS (GOI CUON OR NEM CUON)
Recipe Submitted by: Chang
In all three of Vietnam’s regions, Goi cuon, also known as Nem cuon, is a favourite meal. There is hardly a set recipe; there are numerous ways to prepare it. This classic Vietnamese spring roll recipe combines tender pork pieces, fresh vegetables, and shrimp with an incredibly flavourful hoisin and peanut dipping sauce. I enjoy making this version, filled with bright and fresh flavours, for family and friends.
Ingredients:
• Rice paper (Bánh tráng) wrapping
• Thin rice noodles, or rice noodles
• Carrots, cucumbers, and leafy lettuce
• Avocado (if you like)
• Fresh herbs (such as cilantro, mints, and chives)
• Boiled shrimp
• Boiled sliced pork, ideally from the belly
Method:
Preparation
1. Cook the rice noodles according to package instructions
2. Slice the boiled pork
3. Boil the shrimp
4. Wash and prepare the lettuce, herbs and other vegetables
Soak the Rice Paper
1. Fill a shallow dish with warm water
2. Dip each side of the rice paper wrapper into the water for a few seconds until it softens
Preparation
1. Lay the softened rice paper on a flat surface
2. Add a small amount of rice noodle in the centre
3. Layer on top: halved cooked shrimp, cucumber and carrot juliennes, fresh mint, cilantro etc, slices of pork
4. Fold the sides of the rice paper over the filling
5. Tightly roll from the bottom, forming a snug cylinder
Serve the spring rolls at room temperature with a side of peanut dipping sauce
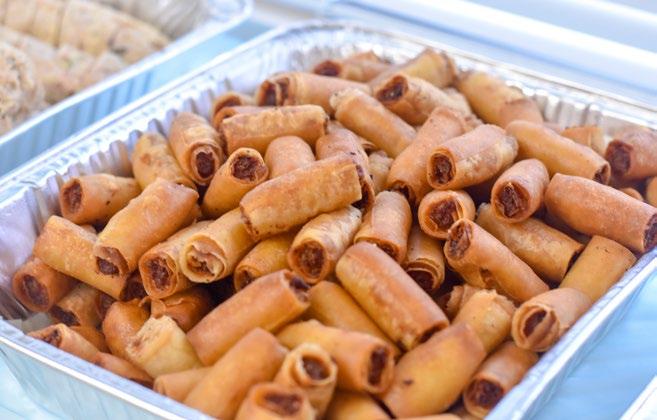
FRIED SPRING ROLLS
Recipe Submitted by: Arleen
Spring rolls bring together a mixture of meat and shredded vegetables to create a delicious savoury snack. Arleen shares her spring roll recipe, learnt in the heart of Southeast Asia in the Philippines. Filipino cuisine includes a mix of Asian and Western influences, carrying with it much history, variety and ingredients unique to the country. Arleen’s spring rolls have been enjoyed by family and friends across the Gladstone community and this simple recipe will have you enjoying them in no time!
Ingredients:
• 500g minced pork
• 1 ½ cups shredded cabbage
• 1 ½ cups shredded carrots
• 1 ½ cups minced round beans
• 1 ½ cups minced potato
• 250g beansprouts
• 2 cloves minced garlic
• 1 large minced onion
• 2-3 tbsp cooking oil
• Salt
• Ground pepper
• Soy sauce
• Spring roll pastry wrappers
Method:
1. Heat oil in pan. Add garlic, onion and mix until aromatic
2. Add minced pork to the pan and cook, breaking it up as you go until it turns white
3. Add minced potato to the pan and mix until it becomes soft
4. Add carrots and round beans to the pan, cooking for 3 minutes
5. Add shredded cabbage and beansprouts to the pan
6. Add soy sauce, salt and pepper to taste, mix for a few minutes then remove pan from heat to avoid mixture going soggy
7. Wait for it to really cool down and remove excess water
To wrap
1. Lay the pastry wrapper flat and add desired amount of filling, wrap it sealing the wrapper with water
2. You can deep fry or air fry the spring rolls
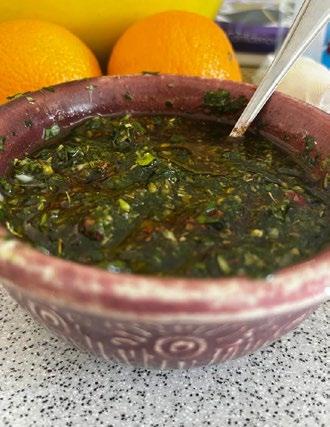
CLASSIC CHIMICHURRI SAUCE
Recipe Submitted by: Carolina
Chimichurri is a quintessential part of Argentine cuisine, often referred to as the “soul” of Argentine BBQ (asado). Its origins are somewhat mysterious, but it is believed to have been brought to Argentina by Basque settlers in the 19th century. The name “chimichurri” might even derive from the Basque word “tximitxurri,” which means “a mixture of several things in no particular order.”
For Argentinians, chimichurri isn’t just a sauce; it’s a tradition and a beloved accompaniment that enhances the flavors of their world-renowned grilled meats. It is a symbol of Argentina’s rich culinary heritage and a must-have at any authentic Argentine BBQ gathering!
Ingredients:
• 1 cup fresh flat-leaf parsley, packed
• 1/2 cup fresh cilantro (optional, can be substituted with more parsley)
1. Prepare the Herbs: Wash and dry the parsley, cilantro, and oregano. Finely chop the parsley, cilantro, and oregano leaves.
2. In a medium bowl, combine the chopped parsley, cilantro, oregano, and minced garlic. Add the olive oil and red wine vinegar or balsamic. Stir in the red pepper flakes, salt, and black pepper.
3. Blend (optional): For a smoother consistency, you can pulse the mixture in a food processor or blender until the desired texture is achieved. Be careful not to over-process; chimichurri should still have some texture.
4. Taste the chimichurri and adjust the seasoning as needed. Add more salt, pepper, or red pepper flakes according to your preference.
5. Let It Rest: For the best flavour, let the chimichurri sit for at least 30 minutes before serving to allow the flavours to meld together.
Chimichurri is traditionally served with grilled meats, such as steak, chicken, or fish. It also makes a great marinade or can be drizzled over vegetables, pasta, or even used as a spread for sandwiches.
MINI VEGETABLE MUFFINS
Recipe Submitted by: Lauren
Lauren and her children relocated to the beautiful Gladstone Region 15 years ago, a safe haven for them. When her children started school, Lauren created this recipe as a cheap and healthy snack. Her children loved them in their lunchboxes and as after school snacks. They can be frozen and pulled out as needed. Now Lauren’s kids are grown, she still makes the muffins for them at parties. They are a hit with all ages!
Ingredients:
• 3/4 cup of grated carrot
• 3/4 cup of grated zucchini
• 3/4 cup of grated butternut pumpkin
• 3/4 cup of grated mushroom
• 3/4 cup of grated cheese
• Fresh chives
• 2 cups of self-raising flour
• 3 eggs
• 1/3 cup of milk
• 1/2 tsp of garlic powder
• 1/2 tsp of onion powder
• Salt and pepper to taste
Makes approx. 16 muffins
Method:
1. Mix veggies and cheese together. Add flour and mix it through veggie mix.
2. In a separate bowl mix egg and milk with garlic and onion powder, salt and pepper.
3. Mix wet ingredients with veggie mix bit by bit, making sure not to put too much liquid in.
4. Add chopped chives and mix through.
5. Put in greased mini muffin trays. (I spray with oil).
6. Place in preheated oven on 180 degrees for approx. 20 minutes. When golden brown and skewer comes out clean, they are cooked. They freeze well.
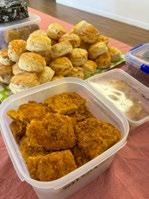
GLUTEN FREE PUMPKIN SCONES
Recipe Submitted by: QCWA
Is there anything better than a freshly baked scone, enjoyed still warm from the oven with strawberry jam and whipped cream? A twist on the classic scone recipe, this pumpkin scone recipe is also gluten free! Submitted by the CWA from their trusted recipe book, their scones and other home-cooked treats are a treasure of the Gladstone Region Community and remind many of their childhood, with hand-written recipes handed down through generations.
Ingredients:
• 2 cups gluten free self-raising flour
• 1/2 cup caster sugar
• 2 tbsp butter
• 1 egg
• 1 cup boiled and mashed pumpkin
Method:
1. Cream butter and sugar, add egg and mix well
2. Add pumpkin and mix well
3. Add flour and knead slowly until combined, or mix slowly with a dough hook mixer if you have one
4. Cut into scones and place on a paper lined tray
5. Bake in moderate oven (approx. 180 degrees Celsius) for 10-15 minutes until cooked
6. Serve with jam and cream
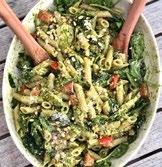
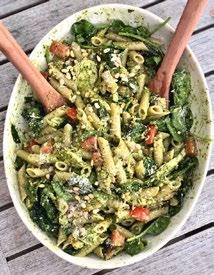
PESTO PASTA
Recipe Submitted by: Larah
Pesto is a traditional sauce from Genoa, in Italy’s northern region. Dating back to the 16th century, it is traditionally made with crushed garlic, basil and pine nuts, blended with parmesan cheese and olive oil. Bright and herby, the flavourful sauce is typically used for dressing pasta. Larah shares her Nonno and Nonna’s Italian recipe for Pesto Pasta.
Ingredients:
• Cherry tomatoes (to taste)
• Spinach and rocket (to taste)
• Baby mushrooms (to taste)
• 500g chicken breast (optional)
• Pine nuts (optional)
• 200g of classic basil pesto paste
• Parmesan cheese, for serving
• Olive oil for cooking
• 500g pasta
Method:
1. Boil water for pasta, once boiled and bubbling add pasta to pot and cook for 6-8 mins.
2. Heat olive oil in a pan and cook the diced chicken until golden.
3. Remove chicken from pan and apply mushrooms and pine nuts, cook until mushrooms are softened.
4. Combine the pasta with chicken, mushrooms and pine nuts with cherry tomatoes and spinach and rocket in the pasta pot.
This Australian dessert is indulgent but delicate and soft. It is perfect after a rich meal or as a secret late-night snack!
Ingredients:
• 2 x Aeroplane creamy mousse mix
• 1 x raspberry jelly
• 1 x 400 ml can of coconut cream, chilled
• Whipped cream
• Dark chocolate, some small pieces and some grated for garnish
Method:
1. Combine jelly crystals and boiling water in a medium bowl. Stir until fully dissolved. Cover and refrigerate until the consistency of a thick syrup (approximately 1-2 hours).
2. Using an electric mixer, beat coconut cream with slightly set jelly on high speed for approximately 5 minutes or until doubled in volume. Should be thick and glossy.
3. Spoon into 6-8 individual glass serving bowls (depending on the ratio of flummery to mousse you wish to have), cover and refrigerate for a further 2 hours or until set firm.
4. Once the flummery is set, sprinkle contents of mouse mix sachet over milk. Beat on MED-LOW speed for 1 minute with an electric mixer, scraping down the sides of the bowl as you mix. Increase speed to HIGH and beat for a further 4 minutes, until the mousse is light and fluffy.
5. Spoon mousse over flummery, cover and refrigerate for 1 hour or until set.
6. Just before serving, add a generous topping of whipped cream, topped with dark chocolate pieces and grated chocolate.
KIMBULA BUNS
Recipe Submitted by: Lasangi
Kimbula Buns are a typical Sri Lankan snack. No childhood in Sri Lanka is complete without eating this delicacy from the shops! Kimbula Buns, or Kimbula Banis as called in Sri Lanka, literally translates to “Crocodile bun”.
Lasangi assures us that they have nothing to do with crocodile other than their shape, they really do look like Crocodiles, don’t they?
Ingredients:
• 350g flour
• 7g instant yeast
• 25g butter
• 50g sugar
• 4g salt
• 1 egg
• 3 tbsp milk powder
• 150ml – 175ml lukewarm water
Method:
1. Place all the dry ingredients into a mixing bowl and mix until combined.
2. Add water to the flour mixture and mix until a clump of dough is formed.
3. Add the butter and knead the dough for 8-10 minutes.
4. Make the dough into a ball and apply a coat of oil, cover with a cling wrap and keep it in a warm place until doubled in size.
5. Once doubled in size punch the dough down to remove the air bubbles.
6. Put the dough on to a clean tabletop and flatten by using a roller. Divide into 8 pieces creating triangular shapes.
7. Flatten the pieces even thinner by using a roller, then using your hands roll the dough up from the base of the triangle to the tip, creating the Kimbula shape.
8. Now let it rest for 30 mins.
9. After 30 mins gently apply sugar syrup or egg wash over the buns.
10. Place it on a baking tray lined with baking paper.
11. Now sprinkle with sugar and bake in a preheated (180 degrees Celsius) for about 15- 20 mins until golden in colour.
12. Take it out of the oven & brush with sugar syrup, let it rest 10mins before enjoying.
RUSSIAN EASTER CAKEKOOLICH
Recipe Submitted by: Marguerita
Easter is an important celebration in the Russian Orthodox year. This Easter Cake (Koolich) is an integral part of the festive food. It is made tall to signify that “Christ has Risen” which is the greeting shared between people when they meet on Easter Sunday. Koolich is eaten with a sweet cheese dish made from cottage cheese or ricotta, depending on what is available. This dish is called Paska which translates as Easter in Russian.
Marguerita learned to make this cake working alongside her mama and enjoys the traditions of her family who came to Yarwun in the early 1950’s. The joy that comes with preparing and consuming Koolich is a big part of her life and Marguerita is proud to share this example of Russian food with the Gladstone Region community.
Ingredients:
Russian Easter Cake (Koolich)
• 1 cup lukewarm milk
• 1 ½ tbsp of dry yeast
• ¾ cup sugar
• ½ cup butter (melted)
• 3 eggs, keeping two half eggshells for decoration
• 1 tsp vanilla
• 4 ½ cups plain flour
• ¼ cup sour cream
Optional
• ½ cup sultanas
• ¼ cup peel
• ¾ cups chopped walnuts
• My favourite additives are ¾ cups chopped macadamias and ¾ cups dried cranberries. These are not traditional additives, but they do taste good.
Method:
Russian Easter Cake (Koolich):
1. Grease and line your tins with grease proof paper.
2. Preheat oven to 150 degrees C (fan forced).
3. Dissolve the yeast in the milk. Make sure milk is lukewarm. If it is cold the yeast will not dissolve and wont multiply. If it is too hot the milk will kill the yeast. Add 1 tablespoon of sugar and 1 cup of flour and mix well. Cover and move to a warm place. Leave for about ½ hour or until the mixture starts to bubble and rise.
4. In another bowl beat the eggs until well combined, then add the cooled, melted butter, sour cream and vanilla. Mix well.
5. Add the yeast mixture to the egg mixture. Add the remaining flour and mix everything with a sturdy wooden spoon, (or dough hooks) until everything is well combined and the dough starts looking elastic or stretchy.
6. Cover and leave in a warm place until dough rises to twice its original volume. This could take up to 1 ½ to 2 hours.
7. Punch down the dough and mix in the additives, in this case, macadamias and cranberries. Separate into pieces to fit into your tins so the tins are only half full. This allows room for the dough to rise.
8. Cover each tin with a towel and allow to rise in a warm place for about 30 to 45 minutes. When the dough has risen almost to the top of the tins, place the tins into the preheated oven. The cooking time will depend on the size of your tins. I use a skewer to ensure cakes are cooked through.
9. When ready, remove the tins from the oven and tip the cakes out onto cooling racks.
10. Decorate when cool
Ingredients:
Paska
• 375g ricotta cheese
• 2 egg yolks
• 100g unsalted butter (softened)
• ¼ cup granulated sugar
• rind of 1 lemon (finely grated)
• 1 tsp vanilla
• ¼ cup cream
• ½ cup chopped glace fruits (optional) Decoration
• Cotton crochet doily
• Icing mixture
• One neatly broken eggshell that has been washed to remove inner film, and dried
• A couple of toys, fluffy easter chicks
11. Decoration: Cake 1 - Make a runny slurry using icing mixture and water. Lower your doily into this slurry. Squeeze out excess and drape the doily evenly onto your cake. Allow to dry and set. Make a small amount of stiff icing and use this to attach the chick and both parts of the eggshell on top of the doily. Check the photo to find my arrangement of decorations.
12. Cake 2 – Make a mixture of icing and water that is runny enough to run down the sides of your cake but not so runny that it will all run off. Once again, check the photo to see how the icing should look on your cake. Sit a fluffy, toy Easter chick on the top of the cake as shown in picture. You might need some more stiff icing to attach the chick firmly.
Paska
1. Line a colander with clean cheesecloth
2. Beat cheese with egg yolks until smooth
3. Cream butter and sugar. To this add lemon rind, vanilla and cream. Mix well.
4. Add glace fruit if using.
5. Transfer mixture to the lined colander which has been set over a bowl. Allow the mixture to drip for 24 hours in fridge. This makes the Paska firmer.
6. Discard the accumulated liquid.
7. Tip the firm Paska onto a serving plate.
To Serve:
Cut one Koolich at a time. Remove decorations. Lay Koolich onto its side and start slicing the cake from the bottom up to the top. Koolich is good served spread with butter or jam. It is particularly delicious served in the traditional way, with a slice or a spread of Paska. If your Paska is firm, slice it. Otherwise, you can spread it onto a piece of Koolich.
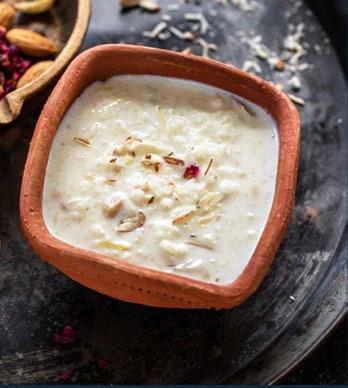
KHEER
Recipe Submitted by: Priyae
Kheer was a popular dish in ancient India and is still enjoyed over two thousand years later! It is a comfort food, often enjoyed in happy moments and when celebrating good news. Enjoyed warm or cold, Kheer is always a dish that is served when there’s visitors at home.
Ingredients:
• 1/4 cup rice, I used basmati rice or use 1/3 cup for a thicker kheer
• 1 tsp ghee also known as clarified butter
• 3-4 green cardamom pods slightly crushed
• 1 litre whole milk
• 4-5 tbsp sugar, adjust to taste
• 3 tbsp chopped nuts (I use chopped cashews & almonds)
• 1 ½ tsp rose water (optional)
Method:
1. Rinse the rice until water turns clear. Then soak the rice in enough water for 20 to 30 minutes, then drain the rice using a colander and set aside.
2. Heat a heavy bottom pan on medium heat. Then add 1 teaspoon of ghee to it and then add the soaked & drained rice. Also add 3-4 crushed green cardamom pods.
3. Toss the rice with the ghee and cardamom for 1 to 2 minutes, stirring constantly until aromatic.
4. Add the milk to the pan and stir well. Set heat to medium-high.
5. Let the milk come to a boil, this will take around 10-12 minutes. Stir in between so that milk does not stick to the bottom of the pan.
6. Once the milk has come to a boil, reduce the heat to low and let the kheer cook for around 25 minutes. Stir every 2 minutes or so. The milk will reduce considerably after 25 minutes and the kheer will look thick and the rice will be completely cooked. If you want super thick kheer, cook for 15 more minutes at this point.
7. Add in the sugar and mix. Also add in the nuts.
8. Cook the kheer for 5 more minutes after adding the sugar and nuts. The sugar should dissolve completely. Don’t worry if your kheer doesn’t look very thick at this point. It will continue to thicken as it cools down.
9. Remove pan from heat. Stir in rose water (if using). Garnish with more nuts and serve kheer warm or chilled. I love mine chilled and serve it after chilling it in the refrigerator for 4 to 5 hours.
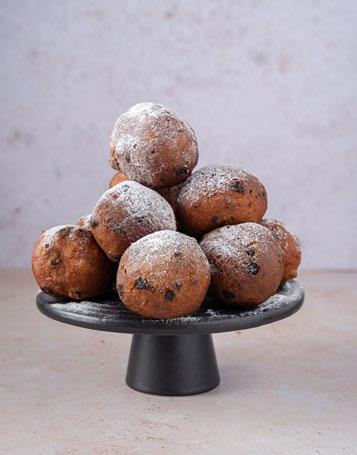
OLIEBOLLEN
Recipe Submitted by: Mirjam
Oliebollen are traditionally made and enjoyed as a New Year’s treat in the Netherlands. The indulgent Dutch treat is readily available from many pop-up street vendors throughout the country in the lead up to the festive period. Fresh cooked Oliebollen are warm and gooey, creating a sweet scent through the air.
Ingredients:
• 2 x 7 g sachets dried yeast
• ¼ cup caster sugar
• 3 cups plain flour
• ¼ tsp salt
• 1 cup milk
• 2 eggs, lightly beaten
• ⅓ cup currants
• ½ cup raisins
• OPTIONAL: 1 granny smith apple, peeled, finely chopped (you do not need an apple in your oliebollen)
• Vegetable oil, to deep-fry
• Icing sugar, to dust
Method:
1. Place yeast, sugar and ½ cup lukewarm water in a small bowl and stir to dissolve.
2. Set aside for 10 minutes or until mixture bubbles.
3. Place flour and salt in a large bowl and make a well in the centre. Pour milk, eggs and yeast mixture into the well and stir until combined.
4. Add currants, raisins (and apple if you want this), and stir until well combined. Cover with plastic wrap and set aside in a warm, draught-free place for 1 hour or until dough doubles in size.
5. Fill a deep-fryer or a large saucepan one-third full with oil and heat over medium heat to 160°C (or until a cube of bread turns golden in 40 seconds). Get 2 spoons, dip them in the hot oil (the batter will slide easier off the spoon this way). Use one spoon to get a ball of dough, use the other spoon to get the dough off the spoon and into the oil. Do not ‘drop’ the ball, the oil is hot! Gently slide the ball into oil and deep-fry, turning halfway, for 5 minutes or until golden and cooked through. Remove with a slotted spoon and drain on paper towel.
6. Dust the oliebollen generously with icing sugar and serve immediately.
PEPPERMINT CRISP TART
Recipe Submitted by: Kristy
Peppermint crisp tart is a trifle no-bake fridge tart that is layered with tennis biscuit, cream, caramel, and peppermint crisp chocolate. This is a fabulous fridge tart. It is the perfect dessert for a backyard BBQ, braai or dinner party. All you need is a packet of biscuits (Tennis biscuits are the classic South African biscuits, but Arnott’s Nice work perfectly too), whipped cream, condensed caramel (a can of Nestle Top N Fill) and Peppermint Crisp chocolate.
Ingredients:
• 600ml thick cream
• 1 tin of Nestle Top N Fill Caramel
• 2 packs of tennis biscuits (Arnott’s Nice biscuits)
• 3 bars of Nestle Peppermint Crisp chocolate
Method:
1. Whip the cream in a large mixing bowl until soft peaks form.
2. Add the caramel and beat through.
3. Finely grate the chocolate and add 80% of the chocolate to the cream and caramel mix by folding it in.
4. Place a layer of biscuits onto the base of a square or rectangular baking dish.
5. Layer with the filling then repeat with another layer of biscuits, and filling.
6. Sprinkle left over chocolate on top
7. Refrigerate overnight - the biscuits will soften to make a chilled dessert.
THANK YOU
A heartfelt thank you to all who contributed recipes to A Taste of the Gladstone Region cookbook. Your generosity in sharing your treasured family recipes has made this cookbook a true reflection of our community’s rich cultural heritage. We are grateful for your support.
Photo Credit: Rikki Razon
PAGE 28
TASTE OF
REGION AN INITIATIVE OF GLADSTONE REGIONAL COUNCIL AND GLADSTONE REGION NEIGHBOURHOOD CENTRE