
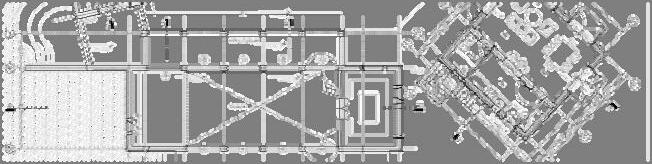
The way the building sits on the site
ODD COURSE 1 S
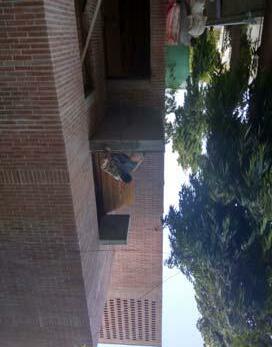
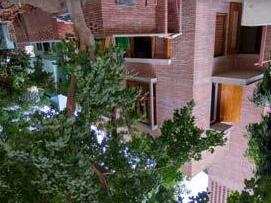
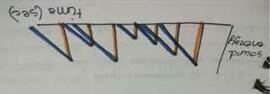
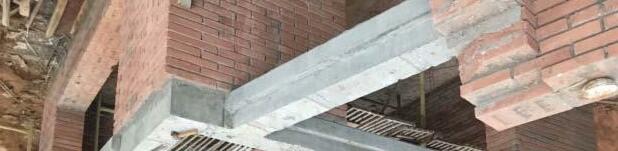
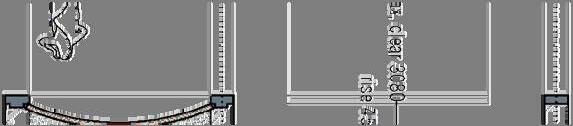
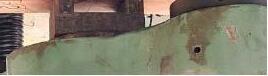
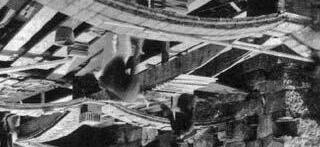
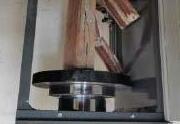
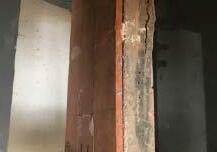
Image from site of existing balcony
brick jali with MS railing
OPTION 2 ITERATION
1. Exploring options for a light railing to allow emphasis on exposed brickwork.
2. Integrating bamboo to relate it with the compound wall bamboo.
3. Making options with varying spacing and density.
4. Felt too flimsy hence did not go ahead with this option.
Key pointers:
1. Using brick jali to relate it to the tower.
2. MS railing added to give it lightness.
3. Made options with brick bonding and varying MS member spacing.
4. Seems like a hybrid solution that gives us a fitting solution to the existing context.
BRIEF:
To make a suitable railing for the balcony.
Learning:
What clues can the existing built context give to the design. How do you play with the visual perception.
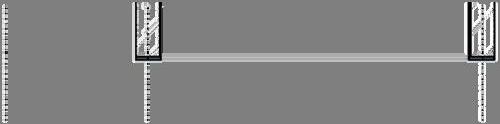
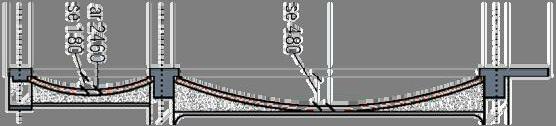
EVEN COURSE - 2, 8 S
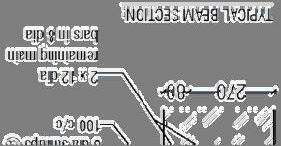
75 75
75
S 75
to be filled within 75mm gap of wall
BRICK
295x110MM BRICK 350x110MM BRICK
75mm x 38mm thk wooden handrail 25mm x 5mm thk MS horizontal flat section screwed to wooden handrail
16mm x 16mm square MS rod chemically welded into coping
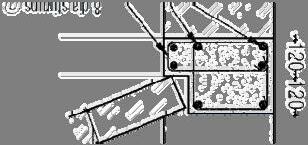
8mm from 2nd brick course 8mm thk skirting running around the balcony 75 75 COURSES PLAN SCALE: NTS COURSES PLAN SCALE: NTS
placed at the center of the 110mm thk brick wall cement mortar filled to match slab line S 75 75
FLY ASH BRICK MASONRY EXPOSED RED BRICK WALL
5 courses of brick jali
thk cement board to maintain 15mm mortar thk throughout
SECTION
SCALE: 1:10
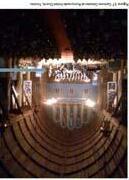
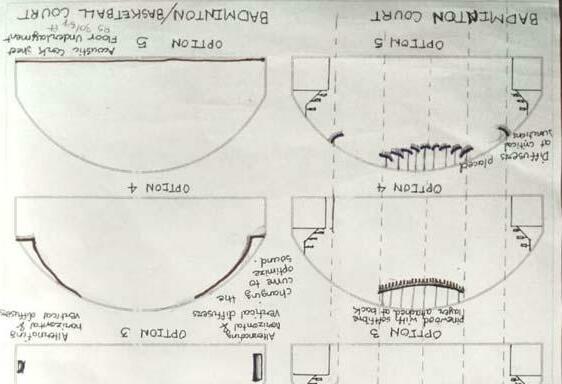
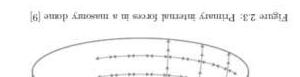
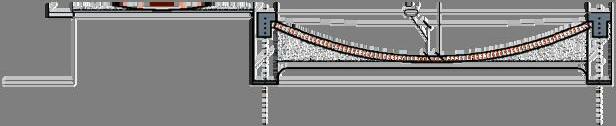
Acoustics in dome:
Key pointers:-
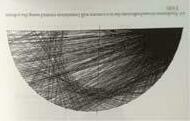
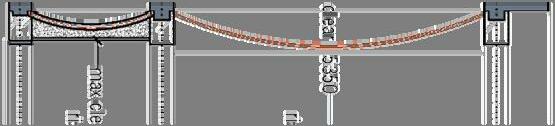
Vault is one of the most inconvenient forms in acoustics. A convex wall will diffuse sound in muliple directions. A concave wall will have a focal point which exists where all reflection of sound are concentrated.
Resolution of echo (acoustical defect):

Two basic considerations:
Fig 1: sound tragetory in a dome
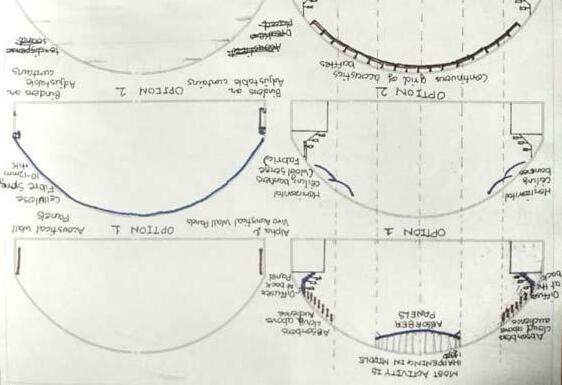
(reference: Architectural Acoustics)

Realising a homogenous dissipation of sound energy in a room (diffuse field). Realising the decay of sound energy (reverberation time) at the optimum level.
MATERIAL STUDY:

Understanding the handling and feasibility of each material through discussions with consultants
BRIEF:
To find design strategies to minimize echo in a large span vault.
Learning:
To understand the complexity of the subject matter through examples in history and looking at what strategies were applied there.
How to apply strategies which effectively reduces the echo but does not hinder the function or visual aesthetics of the space.
rockwool absorber on the inside aluminium frame grid with cork sheet covering crucial 1/3rd of the dome


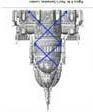
United church, Toronto Proportion with sound propogation
using passage and mezzanine and recessed window to break the sound
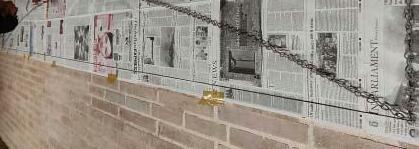
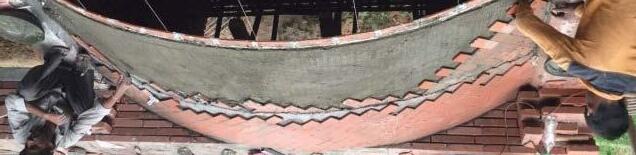
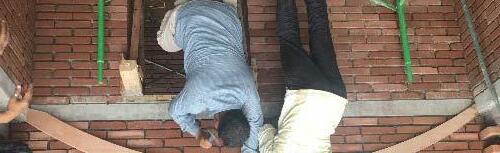
PROCESS:


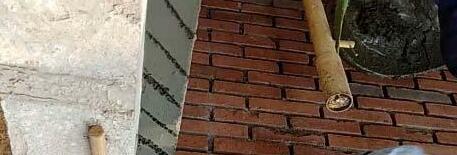
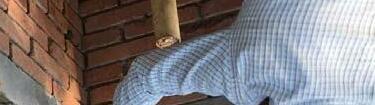
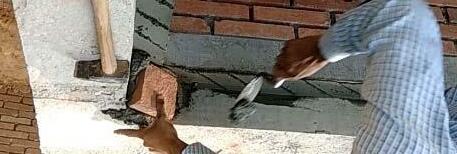
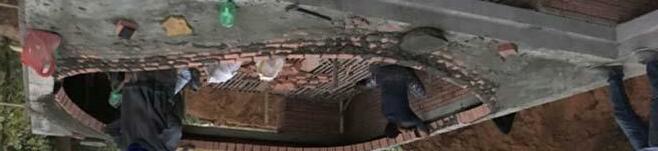
Two masons working at the same time going concentrically inwards Progress


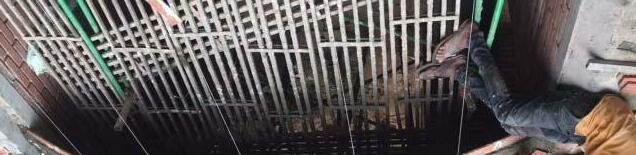
LARGER IDEA:


ROHAK DOME


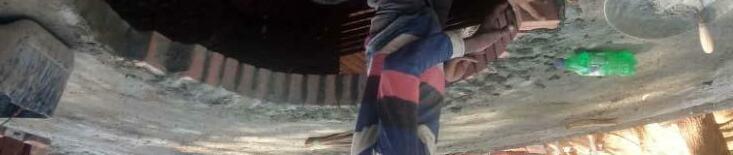


These are shallow brick domes that are used as a conventional roofing technique in villages in Rohtak. They are almost flat-so flat that the curve is hardly noticeable. Another attractive feature of this i hi i h i hi d i h . an effort to encourage environmental, social and economic sustainability. construction technique is that it uses no shuttering and is hence simple and highly economical albeit depending heavily on knowledge, intuition and skill.

Share our explorations in Timbrel/ Catalan Vaulting and RothakDome as an alternative roofing technique that minimizes the use of steel and concrete The larger goal is to disseminate this knowledge and technique as


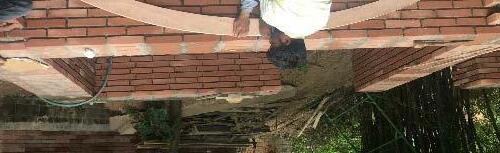
 Ground floor of office block in Alluva Marking on the lintel the brick dimension along the central axis
Placing the bricks with mortar based on the marking and the rise on intuition
Mason standing on dome
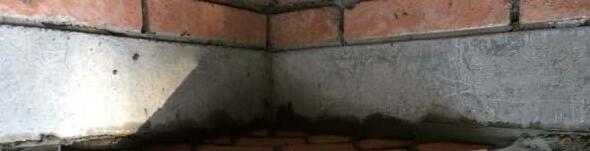
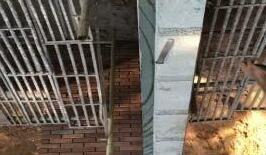
Doubly curved edge of the corner
of the dome from the 4 corners Placing the brick vertically to break the monotony Completed dome with a span of 4.56 x 5 m!
Ground floor of office block in Alluva Marking on the lintel the brick dimension along the central axis
Placing the bricks with mortar based on the marking and the rise on intuition
Mason standing on dome
Doubly curved edge of the corner
of the dome from the 4 corners Placing the brick vertically to break the monotony Completed dome with a span of 4.56 x 5 m!
THEORY AND RESEARCH:
EXPERIMENTS: TESTING
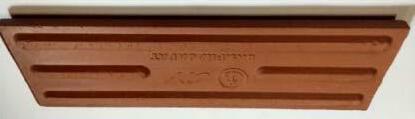
Sample of tile used in construction


Boston Public Library, 1889
Gustavino’s contracting company published


Conducted 4 experiments in the course of 2 weeks in the


office and documented the study in terms of a blog. information of capacity of a tile unit.. Compression and flexural tests were performed at the age of 28 days. The conclusion of the test was that the tile vaulting.
A study was conducted on getting contracting company published all of its work in its book –‘Cohesive Construction’ and this knowledge has helped us understand the mechanism of Timbrel vaulting They have conveyed their
AIM OF THE EXPERIMENTS:
With these experiments, we aim to understand the following with respect to timbrel vault construction:
1.Thetechnique and practical aspectscf construction
2.Theeconomicsof such construction
3.Thestructural aspectsof such construction


had a compression capacity similar to a M20 concrete and could be used for construction.


tstypeocostucto
understanding and calculation in simple language which can truly serve as a start point for anyone who really wants to understand this type of construction.
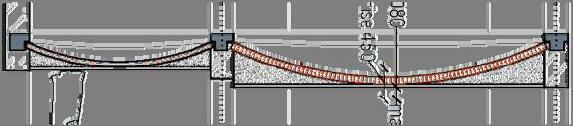
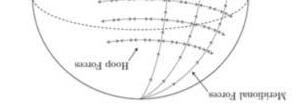
STRUCTURAL ANALYSIS OF MASONRY VAULTS

Calculating the vertical and horizontal components of the forces and deriving a thickness required for the form and geometry.
PROCESS:
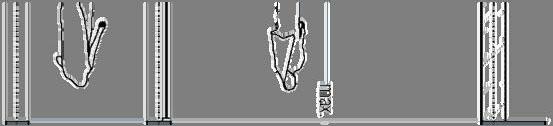
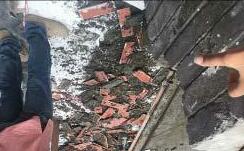
Deriving curve from catenary Failure due to shuttering


Bending moment Flexural testing


Compression testing


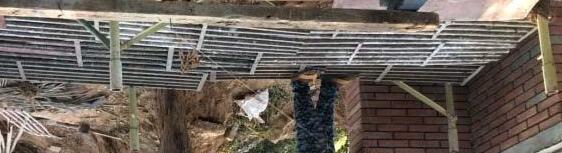
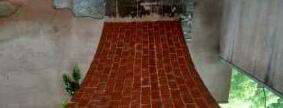
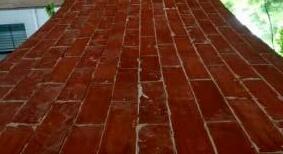
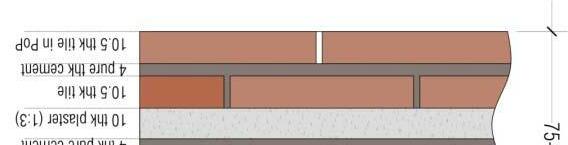
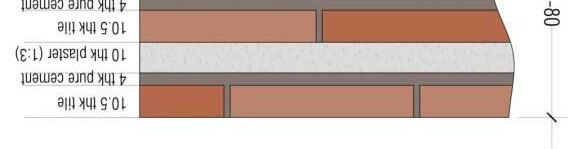
Attaching 25mm ply for guideFirst layer in quick setting mortar (used PoP)

Subsequent layers in cement mortar


Tile Vault spanning ~5m without steel
Tile vault showing the different layers along with the guides
g),gq resource usage.With adequate knowledge and technique, a mason should be able to construct his own roof.

TIMBREL/ CATALAN VAULTING
Atimbrel or catalan vaultingis a thin membrane masonry vault consisting of multiple layers of thin bricks/clay tiles held


LARGER IDEA: The elimination of formwork and the thinness (compared to regular masonry vaults) results in lower thrusts, hence the requirement of smaller buttresses (or ring beams), making this technique efficient in terms of pyy together with mortar and built without any formwork or centering.
TECHNIQUE OF CONSTRUCTION:
The first layer of bricks (preferably thin, light and porous) is laid with a fast setting mortar with guides to help obtain the curve in air. The first layer serves as the formwork for the


successive layers laid in cement mortar.It is important to break the joints between the successive layers to reduce chances of cracking.


mm thick granite river finish stone as window frame on all four sides
4
5
2
3
600mm x 300mm white vitrified tiles on straight wall with 3mm groove filled with cement grout of light grey color
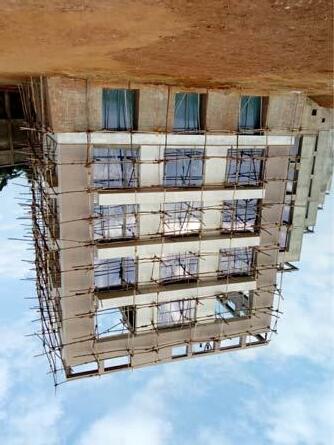
SITE:
Fluent Grid is a I.T. office in Vishakapatnam in Andhra Pradesh and comprises of 5 blocks with 5 floors connected to 4 circular service blocks. The building is placed on top of a hill and is oriented to provide maximum view towards the sea while blocking the south with the service core.
BRIEF:
To integrate flooring and partition design with existing civil work construction of toilet.
Learning:
Importance of placement of start points and where to take residue for the flooring lines to match the drop points.
150mm x 20 mm thick granite river finish stone as window frame on all four sides
x 25mm mosaic tiles on curved wall with cement groove of light grey color
1200mm x 600mm river finish granite flooring with 3mm groove filled with epoxy grout of light grey color
single mala plaster with p.o.p punning to finish level
single mala plaster with p.o.p punning to finish level
600mm x 300mm white vitrified tiles on straight wall with 3mm groove filled with cement grout of light grey color
8mm groove
8mm groove
8mm groove
25mm x 25mm mosaic tiles on the curved wall with cement groove of light grey color (PICCOLO tiles as per selection)
8mm groove TYPE
single mala plaster with p.o.p punning to finish level
12mm x 12mm groove in plaster
150mm x 20 mm thick granite river finish stone as window frame on all four sides
25mm x 25mm
mosaic tiles on the curved wall with cement groove of light grey color (PICCOLO tiles as per selection)
600mm x 300mm white vitrified tiles on straight wall with 3mm groove
12mm thk plaster
18mm thk river finish granite skirting
1200mm x 600mm river finish granite flooring with 3mm groove filled with epoxy grout of light grey color
W3l
plumbing
25mm x 25mm mosaic tiles on the curved wall with cement groove of light grey color (PICCOLO tiles as per selection)
600mm x 300mm white vitrified tiles on straight wall with 3mm groove filled with cement grout of light grey color
25mm x 25mm mosaic tiles on the curved wall with cement groove of light grey color (PICCOLO tiles as per selection)
12mm thk plaster
18mm thk river finish granite skirting
1200mm x 600mm river finish granite flooring with 3mm groove filled with epoxy grout of light grey color
Learning:
Relation of partition and flooring lines and how to provide a visual break through a well designed skirting. Providing essential information in drawing for ease of understanding and execution on site.
25mm x 25mm mosaic tiles on the curved wall with cement groove of light grey color (PICCOLO tiles as per selection)
Granite for flooring to match edge granite
75
75
River finished granite stone 8mm x 8mm deep groove granite to flush with plaster face
20mm thk river finish granite flooring
TYPICAL DETAIL-A - PLAN SCALE - 1:5
OUTSIDEINSIDE
12 mm tile drop
Gypsum false ceiling
Granite runs continuous till false ceiling
20mm thk River finished granite flooring
TYPICAL DETAIL-A - SECTION SCALE - 1:5
To plan and provide finishes drawing for skirting and external plaster of Fluent Grid.
Learning:
How to modulate depth in terms of rough and smooth texture.
To simplify the drawing for ease of understand and execution by combining similar details and providing legends whenever necessary.
end
on
8mm by 8mm groove in plaster 75 from F.F.L internal plaster line to flush with skirting line 20mm thk river finished granite skirting
*refer to flooring drawings for F.F.L.
1 on beam
8mm by 8mm groove in plaster
dripmould to be sloped outwards
internal plaster line to flush with skirting line 20mm thk river finished granite skirting 150
8mm by 8mm groove in plaster 75 from F.F.L
*refer to flooring drawings for F.F.L.
existing RCC slab internal plaster to stop at aluminium frame 150mm x 40mm thk wooden piece on all four sides
OUTSIDE
75 from F.F.L
internal smooth texture plaster line to flush with skirting line
8mm by 8mm groove in plaster
20mm thk river finished granite skirting
*refer to flooring drawings for F.F.L.
exisiting RCC slab
TYPICAL DETAIL DD' SCALE-1:5
F' F
drop texture 1 starts at column center
internal smooth texture plaster
RCC column
INSIDE
internal plaster stops at column center/texture 1
begins
drop
OUTSIDE INSIDE
TYPICAL DETAIL FF' PLASTER DETAIL SCALE-1:10
drop
river finished granite skirting
RCC column skirting stops at floor drop
tandoor skirting starts after floor drop
skirting flushed to granite stoneskirting line
granite stone on all 4 sides
SECTION BB' SKIRTING DETAIL SCALE-1:10
plaster without texture
OUTSIDE
smooth texture internal plaster
8mm x 8mm groove in wooden piece
PLAN AT LL'
INSIDE
8mm x 8mm groove granite stone on all 4 sides
plaster to be flushed with granite stone internal smooth texture plaster on wall
SECTION BB' PLASTER DETAIL SCALE-1:10
texture 1 stops at column center
skirting stops at floor drop
tandoor skirting with coping stone
LEGEND FOR DETAIL F AND DETAIL G:
PLASTER - INTERNAL SMOOTH TEXTURE
PLASTER - TEXTURE 1
SKIRTING - RIVER FINISH GRANITE
SKIRTING - TANDOOR
F' F DETAIL AT FF' SCALE-1:10
4mm groove in skirting
8mm x 8mm groove in plaster
tandoor skirting on circular planter
tandoor flooring
*refer to flooring plans for F.F.L
OUTSIDE INSIDE drop
TYPICAL DETAIL F SKIRTING DETAIL SCALE-1:10
DETAIL AT H
existing slab
SCALE-1:5
Learning:
L'
smooth texture internal plaster
8mm x 8mm groove in wooden piece
SCALE-1:10
texture 1 internal smooth texture plaster on wall
dripmould to be sloped outwards
8mm x 8mm groove in wooden piece 100 12 20
texture 1 to stop at frame
slope outwards
75 from F.F.L
150mm x 40mm thk wooden piece on all four sides
internal plaster line to flush with skirting line
8mm by 8mm groove in plaster
20mm thk river finished granite skirting
*refer to flooring drawings for F.F.L.
uniform thickness of texture 1 on wall and slab exisiting RCC slab
OUTSIDEINSIDE
SECTION LL'
To visualize in 3 dimension how the relation where the plaster and the skirting line meet. Providing plaster along with the skirting detail to understand the entire component from top to bottom and higlight where each of them ends.
SCALE-1:10