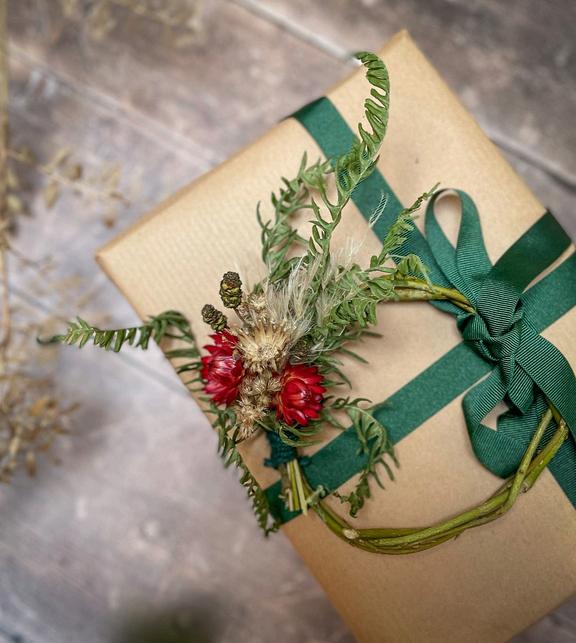
Now, once you’ve gathered your treasures, here are a couple of ideas to get creating ahead of the game. They will all keep perfectly well for Christmas and potentially several Christmases to come!
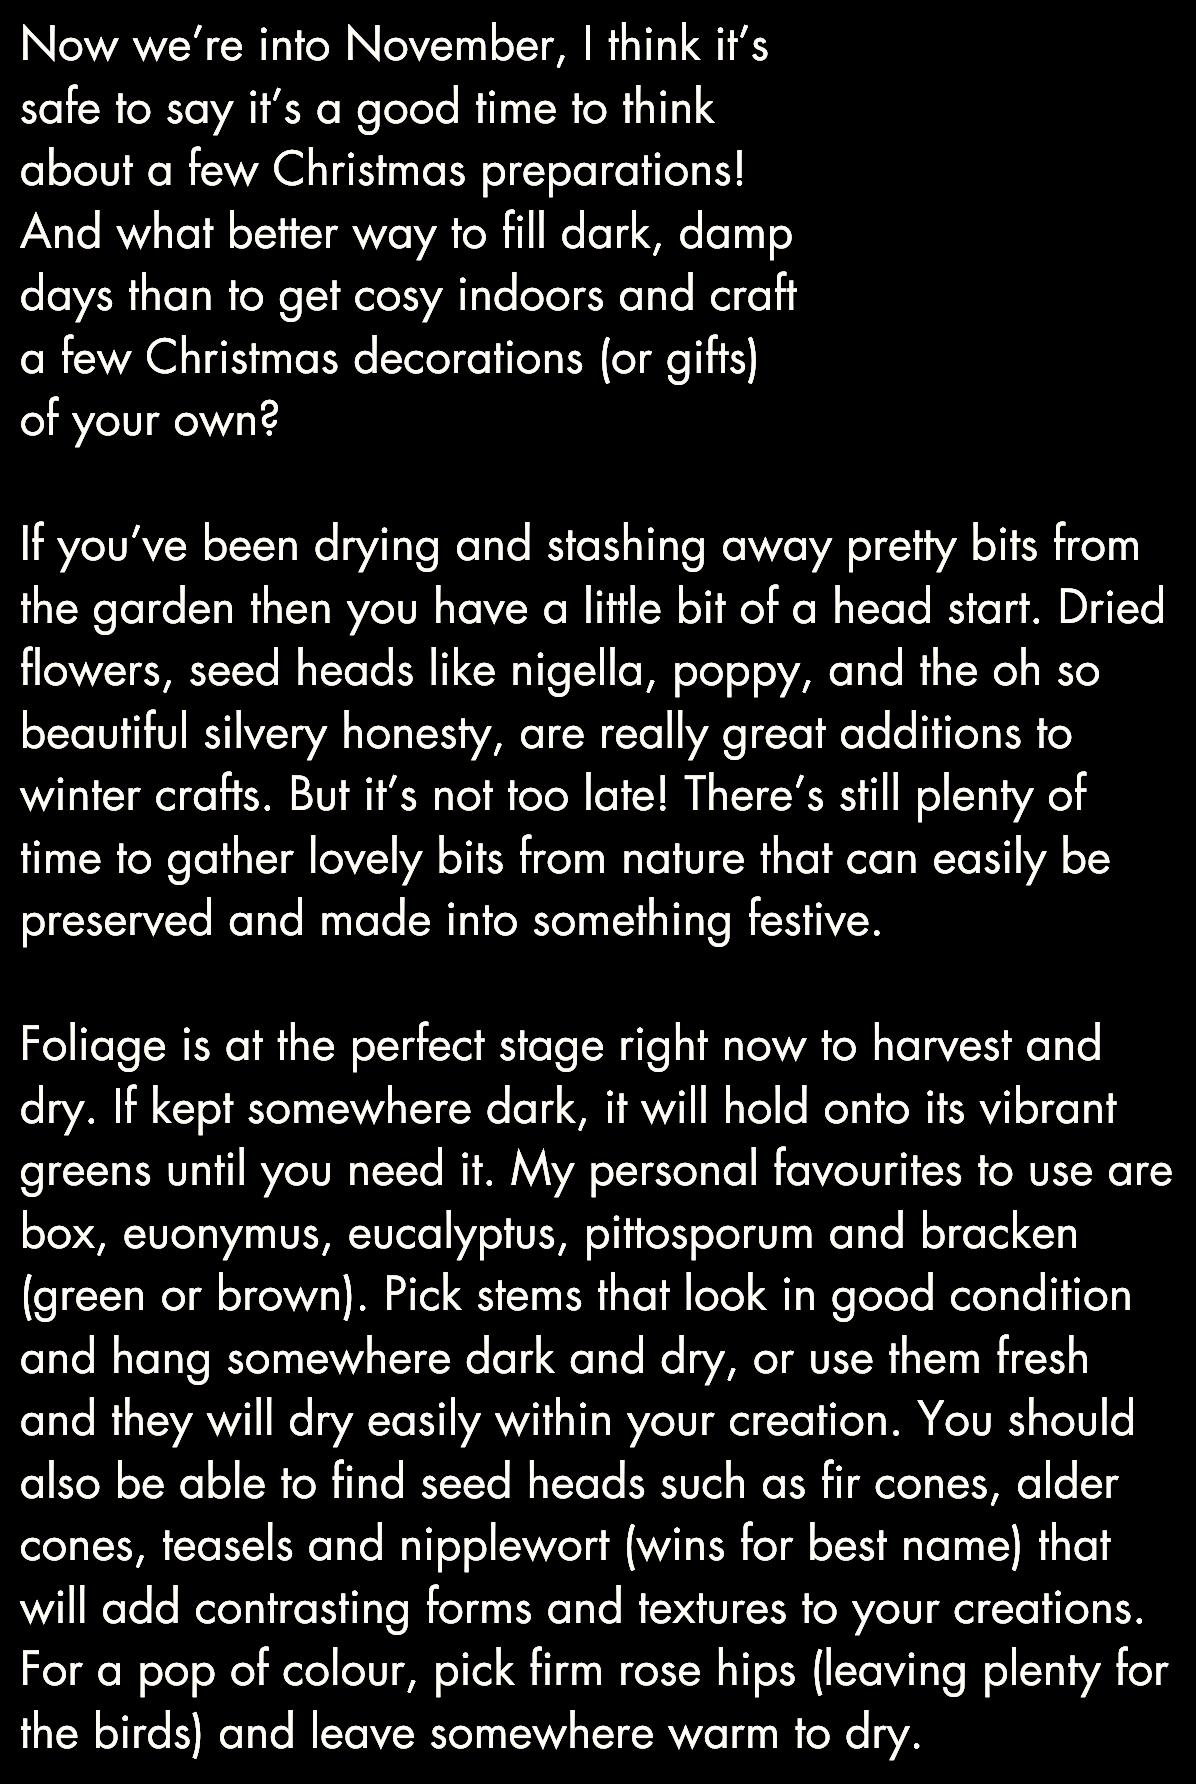
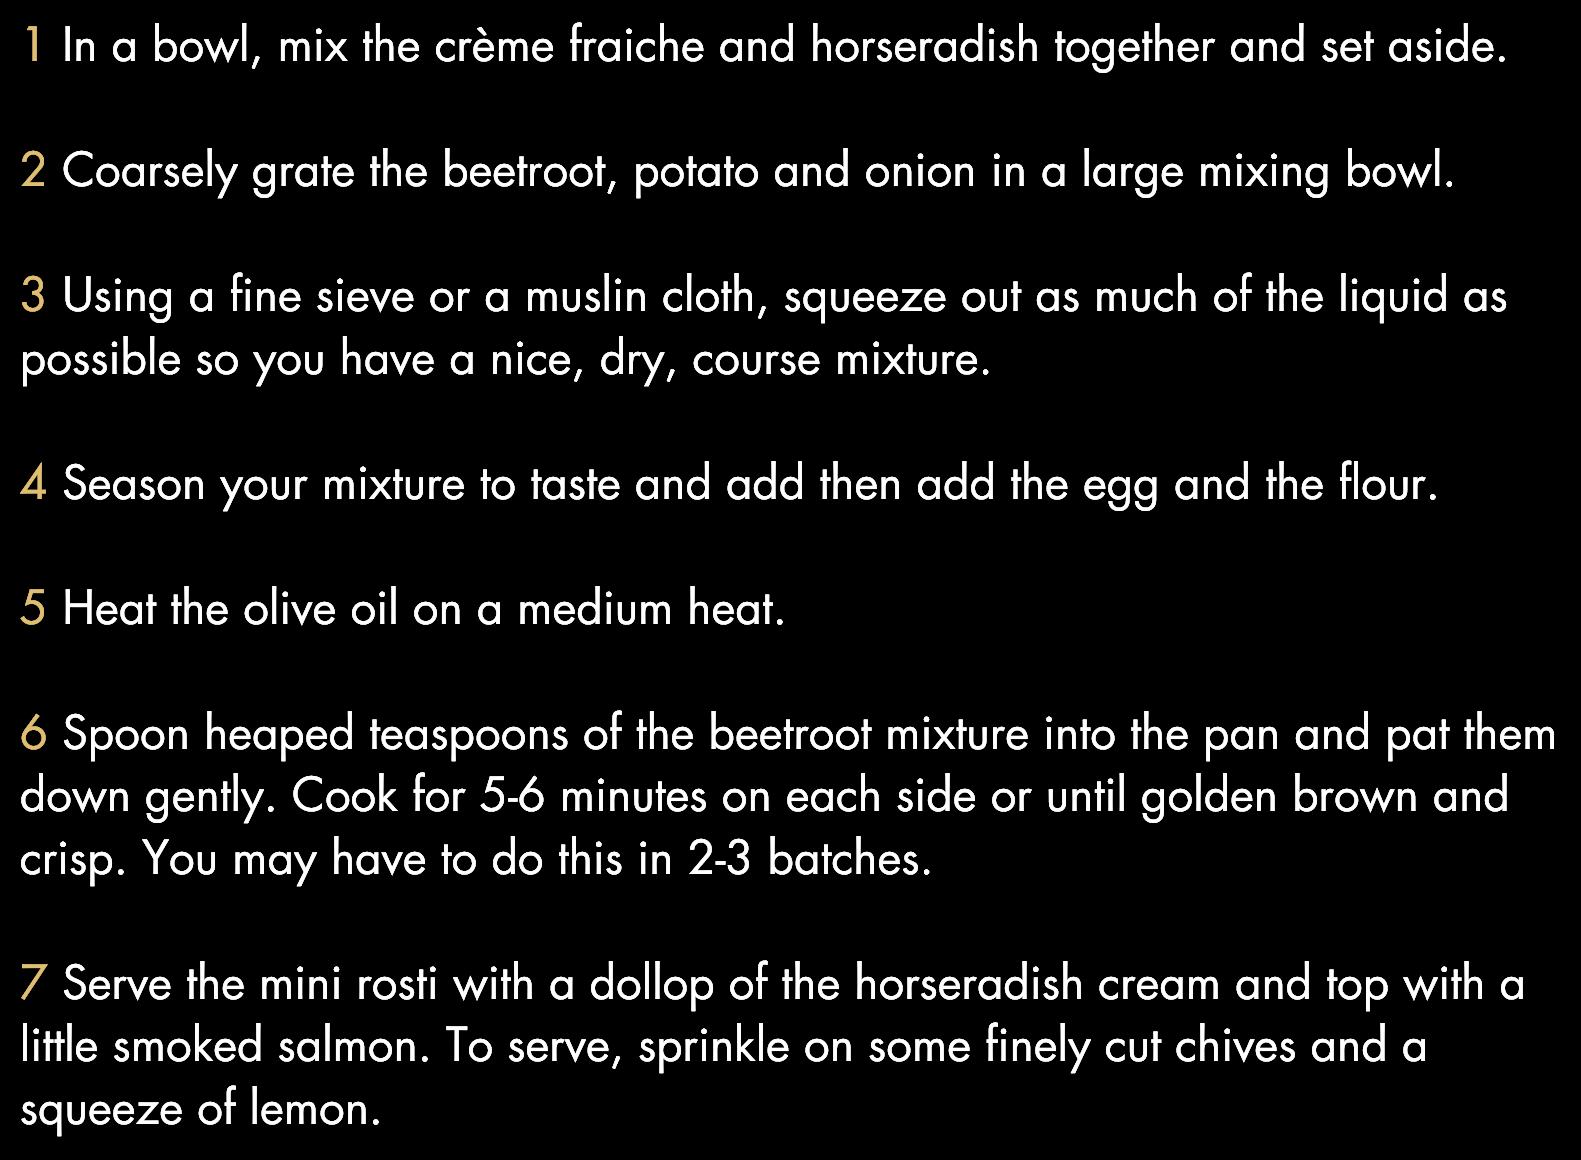
Mini wreaths
Mini wreaths have lots of potential uses They make beautiful present toppers (that no one will want to throw away!), can be used as place settings or even as napkin rings for a beautifully dressed table, they look very pretty around the base of candles, and can be used as hanging decorations on a tree or anywhere else you care to dangle them.
To make the hoop, you will need a thin, flexible branch. Whips of willow and hazel are ideal, but my favourite to use is Virginia creeper. Not only is it always in need of a prune wherever it grows, it is extremely flexible and has the bonus of gorgeous little curly tendrils! Take a length of whichever material you are using; 50-60cm is probably ideal to make hoops around 8cm diameter, but no hard rules here Bend it to form a circle the size you wold like, then continue to twist the remaining length of stem around the circle which will strengthen it as you go It should hold itself without need for any tying in
Using your dried materials to form a little posy and tie it to the hoop If you wish, you can continue to add further posies, each time covering the tied stems of the previous posy Finish with a neat tie of garden twine or ribbon if you ’ re feeling fancy!
Using a mixture of foliage, seed heads and dried flowers if you have them as it will make the arrangement all the more attractive.
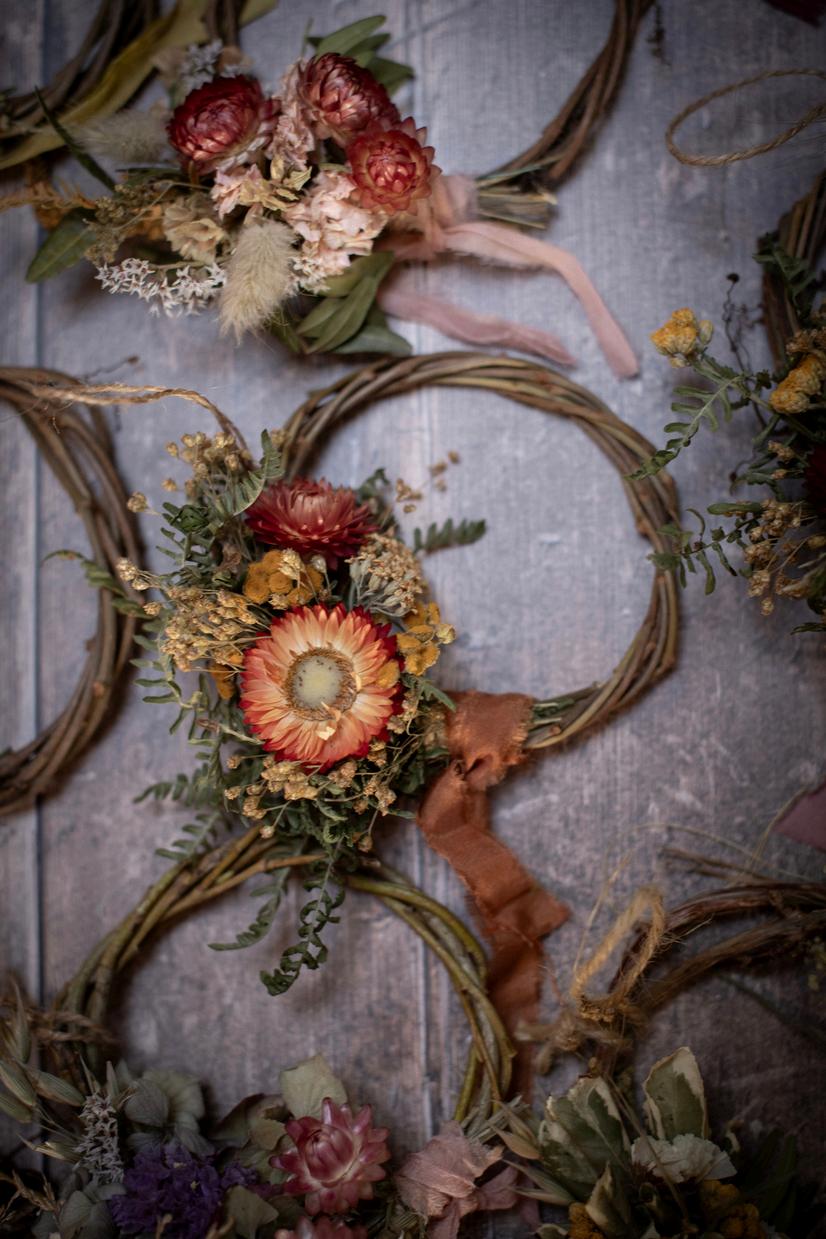
Garlands
I love a natural garland and it seems I’m not alone; they’re popping up all over the place as a plastic-free option for decoration. Use them to decorate the tree, bannisters, the fireplace - most places can benefit from a flowery garland! If you have managed to save lots of strawflower heads, they are really beautiful on a garland, but all sorts of plant material can be used to beautiful effect.
I like to use a fine wire known as Bullion Wire for making garlands It comes in different metallic shades and is easy to find at craft and floristry suppliers For strawflowers, use a large needle (the ones intended for wool are good), to thread the wire through the centre of the flower You can add a little twist in the wire to stop each flower sliding along For all other plant material, and the flowers too if you prefer this method, simply give the wire a few twists around a stem, and move on to the next piece Using the same method, you can also hang your garlands vertically in a window, or from a branch to make a beautiful natural chandelier!
Strawflowers make beautiful dried decorations.
Garlands can be strung both outdoors and in.
@plot67
Materials you will need
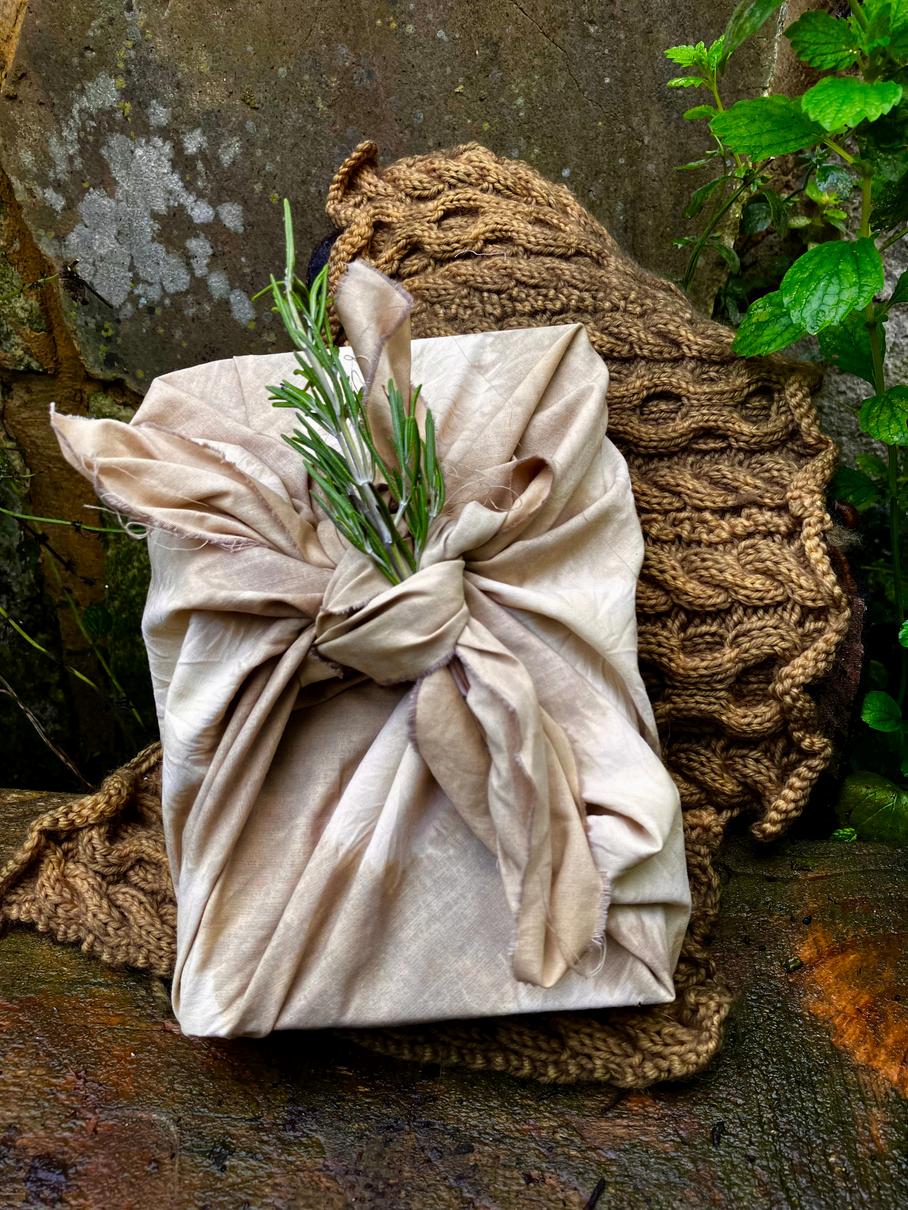
Mordanted fabric (ideally square if wanting to use for Furoshiki)
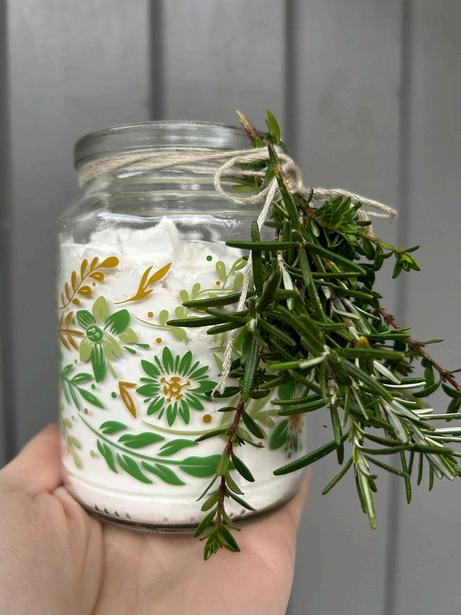
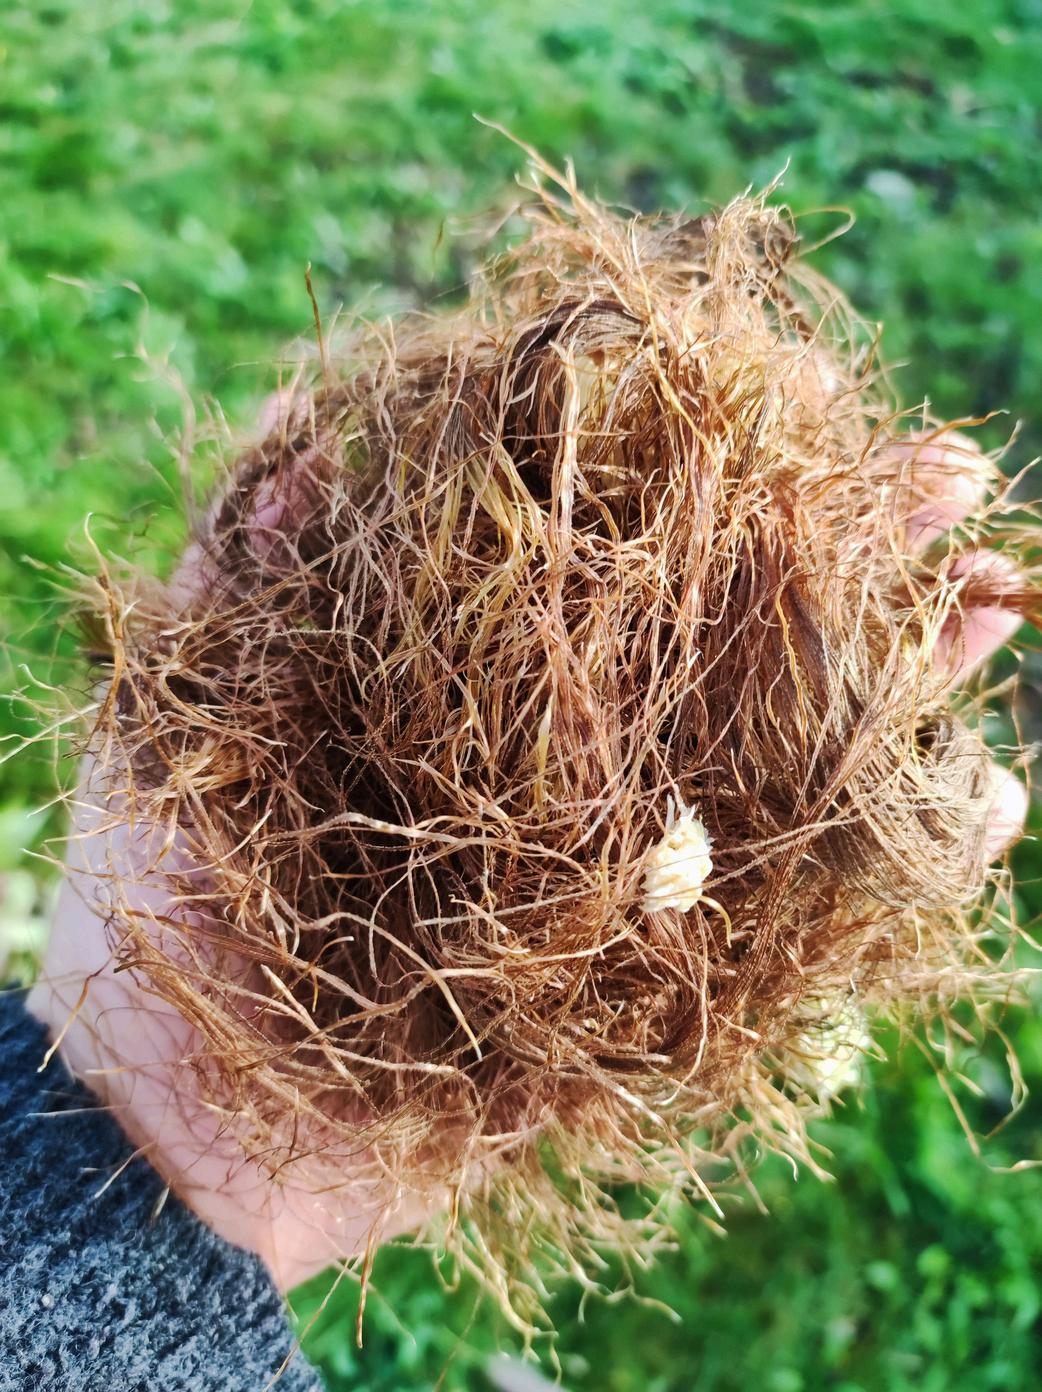
Rosemary (equal in weight to fabric you want to use, e.g. 100g fabric=100g Rosemary)
Dye pan
Sieve
Spoon Bowl or container to soak fabric
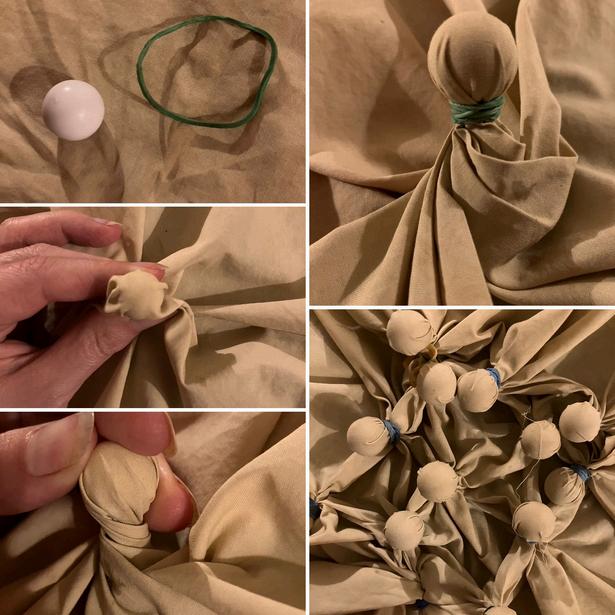
Optional, for Shibori Marbles, beads or dried
chickpeas
Elastic bands
Water
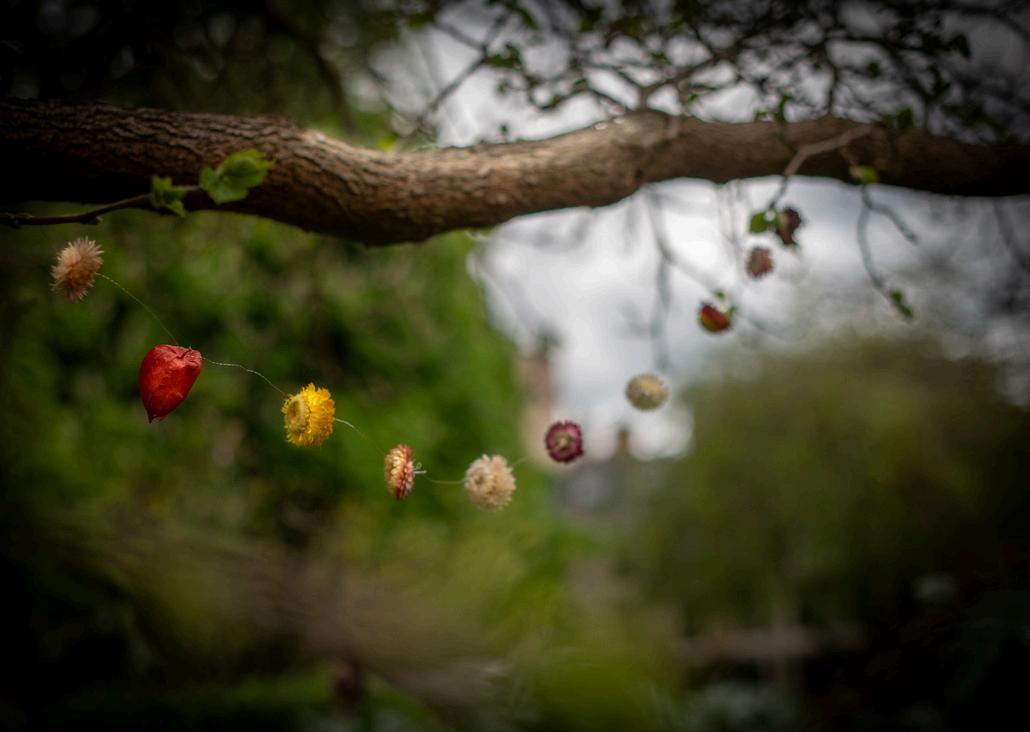
Step 1 - Chop your rosemary into small pieces* and place in your pan, pour a litre of boiling water over and leave to steep overnight
Step 2 - The next day, slowly heat your dye bath Take care to not boil the water as this can affect the colour of your dye bath Heat it for 30-40 mins, then leave to cool overnight
Step 3 - Place your mordanted fabric in a separate bowl/container and leave to soak overnight so that it is ready for dyeing tomorrow. If you want to experiment with Shibori follow the steps for Ne-Maki before soaking your fabric.
Step 4 - The next day, strain the rosemary out of your dye bath and place your wetted fabric in. Reheat the dye bath for 30-40 mins, again taking care not to boil the water. You may need to add some more water at this stage to ensure your fabric is fully covered
Step 5 - Turn off the heat and leave your fabric in the dye bath to cool At this stage you have a few options:
Remove your fabric, rinse and dry
Leave your fabric to steep in the dye bath for longer - this could be overnight or for a few days
Reheat your bath to see if this will deepen the colour
* I used the whole plant but you can remove the leaves and use just them - this part is up to you!
If you would like to take the nod to Japan a little further you could also Shibori Shibori is a traditional Japanese method of manipulating and dyeing fabric to create patterns on the fabric You create the bind before you dye your fabric This is the ne-maki method which is created by binding beads or marbles into the cloth It will create lovely circular patterns across the fabric once dyed
Over a decade ago, the bar was set for Christmas dinner home grown style in the Wallace household. We went to Dads Once we were there, he announced that he was taking my grandma over to the plot to pick veg for dinner When they came back, my Grandma, who isn’t a big lady, proudly walked in with the one parsnip that was going to do for all seven of us she had to hold it above her head it was so long!
@theallotmentmum
Fast forward a few years and I was given the River Cottage Christmas book The first chapter I read? What to sow when to get it on the Christmas dinner plate It lit that dormant spot in my allotment growers heart we would have home grown on the plate for next Christmas!
Which is why I keep trying, regardless of whether anyone else wants it. Haven’t managed a whole plate yet, but I am working on it!
Which means that when I can make something that isn’t veg related to add to the Christmas plate I tend to jump on it. Added to the fact that the now 10 I regularly cook for all have healthy appetites and a smattering of allergies… it means prepping in advance. It also requires clear portions. We’ve had a few occasions when the more choice sides all disappear to a few key plates: I’m guessing every family has that, right?!
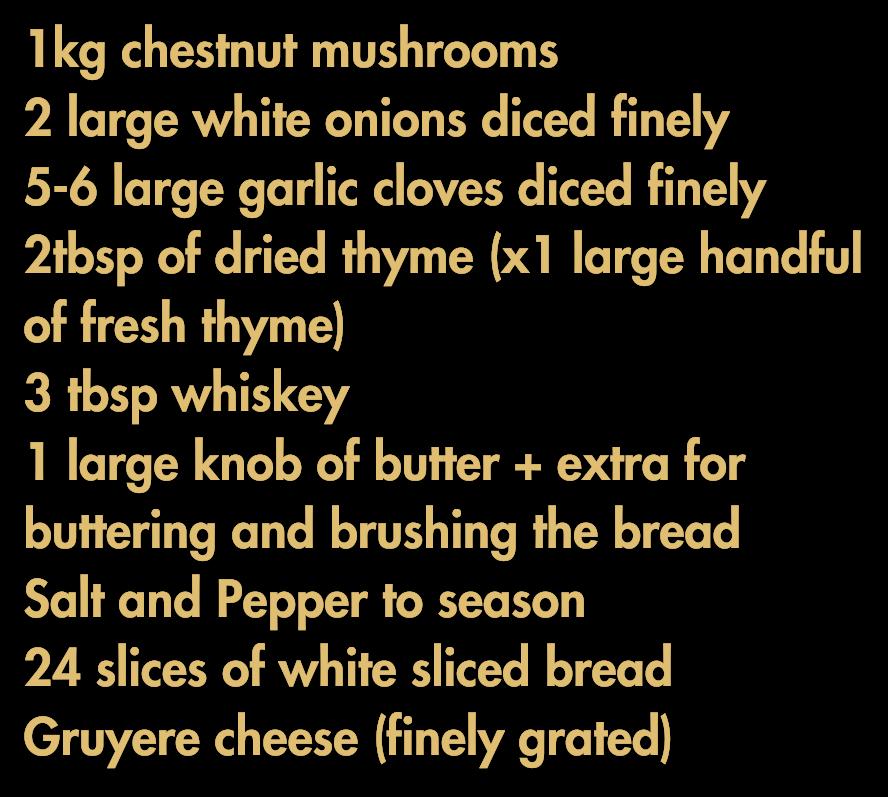
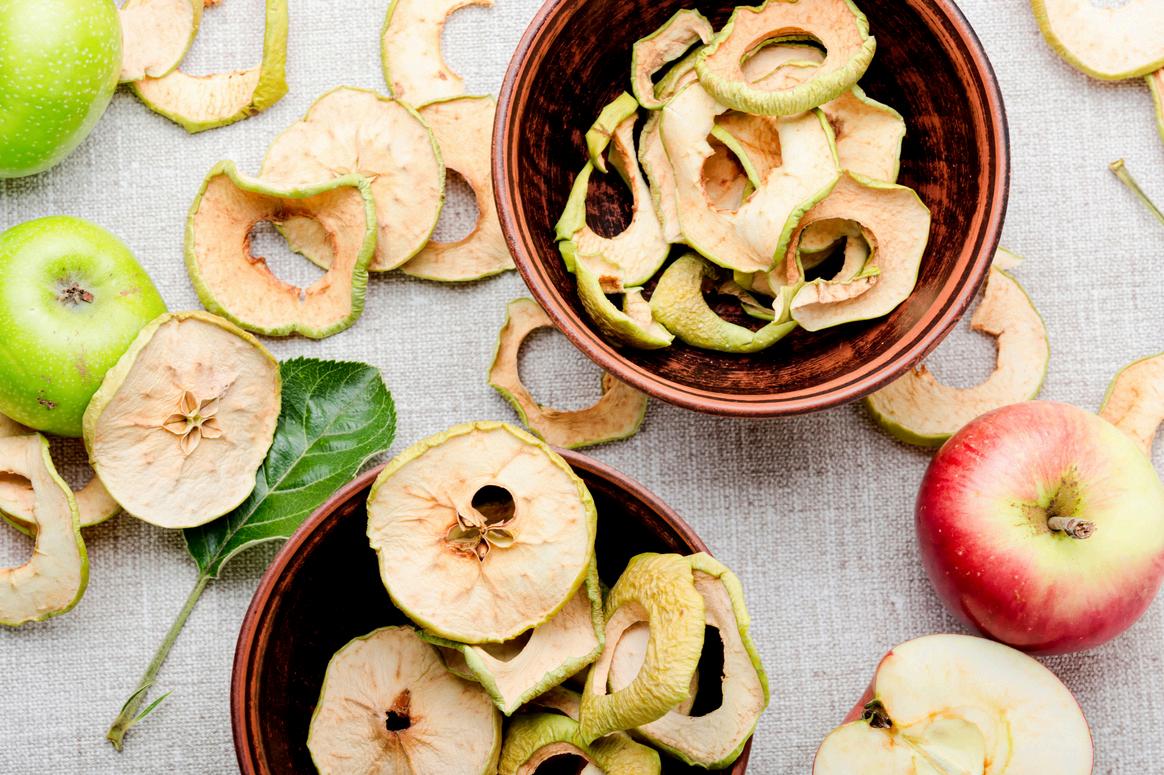
So my autumnal prep for Christmas day is usually very meat based Pigs in blankets and stuffing balls This year the balls will have my own home dried apple nuggets mixed through, along with hopefully some home made chestnut puree and allotment grown dried herbs
The plate may not have much in the way of home grown veg this year (what a year!) but at least there’s something, right?
One pack stuffing mix (ours has to be gluten and chilli free).
One pack chestnut puree.
One eating apple, cored and small dice chopped (or similar in dried).
Two handfuls of dried cranberries.
16 sausages, skinned (or one pack sausage meat for the non coeliacs.)
One red onion, finely chopped.
Seasonings: salt, pepper, sage, rosemary, thyme.
Squish everything together in a bowl, trying to evenly distribute everything Cranberries may need snipping in half if they’re too big Form large balls, think scotch egg size Open freeze for a day or two and then bag up ready for the big day This mix will make 24 balls
On the day, put them in muffin trays. Oven cook from frozen at 180 degrees in the muffin trays for 20 to 25 minutes.
3 chipolatas per person
One streaky rasher of bacon per person. Stack and wrap, then open freeze
Cook from frozen (so they don’t fall apart) at 180 degrees for 20 to 25 minutes, turning with tongs if you remember ( I rarely do)
Important considerations when filling yo plants:
Make sure your pla enough to a window
This seems obvious, but you’d be people put their plants that bit too f if you opt for low-light loving plan snake plant, all houseplants requi light to photosynthesise In a south f situated further from windows, bu they’re better off close
Keep away from draughts.
Many plants really struggle in a draughty spot and will start to show signs of stress like leaf loss. Types of Ficus and other sensitive plants are well known for dropping leaves in air currents. Avoid putting your plants next to fireplaces, outdoor doors, or windows that are constantly open If it feels draughty to you, then your houseplants won’t like it either!
Check the direction of your windows.
Is it south, north, east or west facing light? This can enormously affect the amount of light your plants receive and significantly influence their growth. South facing light can burn the leaves of sensitive plants like calatheas, peace lilies and philodendrons, so it’s best to separate plants from direct sunlight by placing them out of the harshest sun rays or using a net curtain to filter light. East, west and north facing windowsills are usually better places for plants, as tropical houseplants can tolerate the lower light levels when the sun isn’t at its strongest.
By Gemma Haigh
Beware of radiators!
Radiators are the silent killers of houseplants. Radiators cause air currents in rooms to move around. For the best results, place your plants away from hot air currents The worst place for a plant is directly above a radiator because the hot air rises and burns leaves That said, you should also avoid putting floor-standing plants too close to radiators as they tend to dry plants out, making leaves crispy and soil lack moisture
Dont let us go dry.
Living rooms tend to have a lower humidity on average Unless you live in Florida, which is humid all year round, then you need to be aware that many houseplants like high humidity Tropical plants come from rainforests which are high in humidity Ways to boost humidity include grouping plants near one another, keeping plants away from fireplaces and radiators to be sure they stay moist, and keeping windows closed to create a stable environment
Photo Credit: Stock Canva Image
Photo Credit: Stock Canva
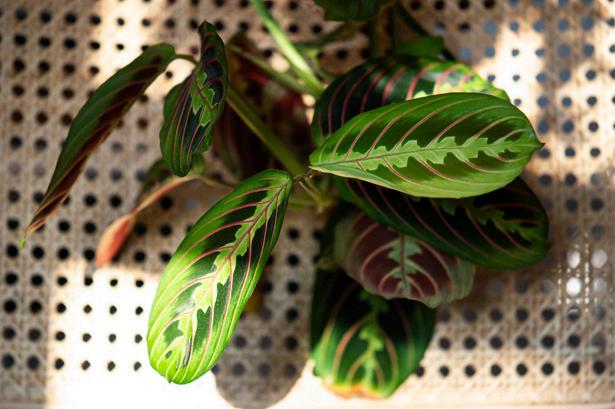
Maranta fascinator Tricolour
Best houseplants for Best houseplants for Best houseplants for living rooms living rooms living rooms
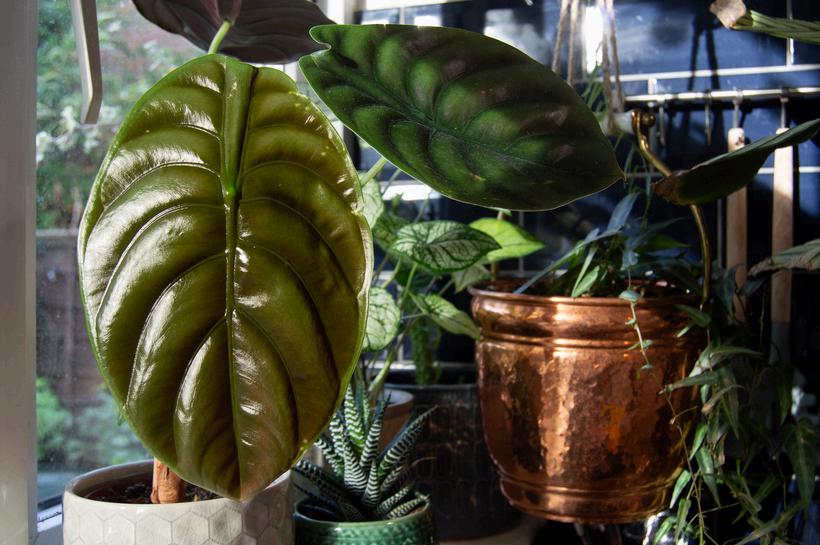
Alocasia
Alocasias are native to the rainforests of Asia and Australia and are an unusual looking plant Alocasias are ground-dwelling plants with thick, detailed leaves, in an array of shapes, colours and patterns Some people think alocasias look a little alien! If you like the weirder houseplants then perhaps an Alocasia Dragon Shield, an Alocasia Stingray or an Alocasia Cuprea is for you! Place yours near an east or west facing window for the best results and be aware of babies and pets as it’s toxic if eaten.
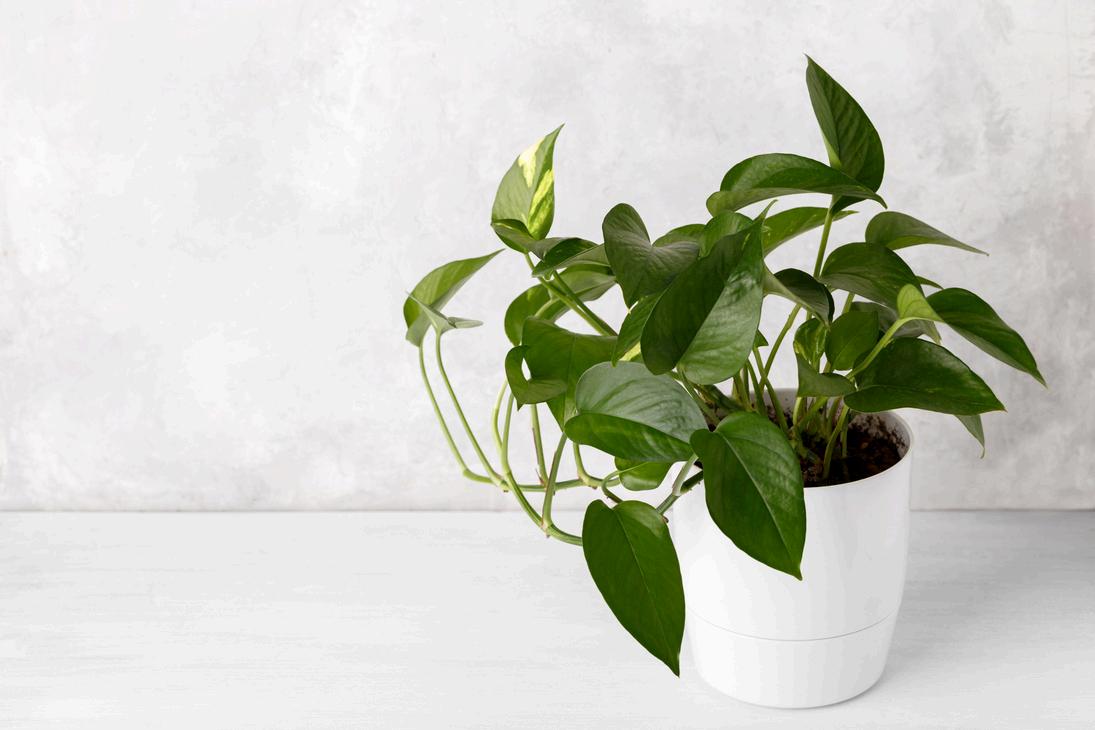
Devil’s Ivy
This popular houseplant is a vine that grows to enormous sizes in the forests of French Polynesia, where it can be found climbing trees Displayed best either on a moss pole or as a trailing plant, its variegated leaves are yellow and green This easy-care houseplant is great for beginners and looks lovely trailing on surfaces and from hanging baskets It does best in a chunky potting mix, is very tolerant t lighting co
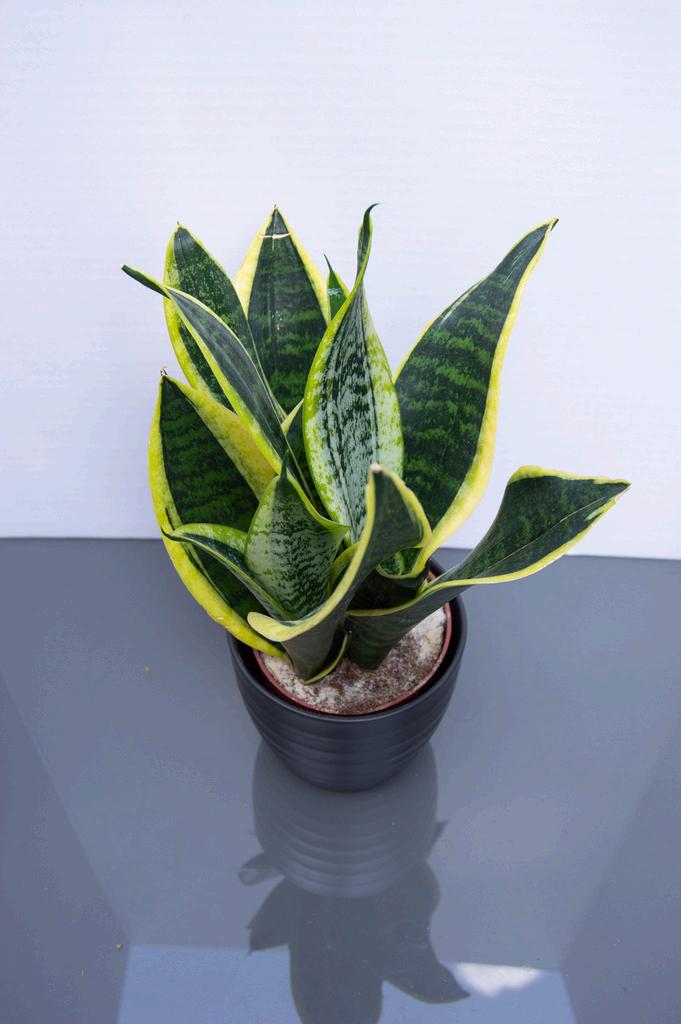
Snake Plant
Also known by the name, ‘Mother-in-law’s tongue’, this houseplant has tall, wavy leaves with a waxy coating. The snake plant originally comes from the hot, dry lands of Africa and can withstand long periods without water. Though they love hot, dry places and strong direct sunlight, they are surprisingly tolerant to darker environments. This extremely versatile houseplant is suitable for rooms with low or high light and is easy-care. Just be cautious to water your snake plant appropriately and never leave it sitting in wet soil.
Photo Credit: Gemma Haigh
Snake Plant
Allocasia platinum
Devil’s Ivy
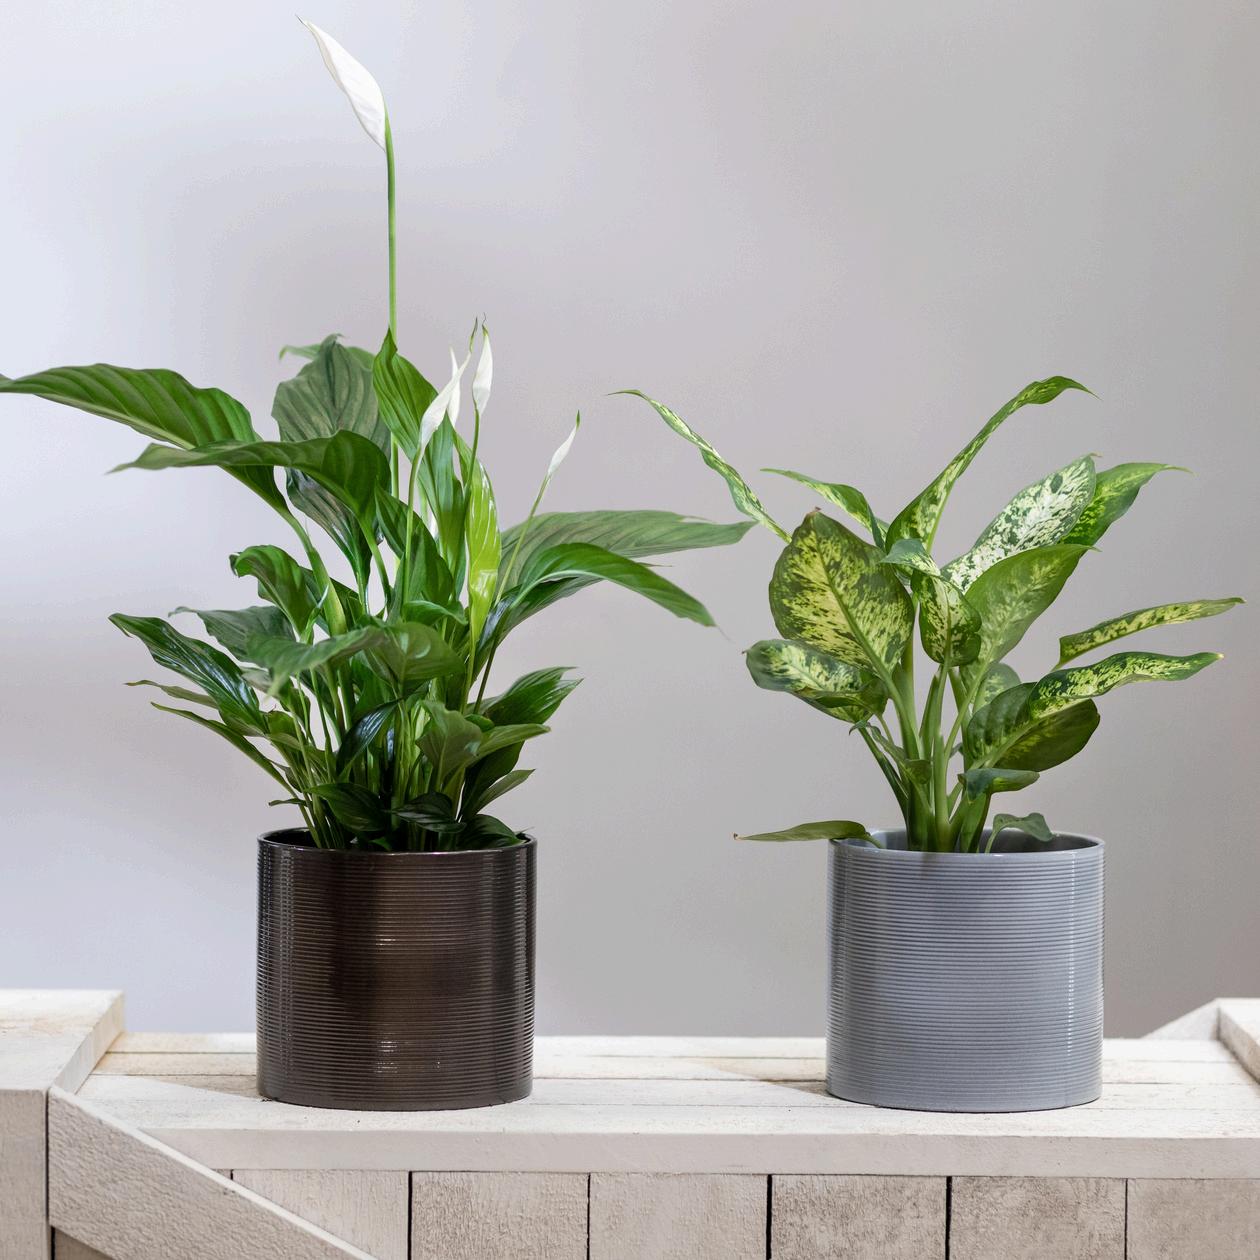
Dumb Cane Plant
Hailing from South America and Mexico, this beautiful plant comes in different leaf varieties that feature many shades of green, white and yellow Toxic if eaten, this houseplant looks beautiful but has pretty poisonous leaves Place your dieffenbachia in indirect light on a north, east or west facing ledge, and water when the soil dries out. Be sure to keep it out of the reach of tiny fingers and furry mouths as this plant is poisonous to pets and humans!
Schefflera
Originating from Australia, the fabulously unique schefflera features umbrella-shaped leaves that add interest to a room It can tolerate lower temperatures than some houseplants and a variety of lighting, making it perfect for bright spaces, or those that are a little duller. Water yours when the soil is dry and never leave it sitting in water. Though pretty, the leaves of the umbrella tree are toxic if consumed.
Pet friendly plants needed for your living room?
Go for something non-toxic like a calathea Calatheas have a bad reputation amongst houseplant lovers (and houseplant killers) as they’re notoriously a little dramatic Known also as prayer plants, there are some prettyleafed calatheas that are easier to keep than others Try Calathea Oribfolia, Calathea Rufibarba or Calathea Peacock if you want to display one of these pretty, painted ladies. They’ll sit happily on an east or west facing windowsill and move their leaves throughout the day, to absorb as much light as they can.
TIP: Can’t get calatheas to do your bidding? Try your luck with their cousins, the Maranta Fascinators.
Still have questions that need answers?
Gemma offers bespoke, bookable online consultations to talk through all your houseplant needs Book 30 or 60 minutes to ask all the houseplant questions you can think of She’ll help you save sad plants, teach you about lighting, and give you tips on plant placement! Head to her website or Instagram for more
Stay tuned for next month’s ‘Plants for Places’ instalment in Garden Folk Magazine, where we’ll look at houseplants for kitchens!
Photo Credit: Gemma Haigh
Peace Lily Dumb Cane Plant
Schefflera
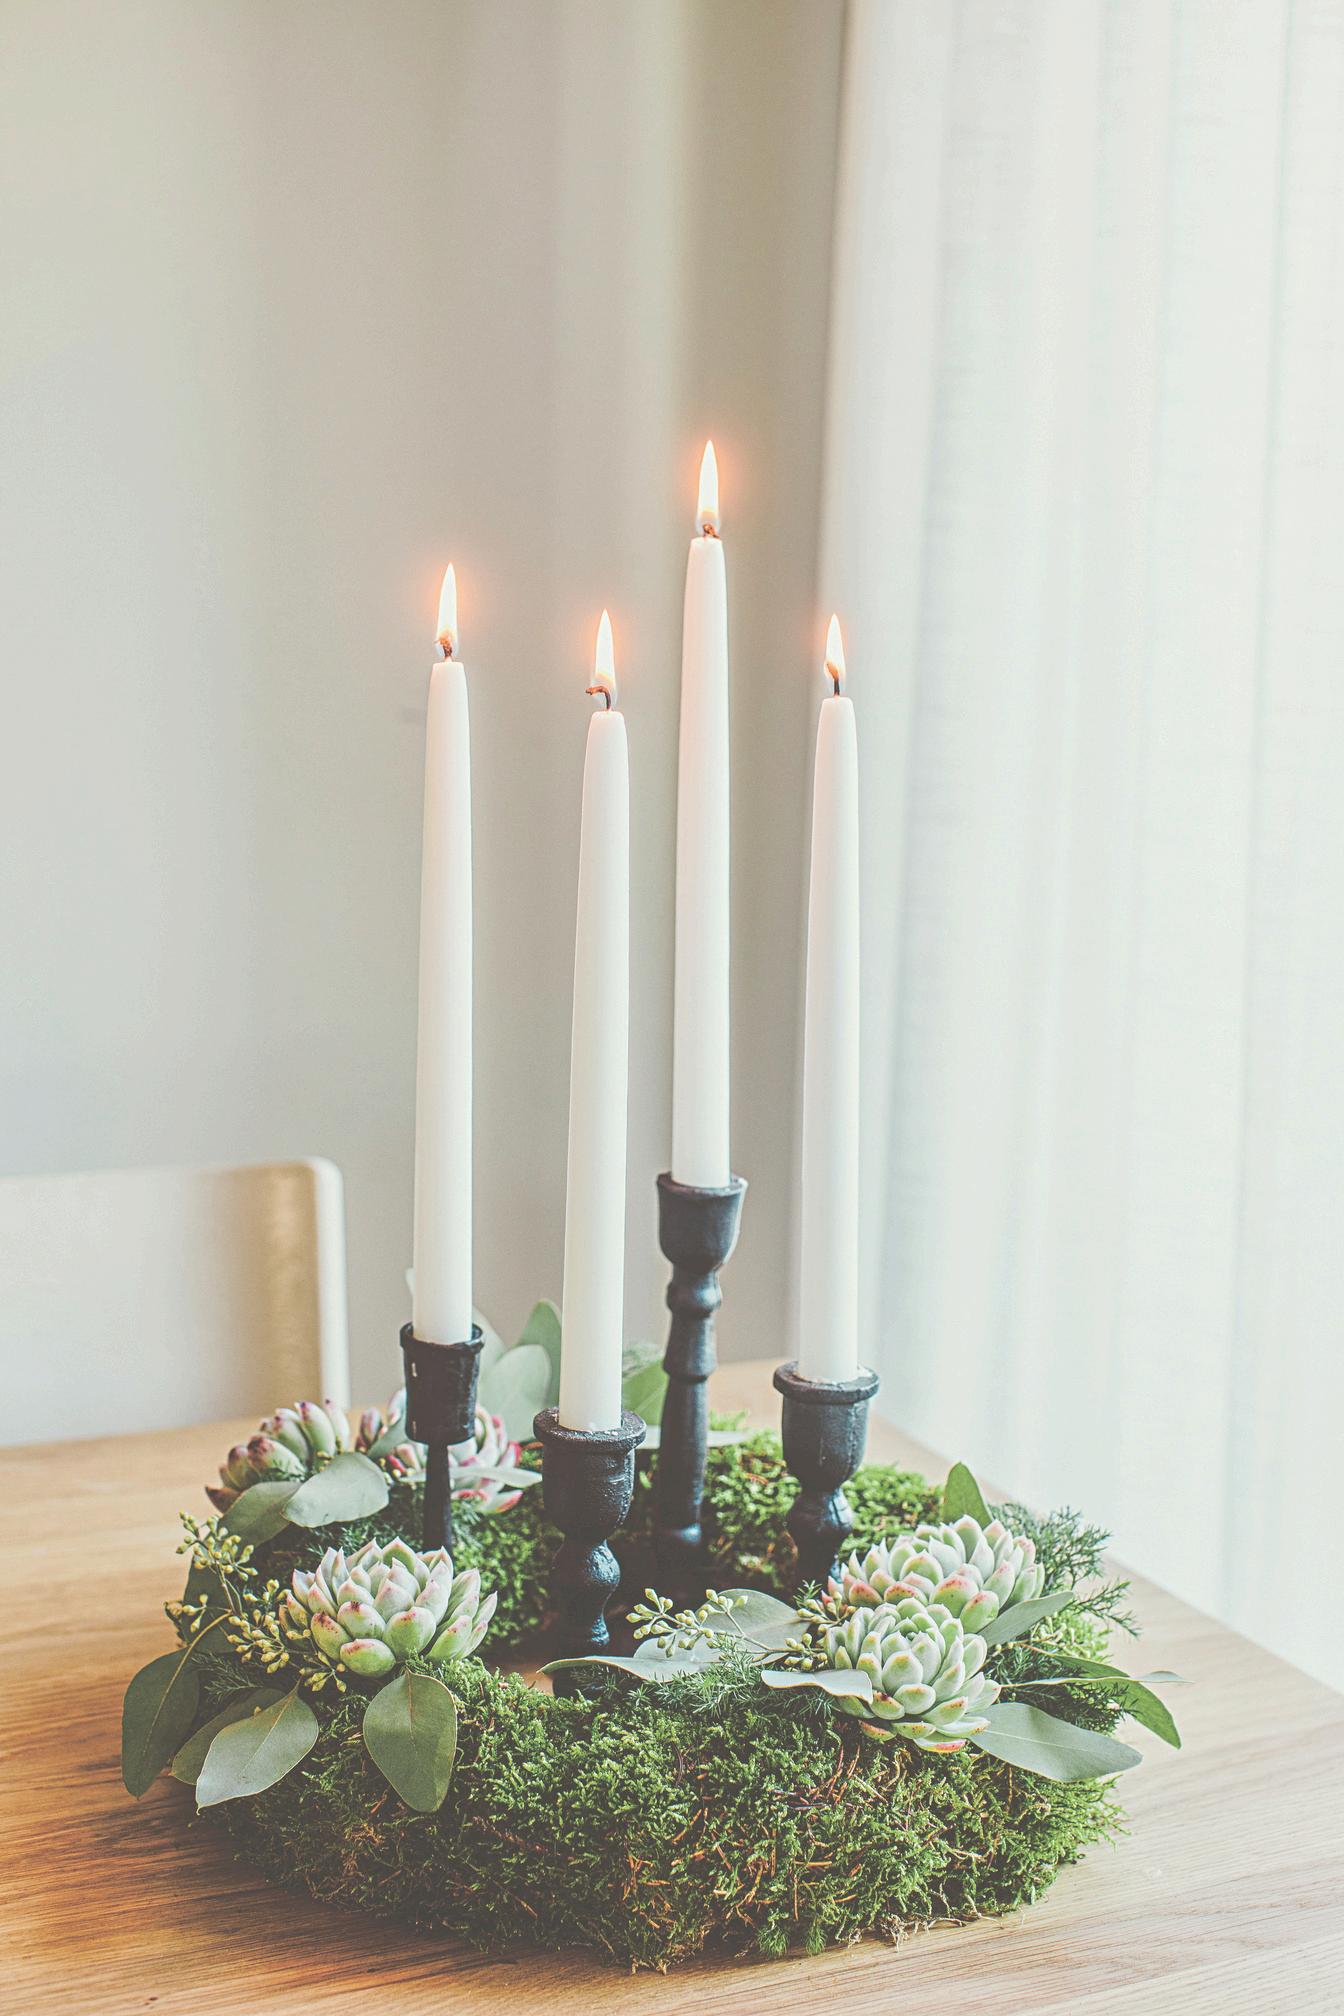
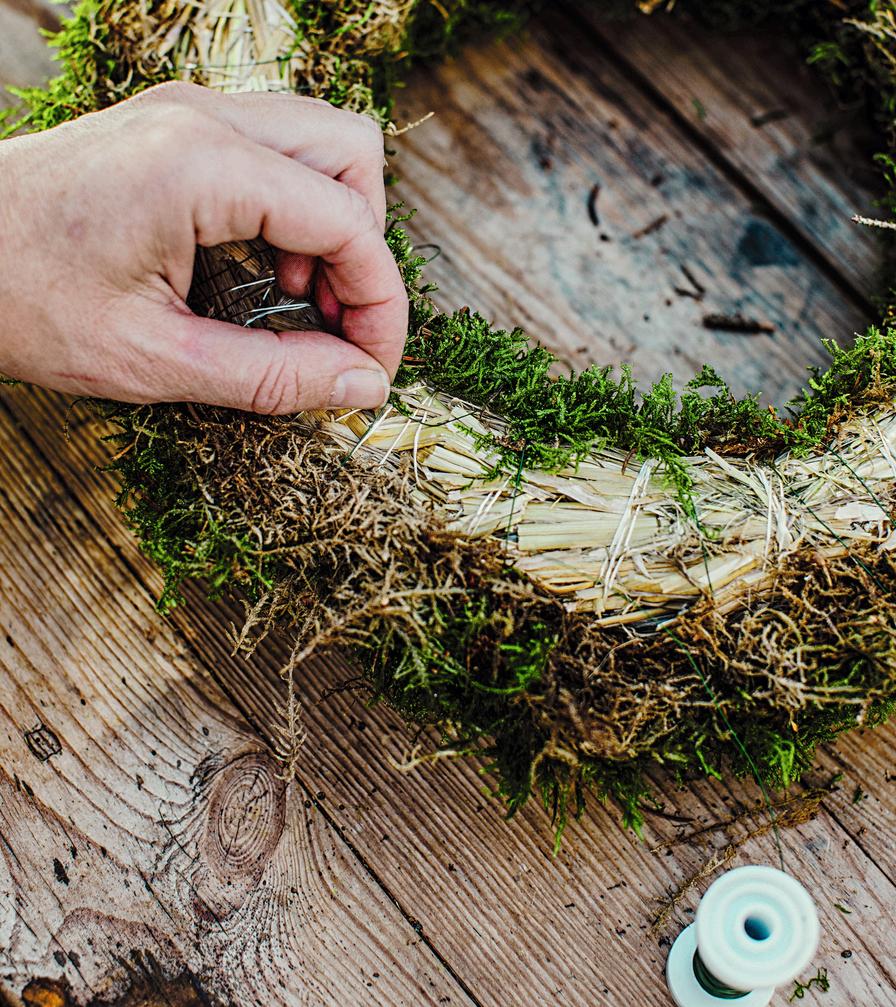
Wreaths can be used in so many decorative ways during the festive period. This elegant creation from ‘A Year of Flower Wreaths’ by Malin Bjorkholm will bring a touch of class and whisper of new life to your table decor
MATERIALS
Straw base
Myrtle wire, green
Florist wire
Wire cutters
FLOWERS/FOLIAGE
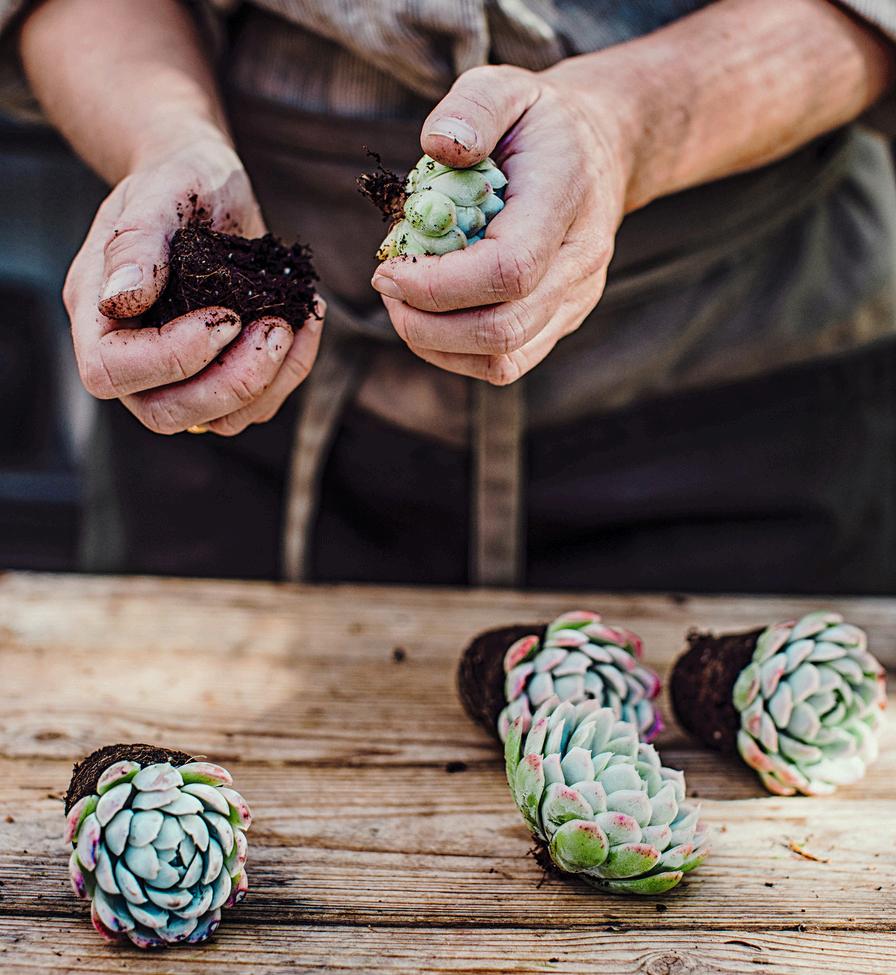
Echeveria
Eucalyptus
Moss
Sawara cypress
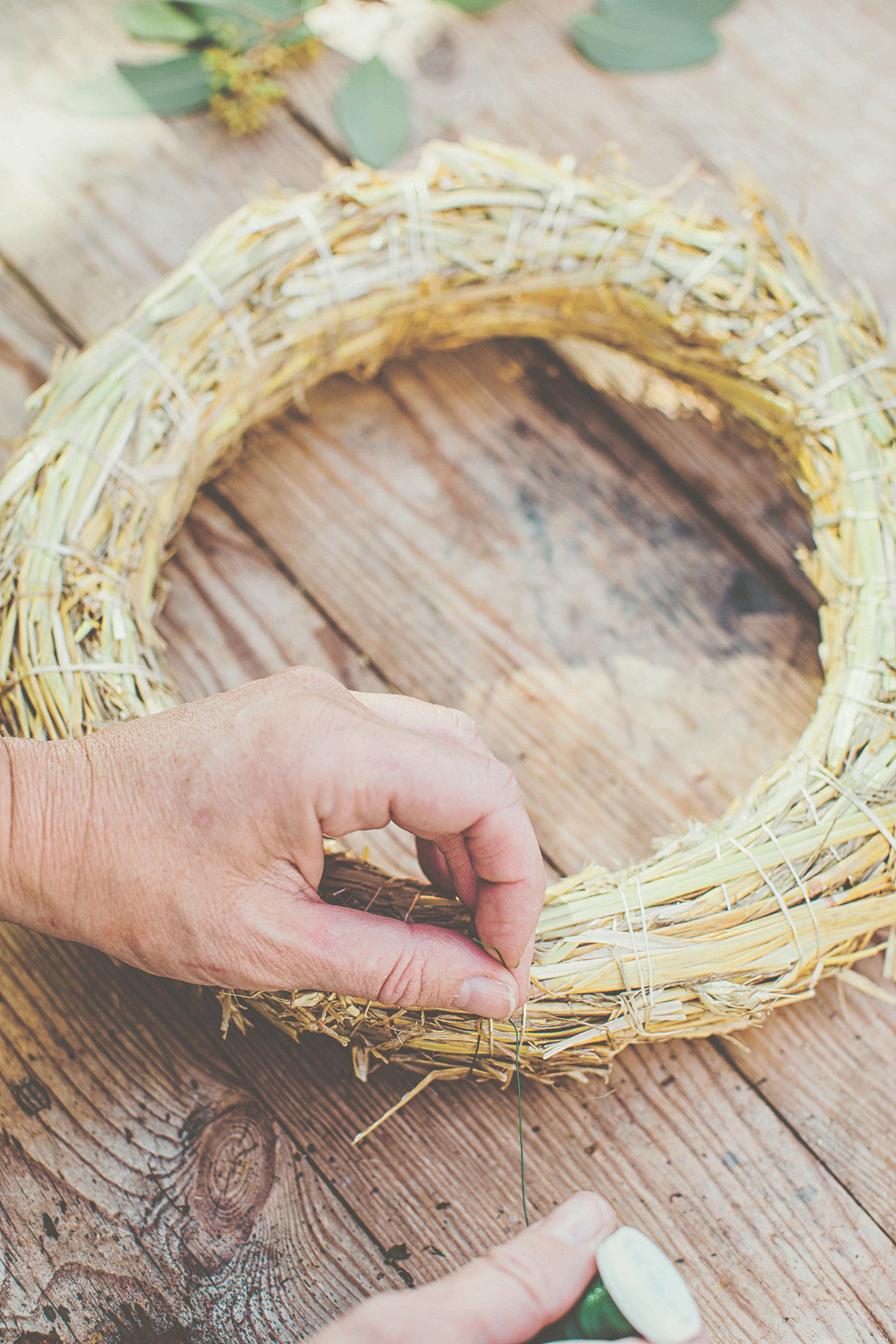
1 Start by attaching the myrtle wire to the straw base by wrapping it around and twisting the end.
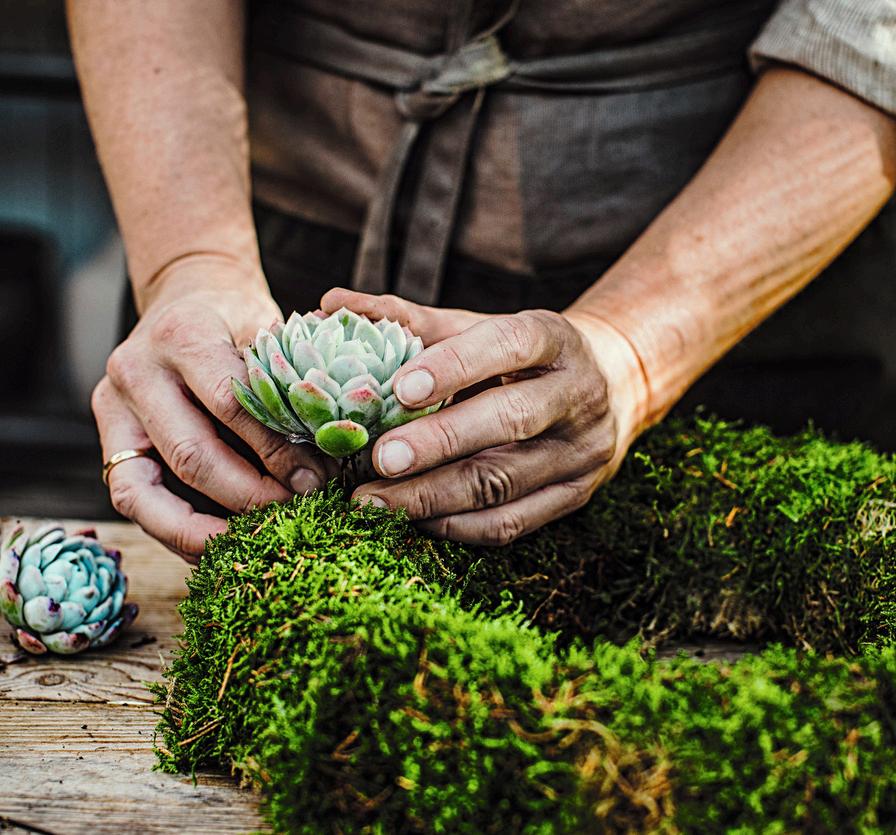
2 Add moss to the wreath to cover the base Secure it in place with myrtle wire, but don’t pull too tightly or the wire will be visible
3 Add more moss and continue the same way until the whole wreath is completely covered.
4 Turn the wreath over and cut the wire Secure it in place by ‘sewing’ a couple of stitches into the wrapped wire
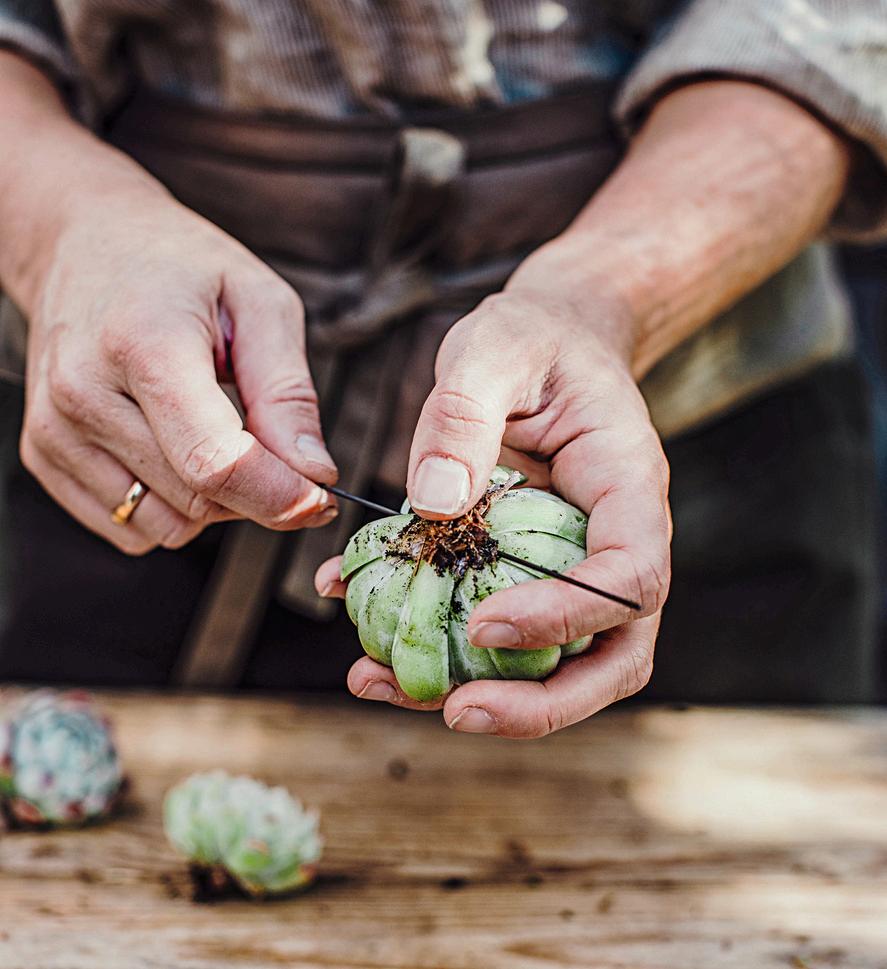
5 Remove soil and roots from the echeveria by holding the flower in one hand and the soil in the other and twisting.
6 Insert florist wire through the lower part of the plant and bend it into two ‘legs’
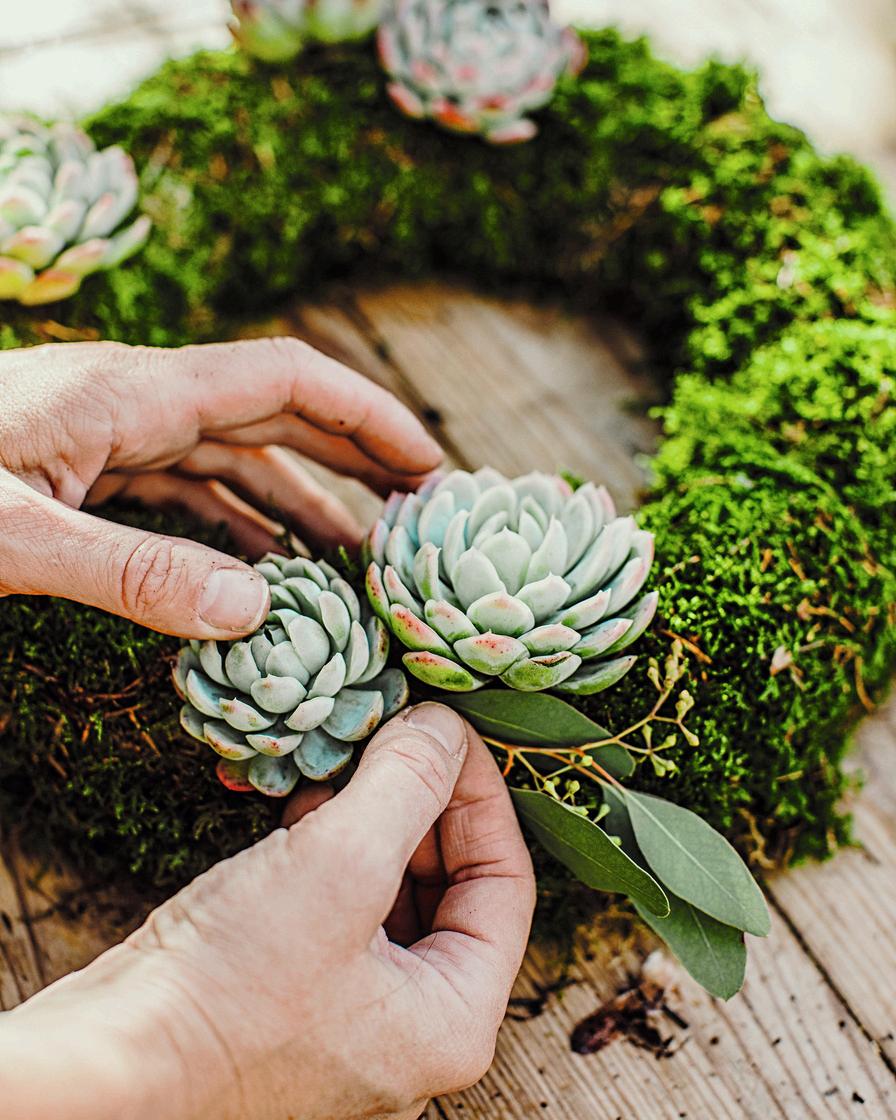
7 Attach the echeveria to the wreath by pushing the florist wire into the base. It looks nice when you group several together in a cluster.
8 Cut smaller lengths of florist wire and bend them into u-shapes
9 Attach branches of eucalyptus and sawara cypress to the wreath using the u-shapes of florist wire
10 Place the wreath on the table, either directly or on a plate Place candle holders in the middle of the wreath for an impressive centrepiece
‘A Year of Flower Wreaths’ is a beautiful book that offers inspirational projects for you to make throughout the seasons using simple materials and plants you can find in your garden. From Spring Flowers in Eggshells, to a Table Maypole, to a Classic Wreath in Silver Tones there are projects for every mood and with full and beautifully illustrated directions you’ll be making stunning creation in no time!
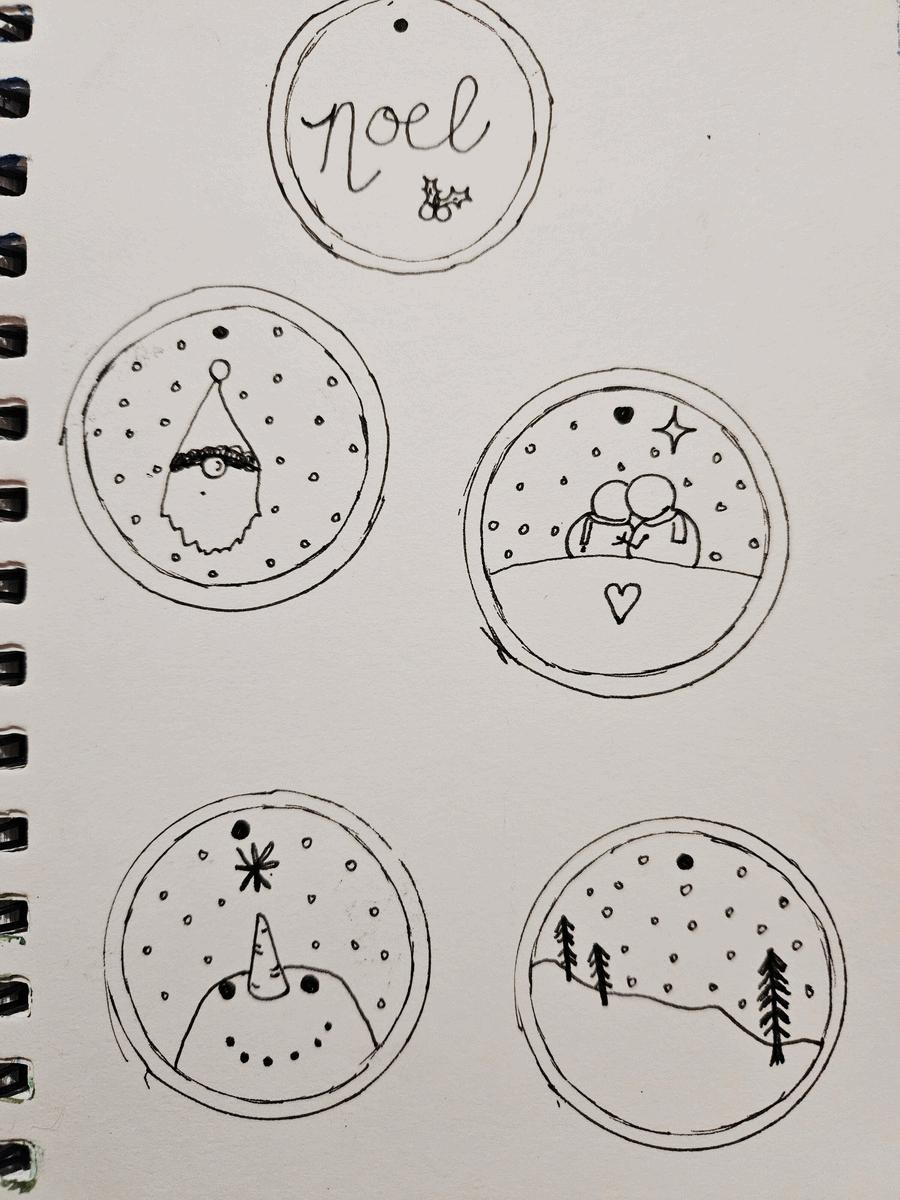
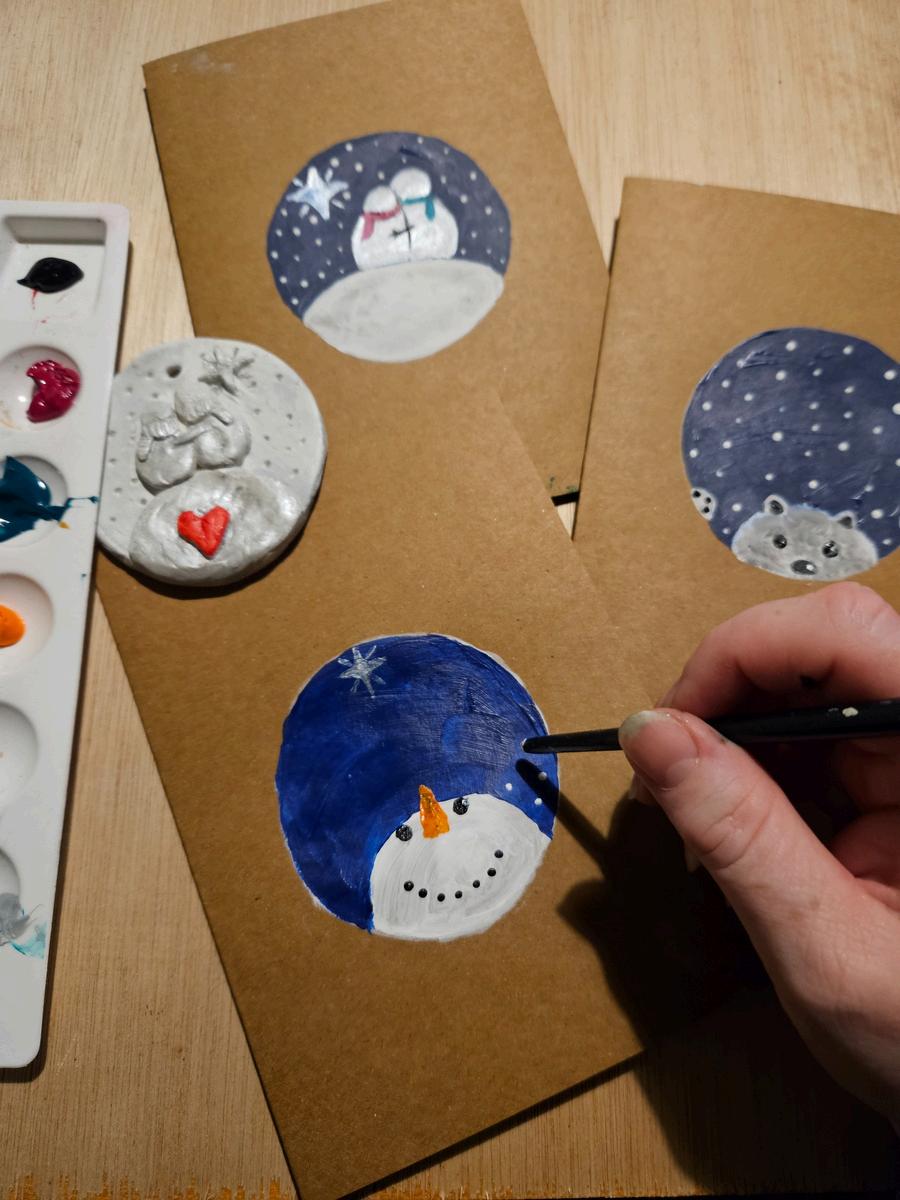
Decorations make a thoughtful gift, and are easy on those purse-strings at this time of year. Here’s how I made my decorations.
What you need:
Air-dry clay
Rolling pin
Cookie cutters / glass to cut around Wooden skewer or toothpick (for details and holes)
Acrylic paints (optional)
Paintbrushes (if painting)
PVA glue / Modge Podge (to seal)
Ribbon or twine (for hanging)
Instructions:
1. Prepare Your Workspace: Lay down a clean surface, such as a table or counter, and cover with newspaper or similar (to protect the surface and dry the clay on)
2. Condition the Clay: Take a chunk of air-dry clay and roll it into a small ball (size will depend on the size of the decoration you intend to make)
3. Roll Out the Clay: Using a rolling pin, roll the clay to about 1/4 inch thickness Try to keep it even to ensure uniform drying
4. Cut Out Shapes: Use cookie cutters / glass with a knife to cut out your shapes
5. Add Details: Use a wooden skewer or toothpick to add details to your shapes, like patterns, faces, or textures. You can also use additional clay to add texture and shapes. You should also poke a hole at the top for hanging.
6. Dry the Decorations: Let the decorations air dry on the newspaper according to the clay package instructions, usually 24-48 hours (they will dry quicker if left near to a radiator).
7. Paint and Decorate: Once fully dried, you can paint your decorations with acrylic paints Let the paint dry completely before appyling the PVA glue / Modge Podge to seal them
8. Add Hanging Mechanism: Cut a piece of ribbon or twine, thread it through the hole at the top of each decoration and tie it into a loop for hanging
By Laura Whiskens @lottieonthehill
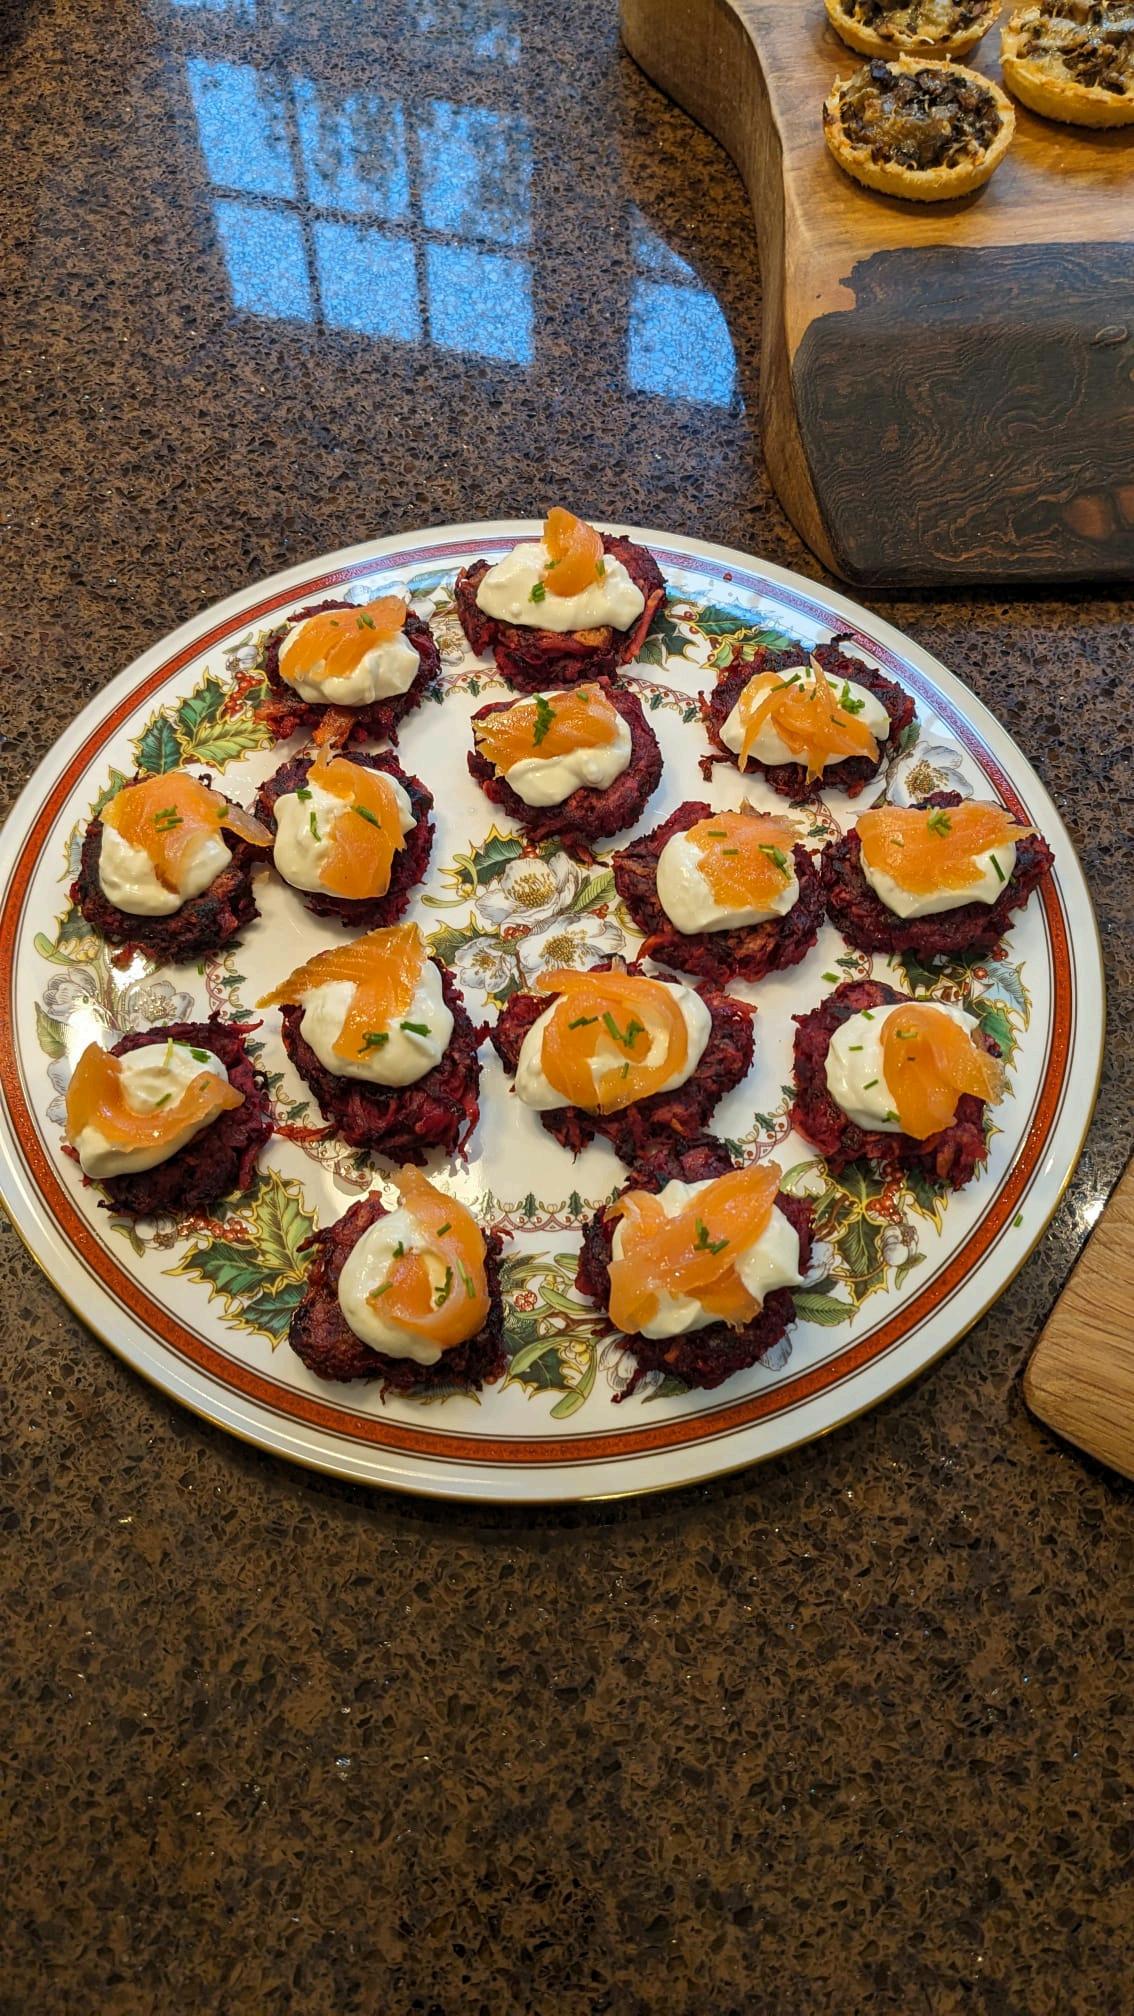
Uncomplicated Christmas Canapes
Beetroot rosti with horseradish and smoked salmon
Celeriac remoulade and chorizo tostini
Create your very own bulb mix
Many spring bulbs can be planted as late as the end of December, so you can raid the bulk sales and create a luxurious mix for someone to grow in the ground or a pot just after Christmas
Mix Alliums, Tulips (Dwarf, Parrot, and Standard), Russian Snowdrops, Hyacinths, Muscari, Oxalis, Ranunculus, and Crocus
The great thing is that when creating the bulb mixture, you can split each reduced pack of bulbs 50/50, creating a gift for yourself as well as a friend
For an extra special touch, bag them up in a hessian bag with a guide on how deep to sow the bulbs You could even print out images of the varieties you have picked.
Cookie Cutter plant labels
What You Will Need
Cornflour 1 Cup
Baking Soda 2 Cups
Water 1 1/4 Cups
Saucepan
Food colouring (optional)
Cookie Cutters
Method
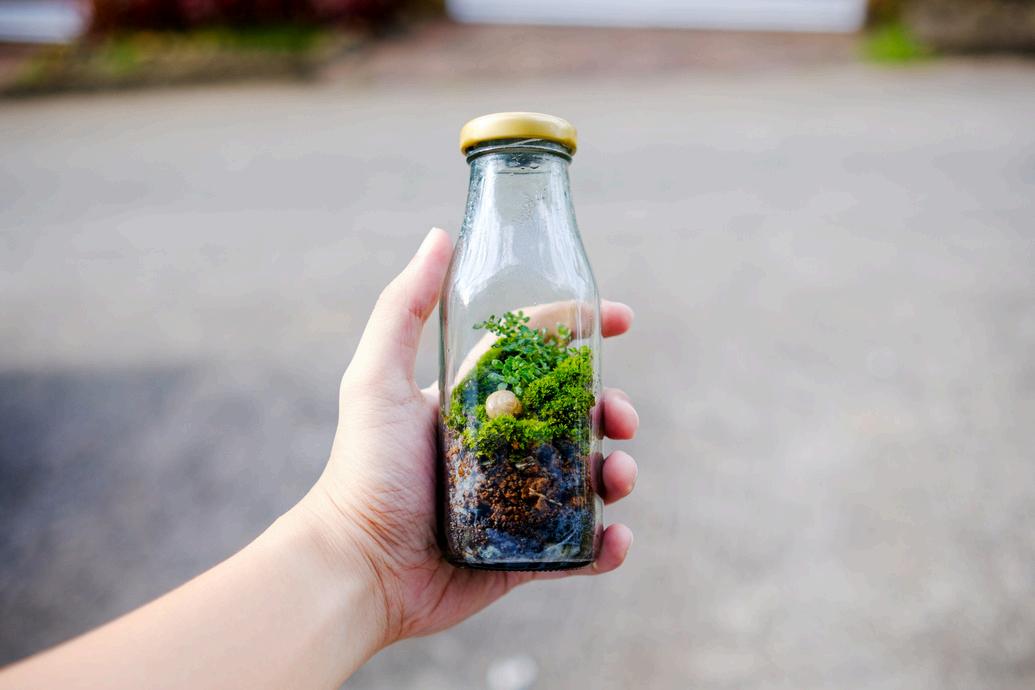
DIY Terrarium for your gardening friend
What you will need
OId Jar
Mix of Gravel and Soil
a small sucullent cutting (with roots)
Method
Put cornflour, baking soda and water (with or without food colouring) into a saucepan on medium heat.
Stir the mixture until it turns into a mashed potato consistency
Take the mixture out and wait until it has transformed from mashed potato to dough
Roll out until flat
Take your cookie cutters and press into the dough to cut the shapes you desire
Carve plant names into your shapes
You can air dry them for 3-5 days, or you can pop them in the oven for 1-1.5 hoursremember to turn the shapes over halfway through
Clean an old jar
Put gravel in the base of the jar
Add a covering of compost
Using tweezers, put the succulent cuttings in the jar, making sure you push the roots in to the gravel.
Give the jar a spray of water.
Pop the lid on.
Add a pretty Christmas tag
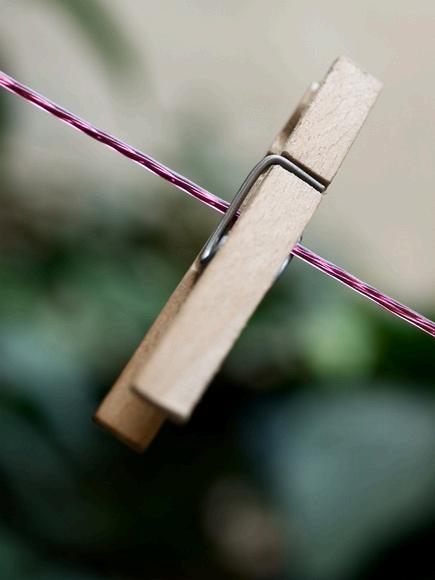
Peg Plant Labels
What you will need
Pegs
Thin nib permanent markers
Clear nail polish
Method
Take a peg, and write the plant variety on the wood
Once the ink has dried, paint over the letters with clear nail polish and leave them in a warm place for a few days to dry thoroughly
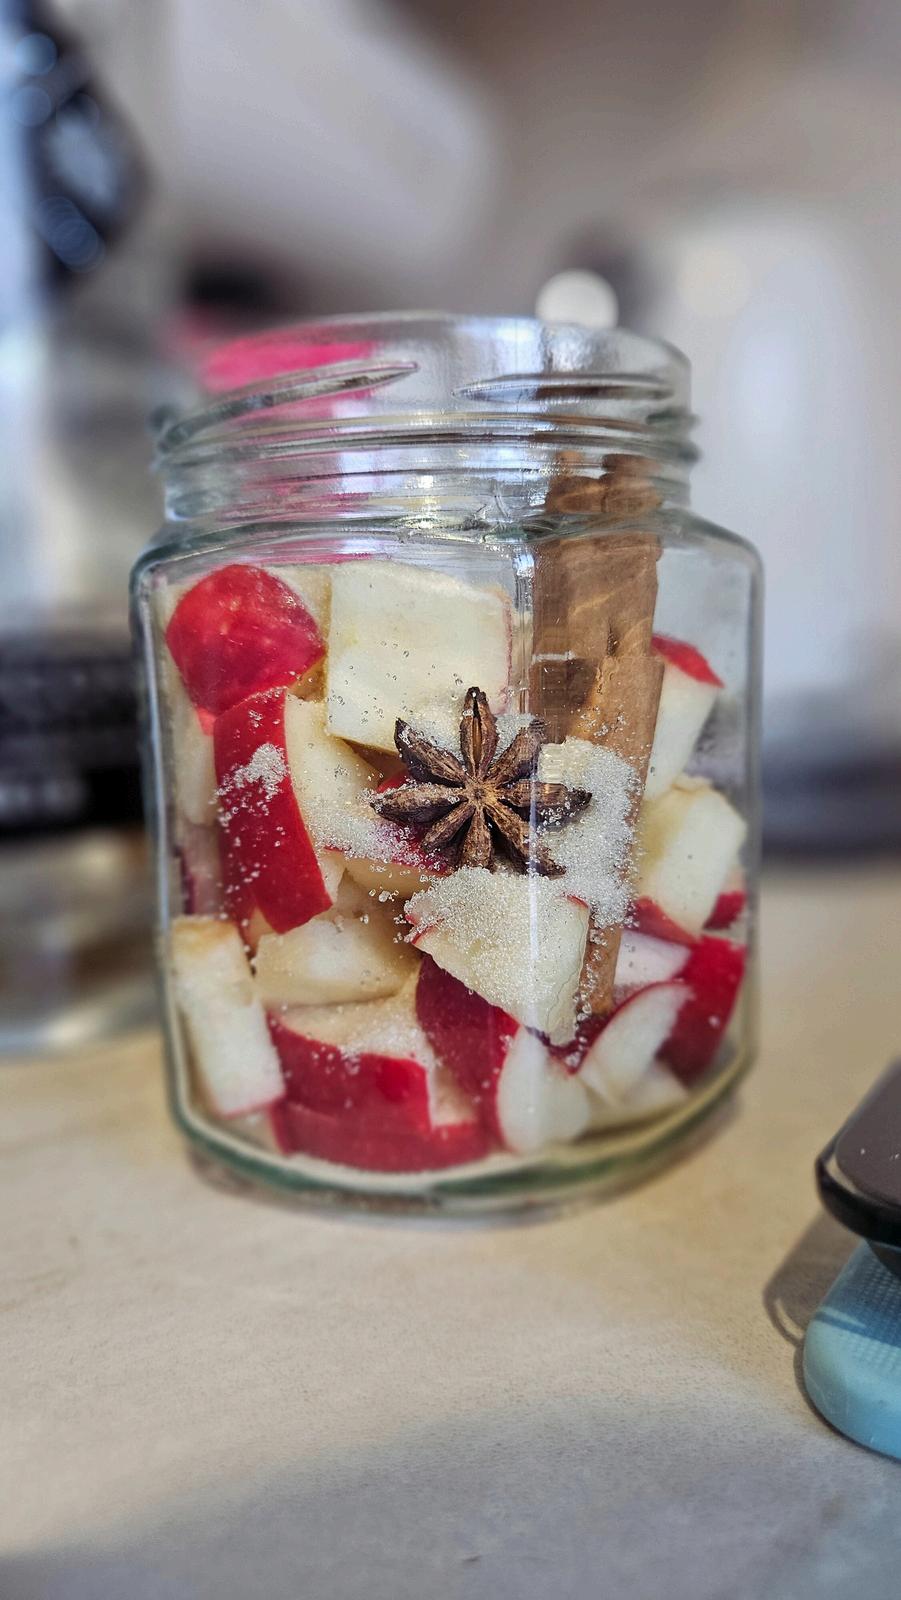
1 jar
500ml Gin
2 apples cored and chopped
1/2 cup sugar
A mixture of spices (cinnamon, cloves and star anise
Add your chopped apples, sugar and spices of choice to the jar.Fill with gin until all the apples are covered.
Shake every day for 5 days and store in a cool dark place for 2 weeks. Taste every 2 days after this time until your desired spicing is reached. The pink from the apples wil slowly colour the gin.
Finish with a label and add some recipe notes for Mulled Gin below:
Warm apple juice in a saucepan add, fresh apple slices and a good measure of the spiced pink gin. Serve in teacups for that extra special treat.
Dont worry if your don’t have pink apples any will work.
Why not try a few different options and tag @gardenfokmag so we can see yours
Who wouldnt love this as a gift!
Rosemary crackers
1 Jar
175g plain flour (if using gluten free flour add a 1tsp of xanthum gum)
1 tsp flaky sea salt
1 sprig or rosemary tied to the jar
Add all the ingredients to the jar and label with instructions below
Finely chop your fresh rosemary and add all your ingredients to a bowl. Add 25ml of oil and 100ml water and mix well. Knead until a smooth dough is formed, cut into shapes and bake at 200C (fan)/ 220C till golden.
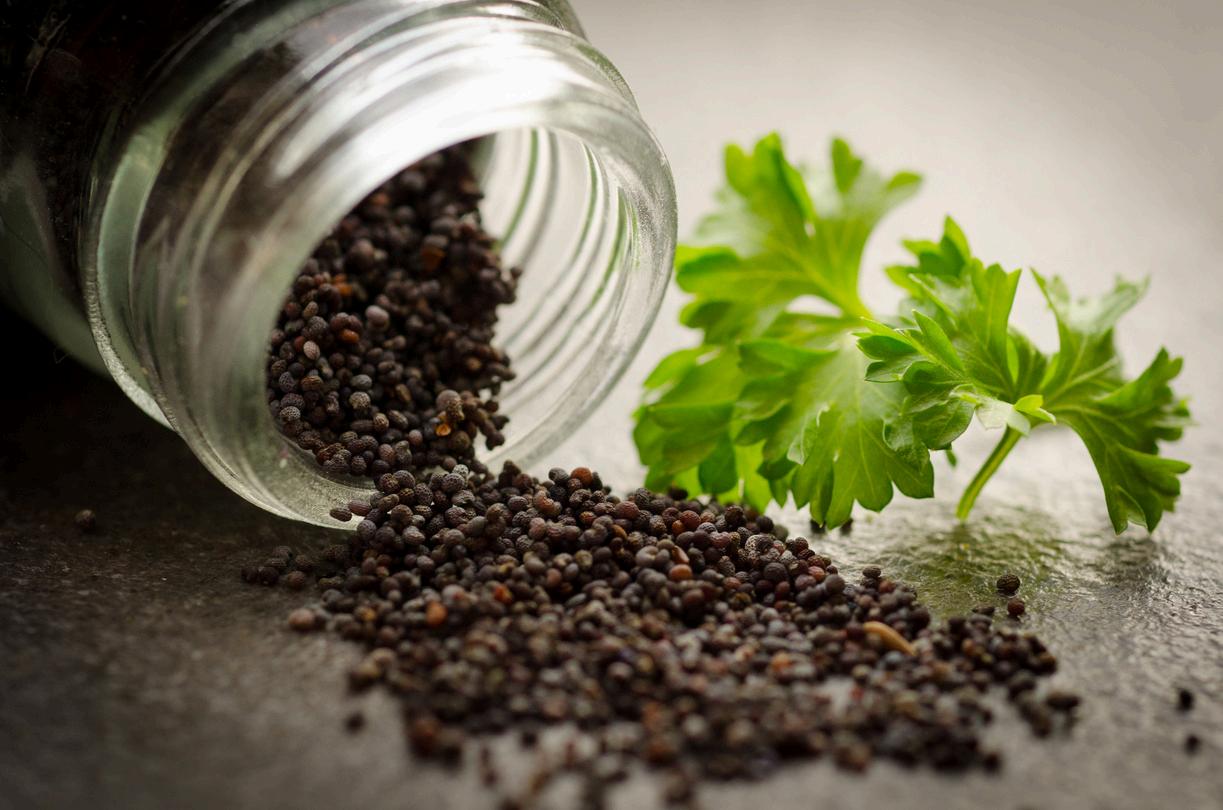
Black pepper and sea salt cracker
1 Jar
175g plain flour (if using gluten free flour add a 1tsp of xanthum gum)
2 tsp flaky sea salt
2 tsp freshly ground black pepper
Add all the ingredients to the jar and label with instructions below.
Add all your dry ingredients to a bowl. Add 25ml of oil and 100ml water and mix well. Knead until a smooth dough is formed, cut into shapes and bake at 200C (fan)/ 220C till golden
Perfect for all the Christmas cheese we will be eating.
Enjoy those crisp winter mornings soaking up the wildlife in your garden.
By Mel Heris
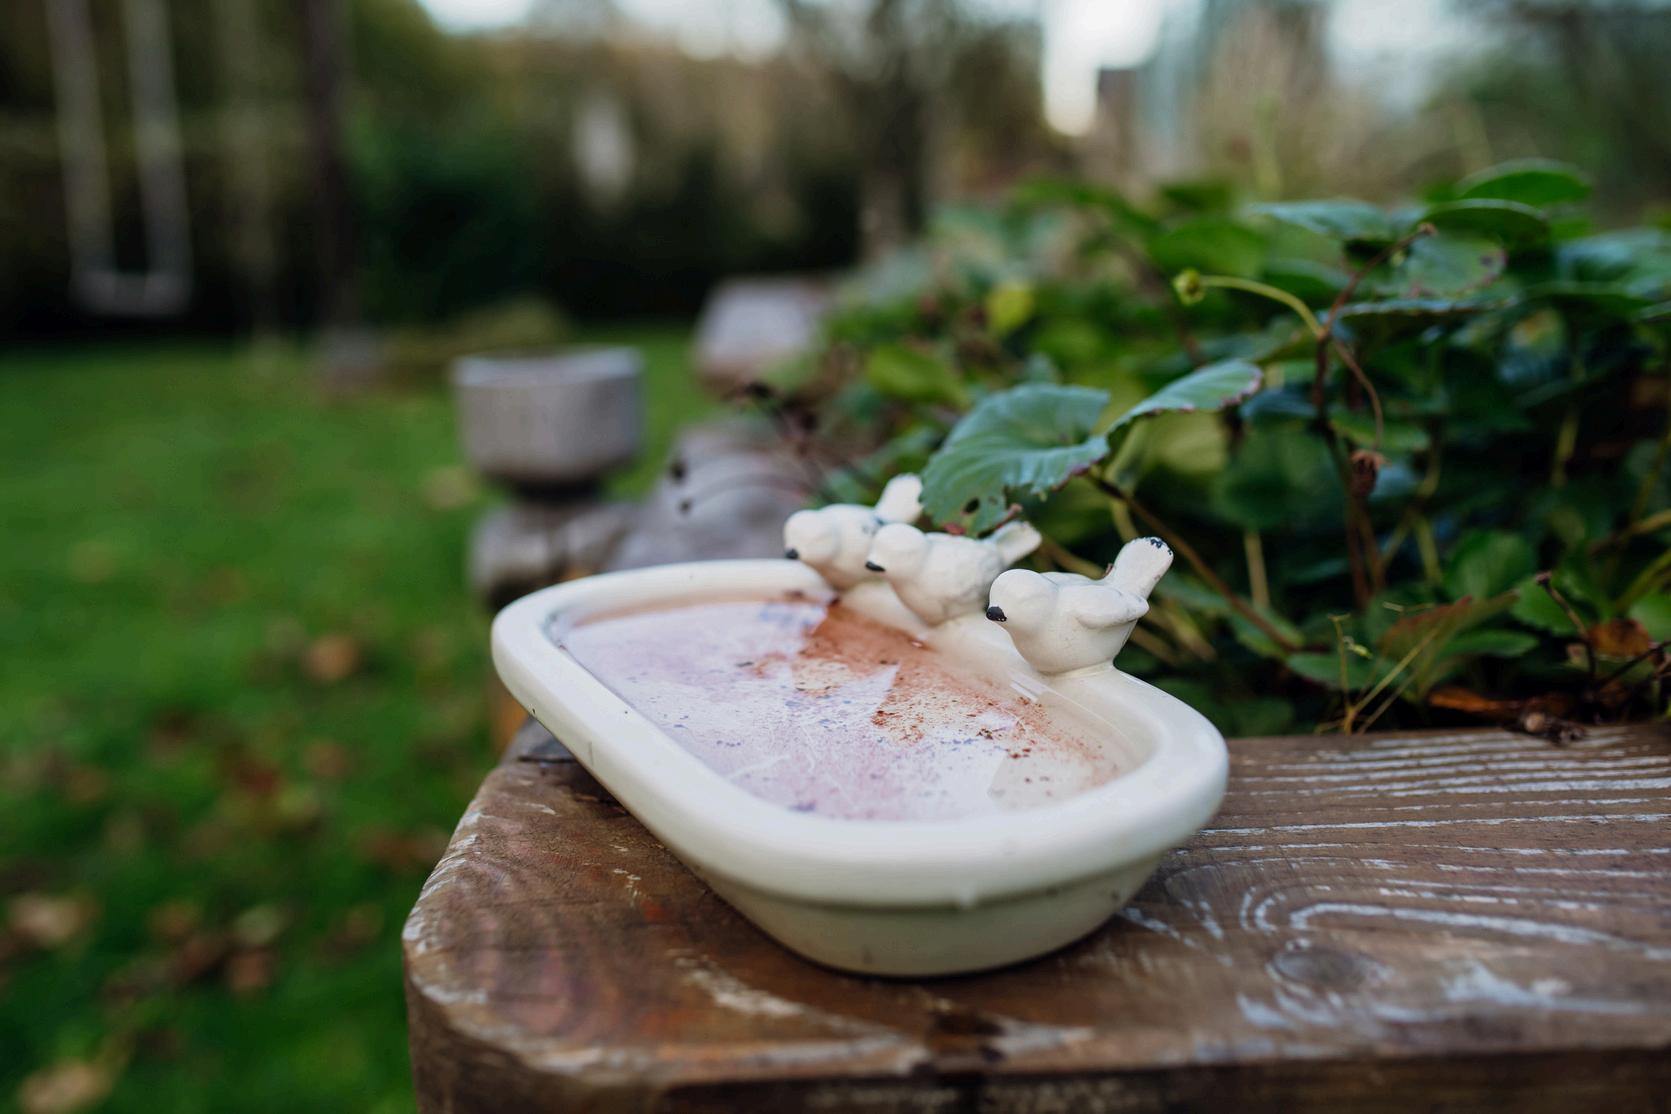
Day 1 : Put out fresh water
Place a shallow dish of unfrozen water outside for birds and other wildlife. Refresh it daily to ensure it doesn’t freeze, providing a reliable winter water source
Day 2
: Set up a bird feeder
Hang a bird feeder filled with high-energy foods like sunflower seeds or suet to help birds stay warm Your feathered friends will soon recognize your garden as a reliable spot for nourishment.
Day 3 : Make a wildlife wishlist
Create a wishlist of items you’d like to add to your garden to support wildlife. Consider bird food, wildflower seeds, native plants, birdhouses, or insect hotels Share your wishlist with family and friends, encourage them to make their own, and then swap lists to spread a bit of holiday cheer.
Day 4 : Create a brush pile or leaf litter corner
Gather fallen branches, twigs, and leaves in a corner of your garden. This simple pile will provide cosy shelter for small mammals, frogs, insects, and birds throughout the winter
Day 6 : Create a shelter for insects with a terracotta pot
Find a dry corner in the garden and turn a terracotta pot upside down, filling it with straw or twigs. This makes a cosy hideaway for insects seeking refuge from the cold.
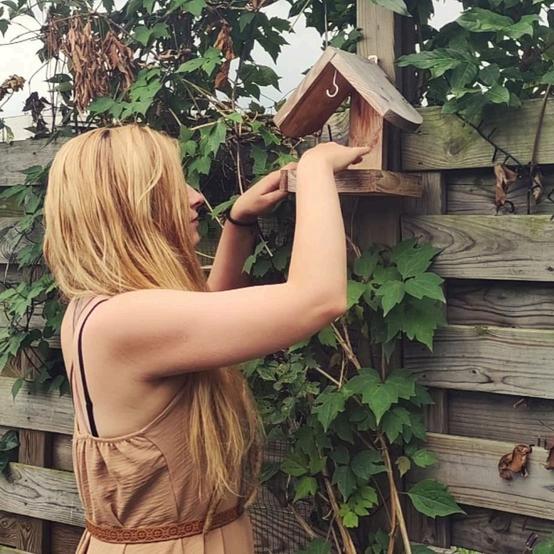
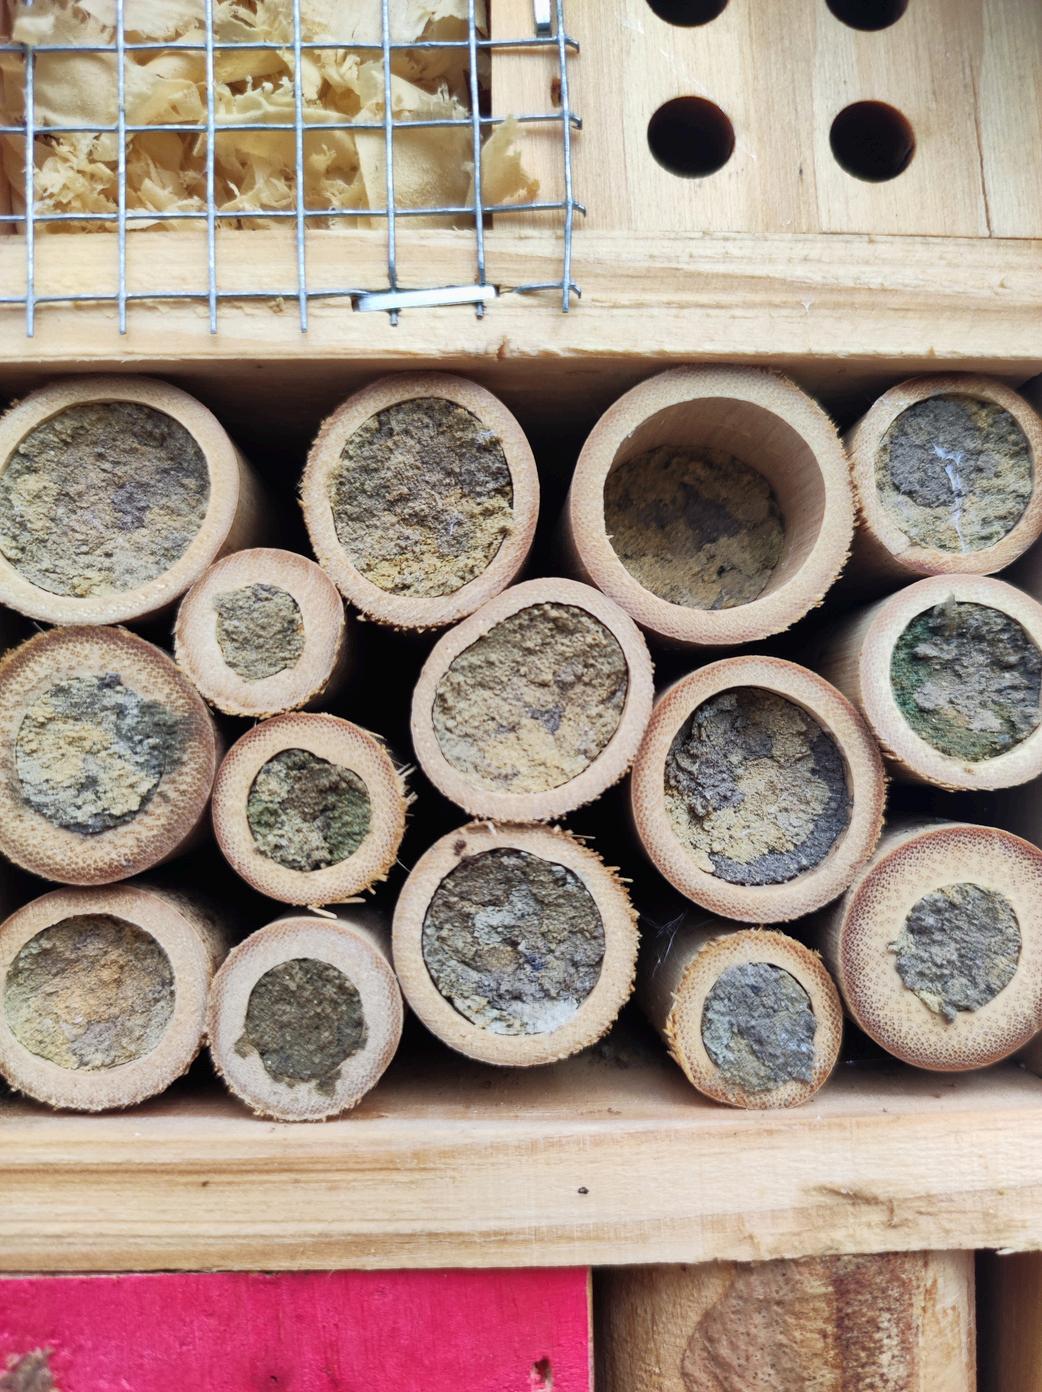
Day 7 : Make or hang a bee hotel
Collect hollow stems, bamboo canes, or drilled wood to create a bee hotel for solitary bees. You could also visit a garden centre and pick up one as an early Christmas gift for you and the pollinators.
Day 8 : Decorate a tree with edible ornaments for birds
String together bird-friendly items like cranberries, unsalted popcorn, or dried fruits, and hang them on a tree. These festive decorations provide nourishment for birds while adding holiday charm to your garden
Day
9 : Plant spring bulbs for early pollinators
Help early pollinators by planting spring bulbs that bloom just when they need them most. If you have any bulbs left to plant, now is a great time to get them in the ground You can also visit a garden centre, where spring bulbs are often discounted at this time of year. If the ground is frozen, you can plant these bulbs in a flower pot instead, and enjoy a pop of early colour that will attract pollinators when spring arrives
Day 10 : Make a sign for your wildlife area
Designate a part of your garden as a “wildlife zone ” by creating a small sign This can be as simple as painting a rock or a piece of wood with the words “Wildlife Welcome.”
Day 12 : Decorate with pine cones filled with peanut butter
Roll pinecones in peanut butter and birdseed, then hang them in your trees These festive, natural decorations are sure to delight visiting birds.
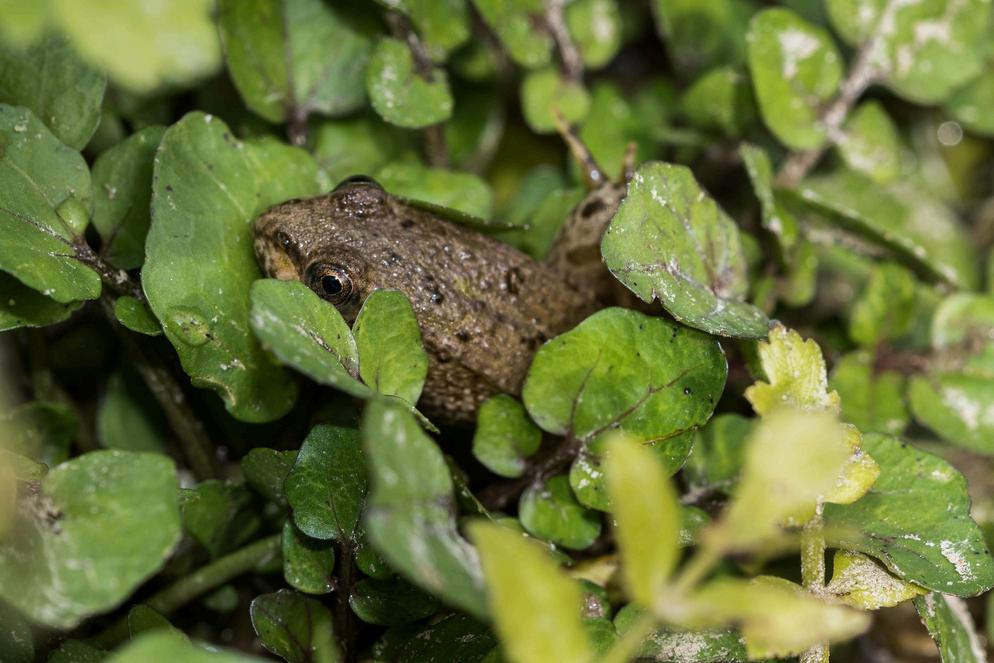
Day 13 : Create a hibernation spot for frogs and toads
Dig a shallow depression in a damp, shady area, and cover it with stones and leaf litter. This cosy spot will provide a winter hideaway for amphibians looking for shelter
Day 11 : Take a slow garden wildlife walk
Take a slow walk through your garden. Immerse yourself in the moment, enjoying the birdscoming to visit your garden, and thinking of all those wildlife friends, big and small, that have found a safe place in your garden during winter to hibernate, forage, and wait for spring to return
Day 14 : Set up a winter feeding station for ground-feeding birds
Designate a part of your garden as a ‘wildlife zone ’ by creating a small sign This can be as simple as painting a rock or a piece of wood with the words “Wildlife Welcome.”
Day 15 : Plan a wildflower patch for spring
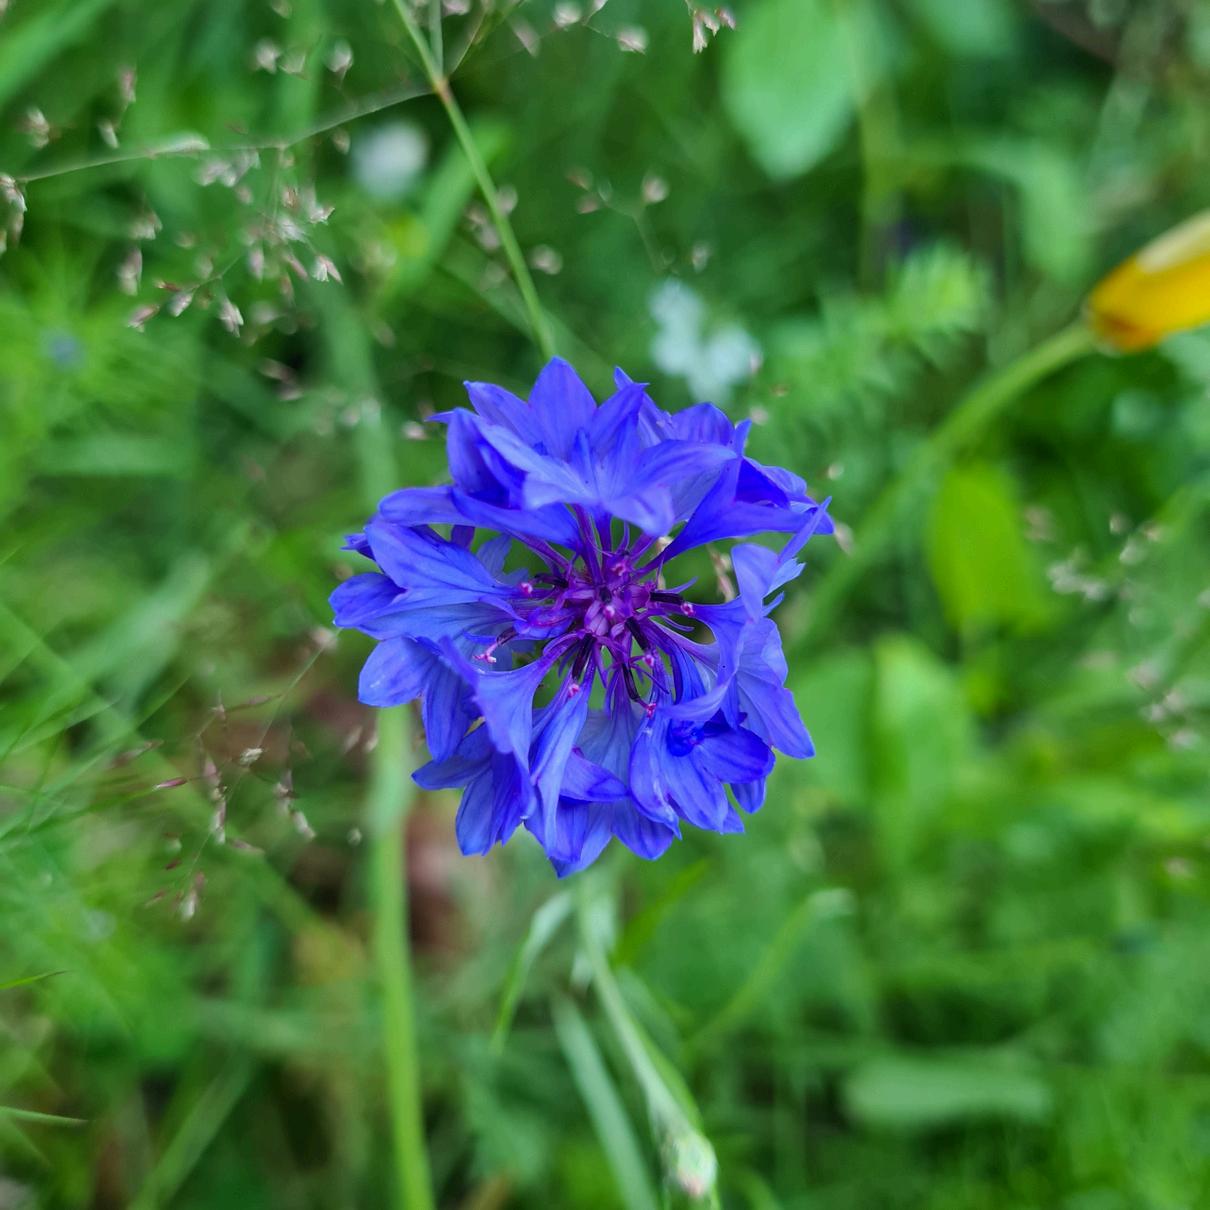
Settle in with a warm drink and make a list of native wildflowers you’d like to plant once spring arrives. Look up varieties that attract pollinators, such as clover, cornflower, daisies, yarrow, and poppies, to create a vibrant oasis for wildlife.
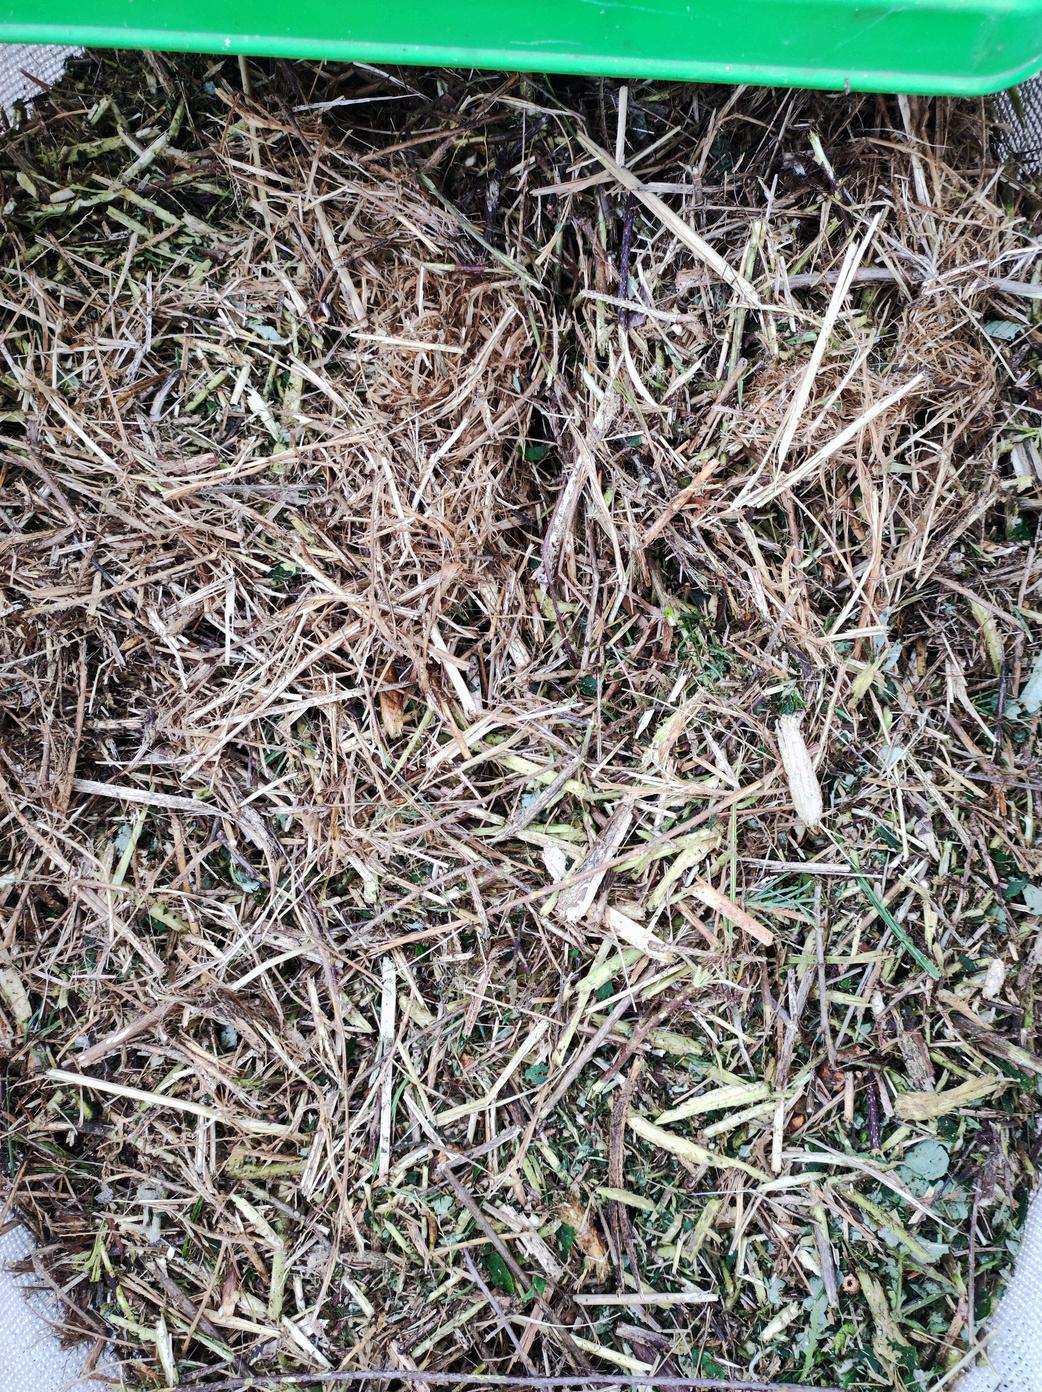
Day 16 : Create an insulated winter habitat with mulch and straw
Lay down a layer of mulch or straw around the base of trees, shrubs, or along garden borders. This provides warmth for soil-dwelling insects, small mammals, and even amphibians. As the mulch breaks down, it will also enrich the soil, benefitting your garden in spring.
Day 17 : Create a dust bath and grit station for birds
Set up a small, shallow dish or tray in a sheltered spot and fill it with a mixture of sand and a bit of grit. Birds like sparrows and finches will use the sand for dust bathing, which helps keep their feathers in good condition The grit also aids in digestion Place this station near shrubs or cover, so birds feel safe while they enjoy their dust bath.
Day 18 : Put down cardboard for ground-dwelling insects
Place a small piece of cardboard on a damp, undisturbed spot in your garden to create a cosy shelter for ground-dwelling insects like beetles and worms. As they take refuge beneath it, the cardboard will gradually break down, enriching your soil and providing a safe space for these creatures to wait out the winter until spring arrives.
Day 19 : Provide nesting materials for birds
Gather natural materials like dried grass, straw, pet hair (if you have pets), or small twigs Hang them up or scatter them in a sheltered spot where birds can easily find them when they start building nests in early spring.
Day 20 : Leave out fruit scraps
Hang apple slices or place raisins in your garden to attract fruit-loving birds like blackbirds, robins, and thrushes. These small treats provide an extra boost of energy during cold weather
Day 22 : Provide a cozy spot with an evergreen branch shelter
Arrange evergreen branches near a fence or under a tree to create a natural, insulated area where small birds can take refuge from the wind and cold It’s an easy way to offer instant shelter for winter days
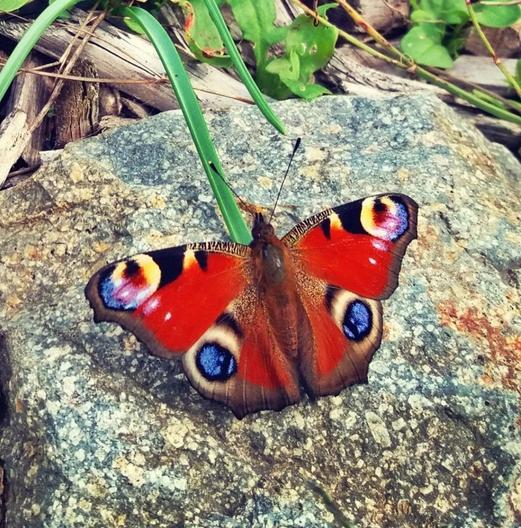
Day 23 : Create a Sunbathing Spot for Butterflies
Arrange flat stones or rocks in a sunny part of your garden. Butterflies will appreciate this warm spot to bask in when they emerge in spring, helping them recharge and get a head start on the season ahead
Day 21 : Build a log pile
Stack some old logs in a shaded corner to create a habitat for beetles, fungi, and other decomposers. This small habitat will support biodiversity and help break down organic matter naturally.
Day 24 : Observe and journal your garden’s wildlife
Spend a peaceful moment in your garden, taking note of the wildlife you ’ ve attracted and reflecting on the small ways you ’ ve helped Take pride in the winter haven you ’ ve created, knowing you ’ ve shared the holiday spirit with the creatures that bring life to your garden.
Wildlife Christmas Cheer
As Christmas draws near, we fill our homes with light, warmth, and the joy of the season. But by extending that festive spirit to our gardens, we can create a haven for the creatures that share our outdoor spaces. Offering food, shelter, and care for birds, insects, and small mammals is a beautiful way to spread the holiday cheer beyond our walls and bring a little extra magic to the world around us
This December, as you enjoy the sparkle of twinkling lights and cosy warmth, take a moment to step outside and appreciate the quiet beauty of your winter garden. From the robins and wrens singing among the branches to the hidden insects resting beneath the frost, every creature adds to the wonder of the season
After all, the true gift of wildlife gardening is the way it invites us to see the world with fresh eyes—reminding us that even in the heart of winter, our gardens are alive with small wonders, waiting to be discovered. As you spread holiday cheer to those who share your garden, know that you ’ re helping to create a sanctuary of peace and beauty that will blossom well beyond the festive season
So this Christmas, may your garden be filled with the flutter of wings, the song of birds, the rustle of leaves, and the quiet presence of nature’s tiniest friends.
A happy holiday season to you, and to all the wildlife that makes our gardens and world a little brighter!
Put out fresh water
Set up a bird feeder
Create a brush pile or leaf litter corner
Make or hang a bee hotel
Take a slow garden wildlife walk
Create an insulated winter habitat with mulch and straw
Click here to download yours and print it at home
Make a wildlife wishlist
Make wildlife gifts to share with family and friends
Decorate a tree with edible ornaments for birds
Decorate with pine cones filled with peanut butter
Create a dust bath and grit station for birds
Tag @gardenfolkmag and @bluebellandbumblebee in your posts and use
#24DaysofWildlife throughout December
Create a shelter for insects with a terracotta pot
Plant spring bulbs for early pollinators
Create a hibernation spot for frogs and toads
Put down cardboard for ground-dwelling insects
Make a sign for your wildlife area
Set up a winter feeding station for ground-feeding birds
Provide nesting materials for birds
Plan a wildflower Patch for Spring
Leave out fruit scraps
Provide a cozy spot with an evergreen branch shelter
Create a sunbathing spot for butterflies
Observe and journal your garden’s wildlife
Build a log pile
By Karen Stewart-Russell @rakeexpectations
My Winter garden to the untrained eye most likely appears quite scruffy with its fallen leave covering the borders and the stems and seed heads a stark reminder that the glory days of summer are long gone There is method however in my scruffy style, the fallen leaves help to insulate the soil and act as a mulch I lift the vast majority of my dahlias as they would not survive a very cold, wet winter but if I have to leave any in the ground I will add more leaves to give them a better chance Hollow stems provide a place for insects including bees to hibernate which is very important as insect number are falling across the U K Here in my garden I noticed far fewer butterflies and bees this year I do not get rid of old stems until temperatures warm up. An added bonus is that they add some drama and structure to the garden while flowers are scarce.
Wildlife is a great source of joy to me and I do my utmost to nurture my many garden visitors, particularly during the colder months. I try to stop my pond completely freezing over by adding a tennis ball so it continues to be a water source over winter. I keep my feathered friends well supplied with food, making sure to include high fat options like suet balls I regularly change the water to make sure it is clean and not frozen solid The hedgehogs still visit in winter, albeit less frequently, so the feeding station is checked and refreshed often and kept inside a hedgehog house so it is clean, dry, and provides much needed shelter
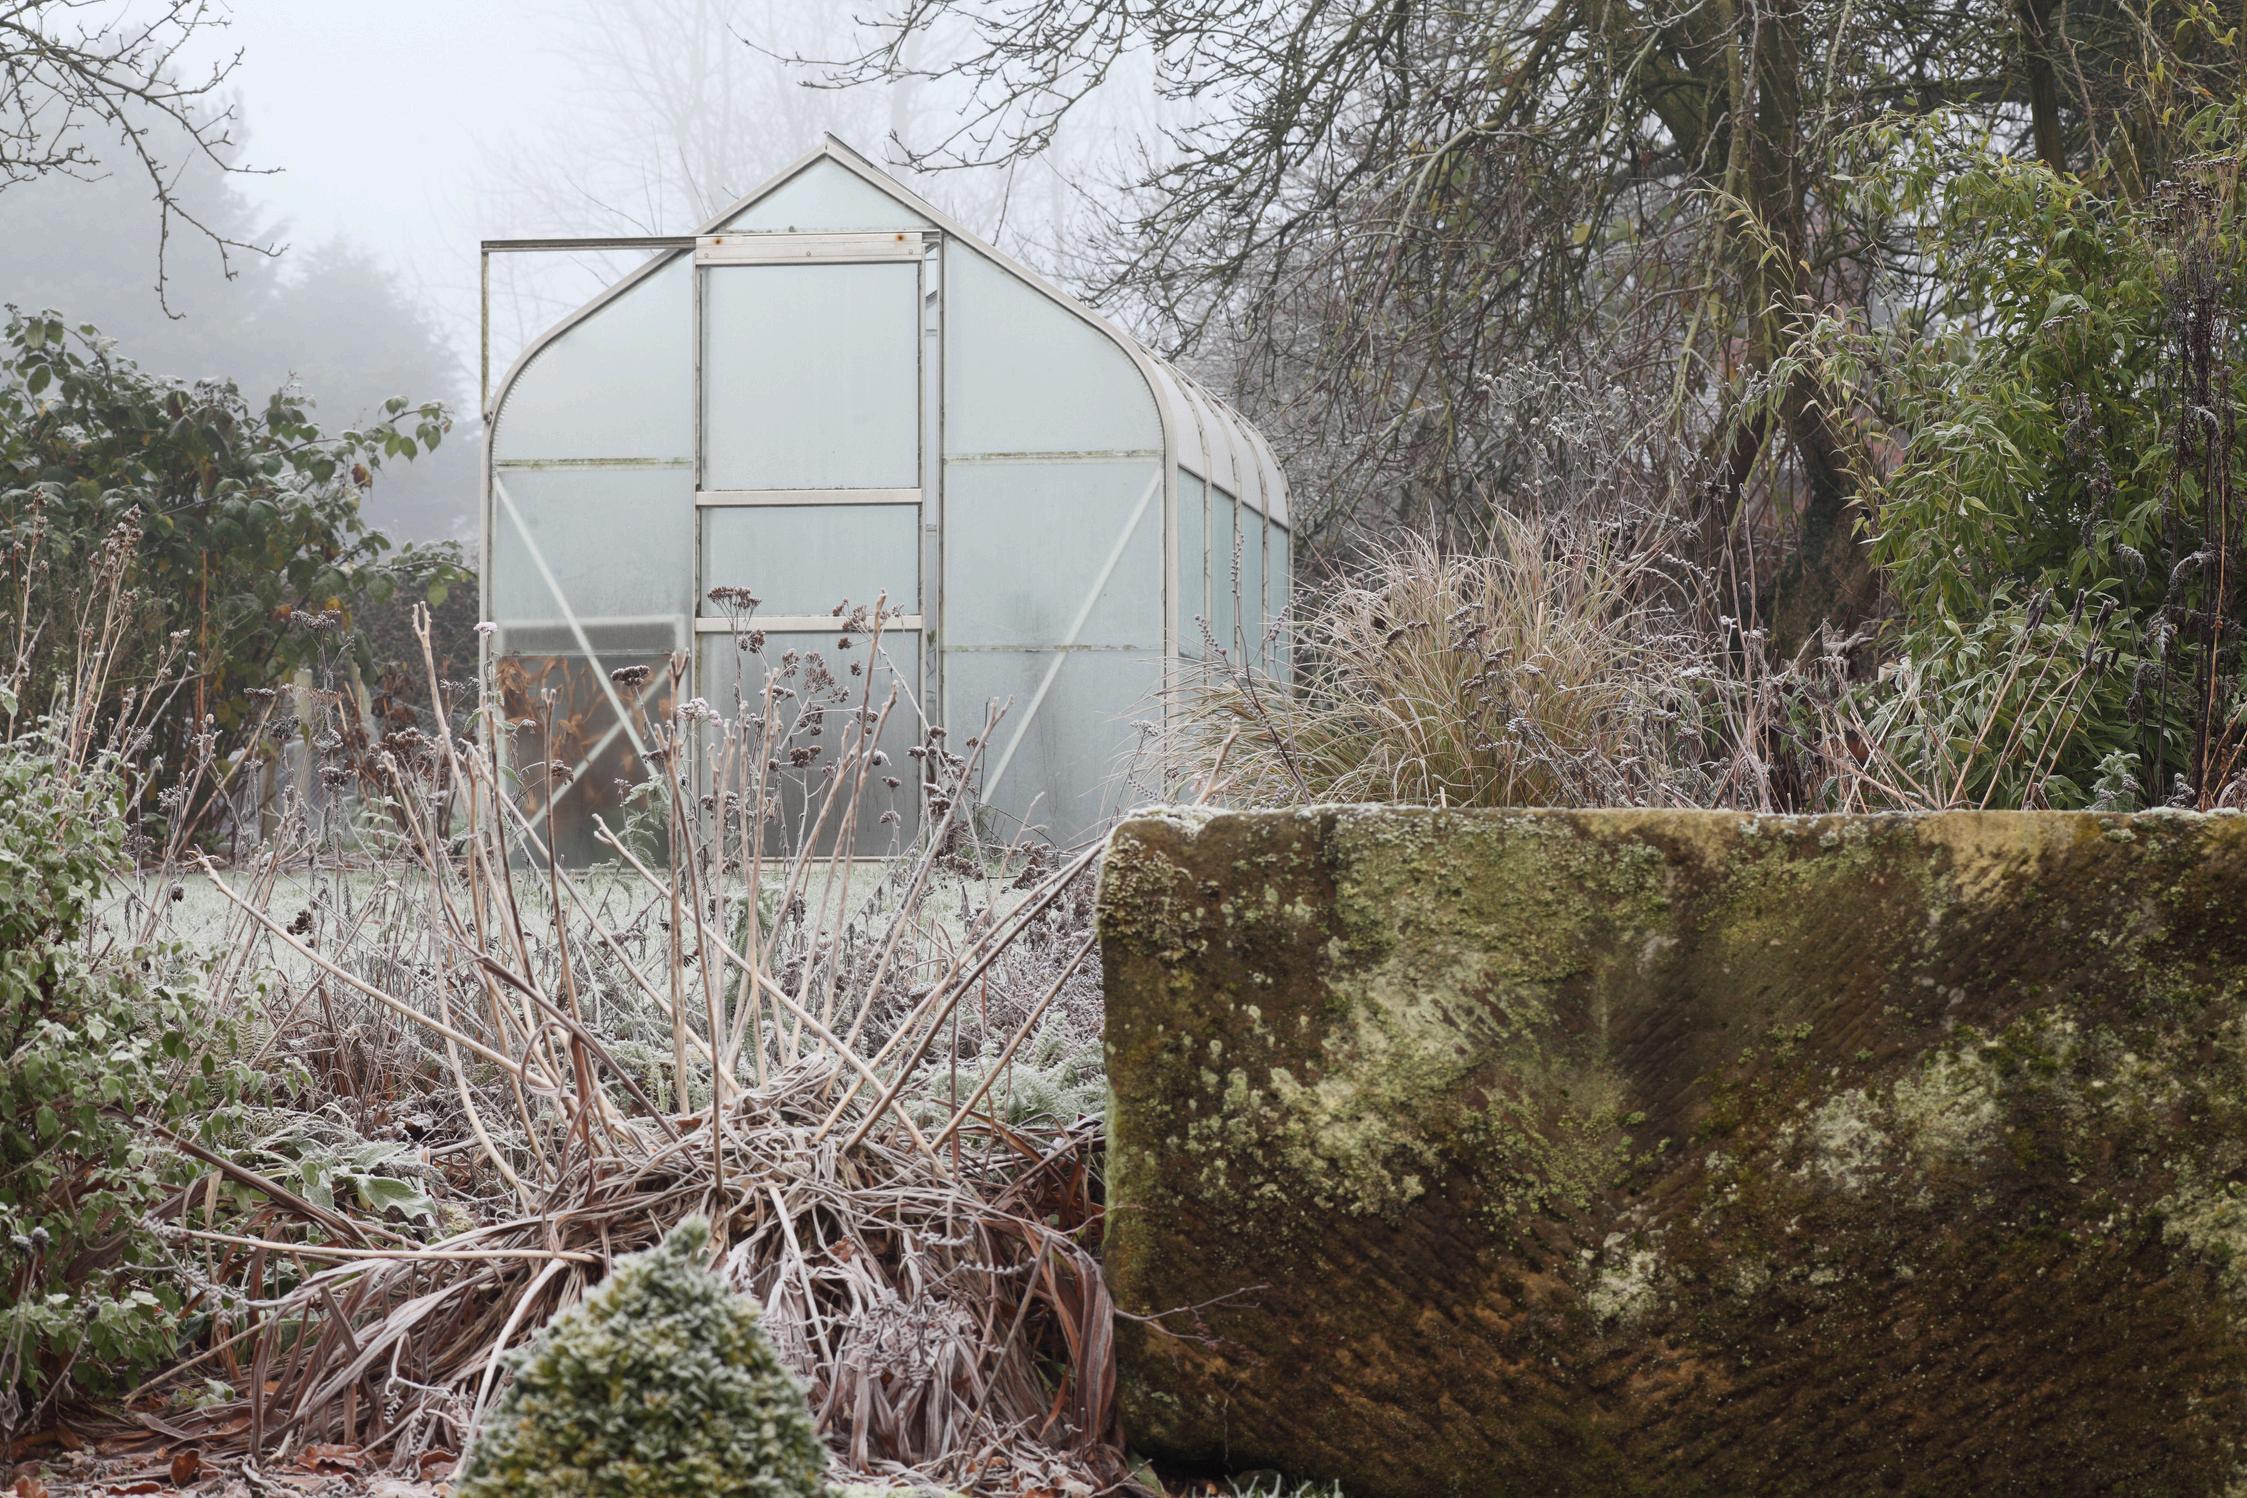
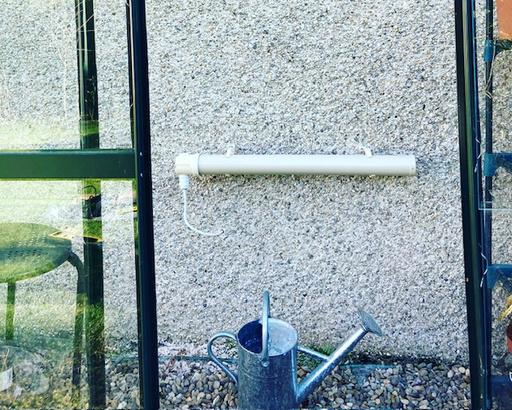
My greenhouse is in use pretty much year round due to me having heating which enables me to make good use of it My heating system is a tubular heater linked up to an automated system so that the heater comes on when the temperature drops lower than my plants would like From a personal perspective it also means it is not quite as cold when I am in there pottering when the weather is too bad to garden, I very much value being able to be in my garden but protected from the wind and rain with a nice hot cuppa.
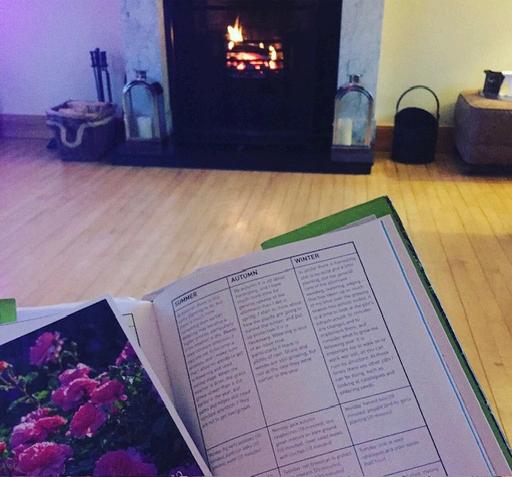
Winters here are quite long and harsh but I do try and make sure I get outside every day even for a short while, to help battle the winter blues. I embrace the season and try not to yearn for the return of the brighter months. Some days, as our garden is right on the edge of the open fields, it is too windy and cold and I am forced to have a day inside and it is then that the garden catalogues come out and I busily plan for next year and indulge in a bit of retail therapy I carefully check the hardiness of plants as sometimes a plant is marked as hardy but would not be here I never really choose plants under H4 hardiness which means it will survive temperatures down to -10 If it is an expensive purchase I play it safe with H5 If it gets colder than that I think I would need to move to sunnier shores! Stay safe this Winter and enjoy your garden.
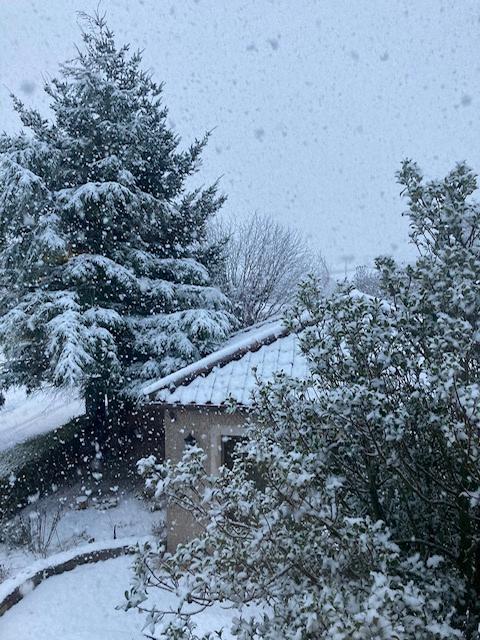
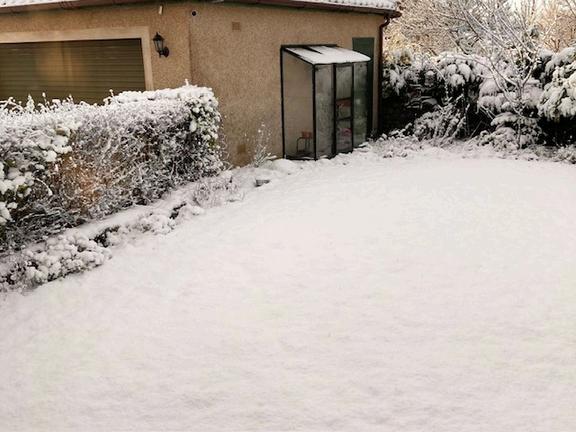
The calm of snow in the garden.
Plenty of planning can be done right from your sofa.
Keeping the plants warm all year round.
Are we ready for
Let’s talk about bulbs, no not the ones everyone knows, you should know me by now, I like to try to introduce you to things you haven’t get discovered.
I also like to try and plant bulbs that come back every year not ones that are effectively bedding plants that are only good for one display, I want bulbs that get better every year and naturalise.
@gardeneriddler
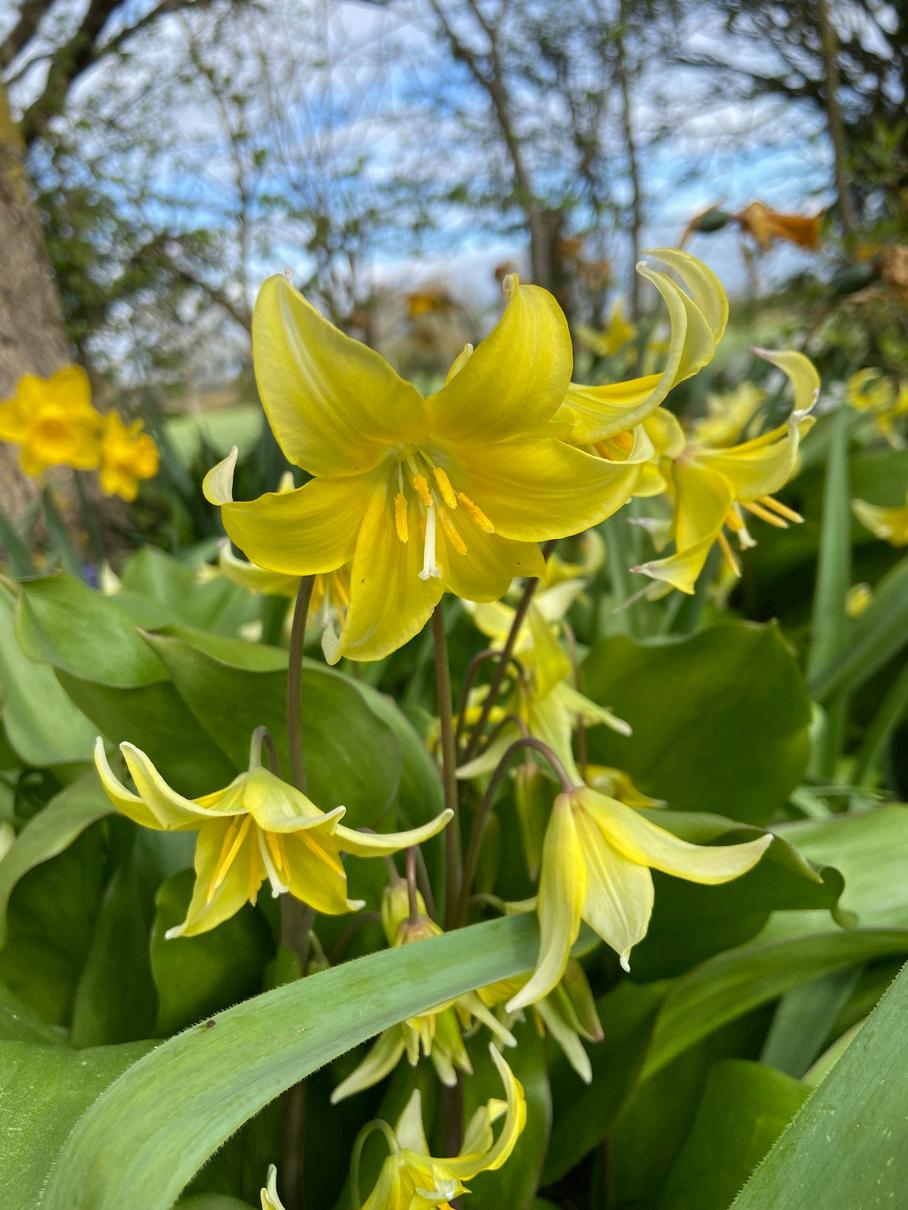
So, without further ado, let me introduce you to Erythroniums or Dog Tooth Violets as they are commonly known because the bulbs are shaped like dogs teeth. My favourite is Pagoda as it’s tough as old boots and comes back reliably each spring. They have beautiful glossy leaves with almost a marble effect and a nodding lily like flower of buttery yellow. I have recently discovered a variety called Snowflake that has white flowers with purple and green leaves, I can’t wait to add that to my collection.
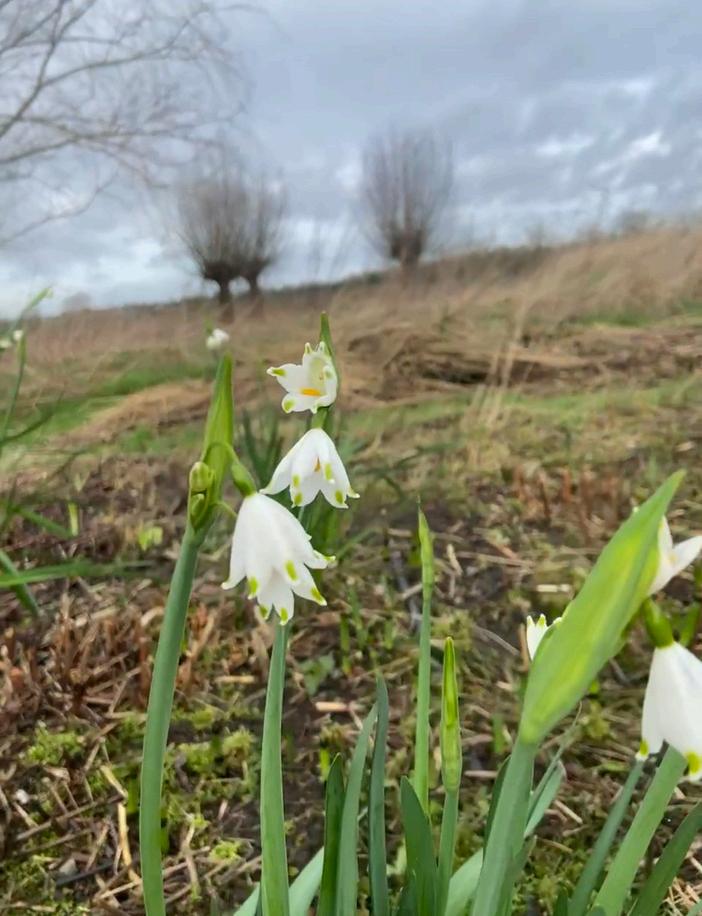
For a bulb that loves a damp corner or even the edge of a pond, In fact, wetter the more impressive, Leucojum aestivum or Snowflakes as they are commonly known, is your guy The flowers could be mistaken for a snowdrop to the untrained eye but this plant is a very different beast, much larger than the delicate snowdrop and they flower for weeks and weeks They also have multiple flowers per stem It’s said to have a soft chocolate scent, go have a whiff for yourselves and report back
Leucojum aestivum
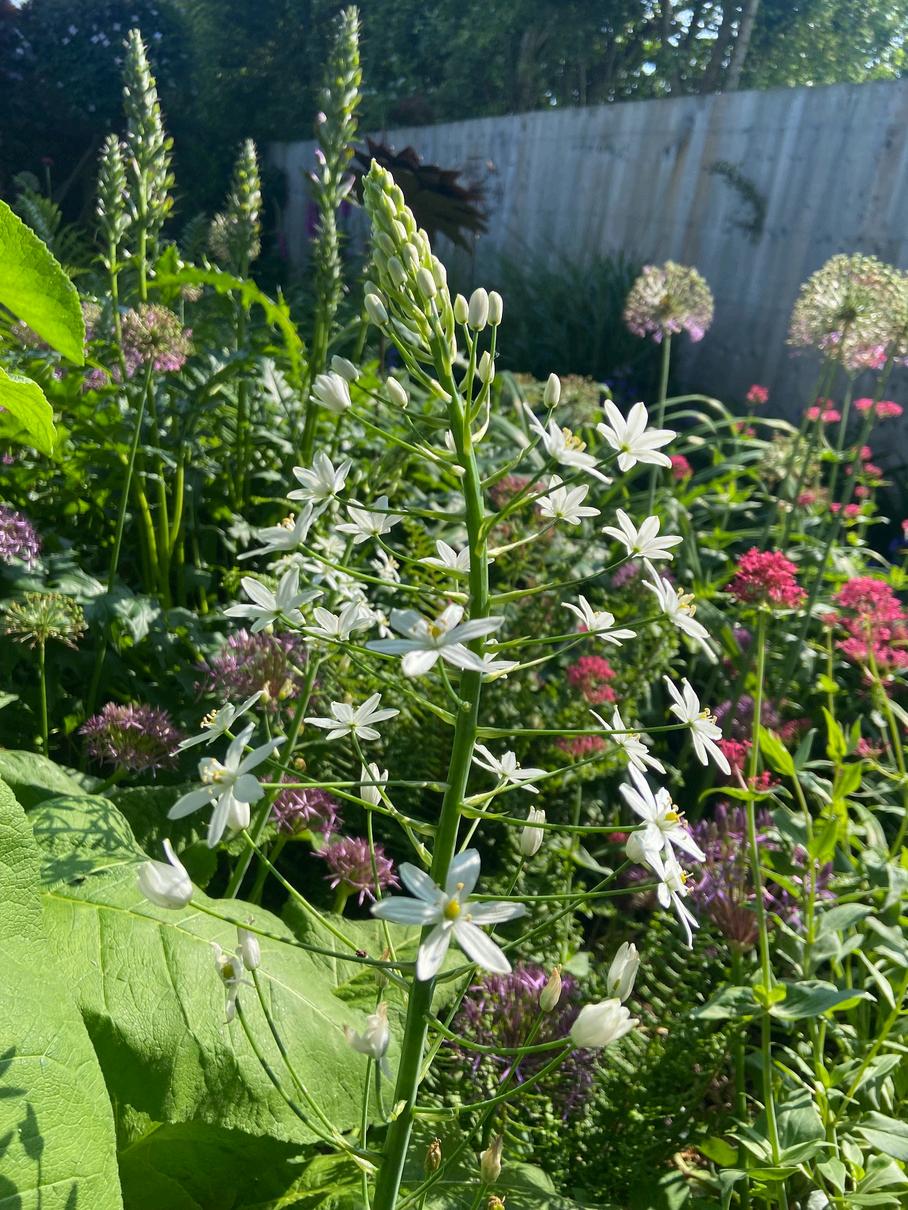
Next is an absolute show stopper, Ornithagalum ponticum ‘Sochi’ Pure white flowers are born on a spike like structure, unfurling from the bottom upwards like that of a Delphinium or a Lupin The leaves are strappy and grass like and fairly insignificant They are probably one of the last bulbs to flower and make an excellent cut flower They spread really quickly into impressive clumps but are rarely to see on sale, so if you see some snap them up!
Erythroniums
Ornithagalum ponticum
Erythroniums basking in the sun
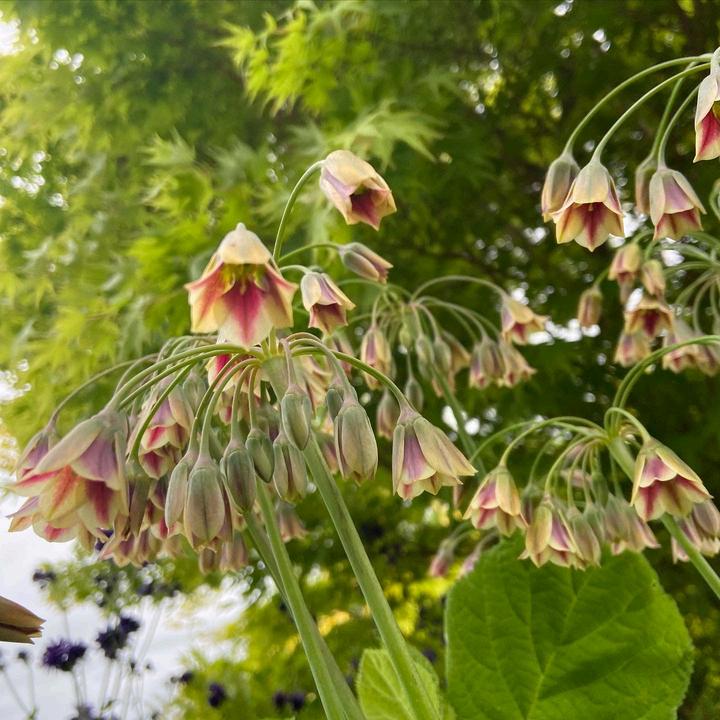
I am not sure if this one is completely unusual, it’s definitely not widely seen but its popularity is increasing. It’s had several names changes and excuse me while I go and google what its current name is… Okay the RHS lists it as Allium siculum so we will go with that The common name is Sicilian honey garlic or Nectaroscordum as they used to be called They are huge bulbs and the plant is also a giant getting to almost a meter tall an arrow shaped flower spike opening up with pendulum flowers that are best viewed from below I also love when they have finished flowering as the flowers close back up and become pointy and they then face upward creating an unusual structure like a candelabra
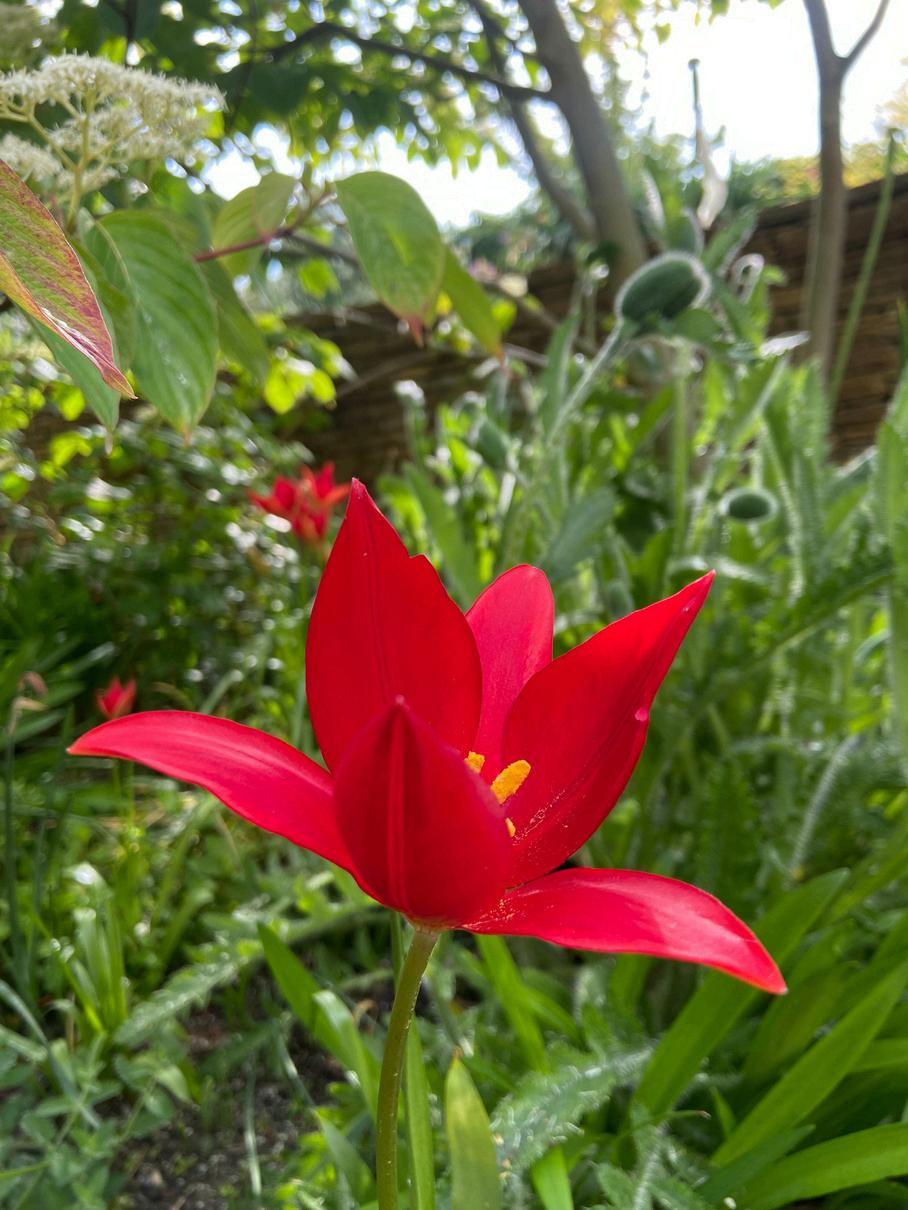
I have saved the most special until last, Tulips! hold up, before you all say we have seen tulips before! This is Tulipa sprengeri a very rare wild tulip from Turkey originally, but one that will grow and naturalise in this country if it’s in its ideal growing conditions. I have slowly been encouraging these beauties to spread at work. They are the last flowering tulips of the year and they have gorgeous, strappy, glossy green leaves with pointy, blood red flowers with bright yellow stamen. There’s even a hint of gold on the outside of the petals. Definitely another one to grab if you ever see it for sale I promise you won’t be disappointed You can grow from seed but it takes 7 years to flower!
So, there you go, 5 bulbs that hopefully you didn’t know of before to add to your garden wish list See you next month for some more planty goodness
Tulipa sprengeri
Young Folk
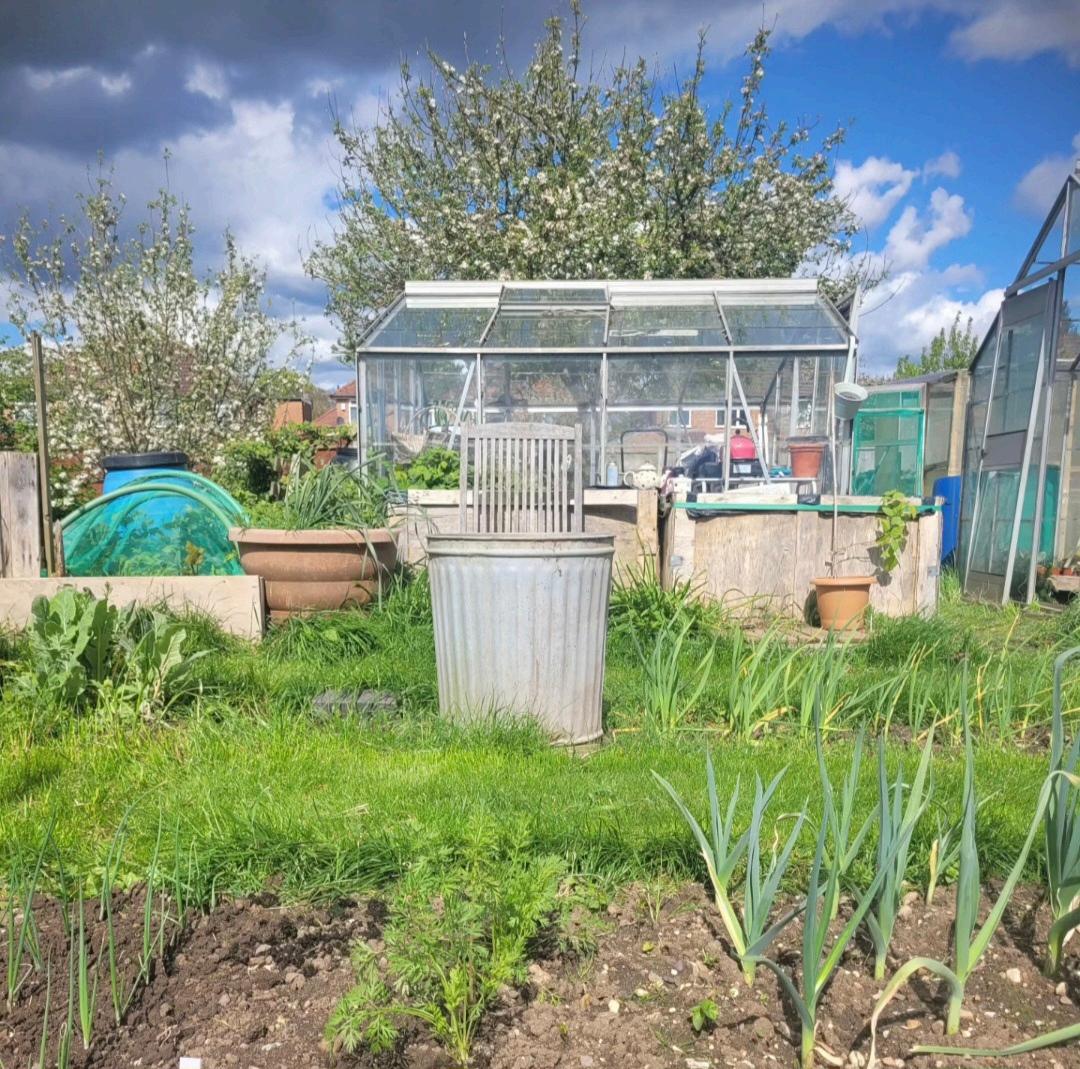
The perfect spot to enjoy the allotment.
I like the wildlife when I'm at the allotment. I love animals and we have chickens, rabbits and guinea pigs at home but my pet is Frenchie. She is a french bulldog and we are training her as a plot dog We have chickens
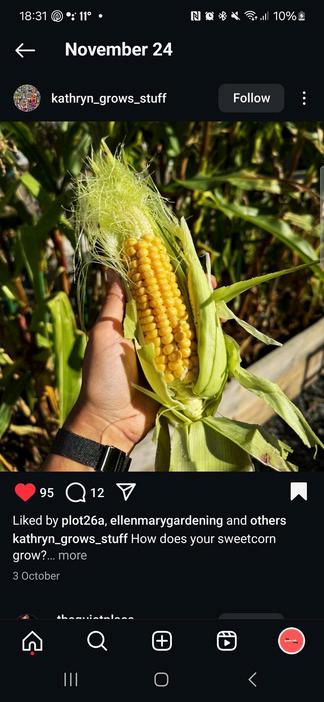
Last year ’ s highlight were my French beans and next year I’m hoping to grow glass gem corn as this year it didn't pollinate very well but I will keep trying
I like to cook at the allotment We have a stove in the shed and a camp fire kitchen area Next year I would like to pop my own homegrown corn on the fire
I've learnt lots about self sufficiency and like to can the food we grow. This year my mum made apple sauce and chutney for Christmas. She used the water bath canning method so it stores for longer and that's something I would like to do too.
I pickled this years gherkins and beetroot and I'd also like to make my own dried seasonings using herbs we grow at the allotment.
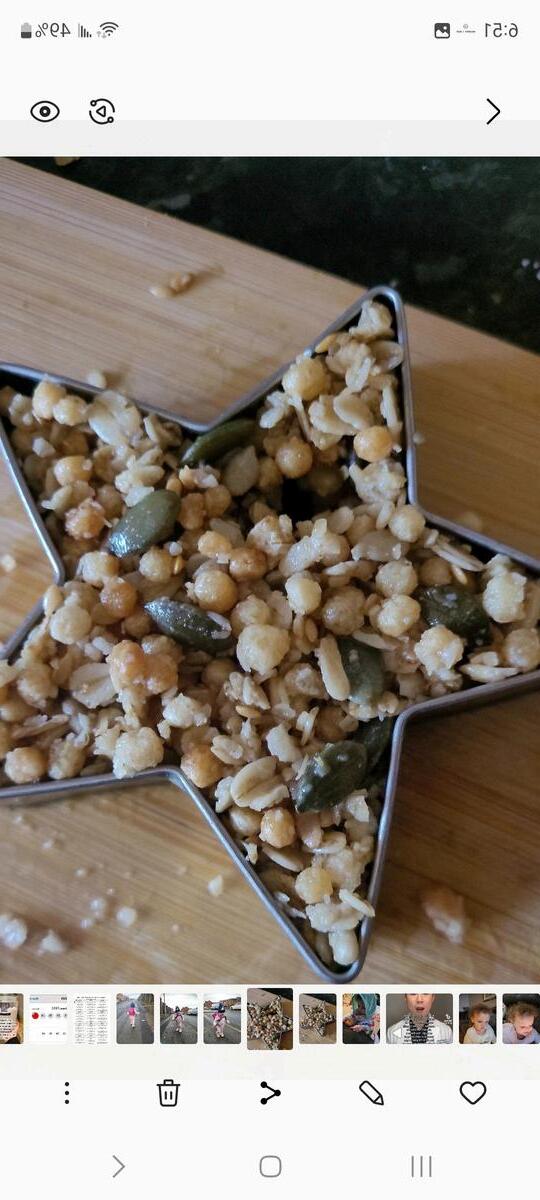
The perfect winter task. Why not make your own bird treats like Blue.
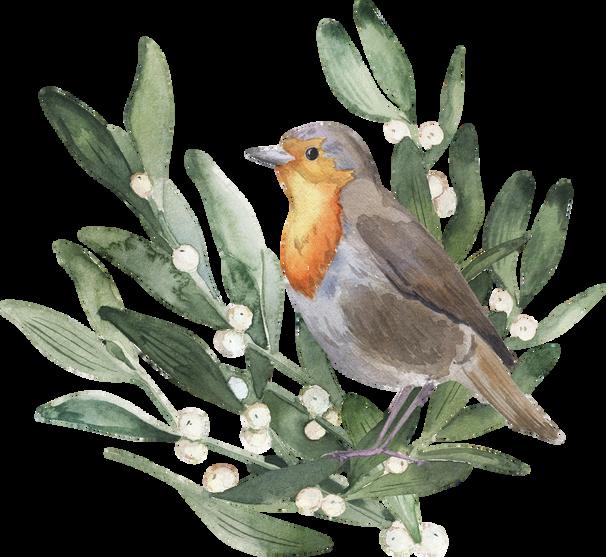
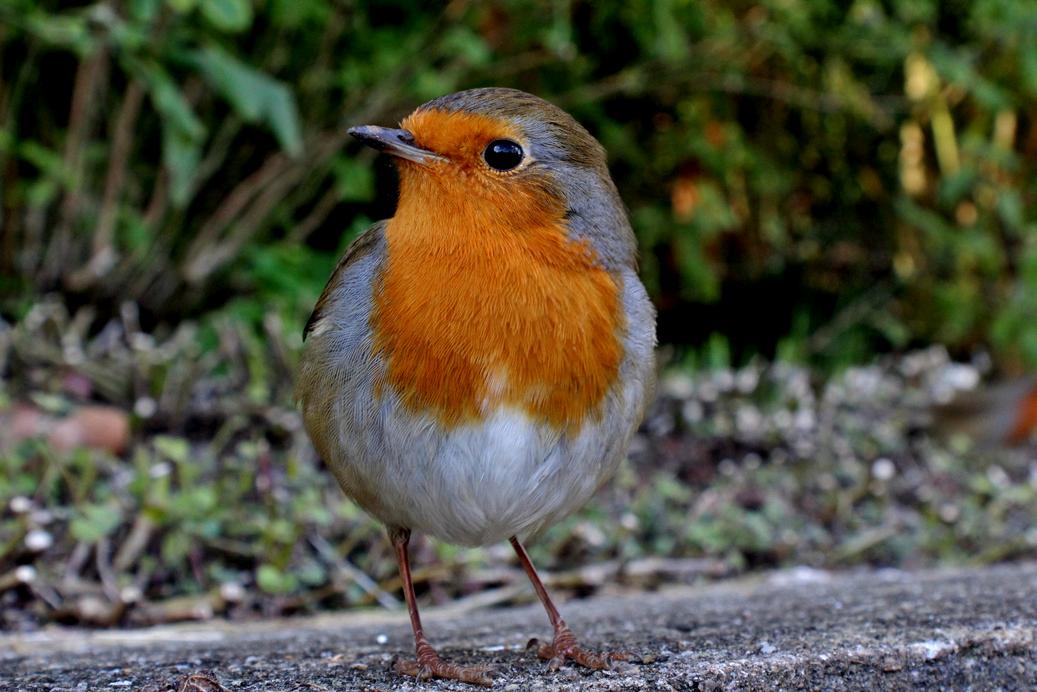
When I'm at the allotment I have a little robin that comes by He flew onto my shoulder once! We make homemade bird food using seeds, oats, granola and lard They seem to like it and we had great tits nesting in our bird box We got to see the fledgings too which was pretty cool
I like to be outdoors, I think it's good for kids to be outdoors learning about nature and wildlife and I feel really lucky that I'm able to do this Next year I will help mum to transform the plot, she's got big plans which means I will be busy. We donated our big greenhouse as we had 2 so there's a big patch that needs levelling and I'm sure my mum will put that on my to do list!
The bird of winter.
Blue loves getting outdoors whether thats in the garden or out with his dog.
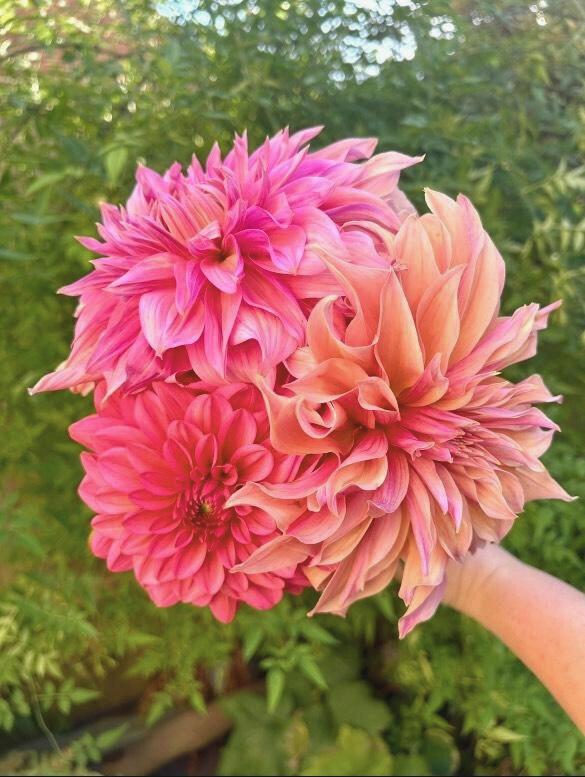
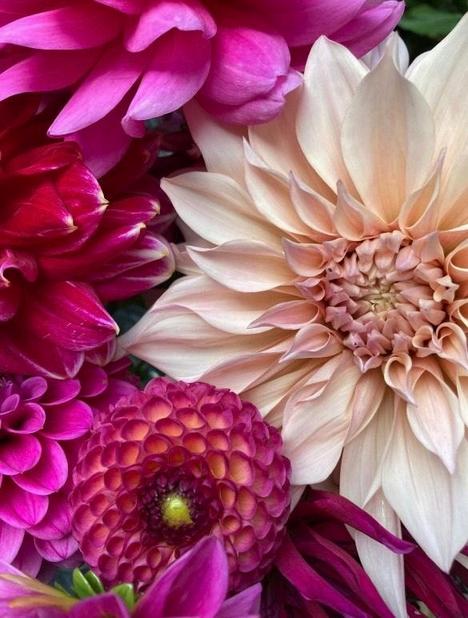
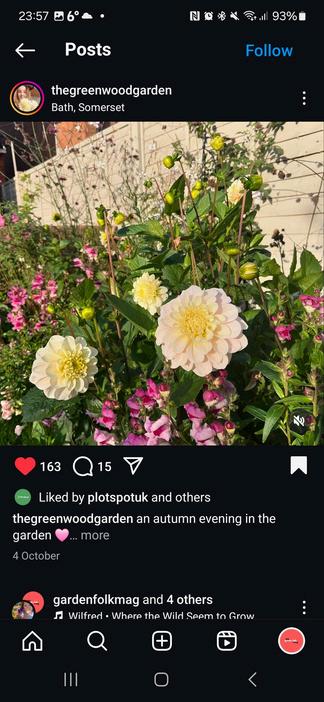
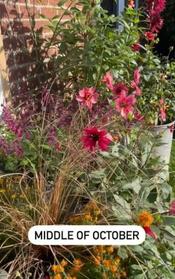
Ah October (yes I know we are in November now) what a month you have been The month of dahlias
The last final hurrah that the 2024 growing year had to offer.
Learn
It never ceases to amaze me the number of messages I receive throughout June and July from gardeners who are fretting that their dahlias haven’t flowered ‘What have I done wrong?’ they ask in a panic The simple answer is, absolutely nothing Dahlias are primarily autumn flowers so let them be autumn flowers Wait, be patient They will arrive in their own perfect time, and when they do, let them dominate the glorious month of October They will luxuriate in their moment before being cut down and moved on to the next stage of their natural life cycle
And that’s another thing… the messages also flood in around now until late November. Should I leave or should I lift (my tubers)? Before you ask yourself (or me) this – have you asked yourself the more important question, which is ‘how have I prepared my dahlia tubers to be left or lifted so that they store well over winter? Have I prepared them for their sleep? and more vitally, will they have lots of energy when they wake up in the spring?
Cutting dahlias back in November might feel like the end of the growing season, but experienced growers will be well aware that this is the start of the dahlia’s year Get it right now and winter and spring will take care of themselves
With 24 years of dahlia growing experience (how can it be so long?) I have decided to share all my knowledge of perfecting incredible dahlias in my new Dahlia Success Course The course is 12 months long, and the beauty of it is that you can join at ANY time throughout the year If you are convinced that the growing season begins for you in January, join in January If you think it’s March, May or even August, join then The course rolls for 12 months regardless of when you join in, and I’ve been blown away by the number of you who are as excited to kick your dahlia growing up to the next level as I am to share my wisdom. There’s already quite a tribe of us – so if you ’ re hankering to join in, you can find the Dahlia Success link in my bio @dahliafarmerama. We’d love to welcome you in. It’s going to be epic! Just picturing all the fantastic dahlias in our gardens and allotments next season makes my heart sing!
As if I couldn’t get enough of dahlias already, having a world famous Dahlia garden a few miles down the road means I now make an annual pilgrimage to visit the renowned Dahlia garden at Anglessey Abbey If you have never visited – you must! All the dahlias here, I am reliably informed are grown in large, sunken pots, because Cambridgeshire heavy clay isn’t the best for growing these divas – don’t I know it!
By Kim O’Brien @dahliafarmerama
to grow Dahlias like this with Kim’s course.
Who doesnt want Dahlias the size of your head.
(Anglessey’s ‘dazzling dahlias’ as they have become known, boasts 60 varieties placed along the length of a large, sweeping border that is changed every year but always grouped by colour for aesthetic continuity. I used to do this in my own field, but when time is at a premium and with 2000 rooted cuttings to transplant, it has very much become a case of plant them anywhere, as haphazardly as you like, as long as you get them in! My field is not accessible to the public, and it’s only really myself and a select few who ever see it, and I’ve come to love the patchwork effect that the mismatch of dahlias produce. How they grow is irrelevant as they are sorted into florist’s buckets once cut. That’s my excuse for binning my colour codes – and I’m sticking to it!
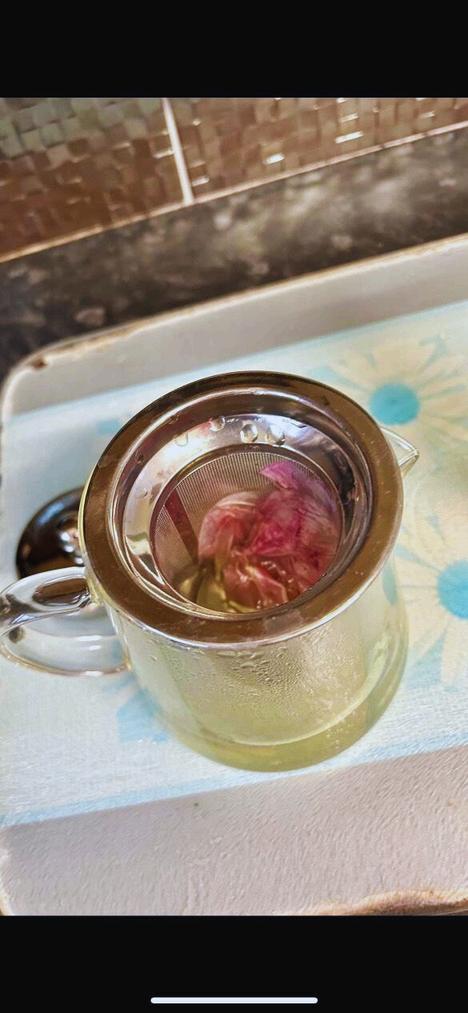
As well as growing dahlias for their flowers, I have in recent months started appreciating these for a more herbalistic reason too I wrote in the last issue of GFM of my meeting at BBC Gardener’s World Autumn Fair with Terry Gilmour, who designed the Silver Gilt winning, People’s Choice garden ‘Fancy a Cuppa’ Terry really inspired me to look at dahlias (among other flowering plants) as a functional crop, (they were originally introduced to Europe as a food crop after all) and I’ve been investigating this under my own terms I have enjoyed utilising the spent petals of dahlia deadheads for dahlia ‘tea’ and I have to say they have a very distinctive flavour and are, although an acquired taste, in my opinion as a hardcore herbal tea connoisseur, remarkably delicious.
I’ve been told that the dahlia petals usually colour the tea. This is true, they do.. Mostly yellow or pale green depending on the variety. My biggest shock was that purple petals turn the tea green, (where does the purple go?) And then there are the dahlia leaves themselves. If you no longer have petals available, and if you haven’t yet cut your dahlias down, I highly recommend making tea with the leaves. You’ll be amazed at the colour the leaves turn the tea to. I’m not going to tell you the colour as I don’t want to spoil the surprise – but it’s not yellow or green It’s really quite surprising Let me know how you get on The leaves can be harvested and stored in one of two ways to keep dahlia tea available all year round Dahlia tea is superb for boosting the immune system which is perfect as we come into coughs and colds season Last year I was successionally very poorly in the autumn with two different strains of covid and then flu This year I’m better prepared and topped up to the brim with all the dahlia, coldpreventative goodness I’ll let you know how it goes
As I said, Dahlia leaves can be stored in one of two ways They can be dried and stored in an airtight container, or they can be placed fresh into an airtight container and frozen Either way, you will get the same delicious, health boosting beverage. So, what are you waiting for? Go and pop the kettle on and here’s to your very good health!
Make your own Dahlia tea
Remove the petals of one dahlia flower/or shred 2-3 medium dahlia leaves
Place in an infusing teapot (one for loose tea is ideal)
Pour over hot water and steep for 5 minutes
Pour into a clear glass mug (to appreciate the colour) and allow to rest for 1 minute
Sweeten to taste with honey or ground stevia if desired (I drink it without)
Enjoy your immune boosting herbal dahlia beverage
By Jen Howarth @life on the lot
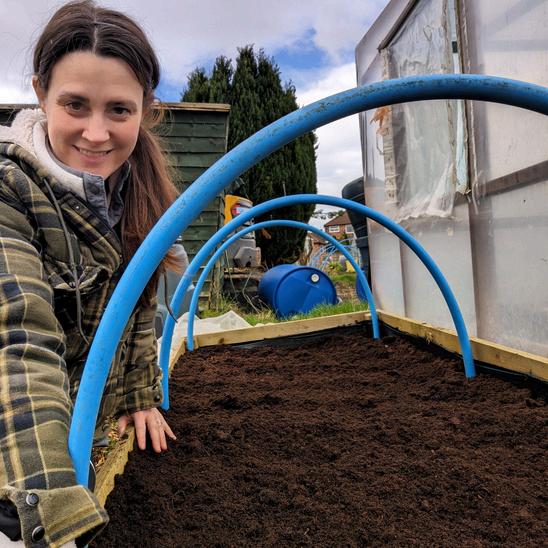
It’s been an exciting time recently and all systems are go as I prepare all the infrastructure for the opening of Wirral Flower Farm in May 2025 While this is happening, all those garden jobs that are come up in Autumn are still needing to be done
So this month, while many people are thinking about putting that garden to bed, trust me when I say you’ll thank me in the spring when all the autumn jobs are done The mulching and the clearing are all great jobs to be cracking on with when there is a bit of a nip in the air Literally no-one wants to lug around a wheelbarrow full of manure in 30degree heat! My main and top priority job though is making sure the dahlias are ready for winter.
Enter the great Dahlia debate: to dig or not to dig! The answer to this is – whatever is right for you. Sorry! That felt like a bit of a cop out, but its totally true and will depend on how cold and how wet your plot gets over winter. This year I’ll be digging mine as they will be moving from the allotment and over to the flower farm, so they’ll need to be split and stored
I trialled a new way of storing them last year- in cling film! It worked a treat, so I’ll be doing this again It was great for saving space too Keep an eye on my Instagram account and you can follow along with me if you decide to dig
If you are leaving in the ground, you’ll need to do a few things to ensure those tubers are protected:
Make sure your ground doesn’t flood or become waterlogged
Choose a mulch and make sure you can get enough of this to cover a min of six inches. This could be compost, straw, leaves, bark etc.
If you live in a particularly cold and/or wet part of the UK, you might want to consider covering with a membrane.
If you are digging them up, you’ll need to make sure a few of the following is done:
Ensure they are free from excess mud – give them a wash but ensure they have dried out before storing
Think of a suitable method of storing – a few ideas are compost, sawdust or straw
Find them a frost-free home for overwintering
And this is all before we even get to splitting them! But that’s probably a piece for another month!
Photo Credit: Stock Canva Image
November may not be the most inspirational month to be out in the garden but there are plenty of tasks you can be getting on with to get the garden ship shape and ready to ride out the winter.
Things to sow/plant
Flowers
Sweetpeas
Crocus
Tulips
Delphiniums
Verbascum,
Foxgloves
Edibles
Broadbeans
Hardy Peas
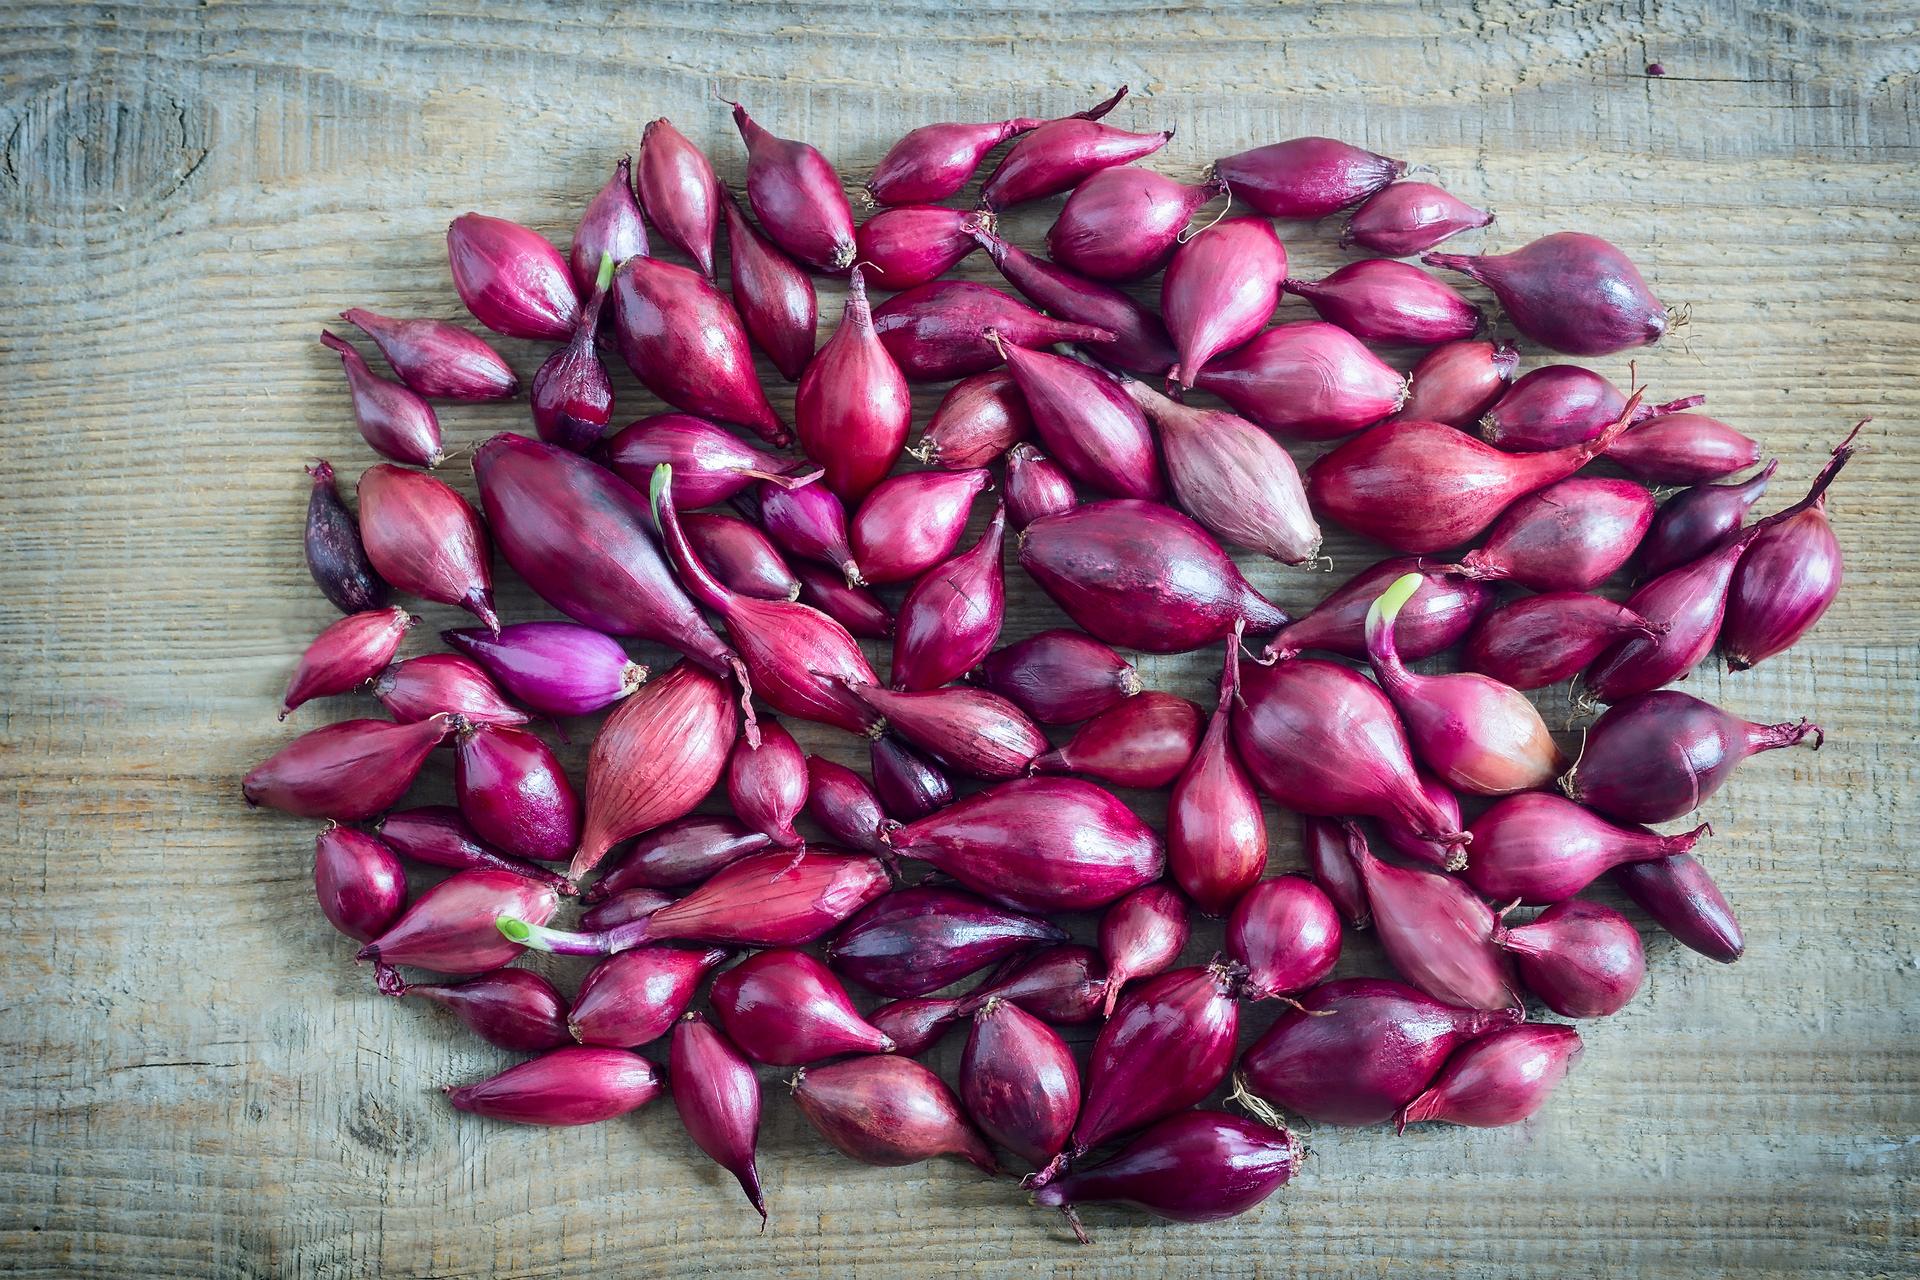
Spring Onions
Onion Sets
Garlic
Winter Salads
Peashoots
Come and join the @gardenfolkmag team for live garden updates throughout the month over on Instagram.
Enthusiastic vegetable grower Richard shares a weekly Podcast all about his food growing journey.
Get out in the garden this month and be your future friend. Your body and mind will feel better for it too.
Lift dahlia tubers, gladiolus corms and begonias tubers to store dry over the winter months
Compost fallen leaves and dead plant material
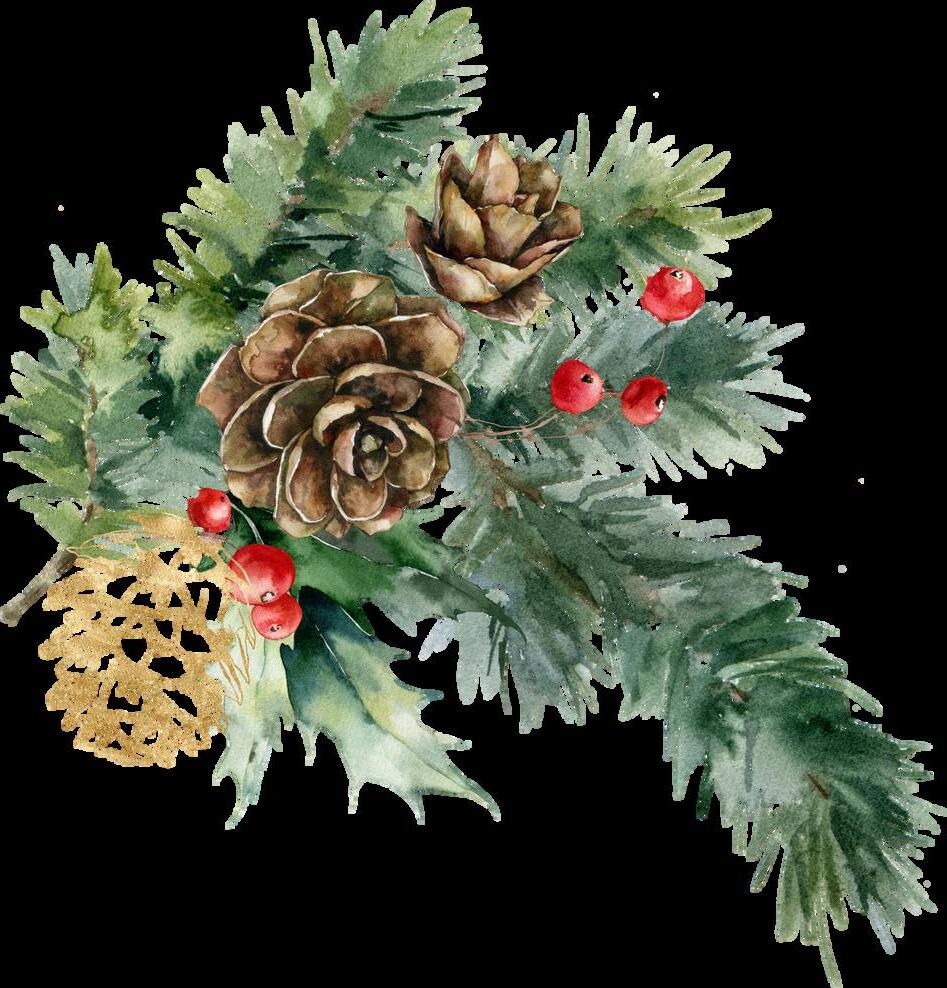
Cut a few stems of holly with berries for making Christmas garlands Stand them in a bucket of water in a sheltered spot where birds can't take them
Plant more bulbs.
Prune apple and pear trees anytime between now and February.
Lift parsnips after the first frosts, when their flavour will have sweetened
Reflect on the growing year gone by and decide what you’ll repeat and what you’ll do differently in the year to come.
Order seed catalogues for next year.
Reuse old compost from annual container displays as a mulch on your garden beds and borders
Spread well rotted farm manure across the surface of your vegetable beds to rot down over winter.
Clean and store bamboo canes in the shed
Protect brassicas from pigeons using cloches, netting or fleece
This month we asked you:
“What would be your dream gardening gift?”
A day a @
I've bee and kee I'd love day, a go a big be
A drier winter than last year please @gardeneriddler
Compost!!!! I’ve literally asked for compost this year. And a mini pond kit with native plants… @theallotmentmum
Slug tongs for the plot �� @ no12 garden house
I'd love a hori hori knife @starof 72
A tree fern! @pumpkins etc
15 ceanotus �� �� @nincalvo
A Hori Hori knife & a 750L bag of mulch ���� @allotment life 16a
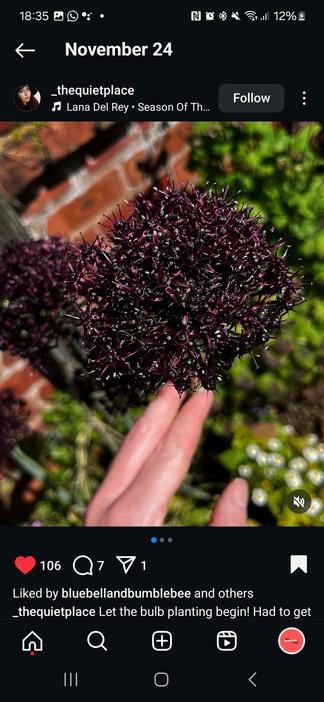
I lovely gothic arbour/bench and lots of plants to go around it! And an Eclipse Hydrangea �� @ thequietplace
I'd really love some beautiful benches for my new farm! �� @life on the lot
A compost bin with space to put it or a hori hori knife ❤ @sophs.mae.garden
Next month we want to know: “ What are your winter garden plans?” Send us a message on Instagram or email us your answers to info@gardenfolkmag.com
@kathryn grows stuff
and durt
...and help us keep making the Garden Folk Mag
We appreciate all the support given to the magazine by all the Garden Folkour readers, writers, industry supporters and anyone else who cheers us on Running the magazine each month does incur financial costs though, so if you are able to contribute, either with a one off payment or by becoming a member, it would really help to keep the magazine going... and growing.
There are currently three membership tiers to choose from, all with great benefits