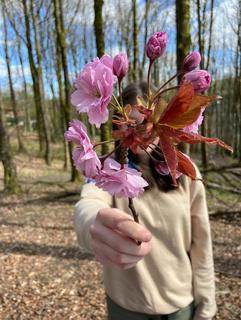
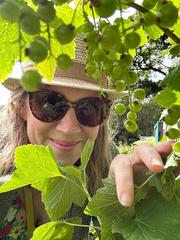
Plants with silver foliage are also great choices as the whole plant will be easily seen in dim light. For an added bonus, I like to select silver plants with furry foliage where possible.
When you spot a Stachys byzantina(aka lamb’s ears) i light of the moon you simply can’t help yourself but reac and give it a stroke, bringing in that extra sensory elem touch into your night garden.
Speaking of extra sensory elements, don’t forget your sens smell There are plants whose scent strengthens when the goes down, such as Cestrum nocturnum (night blooming Jasmine) Planting some of these near your evening terrace area will elevate the evening atmosphere as the scent will around your friends whilst chatting under the twinkling starlight
If your drink of choice is a cocktail or two, then herbs are magnificent addition to your planting scheme Plant some herbs near your chosen evening drinks spot, selecting thos that compliment your favourite drinks, so you can pick spr straight off the plant and drop them into your pitcher of margaritas.
The magic of your night garden isn’t only in your p selections Being mindful of your evening lighting can e your experience to the next level When relaxing in garden, you don’t want to feel like you ’ re sat in a f stadium with floodlights glaring at you. Use lighting that s right mood for your outdoor space, perhaps a few spotlig key feature trees or festoon lighting draped under your pe If possible, only have your garden lighting on when you n as your garden wildlife will really appreciate consideration. Your garden insects, bats, birds and hedg can be really thrown off by all night lighting so when it’s go inside give a thought to turning them off.
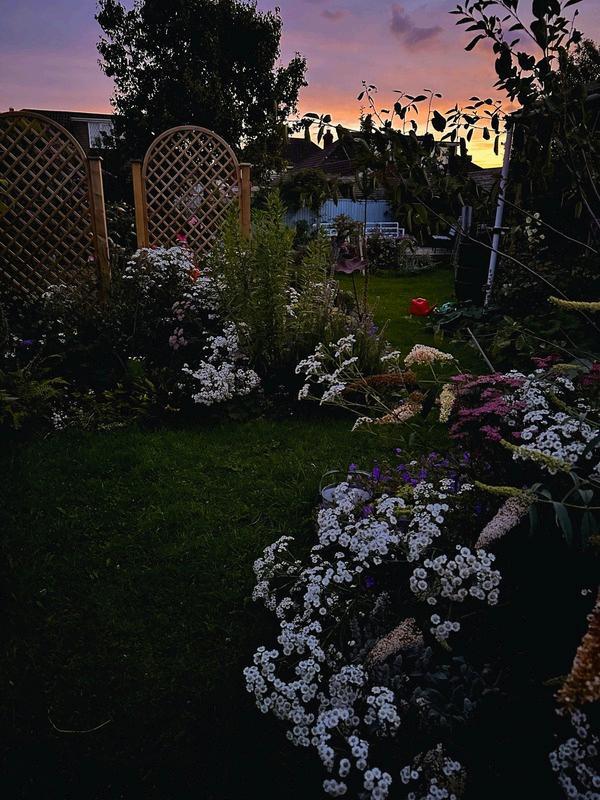
Creating an oasis of calm in a night garden can be enhanced by the sounds around you Your tranquillity m impaired if you ’ re surrounded by more than just the pe quiet of a summer ’ s evening There’s a relatively simple this, incorporate water into your garden A small bu water feature, gently sparkling nearby will cover any unw noise and create a relaxing environment for your evenin out
As those warm summer evenings approach, give a little t to what changes you could implement now to enhanc y garden experience later You’ll be thanking yourself over and over again for taking your outdoor space to the next level this year and wish you’d done it sooner.
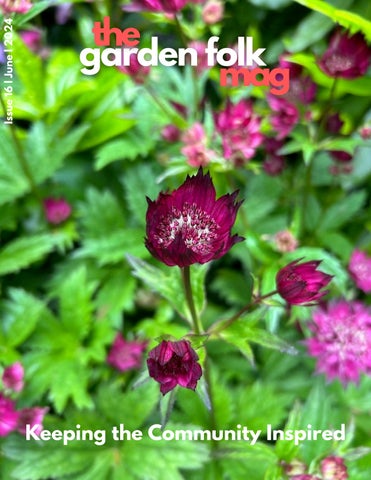
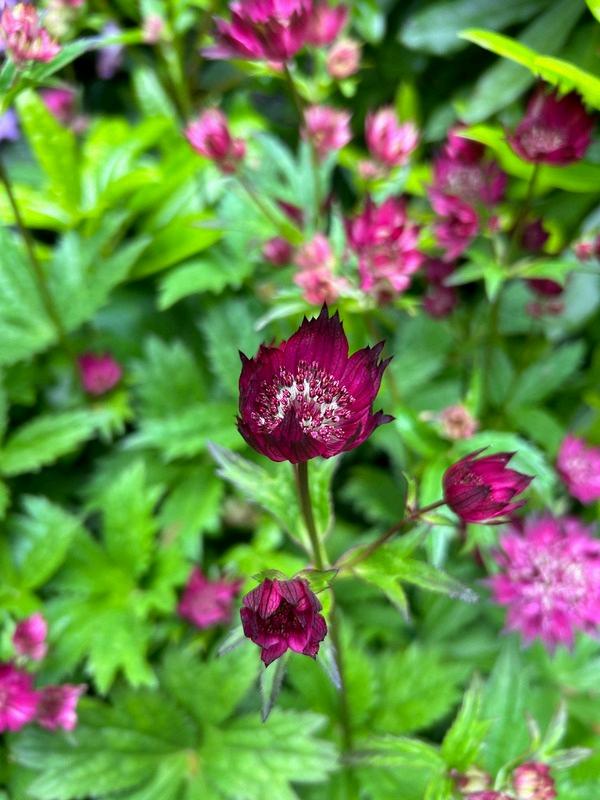
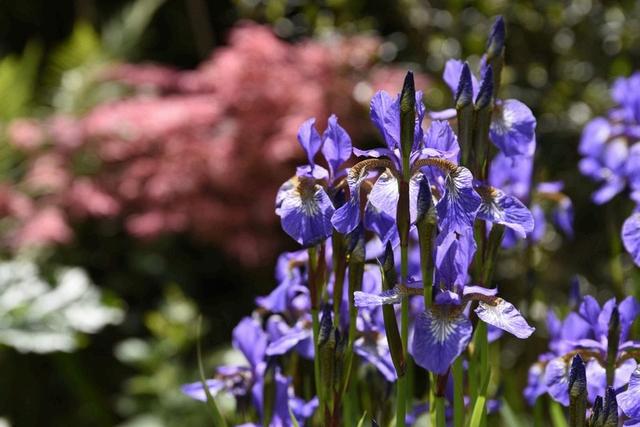
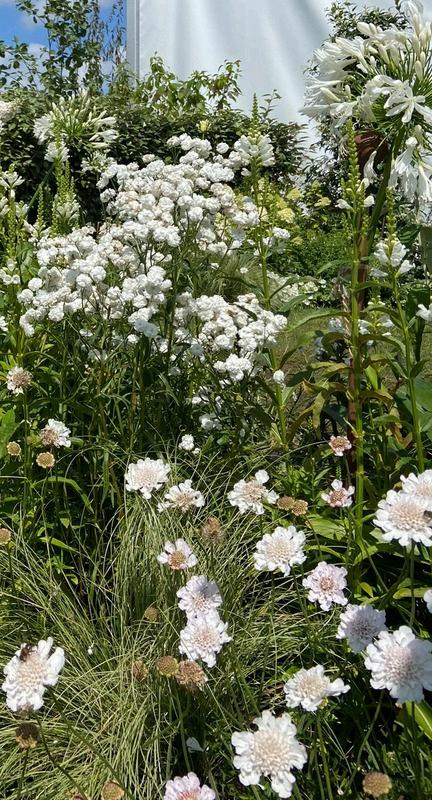
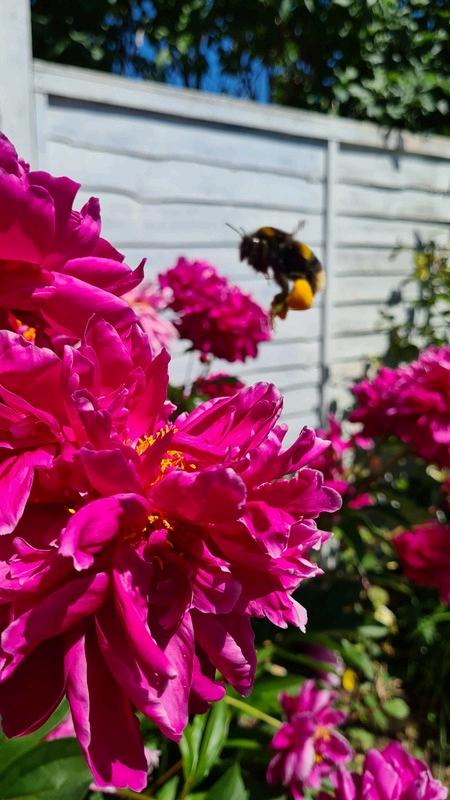
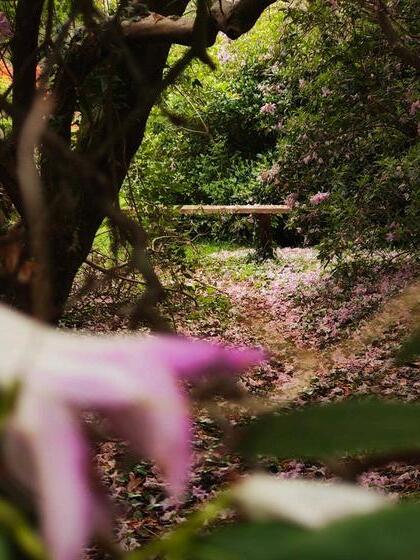
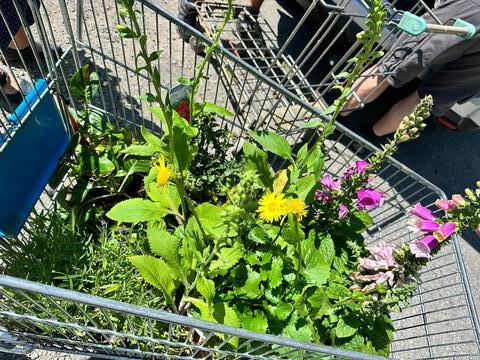
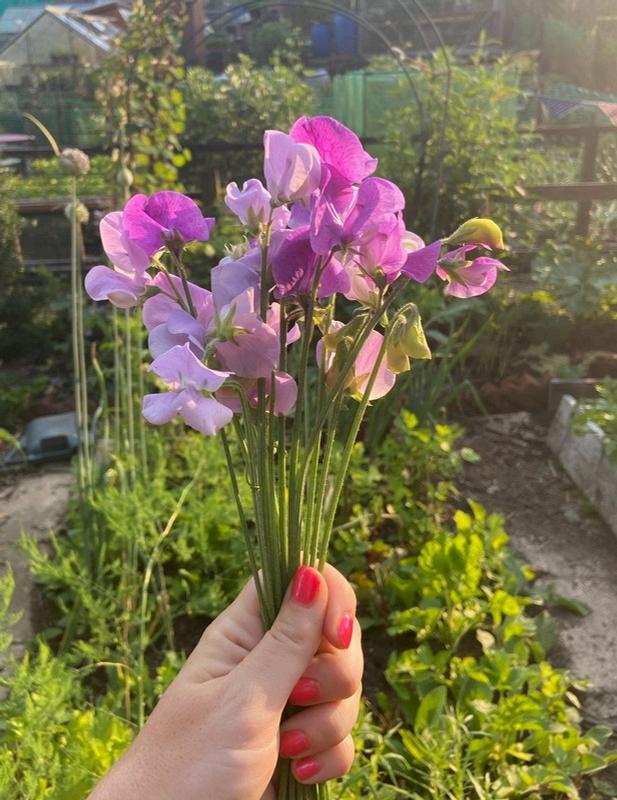
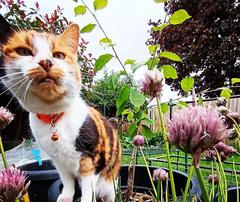
Nightime plants for pollinators
@laura kendallsmith gardens
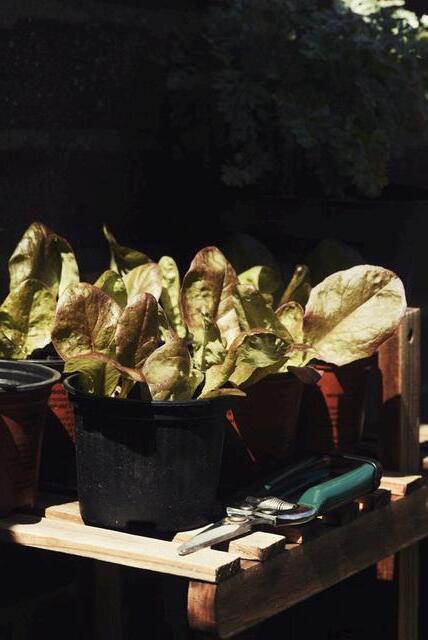
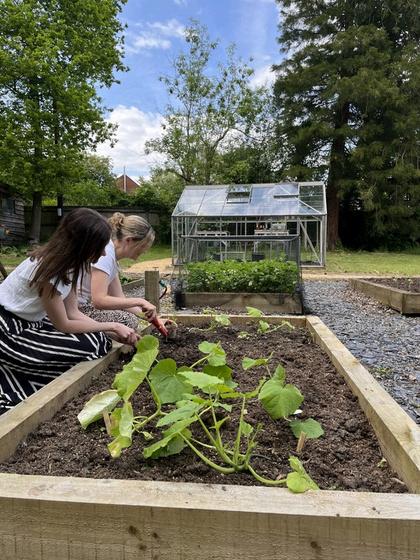
June is the month where your growing space will really start to come to life You’ll be able to start picking salad leaves and snipping herbs like chives to add to your meals, you might even get a tomato or two if you ’ re lucky!
Unfortunately, along with the fabulous vegetable growth comes the nuisance of weeds and insects eating the fruits of your labour It makes me so sad to see fellow growers reaching for slug pellets and other chemical treatments I love to encourage wildlife into my plot, and I am conscious of the risk that frogs, hedgehogs and birds could become poisoned as they feast on slug buffets
But don’t despair, all you need is a little bit of knowledge of the beasties who love to munch your greens!
Greenfly and aphids are an annoying pest for gardeners, that I find particularly love my beautiful roses as well as lots of other plants across the garden and allotment. The good news is that they make a delicious meal for the gardener’s friend – the ladybird! If you can, leave a small area of stinging nettles in your growing space, ladybirds love nettles as a place to hide and rest and you’ll be able to carefully relocate a few of them to areas of concern and let them snack away! I keep a border of stinging nettles along one side of my plot, and it’s always teaming with ladybirds
As well as looking to encourage other kinds of beasties into your garden, you can use companion planting to help protect your crops If you are growing carrots in the ground, they may be attacked by carrot fly Carrot fly is a small, black-bodied fly whose larvae feed on the roots of carrots and other plants such as parsnip, parsley, celery and celeriac Try alternating a row of carrots with a row of onions or spring onions, whose scent will hopefully confuse these pests and help to protect your crops Alternatively, try growing your carrots in a raised bed as carrot flies rarely fly above 50cm!
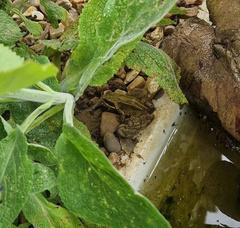
Frogs are great for helping with the slug and snail population They are a great friend to have in your growing space, and even a washing-up bowl sized pond will provide a happy home to these webbed creatures. They will keep the population of pesky slugs under control without resorting to pellets and other methods, keeping your growing space healthy for yourself and your garden’s ecosystem. I’m lucky to have two resident frogs in my wildlife pond, with lots of tadpoles currently growing in there too.
Growing nasturtiums in your growing space will attract white cabbage butterflies away from vegetables. These beautiful looking creatures can have a devastating impact on your kale, broccoli, cauliflower, cabbages and other brassica plants. By strategically placing nasturtiums in the same areas, the butterflies will be drawn to the bright flowers instead – and although they may appear to be destroyed, the amazing thing is that these flowers will grow back, and they are even edible The seed pods can dried and saved for planting out the following year, or they can be used in place of capers for a delicious addition to your dinner plate Placement of mint, chives and thyme are also great companion plants, giving off aromatic scents which confuse and deter a multitude of common garden pests from vegetable plants and flowers
you reach for those pellets, g with nature a try. Creating anced eco system won’t rid ything that wants to nibble on your plants but it may mean there’s quite a bit more left for you!
By Laura Whiskens @lottieonthehill
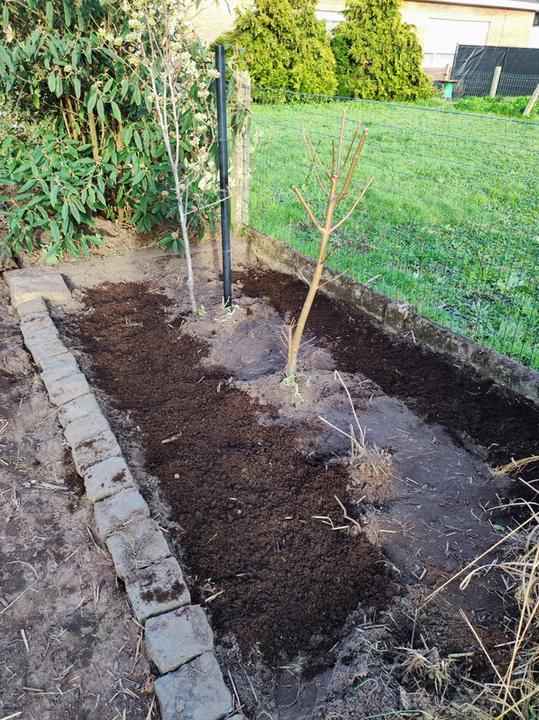
As I sit in the garden, my hands immersed in the soil, memories of the past year flood back, bringing with them the raw emotions stirred by the destruction of our once-thriving flower garden The scorching heat waves of 2022 left the earth parched, with not a drop of rain to quench its thirst Week after week, the relentless sun beat down, leaving behind empty spaces where vibrant blooms once flourished. It wasn't until the following summer that the true toll of nature's fury became evident. Amidst the destruction, the heartache of loss weighed heavily upon us. The garden, once a collection of colors and scents, now stood as a somber reminder of the unpredictable power of the elements. Yet, amidst the sorrow, there lingered a glimmer of determination; a resolve to breathe life back into our cherished greenspace, one bloom at a time. Last summer marked the beginning of this revitalization effort. With each successful cutting, and meticulously replanted self-seeded plant, hope blossomed anew
As I carefully planted spring bulbs, I envisioned not just the beauty of the coming season but also the continued evolution of our garden's revival Alongside tulips, narcissus, and crocus, I sought out spring-blooming flowers that would seamlessly transition into the summer months, ensuring a continuous tapestry of color and life
Amidst the planting, I seized the opportunity to lay the groundwork for our future garden path, a feature that would not only facilitate easy navigation but also serve as a multifunctional element, potentially integrated with a dry stream to enhance resilience and functionality. Strategic planning for bulb and seed shopping was essential in maximizing the resources at our disposal. Utilizing funds from Christmas gifts and overpaid tax returns, I ordered a diverse array of bulbs, bare roots and seeds; opting for preorder sales to stretch our budget further
I bought around 750 summer bulbs and perennial bare roots. From delicate Aquilegia to striking Kniphofia, the vibrant Gladiolus to the elegant Agapanthus, my selections spanned a spectrum of colours and forms, each contributing something unique Additionally, I got around 100 packages of seeds, predominantly annuals, as part of a strategic effort to introduce more seasonal variety into the garden
By incorporating an abundance of annual flowers, I aim to ensure a continuous supply of blooms even if something happens to the perennial flowers. I also hope to lay the groundwork to harvest more of my own seeds this coming season. Over the course of five days, I planted out the bulbs, each one a promise of future blooms adorning our garden. This year, I made the decision to forgo pre-sowing any flower seeds and instead opted for direct sowing I divided the flower seeds into three groups those to be sown in March, April, and May
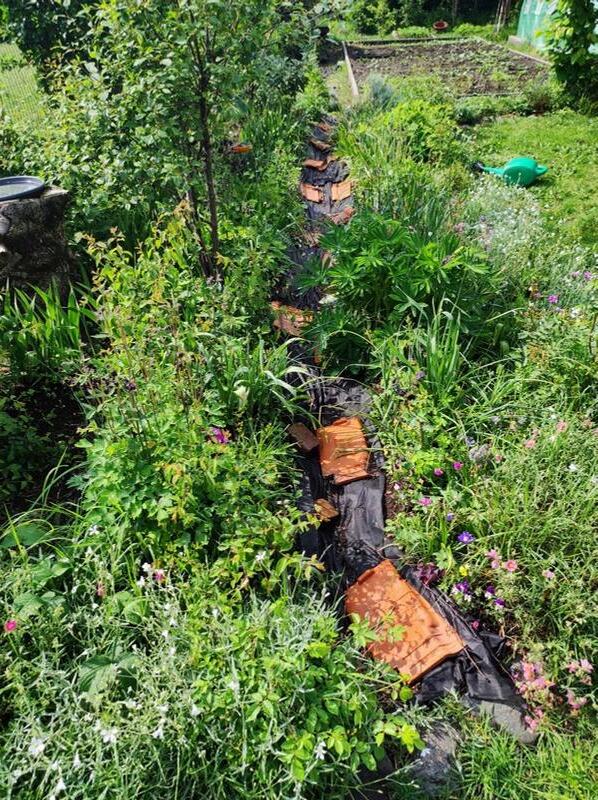
This allowed for organized planting and future planning To maintain order amidst the flurry of activity, I implemented a simple yet effective method: I added a fresh layer of compost to areas where seeds and bulbs were planted This visual cue, denoted by the contrasting colour of the soil, served as a reliable marker, guiding me through the garden and aiding in the identification of both planted areas and emerging weeds
Weeding the flower beds became a necessary step in reclaiming lost ground and preparing for new beginnings. As we diligently cleared away the weeds, we found ourselves also laying the groundwork for a long-awaited project: the creation of a new flower bed. With the abundance of bulbs and seeds at our disposal, we now had the resources and inspiration to bring this vision to life, expanding the canvas of our garden and infusing it with renewed vitality.
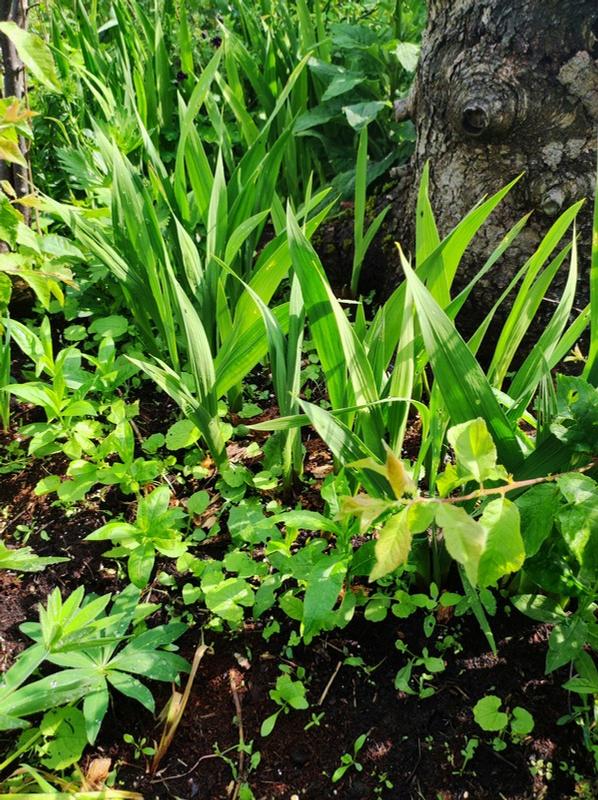
I can’t help but feel a sense of hope blooming within me, as I stand amidst the burgeoning greenery of our garden. Despite the challenges we've faced, I find myself enveloped by a newfound optimism, a belief in the power of renewal and growth. In the end, our garden is more than just a collection of plants; it is a reflection of the journey we've undertaken Already, the garden bears witness to our efforts, with each seedling and bulb emerging from the earth serving as a testament to nature's enduring resilience Every tender shoot and delicate bloom fills my heart with joy As we continue on this journey of rebuilding, I embrace the future with cautious optimism, knowing that with each careful step, our garden blooms anew
By Mel Heris @bluebellandbumblebee
I'm back again with some mo ideas to get you capturing all season has to offer in your ga
We'll begin by recapping som the key considerations that can improve any photo and works with any type of camera which we covered in issue 13 in my first Garden Folk magazine feature:
1. COMPOSITION creates comfort
Perfectly positioning the frame to capture precisely what you're trying to show, in a way that is compelling to the viewer and without distraction or cropped uncomfortably to the human eye, is somewhat of a fine art in itself There are many different types of composition guidelines to learn about and once we begin to understand some of these rules, breaking those rules in an artistic way becomes the next exciting challenge
The most common composition style is known as the ‘Rule of Thirds’. This is the four line grid that most of us will have seen across the screen or viewfinder of any type of camera including phone cameras. Believe it or not, there is a "correct" way to use this grid, I'll share a brief explanation below. You may also find other composition guides built into your camera such as diagonal lines or the ‘Golden Spiral’. You can find everything you need to know about image compositions and why they're effective online, or you can join my mentorship program if you prefer 1-1 guidance
RULE OF THIRDS
The guideline is made up of four lines; two vertical and two horizontal. This splits the image into nine equal parts and the general rule is that only one third of the image contains the main subject(s) that you're photographing
2. LIGHT illuminates feeling:
How beautiful is it to witness the soft morning sun flooding through your windows or the dappled rays causing the mist to transform into a glowing milky blanket?
The atmosphere and drama that light alone can bring to an image is why many photographers are selfconfessed light-chasers. Morning and evening light are great for casting long soft shadows and warm light. The stronger midday sun casts solid dramatic shadows which can sometimes be too harsh for general garden and plant photos but great when playing with more abstract types of photography such as macro or black and white
3. REFLECTING on the subject:
Sometimes when we're playing with light, we find perfect angle but wish that other parts of our subje were also illuminated. Enter.. the reflector! You can b an actual photography reflector if you prefer but y can also easily make one at home by using wh paper, tin foil, or anything that reflects light from surface and attach it to some cardboard. If you' playing with backlit blooms but want to bring mo light to the front or shaded areas without having to u a flash, reflectors are your friend!
4. STORYTELLING draws us in:
Be it the evolution of a plant from seed to seed or t ever-changing view of a landscape; the changi seasons or a space undergoing a redesign, these a examples of stories playing out which can be capture By showing multiple elements that marry togethe stories can be told through one photo or a series images
6. Get LEVEL with your subject:
Getting up or down to the same level as the subje you're trying to capture allows us to see it from perspective most of us don't often get to see That alo creates interest, think of it as seeing the blossoms fro the perspective of our smaller garden visitors
7. Speed and stability improve SHARPNESS:
Shutter speed settings are what will be your bigge help in producing sharp, clear images However, ev when we have a fast shutter speed, as we press t button to capture the image, we apply pressure to t camera which creates a small amount of movement T using a tripod and a remote shutter option; this c really help to prevent any unwanted motion blur
Here are this seasons lush
3
Floral Close-Ups:
Capture the vibrant colours and intricate details of summer flowers Use a macro lens and shallow depth of field to create stunning close-up shots that highlight the beauty of each petal and bloom 1
2
Garden Structures:
Highlight the architectural features such as pergolas, archways, or decorative trellis'. Experiment with different angles, focal lengths and perspectives to capture the unique charm of each structure.
Hidden Treasures:
Reveal the unique hidden gems of your garden. Decorative elements and artistic installations add interest and wonder Try getting close to your subject to reveal it's textures amongst the foliage, showcasing its character
Stand-out Silhouettes:
Create striking silhouettes of plants, trees, or garden structures against the colourful backdrop of a summer sunset. Position yourself to capture the outline of the subject against the vibrant hues of the sky These images can look great in black and white, too!
5
Botanical Portraits:
Capture close-up portraits of individual plants and flowers in your garden. Coloured paper or card make a nice backdrop when trying to isolate plants in situ. Try different focal lengths and depths of field to create compelling compositions that showcase the beauty and personality of each botanical subject
Showcase the abundance of fresh produce growing in your vegetable garden and what it means to you. Capture the vibrant colours and textures of ripe fruits and vegetables with a macro lens.
Sunny Still Life:
Create still-life compositions using elements from your summer garden, such as freshly picked flowers, fruits, or herbs Arrange them in interesting ways to showcase how you might use them and play around with different lighting techniques to create visually compelling images.
Garden Oasis:
Showcase your favourite spot in your garden during the summer months Try to style the sce to capture the feeling that it evokes for you Snuggly seating areas, warm lighting, and lus greenery invite relaxation and tranquillity
Summer Garden Parties:
If you host outdoor gatherings or parties in your garden during the summer, capture the festive atmosphere and joyful moments shared with friends and family. Use candid photography techniques to capture genuine emotions and interactions.
Summer Shades:
Explore the play of light and shadow in your garden on sunny summer days Look for interesting patterns and textures created by sunlight filtering through foliage and casting dappled shadows on the ground or on neighbouring leaves.
Sensory Sensations:
Capture the sensory delights of your space, from the fragrance of blooming flowers to the rustling of leaves in the breeze. Use descriptive photography techniques to evoke the sights, sounds, smells, and textures of the garden environment.
Sun-Kissed Blooms:
Capture the brilliance of summer flowers basking in the sunlight. Try a wide aperture to create a shallow dep h f field, highlighting the main subjec blurring the background
Golden Hour Magic:
Take advantage of the warm, golden light during the early morning or late afternoon. Experiment with different angles and compositions to capture the soft, flattering light that bathes your garden during these times.
Sunset Scenes:
We’re hoping you’ll be so inspired by all these tips that you’ll be chomping at the bit to try putting your skills to the test and really capture the magic of Summer. Over the next few months we will be running a Garden Folk Photo Competition. We have some amazing prizes and fantastic judges lined up. Check our socials for all the info later this month.
Capture the warm, golden light of summer sunsets in your garden
Experiment with different focal lengths to highlight the areas where the last of the sun touches
Urban Veggie Gardening: A Sustainable Hobby Giveaway
Want to win this incredible bundle ?
Make sure you keep an eye on the Garden Folk Mag Instagram page over the next few days!
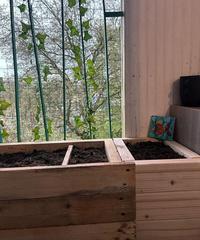
Why grow in pots?
With container gardening, growing your own is not only feasible but also rewarding and enjoyable
Having limited outdoor space should never hold you back from growing your own veggies. Container gardening allows you to transform your balcony or patio into a thriving veggie patch. Moreover, this approach allows you to control soil quality, sunlight exposure and watering, often resulting in healthier plants and a better crop.
Supermarket produce can come with hidden costs to your health and the environment, as many farmers when growing at scale, understandably rely on pesticides to keep their crops safe from pests and diseases By growing your own vegetables, you can ensure your food is both nutritious and chemical free
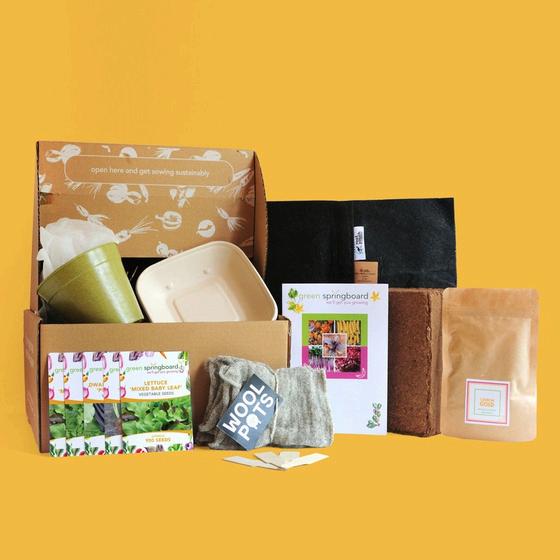
Growing your own vegetables at home not only provides you with fresh, organic produce but also helps minimise your carbon footprint. You eliminate the need for the transportation and refrigeration that is required in the traditional food supply chain. You also avoid food waste by only picking what you need. Choosing eco-friendly, biodegradable materials for your containers and avoiding single-use plastics, means that you aren’t contributing to the problem of plastic waste. You can even reuse containers like fruit and yoghurt pots or ask for free pots at your local garden centre. For more eco-friendly gardening tips please visit our website at www.greenspringboard.com
Garden folk Mag Supporters- remember that you have a discount code from this fabulous company!
Green Springboard was founded with the goal of getting more people into growing their own food, even without access to a garden We are twin sisters with a shared passion for the environment, who grew up helping our parents in the garden Now, with our own children, we are continuing the family veg growing tradition: it’s not only a fun hobby but also a great way to educate kids about where their food comes from
We’d heard friends talking about wanting to grow their own veg but who’d assumed you needed a large garden Even those who had put some more thought into it were put off by the often confusing instructions and jargon on seed packets and a lack of knowledge as to what compost to buy and what equipment they needed We provide our subscribers with ecofriendly kits which include everything they need to grow seasonal veggies including all seeds, pots, fertilisers, and step-by-step instructions. In addition, we also include membership of a ‘Growers club’ for additional support.
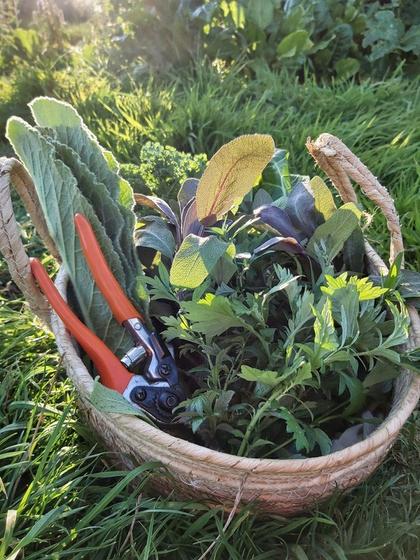
A useful remedy to have in your home apothecary is a bruise balm. At this time of year, I don’t know about you, but I’m covered in bruises from kneeling on raised beds and lugging around tools and watering cans! And if you have children, a bruise balm is always good to have on hand!
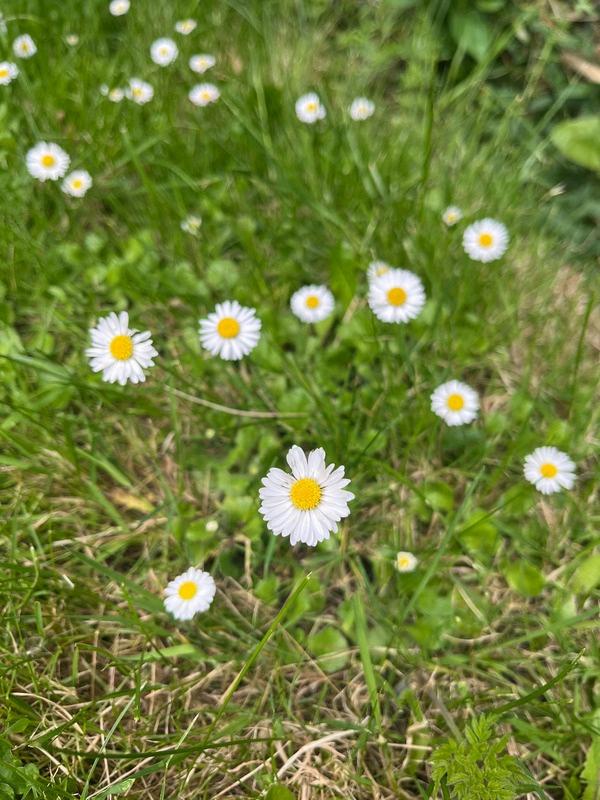
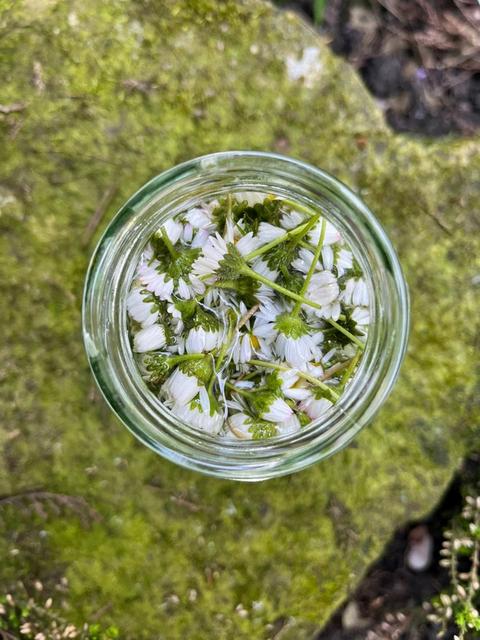
As with most herbal remedies we need a base of herbal oil We have covered herbal oils in previous articles, they are simple to make but open a world of possibilities for herbal medicine Pick daisies from an area where there are plenty, never take every plant, and chose an area where you can be confident they’re not on a popular dog walking route!
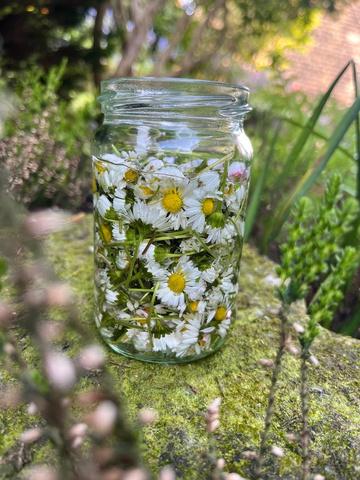
You don’t want to wash your daises as you don’t want any moisture in your oil You can dry them naturally or in a dehydrator, but if you pick them on a dry day and on a small scale you can use them straight away
Put your daisies into a sterilised jar and cover completely with oil. You want to make at least ½ cup of daisy oil. Sunflower oil is a good choice as a base oil as it is rich in vitamins A, D and E and helps to calm and soothe skin.
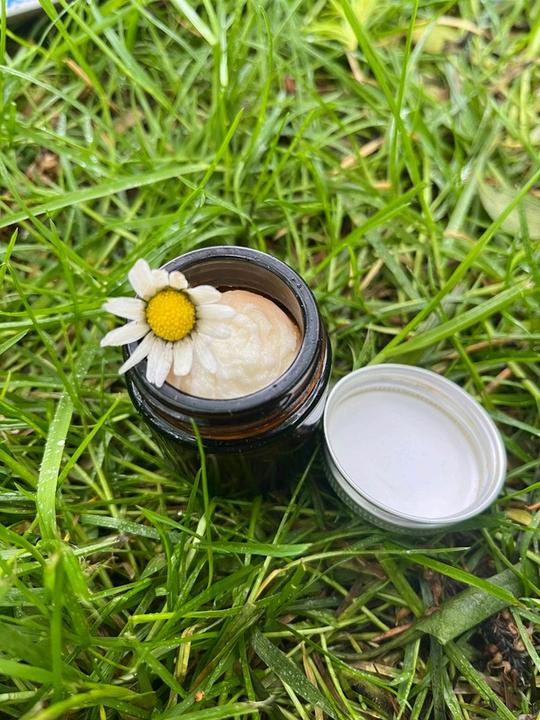
Put a muslin over the top of the jar and leave in a cool, dry place for at least two weeks then strain the oil through the muslin into a sterilised container.
To then make the balm, take ½ cup shea or cocoa butter (these are deep, nourishing natural moisturisers and will be good for the skin) and add this to a pan with the daisy oil.
Gently melt the shea or cocoa butter with the daisy oil in a bowl over a pan of boiling water, making sure the water doesn’t touch the bowl. Mix well and leave to cool. You can tell when they are cool enough to whip by checking that the edges are solid, but the middle is still not solidified Use a hand or electric whisk to whip the mixture until it is fluffy and lighter in colour
If you find the mixture to be a bit greasy, you can use a little arrowroot powder Just a small amount will make a big difference so remember to add a tiny amount at a time – you can always add more but you can’t take it back out!
The oil and the balm will last for up to a year You can apply it directly to bruises or to ease stings, bites and sore skin
As always, happy herbal crafting and tag us in any pictures of your makes, we would love to see them!
@rainbowdaysallotment
By Mel Heris @bluebellandbumblebee
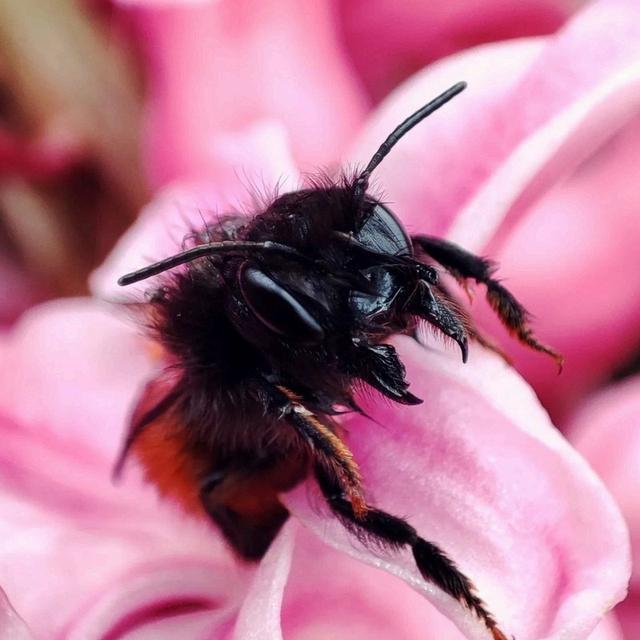
Pollinators
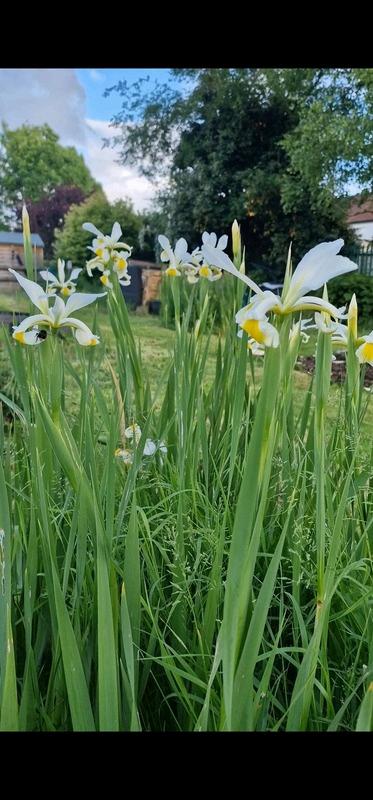
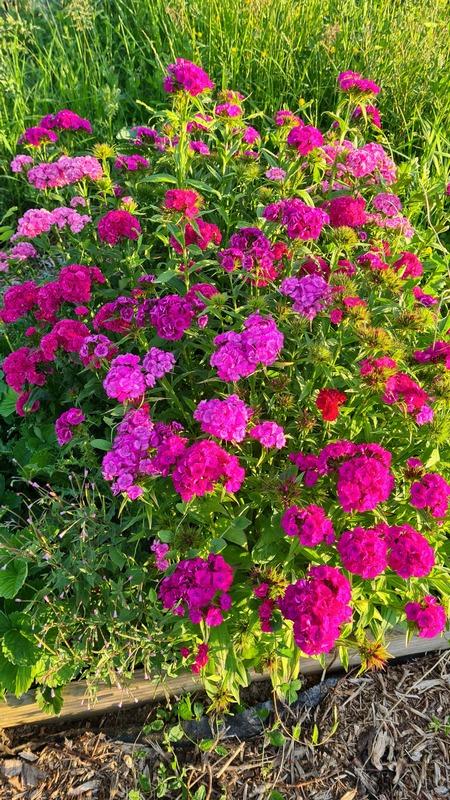
Plant a diverse range of flowers that bloom throughout the summer to provide a continuous nectar source
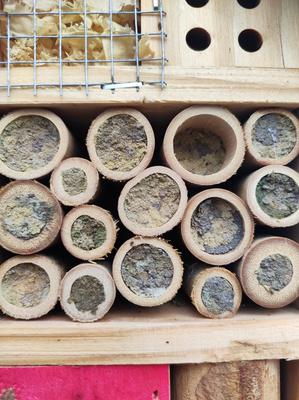
Leave patches of bare ground or sandy soil for ground-nesting bees and provide nesting sites for solitary bees by leaving dead plant stems as bee hotels
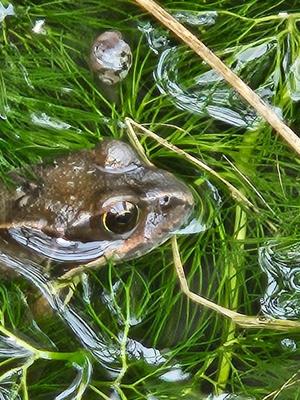
Create butterfly-friendly features by leaving rocks in sunny spots for butterflies to bask in the sun and providing damp patches of soil or sand for them to extract minerals (a behavior known as puddling). Incorporate night-blooming flowers such as evening primrose, moonflower, and nicotiana to attract moths and provide them with a food source during the nighttime.
Provide a shallow dish filled with water and pebbles for pollinators to drink from. The pebbles help them get safely to the water without the risk of drowning. Consider creating a "pollinator-friendly zone" in your garden dedicated to plants that specifically attract and support pollinators, such as bee balm, lavender, and coneflowers
Amphibians and
Reptiles
Provide and create a variety of habitats, such as ponds, rock piles, log piles, and dense vegetation, to offer shelter and breeding sites
Create shady places to help amphibians and reptiles regulate their body temperature during hot summer days
Leave piles of leaf litter and logs undisturbed, as they provide important habitat and hiding places
Bats
Install bat boxes in your garden to provide roosting sites. Place them high up in trees or on the side of buildings.
Plant night-scented flowers to attract insects, which are a primary food source for bats.
Reduce light pollution in your garden by using motion sensor lights and avoiding overly bright outdoor lighting, as it can disrupt bat foraging behaviour.
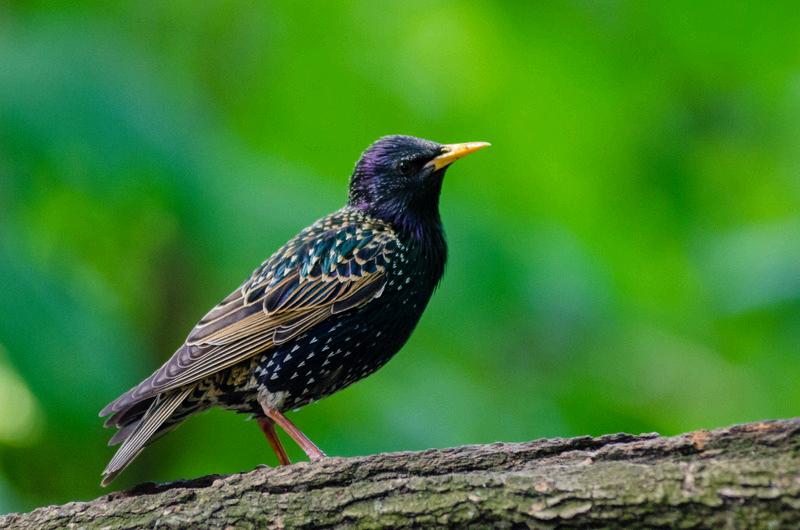
Birds
Offer a variety of bird feeders stocked with different types of seeds, suet, and mealworms to attract a diverse range of bird species
Provide fresh water for drinking and bathing by installing a bird bath or shallow dish
Plant native trees, shrubs, and flowers to provide food, shelter, and nesting sites for birds
Beneficial Insects (e.g. lacewings, ladybugs)
Plant a mix of flowering plants to attract beneficial insects that prey on garden pests
Provide shelter by leaving dead plant stems in place and providing piles of rocks and wood
Mammals (e.g. hedgehogs)
Create hedgehog-friendly habitats by leaving wild areas in your garden with piles of leaves, logs, and compost heaps.
Ensure hedgehogs can access your garden by creating gaps or holes in fences and walls. Avoid using slug pellets and other chemicals, as they can harm hedgehogs and their food sources. Provide a shallow dish of fresh water for drinking.
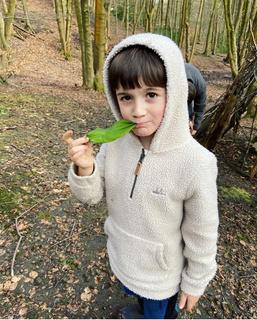
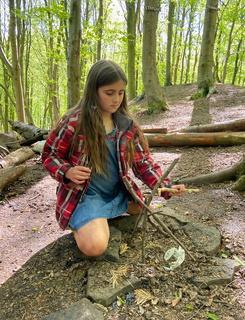
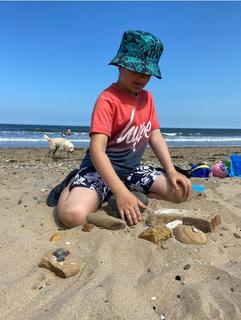
Getting outside every day, even for a short time can have huge benefits on both our mental and physical health. Just standing outside the back door for five minutes in the sunshine can make you feel calmer and refreshed. If you have the time though, try being more intentional and playful with your outdoor time this month. Playing out isn’t just for the kids!
Here’s some ideas to get you started:
Take a slow walk
Hug a tree, or even climb one!
Bring some flowers indoors
Get on your bike
Build an outdoor fire
Go paddling or even enjoy a wild swim
Eat foraged foods
Collect nature treasures
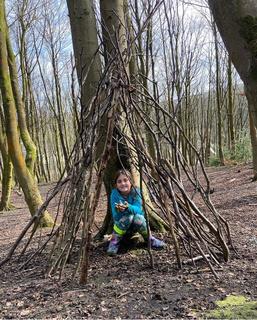
Build a den and sit in it
Read a book outside
Take off your shoes
Eat every meal outside for a whole day
Take time to notice the details
Go out and look at the stars
Be sure to sign up to 30 Days Wild via Wildlife Trust for lots more inspiration throughout the month
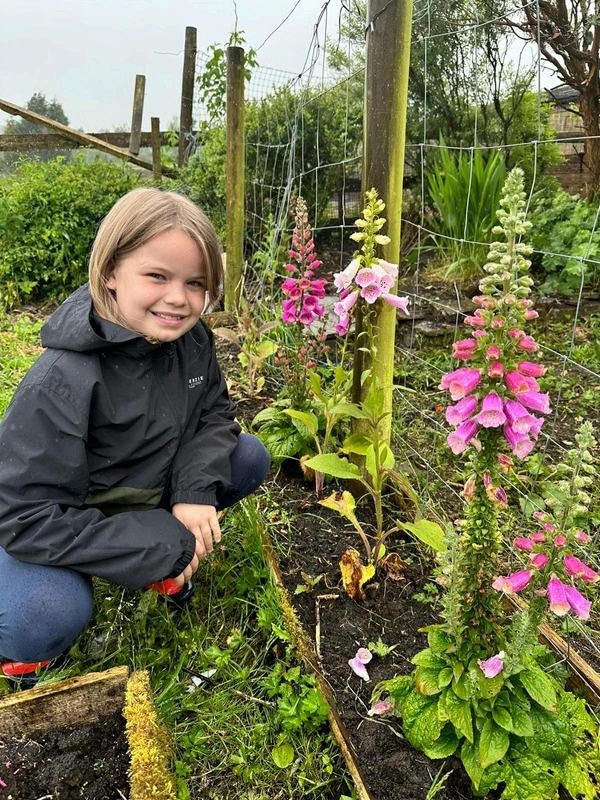
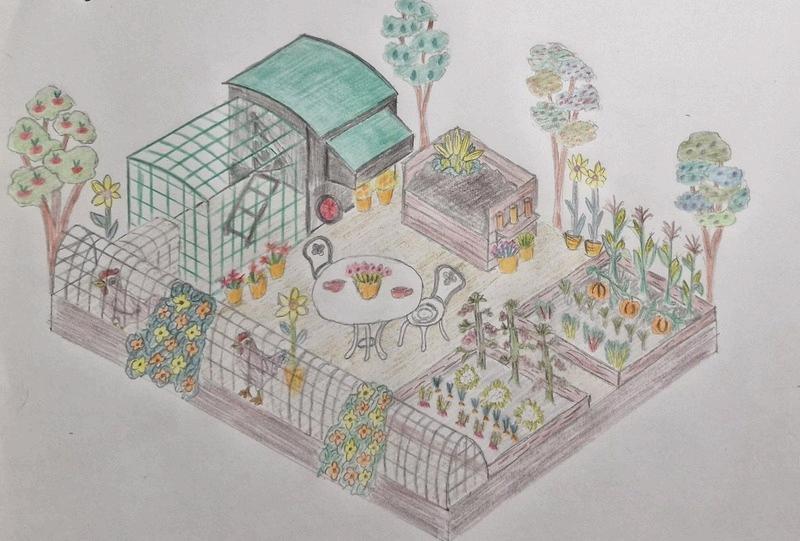
Young Folk Creating a cottage garden on a budget with Cora
Photo Credit: Megan Taylor-Flemming
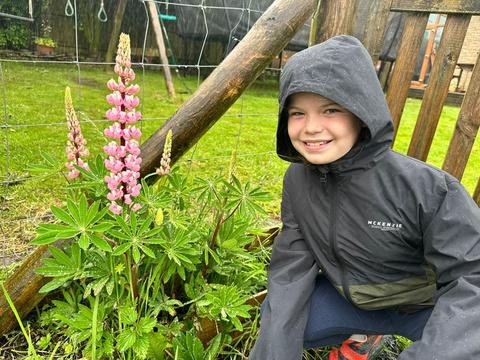
In the last month or so I have been helping my mum (@kitchengardendreamer) to create a cottage style garden to fit in with the countryside where we live I also want to help encourage lots of bees and butterflies to our garden
We didn’t have lots of money to spend on new plants so we did a few different things to get our flowers. The first thing we did was see what was growing already Once we weeded out all the nettles and doc plants, we found lots of plants already growing like Ladies Mantle, Wild Geraniums, Aquilegias and a big Crocosmia plant
We visited the garden centre and found lots of different types of Digitalis (foxgloves) reduced to 50p - £1 so we got some to put in the border around our kitchen garden.
We were lucky to have been given lots of plants by a neighbour who was giving away some pots on the local freecycle site When she heard we were trying to make a cottage garden she kindly gave us lots of other plants too, including Roses and Lavender
We have also had some beautiful Lupins from Grandad’s allotment which are very pretty and the bees love them.
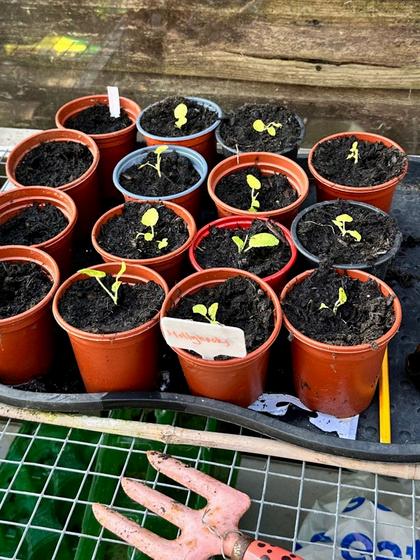
Finally, we have been trying to grow some plants from seeds such as Sweetpeas and Hollyhocks.
We have managed to add lots of new natural plants to our garden without spending much money and it looks much better. I really like the more natural wildflower type plants as they are all very different to each other and they spread their seeds all around so we will get more and more free flowers every year. They also provide lots of food for the bees and insects.
our Young Folk Champion says: ‘I think it’s really amazing that you are growing things that look pretty and that bees will enjoy too. Crocosmia is one of my favourites.’
Photo Credit: Megan Taylor-Flemming
Photo Credit: Megan Taylor-Flemming
Photo Credit: Megan Tayor-Flemming
Photo Credit: Megan Taylor-Flemming
By Anjee Harrison @plot26a
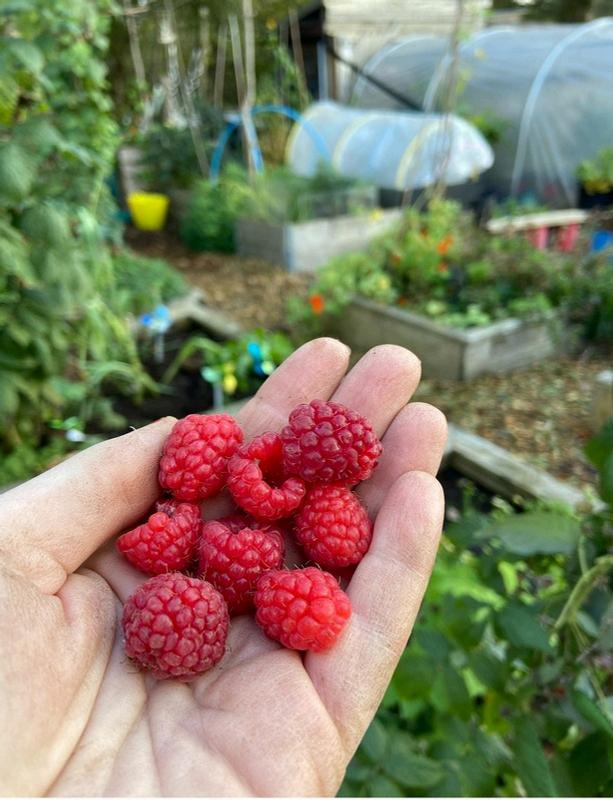
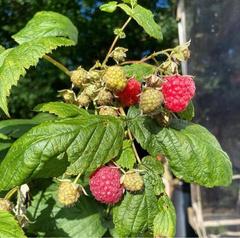
Raspberries have to be one of the defining tastes of summer Whether you grow summer fruiting (June-August) or autumn fruiting (July- November), no summer would be complete without their soft, sweet, fruity juiciness
I love to eat them in all kinds of ways, not least just popped into my mouth straight from the plant, but also: mashed into my morning kefir; sprinkled on granola; drizzled with cream; dipped in balsalmic; made into jam; folded into cakes with generous chunks of white chocolate; or made into a delicious cordial to add to summer drinks.
One of my absolute favourite uses for raspberries though-if I have time and if friends are coming to visit- is this divine baked cheesecake It can be made gluten free by swapping out the biscuits in the base for a gluten free option It also works well with any other soft fruits or berries you have a plentiful harvest of
Growing Raspberries
Both summer and autumn fruiting plants will benefit from some support in the form of canes and string or wire. Summer varieties fruit on last years stems so cut down old canes after harvesting and tie in new growth. Autumn varieties fruit on this years growth so just cut the whole plant down to about 15cm from the ground and mulch in early spring
1. Take a springform 22 cm baking tin and line by standing on a sheet of foil and tucking up around the sides Do this twice to ensure a good seal
2. Crush the biscuits into crumbs and mix with the pinch of salt, melted butter and 2tsps of sugar if you want a little extra sweetness
3. Put the crumb mix into the bottom of your lined tin and press down-using the flat base of a glass works well
4 Bake at 180 for ten minutes
5. Meanwhile, mix the soft cheese, sour cream, double cream, sugar and eggs with a whisk for five minutes until the mixture is well blended and thick
6. Add the vanilla extract and raspberries and stir through
7. Place a baking tray of water in the bottom of the oven and place a shelf above it for the cake.
8. Pour the mixture onto the biscuit base and smooth the top with a spatula.
9. Bake at 140 for 1.5 hours.
10. Turn off the oven and open the oven door but do not remove the cake-slow cooling prevents splitting.
11. Once cool, place in the fridge for at least four hours or overnight.
12. Remove from the cake tin carefully.
13. To decorate, heat a jar of raspberry jam in a pan and sieve out the seeds
14. Pour the liquid jam onto the cake and arrange fresh raspberries on the top
Enjoy!
This Month, we’re back with Ben for an update on how his “Plot amongst the chickens” garden for BBC Gardeners’ World Live Event is going.
If you saw the April issue, you'll have read about how my plan for my Gardeners World Live garden came about and how I started the plans and even had a site visit and a garden ‘upgrade’. However, things have moved on so much from there and in true Ben style, I'm going to give it to you straight about just how brutal the next chapter has been. Strap yourselves in!
Here’s to the brands
So, where to start? First of al incredible my sponsors have with not only their products b going to tell you what they'v sponsored me (although som pretty obvious!) but I am go you who my list of amazing sponsors are
Thank you to:
Blaise Plant Nursery
Rocketgro
Woolpots
Nestera
Zest Outdoor Living
Crocus
Peckish
Kent & Stowe
Stone Warehouse
Rolawn
Bradstone
I also have some surprise fea from a few other amazing co so watch out for those!
Here’s to the helpers
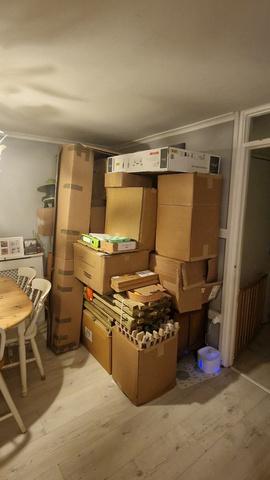
As far as deliveries have gone, we have had just one damaged item by a courier, which to be honest, isn't bad going considering the fact that my lounge, sorry, my wife's lounge looks like an amazon warehouse right now! I'm sure she never imagined losing her dining table and surrounding area to a wall of carboard boxes but she has been so patient with it and has been the most amazing support throughout it all Speaking of support, I have assembled a group of remarkable friends from Instagram, to help me build this showcase garden and the support theyhave offered in the background in our group chats has been amazing and motivational
These guys deserve a special mention, because without them, I couldn't bring this idea to life. They are my gladiators and they are Natalya , Kelly, Gemma, Marc, Kerry, Charlie & my awesome parents! These guys have been a rock in the background, as have JJ and Bish of the bearded growers and of course Stef of homegrownwiththehaydons who has been checking in daily with me. The rollercoaster of emotions has been immense and Stef and I have shared them all!
Unexpected Suprise
Stress can come in such random ways too, like the day I received an email from the Gardeners World team, stating that my garden had been moved Now I was very excited about being I was, it was a beautiful little h great access and I'd figured n my head Then they moved e to the main section of show gardens! Yeah, you know the place, where all those mind blowing gardens are built and Adam Frost is just metres away from you Yep! There! My anxiety went through the roof! I had an absolute meltdown and my poor wife had to deal with my outburst (again!). She decided the best thing to do, was to take me plant opping. It worked a treat and I was instantly calmed by the plants and the strong coffee with me I am so excited to be it at all and the fact that they design is good enough to be mongst the show gardens has made me feel a huge amount of pride
The plants I've been growing myself, have been a real challenge With the weather being so wet and warm, the slugs and snails have had a field day I'm not one for worrying about how plants look or grow, I'm a suck it and see kind of gardener, but creating a show garden changes you Trying to get some things to grow early or out of their optimal season is so difficult and stressful We've got there with some things though and what will be, will be now.
I really hope this has given you an insight to what has been happening behind the scenes here at Brizzle HQ and if you are visiting Gardeners World Live, please come and say hello- I can’t wait to show you around the garden.
By Ben Shutler @plot 27b bristol
PhooCed :BenShuter
PhooCredt BenShue
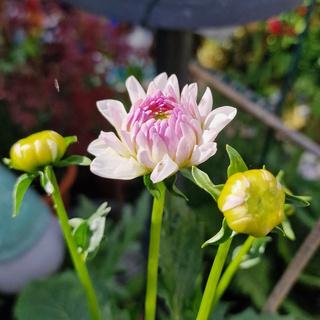
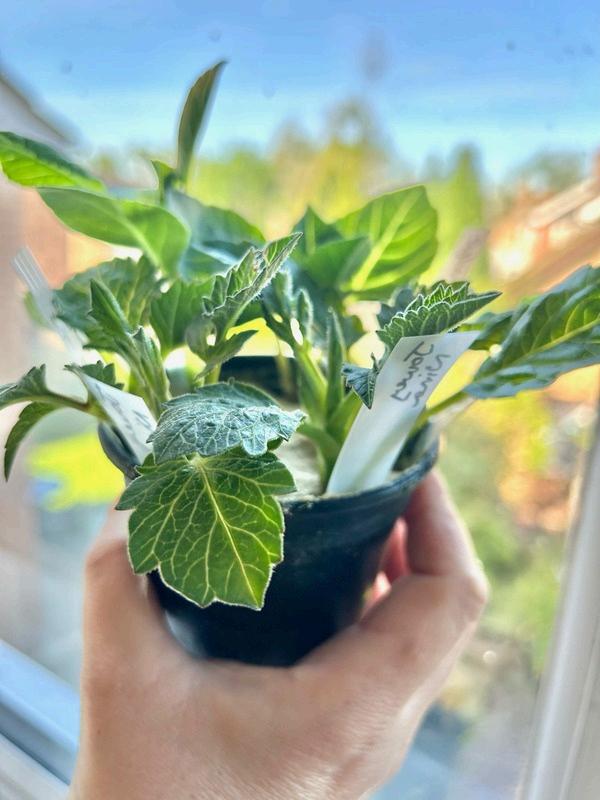
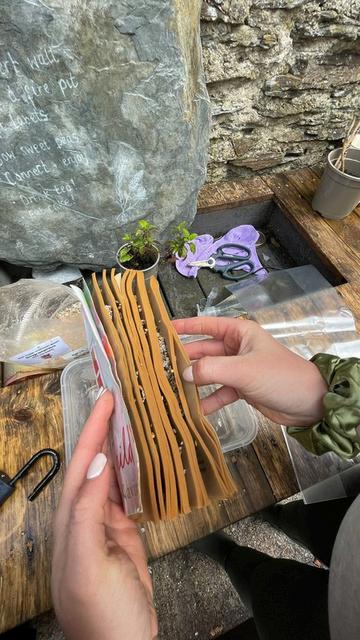
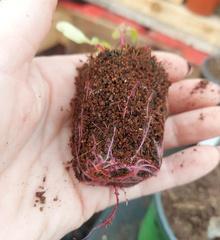
Here at dahliafarmerama towers, the dahlia tubers are almost ready to be planted out into the field This is going to be a massive undertaking and it’s one I normally race to do before the ground becomes baked and too hard to dig I wonder if that will be the case this year after the cold, wet Spring we ’ ve had? The low daytime temperatures have meant that the dahlias haven’t been rushing to wake up this year in the greenhouse (which is unheated with a few drafty gaps) and progress has been slow. By contrast, the tubers on my windowsills have sprung into life with verve and gusto, and I’ve been battling to hold them back. What a difference a few degrees in temperature can make! I have very limited windowsill space to sprout potted tubers as this premium real estate is reserved for the thousands of cuttings I have already taken, which are in their varying stages of development, ranging from freshly cut; barely rooted; perfectly rooted; and rooted to the point that the trailing roots are threatening to walk over to the potting bench and pot themselves up (Well, almost! And wouldn’t it be nice if they could?)
Taking cuttings is a fantastic way of increasing your stock and plants for free is always a win! It’s possible to take anything from a handful of cuttings to around twenty five (if the tuber is really happy and playing ball) I’ve never had much success rooting into compost so I prefer to use horticultural sand and even regular play
@dahliafarmerama sand will do the trick! The cuttings don’t need nutrients, just aerated roots, and sand provides the perfect media for this
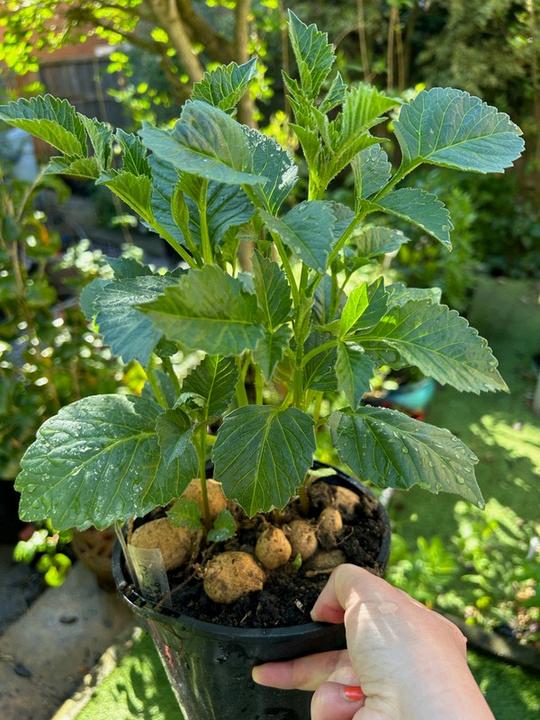
I’m not a hydroponic grower, and I’ve never used this system, however, if hydroponic growing can be defined as using non-soil aggregates, then it could be argued that this method is a step towards hydroponic growing at its most basic level When using this technique, don’t be tempted to pull the cutting out of the sand to check to see if it has rooted You run the risk of snapping off the roots (if there are any), and undoing all of your good work There are a number of tell-tale signs that will indicate that your dahlia is ready to be potted up into compost, the first being that the cutting will begin to lean towards the nearest source of light. Secondly, the cutting may begin to put out a new pair of leaves from the central stem. Finally, and most obviously, the roots will begin searching their way out of the base of the pot, and when you see these signs, it’s time to transfer into compost and that’s when the growth really begins.
As well as increasing stock, it’s typically a requirement that dahlia blooms grown for exhibition, (if exhibiting is something you aspire to), are grown from rooted cuttings as opposed to from tubers The rationale for this is that blooms grown from cuttings are typically larger, stronger and more vibrant than those grown from tubers of the same variety, so if you want to enter your dahlias into your local garden and produce show, growing from cuttings will give you a distinct advantage that is sure to wow the judges
For an in-depth guide to how to take dahlia cuttings follow me on Instagram @dahliafarmerama and search for the hashtag #thegreatdahliagrowalong. It’s a comprehensive, step-by-step guide to growing dahlias, which I will warn you now is highly addictive, explosively floriferous and extremely satisfying, not to mention space-invading …which brings me back to my windowsills of cuttings that needed potting up yesterday… wish me luck! I’ll see you on the other side.
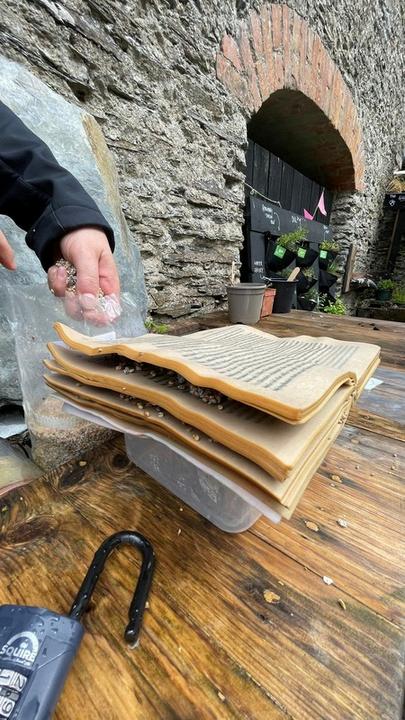
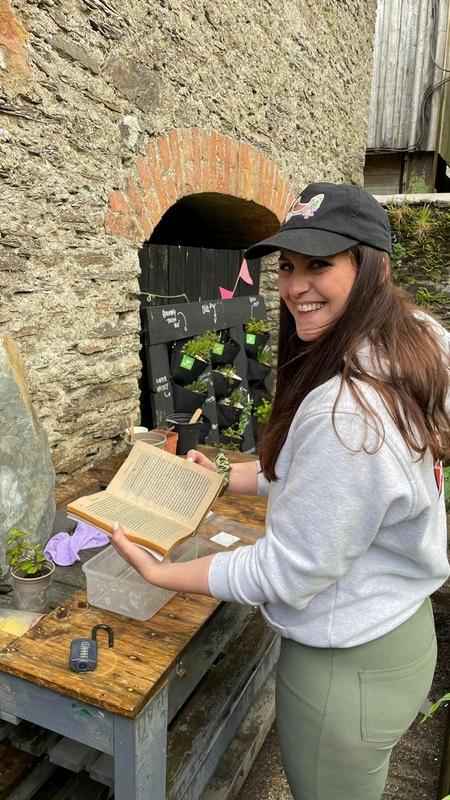
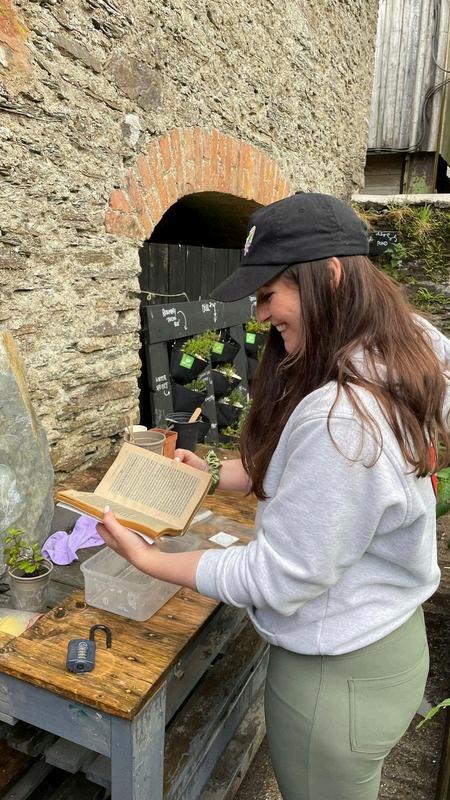
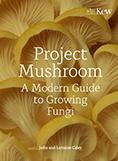
Here at The Gardeners Co. CIC we have spent the month of May on a major mushroom hype after receiving the Caley Bros new book: Project Mushroom: A Modern Guide to Growing Fungi In our garden, we ’ ve added spawn to holey buckets, created mesh sculptures, and started growing mushrooms on books for something a little different. It’s a unique way to grow mushrooms when you ’ ve not got mush room! We’re only in the early stages of growing them, so keep your eye on our socials to see how they grow!
Method:
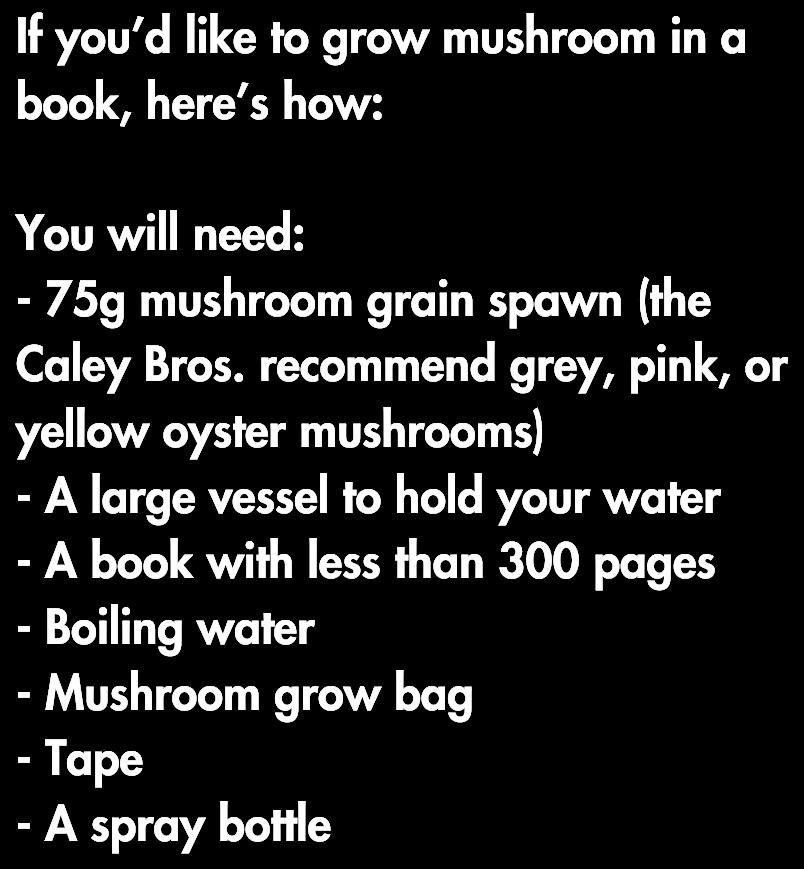
1. First of all, we added our book of choice into a container and filled it up with boiling water enough to ensure all of the pages were saturated, then left it to chill out for a bit until the water was room temperature You need to ensure your hands and surfaces are really clean so we kept a bottle of hand sanitiser handy
2. After an hour or so, we gave the book a few minutes to drip dry before sprinkling spawn between the pages of the book We chose to delicately fill around 10 sections with spawn before sealing it up into one of our grow bags The grow bags have a small ventilation section to ensure airflow which is really important so that you don’t suffocate your substrate
3. The spawn needs around 3 weeks to spread its mycelium all through the pages, so it will be stored in our cool, dark building until it’s done its thing We’re expecting to see a fluffy wool-like layer all over our book and that’s when we’ll know it is ready
4. We will then remove the cover of the book and pop it on a shelf with a little light (but nothing direct) and keep spraying it with a mist bottle for moisture until our pink oyster mushrooms burst into life around 10-14 days later
5. We’re hoping to have 2-3 flushes of mushrooms from this project with each crop spaced 1-2 weeks apart
This was a really fun project to get started and we ’ ve already seen some incredible progress, with a nice white fluffy substance starting to take over our book. Whilst this is completely new to us, we are definitely going to be growing mushrooms for a long time to come, with Project Mushroom: A Modern Guide to Growing Fungi absolutely packed with exciting things for us to test out
Thinking of growing mushrooms of your own? The Caley Bros have some fantastic grow at home kits for you to try, and we’d love to see how you get on and what you make with them so keep us updated @thegardenerscocic and #gardenfolkfriends
Photo Credi: The Gardeners Co CIC
PhooCed :TheGade esCo CC
Photo Credit: The Gardeners Co CIC
Photo Credit: The Gardeners Co CIC
The weather has still not been on my side for much progress on plot 40a. The grass has grown at ridiculous speeds but I finally have a battery mower, making it so much easier to keep on top of. The slugs and snails are everywhere, making me so nervous about planting things out, although I really need to get on with it soon. The greenhouses are overflowing with seedlings that are rootbound and the leaves are starting to change colour where they are not getting enough nutrients.
I've bought some fine netting and I will use blue water pipe to create some hoop tunnels This will hopefully protect the seedlings from the bird life
I am still waiting to catch a woodchip delivery, so that I can add some small walkways within the large no dig bed we've made This will then give us access to walk between the rows of produce, creating a series of long beds Woodchip is in serious demand at our site recently though and it’s gone before you know it
The damsons on the tree have grown like mad I was worried after such a hard pruning, as I thought maybe this year would be a lot lighter harvest. However, it seems to be thriving. To add to my fruit, I am intending on making some strawberry areas, as I potted up about 50 runners from plot 27b last autumn and they are starting to flower. I still don't know whether to use the Garantia raised beds for this or to maybe make something a bit different.
I might pot them up and hang them somewhere off the floor, in hope that the slugs do not find them. I have been given some gooseberry bushes and a few raspberry canes too and I think that I am going to plant these within the area I was going to call the ‘Wildlife area ’ . My logic to this, is that then, my wildlife area is technically being used for produce too and can be classed towards my area of cultivated land on the plot. It also then means it can grow along the fence line and provide both the birds and us with fruit berries, whilst also keeping the allotment officers happing with cultivation percentages
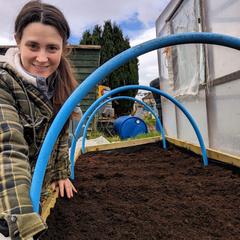
The compost is really working now; the addition of lots more grass clippings has made such a difference The heat coming from them, is making me wonder if I could even use one as a hot bed for my squash and courgettes I am also hoping to get the arches up but this may have to wait until after Gardeners World Live as time is limited to undertake big jobs at the moment
Hopefully, things will all come together and the weather will improve, helping us to get more sorted in the upcoming month.
@plot
27b bristol
June is finally here and so is the warm weather– just kidding, it’s still blinking freezing!
As I write this, I have just run inside to shelter from the most horrific downpour! Great for the plants maybe, but not great for this month’s bloom superstar, the rose! Darn those downpours ruining the beautiful blooms!
Despite the weather plotting against us, there’s still plenty to keep us entertained in the garden It’s seed sowing time again! Hurrah! Time to get those biennials in!
This is where some terminology can get a little confusing, so here are some explanations:
Biennial- means every two years. These flowers put down roots now and overwinter to bloom in early spring next year. Also known as the cut flower hungry gap!
(Not to be confused with Biannual–meaning twice per year!)
My Biennial favourites for cut flowers are as follows:
Honesty
Sweet Williams Foxgloves
Canterbury Bells Poppies
These are all hardy enough to be sown outdoors or into seed trays and left outside till the autumn (or even overwinter) so they won’t take up valuable windowsill or greenhouse space during the busy summer months.
I’m planning on sowing lots of new foxgloves this year, praying for the slugs to give them a break, and hoping for a stunning display next year
By Jen Howarth @life on the lot
June means the beginning of summer and there’s no better time to be enjoying the great outdoors. We have lots of jobs (excuses) to help keep you out in the garden all day long!
Things to sow
Flowers
Primrose
Cornflowers
Poppies
Calendula
Sunflower
Nasturtium
Sweet Williams
Edibles
Courgettes and squash
Climbing Beans
Beetroot
Purple Sprouting Broccoli
Carrots
Basil
Sweetcorn
Come and join the @gardenfolkmag team for live sow alongs throughout the month.
June brings lots of opportunities to delight in the garden you have created but here’s our list of tasks to help you keep on top of things.
Deadhead flowers to keep blooms coming throughout the summer
Leave out water for birds and insects
Plant out and pot on seedlings as they become ready Don’t let them become rootbound.
Tie in climbers.
Sit and admire your space.
Check brassica & fruit netting for trapped wildlife and fix any holes
Collect any rain or grey water to use to water your plants
Don’t let pots dry out.
Harvest salads and resow for successional harvests.
Visit a garden or flower show to gain inspiration and appreciate someone else’s hard work!
Keep weeding.
Feed indoor or container grown plants regularly.
Sarah Wilson explores all aspects of gardening in a sustainable and low impact way in this listener friendly weekly podcast.
I love watching the bees . Saw one had fallen asleep in the flower last night at the allotment so sweet ��. So wished I had my camera for that special moment but it’s in my memory just wonderful nature ���� @thepeppermintandchicoryflorals
I saw a “treasure hunt” suggested by the Wildlife Trust for #30dayswild where you walk in the woods but also collect some moss, pebbles, leaves etc to take home as well Which is such a fun idea! I love to collect pebbles from places we visit for around our garden pond @ thequietplace
It doesn't sound very romantic, but make it part of your routine! I always have a morning check of the garden before I start work, and I try to get on a walk when I finish work to replace my old commute as I work from home.
This month we asked you:
“ Your top tips for getting outside?”
Watching the bees�� it gets you outside and it never fails to put a smile on my face�� @bluebellandbumblebee
@sophs.mae.garden
Go take the kitchen scraps to the compost bin A very small job which takes you outside, and promotes recycling. Then, once youre out, im sure you’ll easily be distracted by all the lovely gardeny things. @my.allotment.obsession
It’s one of those things where say “it will hurt but you are going to like it !” I would suggest uphill walks , and while you are at it don’t forget to stop at the top and turn around It feels like an achievement Also make sure to pay attention to the plants on the pavements Or nooks and crannies as you may find various wild flowers . ❤ @our little alottment
For myself, getting outside daily is important, taking a different route through woodlands, taking my camera to do some photography, walking or running with friends Sometimes, the incentive to get up early is to catch sight of the deer on the trail or to take a late walk to see the bats or owls. It not only helps to silence and clear your mind when so much is going on, but It's relaxing and helps to reduce cortisol levels. @themessyallotmenteer
I like to take a different route, the scenery is always prettier when you walk the long way round �� @vintage.plot
Put chickens on your allotment….that will get you out on a daily basis ���� @lottie.thyme
Have a small but persistent dog who will stand in front of the sofa tapping her feet and glancing through the window and huffing until you take her for a walk @a falling of fingers Next
Putting on your shoes �� @lauras allotment dream
Get a dog @haguardian
@pumpkins etc
accidental gardener
...and help us keep making the Garden Folk Mag
We appreciate all the support given to the magazine by all the Garden Folkour readers, writers, industry supporters and anyone else who cheers us on Running the magazine each month does incur financial costs though, so if you are able to contribute, either with a one off payment or by becoming a member, it would really help to keep the magazine going... and growing.
There are currently three membership tiers to choose from, all with great benefits