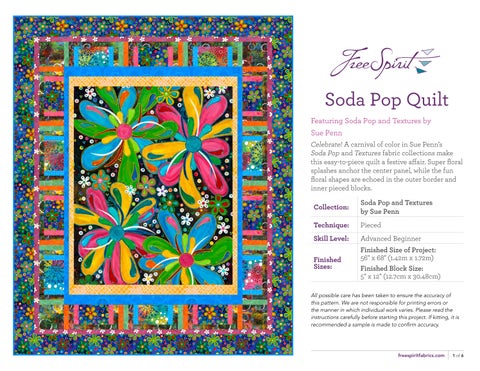

Soda Pop Quilt
Featuring Soda Pop and Textures by Sue Penn
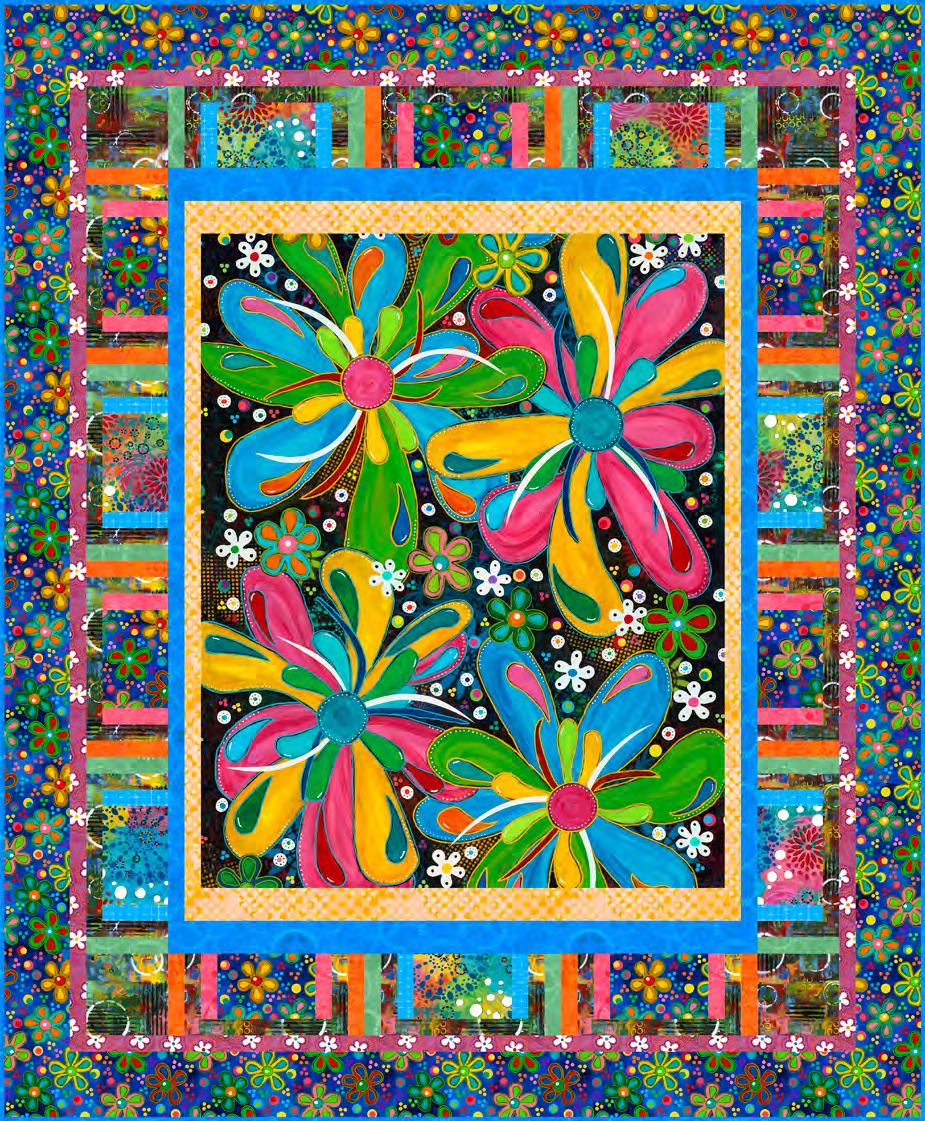
Celebrate! A carnival of color in Sue Penn’s SodaPop and Textures fabric collections make this easy-to-piece quilt a festive affair. Super floral splashes anchor the center panel, while the fun floral shapes are echoed in the outer border and inner pieced blocks.
Collection: Soda Pop and Textures by Sue Penn
Technique: Pieced
Skill Level: Advanced Beginner
Finished Sizes:
Finished Size of Project: 56" x 68" (1.42m x 1.72m)
Finished Block Size: 5" x 12" (12.7cm x 30.48cm)
All possible care has been taken to ensure the accuracy of this pattern. We are not responsible for printing errors or the manner in which individual work varies. Please read the instructions carefully before starting this project. If kitting, it is recommended a sample is made to confirm accuracy.
Project designed by Sue Penn | Tech edited by Alison M. Schmidt
Fabric Requirements
DESIGN
(A) Soda Pop Panel
(B) Fizzy Blue
(C) Rings Royal
(D) Grunge Multi
(E) Daisy Dream Pink
(F) Splatters Bumblebee
(G) Bubbly Multi
(H) Tonal Graffiti Orange
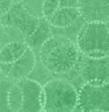
(I) Rings Mint
(J) Tonal Graffiti Raspberry
(K) Plaid Blue
PWSP105.PANEL 1 PANEL
PWSP100.BLUE 11⁄4 yards (1.14m)
PWSP094.ROYAL* 7⁄8 yard (0.80m)
PWSP101.MULTI 5⁄8 yard (0.57m)
PWSP104.PINK 3⁄8 yard (0.34m)
PWSP095.BUMBLEBEE 1⁄3 yard (0.30m)
PWSP099.MULTI 1⁄4 yard (0.23m)
PWSP037.ORANGE 1⁄4 yard (0.23m)
PWSP094.MINT 1⁄4 yard (0.23m)
PWSP037.RASPBERRY 1⁄8 yard (0.11m)
PWSP036.BLUE 1⁄8 yard (0.11m) * includes binding
Backing (Purchased Separately) 44" (1.12m) wide
Bubbly Multi
PWSP099.MULTI 4 yards (3.66m) OR 108" (2.74m) wide 17⁄8 yards (1.71m)
Additional Recommendations
• 100% cotton thread in colors to match
• 64" x 76" (1.62m x 1.93m) quilt batting
Soda Pop Quilt









Cutting
WOF = Width of Fabric
Fabric A, cut:
(1) 401⁄2" x 321⁄2" rectangle, centered on panel motif
Fabric B, cut:
(8) 41⁄2" x WOF; sub-cut
(7) 41⁄2" x 61⁄2" rectangles; reserve remaining strips for outer borders
Fabric C, cut:
(2) 21⁄2" x WOF; sub-cut
(2) 21⁄2" x 361⁄2" for top/bottom borders
(7) 21⁄2" x WOF for binding
(3) 11⁄2" x WOF for side borders
Fabric D, cut:
(1) 51⁄2" x WOF; sub-cut
(4) 51⁄2" squares
(9) 41⁄2" x 11⁄2" rectangles
(7) 11⁄2" x WOF; sub-cut
(14) 11⁄2" x 101⁄2" rectangles
(19) 11⁄2" x 41⁄2" rectangles
Fabric E, cut:
(6) 11⁄2" x WOF
Fabric F, cut:
(2) 21⁄2" x WOF; sub-cut
(2) 21⁄2" x 341⁄2" for top/bottom borders
(2) 11⁄2" x WOF; sub-cut
(2) 11⁄2" x 401⁄2" for side borders
Fabric G, cut:
(1) 61⁄2" x WOF; sub-cut (7) 61⁄2" x 41⁄2" rectangles
Fabrics H and I, cut from each:
(1) 51⁄2" x WOF; sub-cut
(14) 51⁄2" x 11⁄2" rectangles
Fabrics J and K, cut from each: (2) 11⁄2" x WOF; sub-cut (14) 11⁄2" x 41⁄2" rectangles
Sewing
All seam allowances are 1 ⁄4 " (0.64cm) unless otherwise noted. Sew pieces right sides together. Press seam allowances open unless otherwise indicated.
1. Sew (1) 11⁄2" x 41⁄2" Fabric J rectangle to each short end of (1) 61⁄2" x 41⁄2" Fabric B rectangle (Fig. 1). Press seam allowances toward Fabric J rectangles. Make (7) J/B/J units.
Fig. 1
Fig. 1
Make 7 J J B
J/B/J unit
Soda Pop Quilt
2. Sew (1) 11⁄2" x 41⁄2" Fabric K rectangle to each short end of (1) 61⁄2" x 41⁄2" Fabric G rectangle (Fig. 2). Press seam allowances toward Fabric K rectangles. Make (7) K/G/K units.
2
2
K/G/K unit
Make 7
3. Sew (1) 11⁄2" x 41⁄2" Fabric D rectangle to each short end of the J/B/J and K/G/K units. Press seam allowances toward Fabric D rectangles. Sew (1) 11⁄2" x 101⁄2" Fabric D rectangle to one long side of each J/B/J and K/G/K unit (Fig. 3). Press seam allowance toward the Fabric D rectangle.
Fig. 3
Fig. 3
Fig.
Fig.
4. Sew (1) 11⁄2" x 51⁄2" Fabric H rectangle to each short end of the D/J/B/J/D units to complete the B Block (Fig. 4). Press seam allowances toward the Fabric H rectangles.
Make (7) B Blocks.
4
4
5. Sew (1) 11⁄2" x 51⁄2" Fabric I rectangle to each short end of the D/K/G/K/D units to complete the G Block (Fig. 5). Press seam allowances toward the Fabric I rectangles.
Make (7) G Blocks.
Fig. 5
5
Soda Pop Quilt
Top Assembly
6. Sew (1) 1 1⁄ 2" x 40 1⁄ 2 " Fabric F border to each long edge of the Fabric A panel. Press seam allowances toward borders.
Sew (1) 21⁄2" x 341⁄2" Fabric F border to the top and bottom of the panel. Press seam allowances toward the borders.
7. Sew (3) 11⁄2" x WOF Fabric C strips together end to end. Press. Cut (2) side borders, 11⁄2" x 441⁄2". Sew (1) side border to each long edge of the quilt center. Press seam allowances toward the Fabric C borders.
Sew (1) 21⁄2" x 361⁄2" Fabric C border to the top and bottom of the panel. Press seam allowances toward the Fabric C borders.
8. Noting block placement as shown in Fig. 6, arrange (2) B Blocks and (2) G Blocks in a single row. Sew blocks together to make the Left Side Pieced Border. Press. Repeat to make the Right Side Pieced Border . Referring to the Quilt Layout (page 6) for orientation, sew each side border to the quilt center. Press seam allowances toward the Fabric C borders.
9. Following the Quilt Layout diagram, arrange (2) 5 1 ⁄ 2 " Fabric D squares, (1) B Block and (2) G Blocks in a single row to make the Upper Pieced Border . Sew blocks and squares together along adjacent edges. Press. Repeat using (2) 51⁄2" Fabric D squares, (2) B Blocks and (1) G Block to make the Lower Pieced Border . Sew borders to the upper and lower edges of the quilt center. Press seam allowances toward the Fabric C borders.
10. Sew (6) 11⁄2" x WOF Fabric E strips together end to end. Press. Cut (2) 1 1⁄ 2" x 58 1⁄ 2 " side borders and (2) 11⁄2" x 481⁄2" top and bottom borders. Sew (1) side border to each long edge of the quilt center. Press seam allowances toward Fabric E borders. Sew (1) top/bottom border to the upper edge and the other to the lower edge of the quilt center. Press seam allowances toward the Fabric E borders.
11. Sew the 4 1 ⁄ 2 " x WOF Fabric B borders together end to end. Press. Cut (2) 41⁄2" x 601⁄2" side borders and (2) 41⁄2" x 561⁄2" top and bottom borders. Sew (1) side border to each long edge of the quilt center. Press seam allowances toward Fabric B borders. Sew (1) top/bottom border to the upper edge and the other to the lower edge of the quilt center to complete the quilt top. Press seam allowances toward the Fabric B borders.
Fig.
Fig.
Fig.
Fig. 6
Fig. 6
Soda Pop Quilt
Finishing
12. Sew together (7) 2 1⁄ 2" x WOF Fabric C binding strips end to end using diagonal seams. Press seams open. Press the binding strip in half wrong sides together and set aside until quilt is ready for binding.
13. Once the top is complete it is ready for quilting! Quilts can be sent out for longarm quilting or you can quilt it yourself. If you are sending the quilt out, it is important to discuss backing and batting requirements with the quilter to ensure they have everything needed to properly finish the quilt.
14. If quilting yourself and using 44" fabric for backing, choose your favorite method for piecing (taking time to remove selvedges), then layer, baste and quilt. Once finished, trim excess batting and backing and bind according to your favorite method.
15. To complete binding by hand, it must first be machine sewn to the quilt top. Leaving an 8" tail of binding, sew binding to top of quilt through all layers, matching raw edges. Miter corners. Stop approximately 12" from where you started. Lay both loose ends of binding flat along quilt edge. Where the two loose ends meet, fold each side back on themselves and press to form a crease. Using this crease as your stitching line, sew the two open ends of the binding together right sides together. Trim seam to 1⁄4" and press seam open. The binding will naturally fold, wrong sides together, and lay along the quit edge. Finish sewing binding to quilt. Turn and press the binding to the back of the quilt and hand stitch in place.
16. If machine binding, complete the steps above only attach the binding to the BACK of the quilt, turn and press to the front of the quilt and machine stitch in place.
Soda Pop Quilt
Quilt Layout
Quilt Layout
