Those with an awareness of Apophysis know that for a while the program languished without significant development. However, in recent years there has been a resurgence in interest particularly with the launch of Apophysis 7X (described here) and Apophysis AV Phoenix (in 2022), which at time of writing is a beta version. In both instances, if appropriate, download the 64bit version.
Here’s the link for Apophysis 7X (Copy and paste the URL into your browser).
https://sourceforge.net/projects/apophysis7x/
Here’s the link for Apophysis AV Phoenix (Copy and paste the URL into your browser)
https://sourceforge.net/projects/apophysis-av/
Download, unzip and install. Apophysis should self-install from Downloads folder. However, should this prove a problem, try unzipping it with the destination as ‘Desktop’. Once unzipped, open the folder on the Desktop and click the Apophysis7X64.exe file to run. For convenience, create a shortcut to Desktop.
The type of fractals generated are known as ‘Flame Fractals’ and for the curious, I append a note about their structure, gleaned from the internet, at the end of this piece. Previously available only for Windows, there’s good news for Mac users with the release of Apophysis-J which associates with Java and functions with Macs.
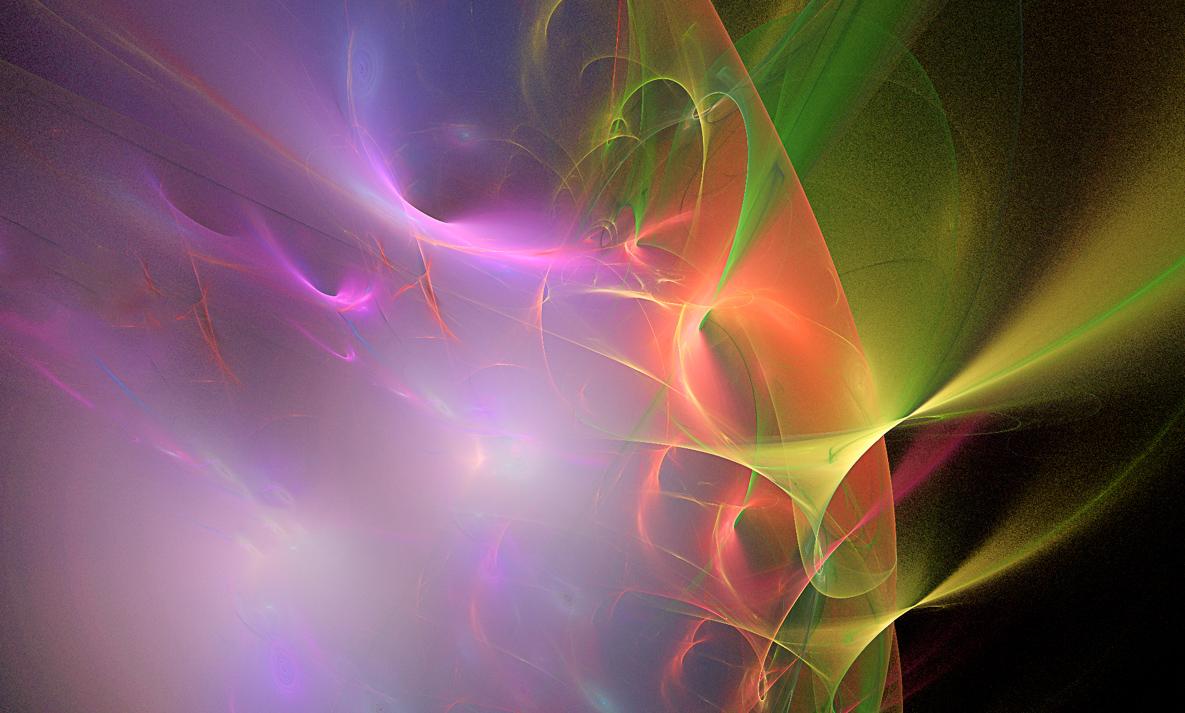
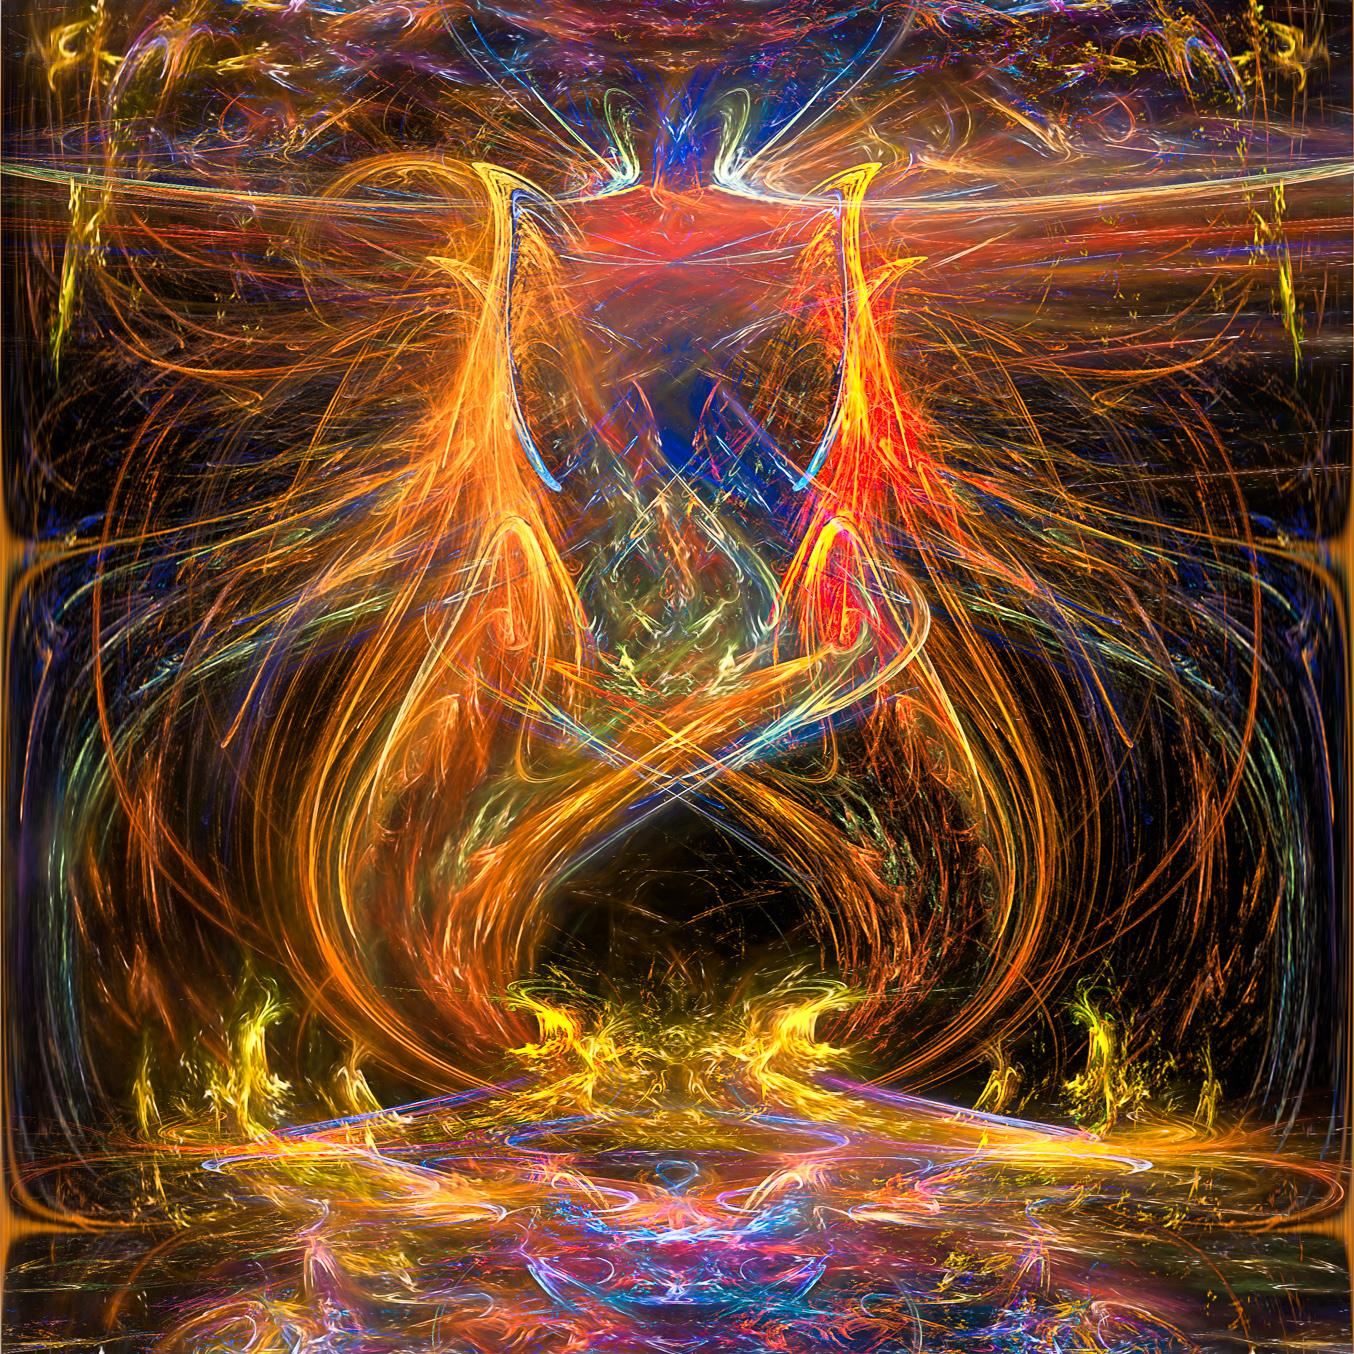
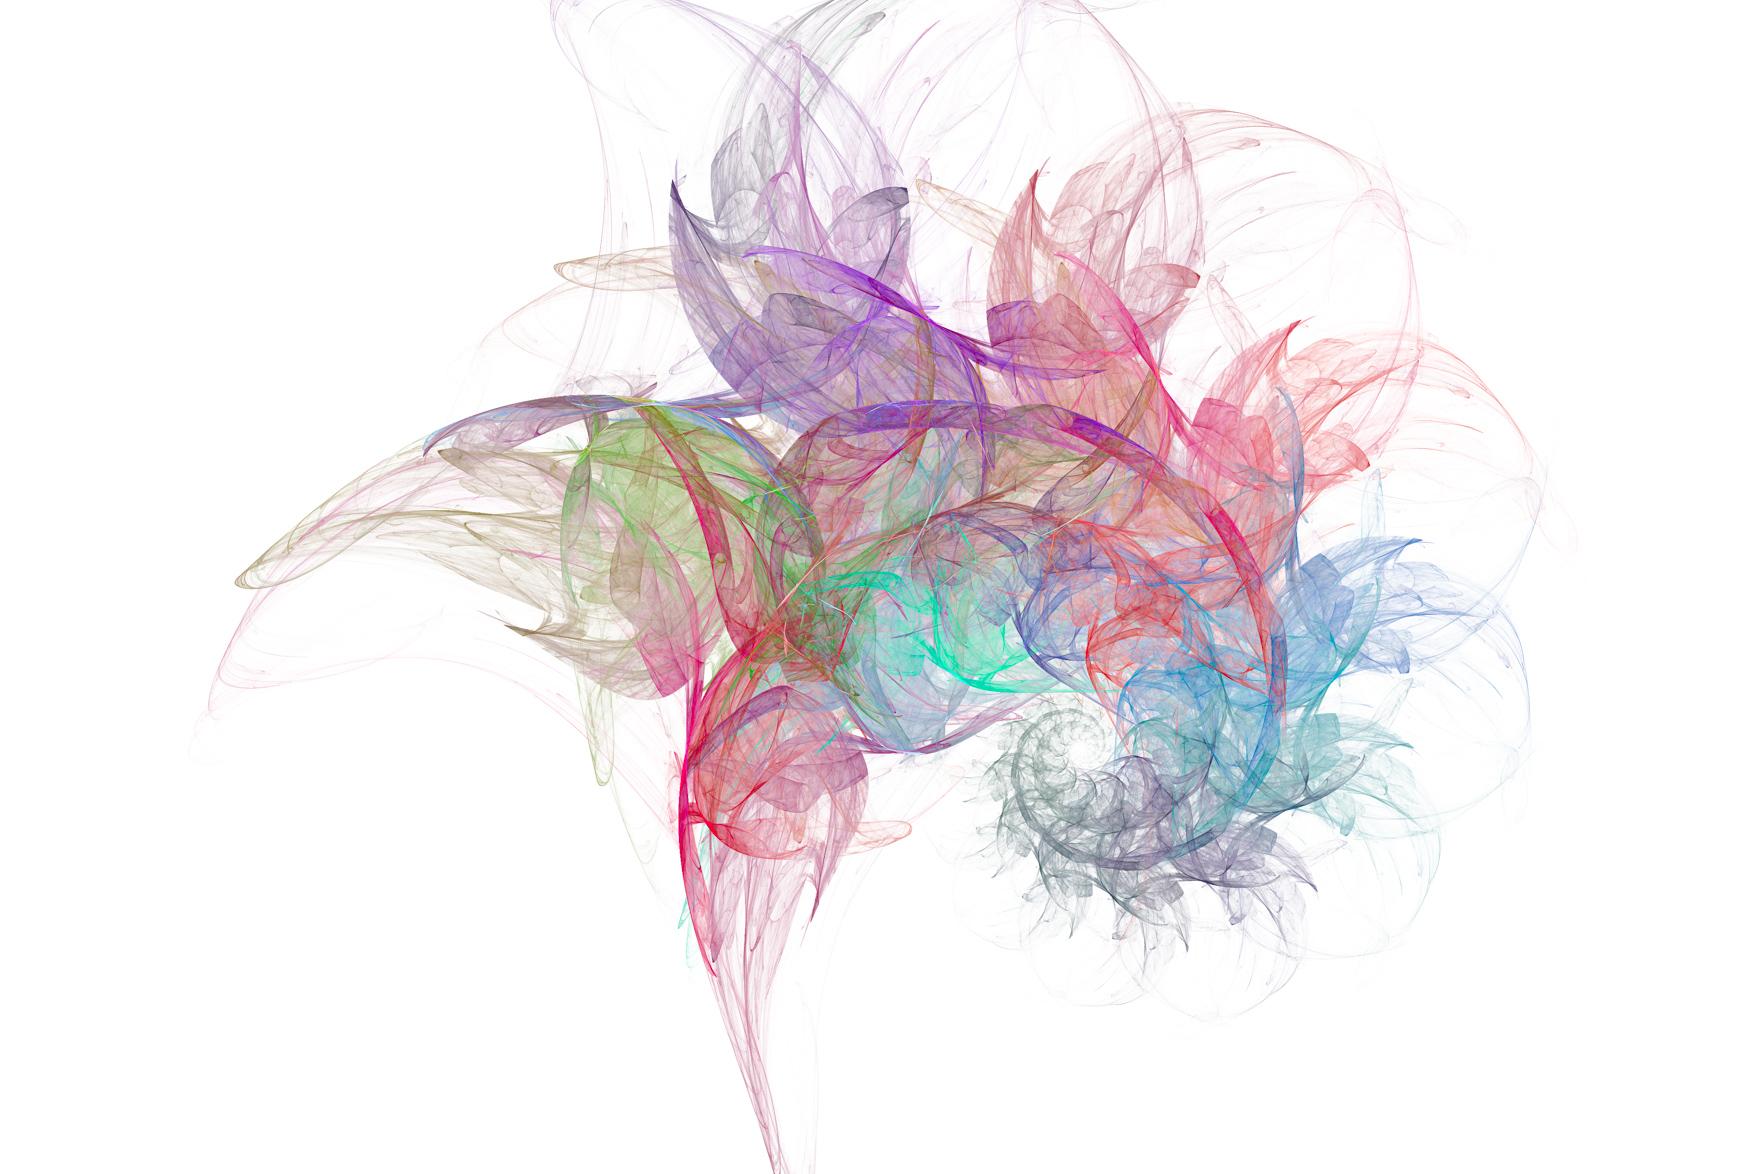
To see examples of fractal images I’ve generated using Apophysis, I’ve published an Issuu e-book ‘Ordering Kaos’, and here’s the URL. (copy/paste into your browser)
https://issuu.com/fotopix/docs/ordering_kaos
The following notes and associated screen-grabs are based upon Apophysis 7X. The general layout, desktop, menu and options are broadly similar to all versions. It should be straightforward to translate from one to another.
There’s not a defined ‘follow-this-method-workflow’ or ‘cookbook’ for managing generating interesting fractals. It’s really a matter of considerable experimentation and the accumulation of a knowledge-base about general principles: what the numerous pre-sets tend to do and what various options allow. Infinite combinations of variables ensure there’s also a huge serendipity factor. I’ve included a few annotated screen-grabs to help.
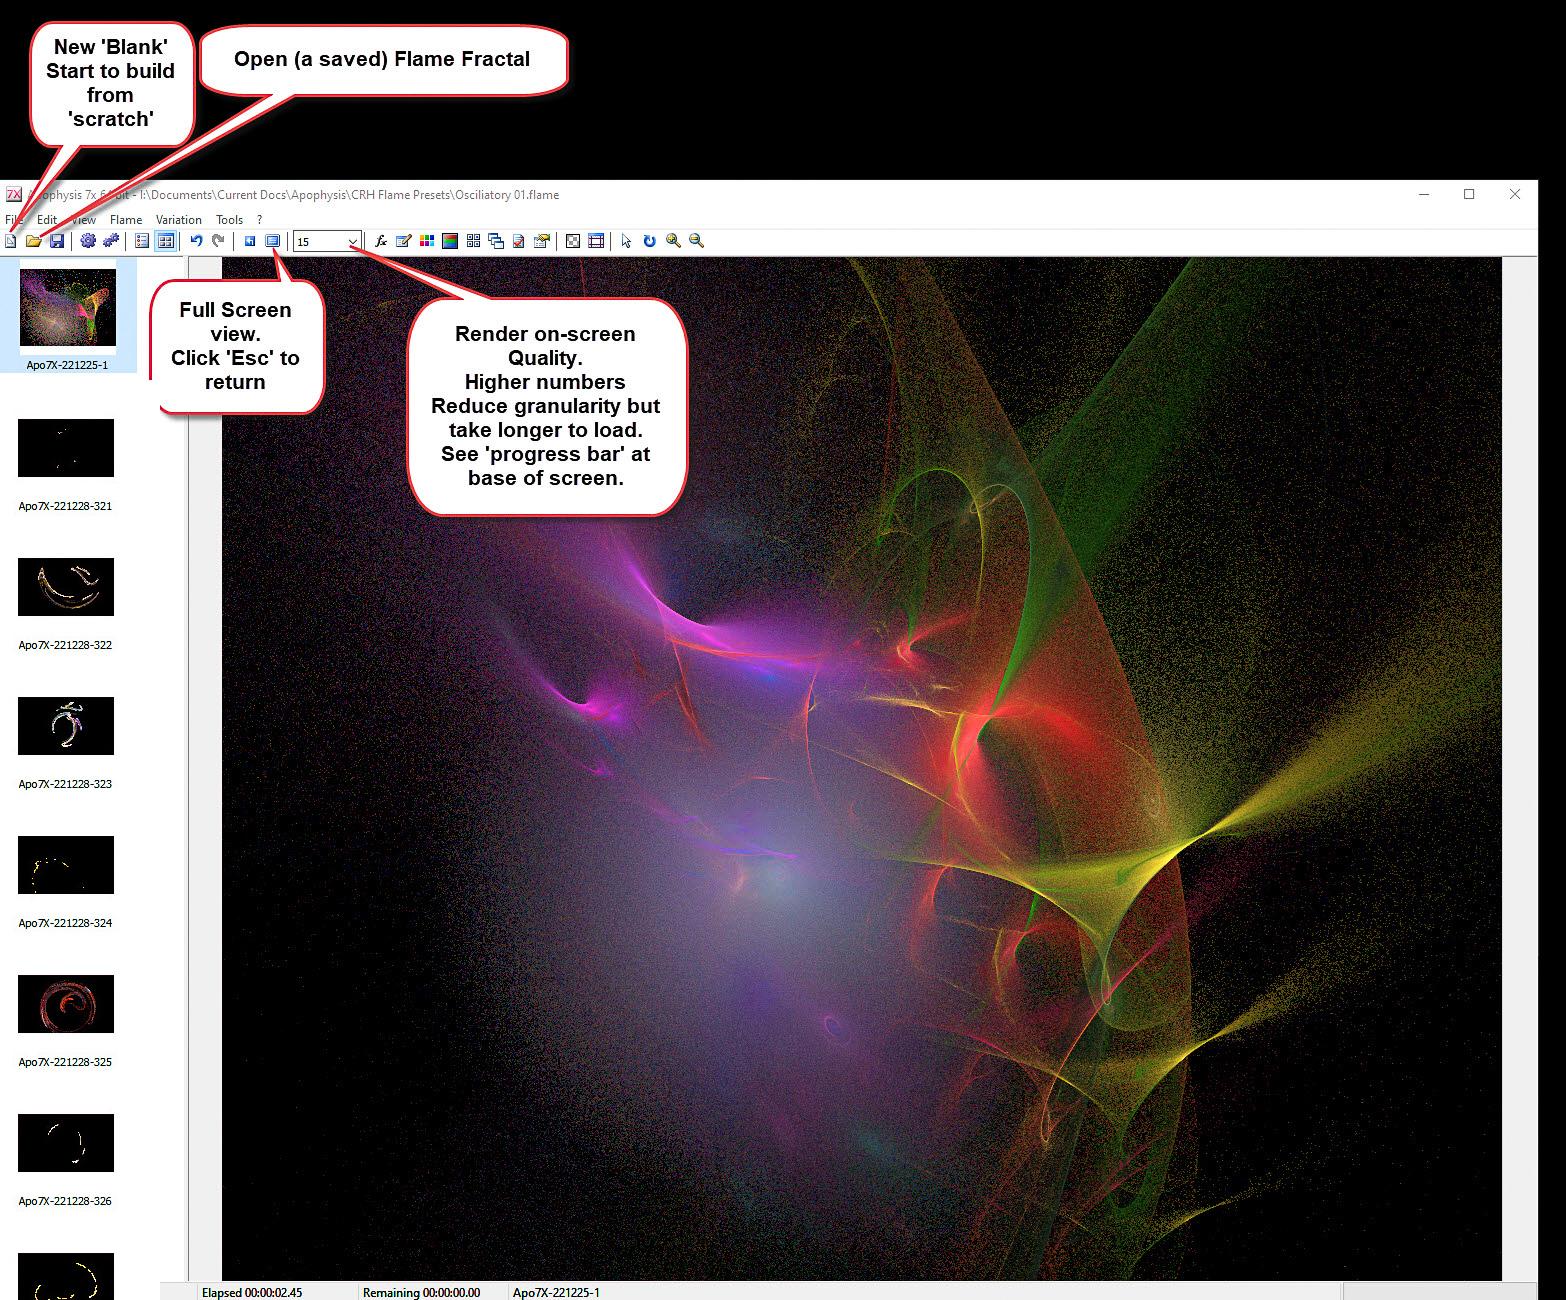
The screen-grabs are detailed and you may need to enlarge them for better viewing. Once Apophysis has loaded, it will provide a Random Batch of fractal patterns. Some will be appealing whilst many others will be less favourable. To generate another set, go to File > Random Batch (shortcut Ctrl+B). Choose a fractal pattern from the batch and it will appear in the main window (screen-grabs 01 and 02 overleaf).
Depending upon the complexity of the fractal and the processing power of your computer, there will be a ‘wait time’ every time you change a parameter. A ‘progress bar’ shows at the bottom right of the screen. Very much depends upon what you choose to do, from loading a fresh pattern to managing the shape of the fractal. To get the general feel about the amount of control you have over the appearance of the fractal, have a play around with the following:
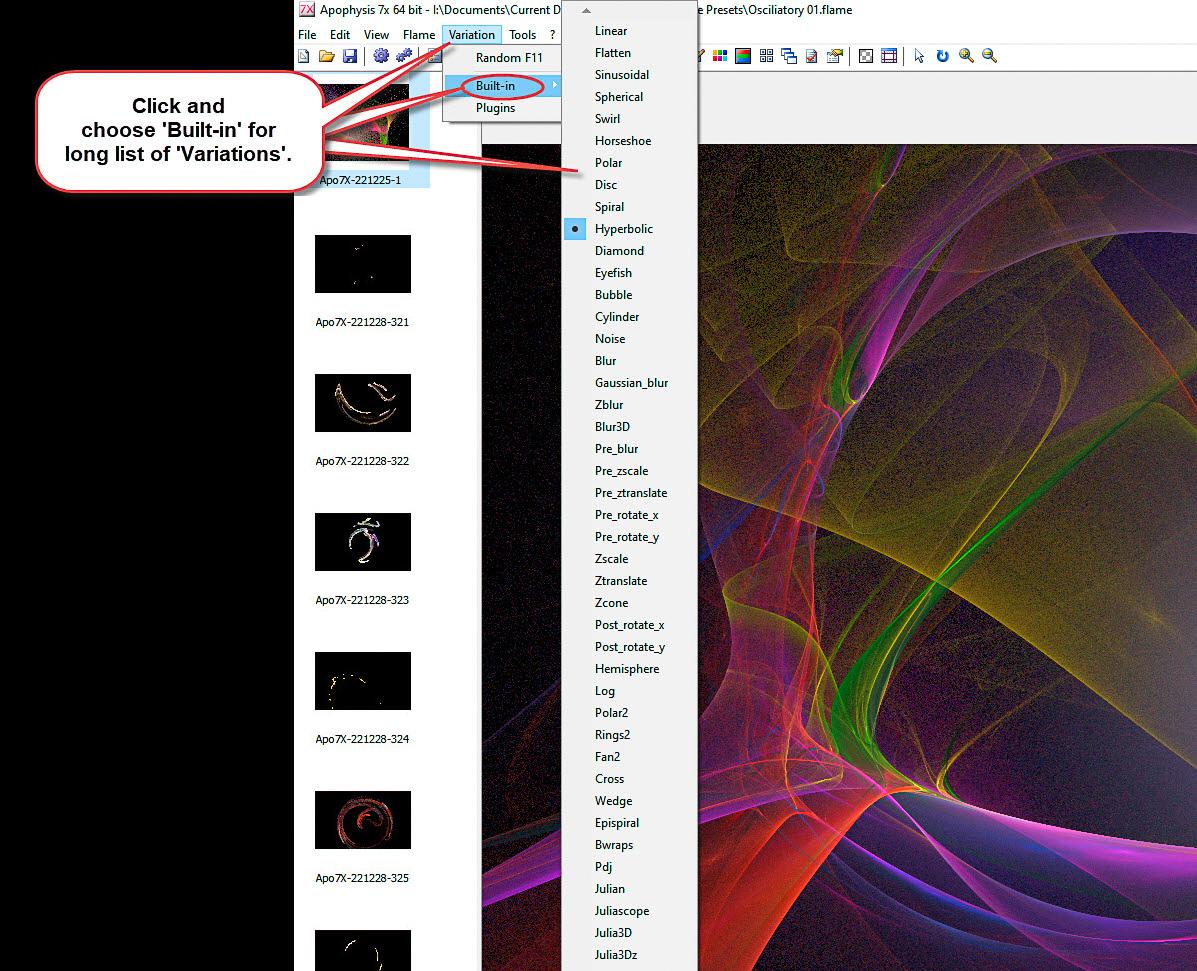
From the top menu, choose Variation > Built In. See screen-grab 02. From the long list presented, experiment with a few. The results will often be quite radical. If you’re feeling lucky, there’s a ‘Random’ (pot-luck) option too. Oh, yes and importantly, there’s an ‘Undo’ button, represented by the usual arrow curling backwards (undo) and an arrow curling forwards (redo). NB. You will find these for many of the options and dialogue boxes.
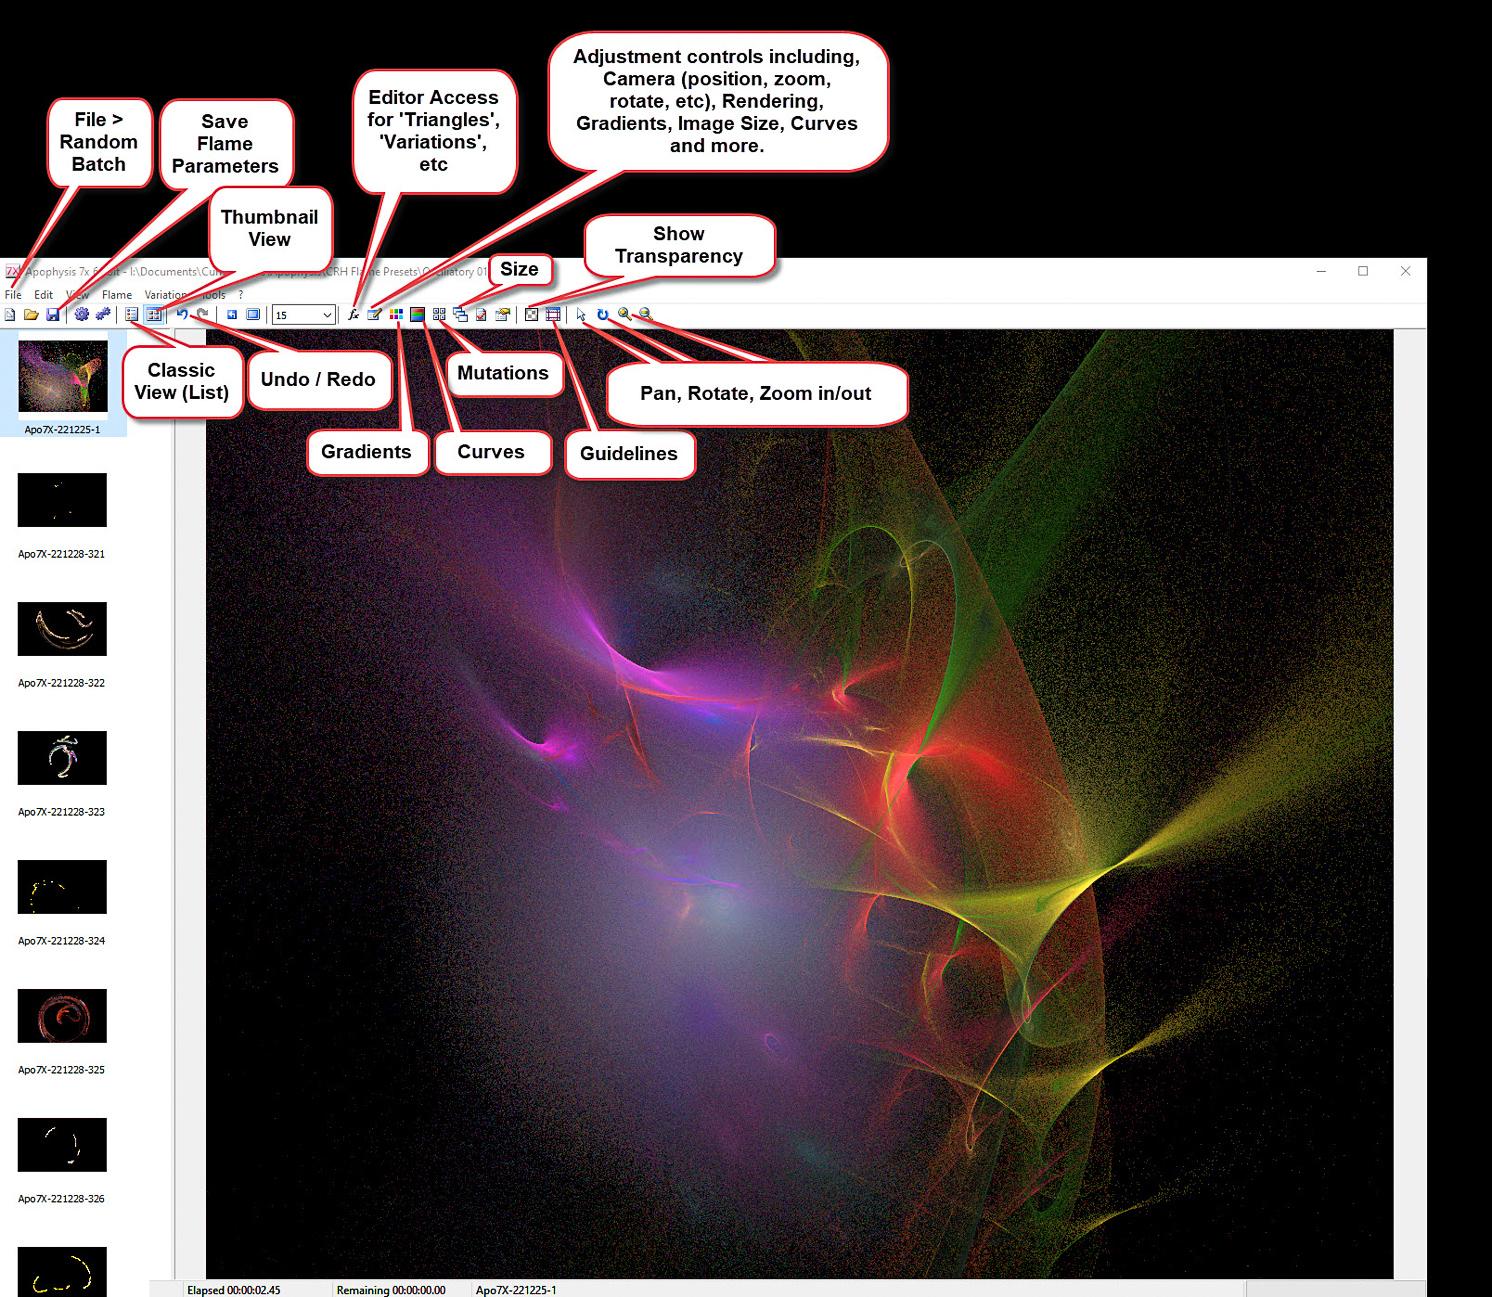
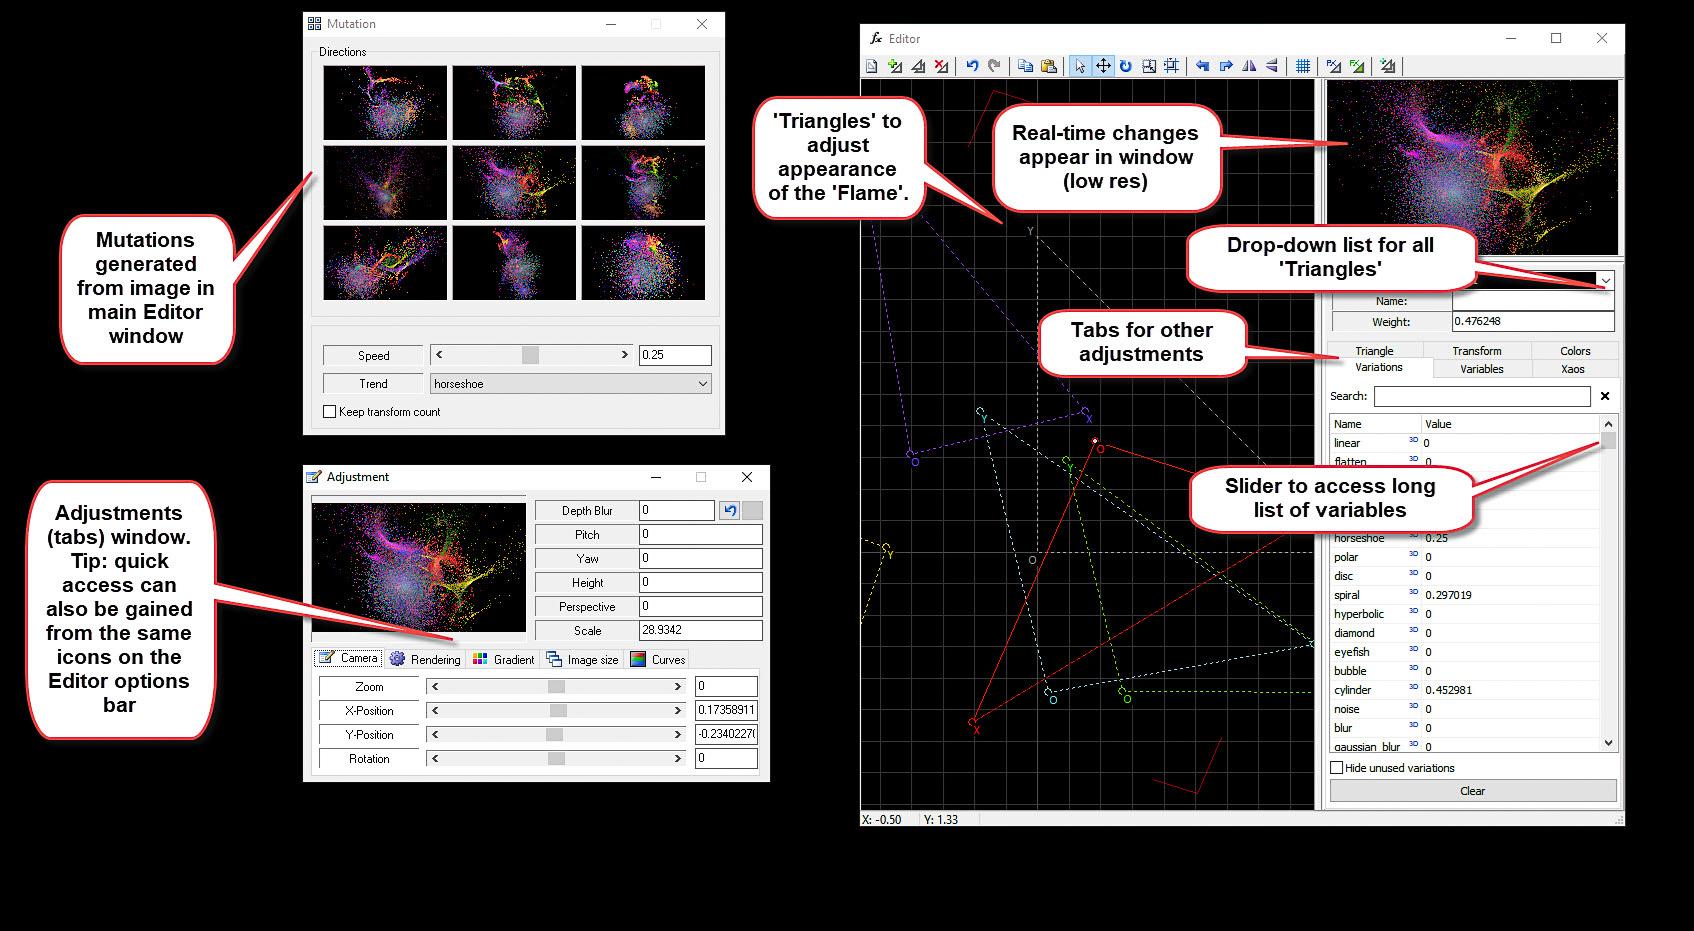
Once you have chosen a pattern, experiment with another variation from the dropdown list. To see the ‘Mutations’, click on the ‘Mutations’ option (a group of four small squares on the top bar,
– see screen-grab 01). This will reveal a set of nine ‘mutations’ arranged about the current version in the centre square. Clicking upon an image in another square will place that one in the centre and your screen display will change to show it. The ‘Trend’ button at the base of the Mutations panel, offers a further set of variables. Simply experiment. Remember each time you make a choice, the on-screen display will take a short time to ‘render’.
Clicking on the ‘Adjust’ icon opens these general adjustments:
‘Camera’: Controls, Zoom, (Global) X & Y positions and rotation
‘Rendering’: Sets the following:
‘Gamma’ - think of this as mid-range contrast value
‘Brightness’
‘Vibrancy’
‘Background’ (colour) – this is usually black or white but other colour choices can be made. (Note: when you have finished making the fractal and choose to ‘render’ it as a PNG file with ‘Transparency’ selected, the background colour will not show in the rendered/exported image. (See ‘Render’ information below).
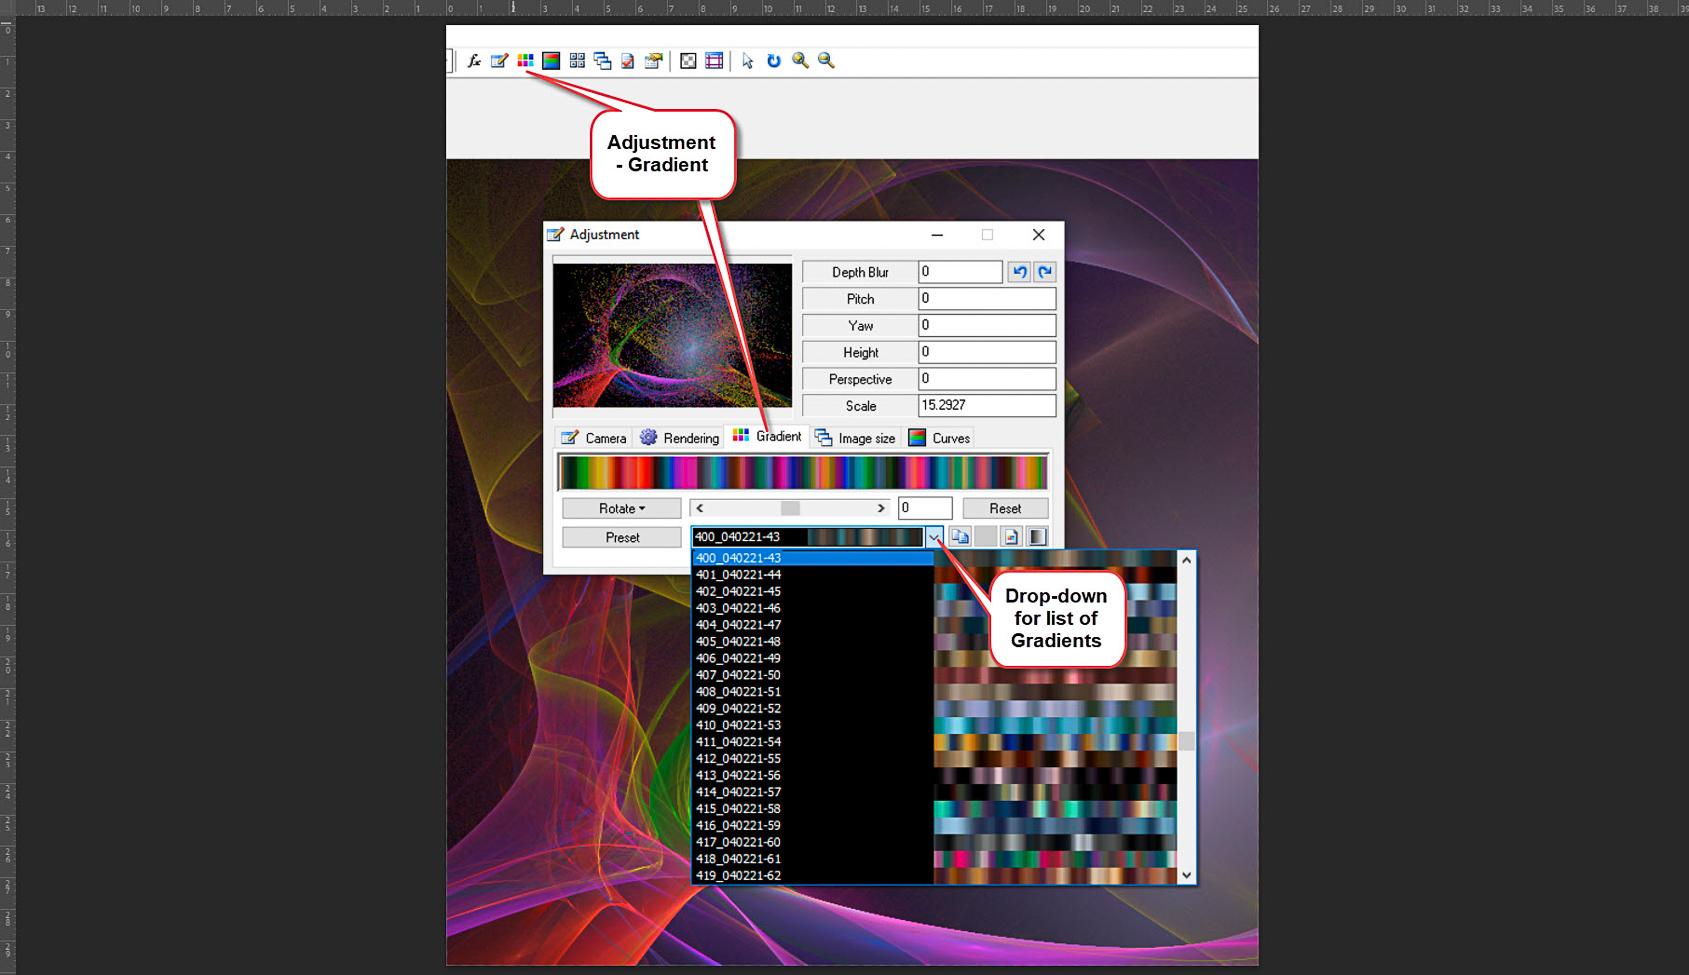
‘Gradient’: This offers a wide range of colour combinations, though the effectiveness will depend upon the underlying characteristics of the fractal. The drop-down arrow on the Gradient Pre-set will reveal many, many gradients to select from. See screen-grab 04 overleaf.
‘Image Size’: Choose the pixel dimensions you need.
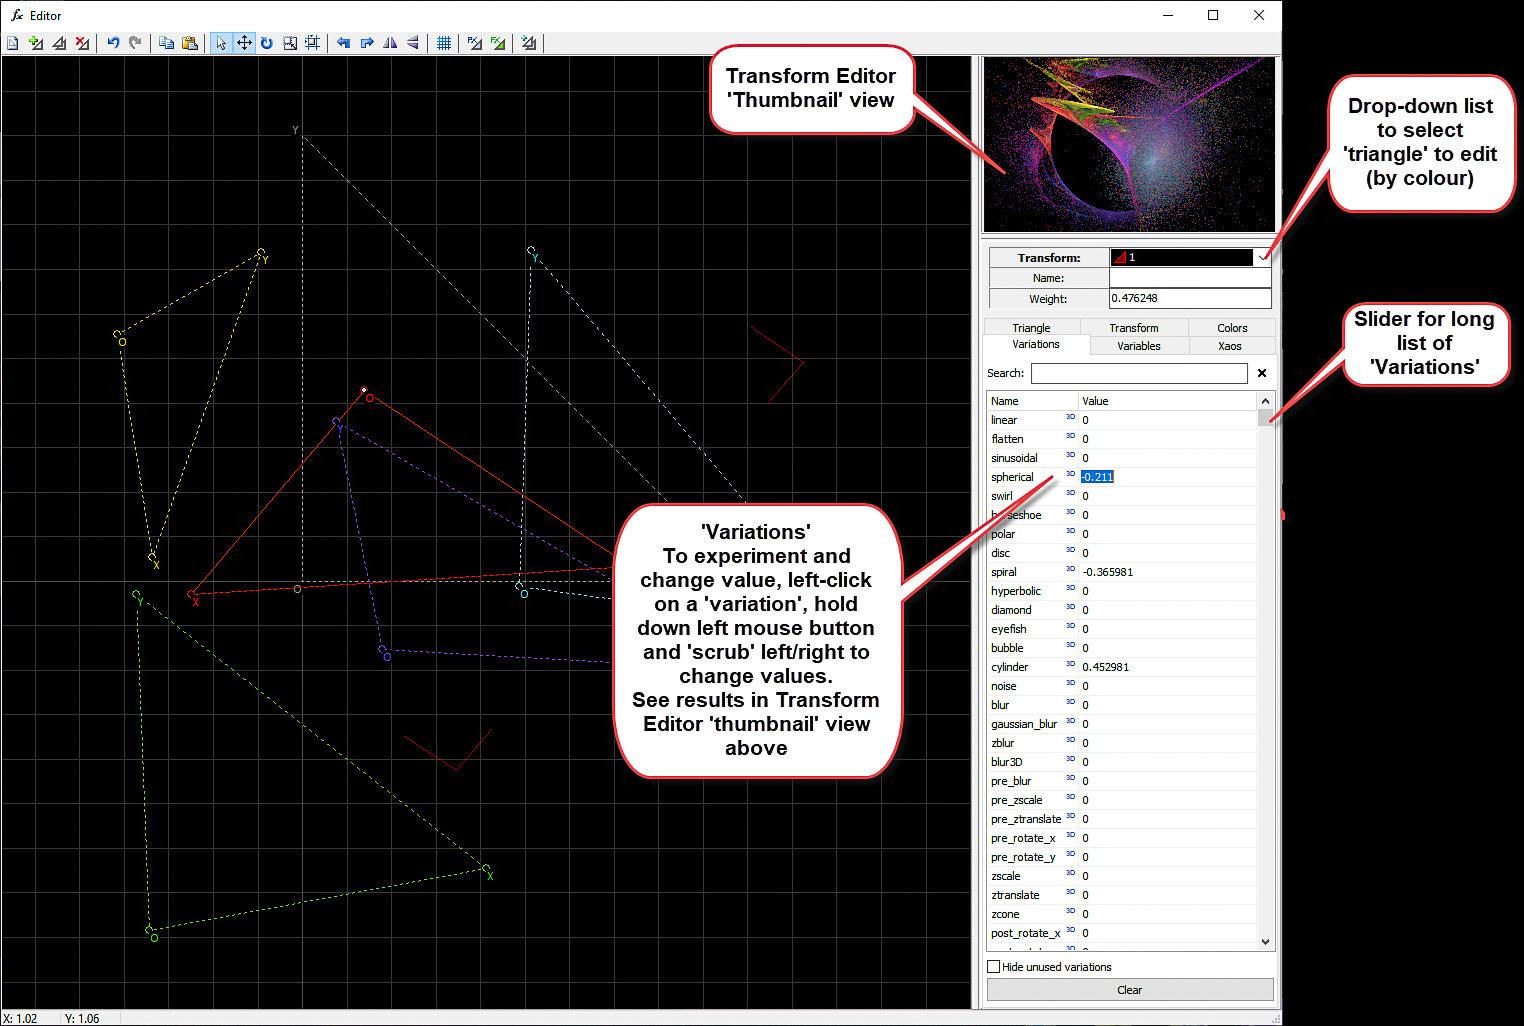
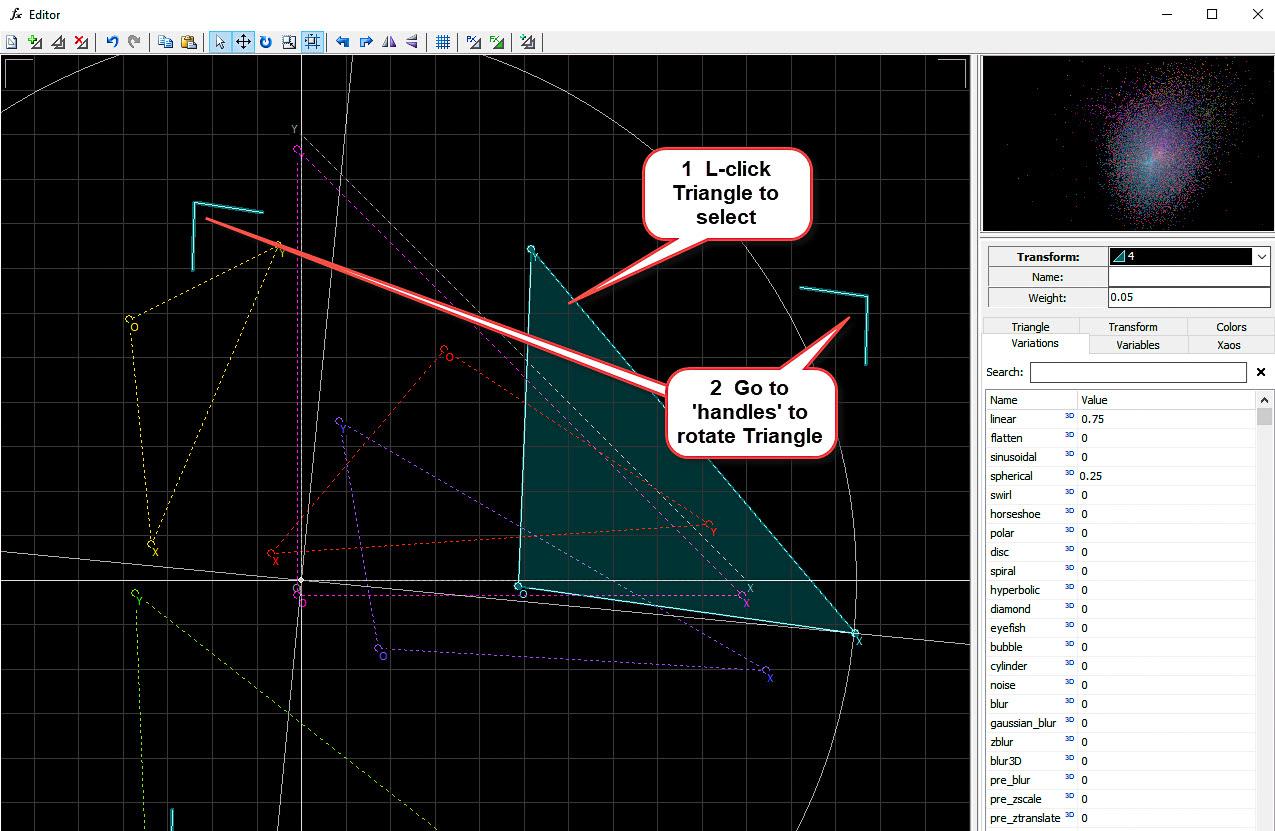
Screen-grab 06 ‘fx’ - Transform Editor. Controlling and Editing ‘Triangles’
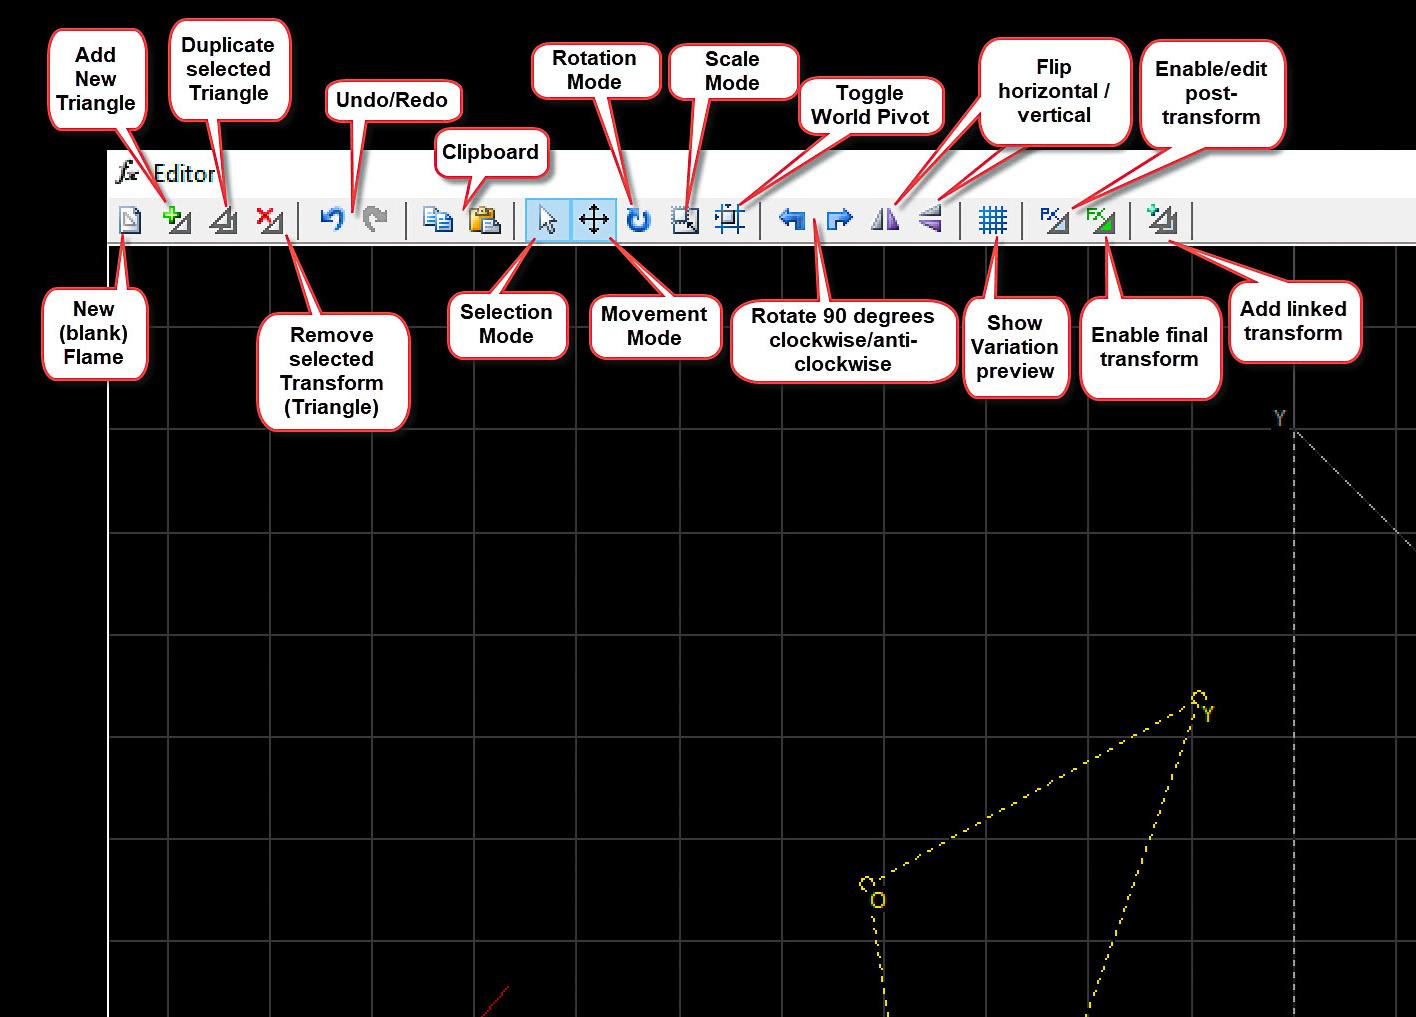
The next control to experiment with is the ‘fx Editor’ (See screen-grabs 06, 07, 08, 09).
The Editor is both subtle and very powerful - and the ‘beating heart’ of Apophysis.
Fractal ‘Flames’ are created by setting parameters for ‘Triangles’. The Editor allows us to see the ‘triangles’ and manage them.
The shape, position and attribute of each ‘triangle’ can be altered. For identification the ‘triangles’ have different colours.
The corner of each ‘triangle’ is identified as ‘X’ for horizontal management (width), ‘Y’ for vertical management (height) and ‘0’ for position. The triangles can also be rotated.
As shown in screen-grab 06 (opposite), here’s a lot of control here.
Screen-grab 07 fx Editor. Controlling and Editing ‘Triangles’

To change the location of the ‘triangle’ (screen-grab 07, opposite).
Either click on the ‘Triangle’ or just below the Transform ‘thumbnail’ display, there’s a drop-down arrow. Clicking this reveals the set of ‘triangles’ identified by colour. From this list, select the ‘triangle’ you wish to manage. The ‘Triangle’ tab in the editor opens an array of options such as move, rotate, scale, etc. Again, experiment to see what happens.
It’s also possible change the ‘variation’ for each triangle (screen-grab 08 overpage). Click on ‘Variations’ tab and select one from the long list. To change the numeric value of the ‘Variation’, left click on the name of the Variation; continue to hold the left mouse button down and ‘scrub’ left and right. The numbers will change, so keep an eye on the ‘Transform’ thumbnail display to monitor what happens.
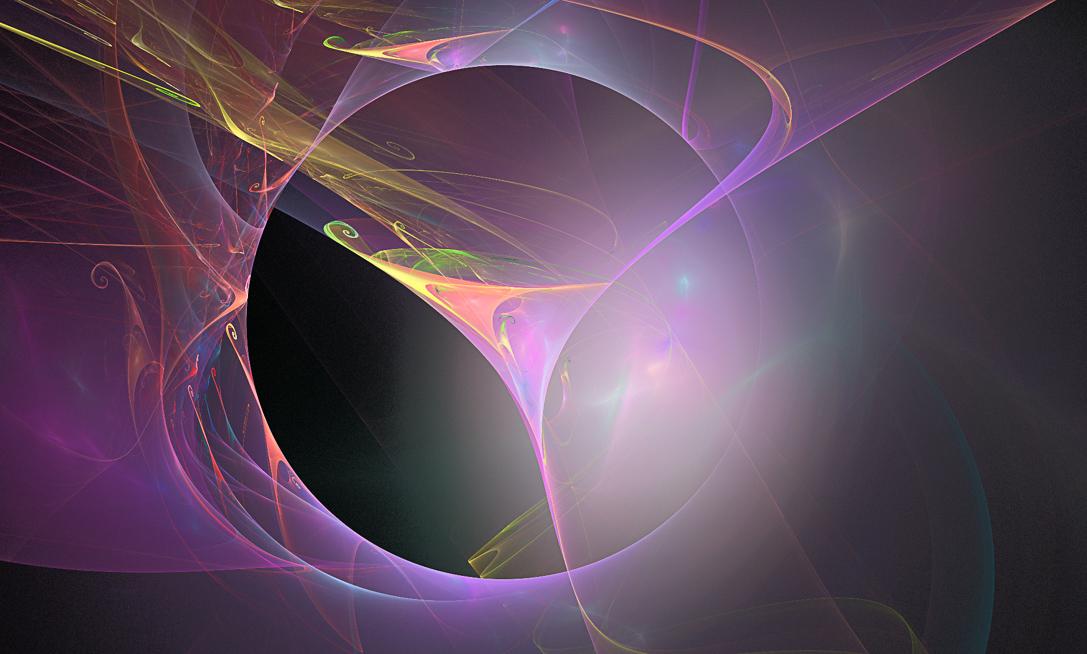
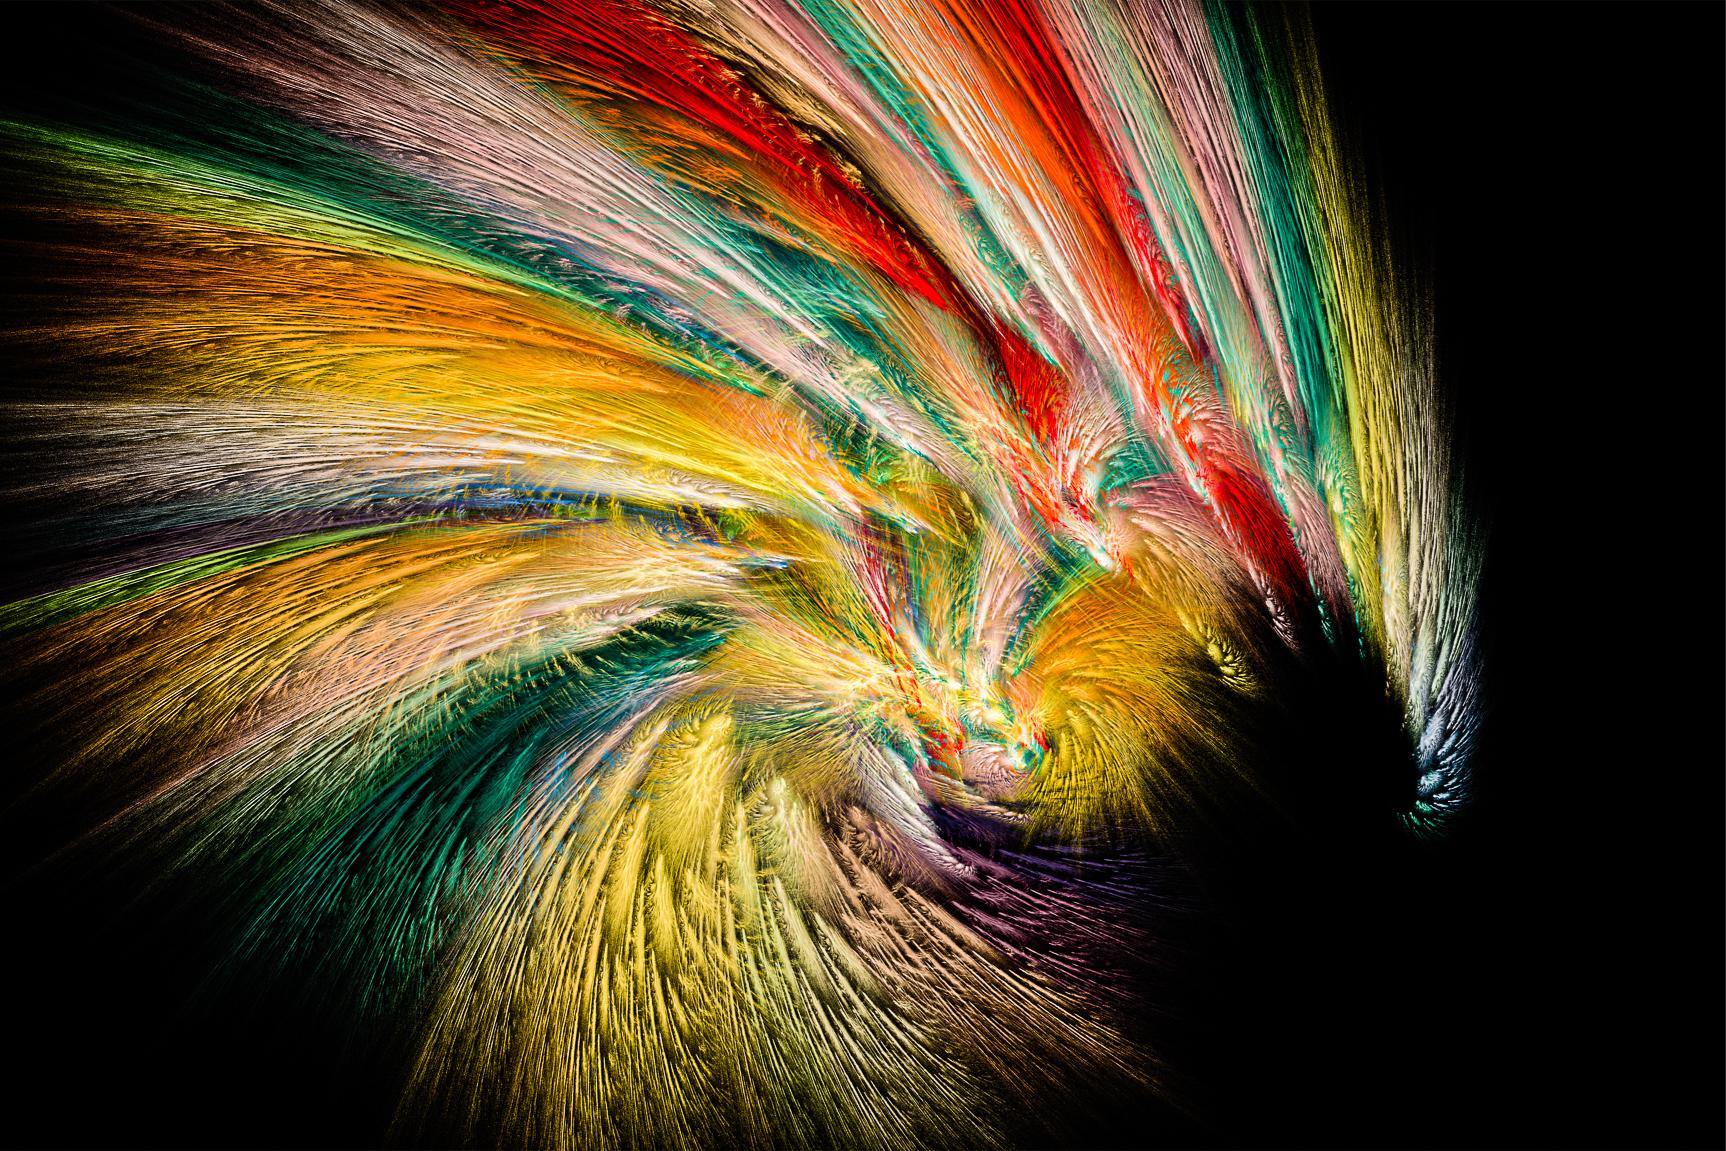
Flame below was derived from the ‘thumbnail’ seen in Editor view on left after changing parameters
Screen-grab 08 fx Editor. Select ‘Triangles’ and manage ‘Variations’ settings
Screen-grab 09 fx Editor. Rotating a ‘Triangle’
Once you have a useful looking flame fractal, it’s possible to save it as a Pre-set and use it as a starting point for further development. It’s really advisable to save a ‘flame’, as once you begin to edit and alter it as despite the ‘undo’ / ‘redo’ it may be impossible to revisit a previous incarnation. .flame files are tiny (just a few kb). It‘s highly recommended to save as a ‘pre-set’ as a you go.
To save as a Pre-set, go to (menu bar) File > Save Parameters. Choose or create a folder for your pre-sets. It’s best to create a folder outside of the Apophysis program structure, as should you need to reinstall the program, the folder will be lost. NB. As a general principle of good practice, saving your own pre-sets and / or images in a folder ‘outside’ the structure of any program is always recommended.
To load a ‘Flame’ from a saved pre-set: go to File > Open - navigate to the folder where you saved your pre-sets, choose the .flame file you need.
Once you’re content with the design you need to ‘render’ the fractal. This enables it to be saved and used in an image-editing program such as Photoshop, Lightroom, etc. To render, click on the small cogwheel icon beneath Edit on the menu (Screen-Grab 1). Set width & height in pixels. Generally speaking, I use the following: Quality: 2000 or 4000 Filter Radius: 0.4 Oversample: 4 The larger the numeric value for Quality and Oversampling, the better the quality will be and as a result, rendering will take longer. An ‘oversample’ of 4 is usually reckoned to be perfectly adequate by the way. Choose a destination to save the file (remember, not inside the program) and give it a name. Here you can choose to save your creation either as JPEG or PNG.
Saved as JPEG (white background)

Saved as PNG with transparent - chequer-board background in Photoshop. BG Would appear white when exported
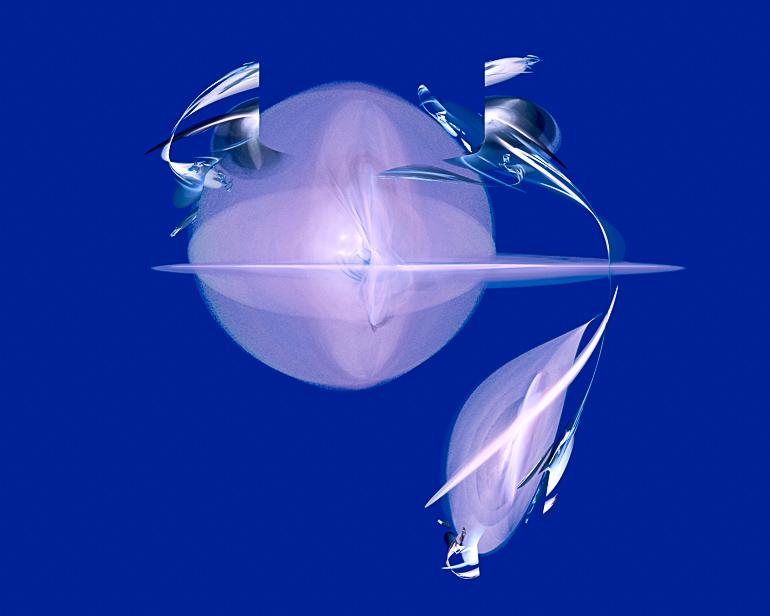
Saved as PNG with black background added as a New Layer in Photoshop
Saved as PNG with blue background added as a New Layer with reduced opacity, above the black Layer in Photoshop

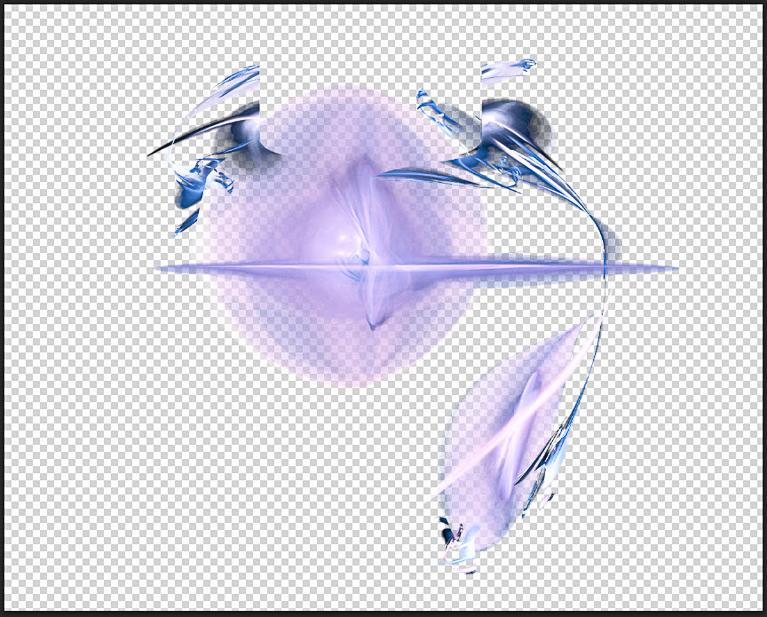

A note about ‘Transparency’. JPEGs don’t allow for ‘transparency’ and your fractal pattern will be saved as displayed with its background colour. PNGs do allow ‘transparency’ and you may wish to consider this option. I often prefer ‘transparency’ as it offers advantages when editing layers in Photoshop. However, a fractal saved as a PNG with ‘transparency’ and opened in Lightroom will usually have a rather thin and veiled appearance. When opening a fractal PNG with ‘transparency’ in Photoshop, it will also appear rather faint and insubstantial. To restore ‘visibility’, add a layer beneath the image and fill this with black, white or any colour of your choice. If choosing black, the image will then become much more substantial and will appear as you viewed it in Apophysis. Choosing ‘Transparency’ also often makes it easier to combine the fractal pattern with another image via a suitable Blend Mode in Photoshop. In Apophysis, to ensure transparency when saving, be sure to choose PNG as the file type. JPEG would be the other option. Additionally, for some purposes, PNGs do offer improved attributes over JPEGs.
Click ‘Render’ ‘cogwheel’ icon and the fractal will be saved. An estimated rendering time will be shown. The predicted time is dependent upon fractal complexity and computer processing power. Times can vary between just a few minutes to over one hour. The essential business of ‘oversampling’ for a complicated and well resolved fractal involves lots of complex work for the computer processor to complete. Once the fractal has been rendered and exported to, say, Photoshop or Lightroom, simply treat it and edit it as you would for any other image.
There are many adjustments and controls beyond the scope of this introduction. However, there should be sufficient information for you to get started.
Just in case you really wanted to know, here’s the promised additional information about Fractal Flames (gleaned from the Internet).
Fractal flames is a member of the iterated function system class of fractals created by Scott Draves in 1992. Draves' open-source code was later ported into Adobe After Effects graphics software and translated into the Apophysis fractal flame editor.
Fractal flames differ from ordinary iterated function systems in three ways:
• Nonlinear functions are iterated in addition to affine transforms.
• Log-density display instead of linear or binary (a form of tone mapping)
• Color by structure (i.e. by the recursive path taken) instead of monochrome or by density.
The tone mapping and colouring are designed to display as much of the detail of the fractal as possible, which generally results in a more aesthetically pleasing image.
The algorithm consists of two steps: creating a histogram and then rendering the histogram.
For fractals rendered with Density Estimation, the noise is smoothed out without destroying the sharp edges.
The flame algorithm is like a Monte Carlo simulation, with the flame quality directly proportional to the number of iterations of the simulation. The noise that results from this stochastic sampling can be reduced by blurring the image, to get a smoother result in less time. One does not however want to lose resolution in the parts of the image that receive many samples and so have little noise.
This problem can be solved with adaptive density estimation to increase image quality while keeping render times to a minimum. FLAM3 uses a simplification of the methods presented in Adaptive Filtering for Progressive Monte Carlo Image Rendering, a paper presented at WSCG 2000 by Frank Suykens and Yves D. Willems. The idea is to vary the width of the filter inversely proportional to the number of samples available.
As a result, areas with few samples and high noise become blurred and smoothed, but areas with many samples and low noise are left unaffected.
Rendering an image: to increase the quality of the image, one can use super-sampling to decrease the noise. This involves creating a histogram larger than the image, so each pixel has multiple data points to pull from.
For example, creating a histogram with 300×300 cells in order to draw a 100 x 100 px image. Each pixel would use a 3 x 3 group of histogram buckets to calculate its value.