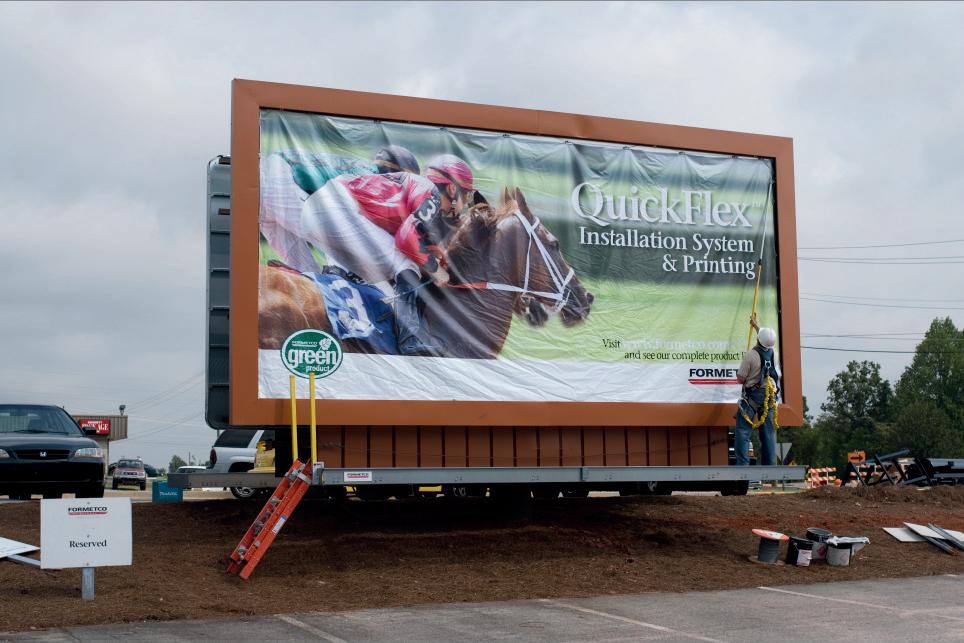
At Formetco we’ve always designed products with the whole outdoor industry in mind and our QuickFlex™ System is a great example of that philosophy. We started by building it around the standard poster panel so it would be universal, then refined it to work with every kind of substrate, lightweight and standard vinyl, even paper.
TRUE FLEXIBILITY
This is a truly universal system designed to work with all standard Poster Panels
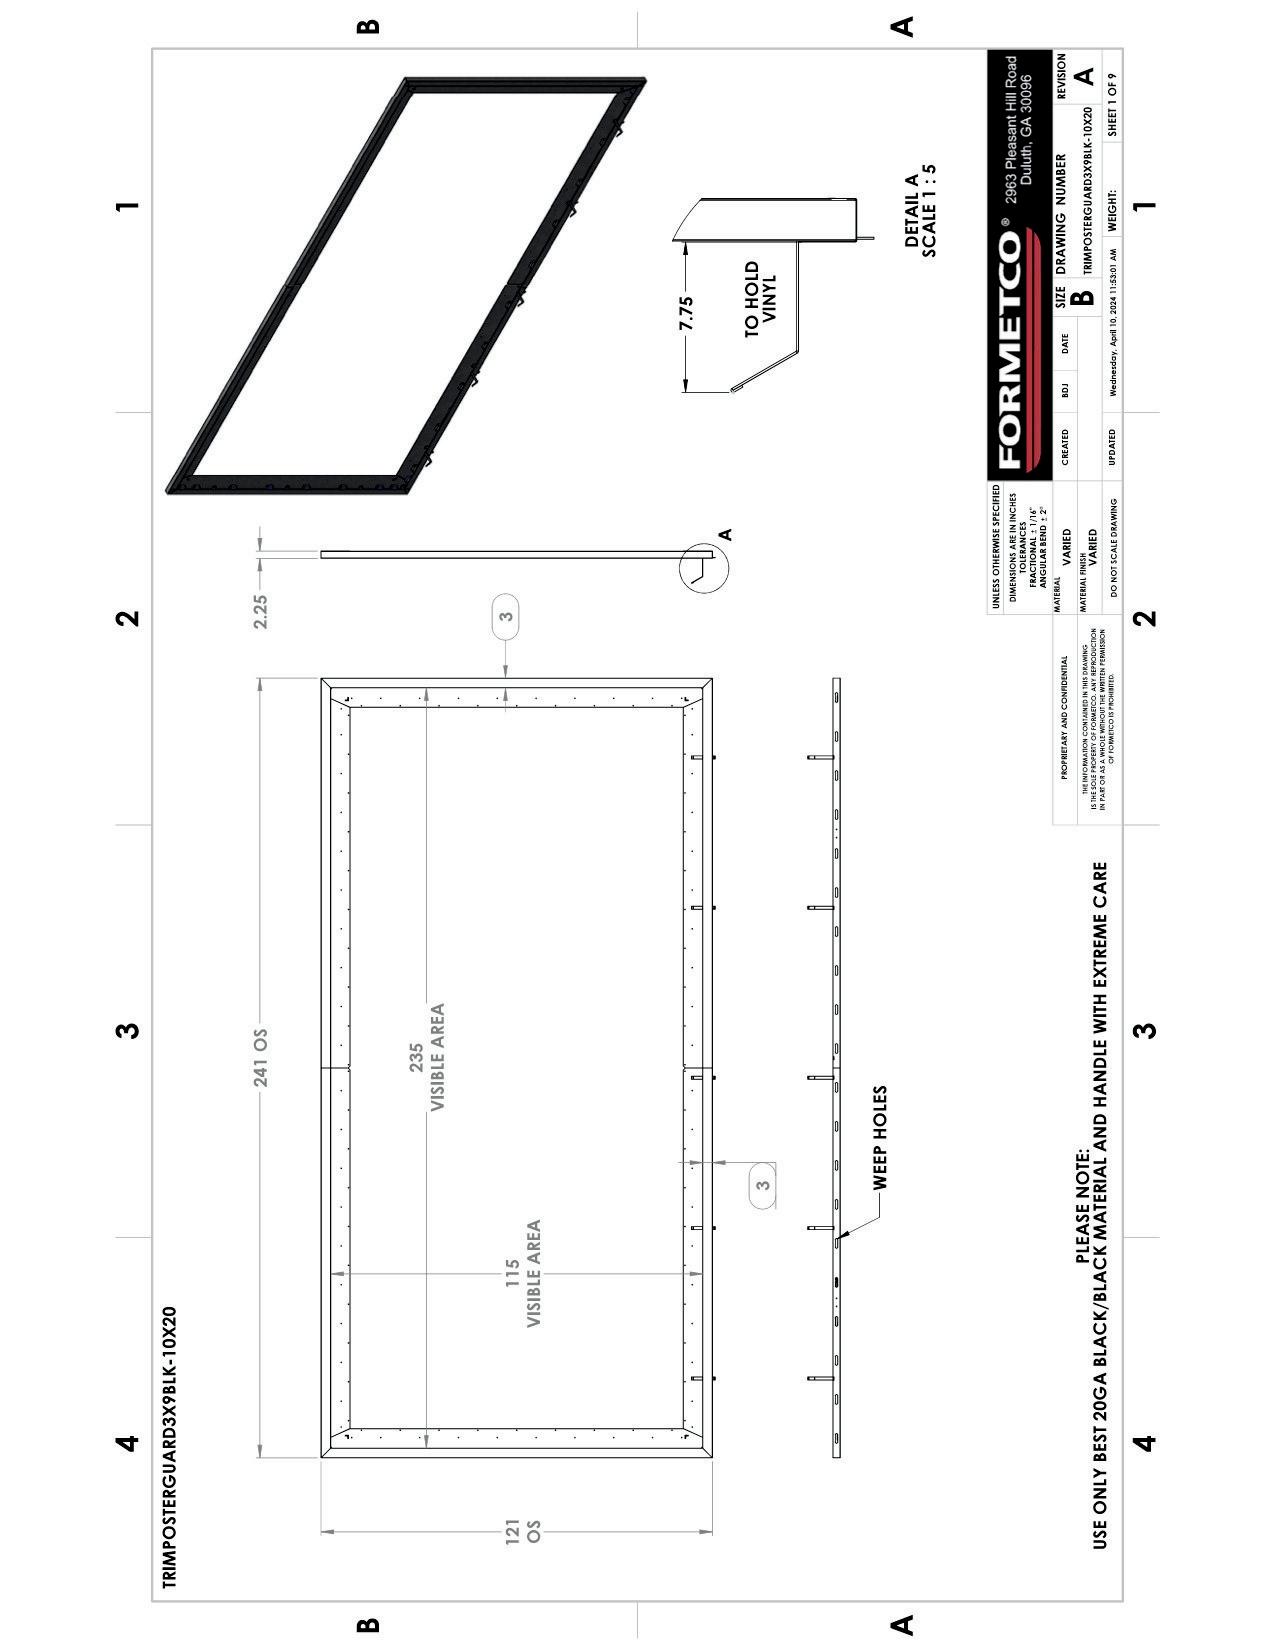
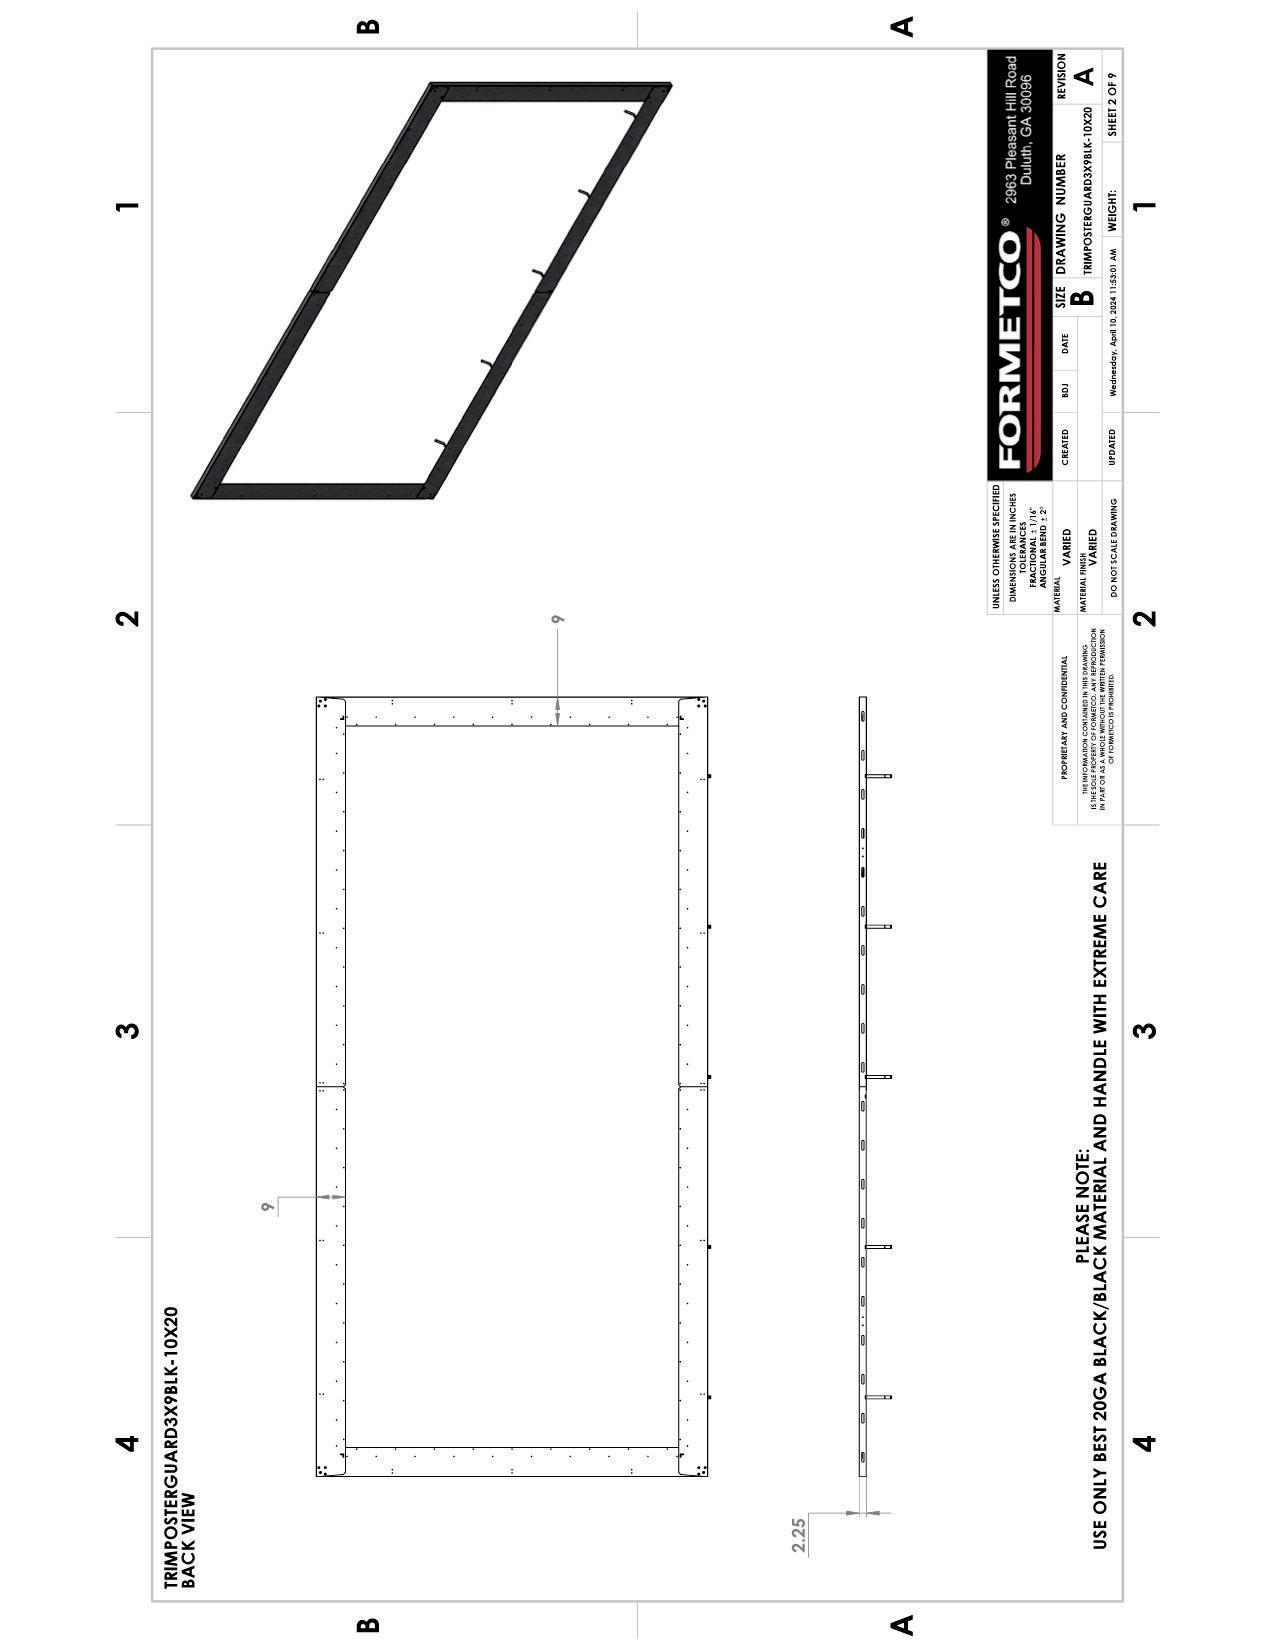
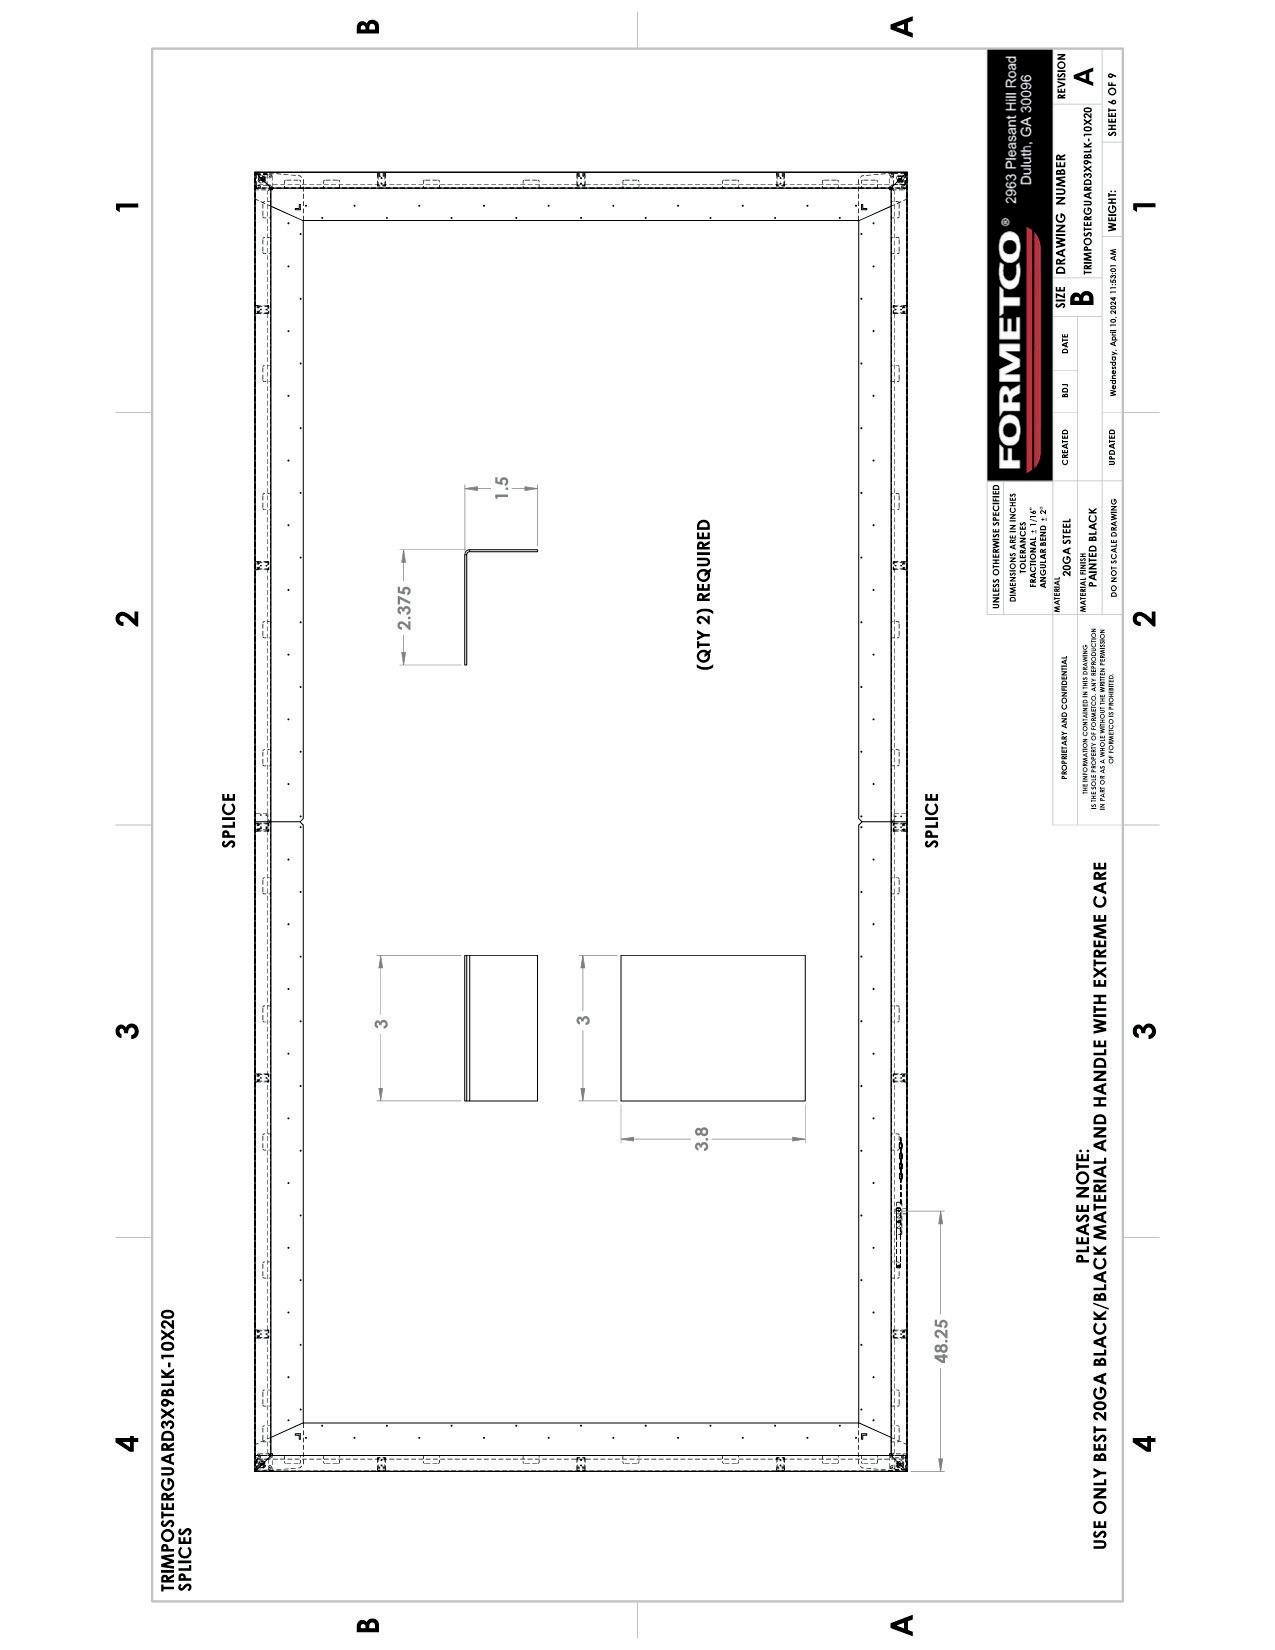
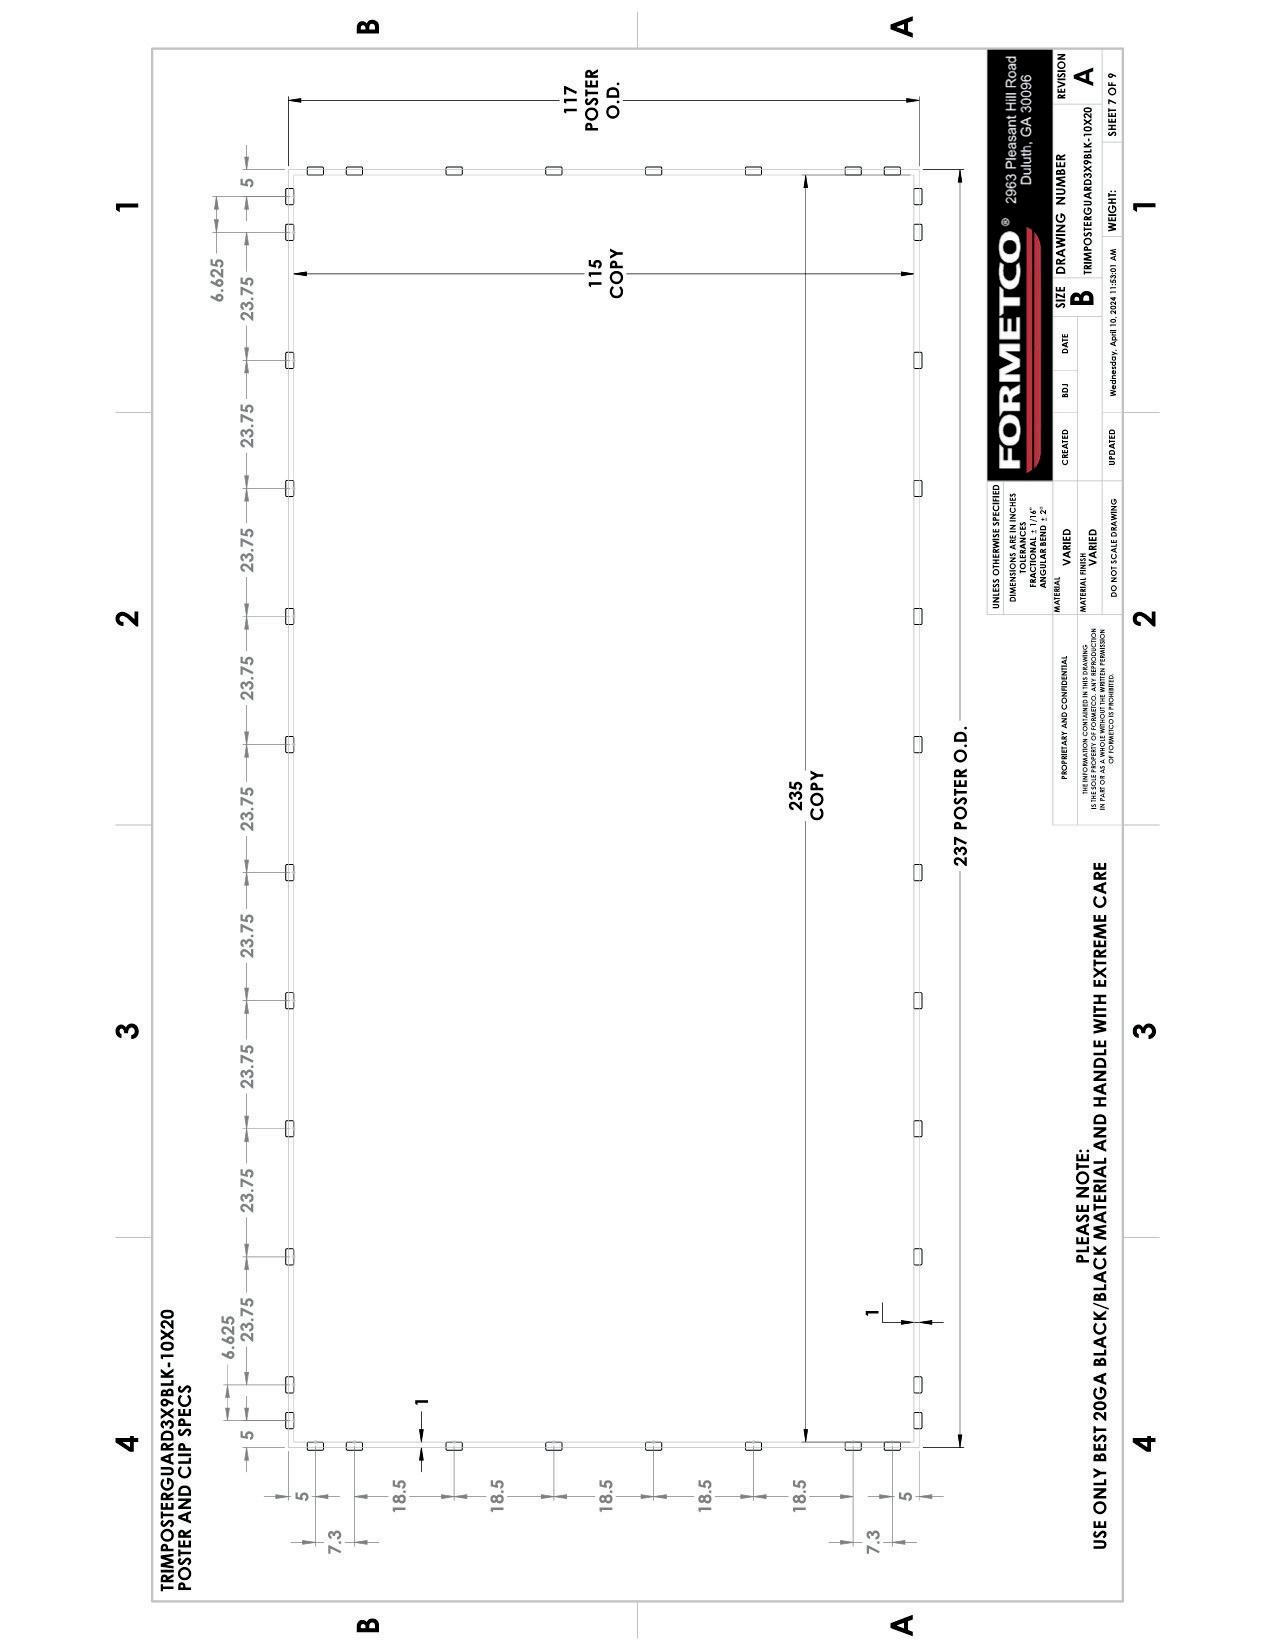
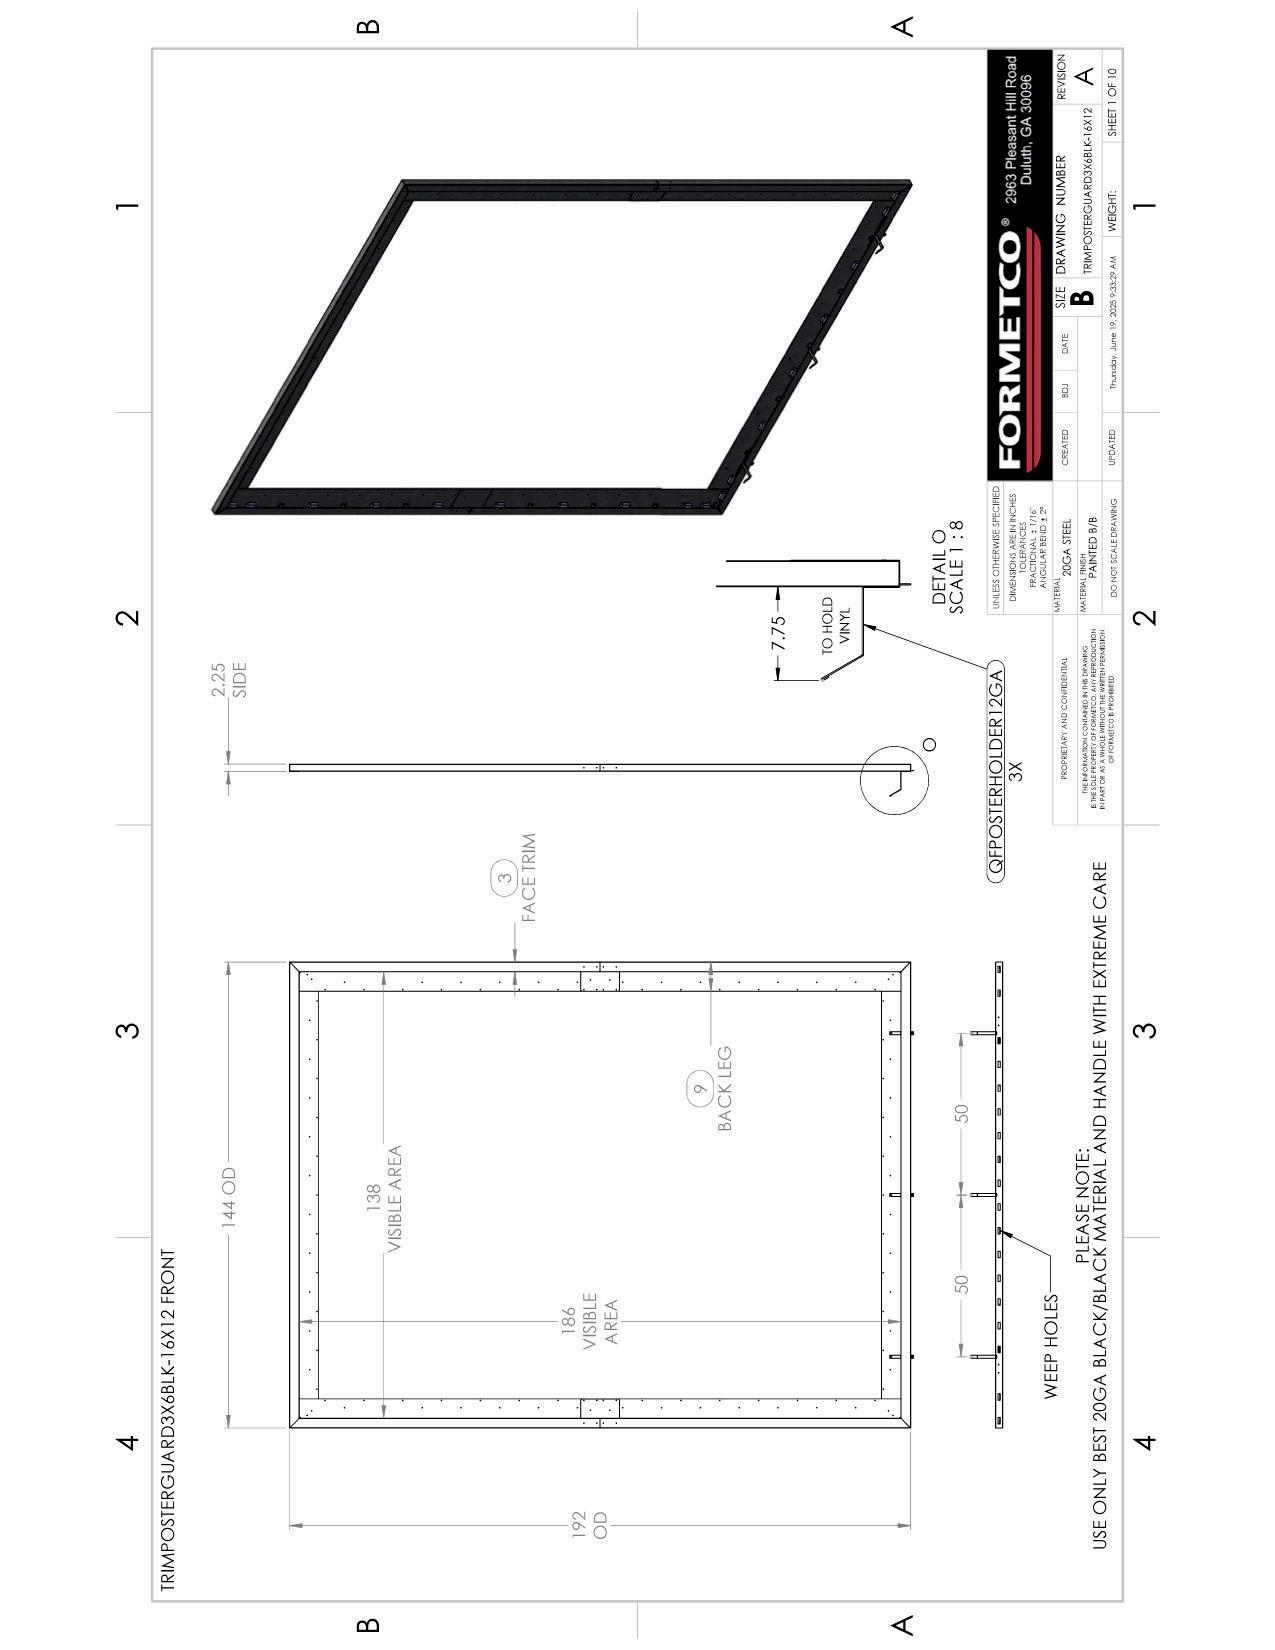
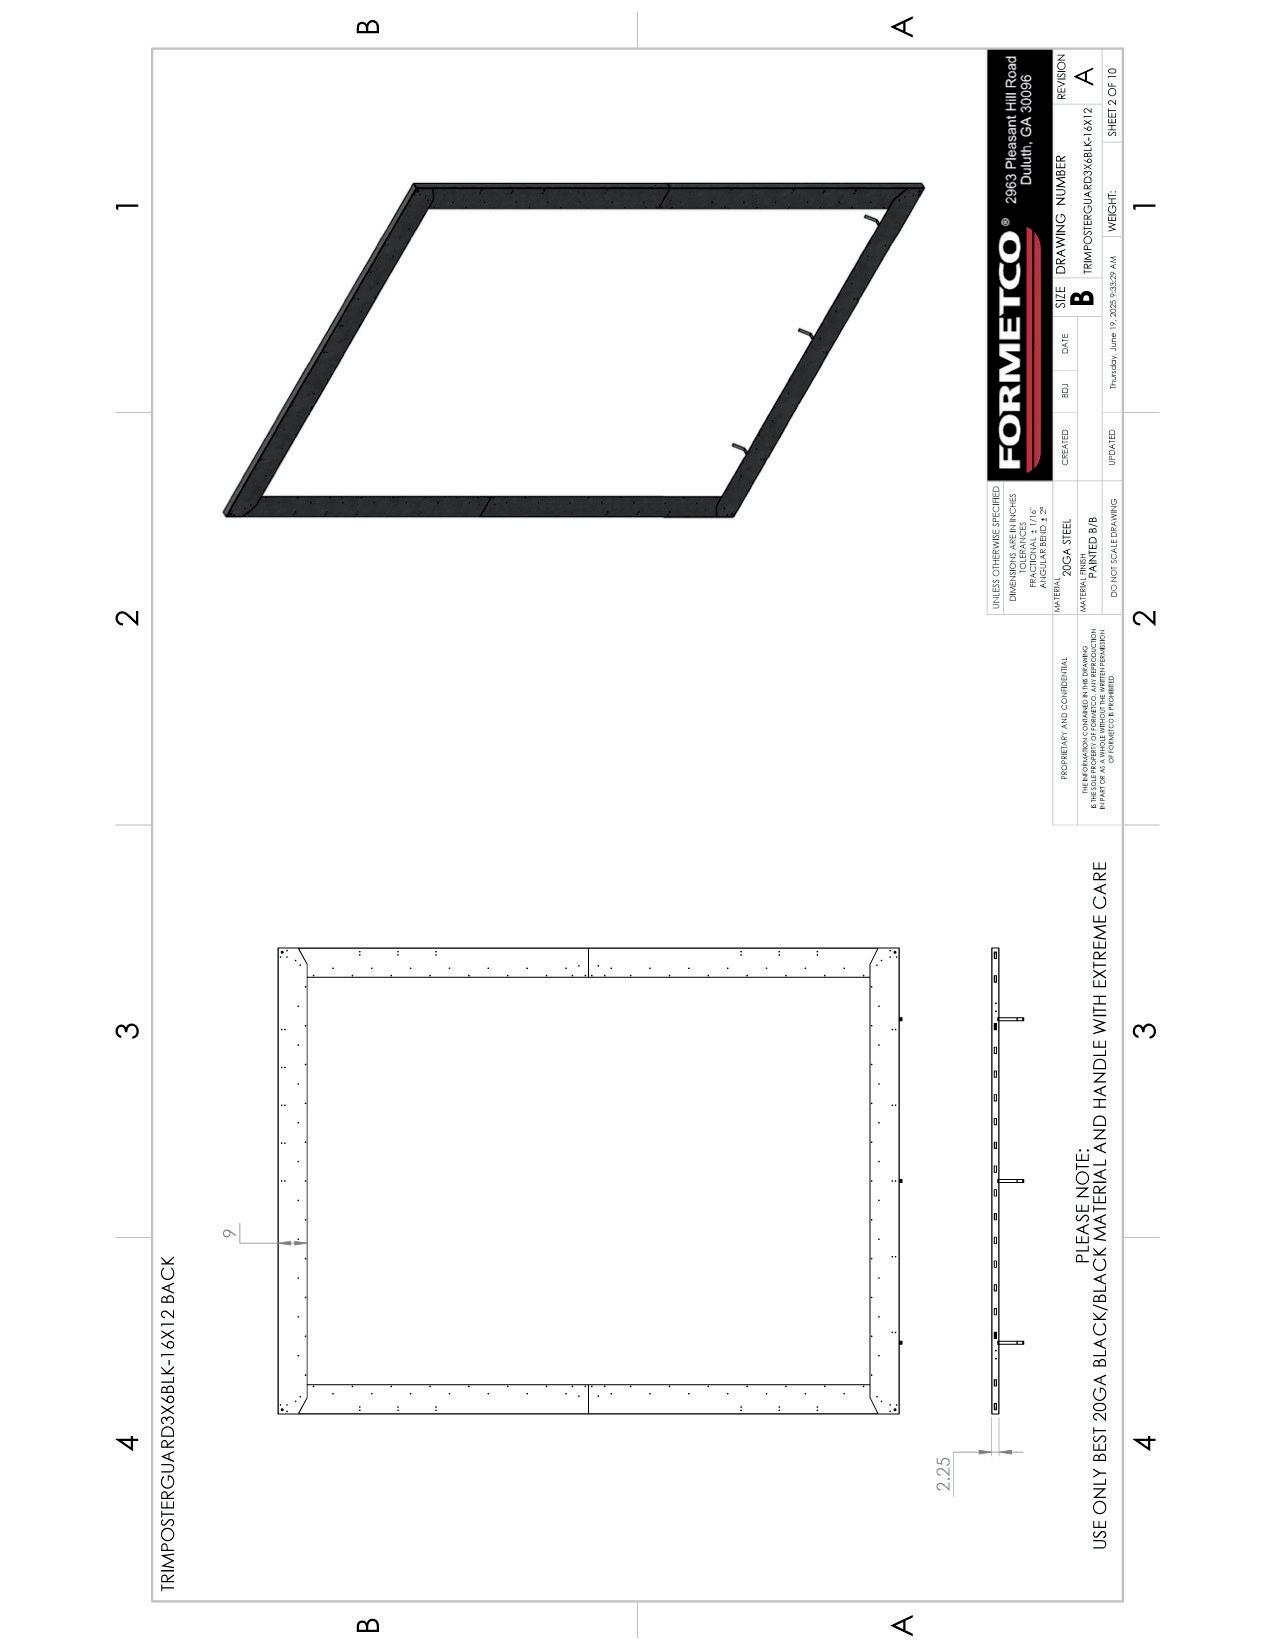
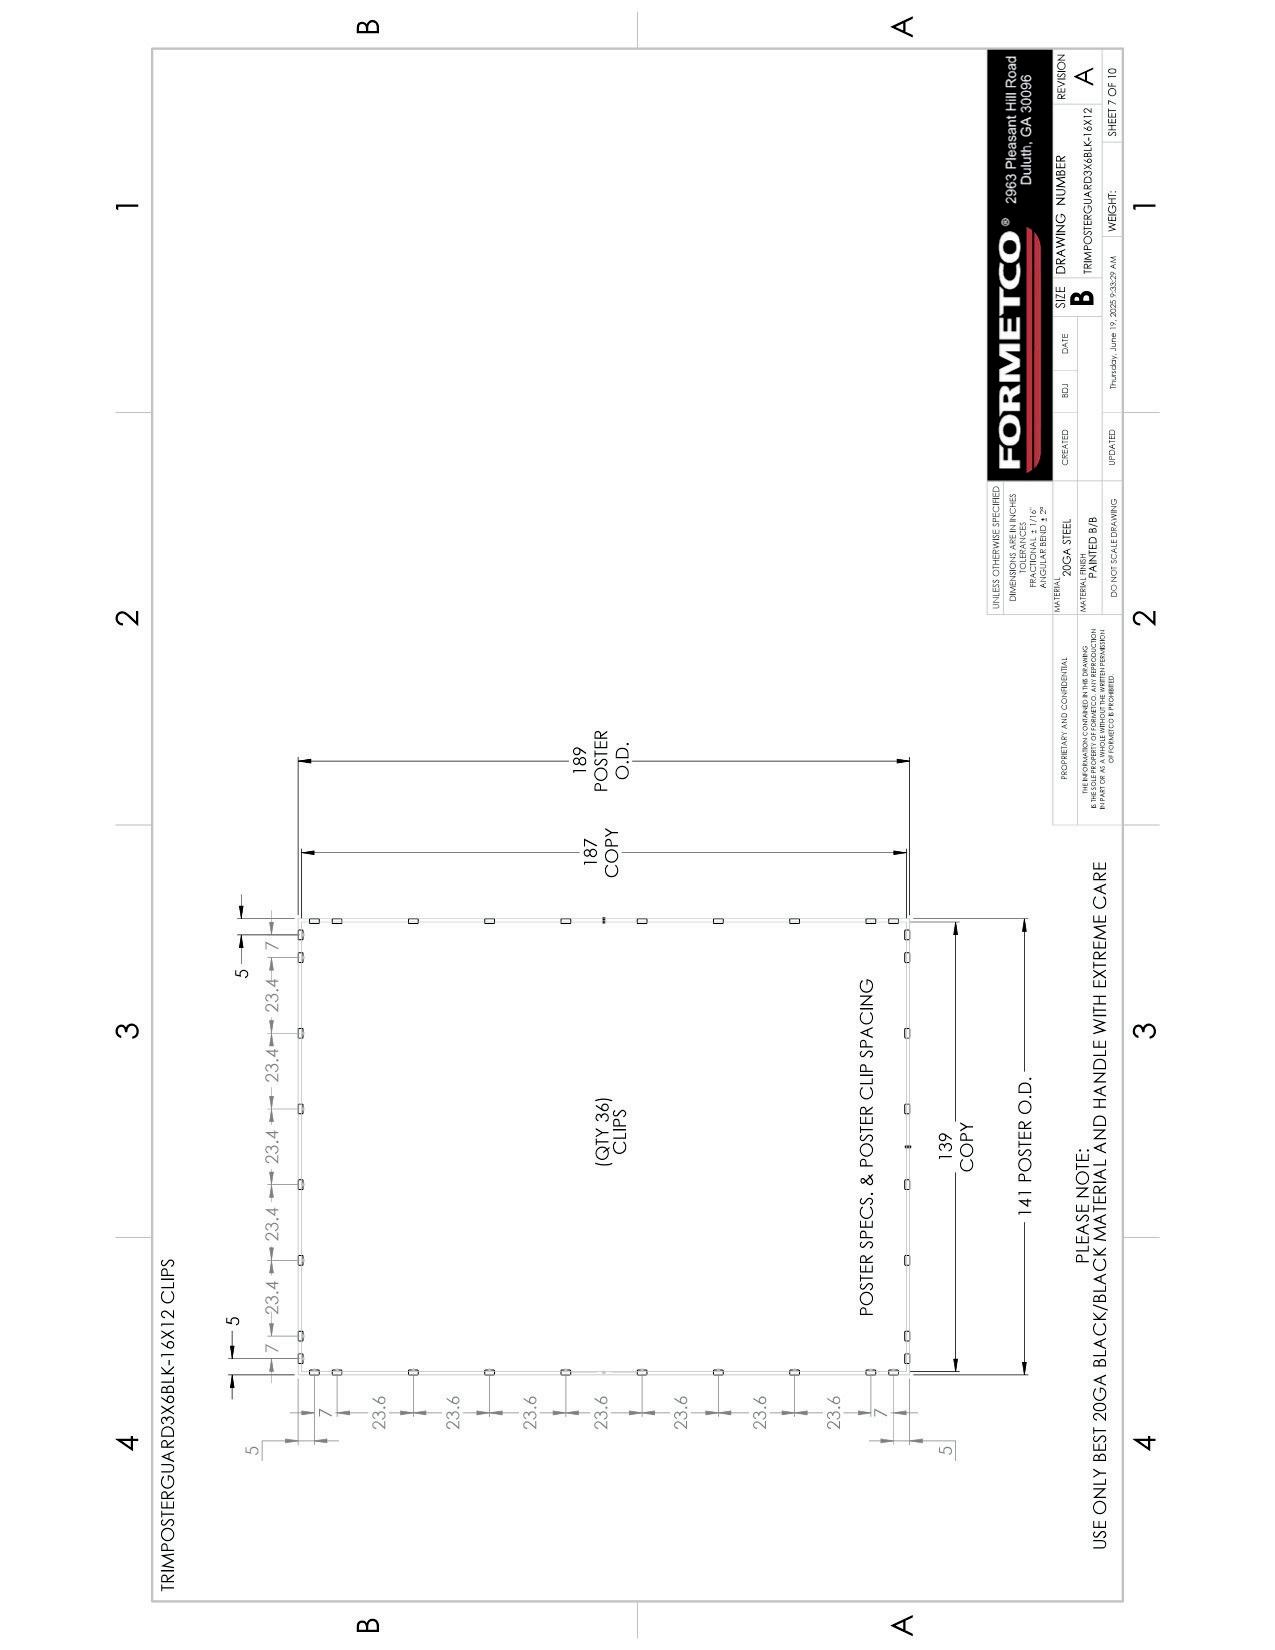
Maintains the Outdoor Industry Standard copy area of 10 x 20 & 16 x 12
Offers and easy transition between Paper, Vinyl and Lightweight Flex posters
Works if your vinyl is pocketed, non-pocketed, over or undersized
Nothing will interfere with posting or scraping paper.
NO FINISHING
Every printer you work with is equipped and ready to produce graphic for the QuickFlexTM system
Requires no pockets or edges finishing, the graphic is simply cut to size
Posting requires Only One Installer, Offering outstanding labor savings
INSTALLATION GUIDE
Prep The Single Sheet Poster (SSP) Prior To Posting:
1.The SSP should have asterisk marks printed at the locations provided in the print specification layout.
2.The SSP should be folded from bottom to top 4 times and folded from left to right as shown in the QuickFlex Poster Folding diagram.
3.Carry up the SSP to the Poster Panel catwalk using a medium sized duffle / carrying bag. This bag can also be used for storing the SSP that’s going to be taken down.
4.IMPORTANT - Installers should follow their company’s safety protocols before transitioning from the extension ladder to the catwalk and while performing their duties on the billboard structure.
Steps On How to Take Down a Single Sheet Poster (SSP):
1.Flip the tensioning handle to the loose position and slide the adjustment bar to the last straight slot on the bar.
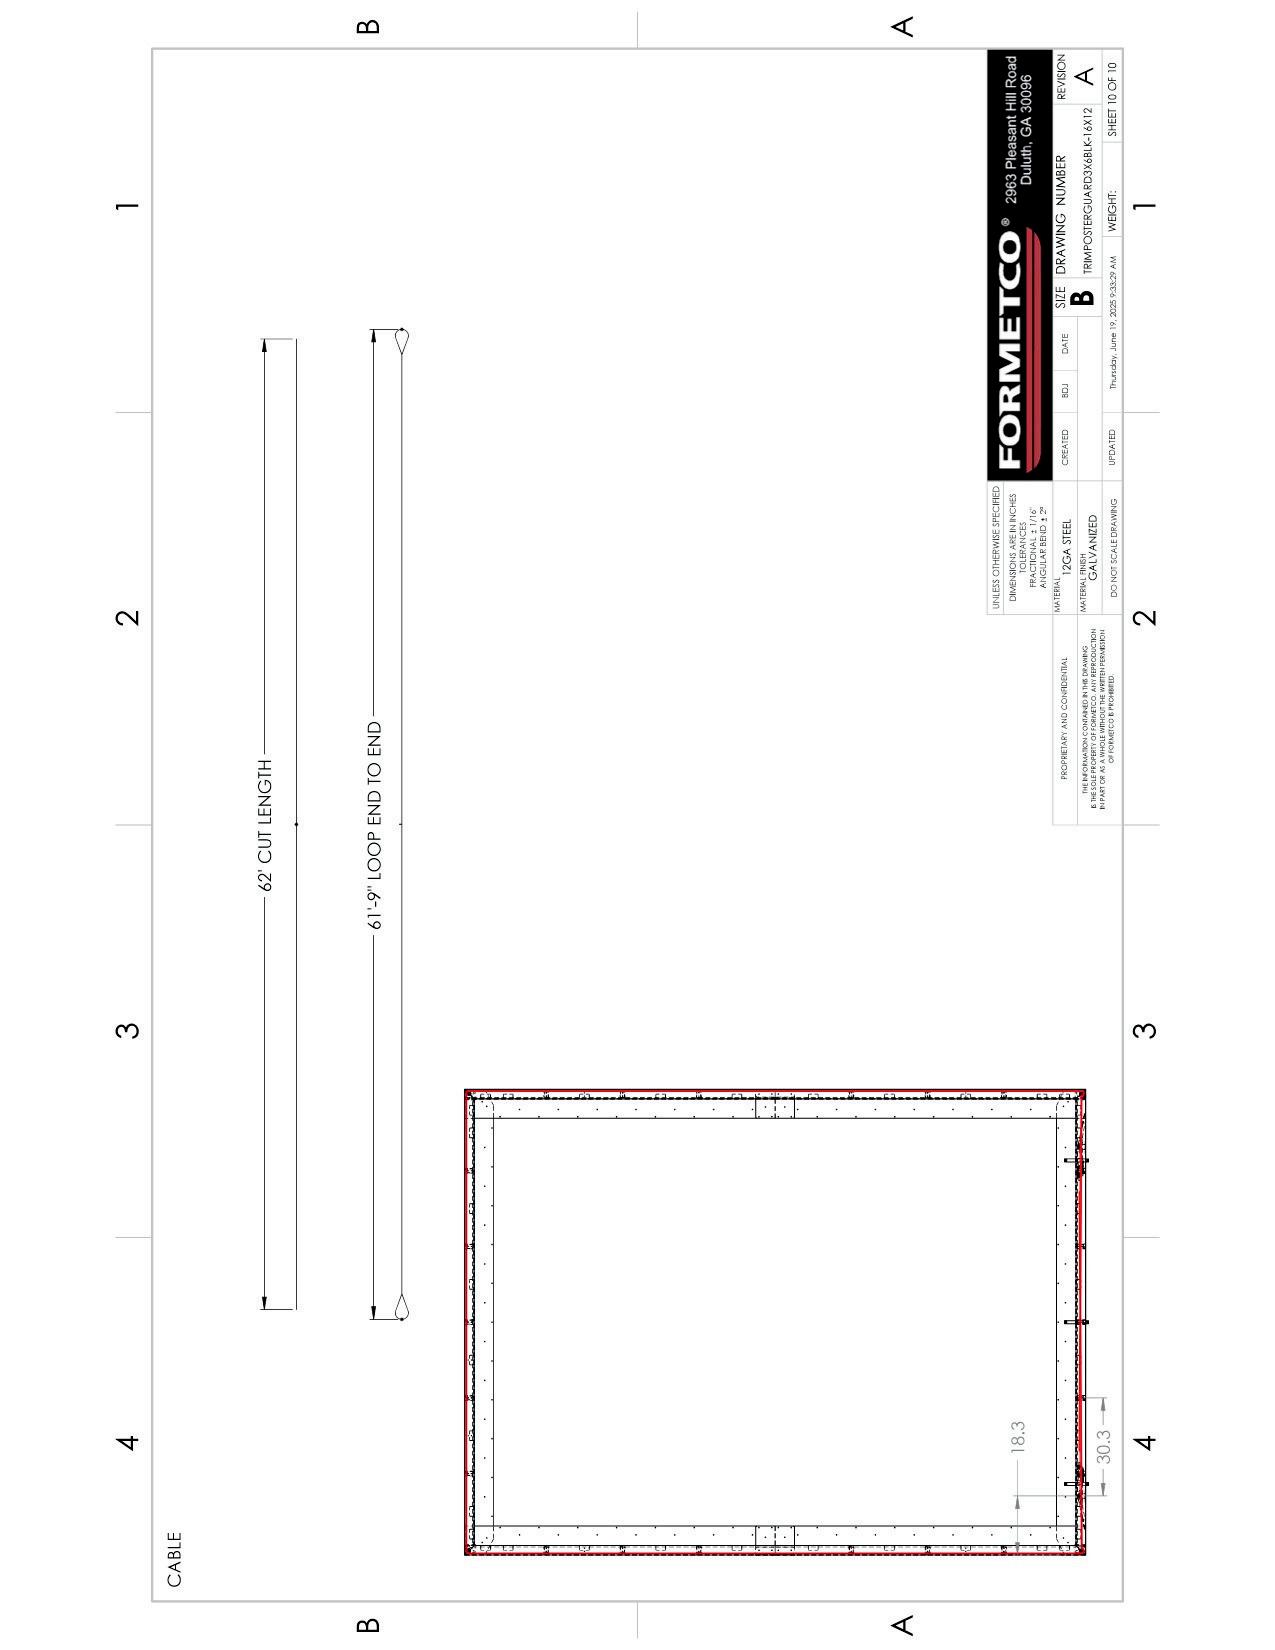
2.Set the cable to the last chain link on the tensioning handle. This will give enough slack in the cable so the SSP can be removed.
3.Using the extension pole & tool, unhook the side cables from all the side cable guides.
4.Start unclipping the poster clips from the cable along the sides, just the 1 four poster clips from the bottom up, as well as all the poster clips along the bottom. NOTE – In windy conditions the sides poster clips can be left attached to the SSP sides while only removing the SSP from the top and bottom poster clips. Remove the SSP from the side poster clips from the same direction as the wind is blowing from. Roll up the SSP while walking with the wind to the opposite side. Remove the remaining side poster clips from the SSP.
5.Unhook the top cable from the top cable guides.
6.Detach the cable from the tensioning handle and walk it towards the center bottom right trim and hook the cable snap hook to one of the drain holes. This will keep the poster about chest high making it easier to unclip the poster from the top cable without bending over.
7.Starting on either side by unclipping the remaining side poster clips, then all the top poster clips working your way over to the other end until all of the poster clips have been unclipped from the top and side cables.
8.Bundle up the SSP and stuff in a duffle bag. Now you’re ready to install the new SSP.
INSTALLATION GUIDE
1. Lay the SSP on the right end of the poster panel and unfold toward the left end.
2. Hook the 1 four poster clips of the top and left side of the SSP to the top and left side cable.
3. Work your way down toward the right end of the poster panel while clipping on all of the remaining top poster clips and the 1 four poster clips of the right side of the SSP to the right cable.
4. Grab the cable coming out of the bottom right corner pulley and pull it towards the tensioning handle, hook the cable to the last link on the chain to hold the SSP up. While pulling the SSP up make sure that the side cables don’t fall behind the side cable guides preventing the SSP from going up.
5. Using the cable pole & tool, hook the top cable over the top cable guides, starting on the left end working your way over to the right end.
6. Hook the remaining right side poster clips to the right-side cable.
7. Starting on the right side hook the bottom poster clips to the bottom cable that is fixed to the bottom right corner pulley bracket and work your way to the left end of the poster panel.
8. Using the cable pole & tool, hook the left side, right side, and bottom cables over the remaining cable guides.
9. Pull the slack out of the cable that’s attached to the tensioning handle by detaching the cable end from the chain and pulling it closer to the tensioning handle spring. You will then need to back down 4 to 6 links on the chain before re-attaching the cable. This will allow you to flip the handle into the tensioning position easier as well as adjust the adjustment bar.
10. Lift the tensioning handle halfway and slide the adjustment bar into the angled slot, then lock the handle into the tension position. For more tension, move to the next slot or adjust the chain link. To reposition the poster, release the handle, tug the poster, and re-tension.If the handle is hard to lock, reduce the tension and readjust.
11. Lastly check that all the poster clips are pulling the SSP tight and even with no wrinkles. If there are any wrinkles in the corner simply push the very corner poster clips toward the corner pulley bracket until they disappear.
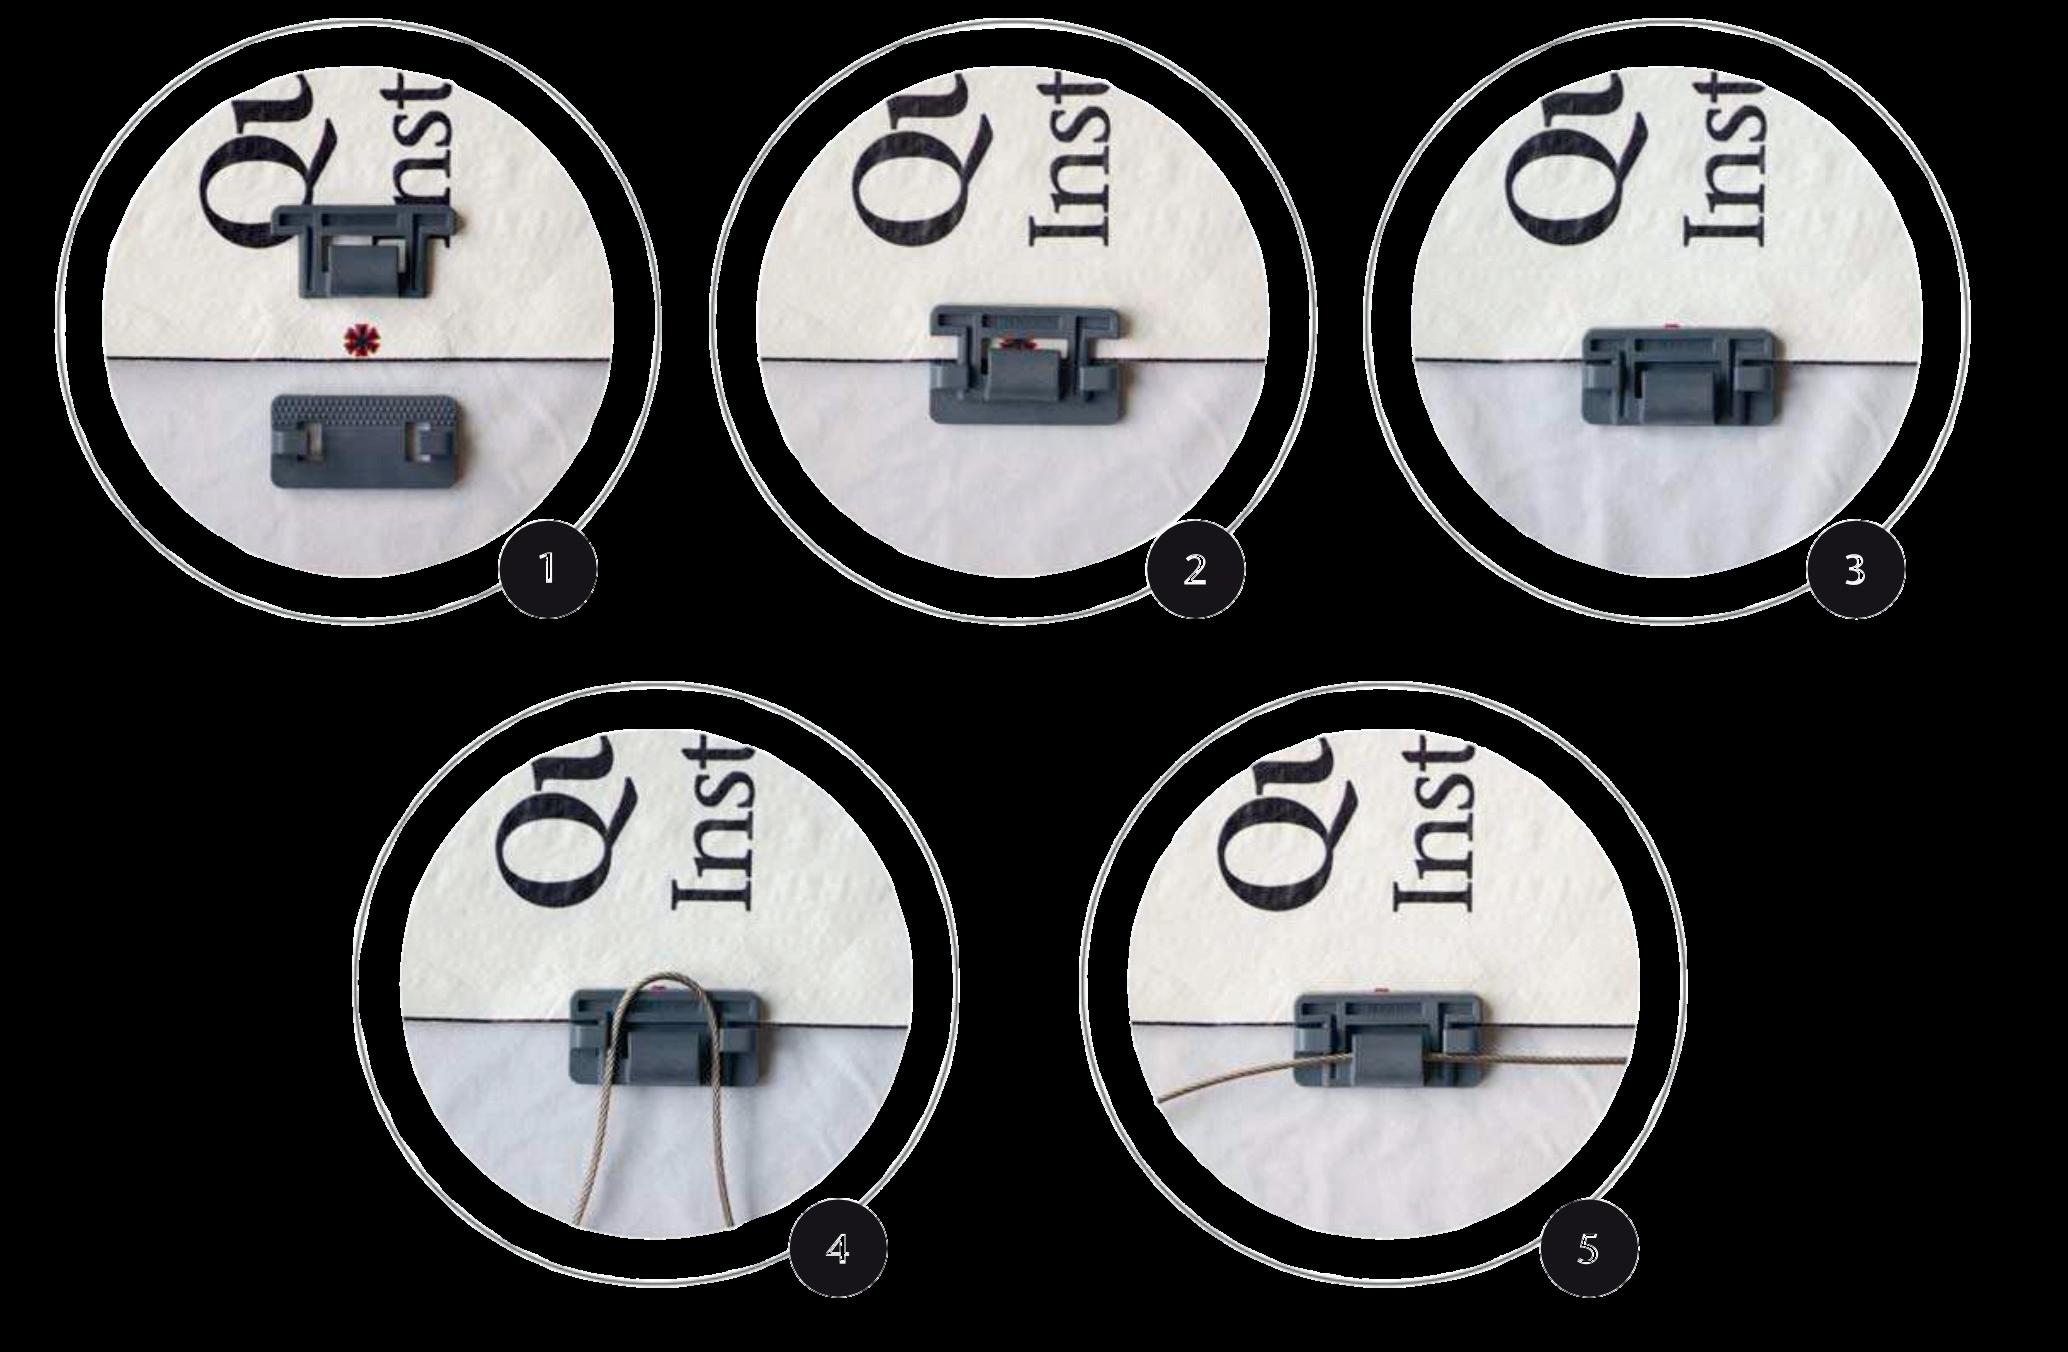
POSTER CLIP INSTALLATION
Make sure the clips is straight with the edge of the poster to eliminate wrinkles. Most posters where the QuickFlex™ Poster Clips are to be installed
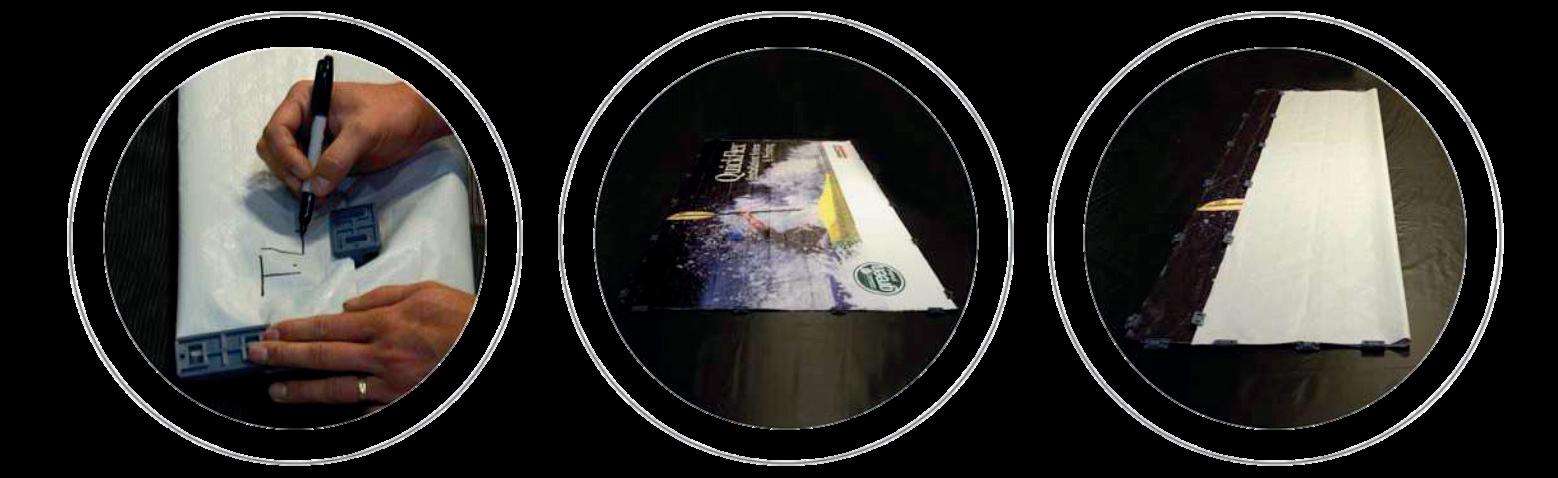
SINGLE SHEET POSTER
Lay out Poster on floor. If Installing
from left to right, mark on the back of the Poster TL on the top left corner
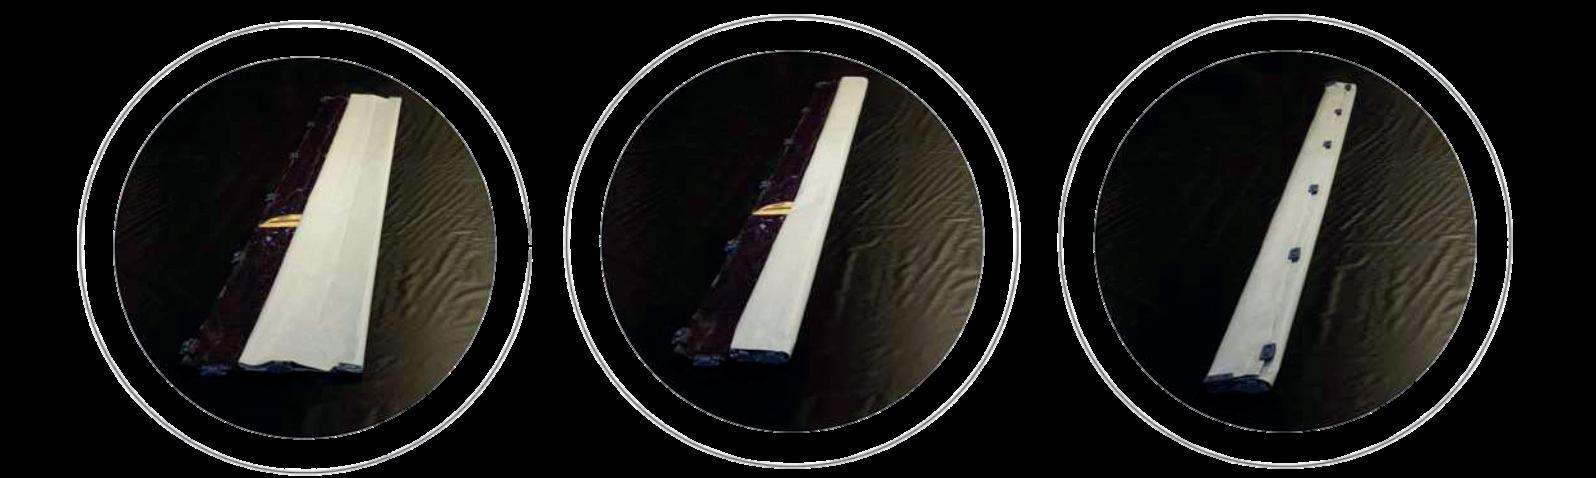
Fold bottom up to about 6" below top of poster
Fold bottom up to align with first fold
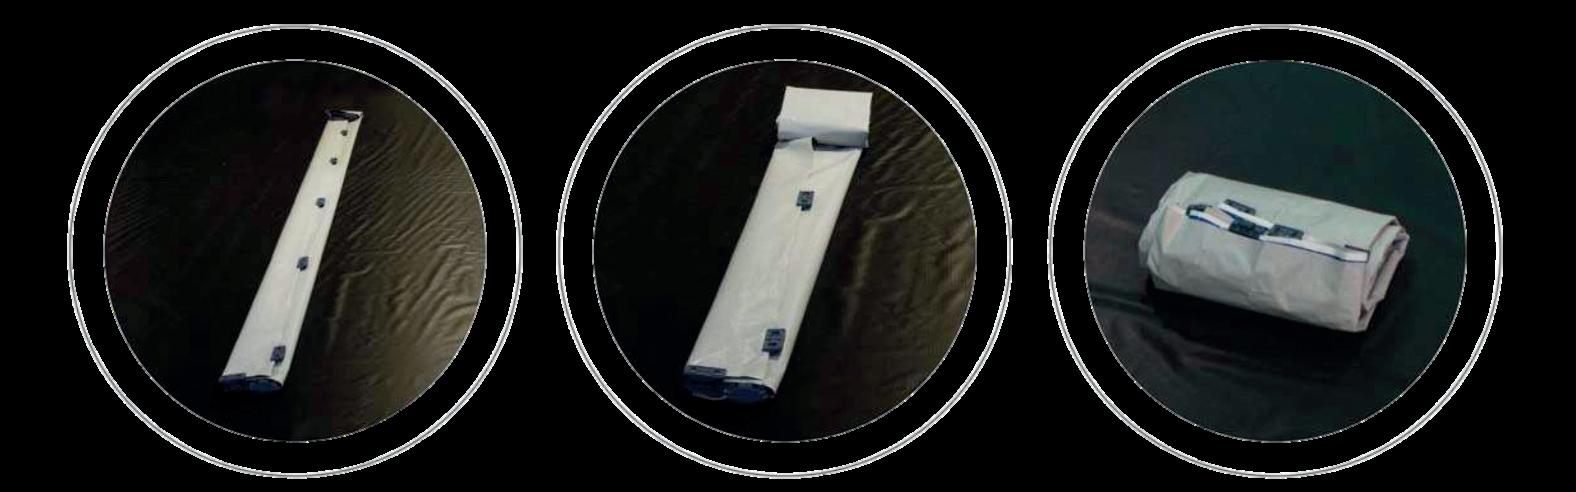
Fold top over on the folds
Starting on the right side of the Poster roll the poster in a small package