
5SB101746 (11/01/12)


Introduction
Read this manual carefully. It will instruct you on how to operate and service your machine safely and correctly. Failure to do so could result in personal injury and or equipment damage.
This SAFETY ALERT symbol is intended to warn you of some potential hazard. You should look for this symbol on your equipment and throughout this manual. If you see this symbol you should carefully read the warning that is printed beside or under the symbol and follow it! Failure to do so can result in serious bodily injury or death.

WARRANTY:
Warranty coverage is provided by John Deere according to the terms of the Agricultural/Commercial & Consumer Equipment Warranty Statement. Carefully read the warranty statement on the back of your original purchase order for details on coverage and limitations of this warranty.
This warranty does not cover the following: Cleaning, transporting, mailing and service call charges. Normal wear items such as bearings, chains, sprockets, points, etc. Depreciation or damage caused by normal wear, accidents, improper maintenance improper protection or improper use of the machine.
For complete Warranty information see inside back cover of this manual. Record your implement model and serial number in the space provide below. Your dealer will need this information to give you prompt, efficient service.
Model Number: ______________________________________
Serial Number: _______________________________________
Date Purchased: ______________________________________
Dealer Checklist
To the Dealer: Inspect the machine thoroughly after assembly to assure it is functioning properly before delivering it to the customer. The following checklist is a reminder of points to cover. Check off each item as it is found satisfactory or after proper adjustment is made.
Predelivery Checklist
______1. All hardware properly tightened.
______2. Lubrication of all grease fittings.
______3. All chains properly aligned and tight.
______4. All decals properly located and legible.
______5. All guards in place and secure.
______6. Overall condition and appearance (touch up any scratches, clean/polish)
______7. Test run, check for any vibrations, chain popping, or unusual noise.
______8. Seed cups open and close properly.
______9. Seed cup gates all in the same postion.
______10. Transmission sprocket engages and disengages the hopper drive properly.
______11. Machine is equipped with operator’s manual.
Date Set Up
Signature
Delivery
Review the operator’s manual with the customer. Explain the following:
______1. John Deere Equipment Warranty
______2. Safe operation and service
______3. Correct installation and maintenance
______4. Daily and periodic lubrication, cleaning and all other maintenance
______5. Correct lubricants
______6. Daily and periodic inspections
______7. Troubleshooting
______8. Machine storage
______9. John Deere Equipment parts and service
______10. Fill in model and serial numbers in the provide space on the introductory page of this manual
______11. Remove and file this page
______12. Give customer this operator’s manual and encourage them to read it carefully and follow all operating and safety procedures.
Date Delivered __________ Model Number ______________ Serial Number __________
Signature (dealer) ____________________ Signature (customer) ________________________
Safety Precautions
1. Read this manual carefully before beginning operations.
2. Allow only properly trained personnel to operate this machine.
3. Read and adhere to all safety precautions posted on this machine and written in this manual. Review safety decal illustrations on page 7 and machine locations on pages 50-51.
4. Be sure that all guards are in place and properly secured; and all warning decals are in place and legible.
5. Be certain that all hardware is properly tightened.
6. Always use a tractor of sufficient size and weight to properly lift and carry machine safely and securely.
7. Be certain that no persons are standing near the machine before starting tractor engine.
8. Never allow passengers on tractor or machine.
9. Never attempt to service any part of machine with tractor engine running.
10.Always shut off engine; lock brakes and lower machine before inspecting, servicing or making any adjustment of any kind.
11. Never climb on machine when filling seed hoppers or servicing.
12. Never put hands, arms, feet or legs under machine when it is raised off ground with tractor lift. If machine needs to be raised to perform work; always securely block it up only as high as necessary to perform the services needed.
Safety Decals
Qty 1 – Falling Off Can Result in Being Run Over Warning Decal 2” x 10.25”


Additional safety equipment:
Qty 2 – 2” x 9” Red Reflectors
Qty 1 – 2” x 9” Yellow
Reflector (CS1384 only)
SMV sign
Qty 3 - Do Not Step Warning Decal

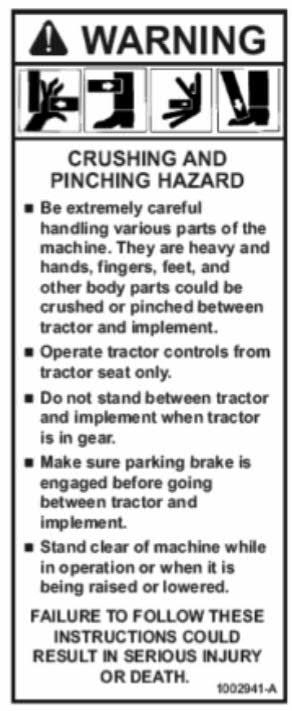
Qty 1 - Crushing and Pinching Hazard Warning Decal 2.87” x 7”
Qty 1 - Chemical Warning Decal (Fert. Box only) 4” x 7.38”

Specifications
SPECIFICATIONS

Pre-Operating Instructions
Make sure machine is properly hitched to a tractor of sufficient size & weight to properly handle and safely lift machine.
Check that all hardware is properly tightened.
Check that machine has been properly lubricated.
Check that all chains are properly aligned and tightened.

Check all seed/fertilizer boxes to make certain that no foreign objects (tools, bolts, etc) were left inside that might damage seed cups.
Check that all seed cup gates are in same position.
Operating Instructions
The Conservation Seeder is a multi-task landscape machine. It can be used for primary seeding, over seeding, applying fertilizer or lime, aerating and dethatching.
If conditions are such that multiple passes are needed before application of seed; you can disengage seed box by pulling out spring loaded pin in transmissionsprocket assembly found behind large guard on left side of machine. Rotate the pin 90 degrees and release. To re-engage seed box drive assembly, reverse thisprocedure. When the sprocket rotates enough to align the holes, the internal spring will cause the pin to engage the inside sprocket.

Operating Instructions, cont.
The depth of the second spike roller can be controlled by the length of the turnbuckles that connect the torque bar to the cultipacker roller. Lengthen the turnbuckles to raise the rear or ‘driven’ spike roller or shorten the turnbuckle if you want the driven spike roller to operate deeper. The rear cultipacker roller is spring loaded in order to provide good ground contact in uneven terrain and to prevent itself and the driven spike roller from cavitating in low spots. The tickler tines are to improve seed to soil contact and should not be positioned aggressive enough to ‘carry’ trash or residue in an over seeding situation.
The top link on the tractor hitch should be properly adjusted to carry the machine level in an operating position. During operation the tractor lift must be fully lowered to allow the machine to follow the contour of the ground.
The machine is totally ground driven, so proceed with a speed that is most comfortable and safe for existing conditions.
Be sure to stop forward motion before lifting machine off ground. This practice will stop rollers from ‘free spinning’ and therefore eliminate the unwanted application of when turning around.
Never operate the machine in reverse, serious damage will occur.
Lubrication & Maintenance
1 Hour Check all fasteners and hardware including set screws in sprockets and bearing collars and retighten as necessary.
8 Hours Grease bearings and inspect chains for tightness.
25 Hours Remove guard cover on right hand side of machine and inspect chain; lubricate using multipurpose lithium base grease.
As needed: Remove any crop residue, grasses, weeds, or debris wrapped around shafts near bearings. This can cause bearings to overheat and lead to premature failure.
Always: Protect machine from weather. Never leave fertilizer in hopper. Do not leave seed in hopper for more than 24 hours. Remove all fertilizer and seeds and thoroughly clean hoppers and lubricate all drive chains before storage.


