
Integration User Guide

Linking Perfect Portal to LEAP1
Log into Perfect Portal and go into your account settings.

Click the profile picture icon to access the drop down menu.


Select the Link LEAP Account button.

Use your LEAP login credentials to link LEAP to your Perfect Portal account.

Once linked, it will display the LEAP account that your Perfect Portal account is linked to.
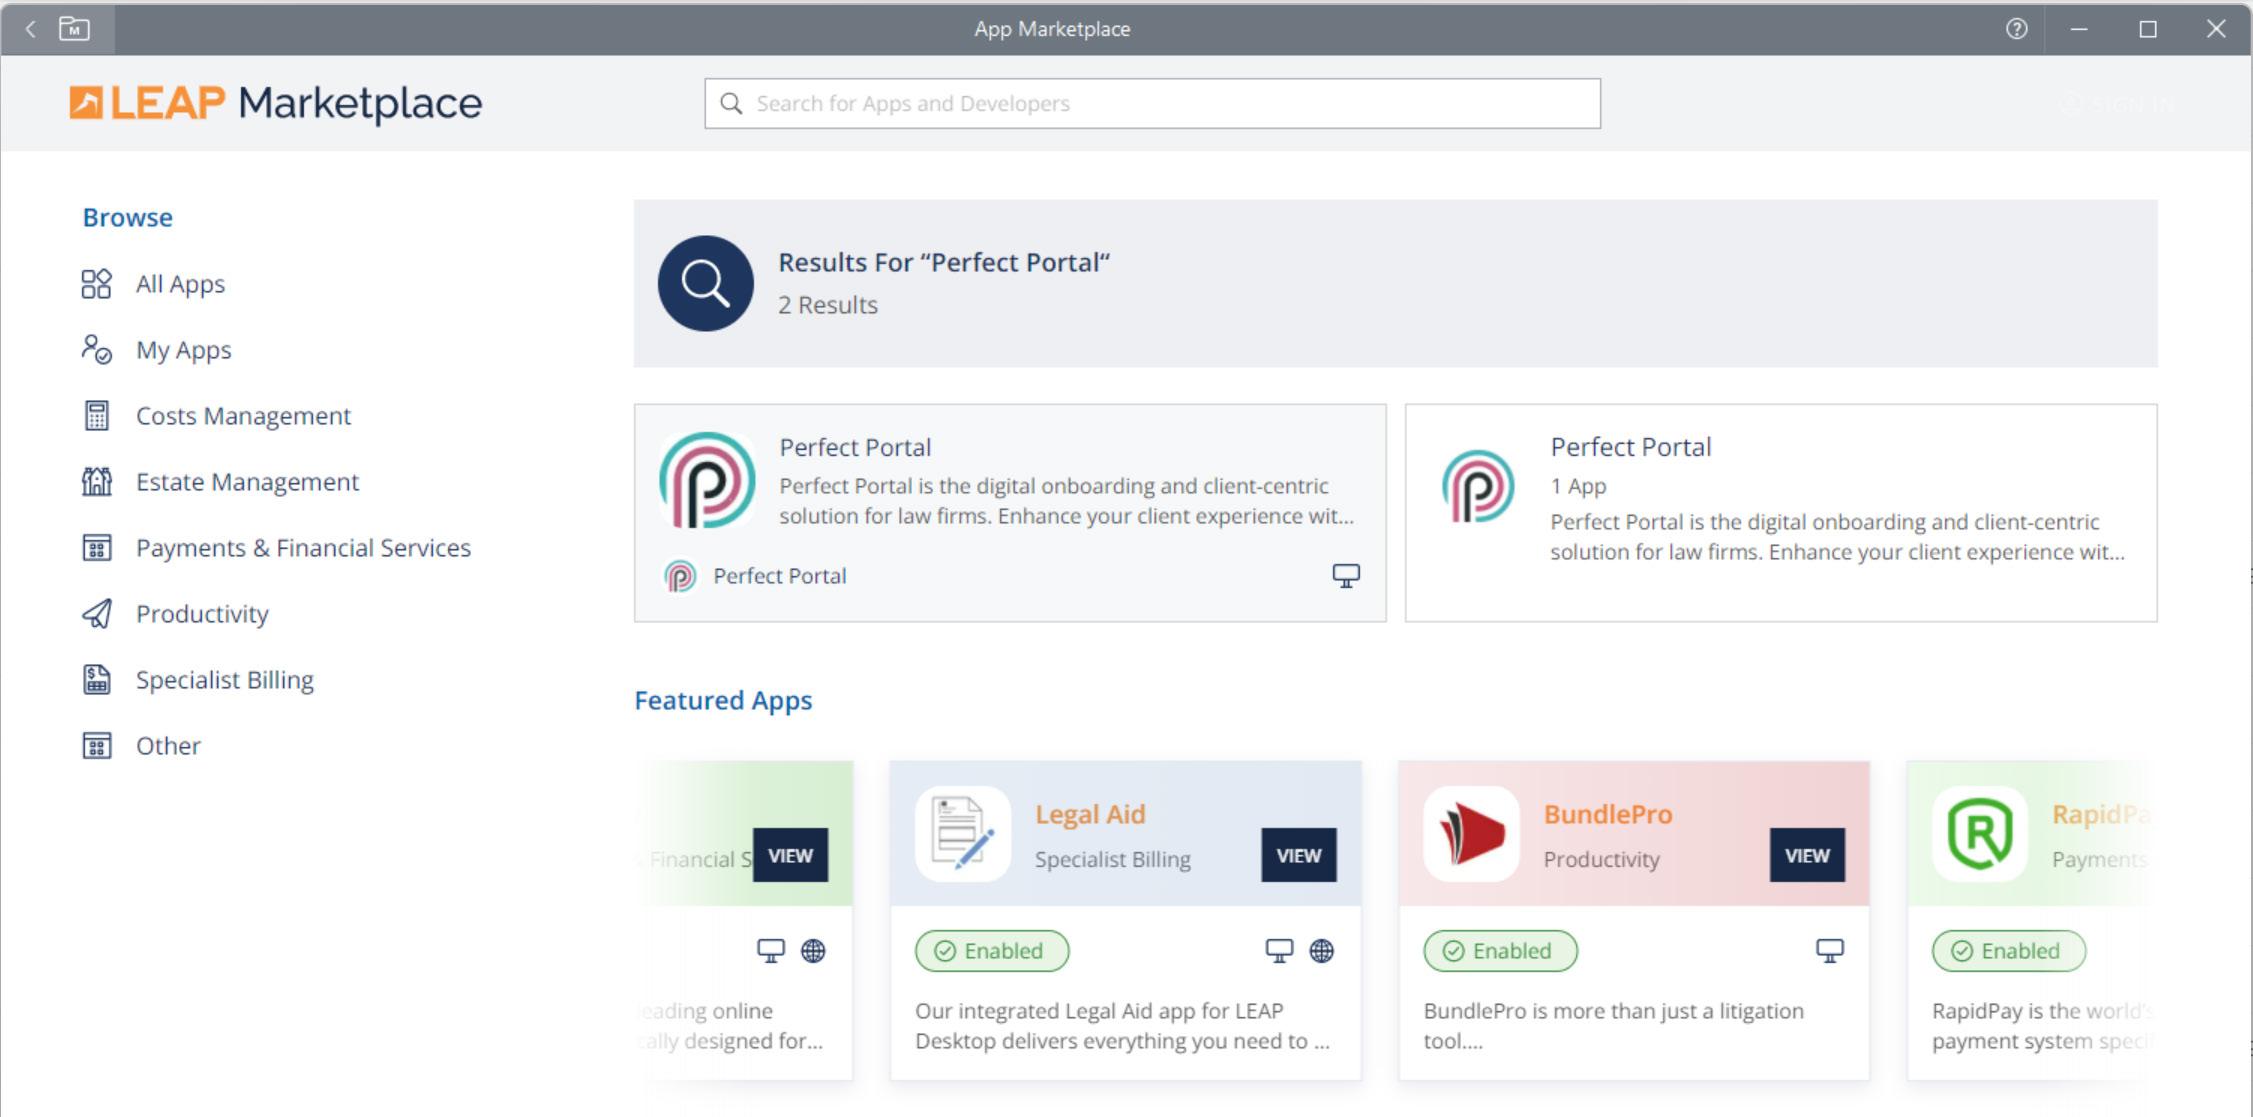

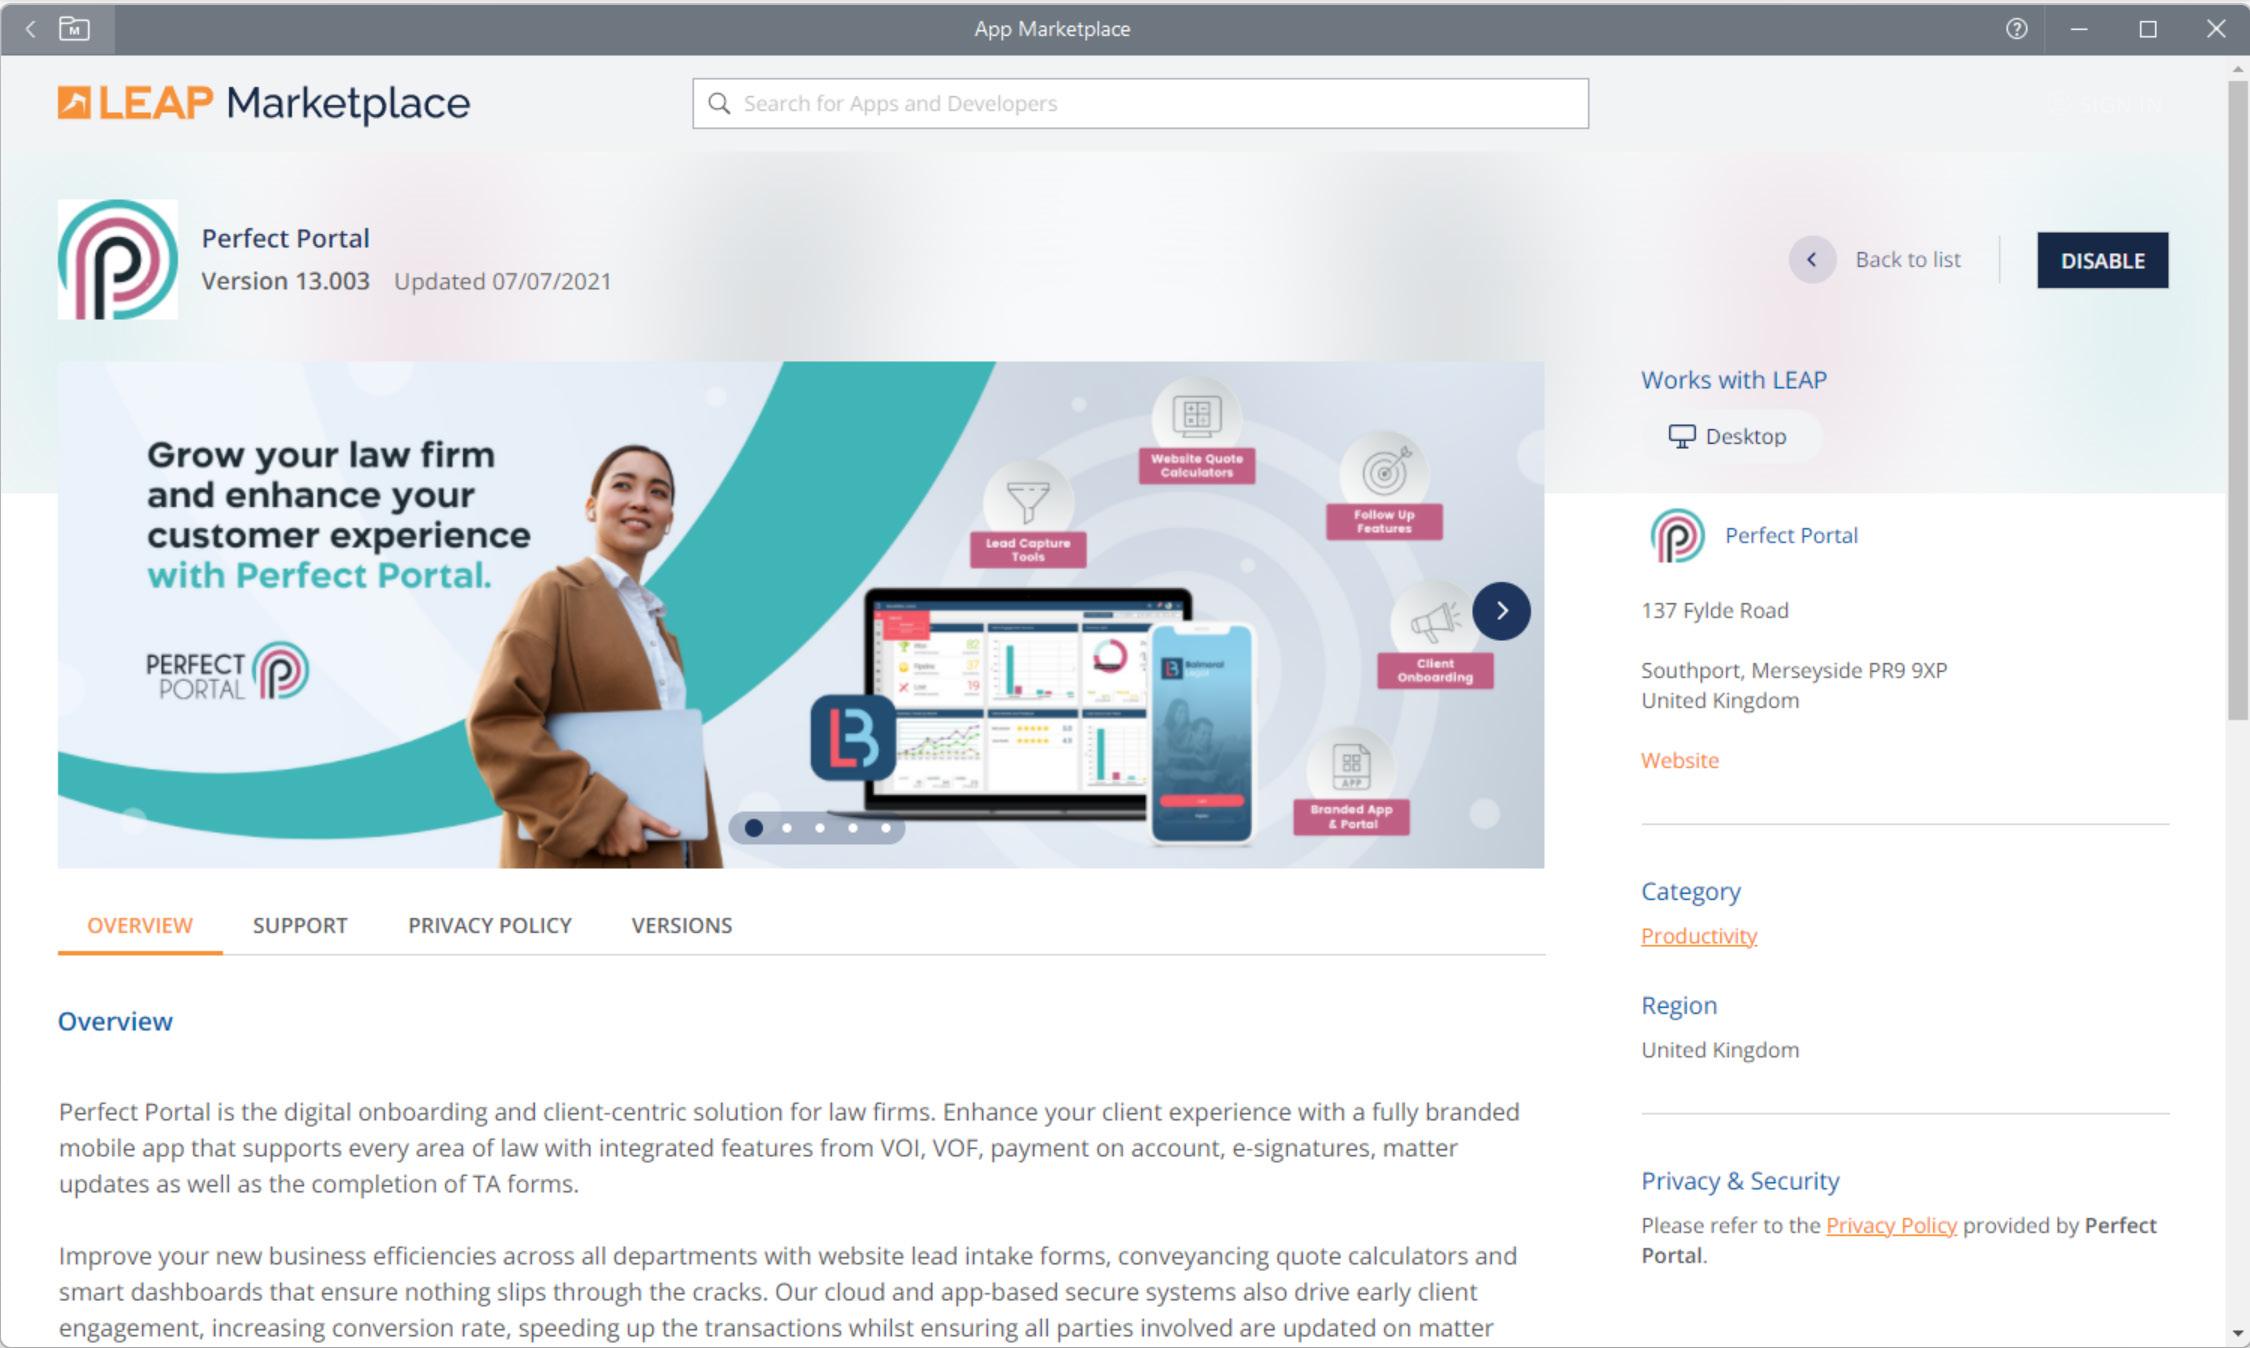
To enable the Key Stages, open any file in LEAP and head into the LEAP market centre

Enable Perfect Portal and the Key Stages plugin will appear. Note: you will only need to do this once. You can only send Key Stages with matters started in Perfect Portal.

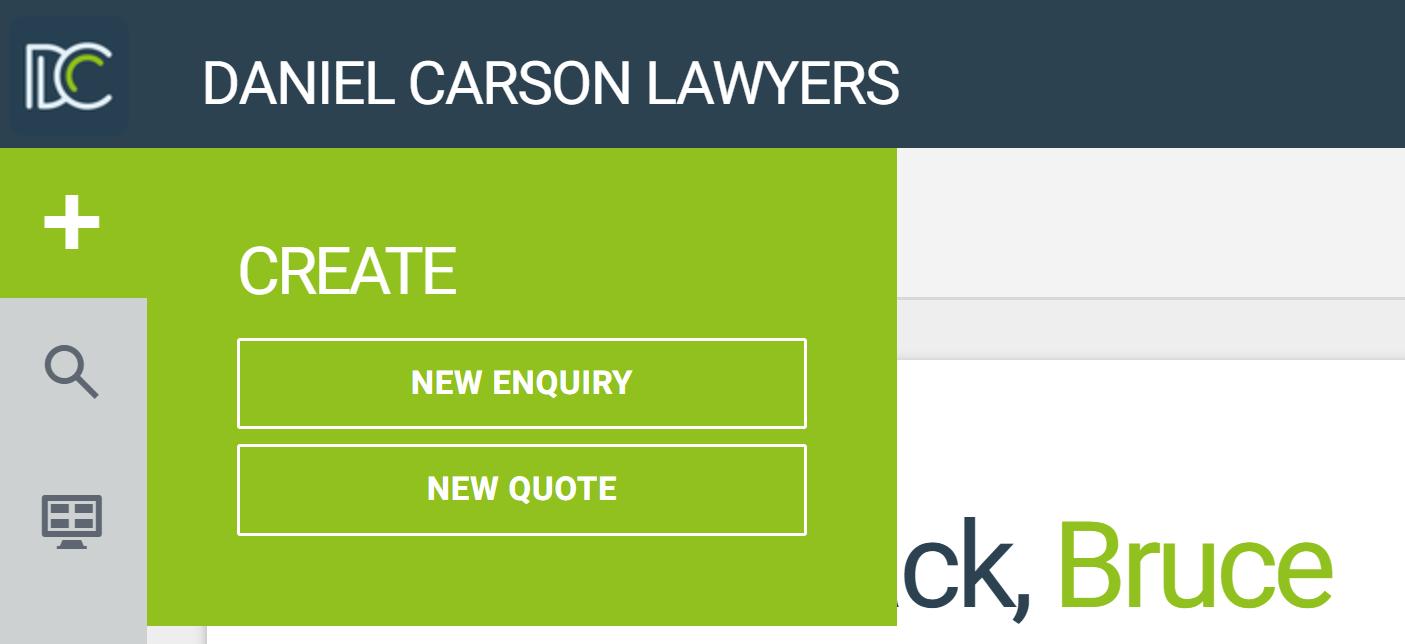
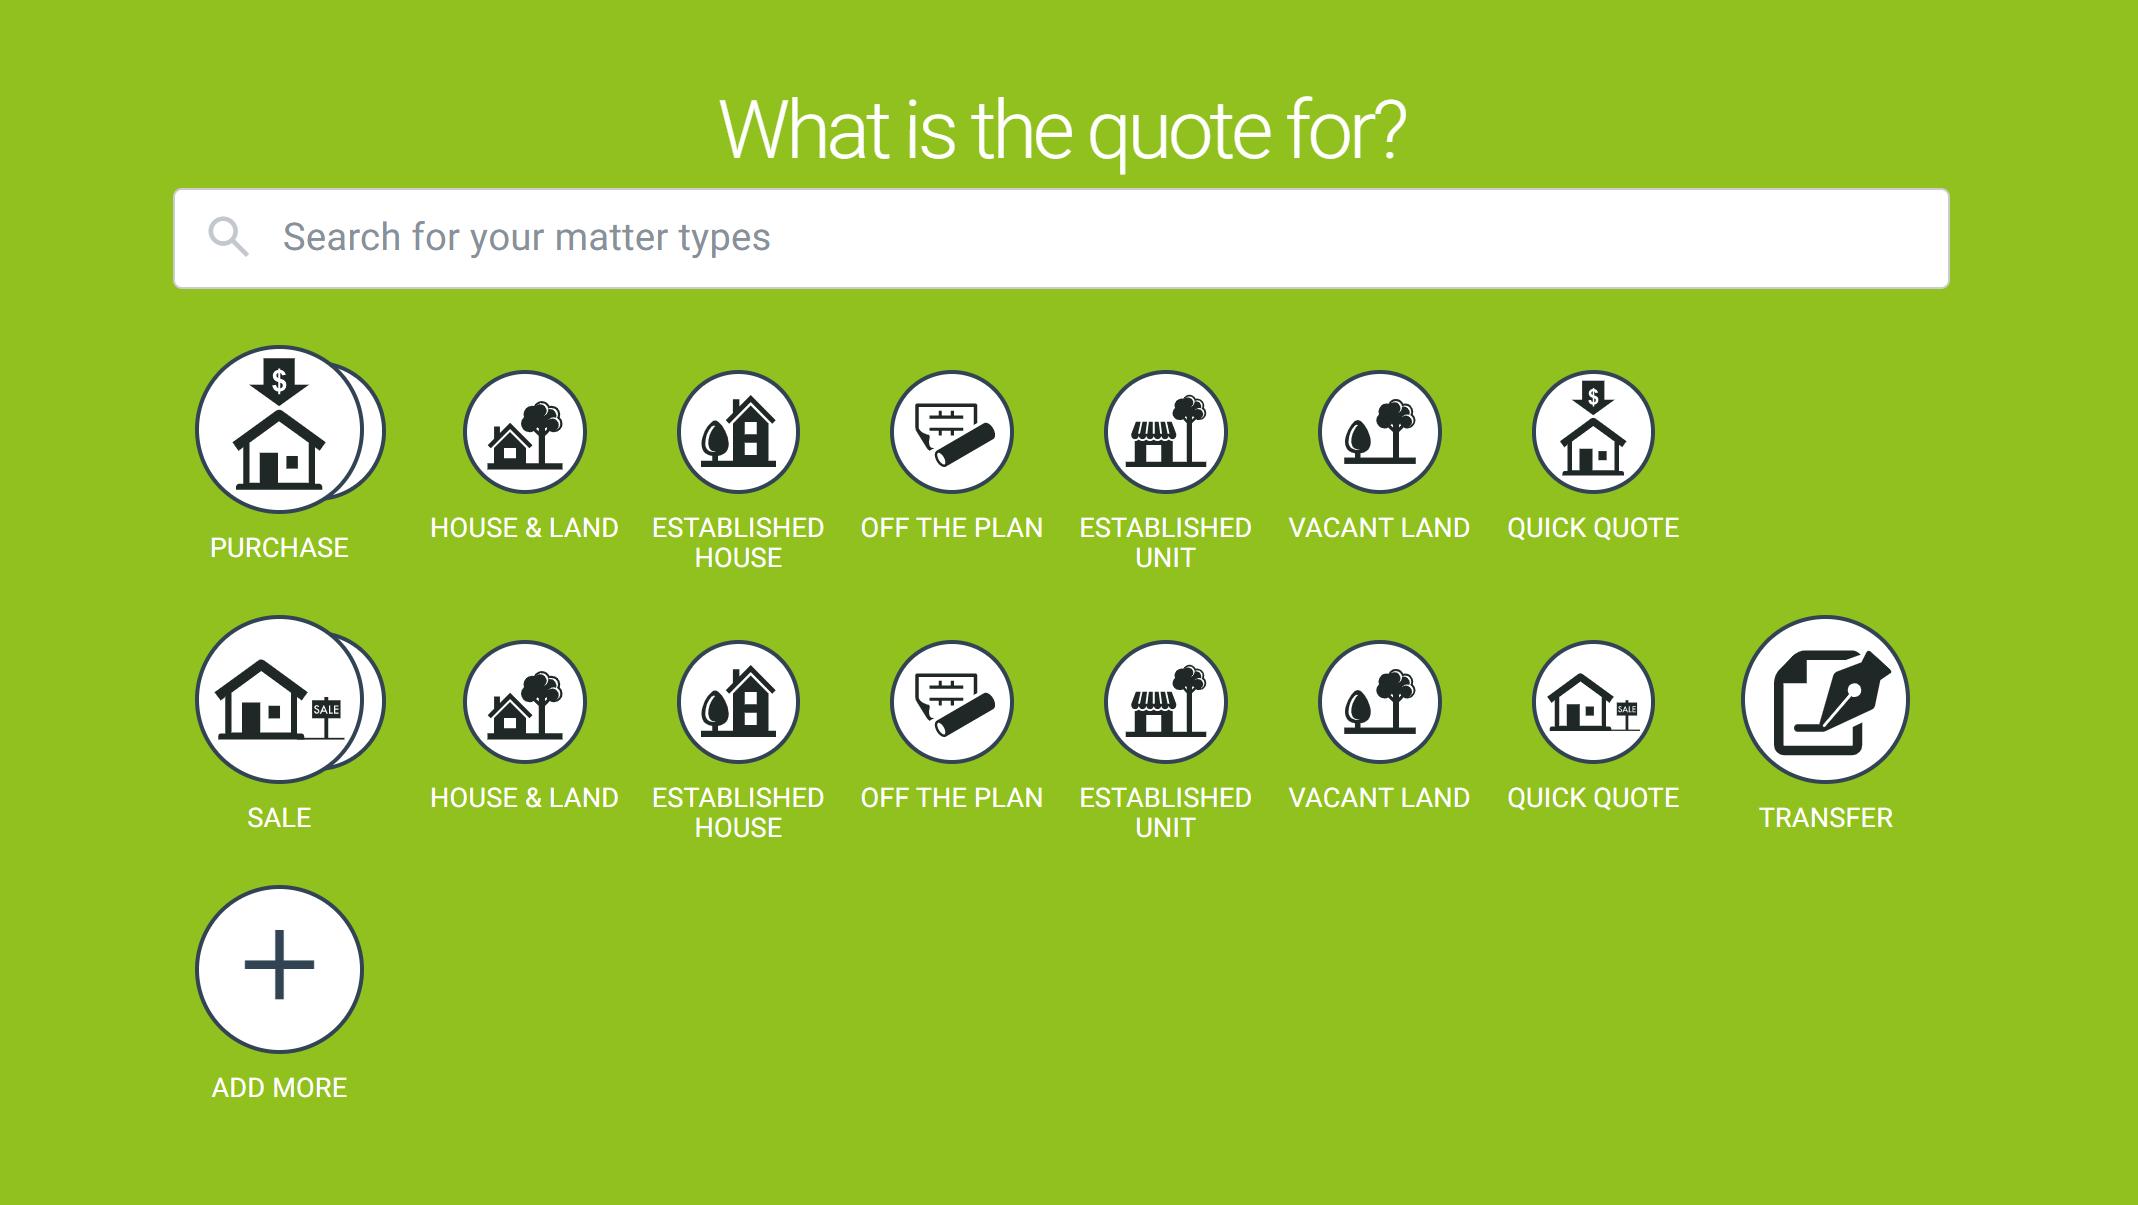
Creating a new quote/matter in Perfect Portal2
Head to the “plus sign” on the top left-hand side of the screen.
Select New Quote (conveyancing matters) or New Enquiry (other areas of law, eg Family Law, Wills & Estates, Personal Injury, etc).
Select the relevant matter type for quoting.
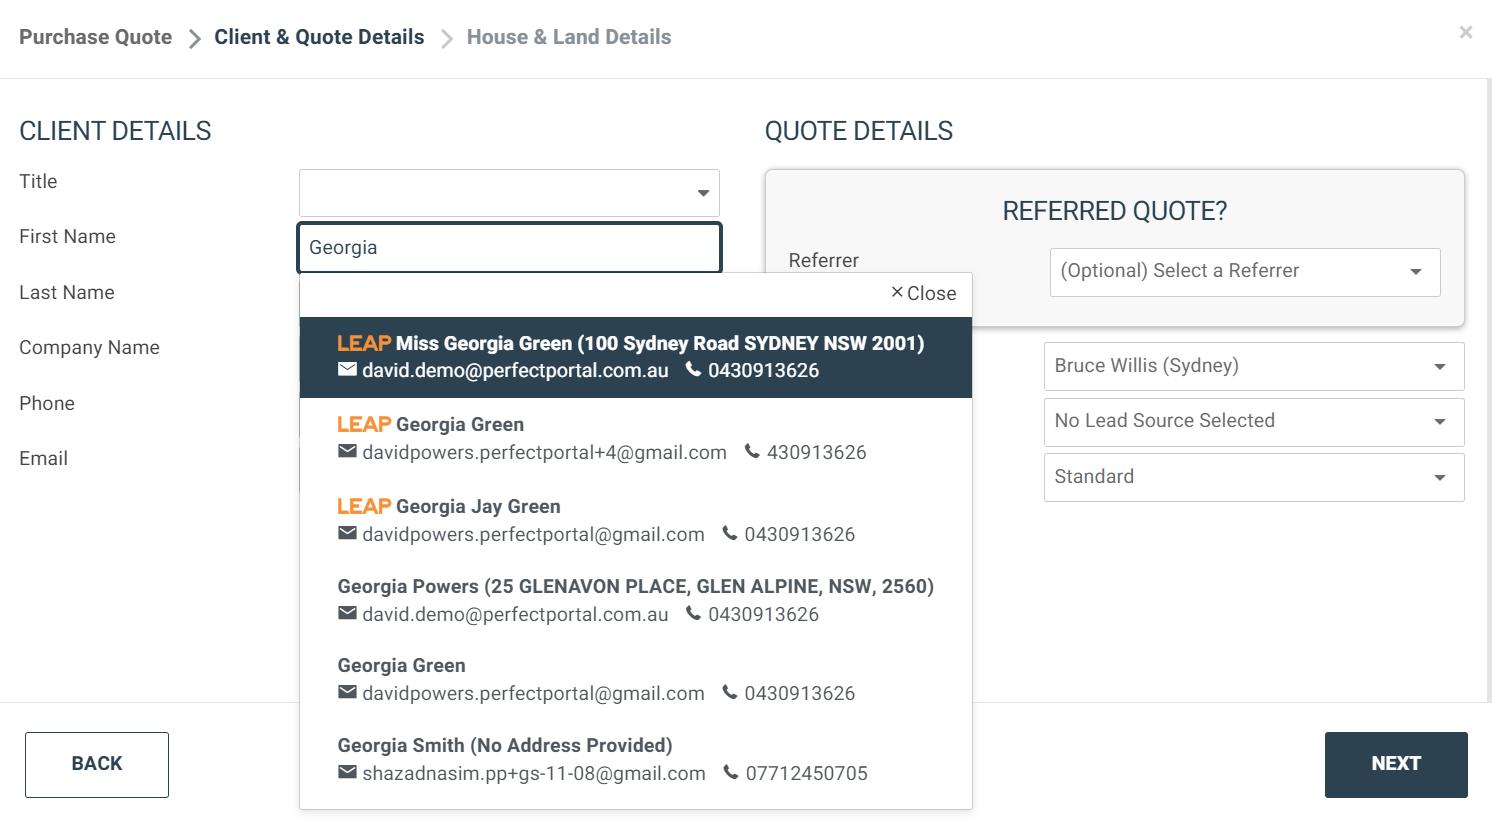
Fill in the relevant information (new client).


When pushed to LEAP, this will create a new client card.
Click here to add multiple clients
If ticking the “Spouse or Partner of primary contact, this will create a joint card in LEAP”
Add Second Client Add Second Client
If this is a recurring client, Perfect Portal will complete a conflict checker with your LEAP cards.
If the client contact information needs to be updated, update this in the LEAP client card. Once completed, select resync and this will pull through the amended contact information.
Fill in the relevant information.
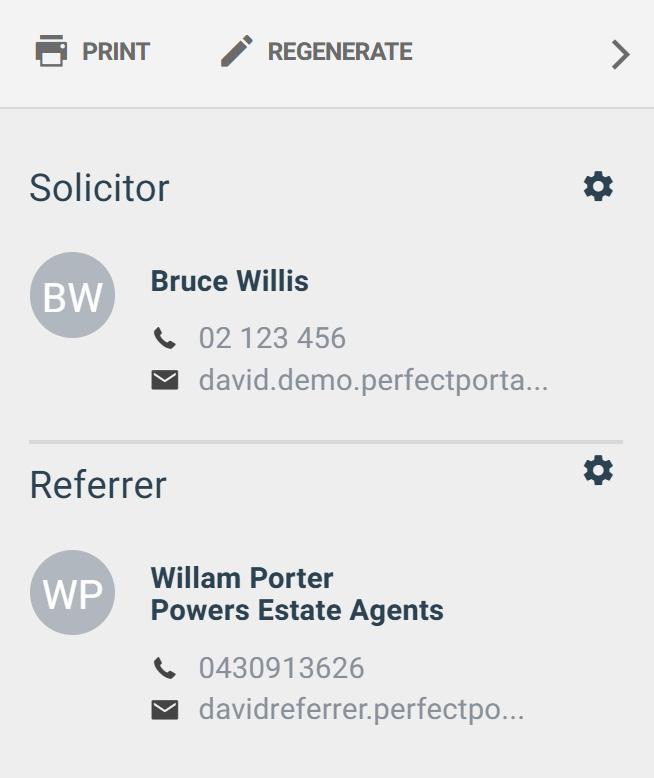
If the quote was referred, select the relevant referral agent. By adding the referrer this will feed into your reporting and they will have access to the Key Stages and app.
If you have multiple fee scales, select the relevant fee scale.
The person who will be looking after the lead.
If this was a private lead, select the lead source and this will feed into your reports.
Fill in the relevant property information.
If price is unknown, add a “0”. The system will pick up on this and not feed any pricing onto the quote.
If address is unknown, leave this field as blank. Note: if you have InfoTrack integration turned on, this will pull through your estimated searches & enquires fee if property field is blank.


If the client is buying & selling, enter the secondary property information and this will create two quotes.
If InfoTrack integration is turned on, confirm the address and this will pull through the searches selected in InfoTrack onto the quote.
Sending the quote3
Once the lead has been generated, this will bring you to your quote overview page.
Before sending the quote, you can edit the cost breakdown
Add additional or disbursements by selecting “create fee”.

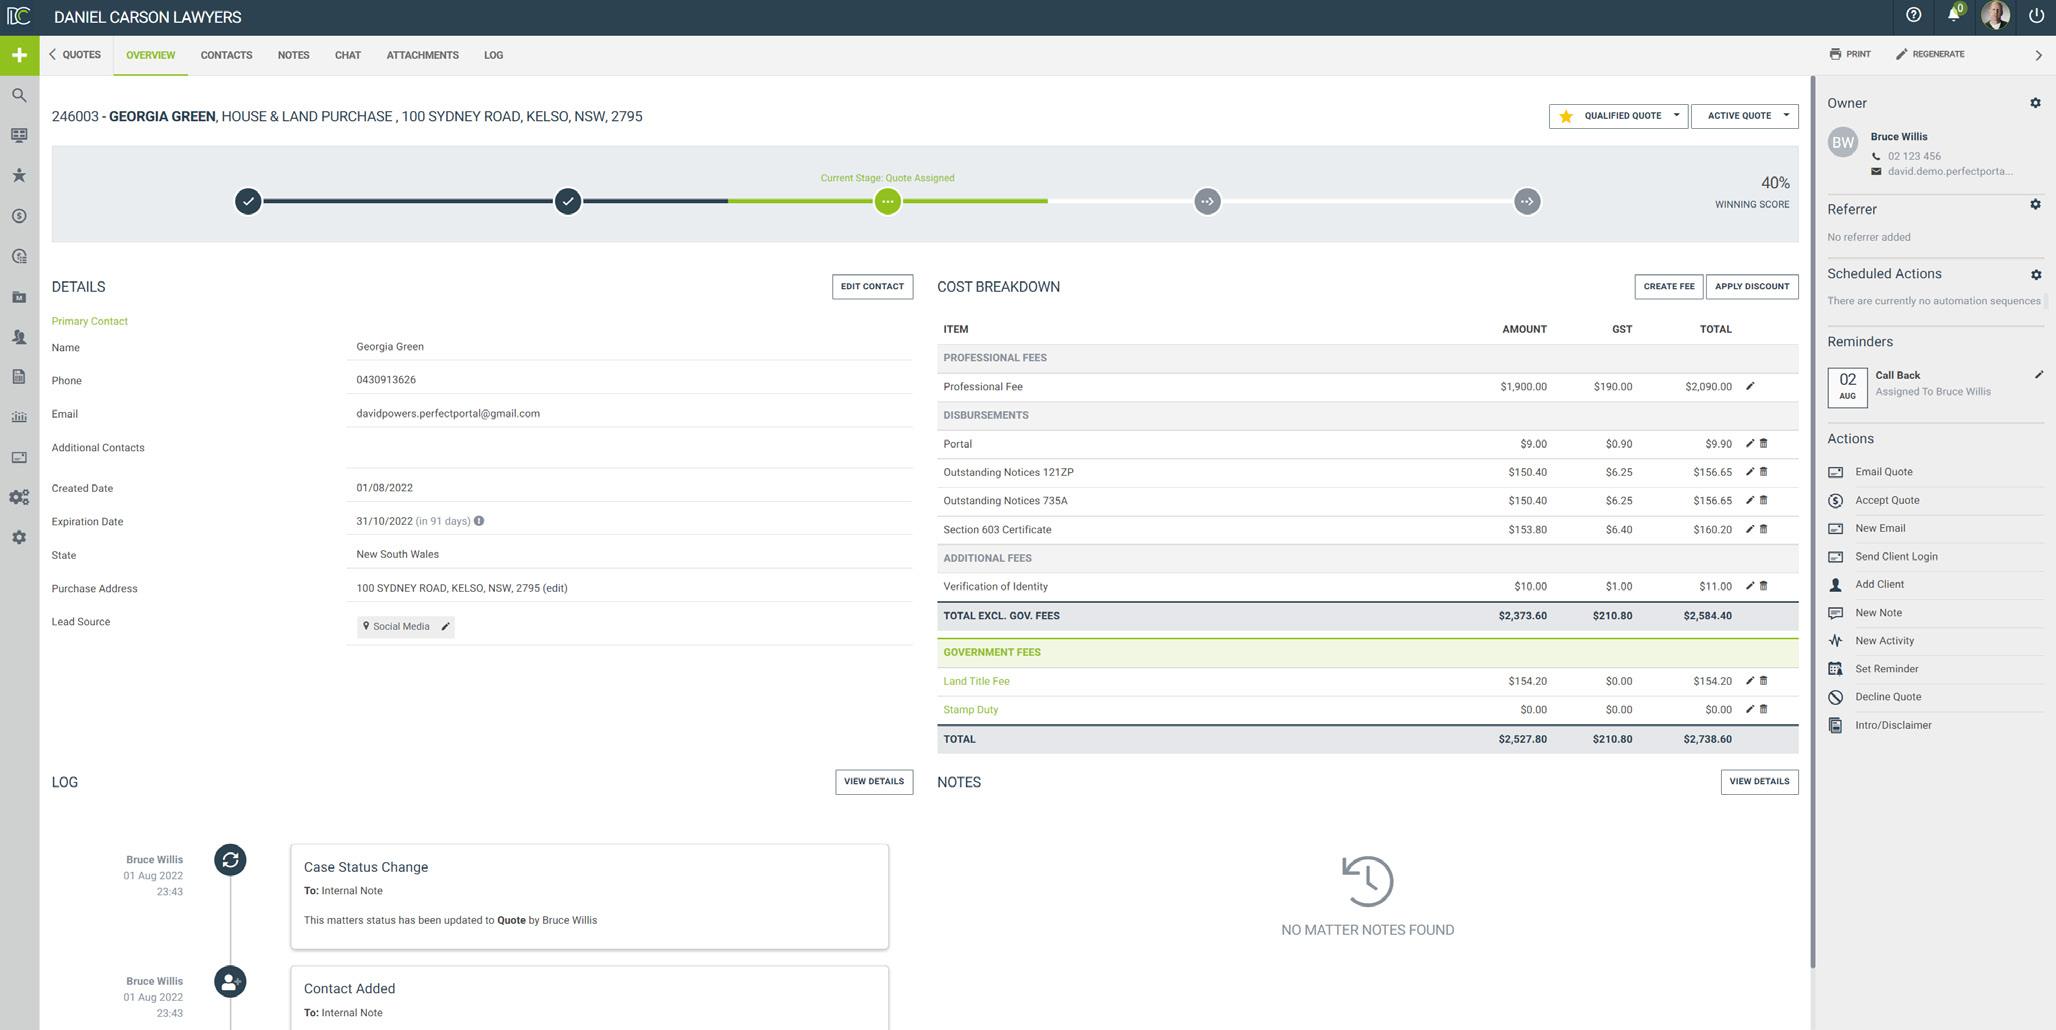
Apply discount or discount voucher by selecting “apply discount”.
Edit fees by selecting the pencil icon.
Delete fees by selecting the “bin” button.
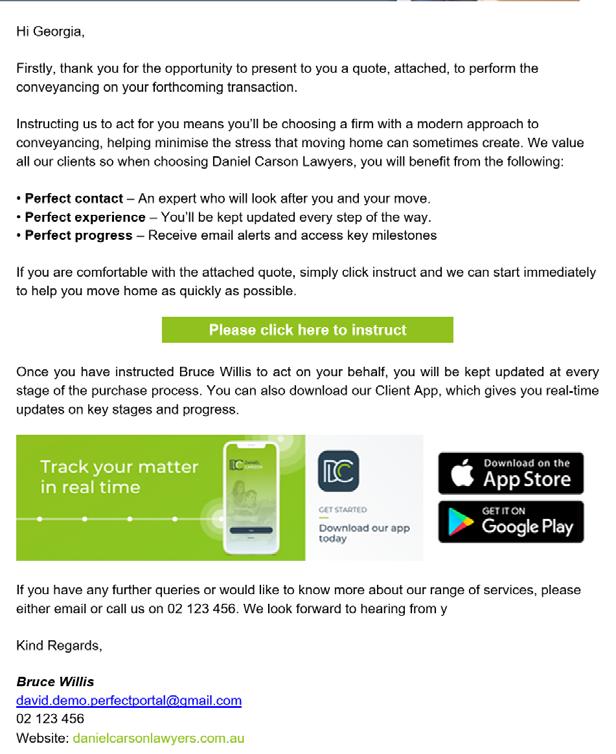
Once the fees have been cross-checked, you can email the quote to the client by selecting “Email Quote” in the Actions side-bar on the right.
This will then bring up a pre-populated email template. Select the relevant email template.
Select who you would like to send the quote to or CC into the email.
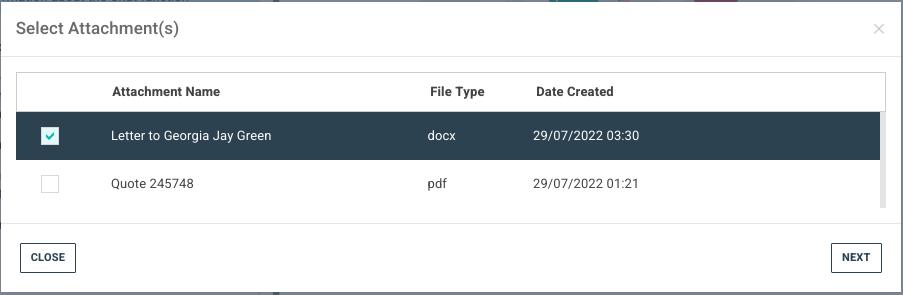
Unselect any default attachments or upload any documents as an attachment to the email.

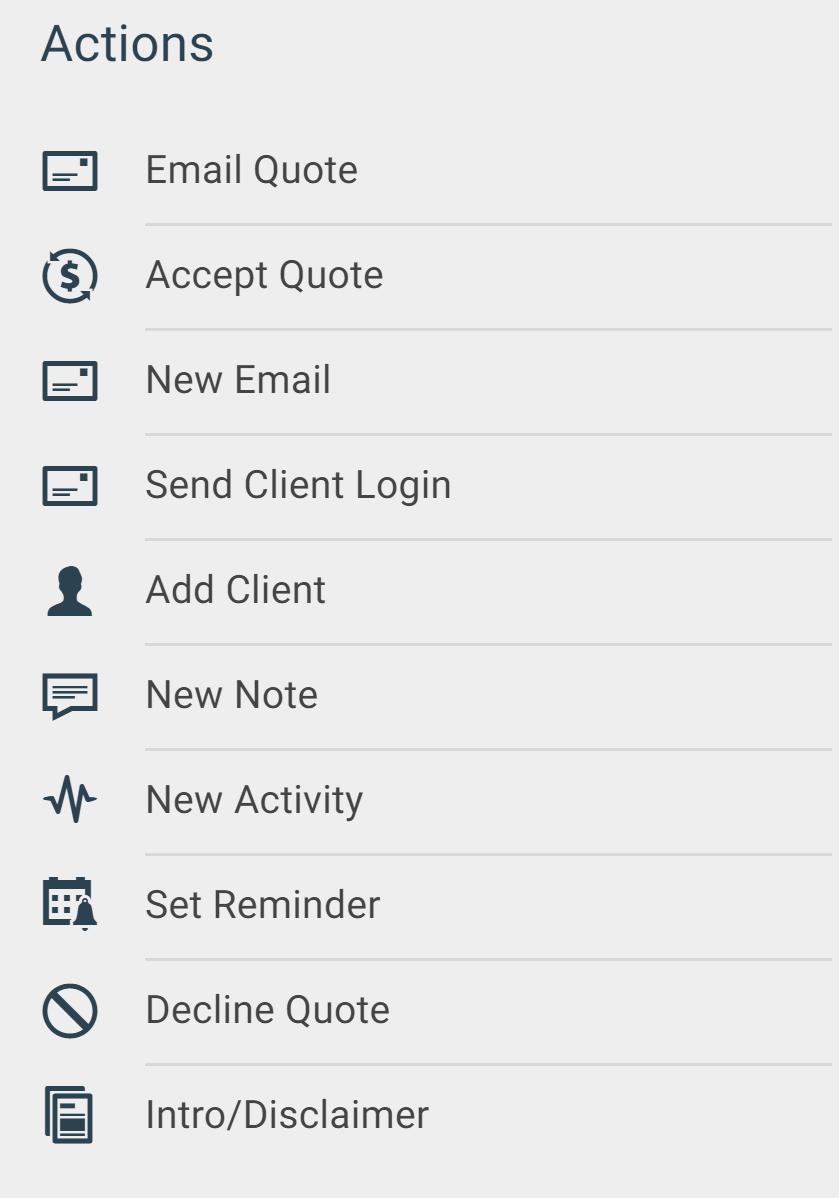
These are BB codes. This will drop in any relevant information in the bracket [xxxx_xxxx] once sent.
This will send the quote to the client.
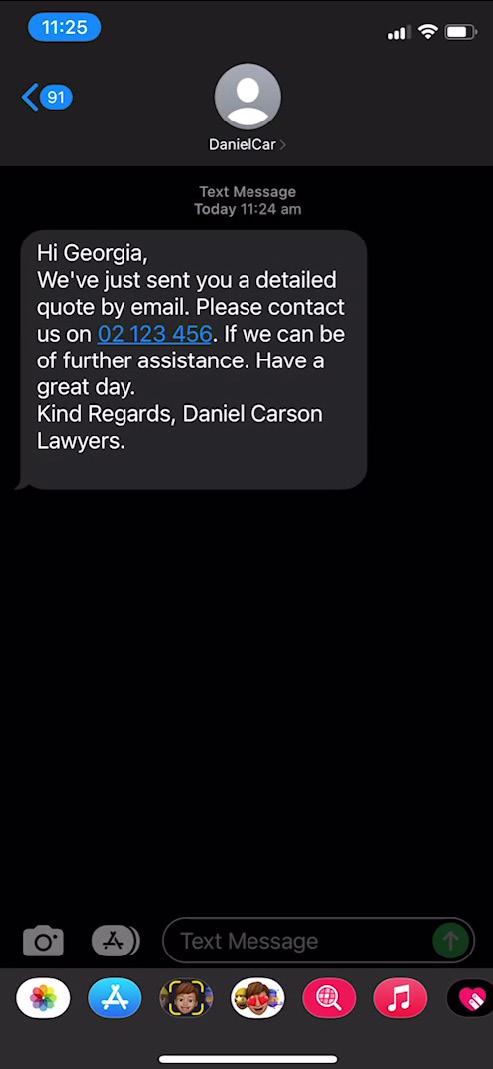
Once the quote email has been sent, the client will receive an automated text message as well as the quote via email. The client cannot reply to the text.


They will receive a branded quote PDF as an attachment.


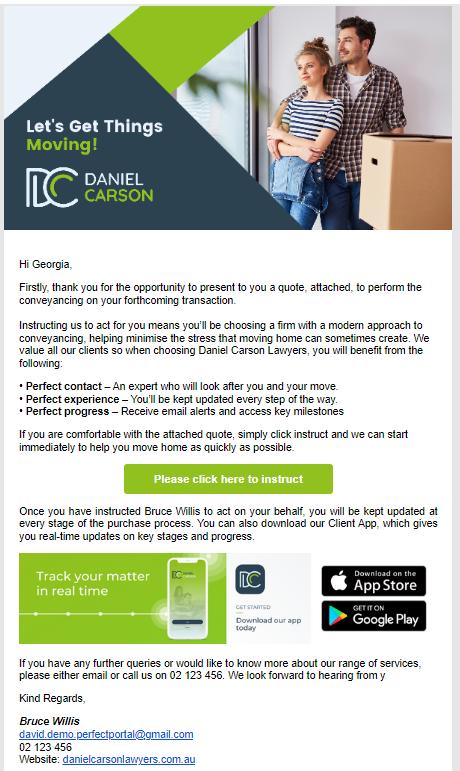
If the client is happy with the quote, they can instruct via the instruction button. Conveyancing Quote 02.08.2022 Quote Ref: 246004 Daniel Carson Lawyers 77 CASTLEREAGH STREET SYDNEY About Your Purchase: Purchase Price $500,000.00 No. of Buyers State New South Wales Purchase Address 100 SYDNEY ROAD, COBURG, VIC, 3058 Fees: NET GST Total Professional Fees $1,900.00 $2,090.00 Estimated Searches & Enquiries $350.00 $0.00 $350.00 $9.00 $0.90 $9.90 Additional Fees Verification of Identity $10.00 $1.00 $11.00 $2,269.00 $191.90 $2,460.90 GST Liability $45,454.55 $0.00 $45,454.55 Land Title Fee $154.20 $0.00 $154.20 Stamp Duty $0.00 $0.00 $0.00 Total: $47,877.75 $191.90 $48,069.65 Conveyancing Quote 02.08.2022 Quote Ref: 246004 Important Information Searches required may vary from region to region.Search packs do not include certain regional searches which will attract an additional fee. We will confirm the property you are buying is in an area where additional searches are recommended. We will ask you for $200 on account along with your signed letter of instruction to start the process of ordering the necessary searches. and they will be payable by you. The quote is valid for 30 days subject to receiving your instruction. Within this period our fees will not increase.Please note applicable to the Land Registry will adjust according to the most recent scale at the time your matter completes should changes have been made from the date of your instruction. Our fee is based upon the information provided.If this is incorrect or changes, you should let us know immediately. This Quote is subject to any government changes.
Managing New Lead4
Once the quote has been sent, this will trigger the automated text/email follow ups. Once the client has instructed via the instruction button within the email, or if you accept/decline the quote, this will cancel the automation automatically.
You can choose to cancel or reschedule the automation as well.
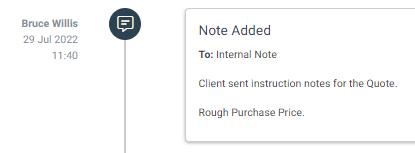
You can also log any actions to the quote. If any notes or activity are logged, this will feed into your LEAP correspondence for the matter.
Complete/cancel default reminder.
Send further email templates or custom emails. Send the client an activation link to setup their portal/app.


Add additional clients.
Log any internal notes or send notes to additional parties involved in the transaction.
Set up any additional reminders to ensure no lead is missed.
Log any activities made such as phone calls.
Decline quote. This will feed into your declined quote report.Edit the important information page on quote PDF before.
If any activities were made, this will be visible in the log.
LOG
LOG
NOTES
For a further in-depth activity log, use the log tab where you can see email open read receipts.

LOG Read
Return to overview page.

Add/View notes on the quote.
See all attachments sent to the client.
Add/View contacts.
Chat to the client via your app.
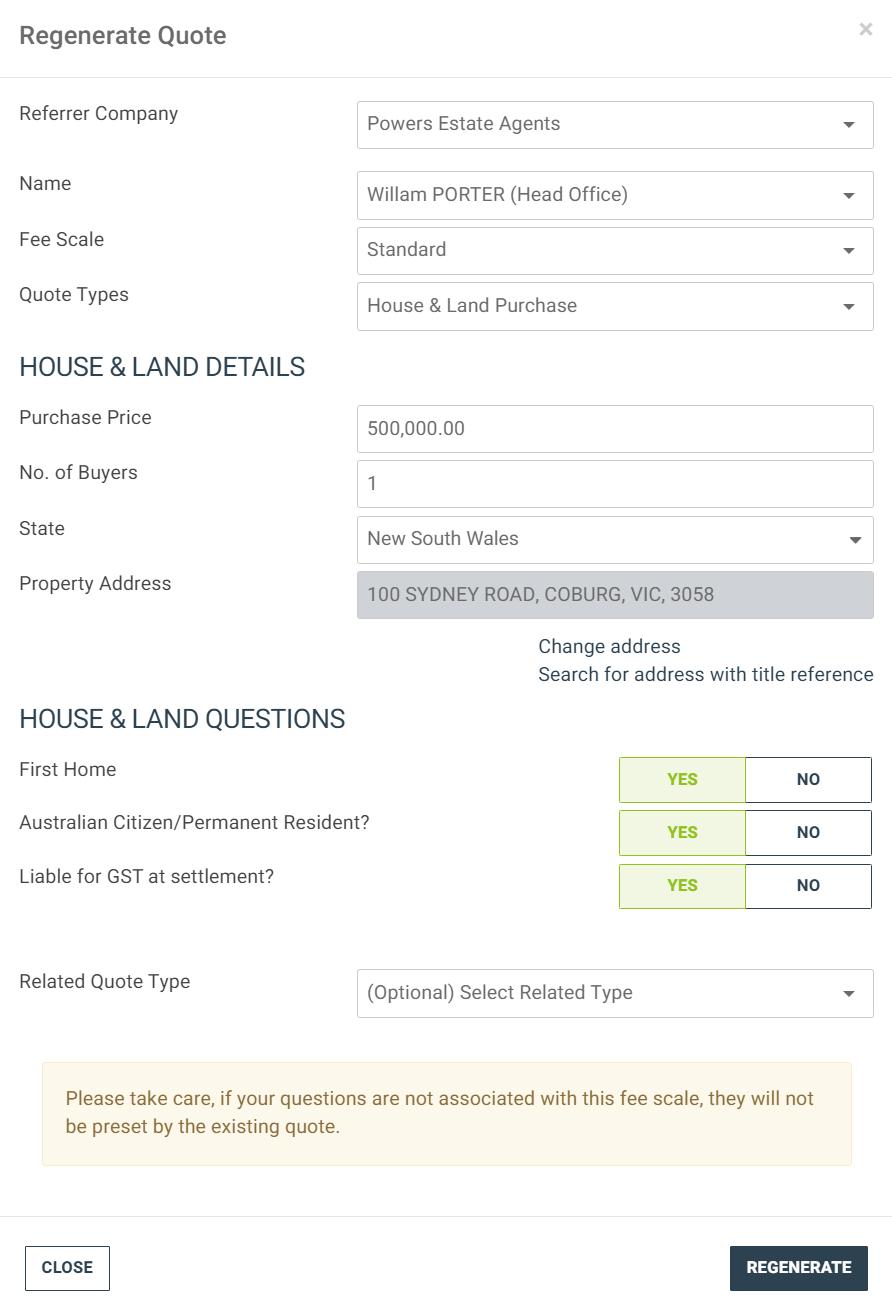
If you need to change any of the property information or government fees, select the regenerate button Note: if you have amended the cost breakdown (eg, add/removal of fees or discounts) you will need to add the changes back to the cost breakdown, as this will “refresh” the quote.
Quote Acceptance and Matter Creation5
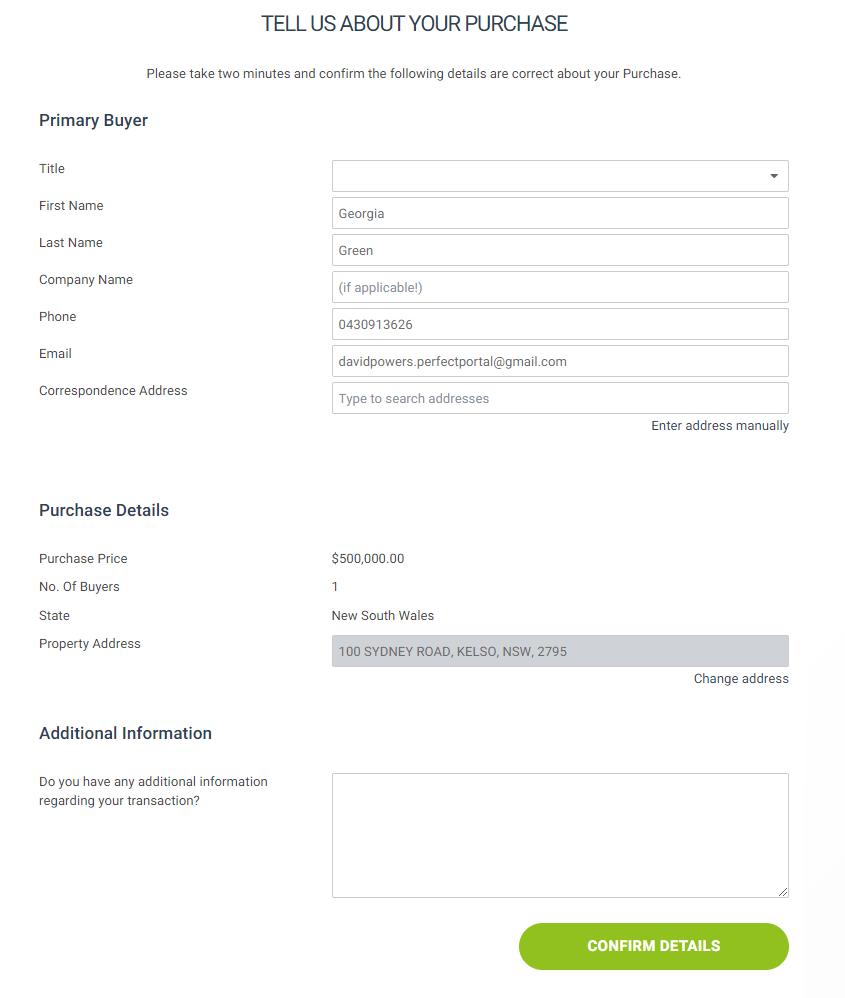
Once the client has selected the “instruction button” via the quote email, they will land on a page where they can confirm their contact and property information.


The client will also be prompted to change on to via the online portal/app.
The owner of the quote will receive an email from Perfect Portal that the client has instructed. Clicking the hyperlink will take you directly to the quote overview page. If the client leaves any notes, this will appear in your notes log.

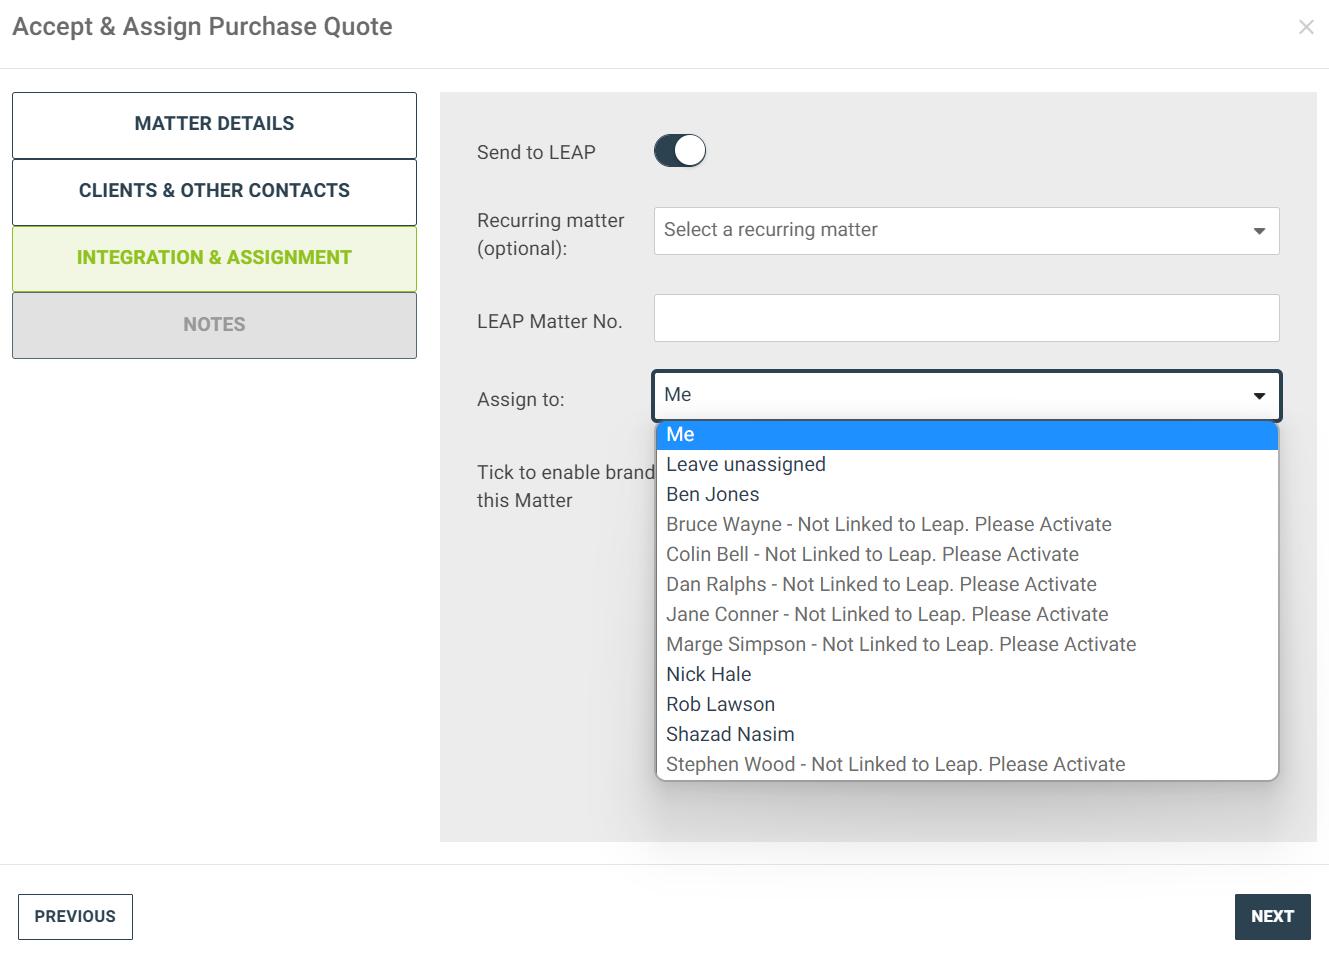
From here, click on select the “Accept Quote” button. Note: If you don’t need to send the quote to the client, Accept Quote straight after generation. Think of the “Accept Quote” button as creating the file in LEAP.

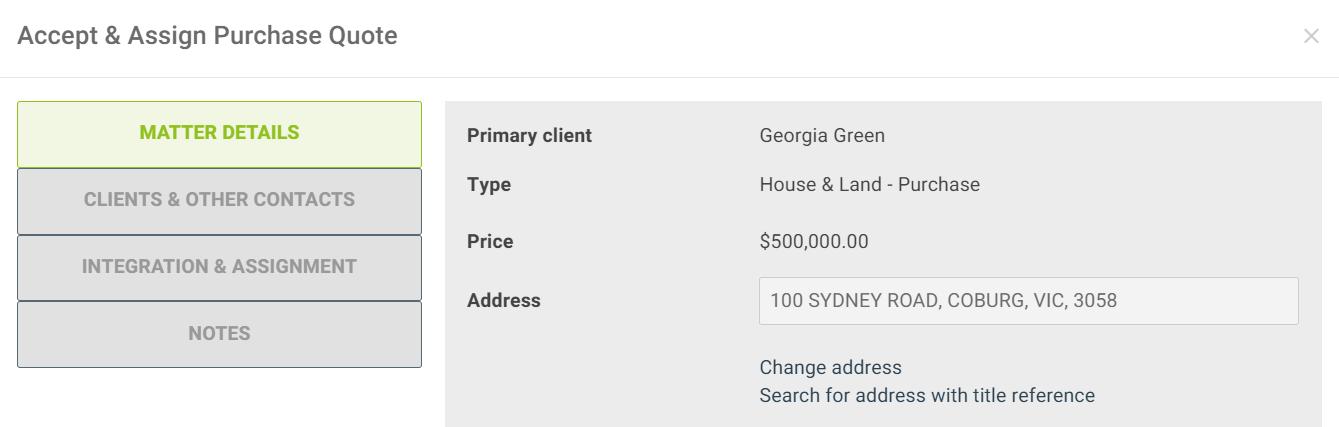
Confirm all matter information.
If you use recurring matters in LEAP, select the relevant folder.

You can then assign the quote to the relevant matter owner. Note: the user will need to be connected to their LEAP account. If reassigned, the user will get a system email saying that they have a new matter assigned to them.

Finally you can leave any notes to the new matter owner, and this will be sent as an email.
This will now push and create the matter for you in LEAP.
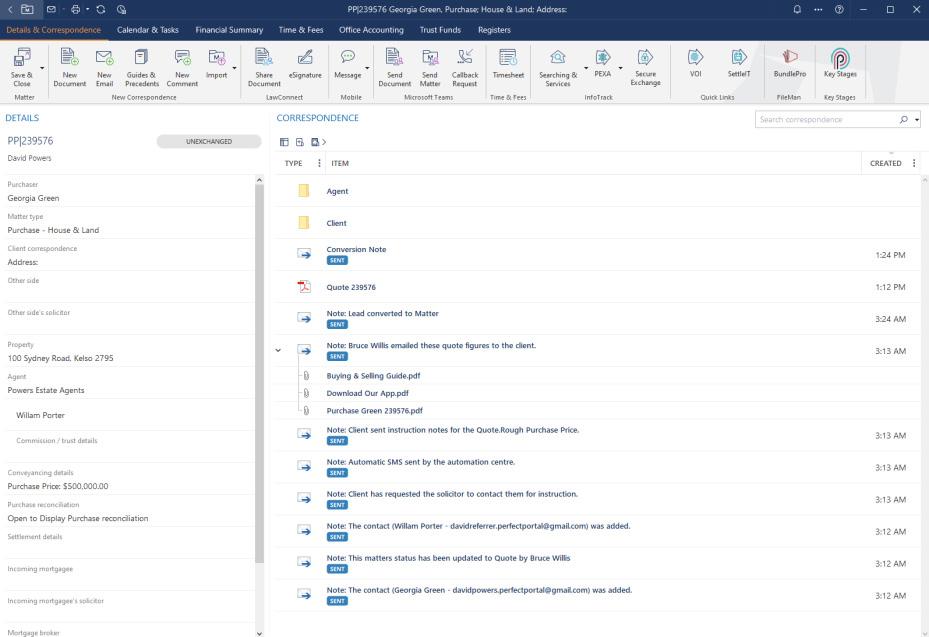
Managing Matter in LEAP6

Search for the file in LEAP, and open matter Note: if you use auto numbering in LEAP this will take the next available matter number. If not, Perfect Portal will create a matter number for you.


Within the correspondence of the matter, this will show all Perfect Portal activities.
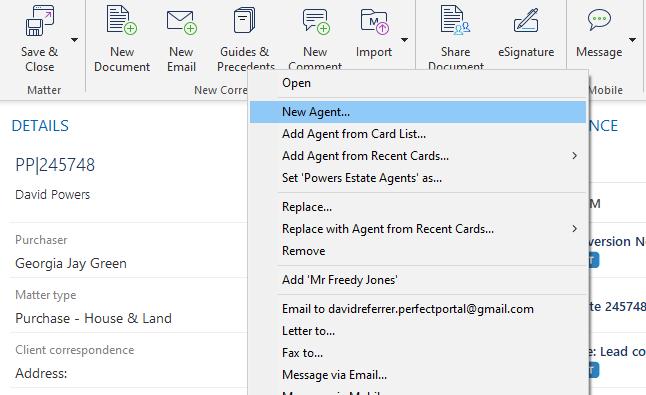
If you add a related party in LEAP, Perfect Portal will sync and add the contact to receive updates.
 LOG
LOG
New Agent...
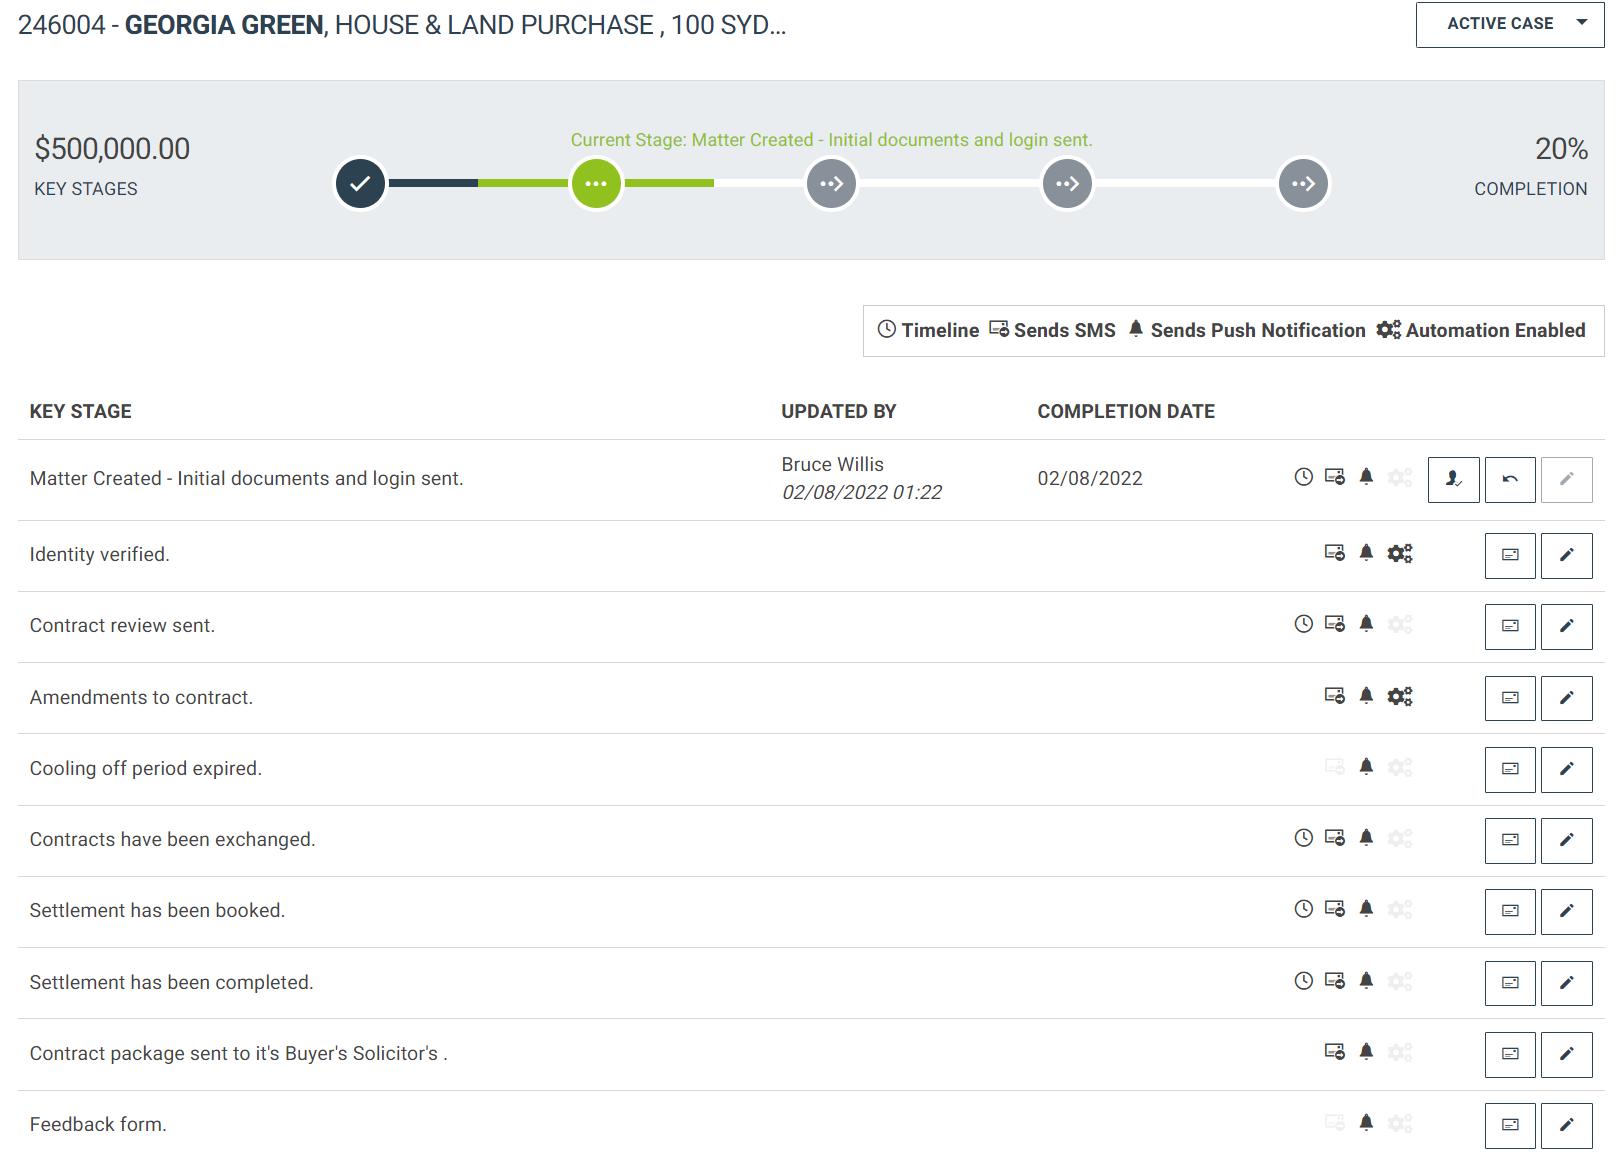
Key Stages in LEAP7
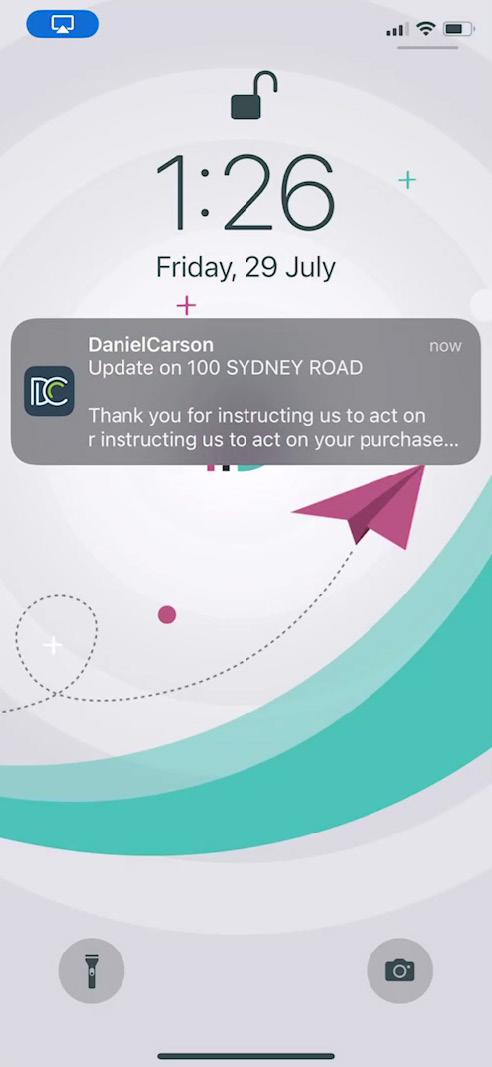
You can now use your Key Stages plugin to send out updates to the relevant parties.


This will send the client an activation link to your portal/ app. Note: if you send the first Key Stage, this will automatically send the activation link.
The “mail” icon will send the Key Stage update.
This will allow you to edit the Key Stage before sending.
You can edit a Key Stage before sending with the pencil icon.
This will change the template name. Note: this will not change the communication to the parties.
This will change the date when the Key Stage was completed. This will reflect in the app.
If “Complete Key Stage” is toggled off, this will not complete the Key Stage but send communication.
If “Send Communication” is toggled off, this will complete the Key Stage in LEAP but not send communication to the parties. This will allow you to change the personalised communication to each party involved. Select the party to amend.


Sending Updates to clients8


Once the Key Stage is sent, it will highlight the user and timestamp. This will also feed into your LEAP correspondence.
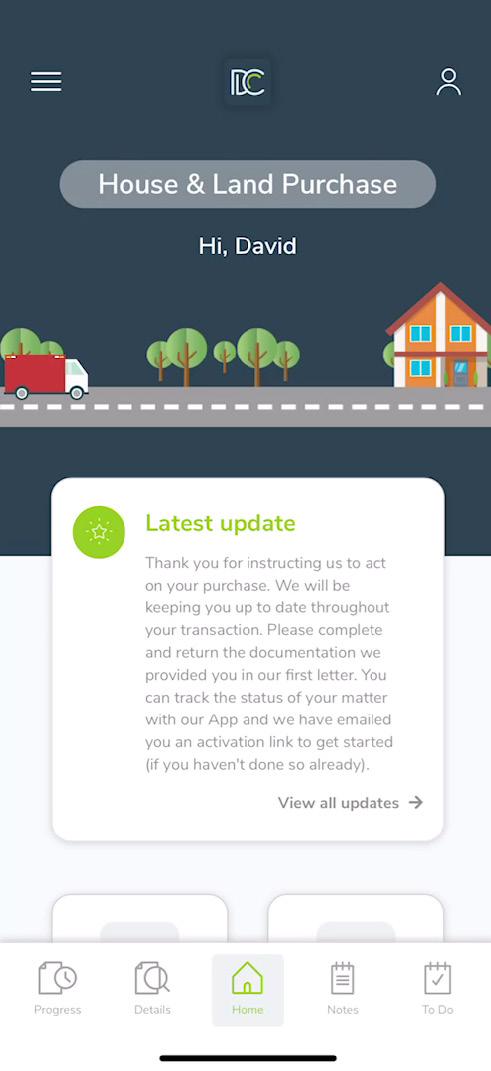
The client will receive 3 forms of communication: Email, SMS and Push Notification.
The client can now track their matter within the app and online portal.


The client can tailor make what communication they would like by heading into the profile settings.
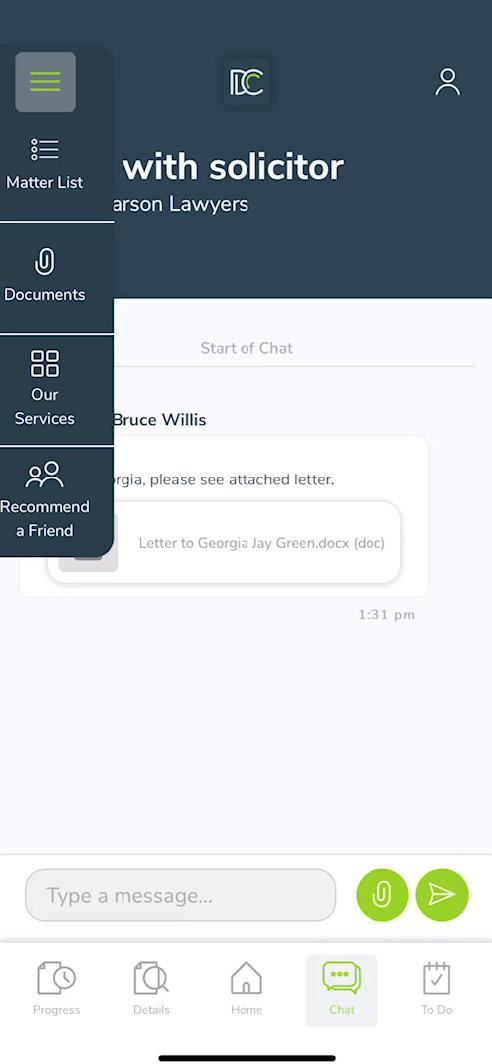
Chat
To activate the chat and doc share, select the “chat” tab within the Key Stages button. Note: you will need to initiate the conversation first for the client to have access to this feature.

Start the conversation, type your message in the text box.
You can then select to send documents to the client via the paperclip.

& Document Share9
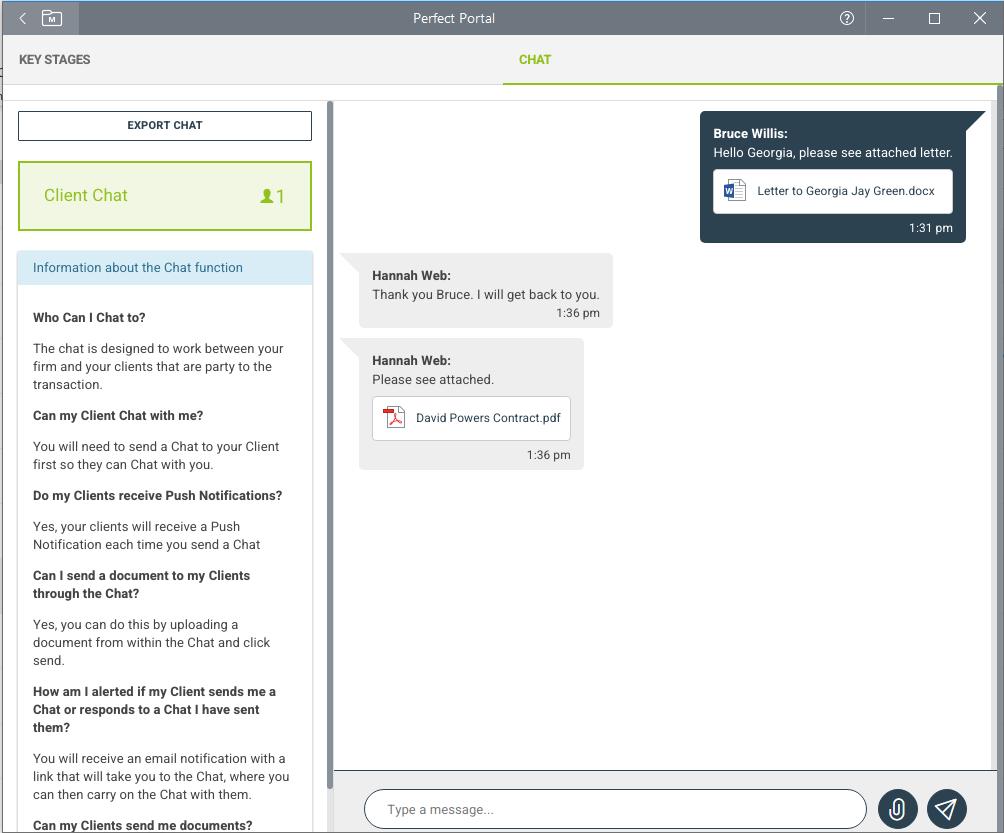
If you choose “LEAP” you can send any documents that are in your matter correspondence. Select and send by clicking the paper plane button.

The client will then receive a push notification that they have received a message. If they do not open the message within 5 minutes, a further email will be sent to them.


The client can now view and reply to the messages. All documents sent to them will be


in their
will be
via email within
minutes if the client replies.
Hello Bruce,
has
View David’s Message
stored
documents tab. You
notified
5
David
sent you a new message David Power’s Purchase of 100 SYDNEY ROAD, KELSO, NSW, 2795
If the client responds back with a document. LEAP will create a new folder in your correspondence called “Perfect Portal Chat Documents”.


 CHAT
CHAT
You can export the chat as a chat log document in your LEAP correspondence.

EXPORT
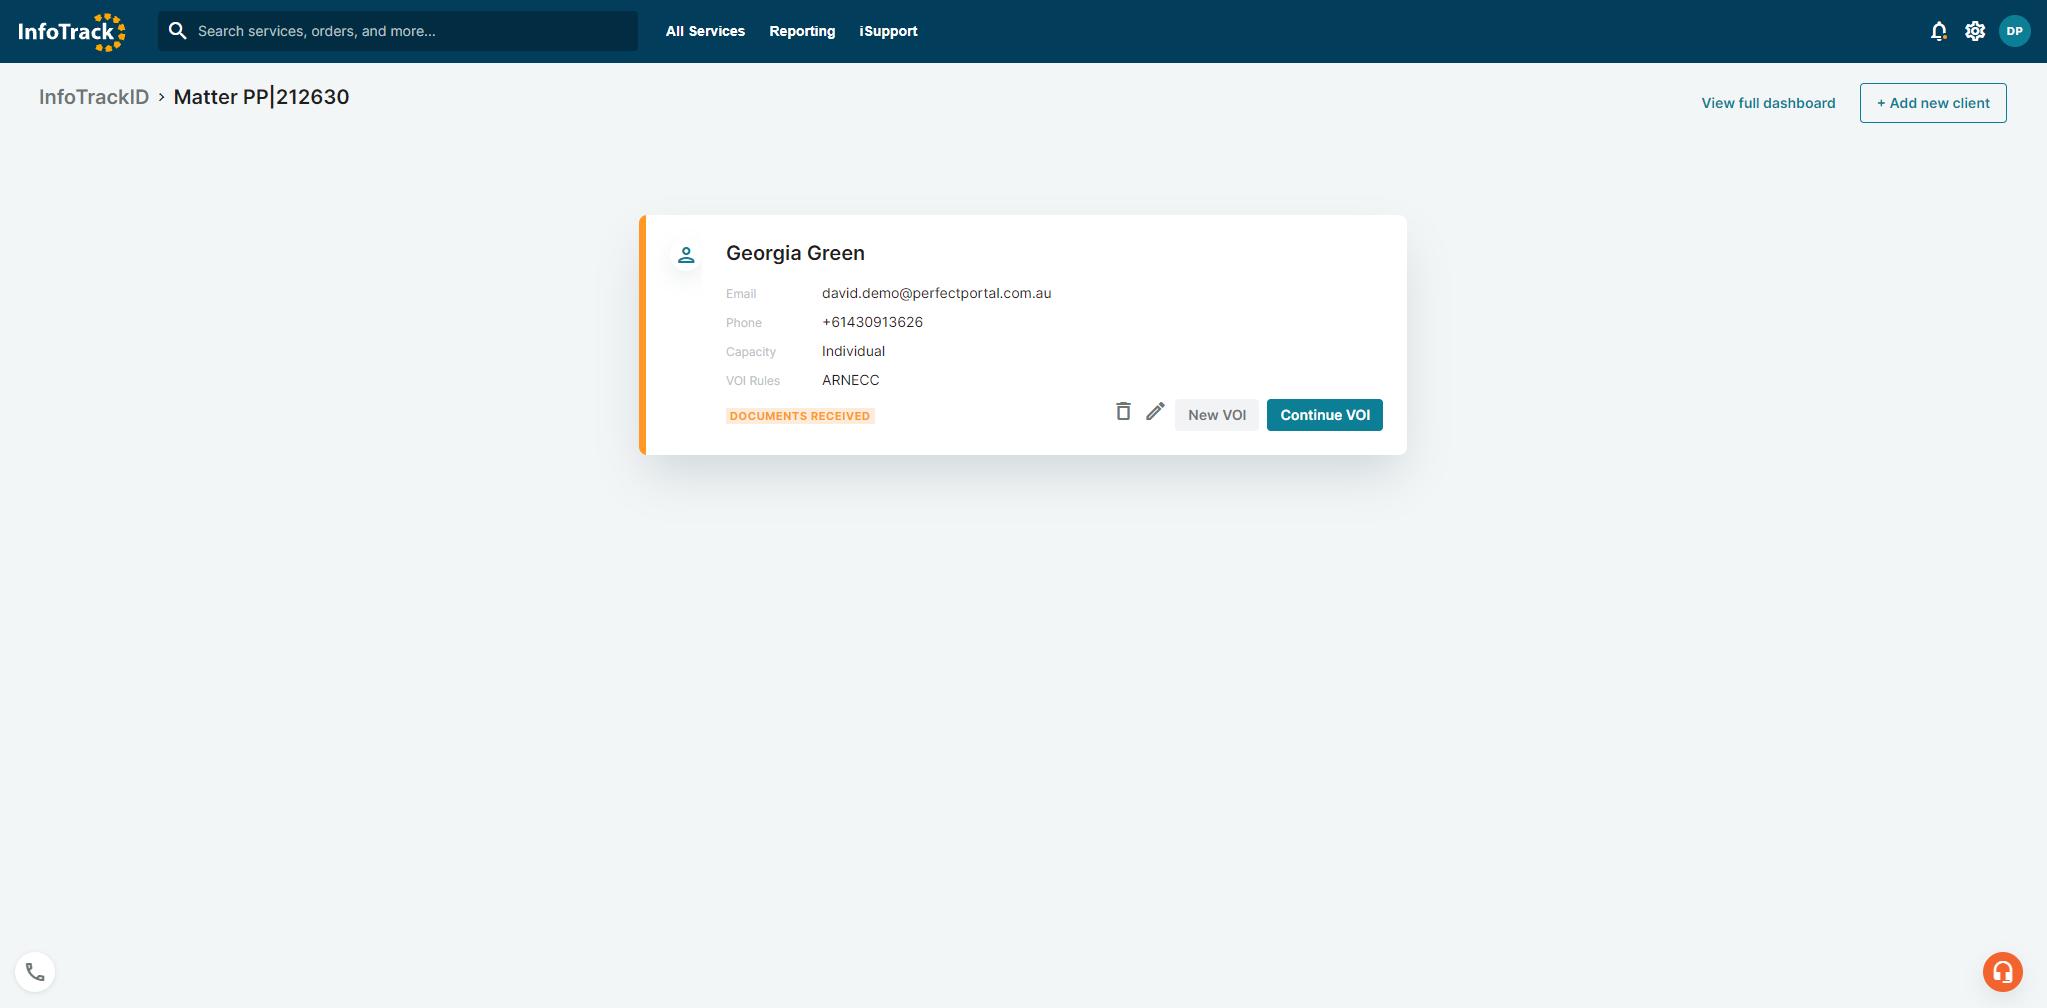
InfoTrack ID Integration
If you use InfoTrack ID, this can be integrated via your app and portal.
Select the VOI button within LEAP.
Complete the normal VOI process. Make sure you select remote for your workflow so this will be triggered via the app.

10
Once the client has accessed the “To Do” list, they can select “Submit Documents” and this will direct the client to InfoTrack ID’s platform.

From here, the client can complete their verification of identity
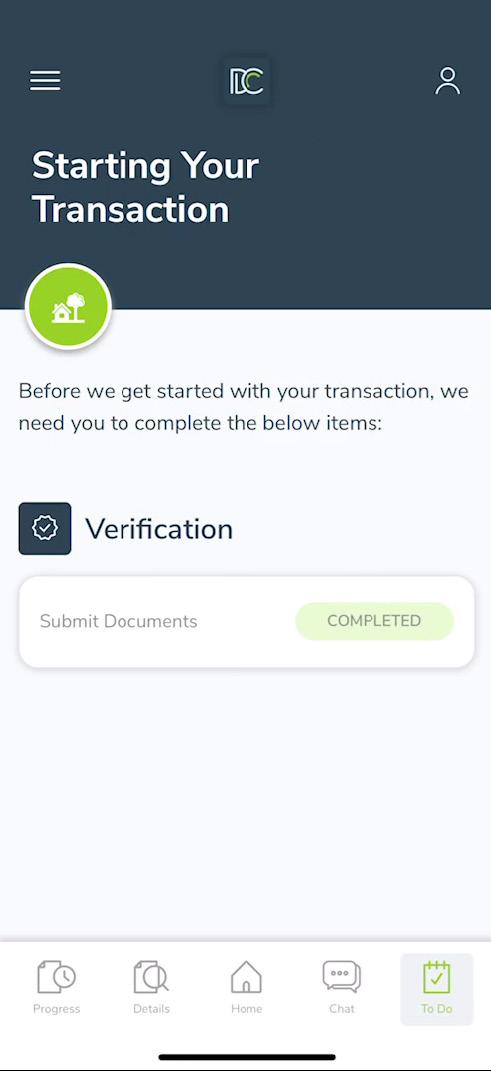

Once submitted, the client will be prompted to go back to their “To Do” list. This will then open the App and show “Submit Documents” as completed.

You will then get an email from InfoTrack to verify documents. This will also feed into your InfoTrack Dashboard.

If documents need to be “Resubmitted”, similarly the client will receive a push notification and a branded email sent to them asking them to reverify documents.
Once again this will feed into your LEAP correspondence.
Proposed Settlement Date11

Once you have entered the “Settlement Date” in your Calendar & Task in LEAP, this will feed into the app and portal.

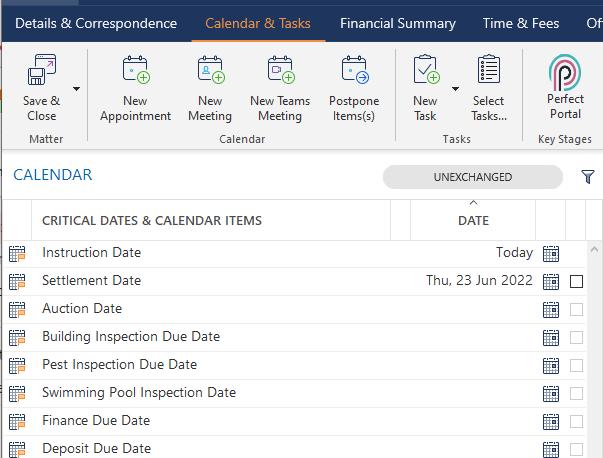
If you are using the BB code [proposed_settlement_date] for your Key Stages, this will drop the date field in for the communication.


 Proposed Settlement Date
Syncing Between Perfect Portal & LEAP12
When you have updated the client or related party in LEAP, every time you select the “Key Stages” plugin, this will force the sync between Perfect Portal and LEAP. You will know this has worked as a “LEAP alert” will appear asking you to save now.

If you need to update the price or property address, you will need to do this in Perfect Portal within the matter. Note: If you do not update, this will show the previous address and price within the app and portal.


Purchase Price Property Address
Matter Completion and Client Review13
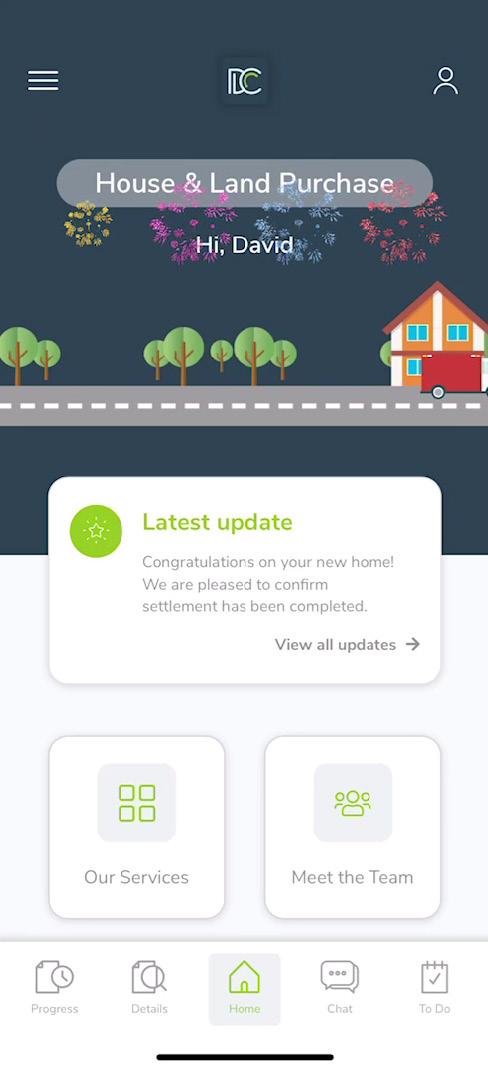
Once you have sent your final Key Stage or “settlement has been completed”, this will complete the matter and feed into your reporting in Perfect Portal. This will also trigger the fireworks (purchase matters only) in the app and portal.
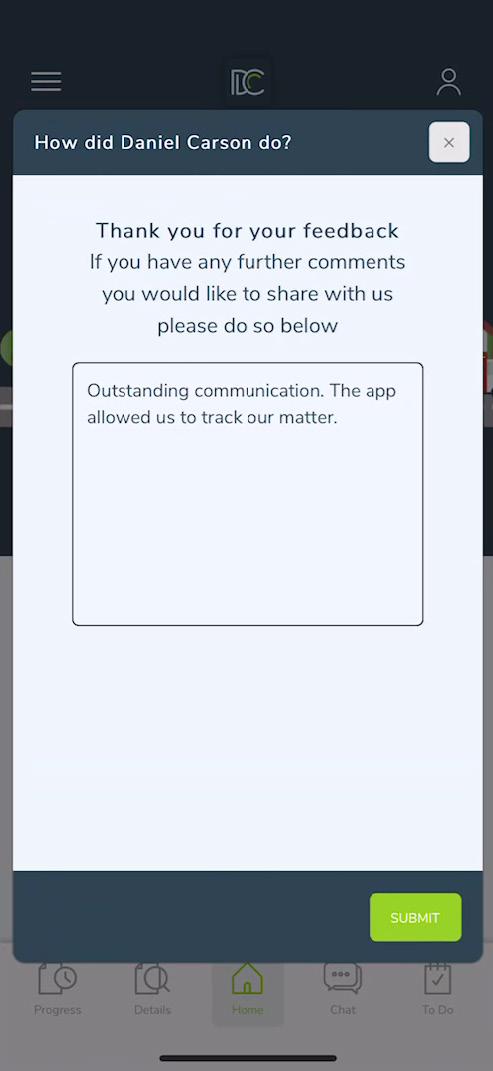
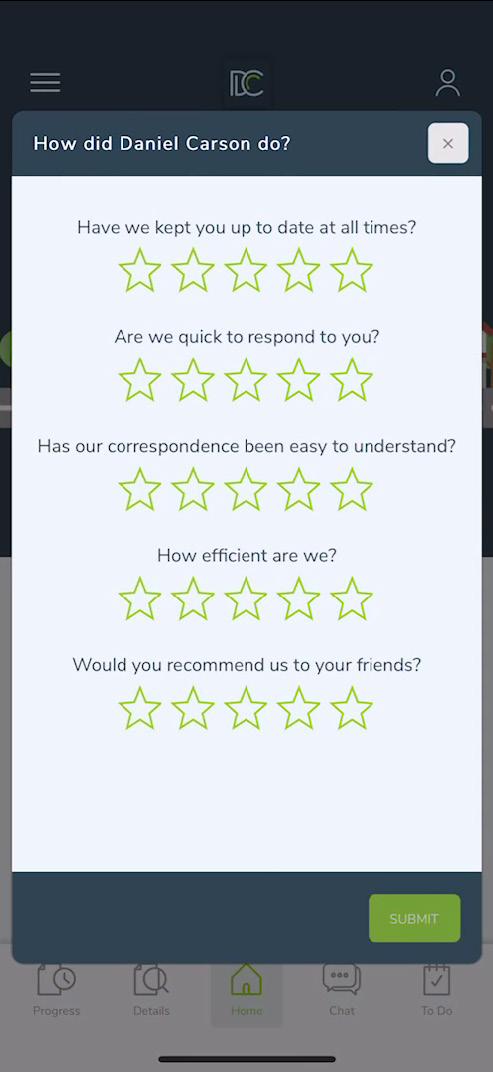
Once the “feedback form” Key Stage has been triggered, this will bring up a review for the client to fill out. If you have the review widget installed on your website, these results will feed automatically to your website. You can find the results in the “Client Rating Per Matter” and “client Feedback Per Matter” report in Perfect Portal.
Other App and Portal Features14


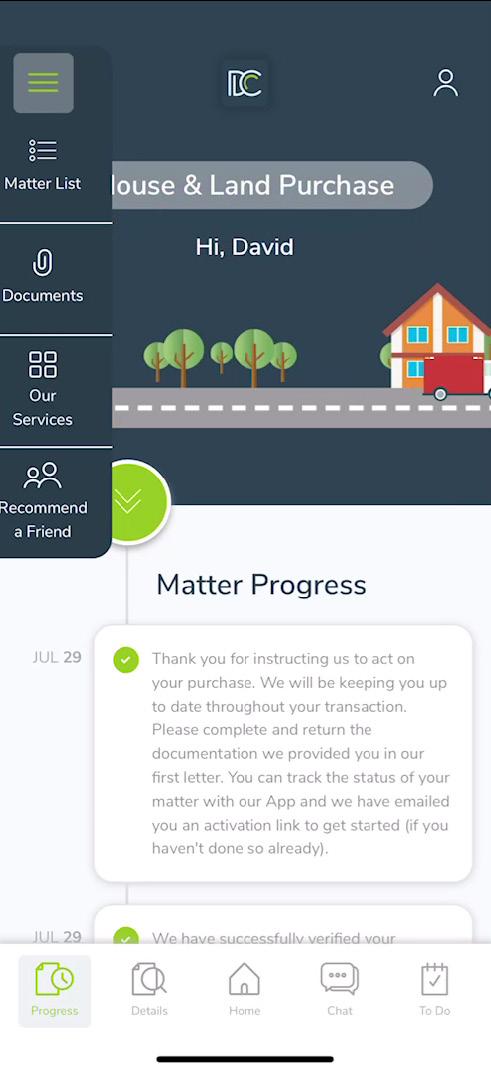
The client can track multiple matters within their matter list. Note: They will need to have the same email address across multiple matters. If they do not, this will create a separate app and portal login.

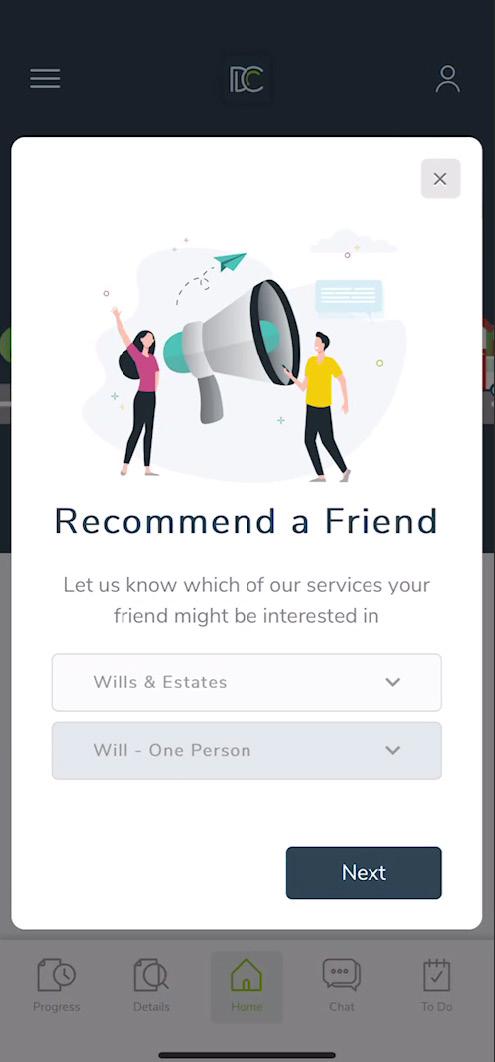
The client can refer a friend (lead) by selecting “refer a friend”. This will feed as a new lead into Perfect Portal and you will be notified via email.
The client can enquire about other areas of Law by selecting the “Our Services” button. When the client selects “Enquire Now” this will feed as a lead into Perfect Portal and you will receive an email. The “Find Out More” button will direct the client to your website for that area of Law.


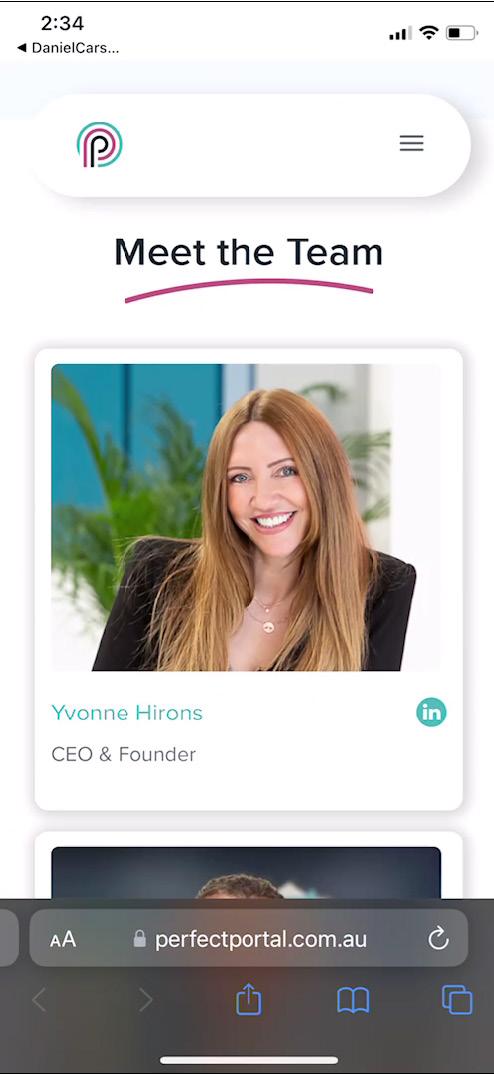
The client can meet the team by selecting “Meet the Team” button. This will direct the client to your “about us” page on your website.

“Perfect Portal has made a world of difference for our firm, and our clients love it too. Inbound calls regarding matter updates have dropped about 90% since we started using Perfect Portal’s branded app with the LEAP integration. Clients can get the information they need without having to call us; the process is smoother and easier for everyone involved. Overall, it’s been a great experience and I’m excited to continue using Perfect Portal to improve our firm’s workflow and client communications.”
Christie Murphy @ConveyOnline1800 098 354 info@perfectportal.com.au perfectportal.com.au