15.6"AndroidTeslaScreenRadioInstallation
Tutorialfor19-upDodgeRam
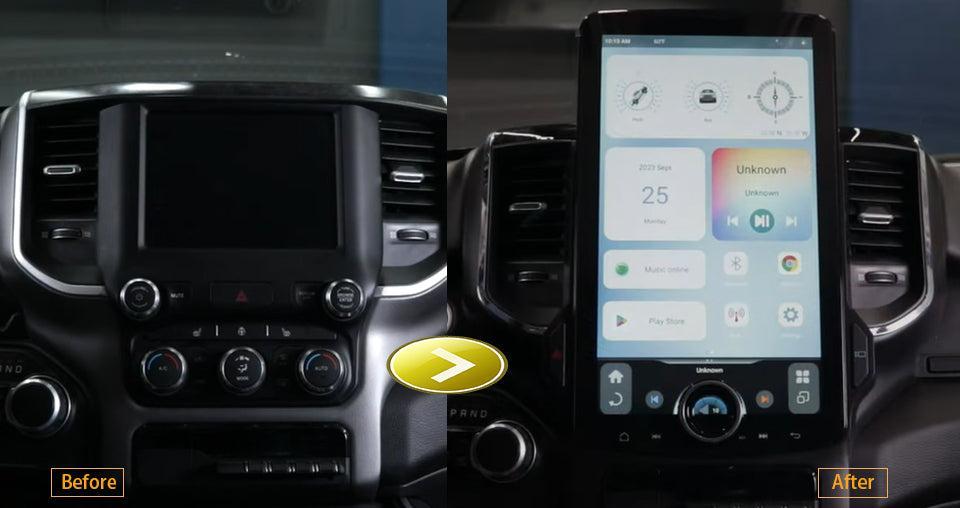
Whetheryouarekeenoncarmodificationorwanttogetamoreperfectdriving experience,wecanalwaysfindavarietyofcarupgrademethodstomakeourdriving moreexciting,aswellasunique.Oneofthemostimpressiveupgradesavailableis addinga15.6"TouchscreenTesla-StyleRadioNavigationSystemtoreplacethe simplefactorystereo.
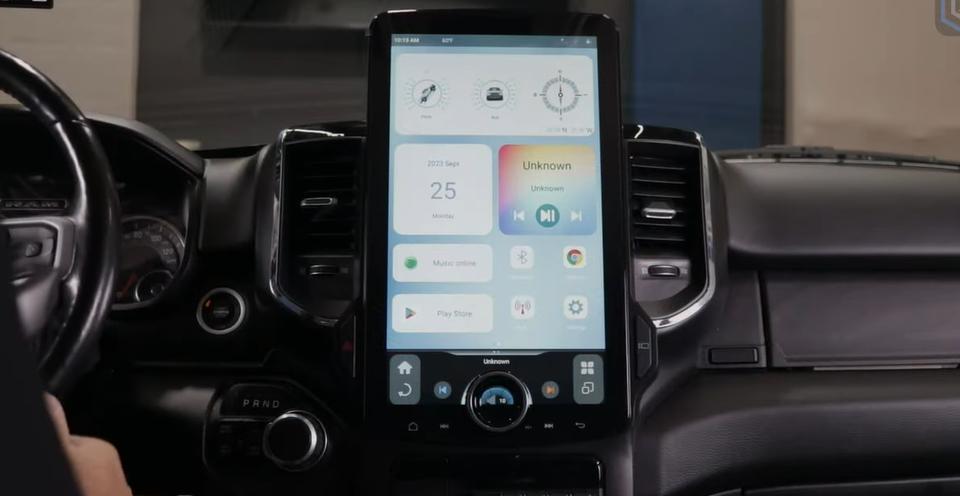
AftermarketT-Styleradiooffersasleekdesignandadvancedfeatureslikeaccurate navigation,Bluetoothhands-freecallandmusicstreaming,wirelessCarplayor AndroidAuto,WIFIconnection,onlineandofflinevideoplayback,GooglePlayStore appsdownloadingetc.It'sthebestassistantwhereveryoudrive.
Inthisarticle,wewillshowcaseastep-by-steptutorialofinstallingaLinkswell15.6" XLT-StyleCarRadioforDodgeRam(2019-up)HelpsyouunderstandDIYradio installationandanewdrivingexperience.
ToolsandMaterialsNeeded
156"XLT-StyleRadioHeadUnitfromLinkswell
Trimremovaltools
Screwdrivers(Phillipsandflathead)
Socketwrenchset
Electricaltape
Cableties
Usermanualforreference
Step1:PreparingforInstallation
Beforebeginningtheinstallation,ensureyourvehicleisparkedonalevelsurface withtheengineturnedoff.Disconnectthenegativeterminalofthebatteryto preventanyelectricalissuesduringtheprocess
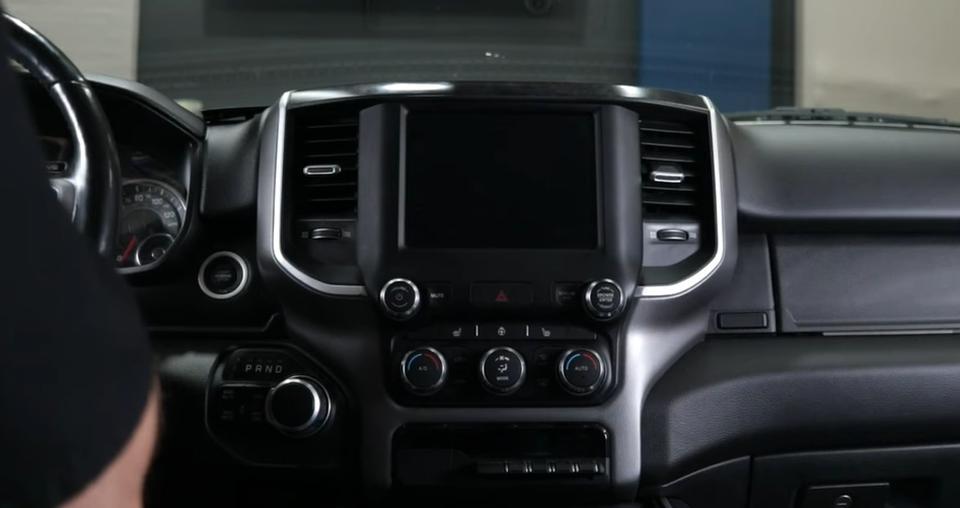
Step2:RemovingtheFactoryRadio
1.Usetrimremovaltoolstocarefullydetachthebezelsurroundingthefactoryradio. Startfromtheedgesandgentlypryitofftoavoiddamagingtheclips
2Oncethebezelisremoved,locateandunscrewthemountingboltssecuringthe factoryradiousingtheappropriatesocketwrench.
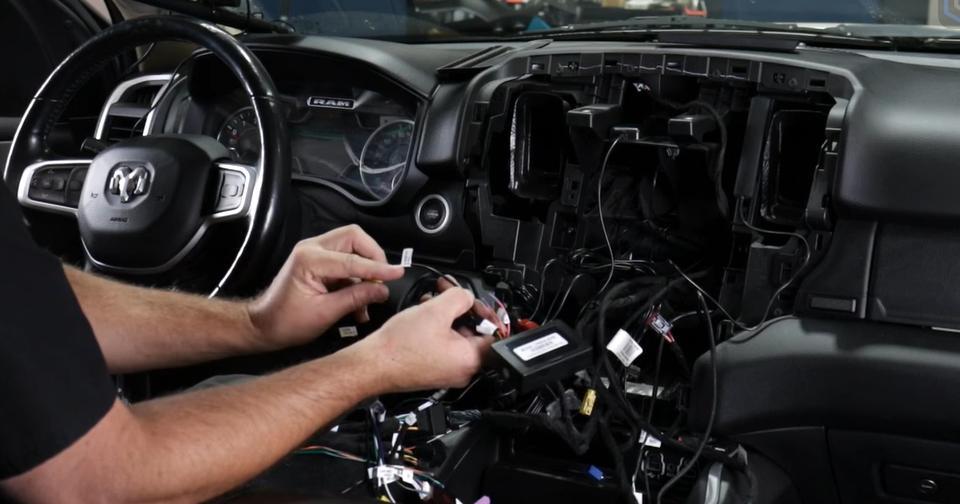
3Carefullyslidetheradioout,disconnectingallwiringharnessesandantenna connections.It'sadvisabletolabeltheseconnectionsforeasierreinstallation.
Step3:PreparingtheXLT-StyleRadio
1.PlacetheXLT-StyleRadioonaclean,flatsurface.
2.Ifrequired,transferanynecessarycomponentsfromthefactoryradiotothenew unit,suchasmountingbracketsorspecificconnectors
3Familiarizeyourselfwiththewiringdiagramprovidedintheusermanualtoensure correctconnections.
Step4:InstallingtheXLT-StyleRadio
1Connectthewiringharnessesfromthevehicletothecorrespondingportsonthe XLT-StyleRadio.Ensureeachconnectionissecureandmatchesthelabelsor diagram
2Attachanyadditionalcomponents,suchasGPSantennasorUSBextensions,as perthemanufacturer'sinstructions.
3Carefullyslidethenewradiointothedashboard,aligningitwiththemounting brackets.
4.Securetheunitbytighteningthemountingboltsremovedearlier.
Step5:ReassemblingtheDashboard
1.Reattachthebezelbypressingitfirmlyintoplaceuntilallclipsaresecurely fastened
2Ensurethatallpanelsandtrimpiecesareproperlyalignedandfreefromgaps
Step6:TestingtheNewSystem
1.Reconnectthenegativeterminalofthebattery.
2.StartthevehicleandpowerontheXLT-StyleRadio.
3Testallfunctions,includingaudioplayback,navigation,Bluetoothconnectivity, andanyotherfeaturesspecifictoyourmodel.
4Ifanyissuesarise,consultthetroubleshootingsectionoftheusermanualor contactcustomersupportforassistance.
TipsforaSuccessfulInstallation
Keepallscrewsandcomponentsorganizedduringtheprocesstoprevent misplacement
Avoidusingexcessiveforcewhenremovingorattachingpartstoprevent damage.
Ifyou'reunfamiliarwithcaraudioinstallations,considerseekingprofessional assistancetoensureoptimalperformance.
Apparently,youcanfindthatcomparedwiththefactoryradio,the15.6"XLT-Style Radiomakesthedashlookbrandnew,moreadvancedandtechnologicalMost importantly,theTesla-styleheadunitgreatlyenhancesyourvehicle'sfunctionality.
Nowbyfollowingthisdetailedguide,youcanachieveaprofessionalinstallationof upgradingthe19-upDodgeRamtoa15.6"T-StyleAndroidradio,allowingyouto enjoytheadvancedfeaturesofyournewinfotainmentsystem