


PREREQUISITE KNOWLEDGE PYTHON ● Create a function and return a value with return ● Import a library ● Browse an array with a for loop ● Make a decision with an if/else condition ● Display in the console with the print function ● Write assignments and equations MATHEMATICS Calculate a distance between two points with the function�� �� 1,��1( )������ �� 2, ��2( ) �� = �� 2 �� 1( )2 + ��2 ��1( )2 SOFTWARE HaveAlphAI software installed on a computer HARDWARE ● a computer with a Wi Fi connection to communicate with the robot ● a loadedAlphAI robot ● a redAlphAI arena 1


The objective of this TP is to become familiar with the knn nearestneighbors algorithm(k nearest neighbors)and to find a value of the number of neighbors k that minimizes errors in decision making to optimize the navigation of the robot
MACHINE LEARNING AND SUPERVISED LEARNING
OBJECTIF
Machine learning is a branch of artificial intelligence that aims to give computers the opportunity to learn A computer is not smart, it only performs tasks It is described in the form of programs what to do and how to do it This is called programming
Supervised learning is the most common type This involves providing the learning algorithms with a training dataset (Training Set) in pairs (X, Y) with X the predictive variables (or input data),and Y the result of the observation (or decision) Based on the Training Set,the algorithm will find a 2
The basic principle is that the robot's goal is to travel the greatest distance without hitting a wall or being stopped by an obstacle.The robot is placed in an arena with red walls.
There are three types of learning in machine learning: ● Supervised Learning ● Unsupervised learning ● Reinforcement Learning
Machine learning deals with complex subjects where traditional programming finds its limits Building a program that drives a car would be very complex if not impossible This is due to the infinite number of possible cases to be treated Machine learning treats this problem differently Instead of describing what to do, the program will teach itself how to drive by "observing" experiments.
Machine Learning: Give the computer the ability to learn without being programmed Depending on the experimental datathat the input learning algorithm will take, it will deduce by itself a hypothesis of operation. He will use the latter for new cases, and will refine his experience over time.
INTRODUCTION

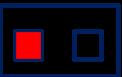
It is now necessary to specify the X situations and the expectedYdecisions The proposed case study is the movement of the robot in a red arena The goal is for the robot to move on its own without ever touching the walls For this the robot w ble to make the following decisions: ● Turn left ● Go straig ● Turn righ In order to mak ecision, it is necessary to provide feedback in order to have data (data or training set) This is given by the sensors The choice made here is to use the camera From the image area of the camera it is extracted two areas that will be called super pixels (see opposite) The amount of red in each super-pxiel increases as the robot approaches the walls due to the contrast between the white track and the red walls.
Activity 1 Indicate in the table below the expected result as a decision based on what is spotted in the super pixels Super pixels Decision (Action) Go straight forward Turn left 3
mathematical function that makes it possible to transform (at best) X to Y In other words, thealgorithm will find afunction F such that ��≈��(��)
Thus, in a situation X, he will know what decisionYhe must make STUDY SITUATION ET TRAINING SET OF THE ALPHAI ROBOT


The above simplified cases, occur only very rarely To be able to make the decision in all possible cases, it is necessary to obtain the numerical value of the level of red The image from the camera is 48*64 pixelsin size. The position and geometry of the superpixins is defined by the following figure: Activity 2 Open the get values py file Specify the path of the image forward 0 jpg and specifythe codeto displaythe imagein python from PIL import Image import numpy as np import matplotlib.pyplot as plt def read image(name): return np.array(Image.open(name, "r")) img1=read _image("forward 0.jpg ") # give the image path plt.imshow(img1) plt.show() You must get an image of the shape below with a size of 48 pixels by 64 pixels, encoded with the three colors RGB (Red Green Blue). "img1" is an array of pixels of size 48*64*3 In the pixel table we find the 3 levels of Red Green Blue color coded between 0 and 255
Turn right


We will compare different techniques to get the best contrast between the red and white of each superpixel: ● the average grayscale of each superpixel ● the average red level of each superpixel ● the average green level of each superpixel
"img2" is the grayscale image Thus there is only one numerical value between 0 and 255 for each pixel. 0 is a white pixel and 255 is a black pixel. Super pixels being in the "low" area of the image
From this image, it will be necessary to extract the two super pixels defined previously and determine a method to obtain the level of red for each
Activity 4 Execute the code to retrieve the value1 and value2 values of the previously obtained grayscale image
First, the image is transformed into grayscale using the code: def rgb2gray(rgb): return np.dot(rgb[...,:3], [0.299, 0.587, 0.144]) img2=rgb2gray(img1)
Activity 3 Write a function that will take as an argument an��������(������,��,��,ℎ������ℎ��,��������ℎ) array of pixels "img" at a color level, the coordinates "x" and "y" of the pixel at the top left of a super pixel, the height "height" and the width "width" of a super pixel and which rensees the average of the color level ofu super pixel
It is thus possible to retrieve two values with the two superpixls defined previously using the code: def get two values(img, x1=10, y1=28, x2=42, y2=28, height=16, width=13): value1 = average(img, x1, y1, height, width) value2 = average(img, x2, y2, height, width) return np.array((value1, value2))
The red level of the left superpixel is denoted value1, the red level of the right superpixel is denoted value2. It is thus possible to define a point of coordinates (value1, value2)
The choice made in the AlphAI software and use the python mean function that will calculate the average value of the array 5

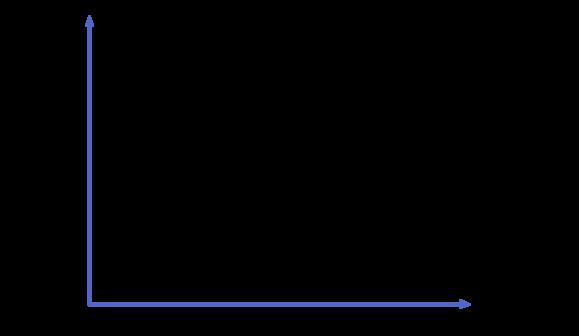
Activity 5 Apply the method of the AlphAI software and the one with the gray level and complete with the values value1 and value2 in both cases Mean function Grey Level Forward 0 212.39 226 219.25 Forwad 1 214.9 211 221.94 218.0 Left 0 219 530 89 37 226 85 Left 1 232 74 112 32 240 42 109 4 Right 0 104 6 129 9 90 99 123 9 Right 1 137 211 32 133 4 218 1 Right 2 139 229 133 235 Test 0 191 194 201 203 Test 1 216 214 224 221 Activity 6 Place the dots on the graph and identify the areas corresponding to the different decisions (turn left, go straight, turn right) Conclude on the method that seems most appropriate to distinguish the different decisions 6

This supervised learning algorithm makes it possible to classify data according to their proximity to the existing ones constituting the training data The new data consider k neighbors, the k closest, to choose which classification to apply With discrete data, such as points in a plane or in space, the nearest neighbors are selected using the Euclidean distance, but other methods can be used in other situations, such as the Manhattan distance if the data is placed on a grid or chessboard. The interest of this algorithm lies in the choice of k: too small and the algorithm becomes too sensitive to errors or missing data, too large and it considers data that should not be considered 7
Right super pixel intensity Left super pixel intensity It would be possible from conditional actions to pilot the robot. The approach is going to be different in the following We will impose THE K'S NEAREST NEIGHBORS ALGORITHM, KNN
The idea is to use a large amount of data in order to "teach the machine" how to solve a certain type of problem The algorithm is particularly intuitive when the data is presented as points in a space of dimension 2, which can therefore be displayed on the screen We will therefore choose a configuration with only 2 sensor inputs, namely 2 "super pixels" of the camera to allow the robot to locate the walls and circulate in the arena without blocking. At first it will be up to us to indicate to the robot the associated action for each new data (2 "super-pixels"), but then it will be able to circulate by itself by choosing the majority action taken by the K closest neighbors among the data entered during the training phase
We will closely study an algorithm well known among machine learning algorithms: the K nearest neighbors algorithm, or KNN in English for "K Nearest Neighbours" This algorithm has the advantage of being very simple, and therefore providing a good basis for understanding supervised learning

3. Take the values of Y of the k observations retained. Perform a regression and calculate the mean (or median) of Y retained
Start Algorithm Input data: ● a dataset D, corresponding to the elaborated training set ● a function for calculating the distance between the two considered points of coordinates [x1,y1] and [x2,y2].�� = �� 2 �� 1( )2 + ��2 ��1( )2 ● An integer k, representing the number of neighbors to be considered
For a new observation X of which we want to predict his decision Y Do:
We can schematize the operation of k NN by writing it in the following pseudo code:
1. Calculate all distances of this observation X with the other observations in dataset D
2. Retain the K observations of dataset D closest to X using the distance calculation function d
4. Return the value calculated in step 3 as the value that was predicted by K NN for observation X. End Algorithm
It is therefore necessary to be able to calculate thedistance between two points In a two dimensional graph as is the case in our example it simply corresponds to the norm of the vector between the two points. Activity 7 Write the function that takes as an argument two points (point1=[x1,y1], point2=[x2,y2]) and returns the distance between these two points����������������(����������1, ����������2)
0 Distance to test 1 forward 0 218.96 212.39 33.4 3.31 forwad 1 214 9 211 29 3 3 19 left 0 219 530 89 37 108 124 6 left 1 232 74 112 32 91 72 103 right 0 104 6 129 9 107 58 139 58 right 1 137 211 32 56 7 79 right 2 139 229 62 68 78 8
Activity 8 Complete the table below by determining the distance between the superpixls of the previous images (forward 0 jpg, forward 1 jpg, ) and the two test images (test 0 jpg and test 1.jpg). to test
x1 y1 Distance
Activity 10 Prepare the work environment by following the protocol below
→ Turn on the robot The switch is on the bottom Next to the switch you will be able to see the number of the robot. Once put on, you have to wait about thirty seconds; a green light lights up on the back and then the robot starts vibrating, then flashing white below: this means that it is ready to receive a connection
→ Launch the software by clicking on the "AlphAI" icon on the desktop or from the start menu
→ Connect to the robot's wifi (look for the wifi that starts with ALPHAI: the password is identical to the name of the wifi). It is only possible to drive with one computer at the same time.
→ In the Settings > Load sample settings menu, select the example configuration "supervised learning KNN camera"
test 0 191 194 0 32 test 1 216 214 32 0 Activity 9 Apply steps 3 and 4 of the K NN algorithm by taking K=1,2,3 and 4 and deduce the decision that must be made (go straight, turn left, turn right) ROBOT TRAINING PREPARATION PHASE OF THE WORK ENVIRONMENT


● Connect the robot
The pixels become darker when the robot approaches the walls Normally if the pixel on the left is the darkest, you have to turn right, and if the pixel on the right is the darkest, you have to turn left 10
CAUTION: FOR THIS SCENARIO, IN ORDER TO GET THE BEST POSSIBLE CONTRAST, PUT A WHITE SURFACE FOR THE ARENA, AND LIMIT DAYLIGHT, FOR EXAMPLE BY MOVING AWAY FROM WINDOWS TRAINING PHASE Activity 11 Follow the protocol to carry out the training phase
PLEASE NOTE:
● If the robot is approaching a wall, pressTurn left or right
You are now connected to the robot The level of its battery should be displayed at the bottom right (check that the robot is well charged) ● Uncheck autonomous then start the robot
The graph fills up with a new point with each new action These points x/y represent the superpixel left/right of the camera and the color around each point is the color associated with the chosen action (purple to rotate right, white to forward and sky blue to rotate left). This is called training data. This phase is essential for AI to function properly If the training data is too noisy, the AI ne will not allow to have a satisfactory result
● As long as the robot is not stuck, press go straight


TO GO FURTHER: Activity 14 If you have time left and want to experiment, change the algorithm and see what differences the robot has in its behavior compared to the KNN. What other proposed algorithm has faster learning? And what other algorithm do you think would allow learning more complex tasks, such as tapping a green ball or recognizing somatic orders?
When you have three clear regions on the graph, stop the training phase and reactivatethe autonomy to move on to the test phase Do not hesitate to move the robot by hand, if a position could not be tested.
Activity 13 Now that you have understood the algorithm, try to train the robot with the minimum possible data that allows it to rotate without hitting the walls
NOTE: We managed to teach the robot to move around the arena without hitting the walls with only 3 points
In order to obtain the best behavior of the robot, it is necessary to test several values of k To change this value, go to the "AI" tab and change the value of the "number of neighbors" parameter
PROGRAM THE K'S NEAREST NEIGHBORS ALGORITHM 11
TIP: You can move the robot by hand to choose the points you want to teach it
TESTING PHASE
PLEASE NOTE:
If the robot is well trained, it will be able to avoid the edges by itself. If, on the contrary, it is poorly trained or the brightness in the arena is not homogeneous, this will produce noise in the regions created and the robot will do more inappropriate actions
A good value of k reduces the effect of noise and allows the robot to better manage unexplored regions Once the robot is well trained and the tests run smoothly, you can move on to the activities
Activity 12 Compare the behavior of the robot with k=1, k=3, k=10, and k=30 Then, from what you see, try to determine the value of k that minimizes the effect of errors and gives the best behavior oftherobot, that is, the greatest distance traveled without hitting a wall
Start by making a theoretical version by drawing the map of the movements Which areas are to be drawn? What points are to be placed to achieve it? Test these points with the robot after entering them into the software Has your theoretical model been applicable to reality,or have you had to make changes to it? What are the limitations of this method for a robot like this?
The sensors input is the state of the robot's sensors, that is to say in our case a list of two values sensors[0] and sensors[1] which are the intensity of what the robot sees to its left and right Its output is the number of the chosen action
THE ROBOT DIRECTLY Before programming an artificial intelligence, let's start by understanding the principle of the take decision function You will be able to modify this function to change the behavior of the robot: after each modification, save your code This step is to be repeated for each modification of the code: save and then reload the code. The function has the following prototype: ������������������������(��������������:��������)→������
PROGRAM
Facing a wall: close to [0, 0], conversely, close to [200, 200], with a wall on the left: [0, 200] and a wall on the right: [200, 0] Activity 16 For now the function returns 0 What value must be returned for the robot to go straight? (Give it a try) It needs to return 1
Activity 15 Add the print(sensors) statement inside the function Back up, click "Reset AI" in the software, and start the robot The value of sensors is now displayed in the console (click on the icon in the taskbar to display the console) What is roughly the value of sensors when the robot is facing a wall? when it is not facing a wall? when there is a wall to its left or right?
→ After giving it a name, the file appears in Windows Explorer: open it in your favorite code editor(Spyder,for example)
→ Stop the robot and reactivate the "Autonomous" button
→ On theAI tab, selectAlgorithm: Student Code, this will open a new window asking you to name the file
This code presents 3 already existing functions: init, learn and take decision These functions will be called by the main software Only the take decision function is important for thisTP
→ Notice that when you log out, a simulated mini robot appears at the bottom right If you want, you can do the questions below with this mini-robot and return to the real robot at the end of theTP; but you can also do all theTPby staying connected to the real robot: as you prefer!
Activity 17 Use the x variable to program a consistent behavior of the robot: "If there is no wall, I go straight ahead; if there is a wall, I turn » 12


threshold = 50 left, right = x if left < threshold: return 2 elif right < threshold: return 0 else: return 1 13
ALGORITHM PROGRAMMING
DISTANCE CALCULATION
The square root can be used in Python by importing the math library (or numpy)at the top of the file: import math and is written as follows: y = math.sqrt(x) The square operator can be done as follows: y = x**2 Activity 18 Program the new distancefunction Then to test it, write at the bottom of the file: # compute distance a = [0, 0] b = [1, 2] print("distance", distance(a, b)) Save, load the code with "ResetAI" and note below the result that appears in the console: def distance(a, b): return math.sqrt((b[0] a[0])**2 + (b[1] a[1])**2)
CALCULATION OF ALL DISTANCES
As a reminder, the Euclidean distance between these two points is: �� = �� 2 �� 1( )2 + ��2 ��1( )2
Now that you have a method to calculate a distance, write a new function all distances that calculates all the distances of a point from the variable train sensors which are the training input data. This function will take as an argument a new point x which is a list of two elements as before, and will return an array containing all these distances Its prototype is: ������������������������(��:��������[����������], ������������������������:��������[��������[����������]])→��������[����������] With and The table train sensors being of�� = �� 0, ��0[ ] ������������������������ = �� 1, ��1[ ], �� 2, ��2[ ], , �� �� , ����[ []] length n 14
If you have not already done so in the previous activity, program a new distance function that takes as arguments two points a and b which are two arrays of two elements each containing their coordinates and which returns the Euclidean distance of these two points. The prototype of the function is as follows: ���������������� ��:��������, (��:��������)→���������� With �� = �� 1, ��1[ ]������ = �� 2, ��2[ ]
Activity 19 Program all distances, and then test with the following code at the bottom of the file: # compute all distances a = [0.4, 0.6] train sensors = [[0, 0], [0, 1], [1, 0]] distance list = all distances(a, train sensors) print('distances to data', distance list) Reload the code and copy your result: def all distances(a, train sensors): return [distance(a, b) for b in train sensors] distances to data [0 7211102550927979, 0 5656854249492381, 0 848528137423857] FIND THE SMALLEST ELEMENT OF A TABLE Create a function called find minimum taking an array as the only argument and returning the index of the first smallestelement Its prototype is: ����������������������(����������:������������������ [ ])→������ Activity 20 Program and test find minimum with the following code: # minimum in a list idx min = find minimum(distance list) print('index of minimum', idx min) Note the result: def find minimum(dlist): value min = math inf index min = None for i in range(len(dlist)): if dlist[i] < value min: value min = dlist[i] index min = i return index min index of minimum 1 NEAREST NEIGHBOR Now that we have all the necessary functions, we will be able to create the function nearest neighbor decision which takes as an argument the training data and the input of the current camera, and which returns the command to be sent to the robot Its prototype is: ����������������������ℎ����������������������(������������������������:��������[������������������ [ ]],����������������������������:��������[������],��:��������[����������])→������ As before, and�� = �� 0, ��0[ ]���� ������������������������ = �� 1, ��1[ ], �� 2, ��2[ ], , �� �� , ����[ []] where each is the decision made for the point in table���������������������������� = �� 1, ,�� ��[ ] �� �� �� ��, ����[ ] train sensors To perform the function, calculate the distances, find the shortest one and return the associated command using train decisions def nearest neighbor decision(train sensors, train decisions, a): dlist = all distances(a, train sensors) 15
16
idx min = find minimum(dlist) return train decisions[idx min]
Activity 21 Program and test nearest neighbors decision with the following code: # KNN a = [0.4, 0.6] train sensors = [[0, 0], [0, 1], [1, 0]] train decisions = [1, 2, 0] decision = nearest neighbor decision(train sensors, train decisions, a) print('KNN', decision) Copy the result: KNN2
Congratulations,
6 The
USING YOUR ALGORITHM WITH THE ROBOT you have programmed the algorithm of the nearest K neighbors in the case K=1 yourself All you have to do is use it in the program to train the robot
To do this, copy the lines below to program the function take decision to make the right decisions, but also learn to remember the training data train sensors and train decisions that will be created as and when in the main program: train sensors = train decisions = None def learn(X train, y train): global train sensors, train decisions train sensors, train decisions = X train, y train loss = 0 return loss def take decision(sensors): if train sensors is None : return 0 return nearest neigbor decision(train sensors, train decisions, sensors)
3
4
1
17
5
And now you can train your robot! Save your code 2 Disable the autonomy of the robot by clicking on the icon , Start the robot by clicking on the Direct the robot by clicking on the arrows on the right side of the screen Turn when the robot is close to the walls and go straight otherwise. tables train sensors and train decisions are filled in automatically by the software each time you click an arrow After a short learning, reactivate autonomy robot navigates the arena alone Does he avoid walls on his own? It should
The

TO GO FURTHER K NEAREST NEIGHBORS
18
CONCLUSION :
Load the "Supervised learning, camera navigation" sample settings and restart a learning What are the differences between the two algorithms?
IN
LThe KNN algorithm uses the Euclidean distance from training data to generalize decisions to new data Its main advantage east that it is particularly simple, and in the case of dimension 2 viewable on the screen. On the other hand, the calculation time explodes when the data becomes larger, and the Euclidean distance is not always the most appropriate for certain types of data (for example in face recognition)
The algorithm you wrote uses the nearest neighbor to make his decision Modify your code to take into account the majority of decisions made between a number The difficulty lies in modifying�� > 1, ��∈�� the function finding the minimum. Now she has to find k and not just 1. TRODUCTION TO NEURAL NETWORKS
